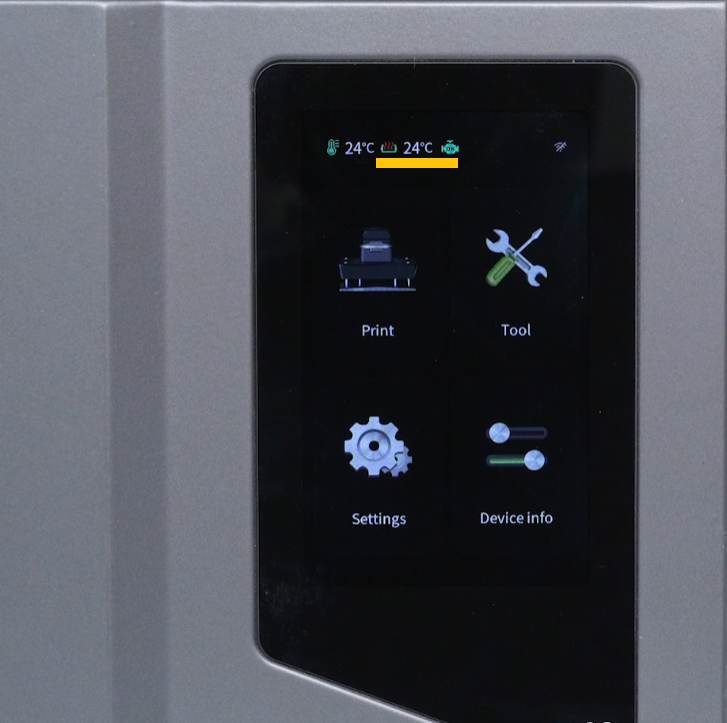
Notice:Replacing the heating wire adapter board takes approximately 10 minutes.
¶ Required Tools
2.0mm hex key
Cable ties
Sealing bag
¶ Preparation
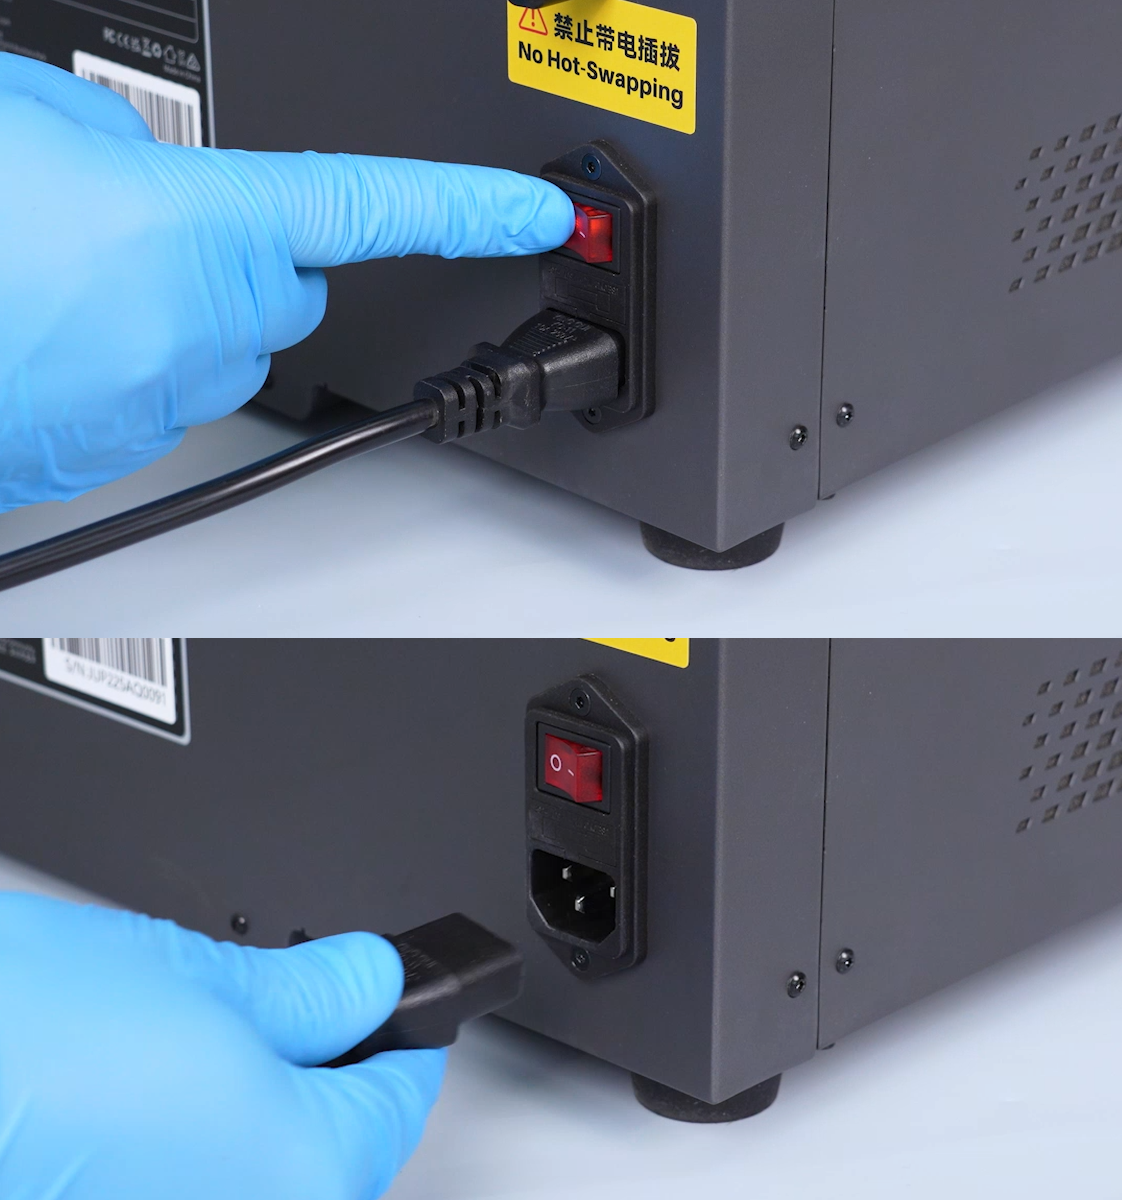
Turn off the power switch and unplug the power cable.
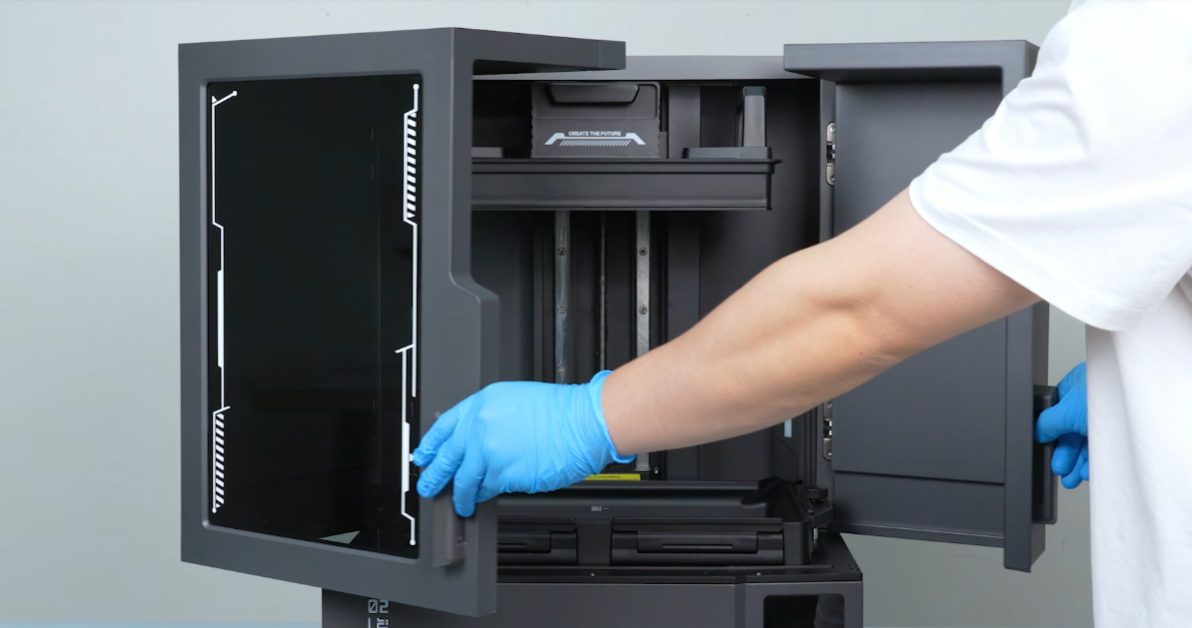
Open the front door.
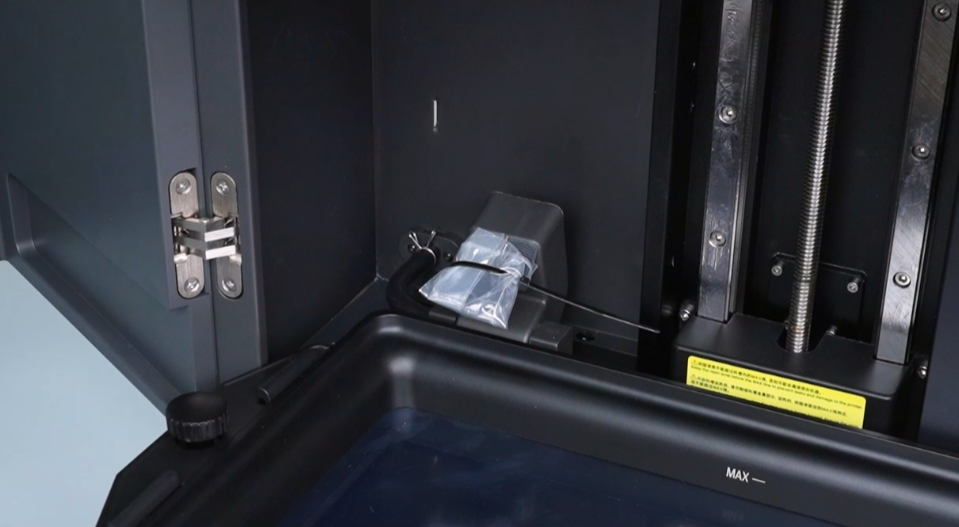
Lift the Automatic Resin Feeding and Recycling Module.
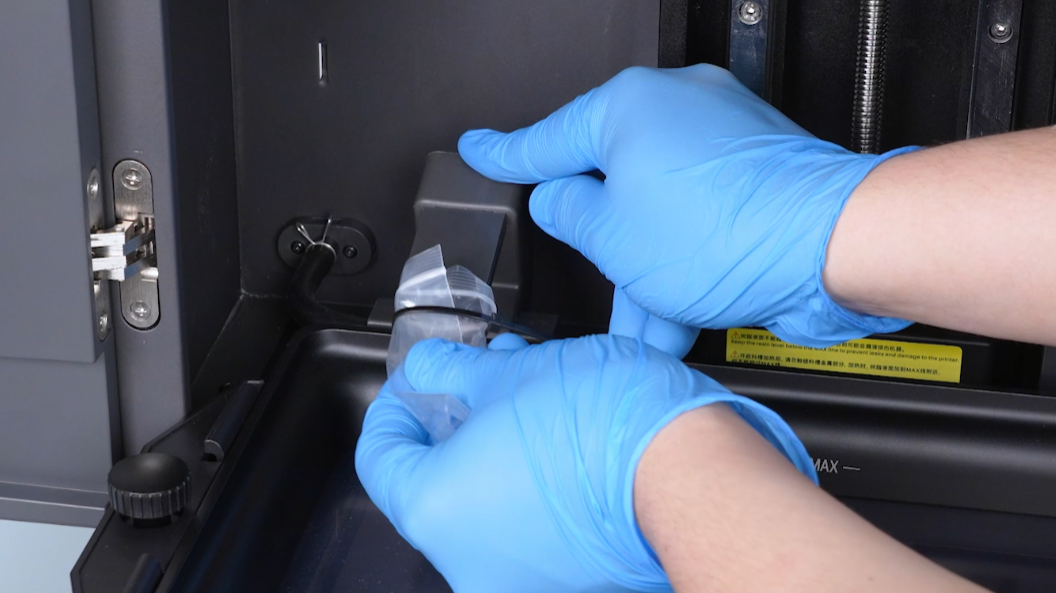
To prevent resin dripping, use a sealing bag and cable ties to secure the Resin Transfer Nozzle of the Automatic Resin Feeding module.
¶ Disassembly
¶ 1. Remove the Resin Tank
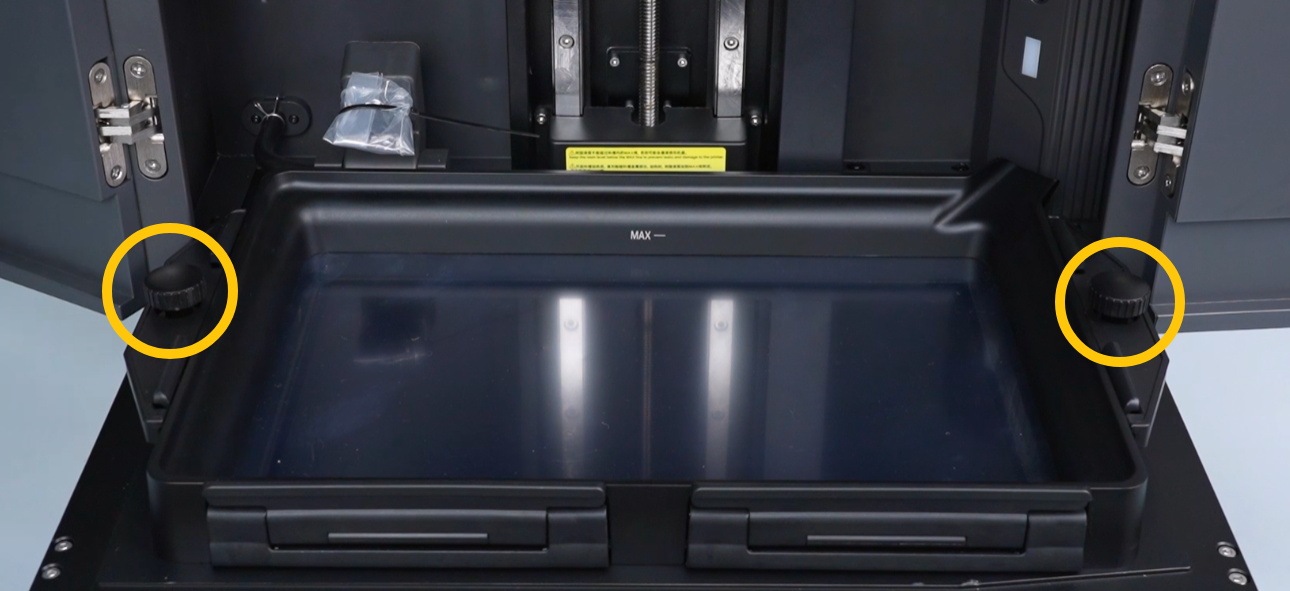
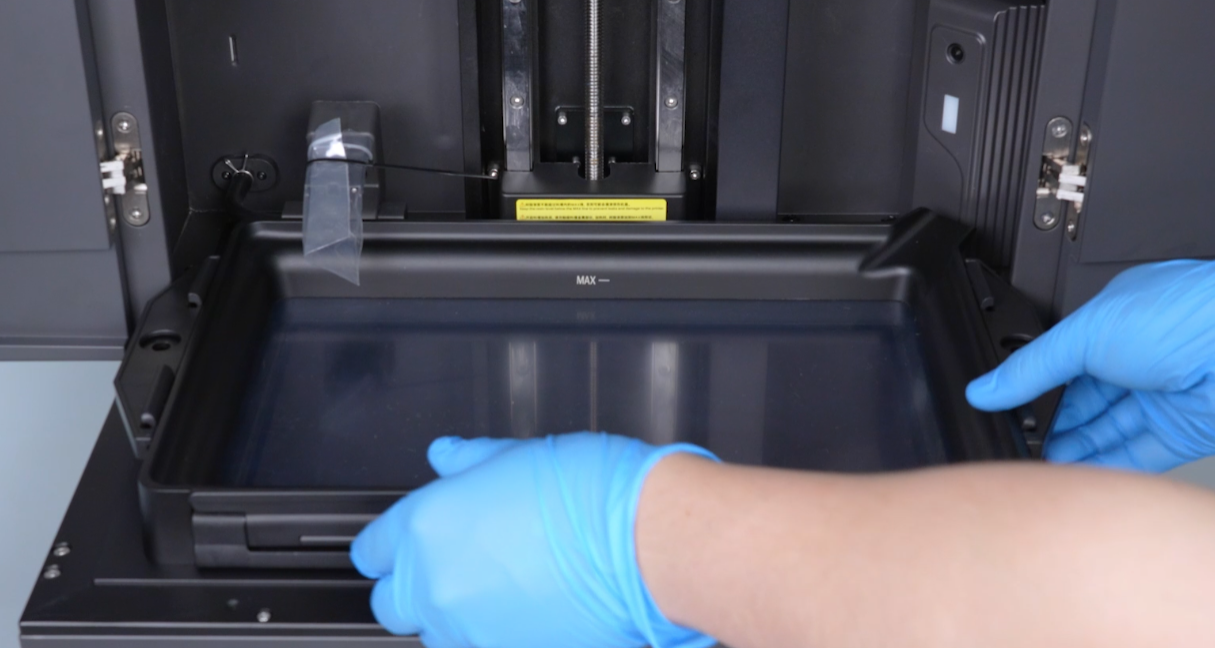
Remove the Resin Tank.
Remove the two Screw Knobs.
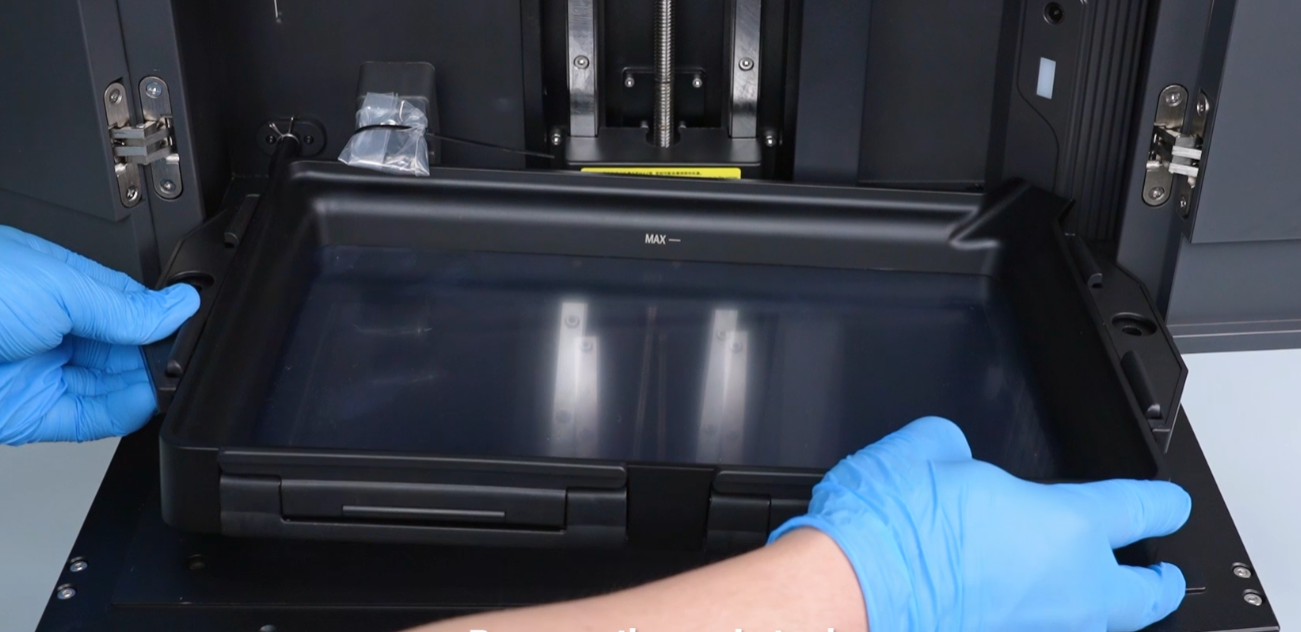
Take out the Resin Tank.
¶ 2. Remove the Auto Resin Feeding Box
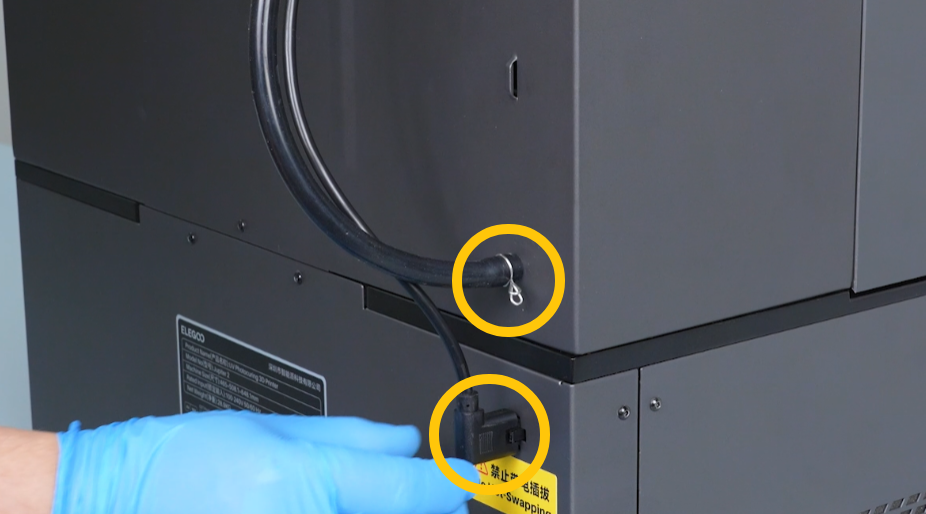
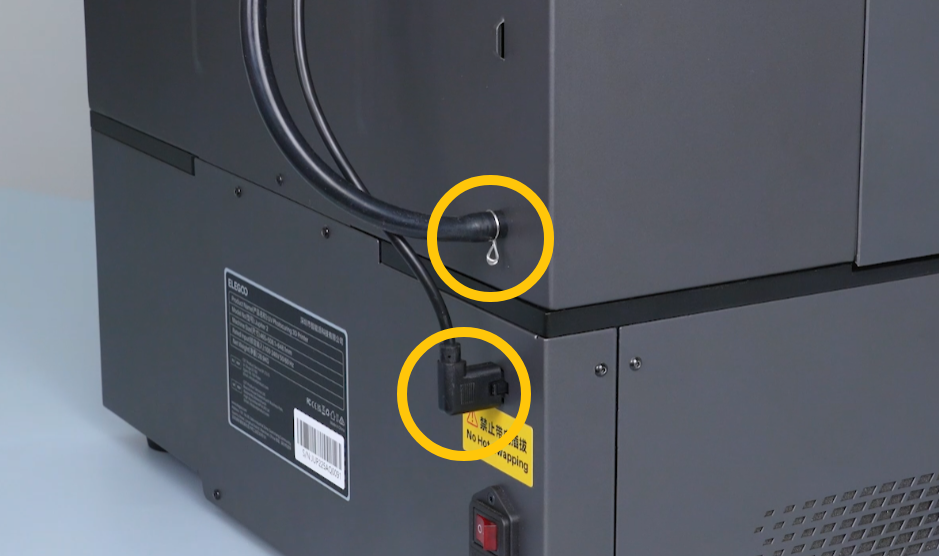
Disconnect the Automatic Resin Feeding and Recycling Module plug.
Unlock the latch and disconnect the Resin Tube Connector.
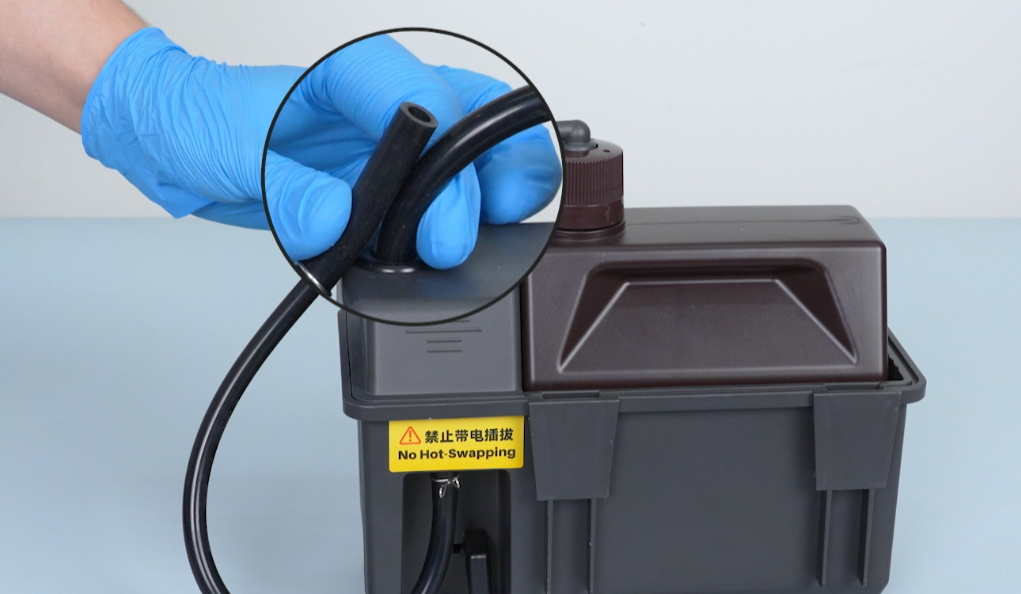
Remove the Auto Resin Feeding box.
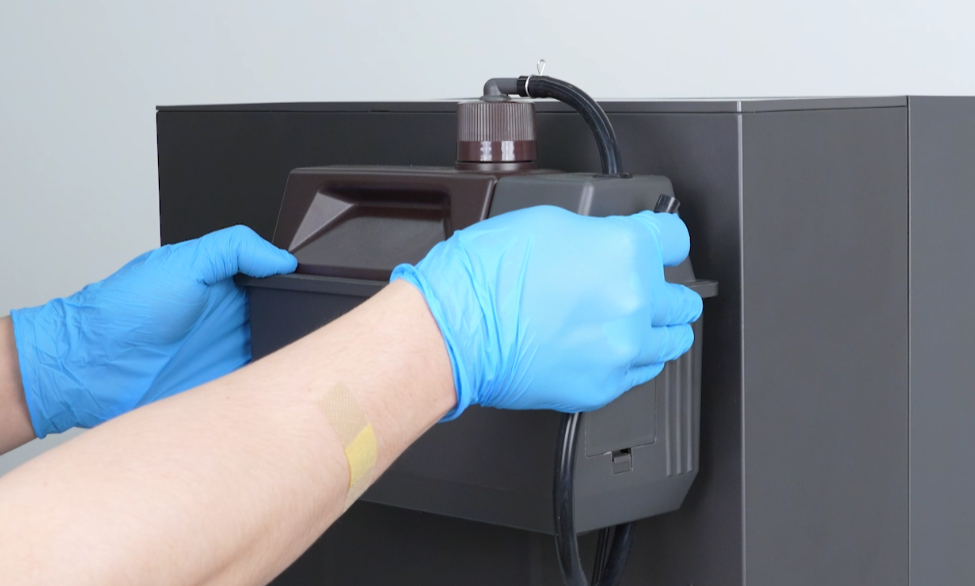
To prevent Resin dripping, secure the end of the Resin Tube using cable ties.
¶ 3. Remove the Left Panel
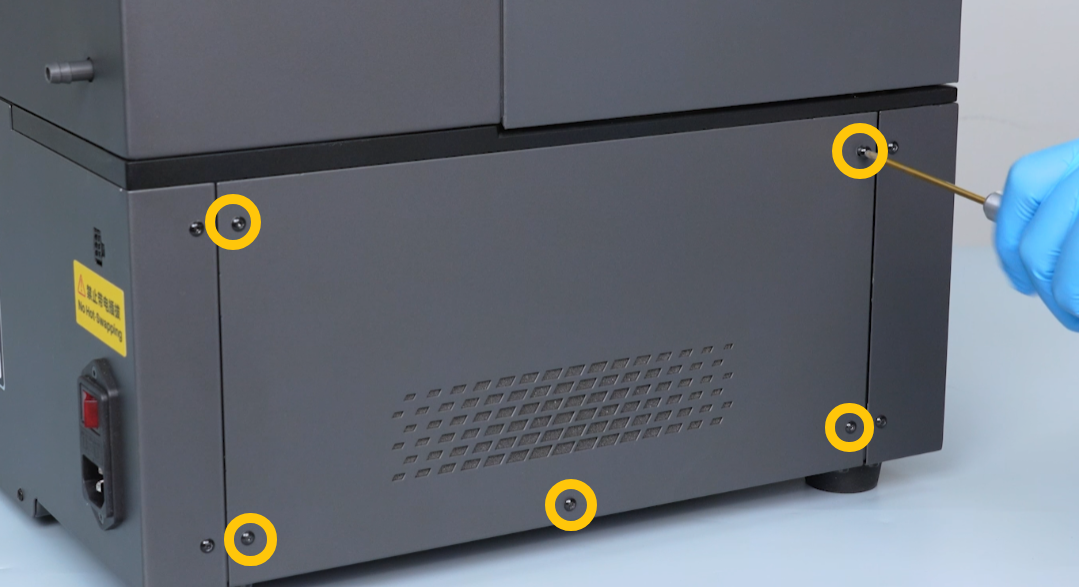
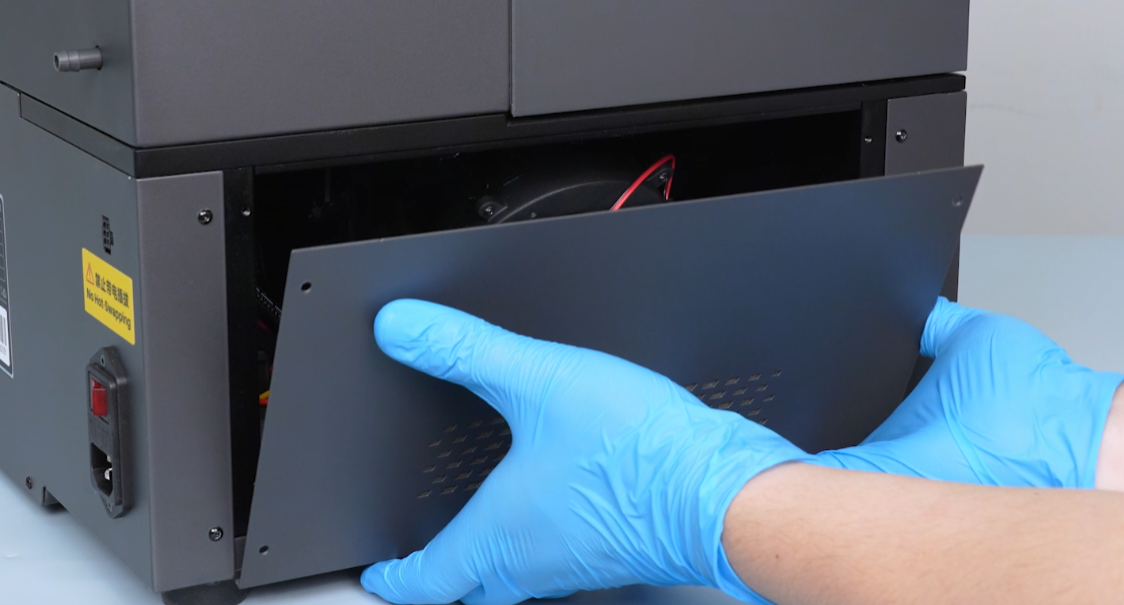
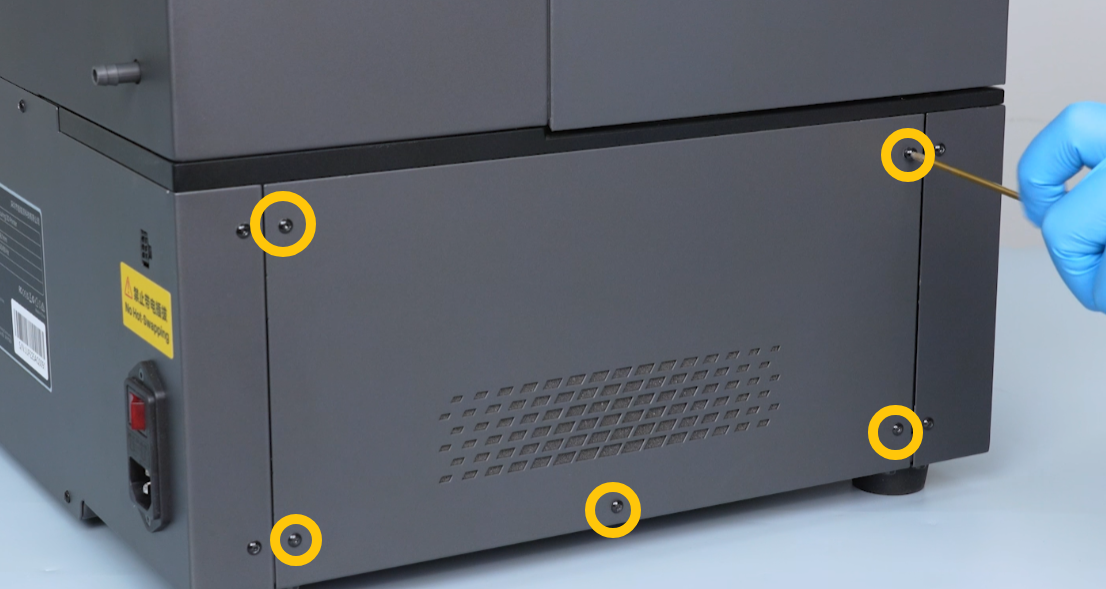
Use a 2.0mm hex key to remove the five screws securing the left panel.
Remove the left panel.
¶ 4. Remove the Right Panel
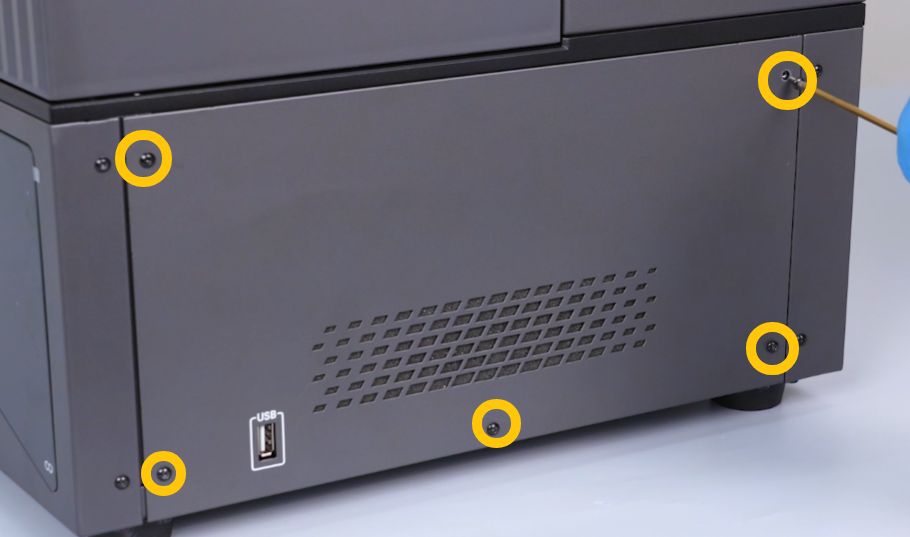
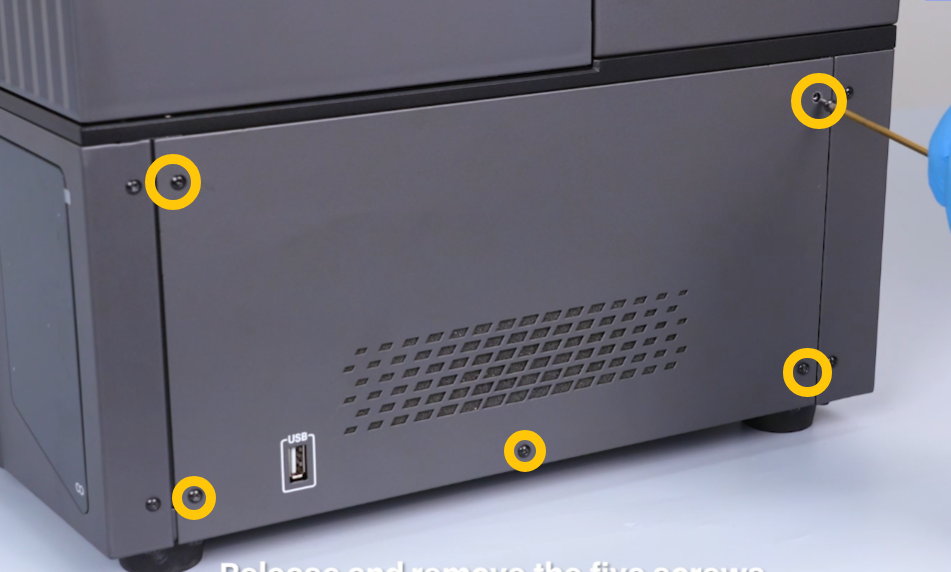
Use a 2.0mm hex key to remove the five screws securing the right panel.
Remove the right panel.
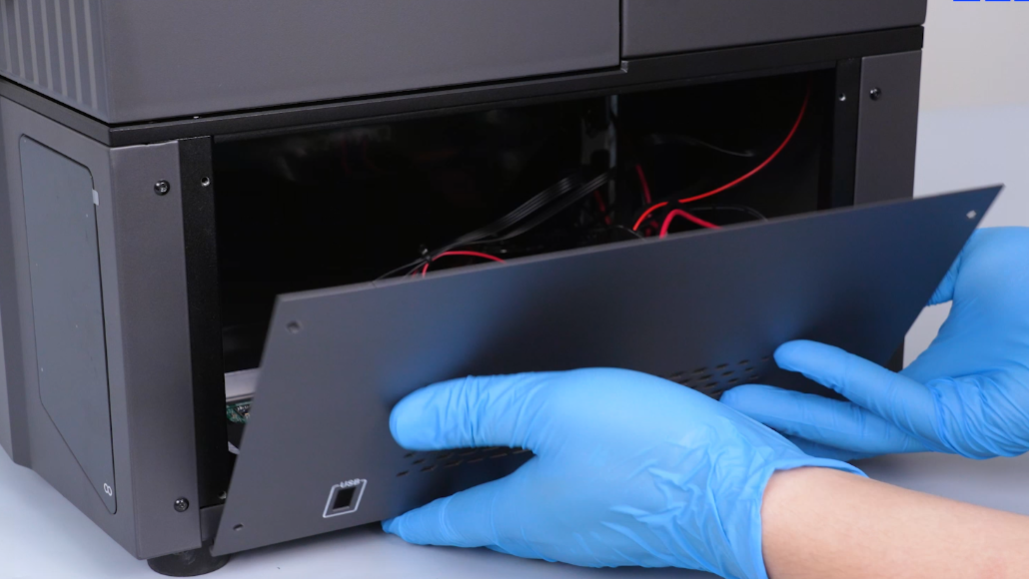
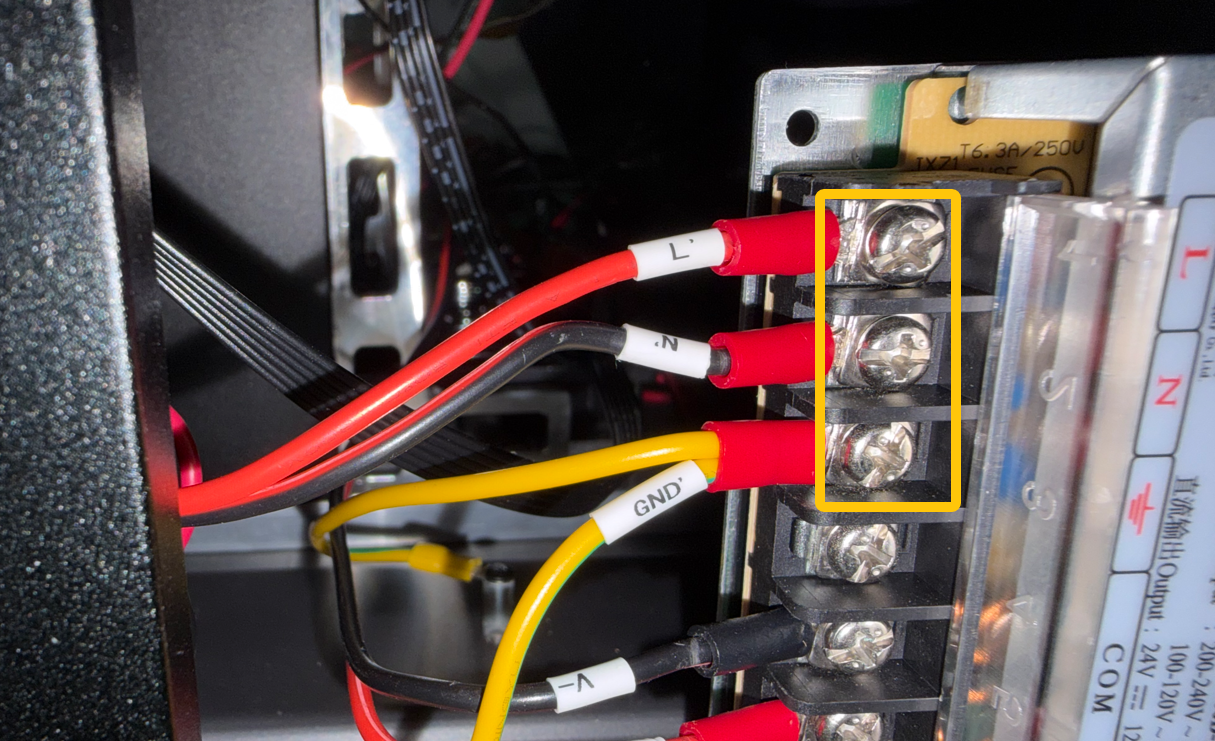
¶ 5. Remove Power Terminal Block
Use a Phillips screwdriver to remove the screws of the L/N/GND Signal Detection Terminal.
Remove the power terminal block.
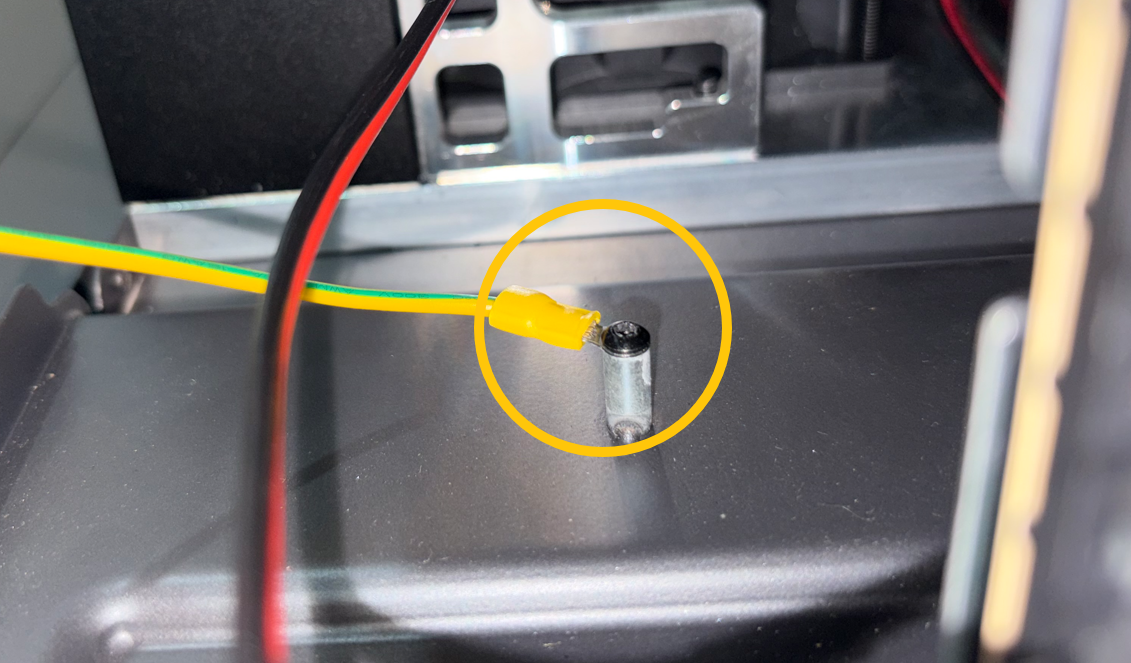
Use a 2.0mm hex key to remove the GND screw on the base-mounted power terminal.
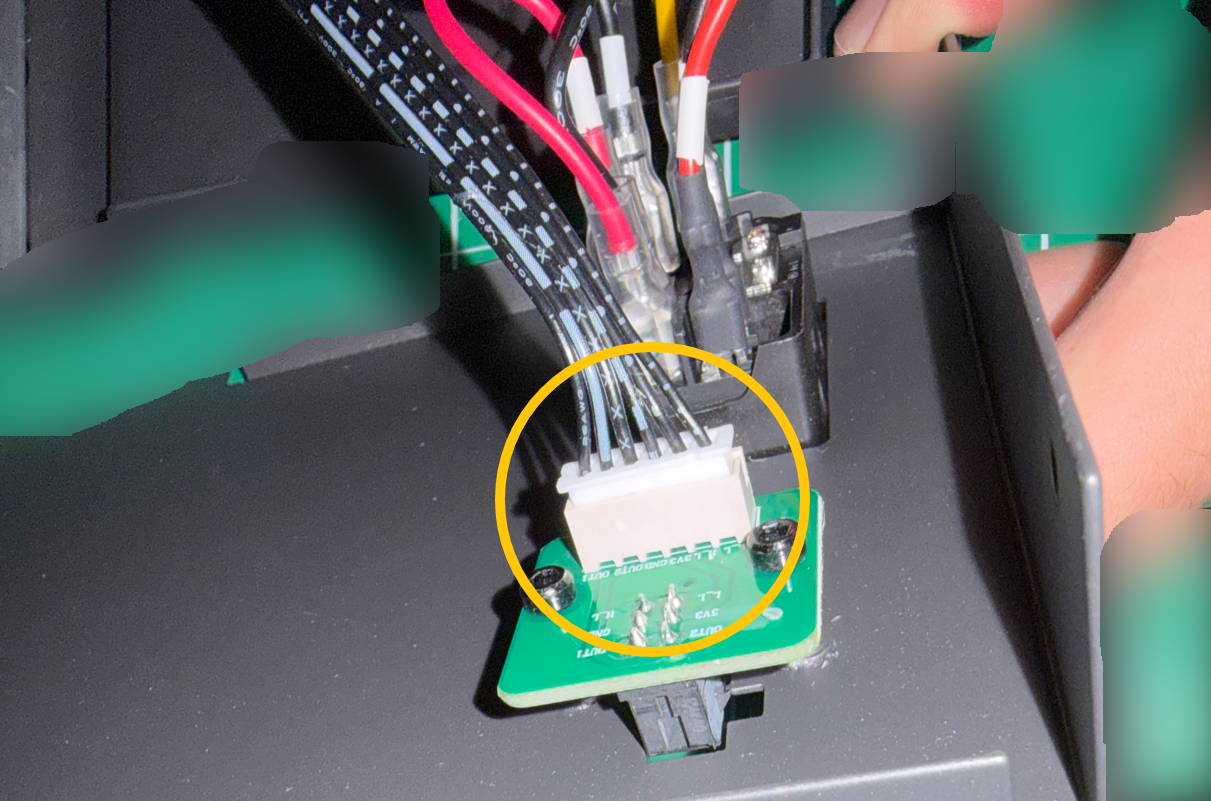
¶ 6. Disconnect Auto Feeding Adapter Cable
Disconnect the Automatic Resin Feeding and Recycling Module adapter cable plug..
¶ 7. Remove the Rear Panel
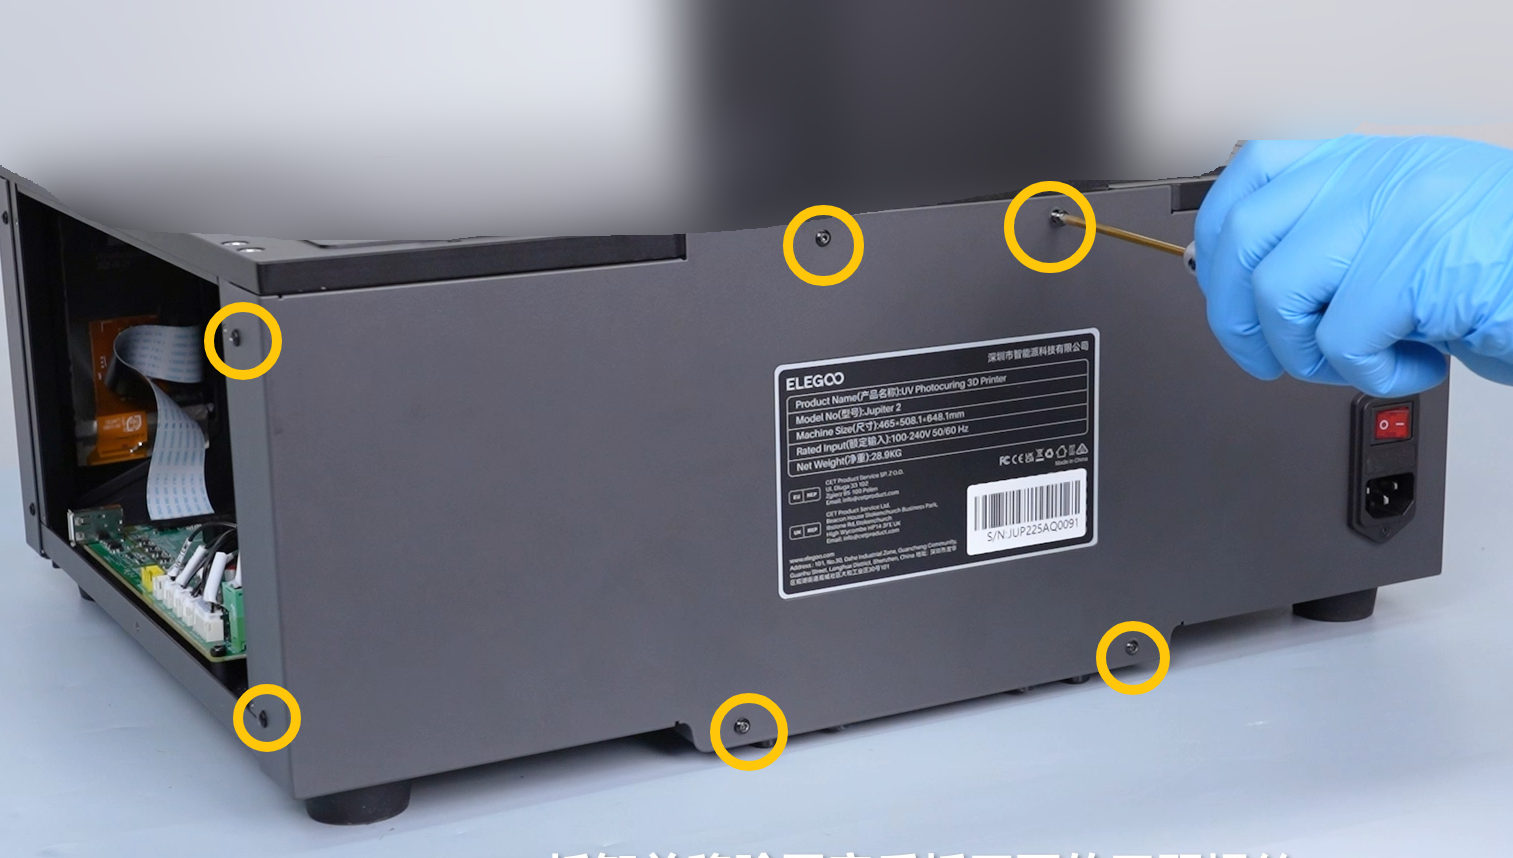
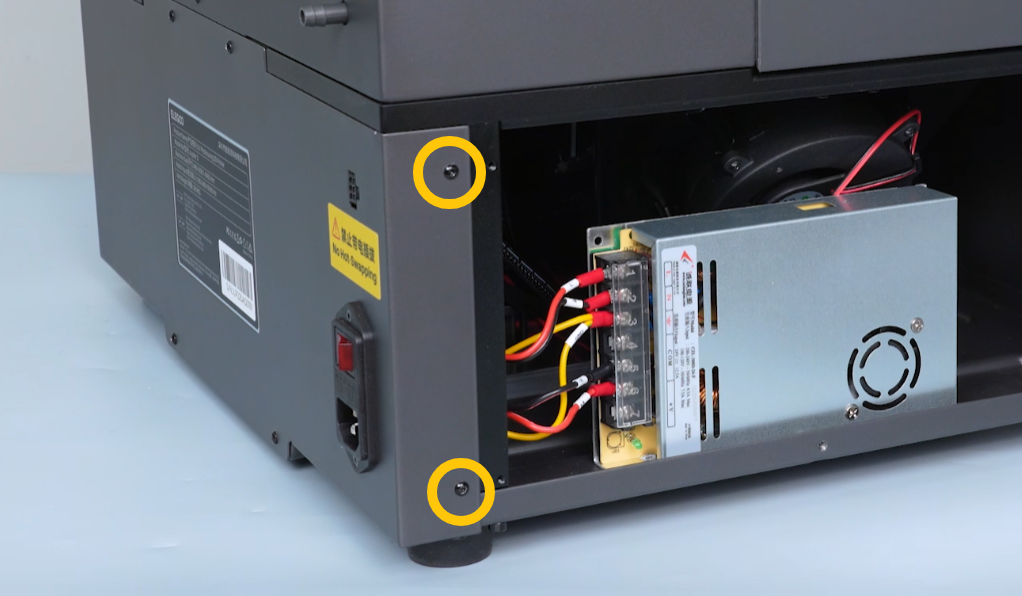
Use a 2.0mm hex key to remove the eight screws securing the rear panel.
Remove the rear panel.
¶ 8. Remove the Heating Wire Adapter Board
Place the printer horizontally on a workbench.
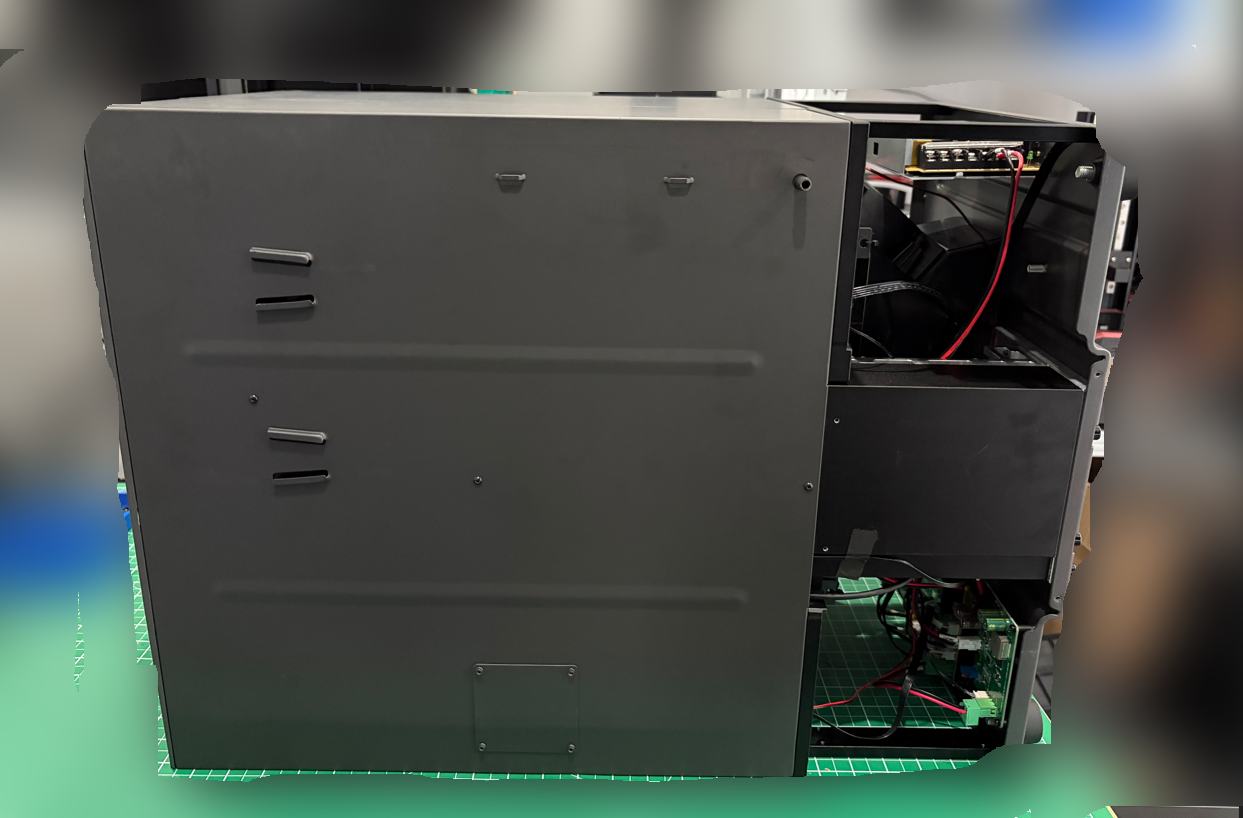
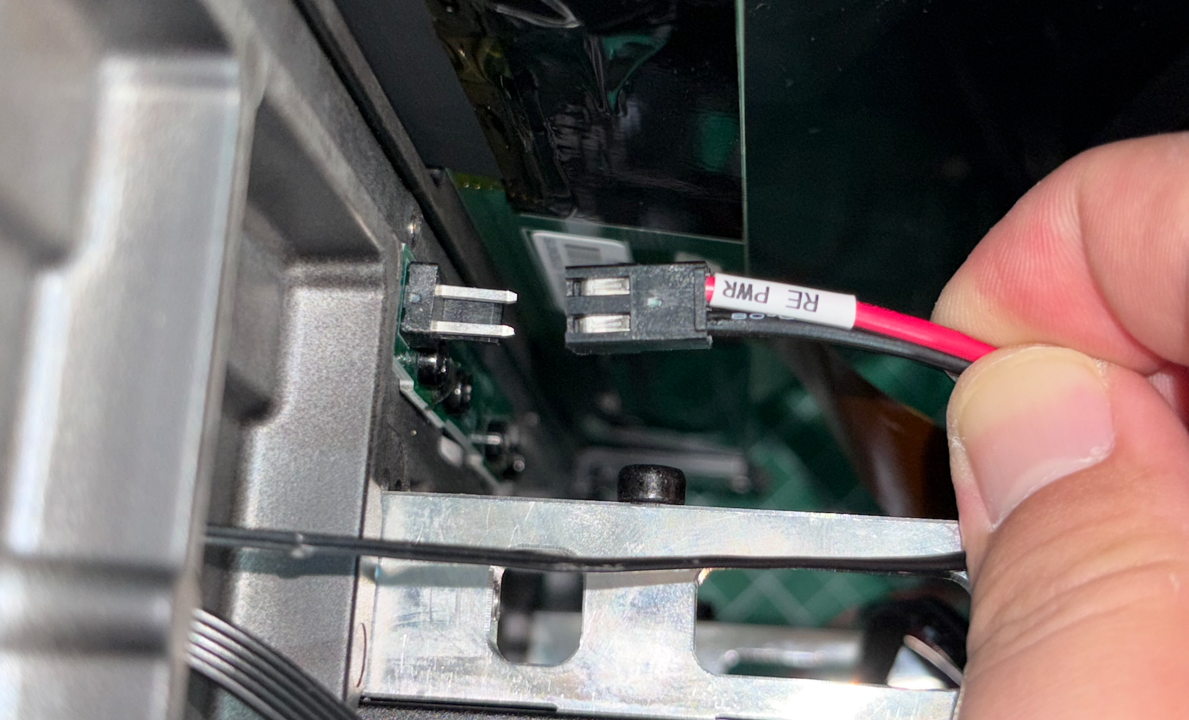
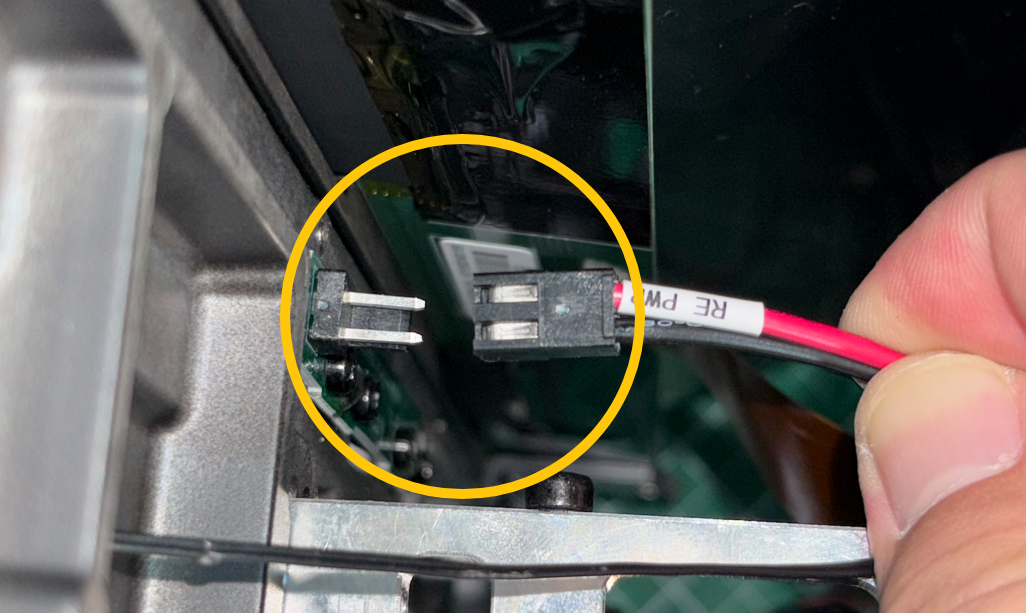
Disconnect the heating wire adapter board cable (RE PWR).
Use a 2.5mm hex key to remove the four screws securing the heating wire adapter board.
Remove the old heating wire adapter board.
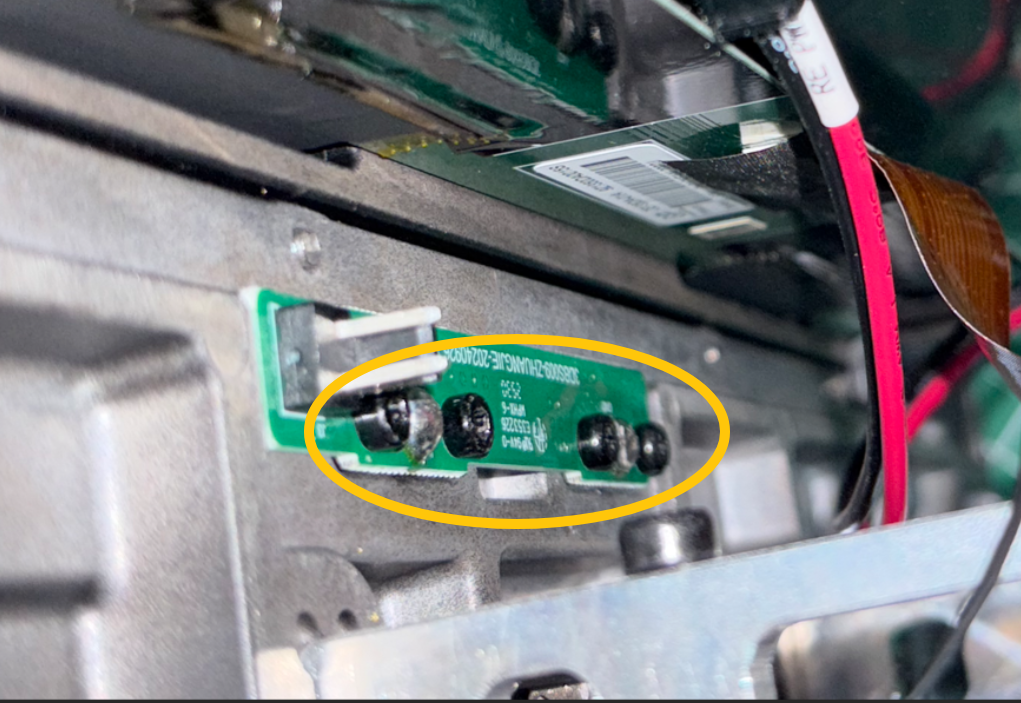
¶ Installation
¶ 1. Install the Heating Wire Adapter Board
Place the new heating wire adapter board into position.
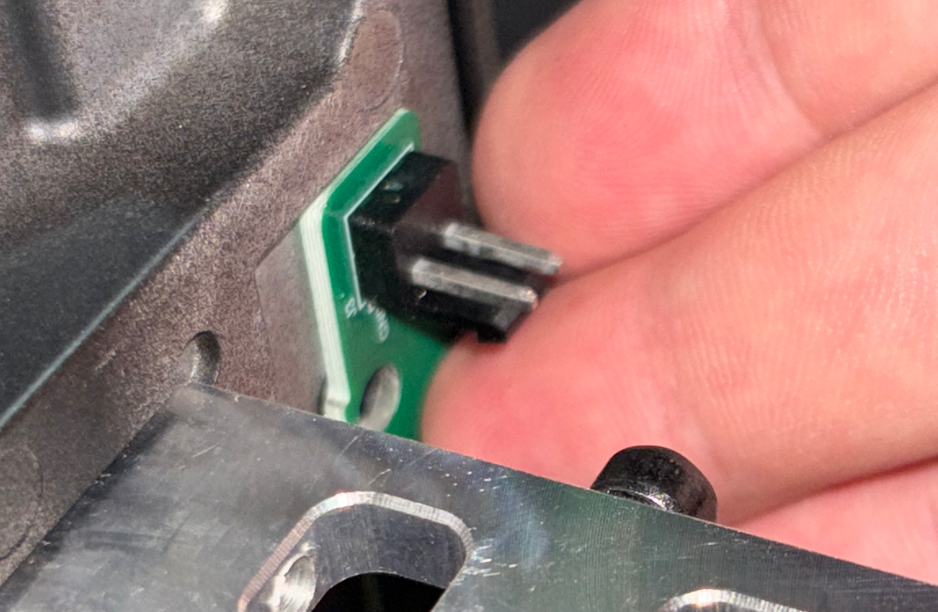
Tighten the four fixing screws.
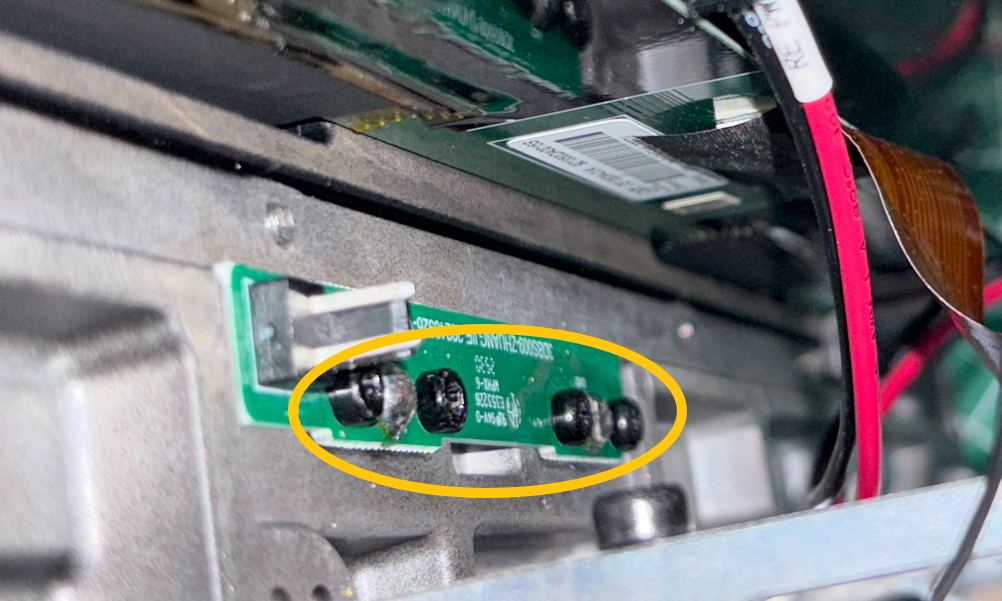
Reconnect the heating wire adapter board cable to its original position.
¶ 2. Reconnect Power Terminal Block
Temporarily place the rear panel aside.
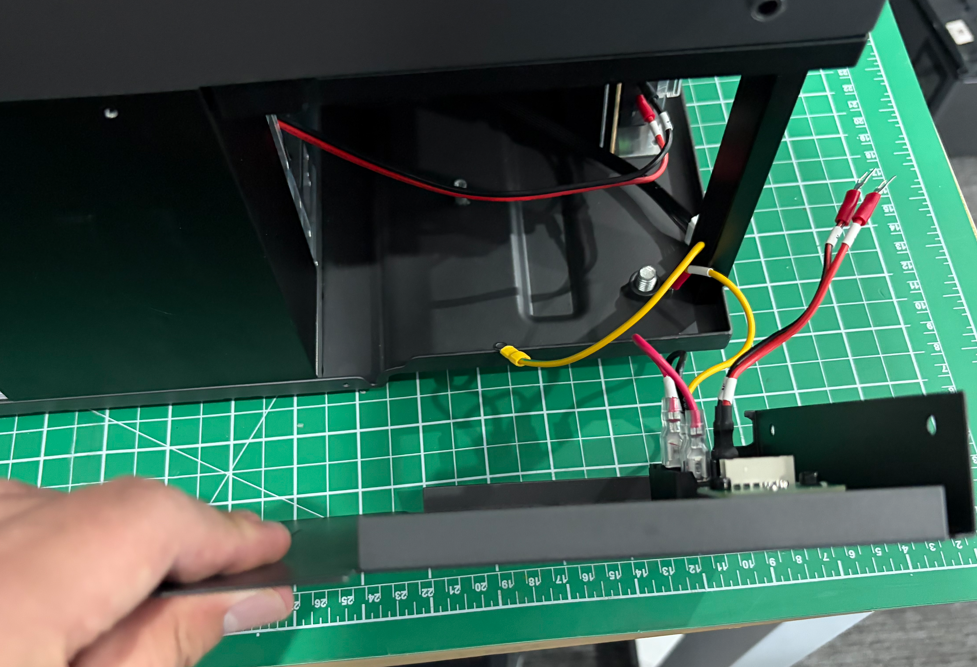
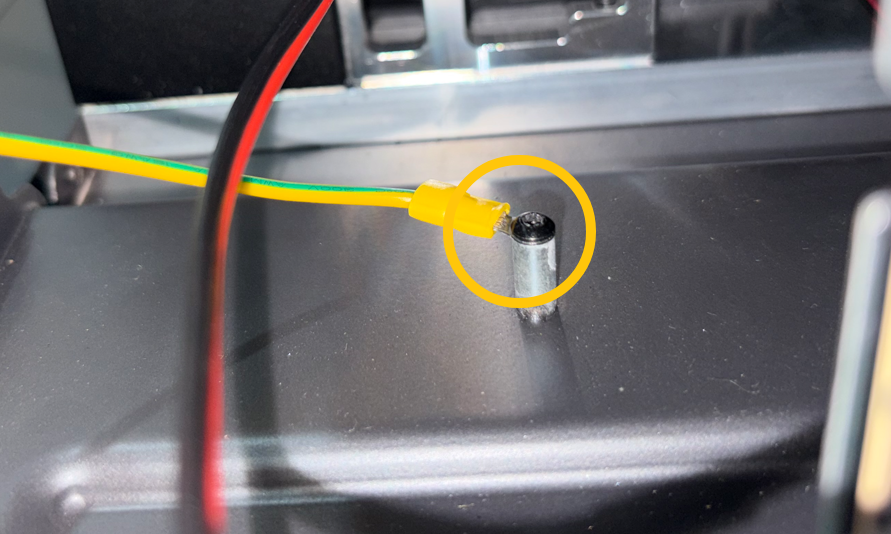
Tighten the GND terminal screw using a 2.0mm hex key.
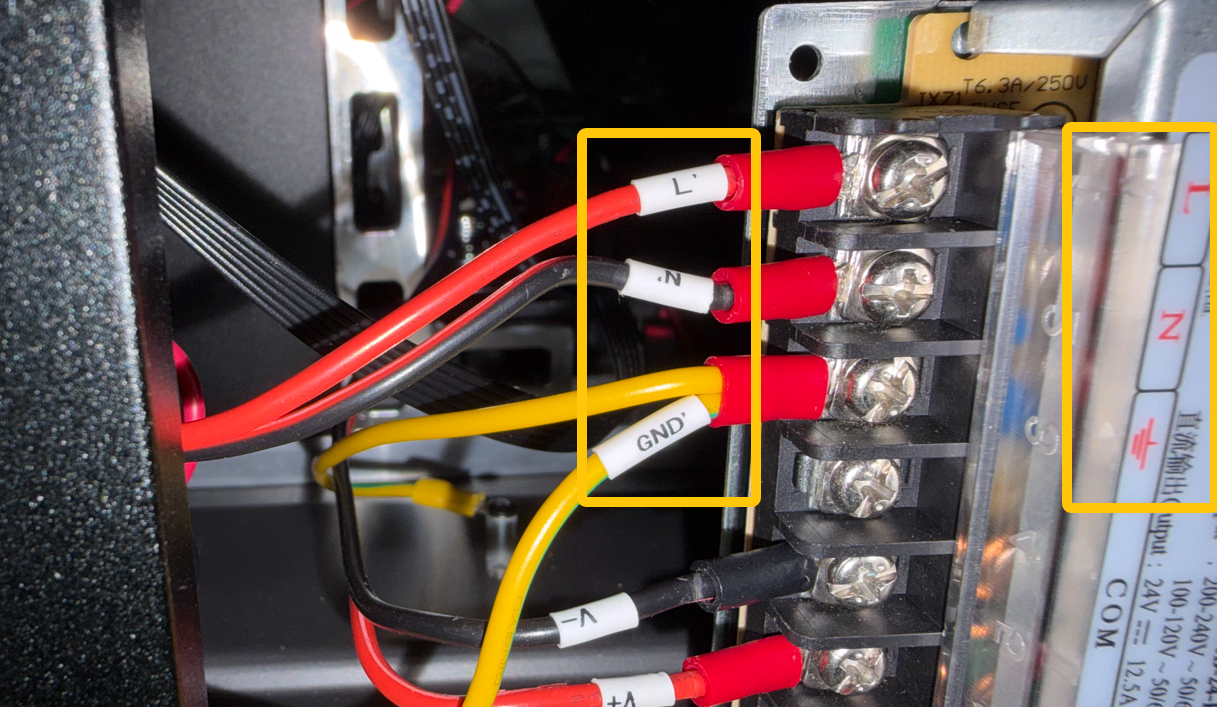
Reconnect L/N/GND power terminals according to the marking. Tighten all screws.
Important: Incorrect wiring of L/N/GND may cause power damage.
¶ 3. Reconnect Auto Feeding Adapter Cable
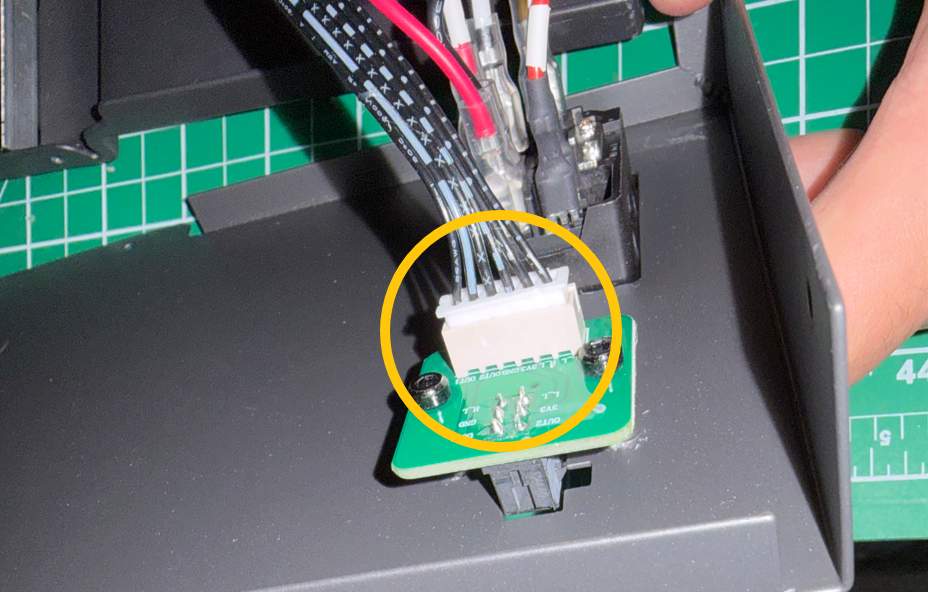
Reconnect the Automatic Resin Feeding and Recycling Module adapter cable.
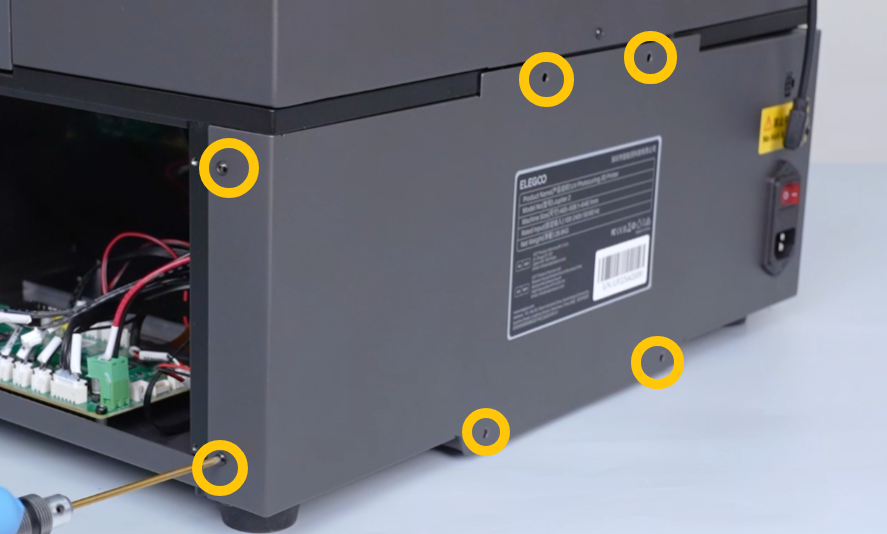
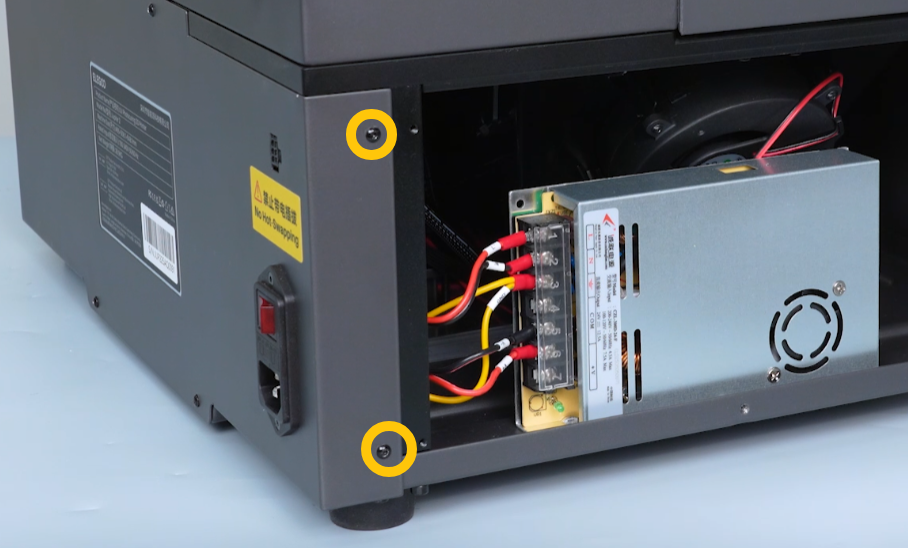
¶ 4. Install Rear Panel
Place the rear panel back into position.
Tighten the eight screws.
¶ 5. Install Left Panel
Install the left panel back into position.
Tighten the five screws.
¶ 6. Install Right Panel
Install the right panel back into position.
Tighten the five screws.
¶ 7. Install Auto Resin Feeding Box
Remove cable ties securing the Resin Tube.
Install the Auto Resin Feeding box back into position.
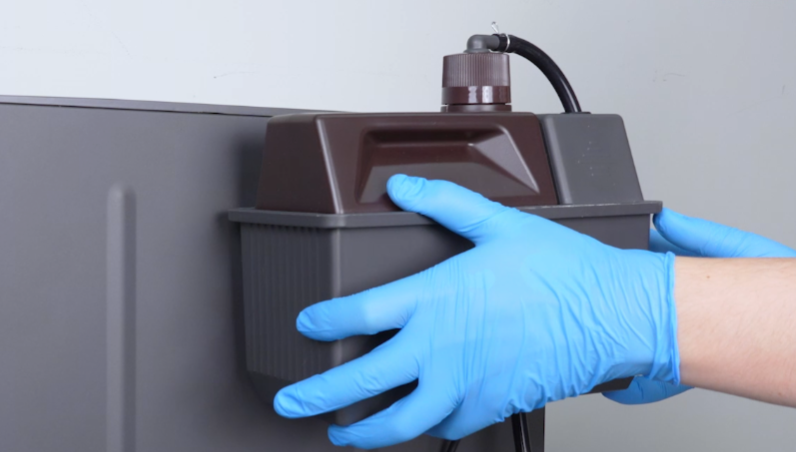
Connect the Resin Tube and Auto Resin Feeding plug. Lock the latch of the Resin Tube.
¶ 8. Install Resin Tank
Place the Resin Tank back into position and tighten the two Screw Knobs.
Remove the sealing bag and lower the Resin Transfer Nozzle of the Bottle Cap Module back into position.
¶ Verification
- Plug in the power cable and turn on the Power Switch.
- Activate Resin Tank preheating via the Touch Screen.
- Return to the main interface and confirm that the resin tank temperature increases.
- Repair procedure completed.