¶ Tools Required
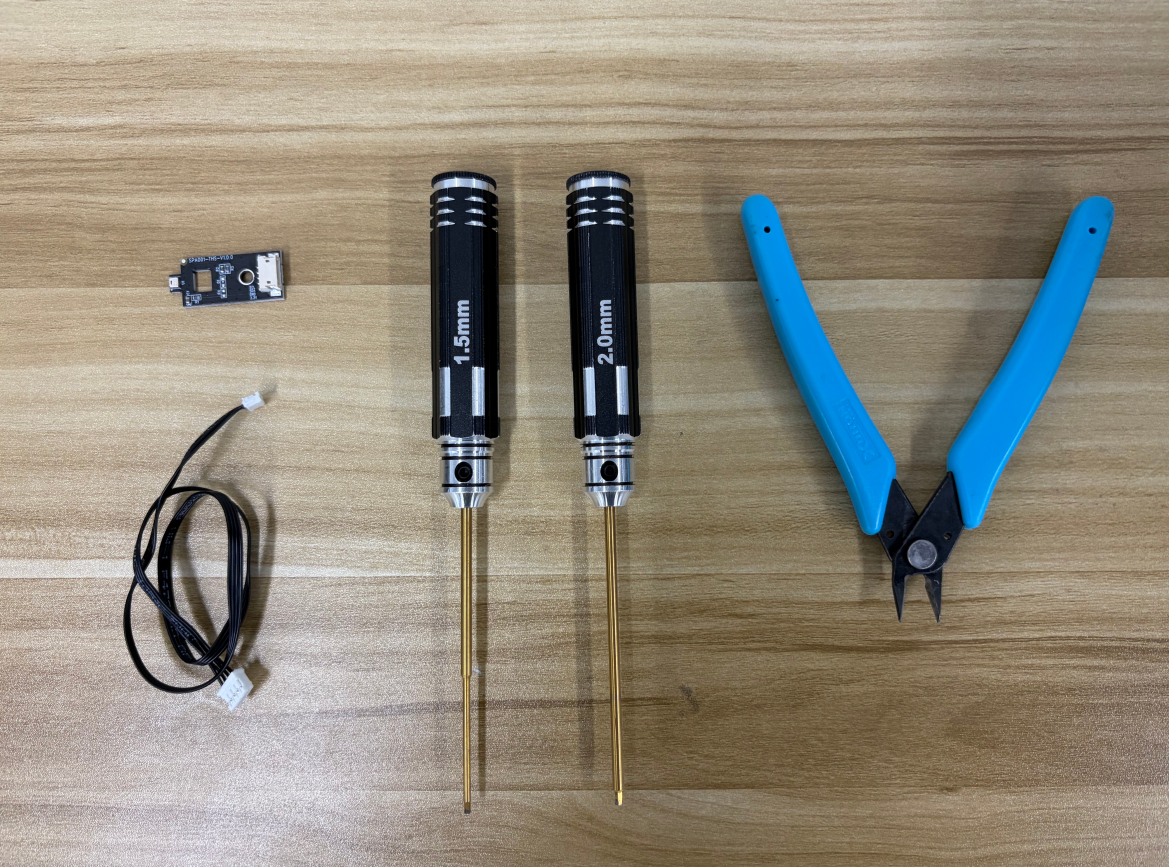
- Diagonal cutters
- 2.5 mm Allen key
- 1.5 mm Allen key
- Temperature and humidity sensor board
- Temperature and humidity sensor cable
- New cable ties
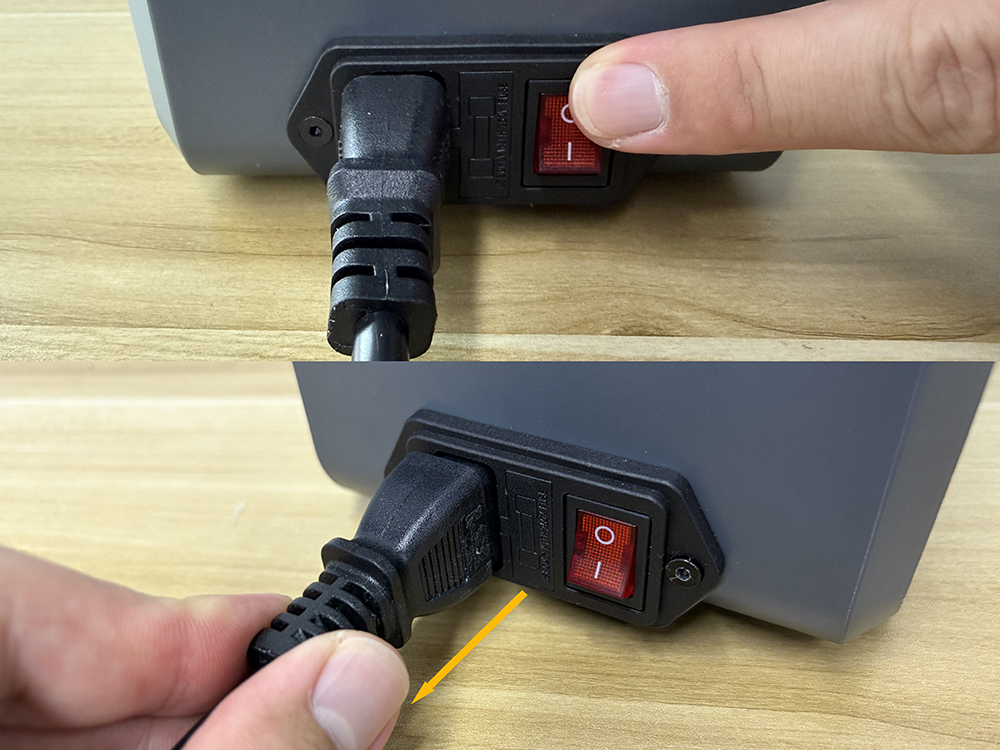
Note: Before proceeding, turn off the H1 HT and disconnect the power cord.
¶ Disassembly
¶ Remove the Filament
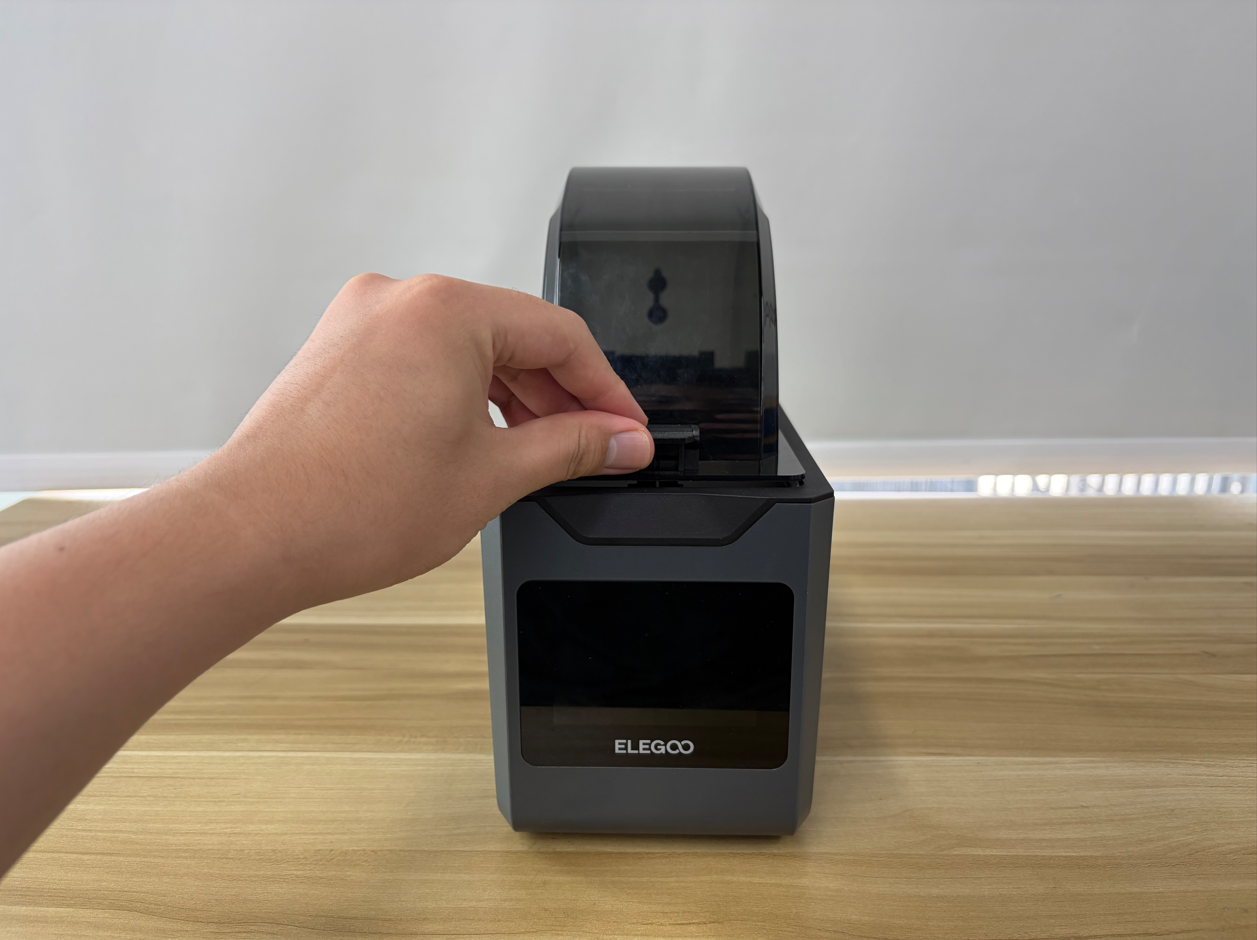
- Open the top cover.
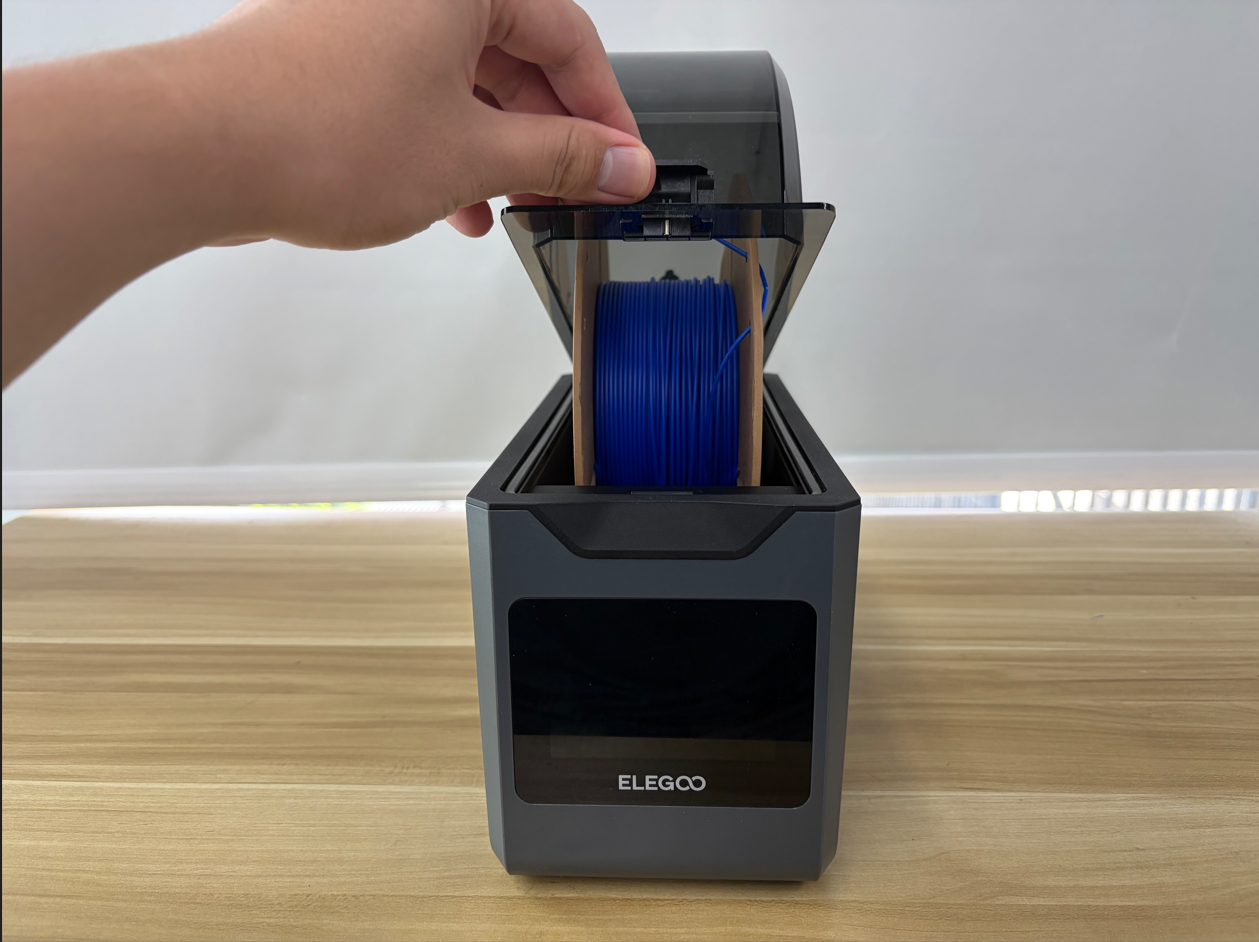
- Remove the filament.
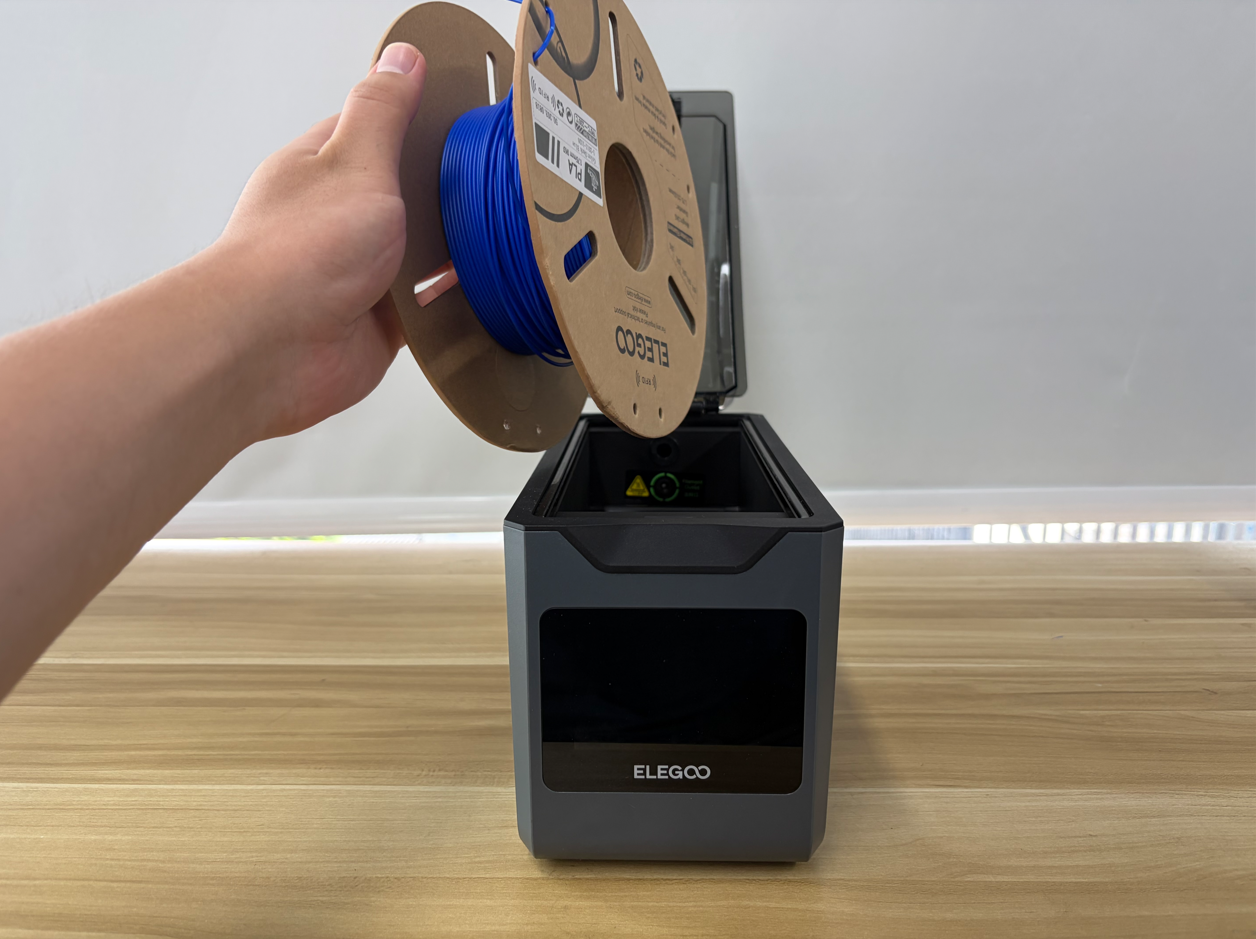
- Close the top cover.

¶ Open the Bottom Cover
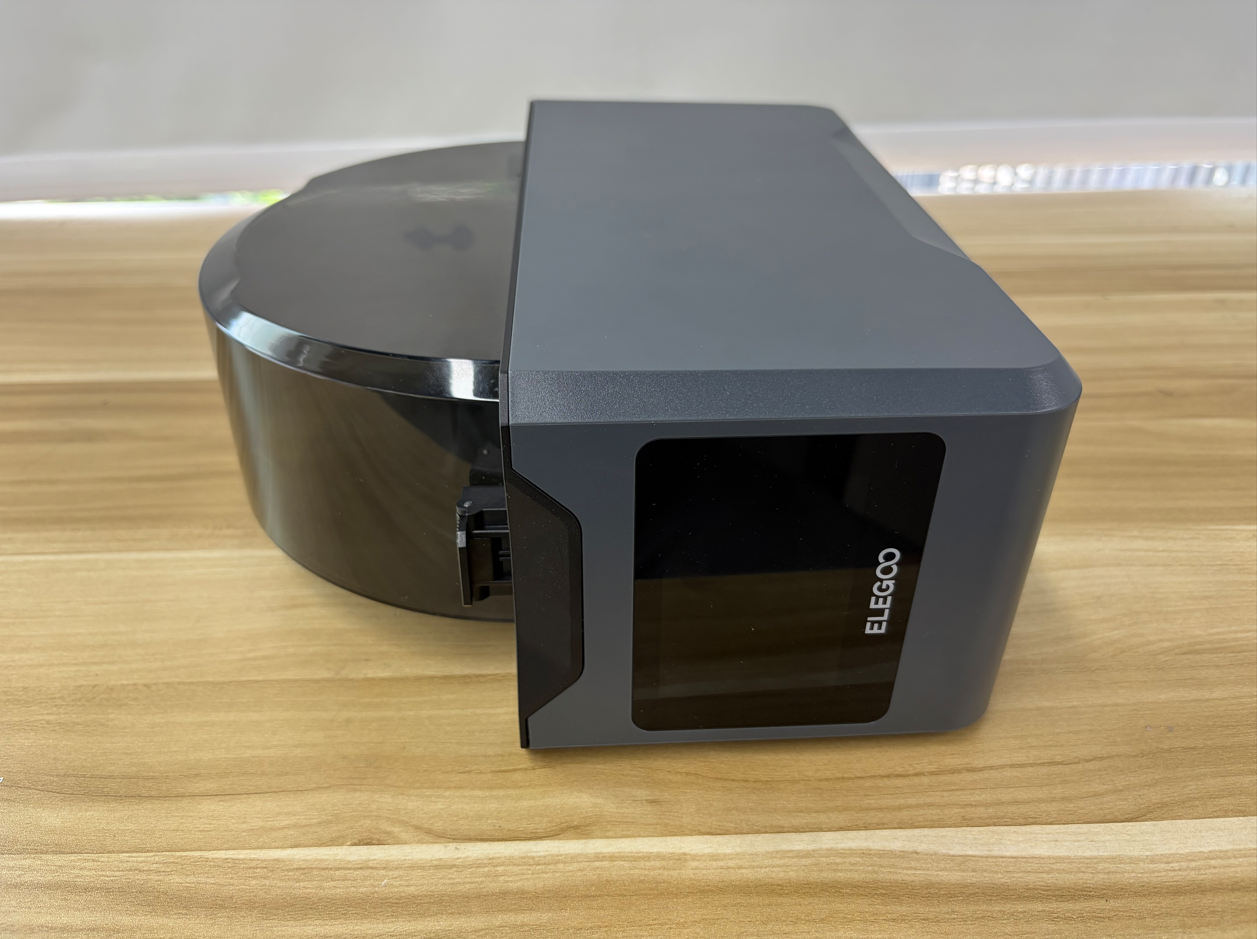
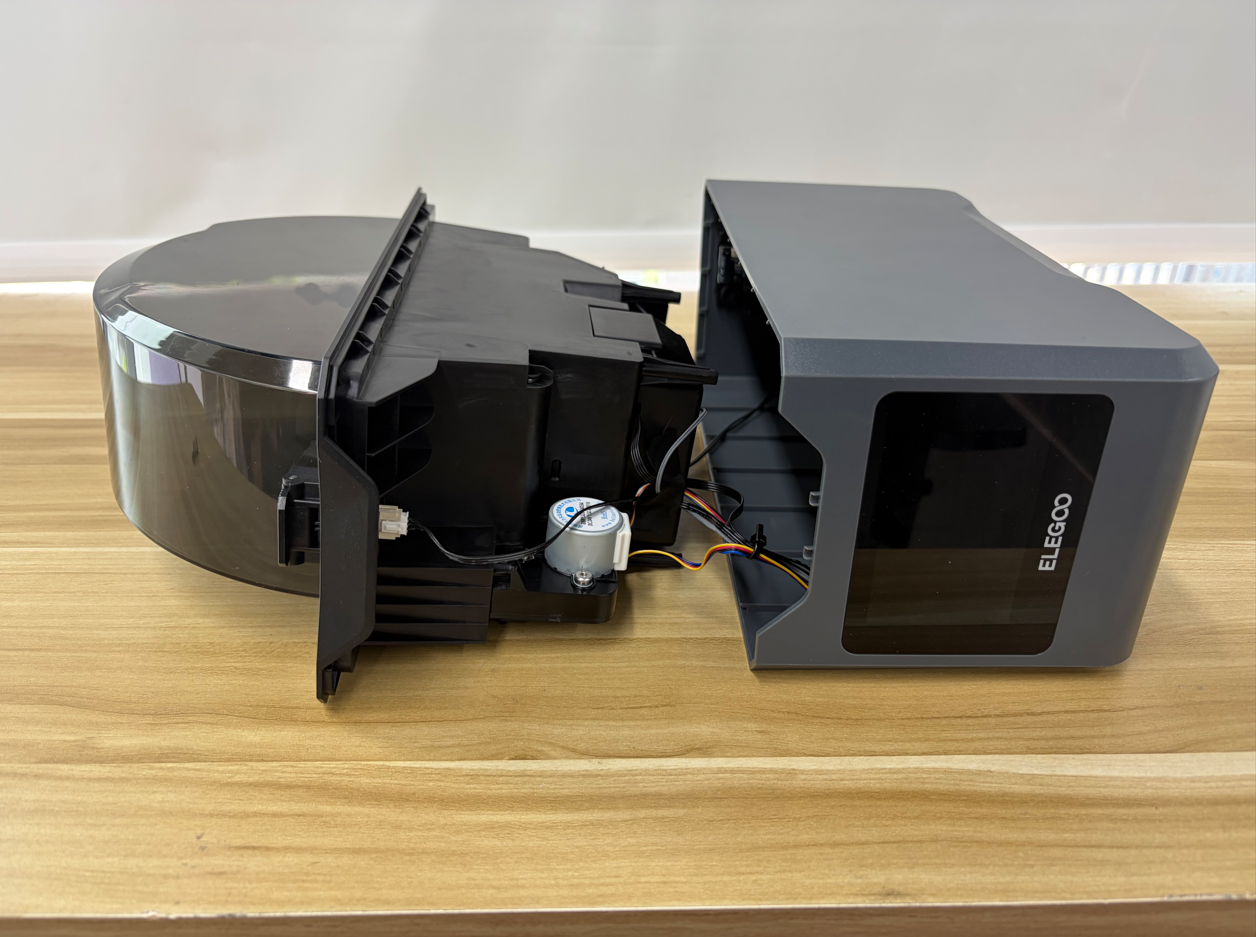
- Place the H1 HT on its side on a table.
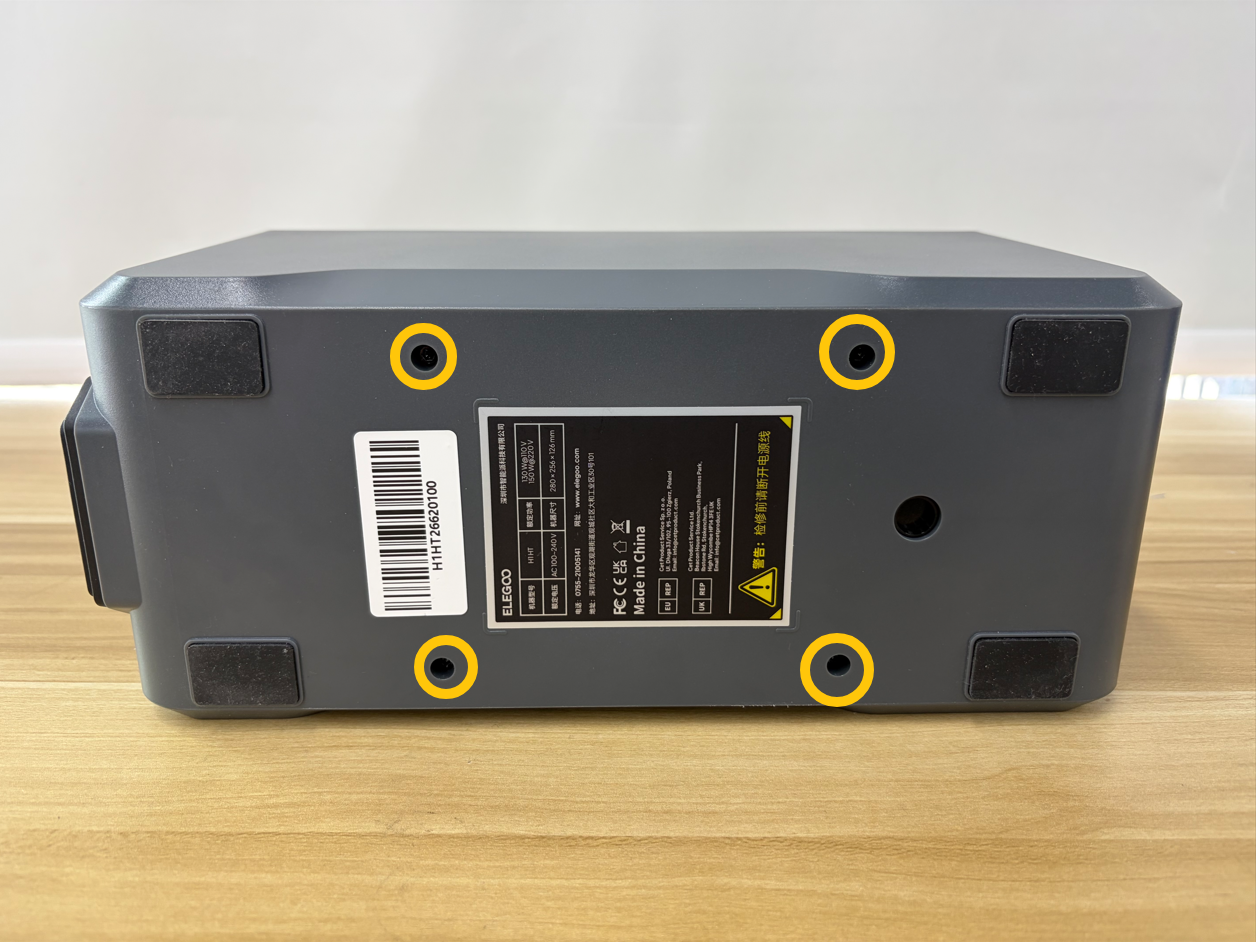
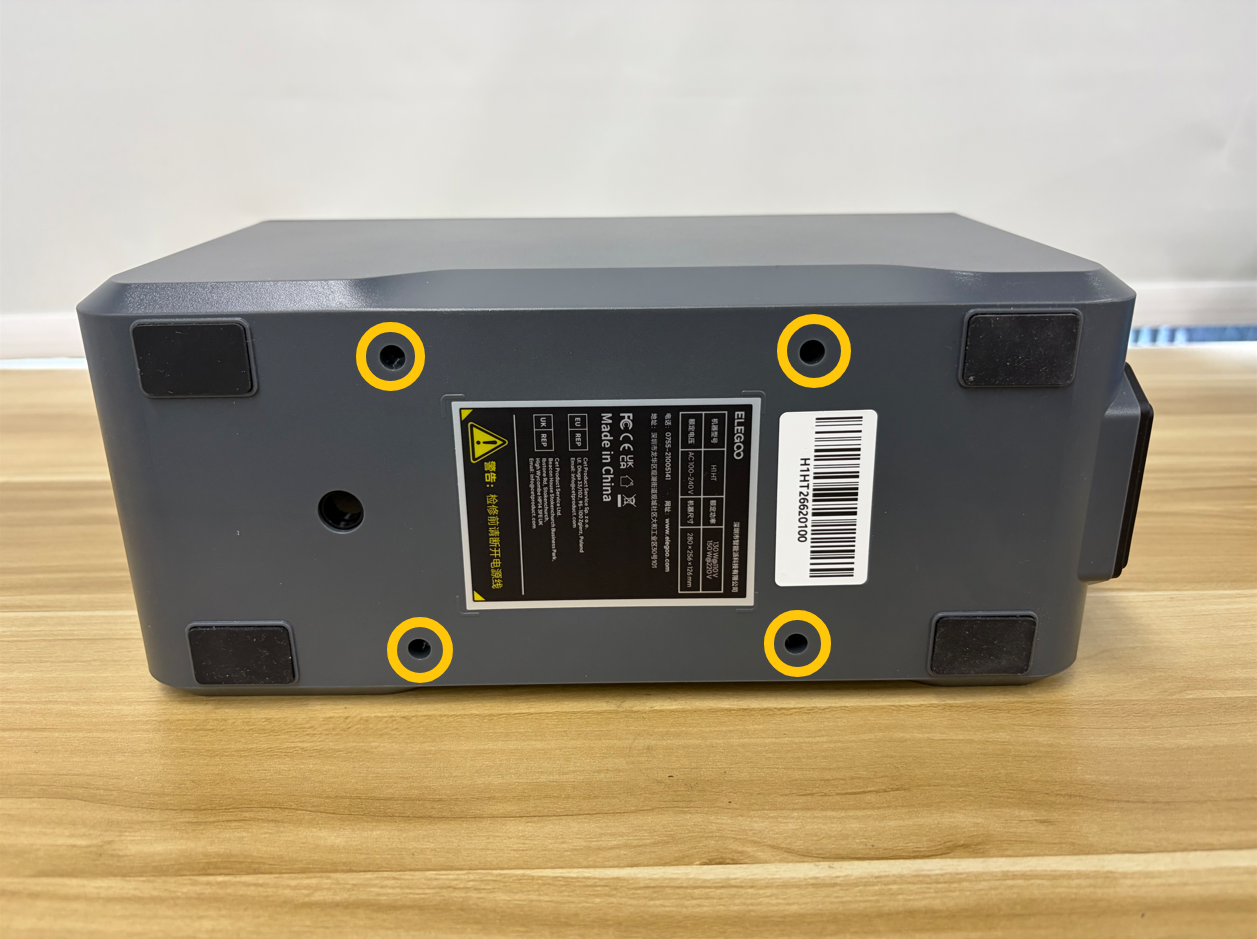
- Use a 2.5 mm Allen key to remove the four screws securing the bottom cover.
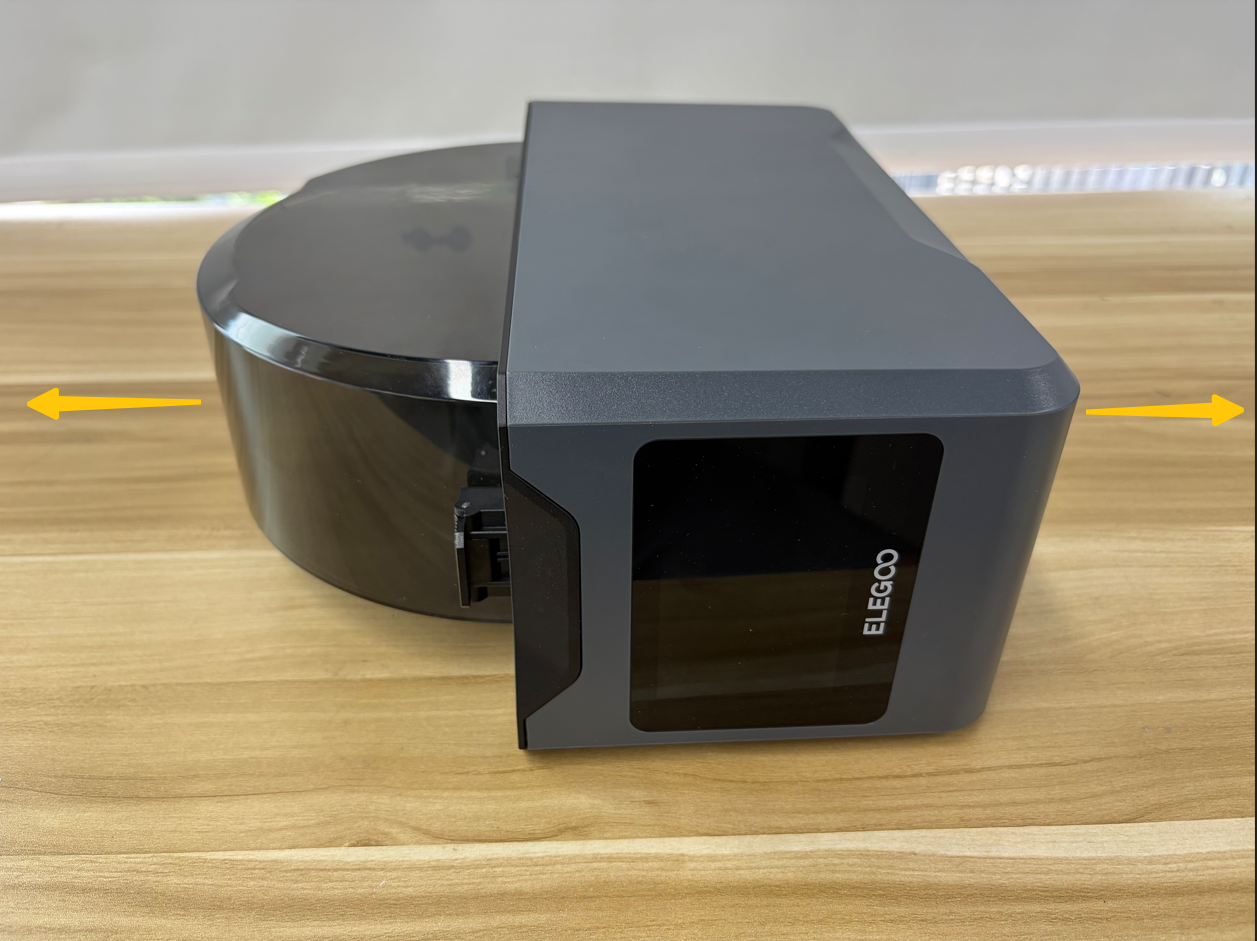
- Slowly open the bottom cover.
Note: Be careful not to pull or disconnect the cables inside the bottom cover.
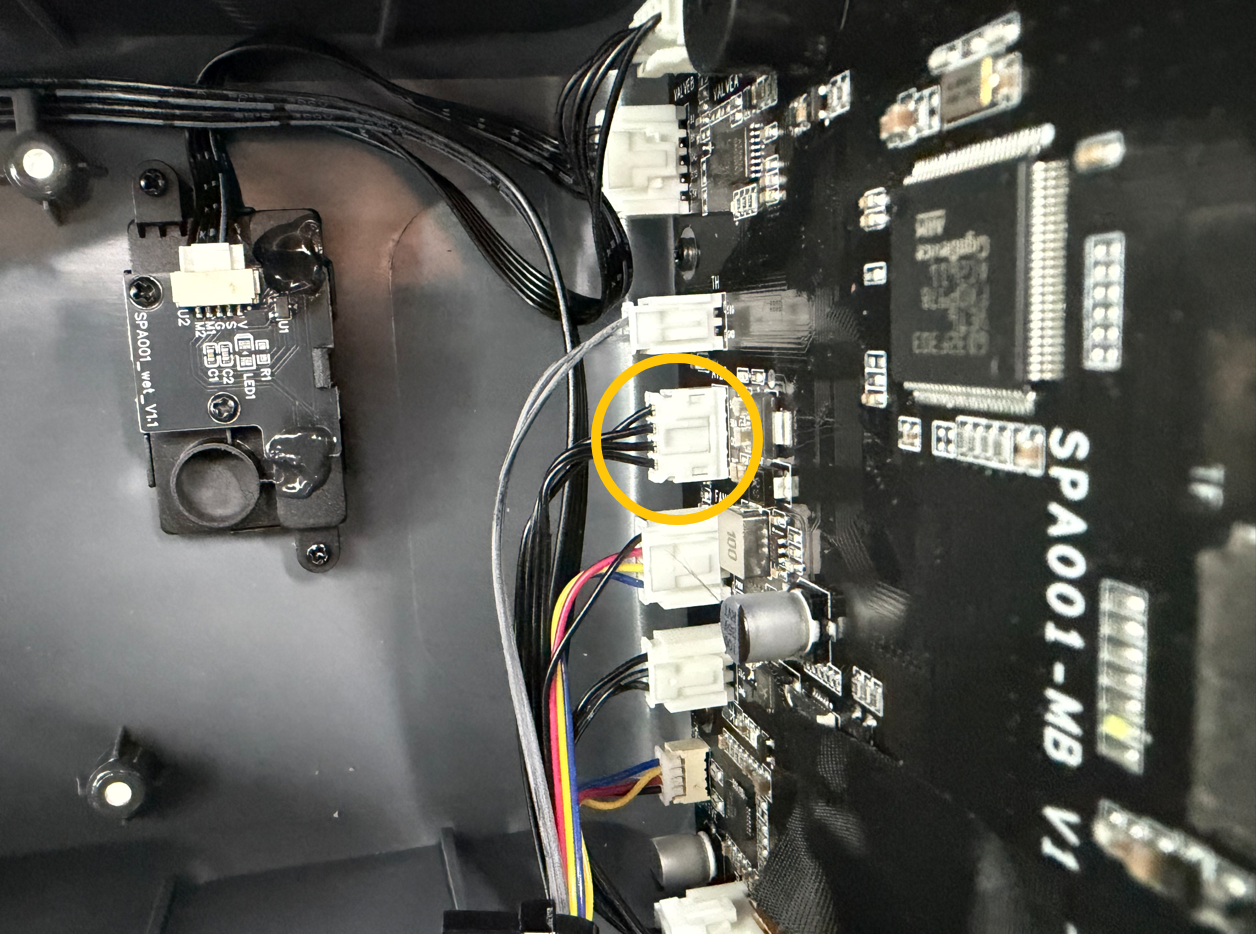
¶ Disconnect the Temperature and Humidity Sensor Board Connector
Locate the mainboard on one side of the bottom cover and disconnect the connector shown below.
¶ Remove the Air Duct Protection Assembly
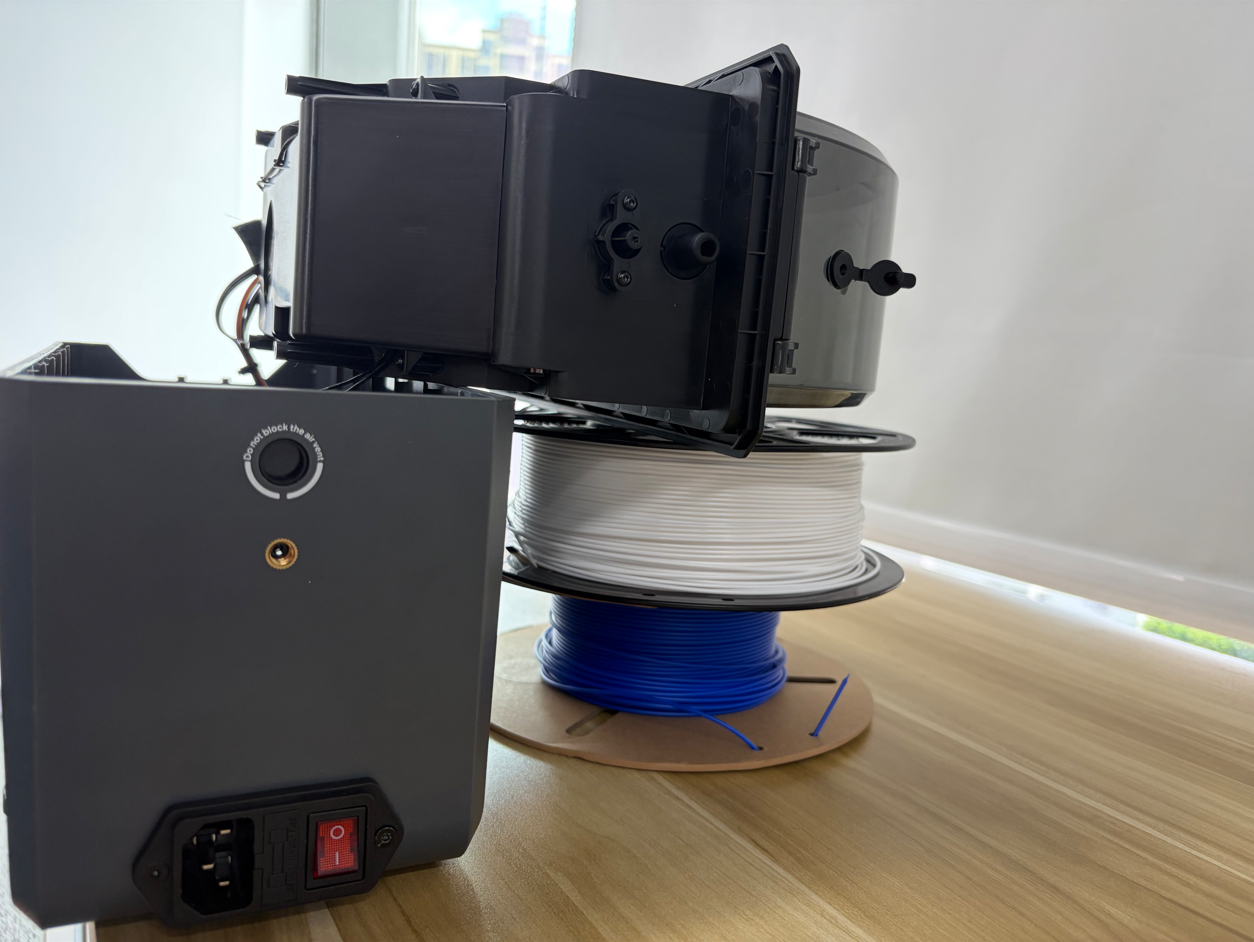
Note: For easier operation, place the two filament spools under the inner tray and top cover to provide support.
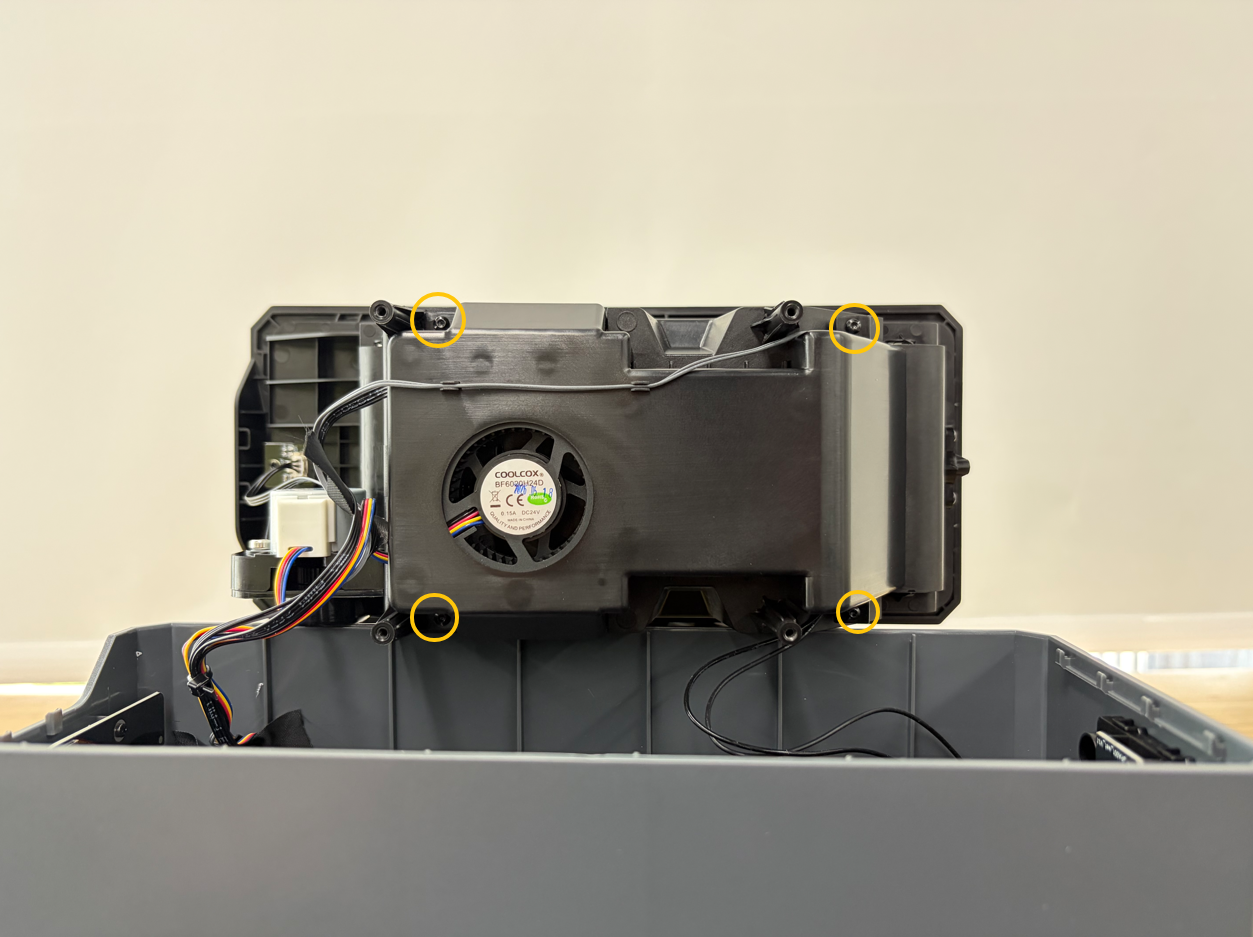
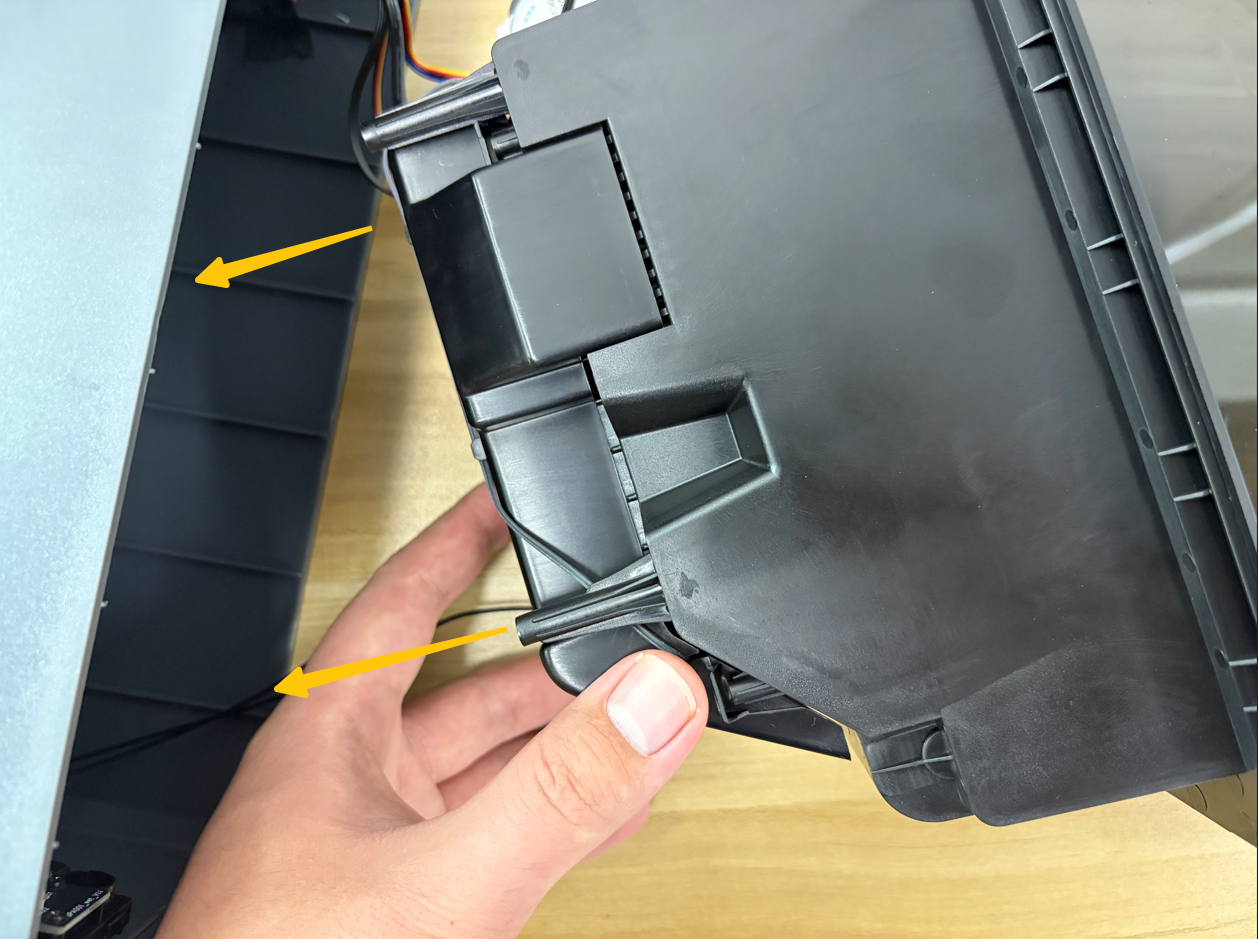
- Use a 1.5 mm Allen key to remove the four screws securing the air duct protection assembly.
- Slowly separate the inner tray assembly from the air duct protection assembly.
¶ Remove the Temperature and Humidity Sensor Board
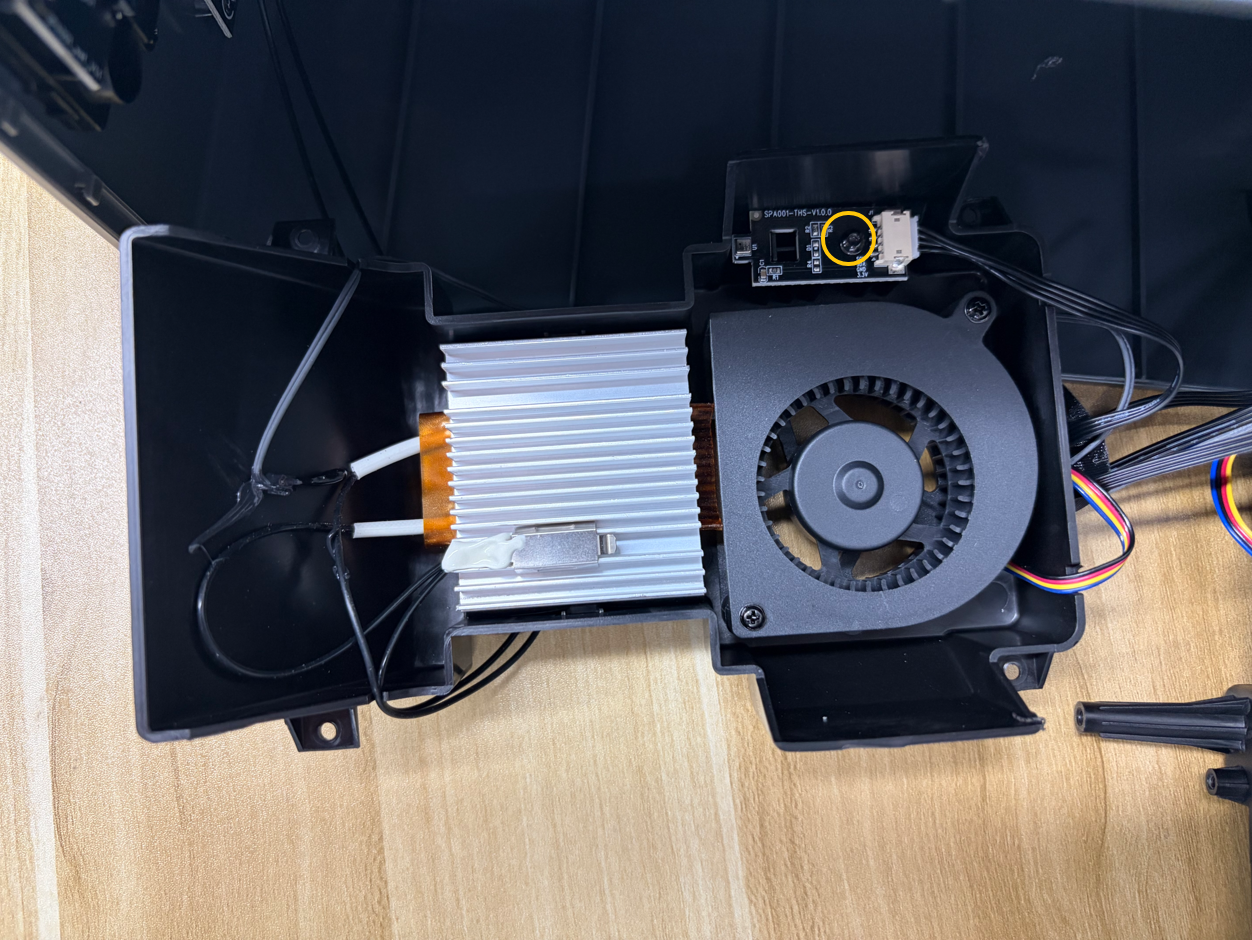
Use a 1.5 mm Allen key to remove the screw securing the temperature and humidity sensor board.
¶ Remove the Tape
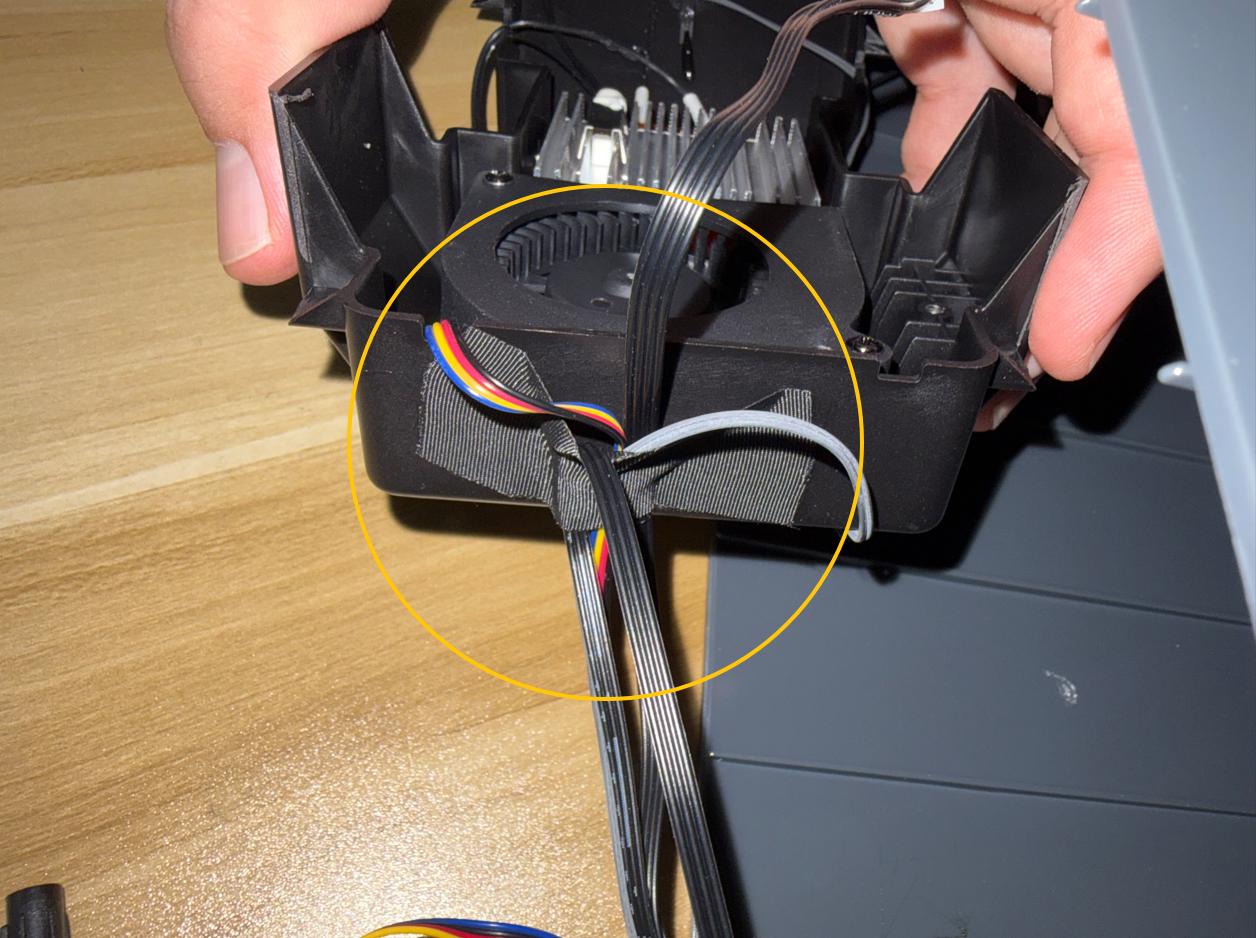
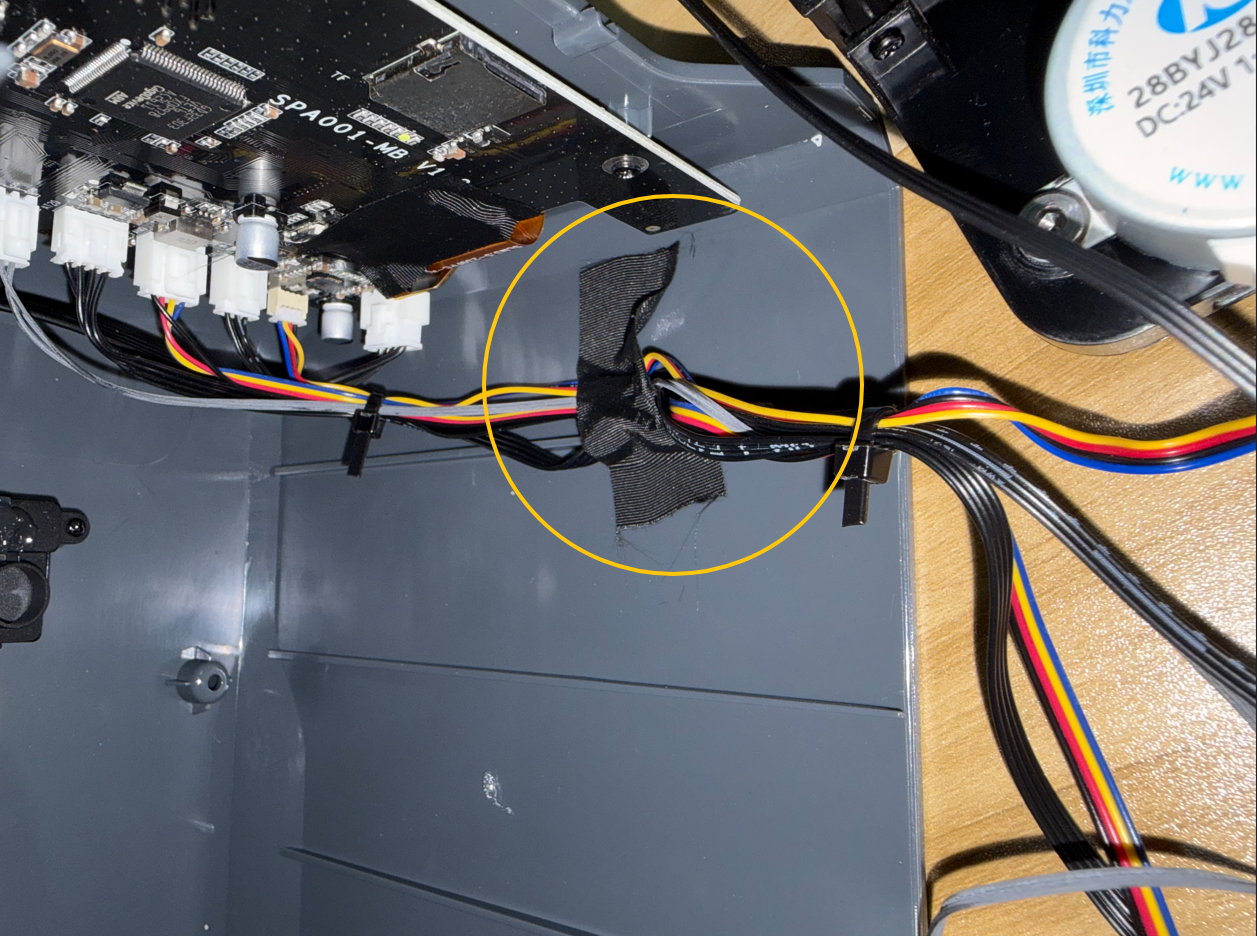
Remove the tape from the side of the inner tray assembly and the edge of the bottom cover. Set the tape aside for later use.
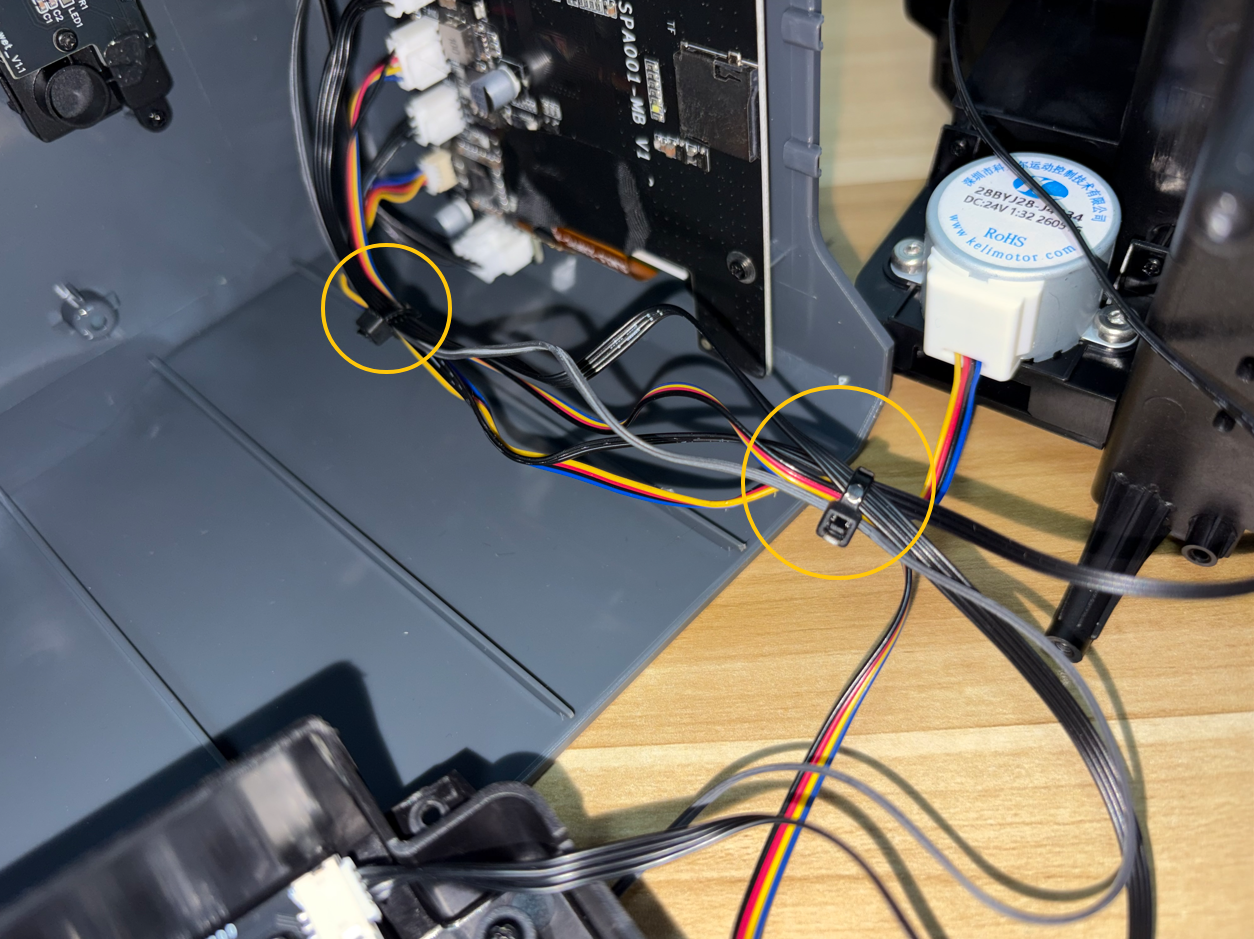
¶ Remove the Cable Ties Securing the Cables
Use diagonal cutters to cut the cable ties securing the cables, then remove the old temperature and humidity sensor board and its connection cable.
Note: Be careful not to cut the cables during this operation.
¶ Installation
¶ Connect the Temperature and Humidity Sensor Board Connector
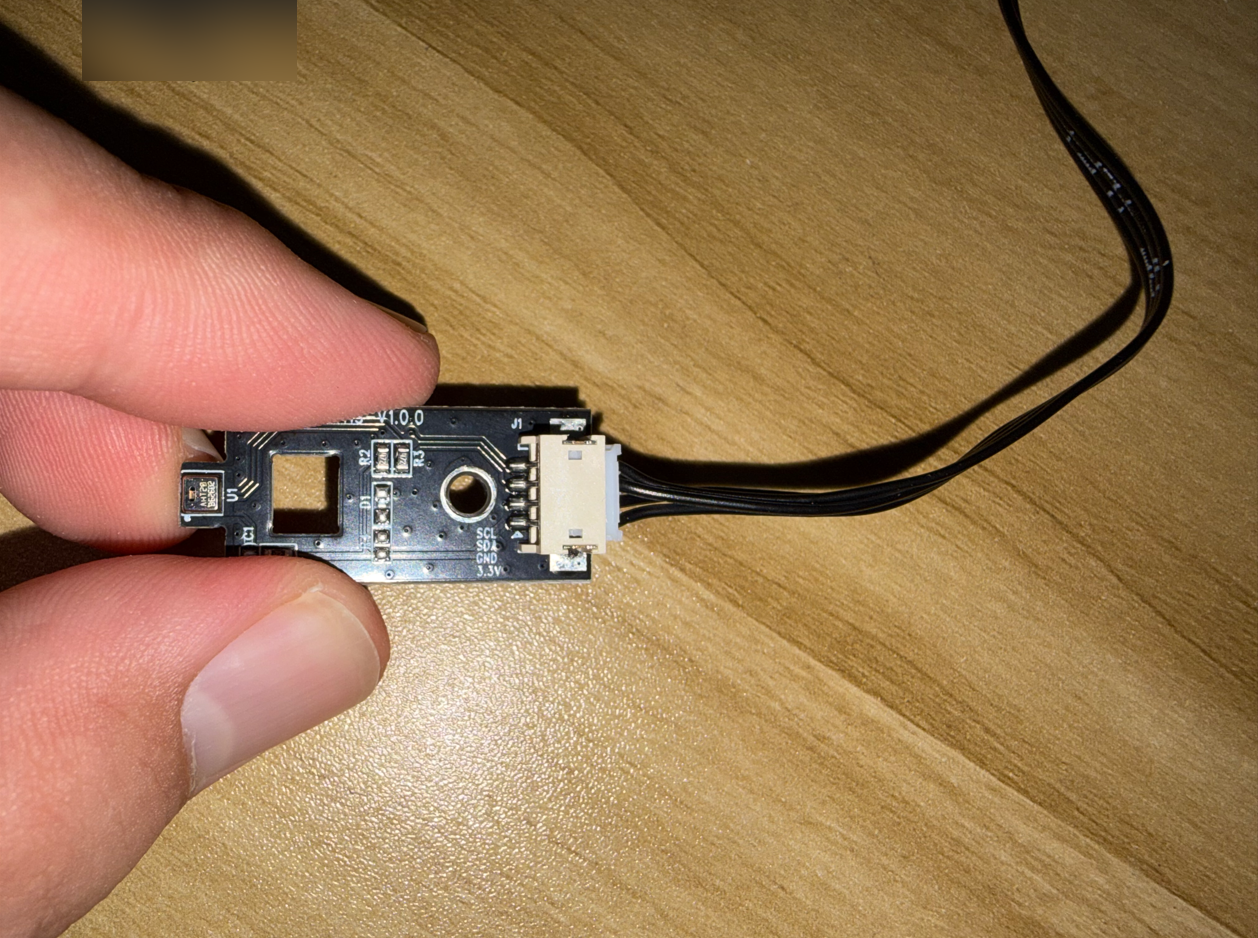
- Connect the new temperature and humidity sensor cable to the port on the temperature and humidity sensor board.
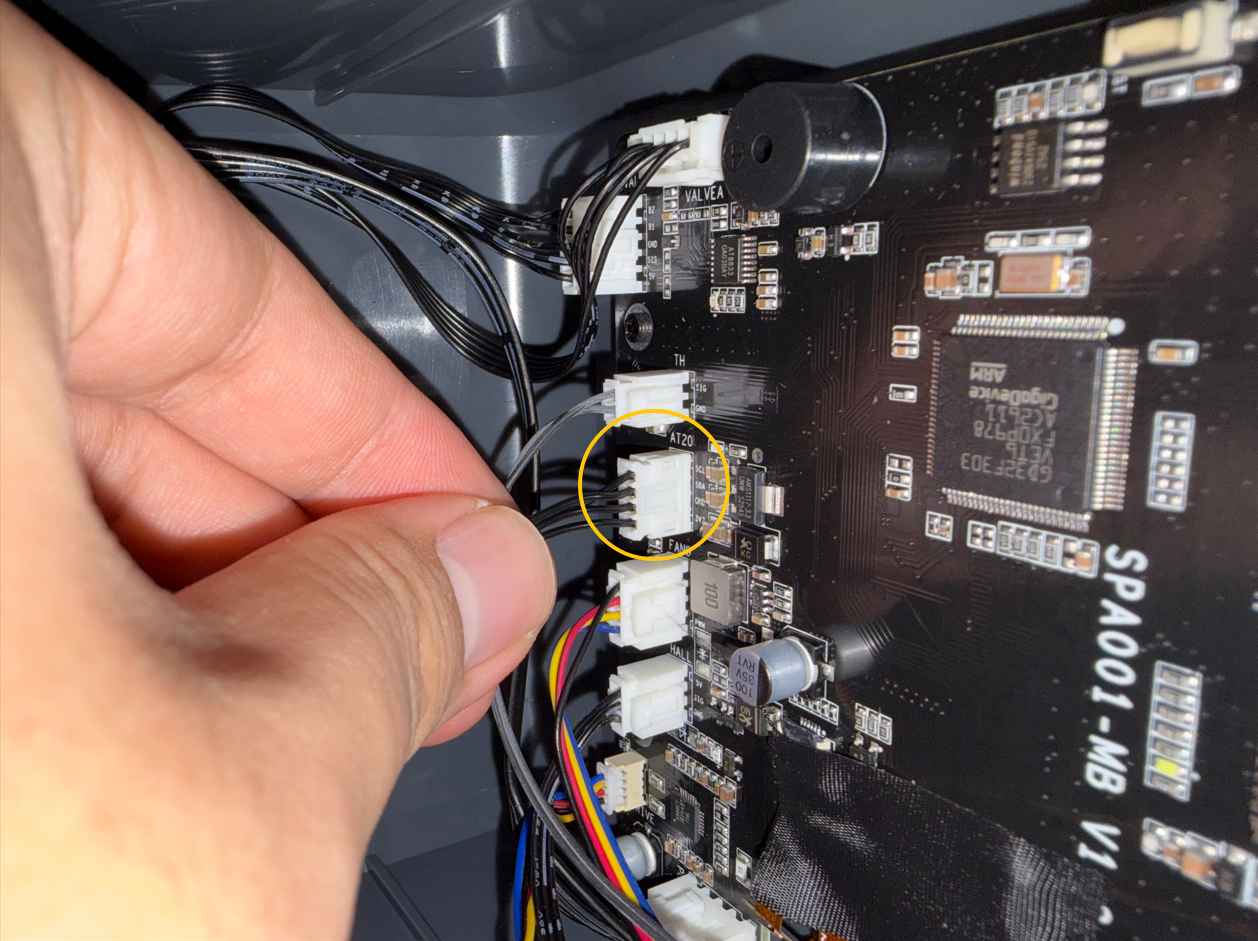
- Connect the temperature and humidity sensor cable to the port on the mainboard.
¶ Secure the Temperature and Humidity Sensor Board
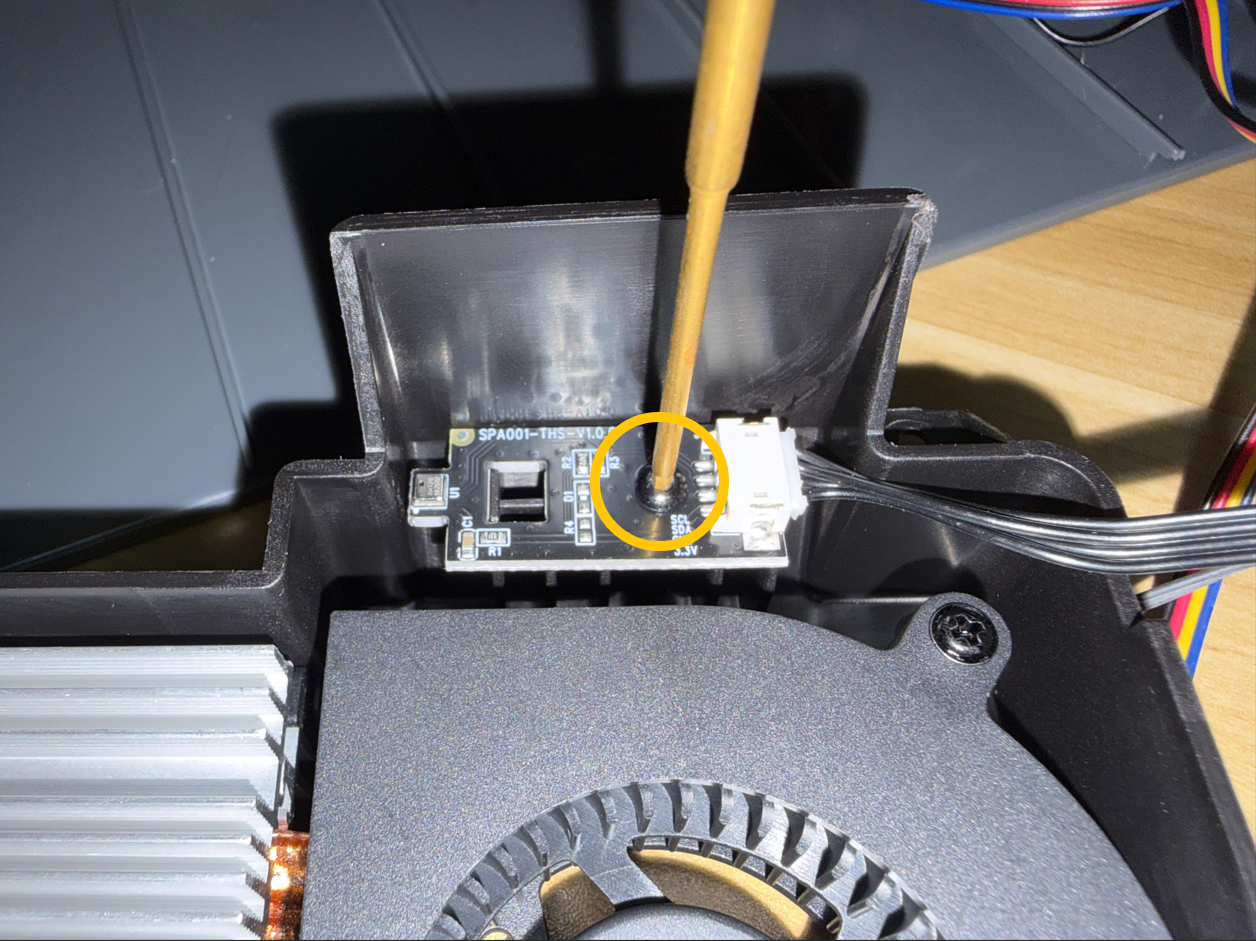
- Place the temperature and humidity sensor board in its original position.
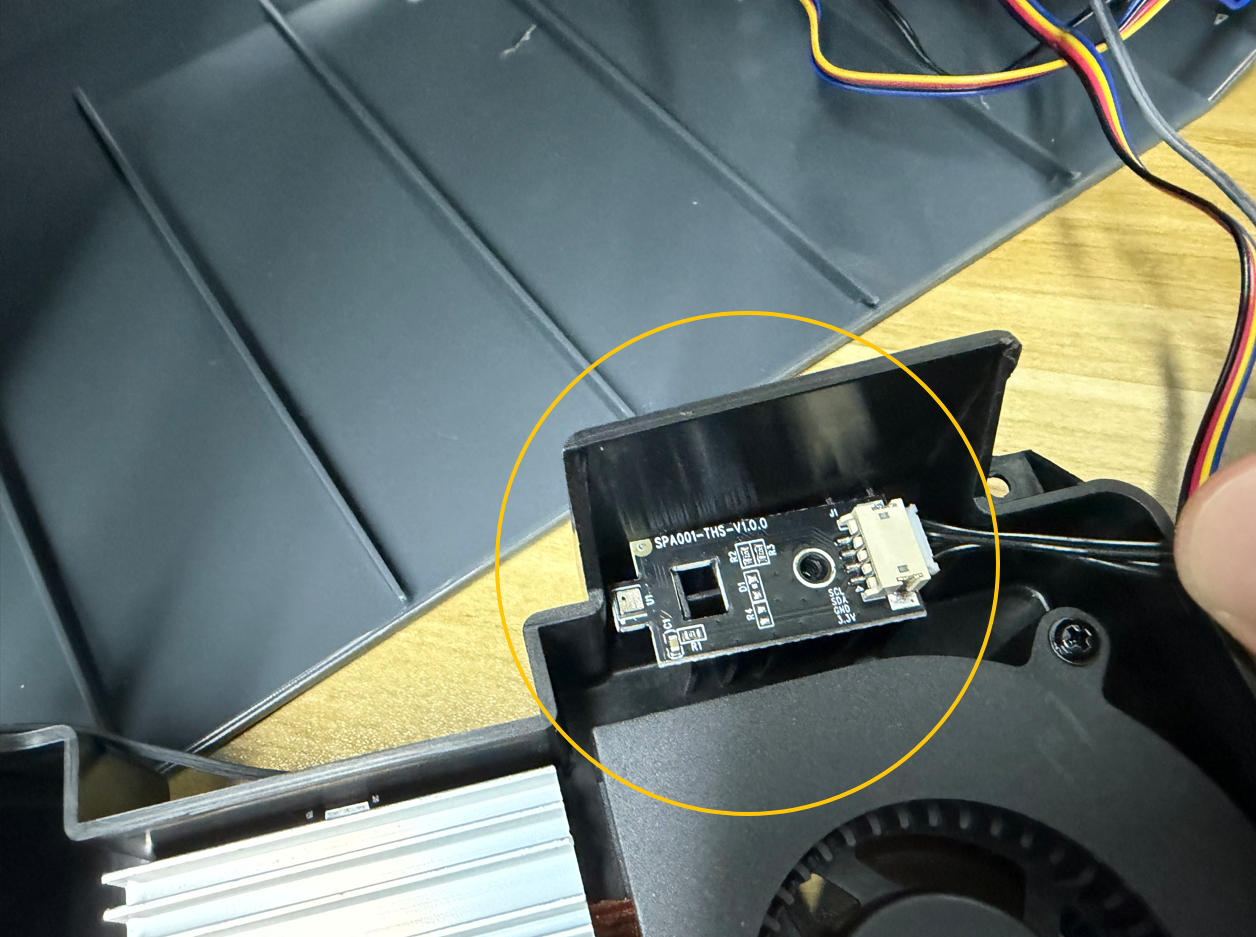
- Tighten the screw (M2.6 × 6) securing the temperature and humidity sensor board.
¶ Secure the Cables with Cable Ties
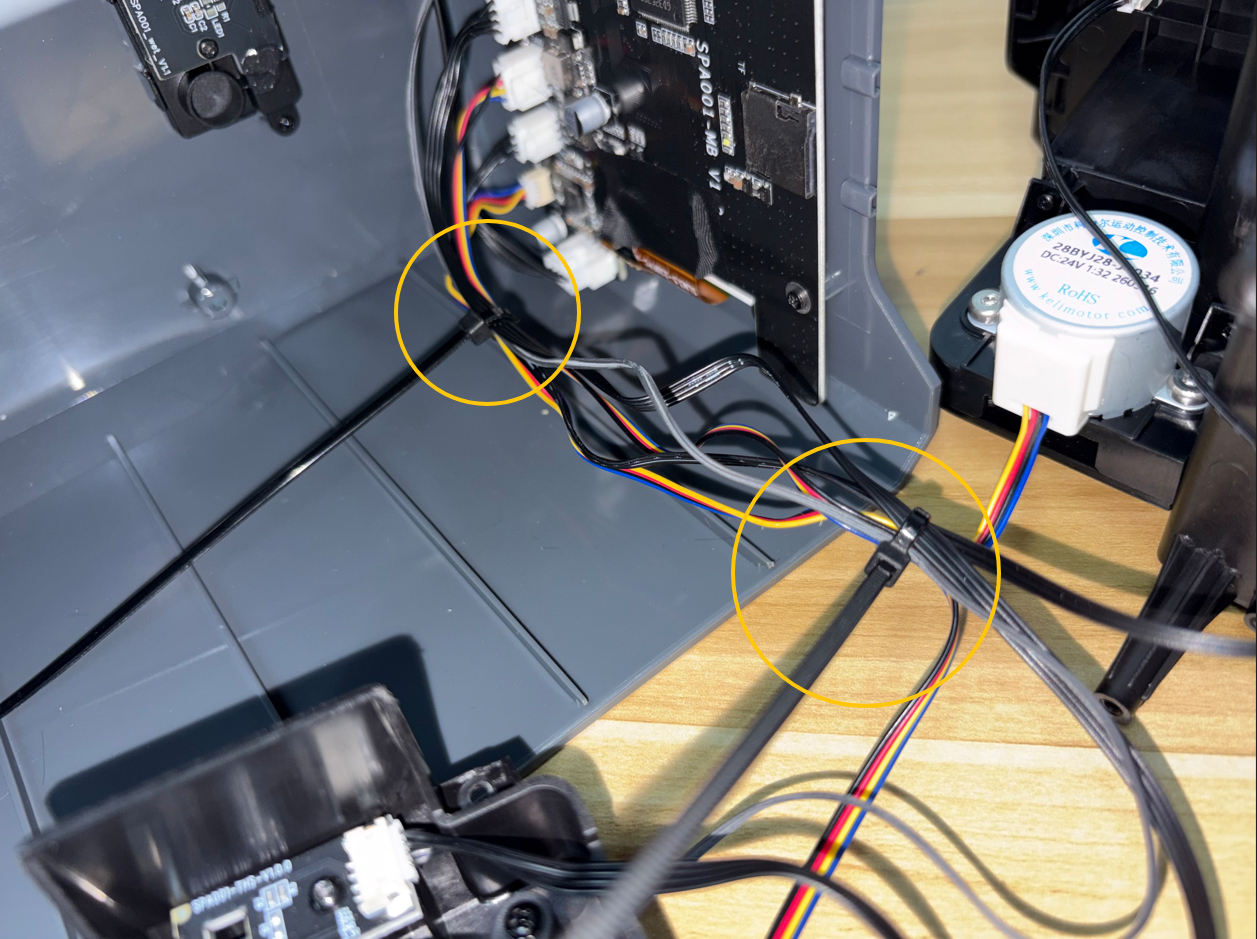
- Secure the cables with the new cable ties.
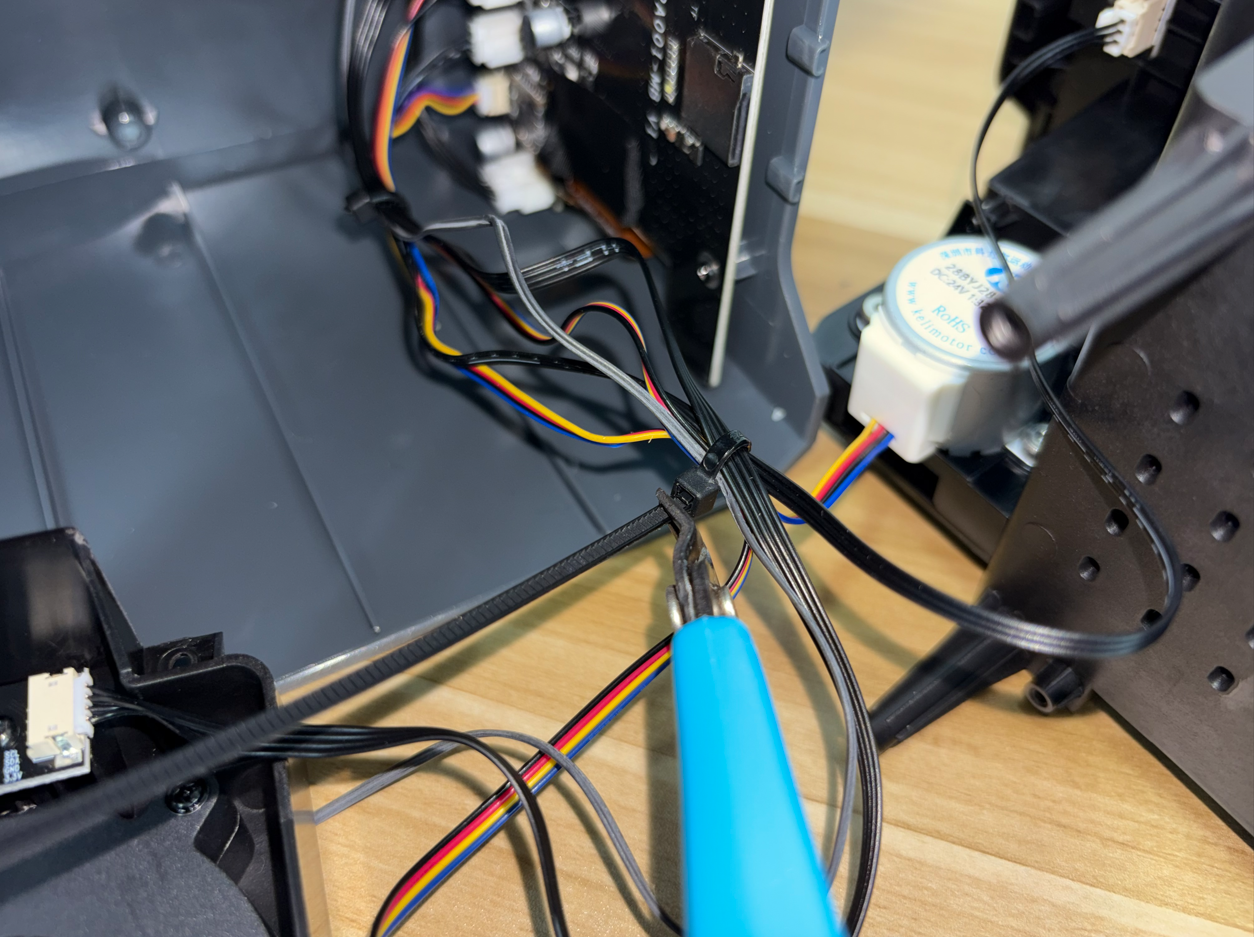
- Use diagonal cutters to cut off the excess end of the cable tie.
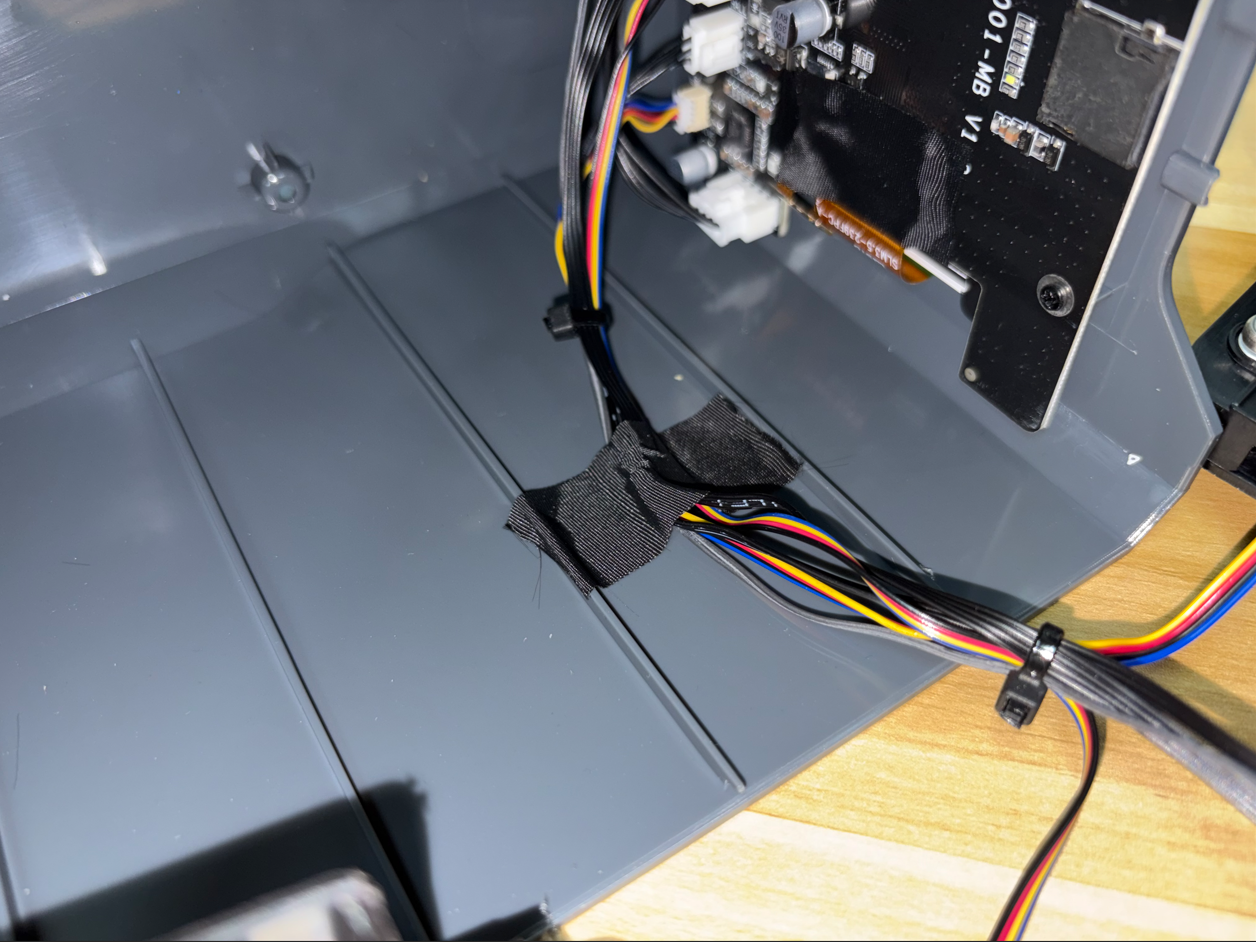
¶ Secure the Cables to the Side of the Bottom Cover
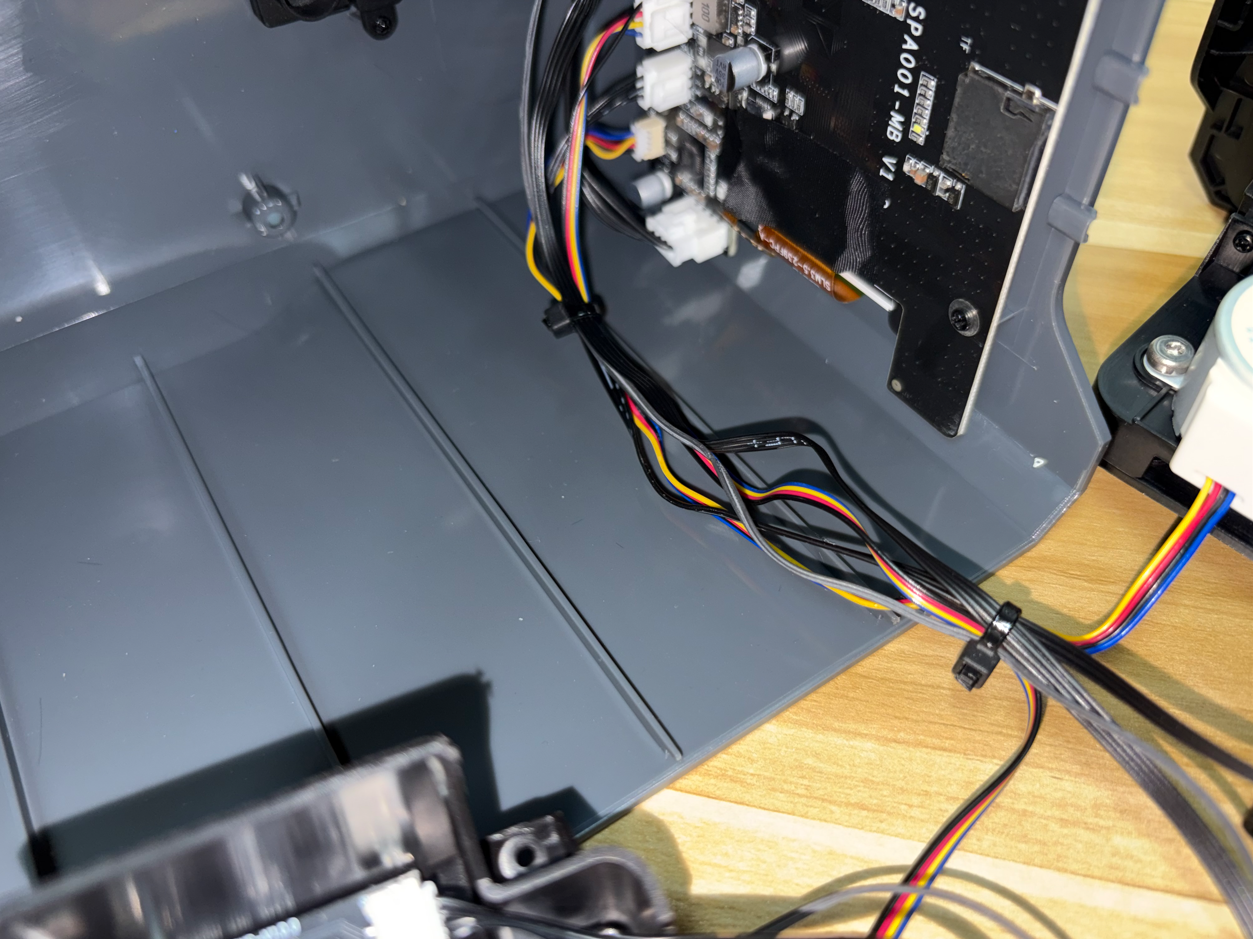
Use tape to secure the cables to the side of the bottom cover.
¶ Install the Air Duct Protection Assembly
- Place the cables into the groove along the edge of the air duct protection assembly.
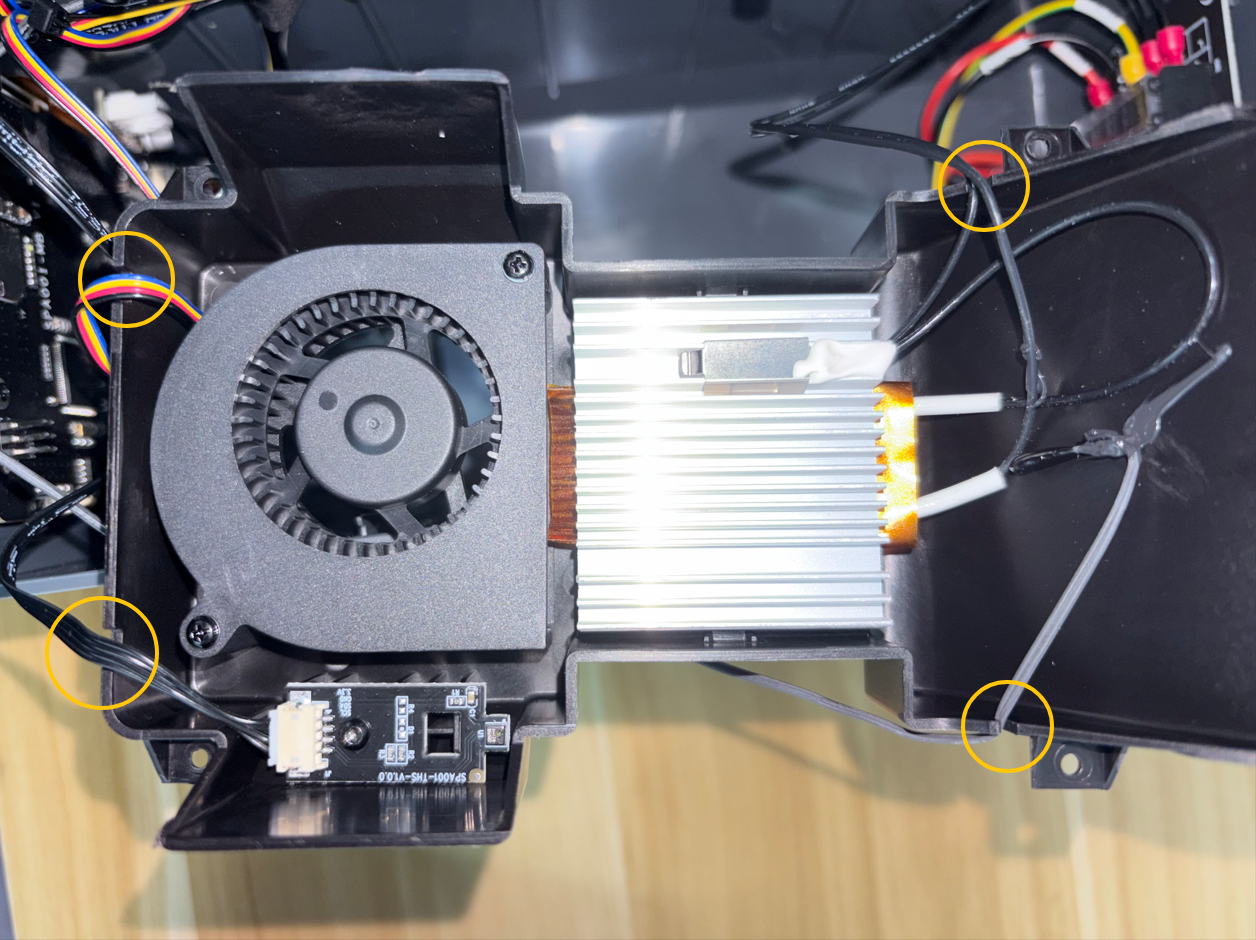
- Slowly close the air duct protection assembly.
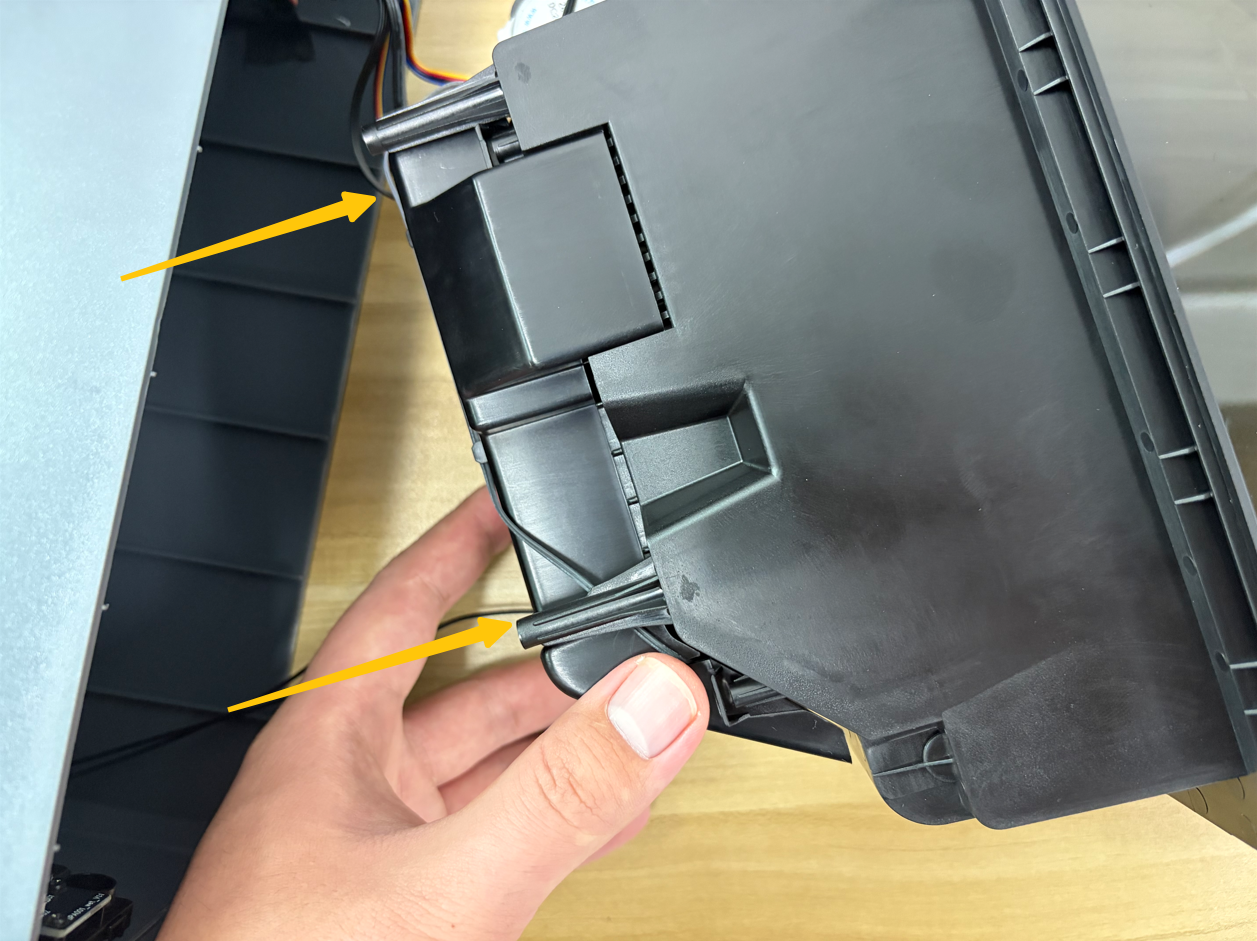
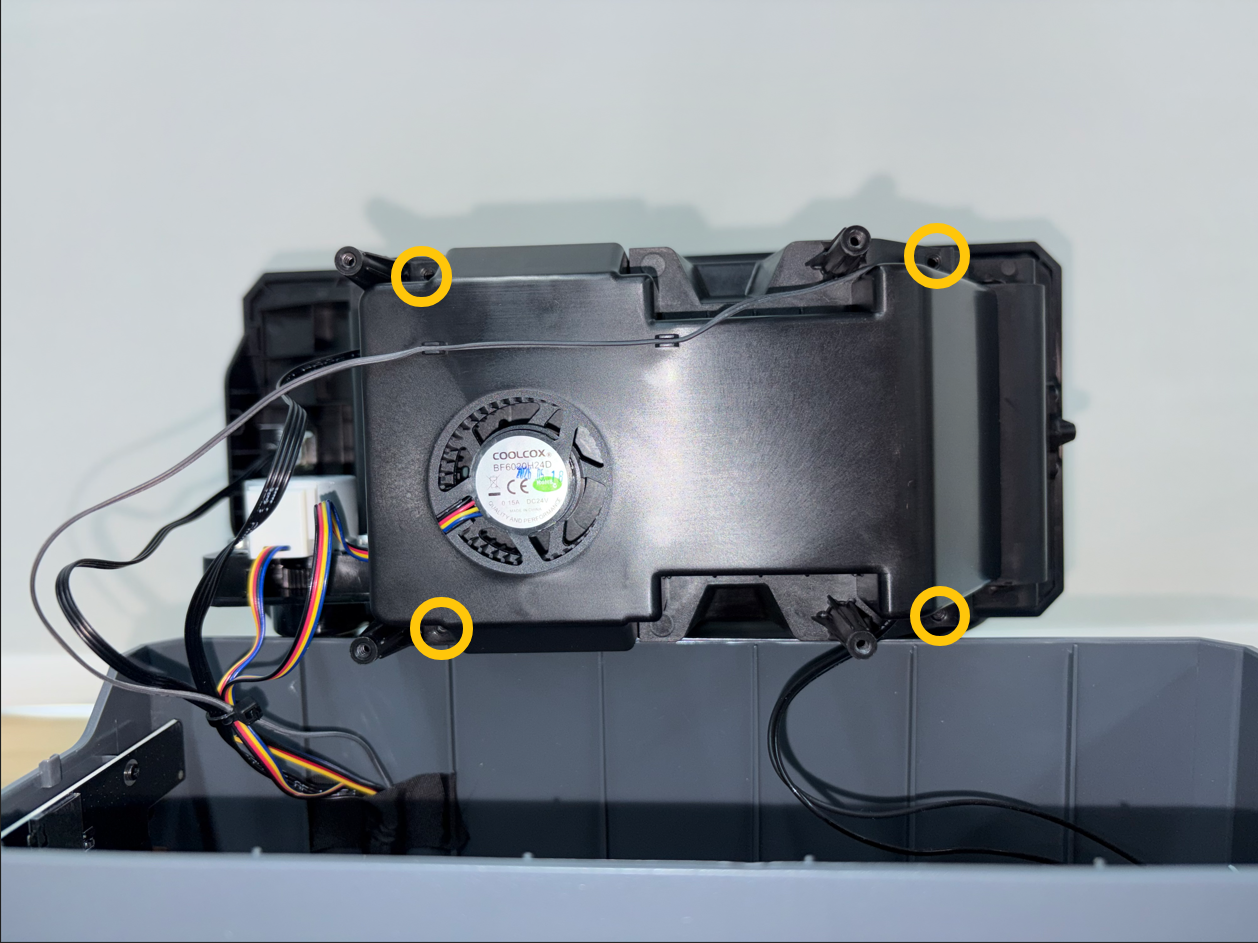
- Use a 1.5 mm Allen key to tighten the four screws securing the air duct protection assembly.
¶ Secure the Cables to the Side of the Air Duct Protection Assembly
- Organize the cables.
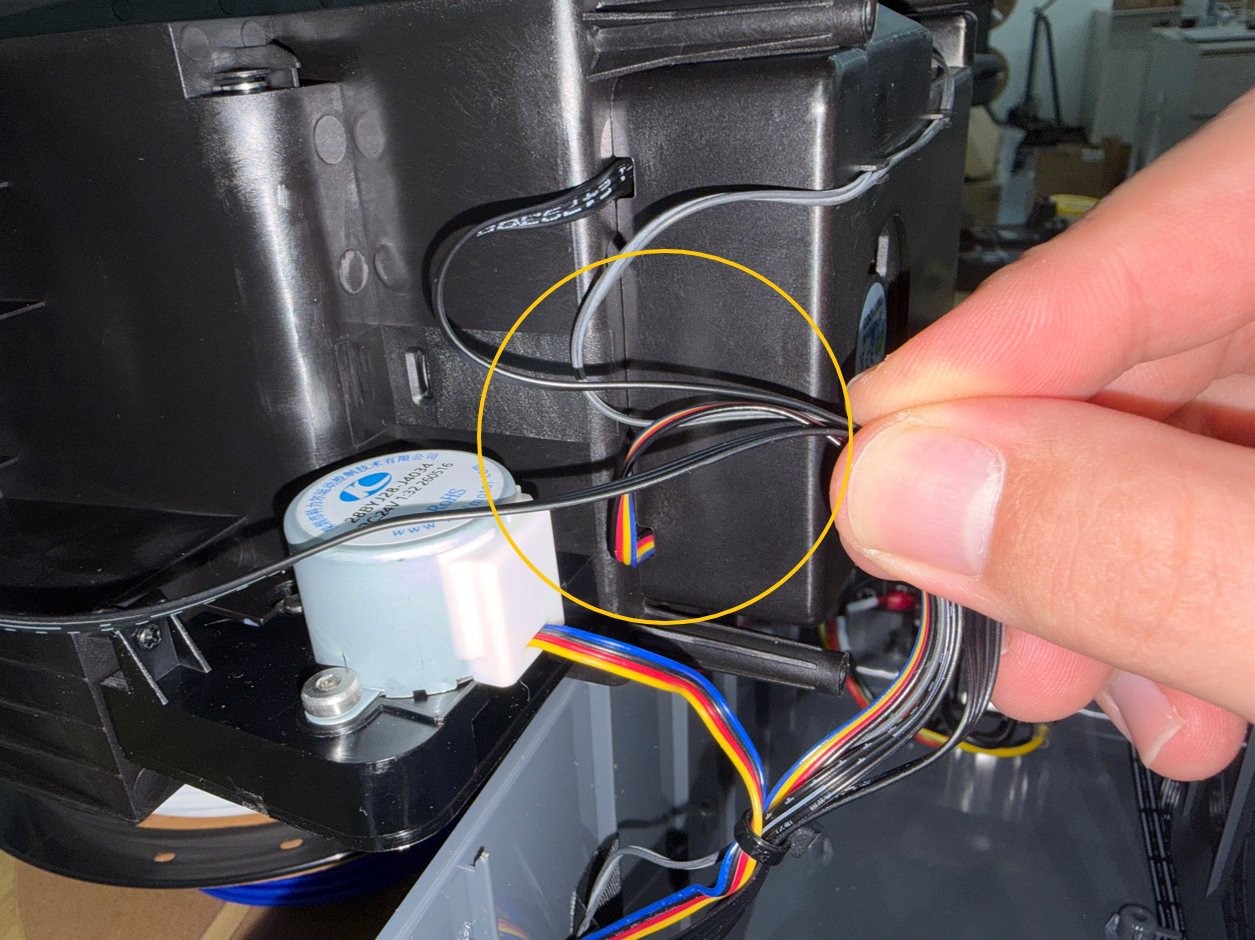
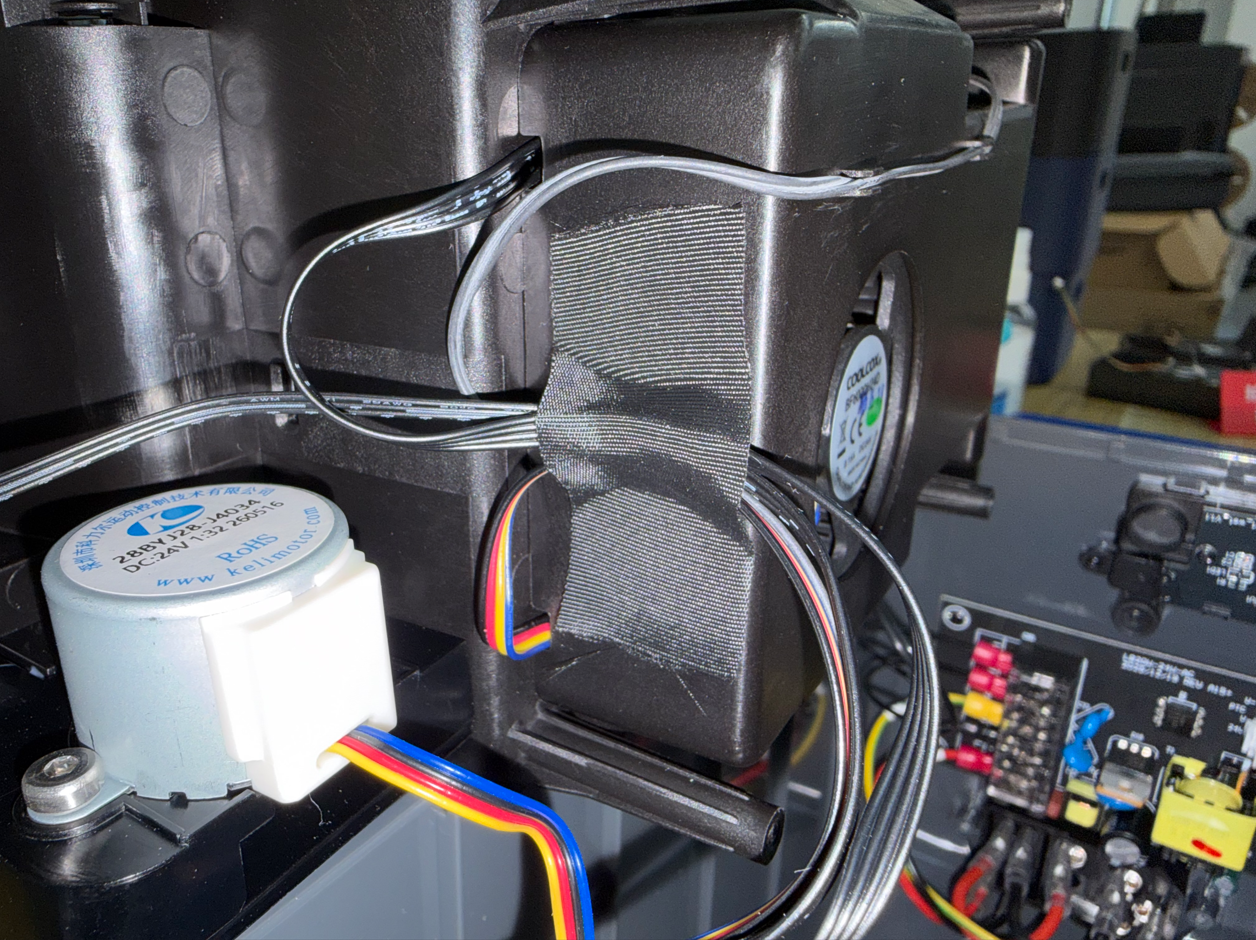
- Use tape to secure the cables to the side of the air duct protection assembly.
¶ Secure the Bottom Cover
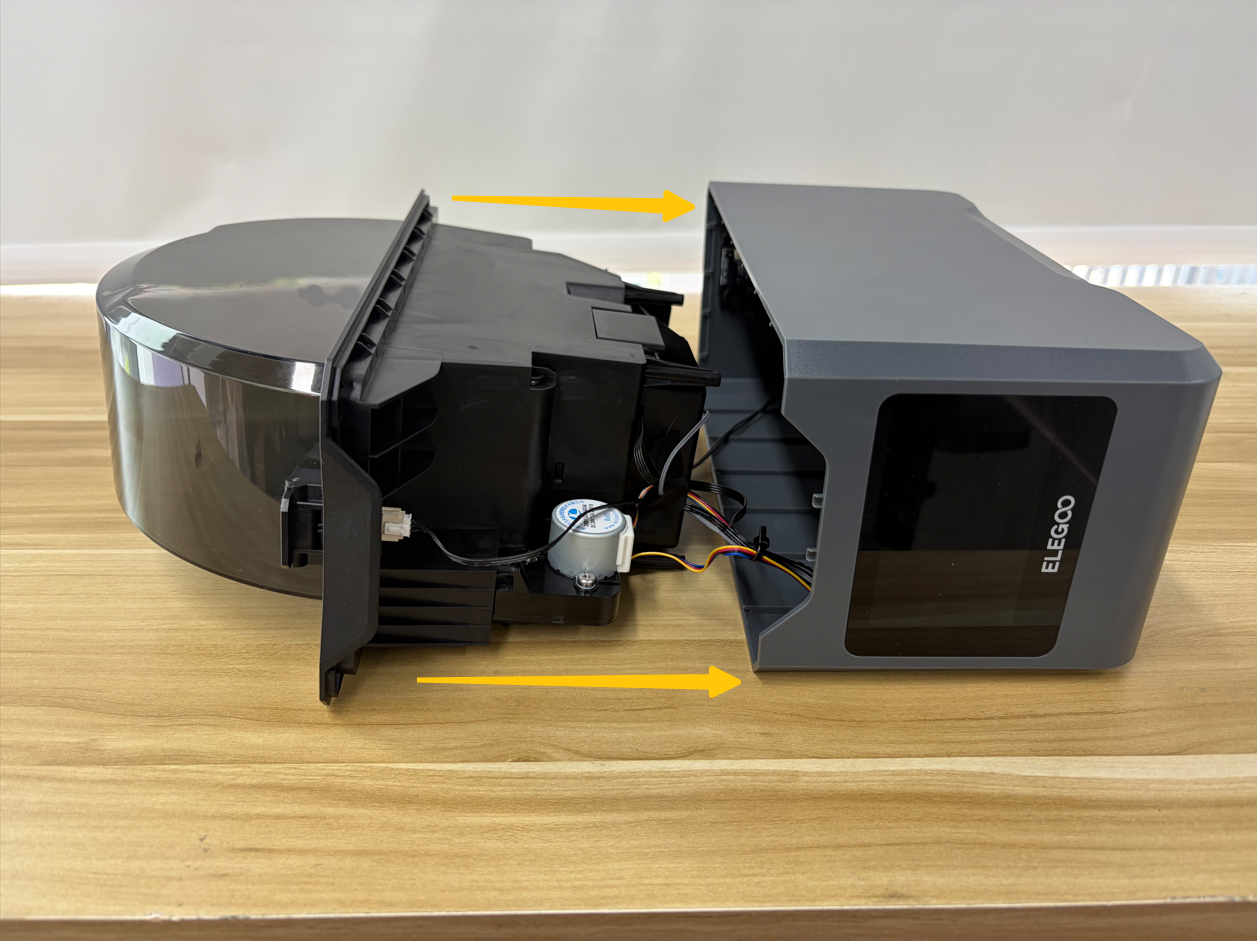
- Align the inner tray assembly with the bottom cover and place it inside the bottom cover.
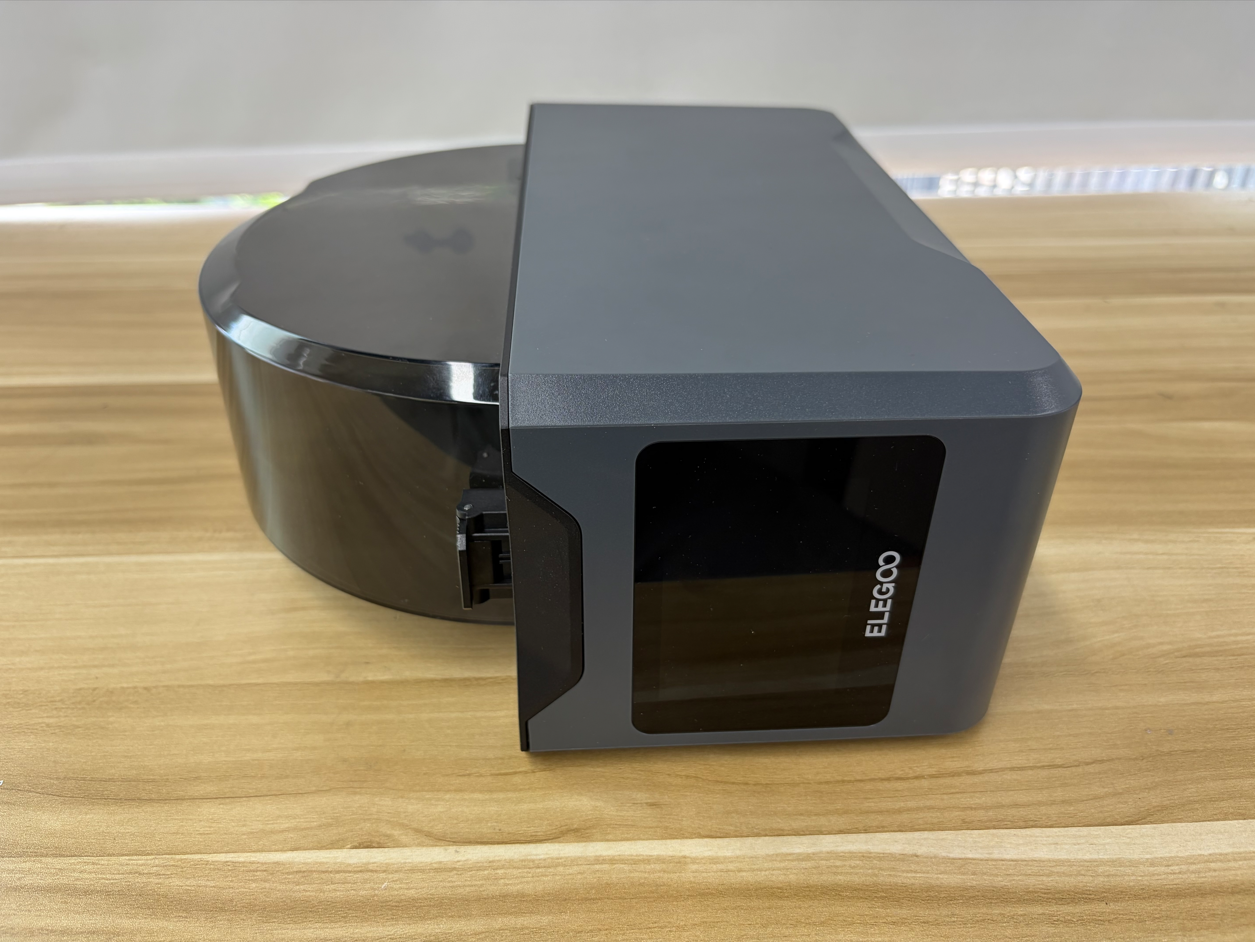
- Tighten the four screws securing the bottom cover.
¶ Verification
- Place the H1 HT upright.
- Connect the power cord and turn on the power switch.
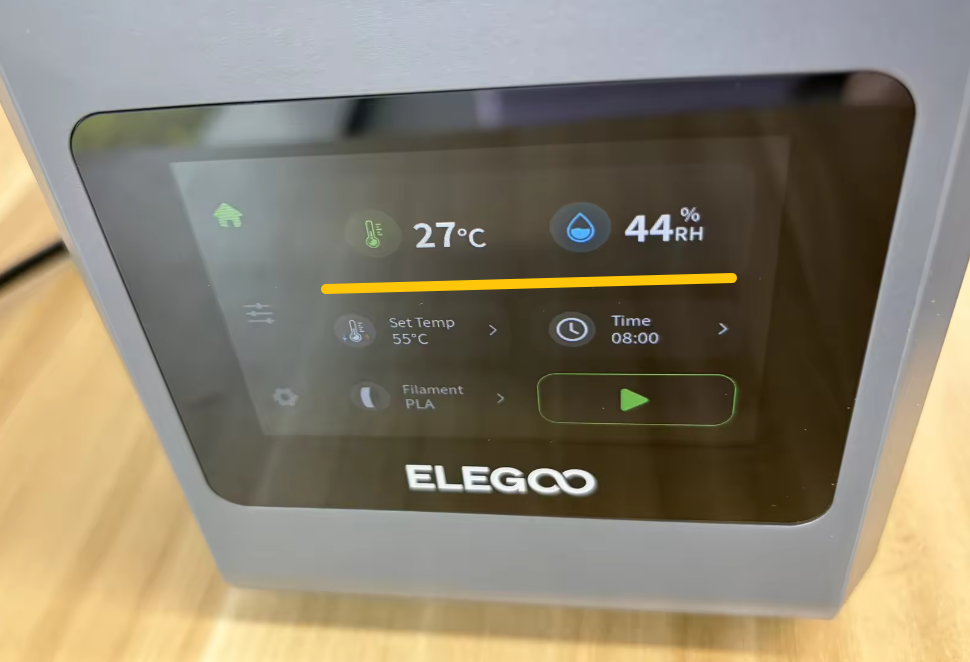
- Wait for the touch screen to turn on, then confirm that the temperature and humidity are displayed correctly. The replacement is complete.
¶ Help us improve
If you have any ideas about the wiki pages, please let us know via ELEGOO official feedback channel