¶ Required Tools
- 2.5 mm Allen Key
- 1.5 mm Allen Key
- Phillips Screwdriver
- Fan Assembly ×1
- New Cable Tie ×2
- Scissors
¶ Disassembly Steps
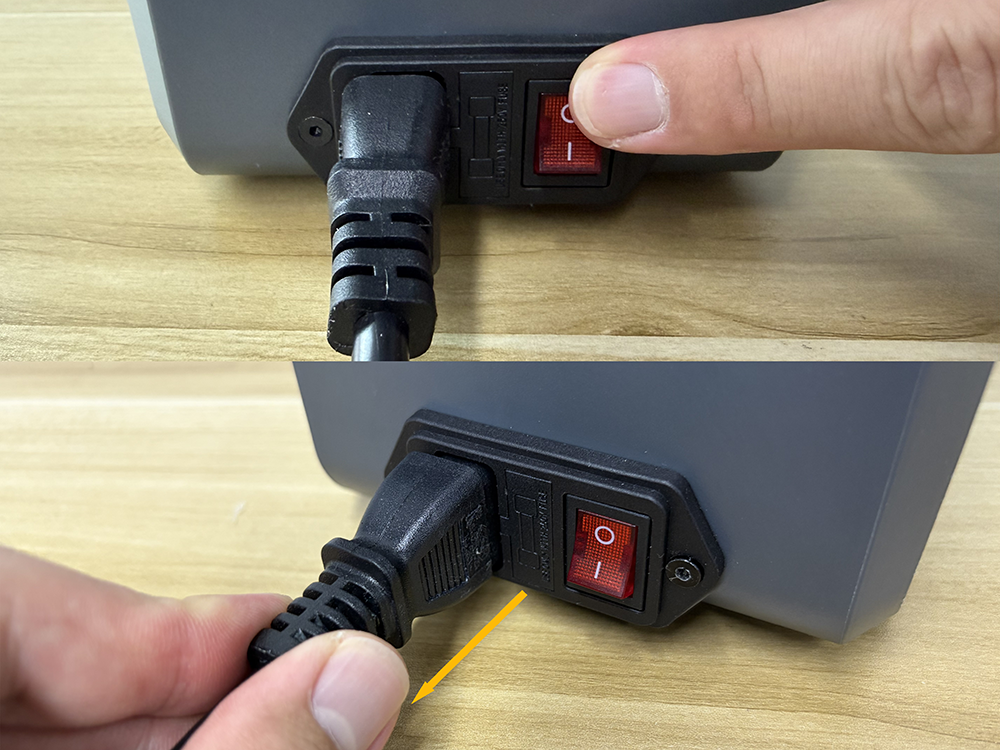
Note: Before starting the operation, turn off the H1 HT power switch and unplug the power cord. Ensure the device is completely powered off before proceeding.
¶ Remove the Filament
- Open the top cover.
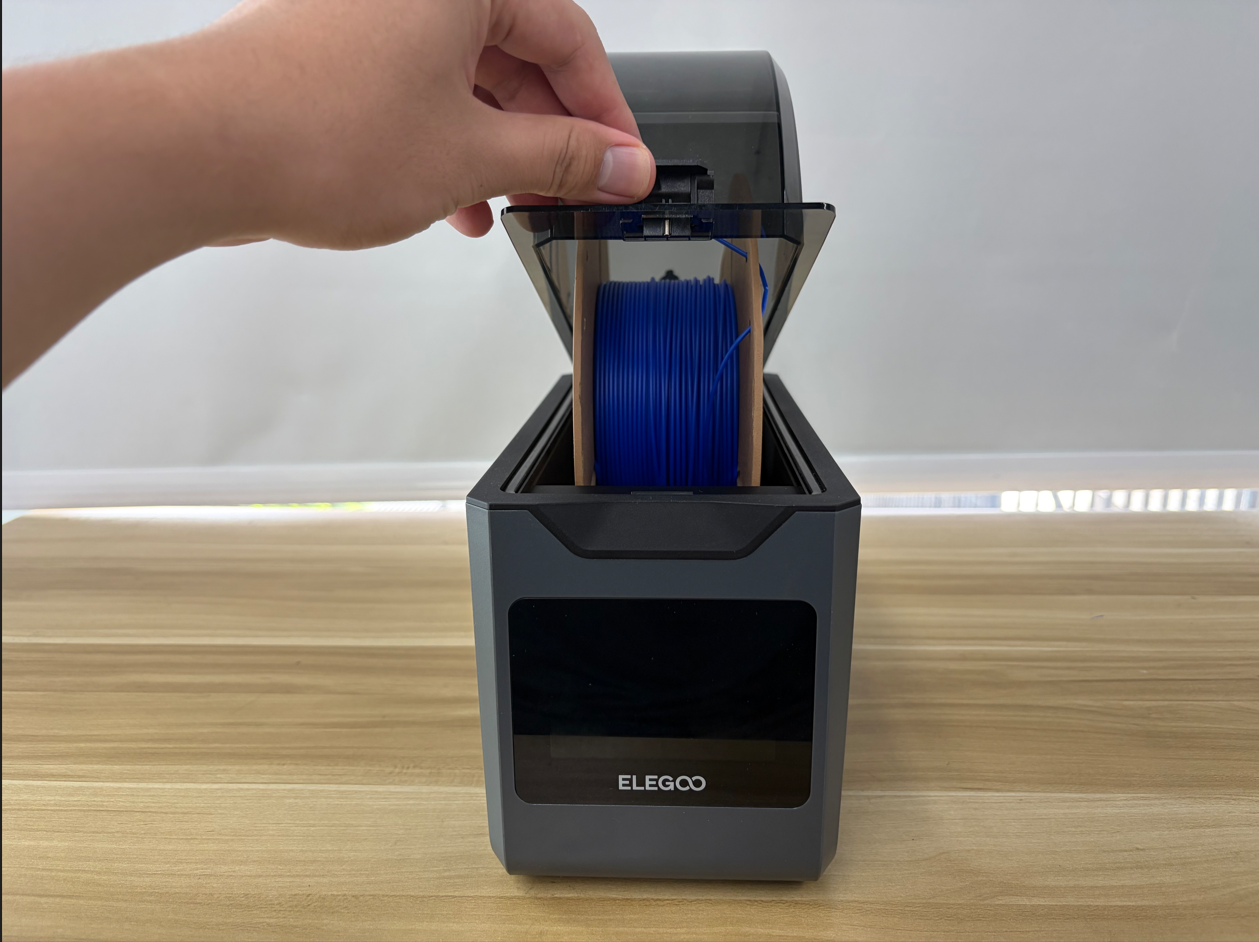
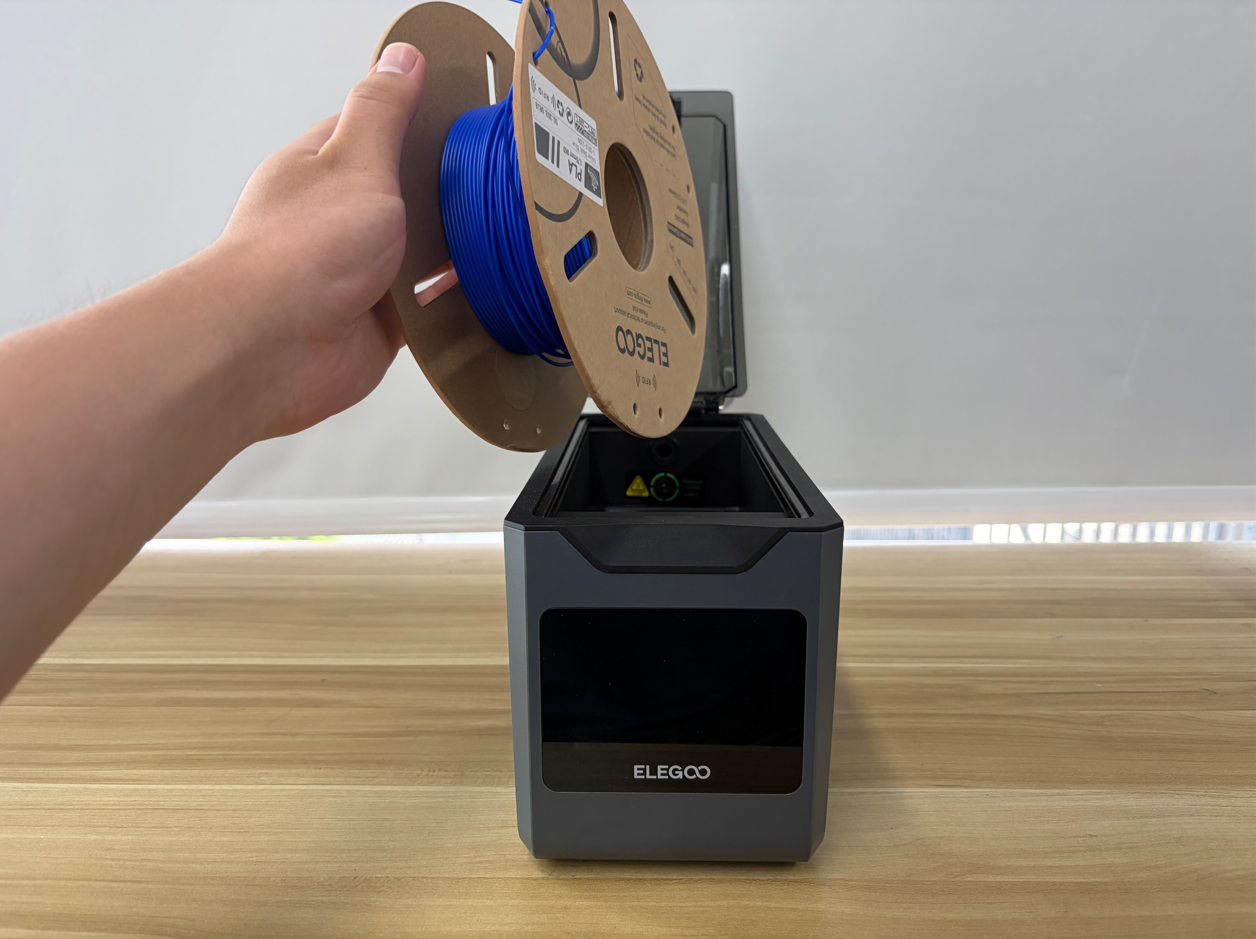
- Remove the filament.
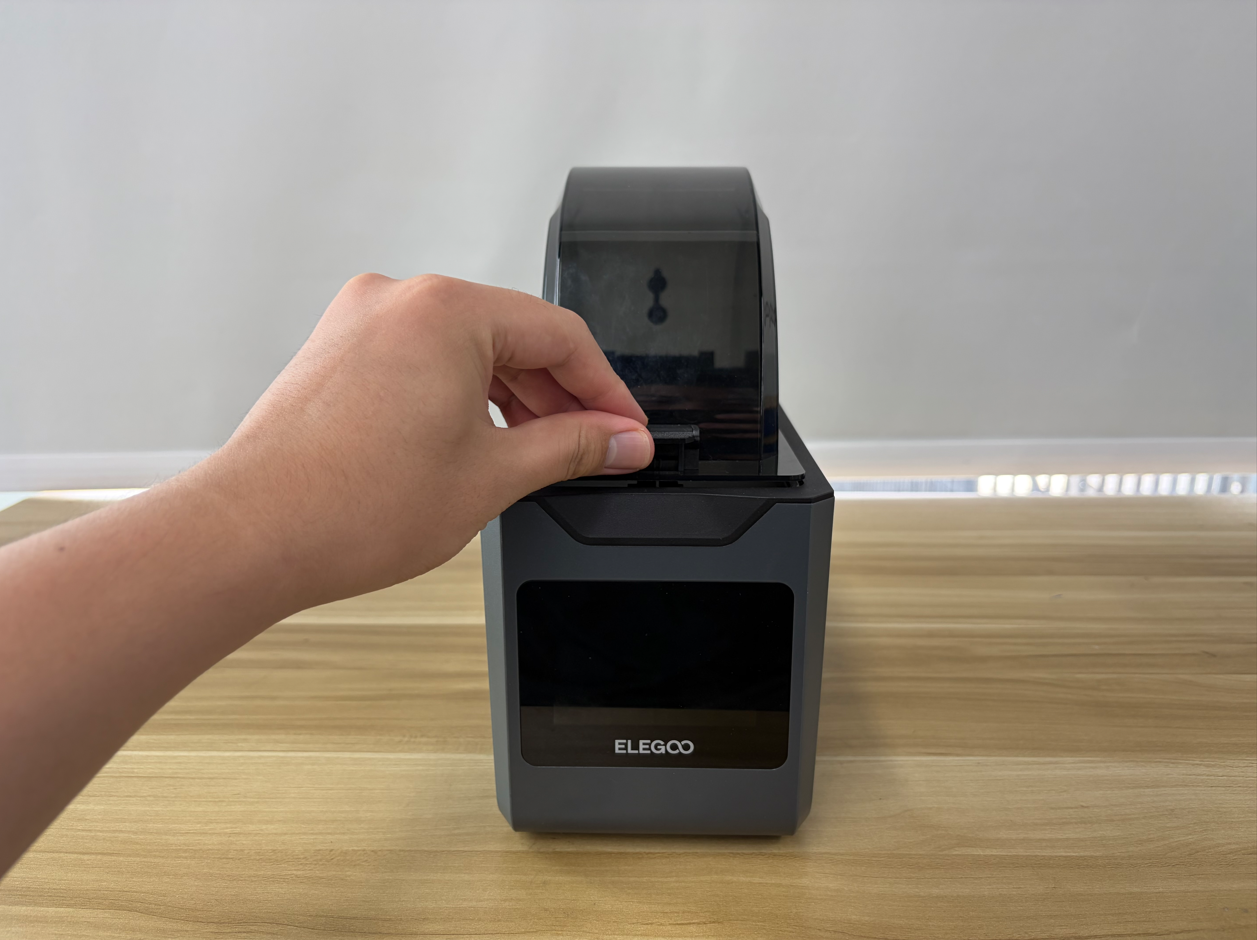
- Close the top cover.

¶ Open the Bottom Cover
- Place the H1 HT on its side on a level surface for easier removal of the bottom cover.
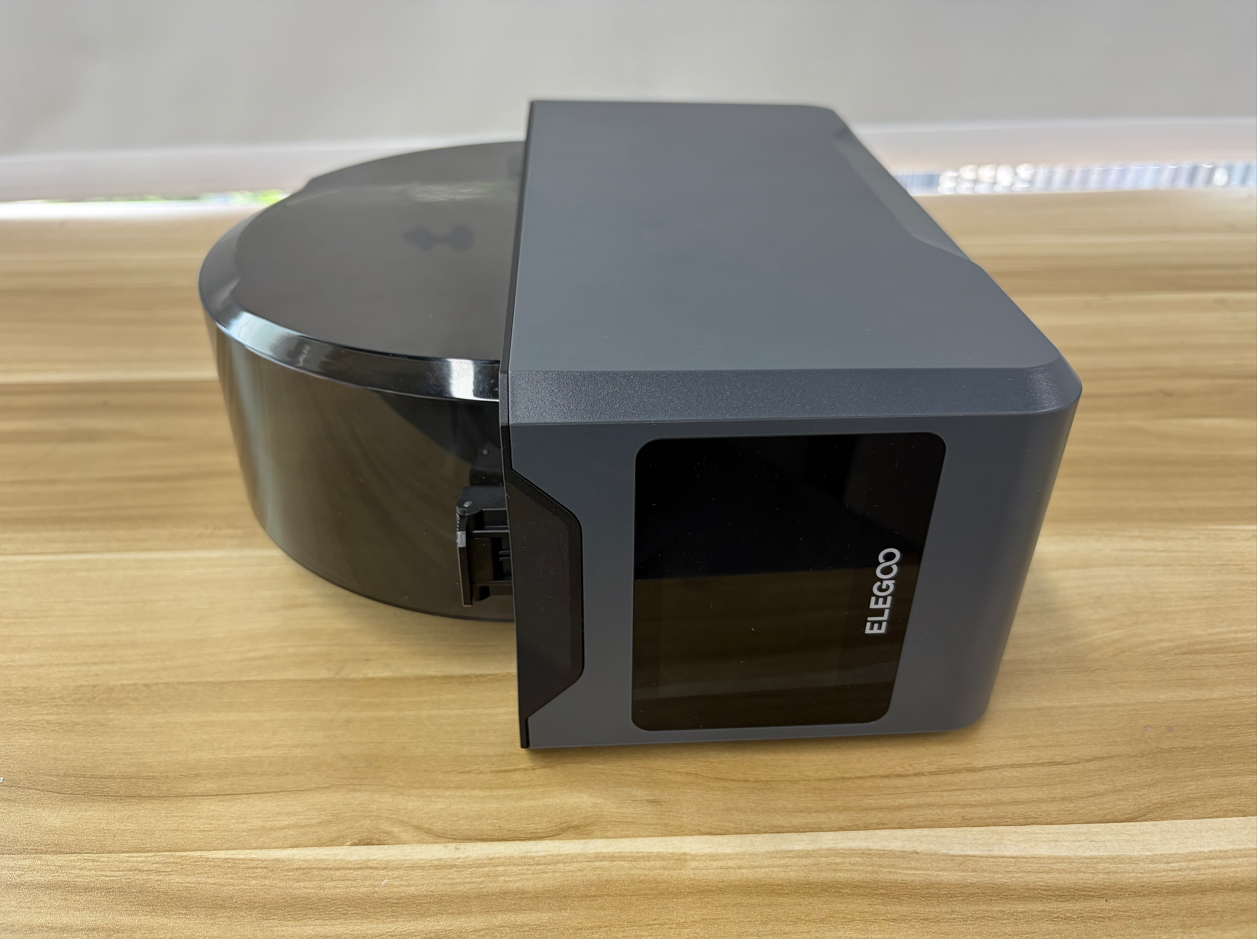
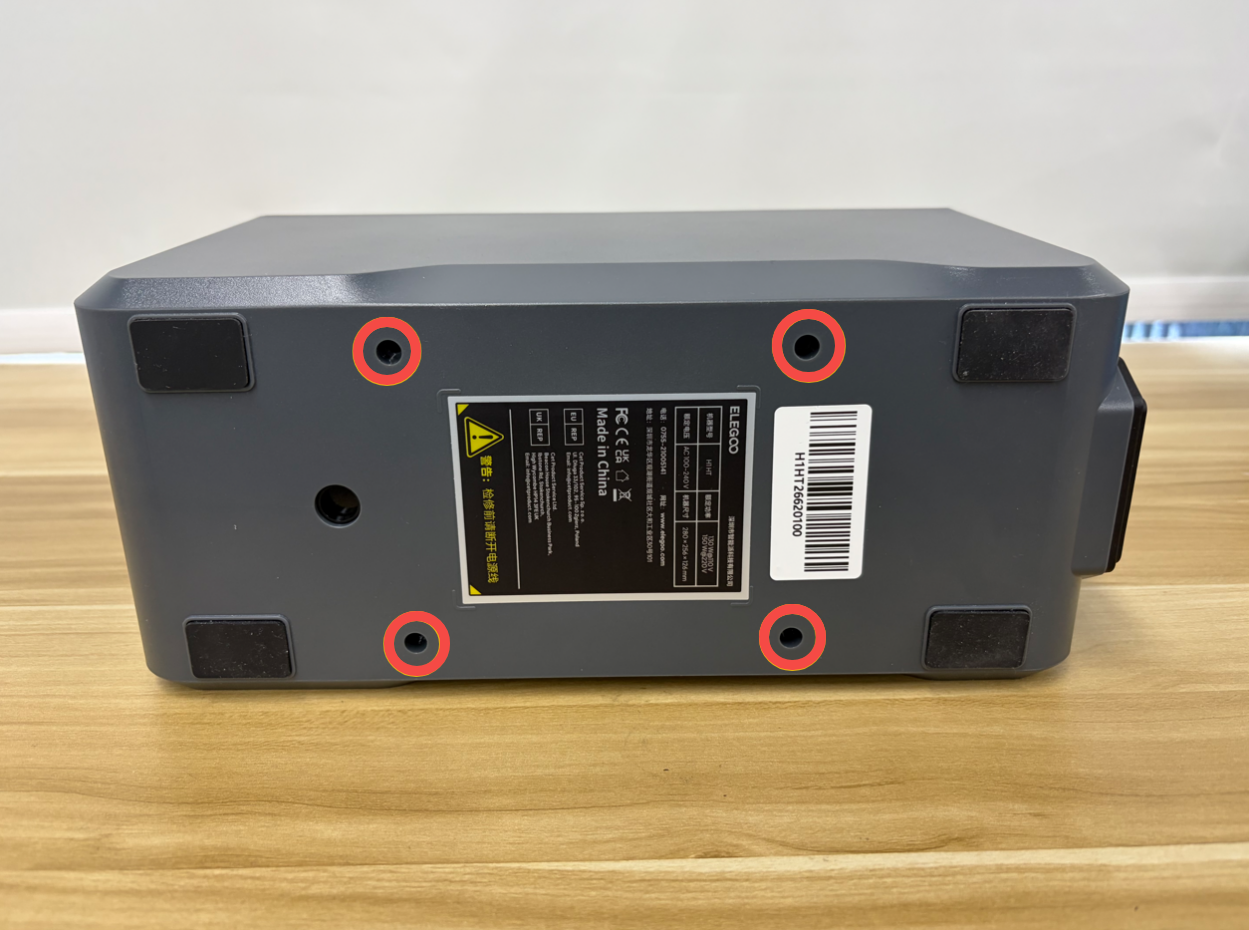
- Use a 2.5 mm Allen Key to remove the four screws securing the bottom cover.
- Slowly open the bottom cover and pay attention to the internal cable connections to avoid pulling or damaging the cables.
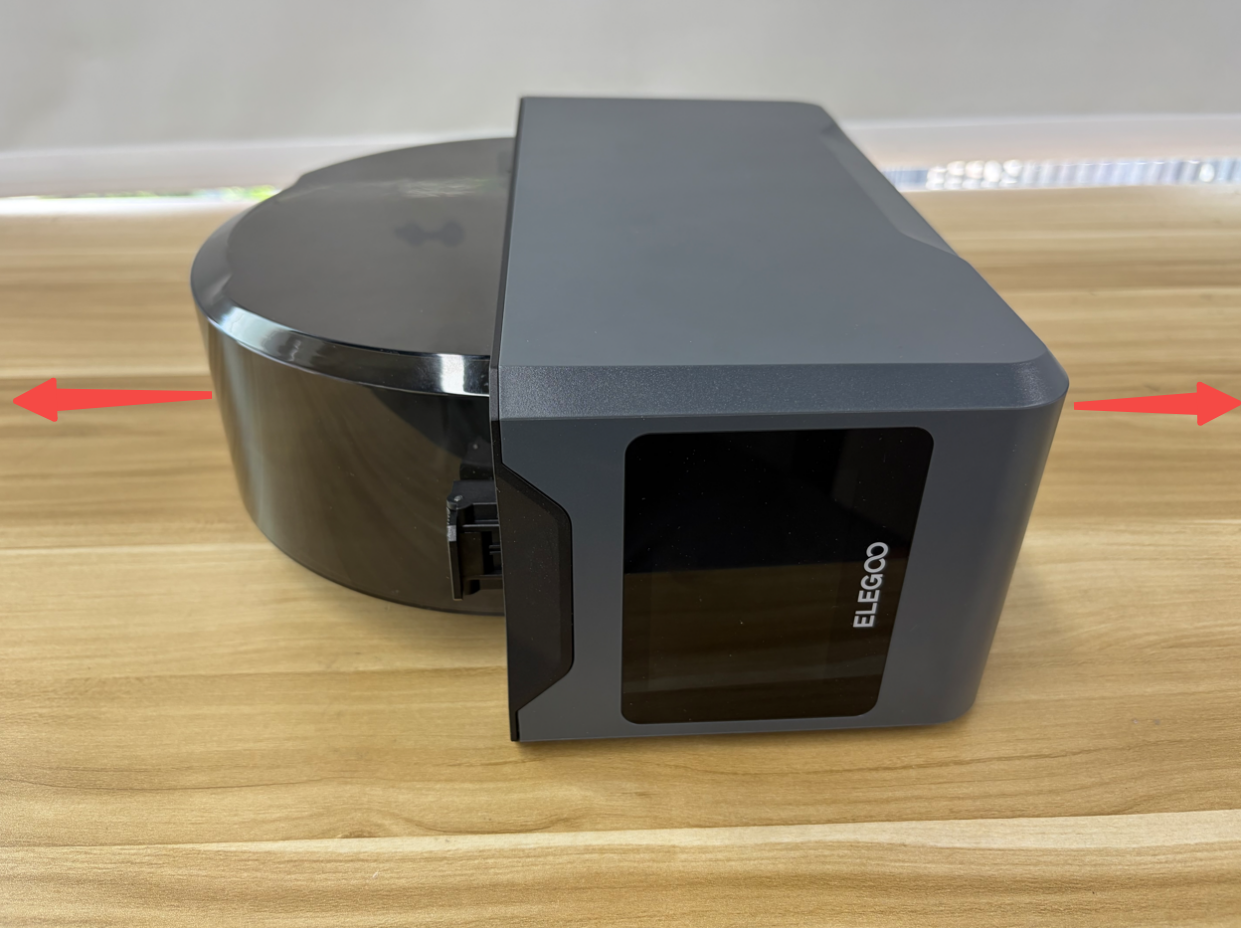
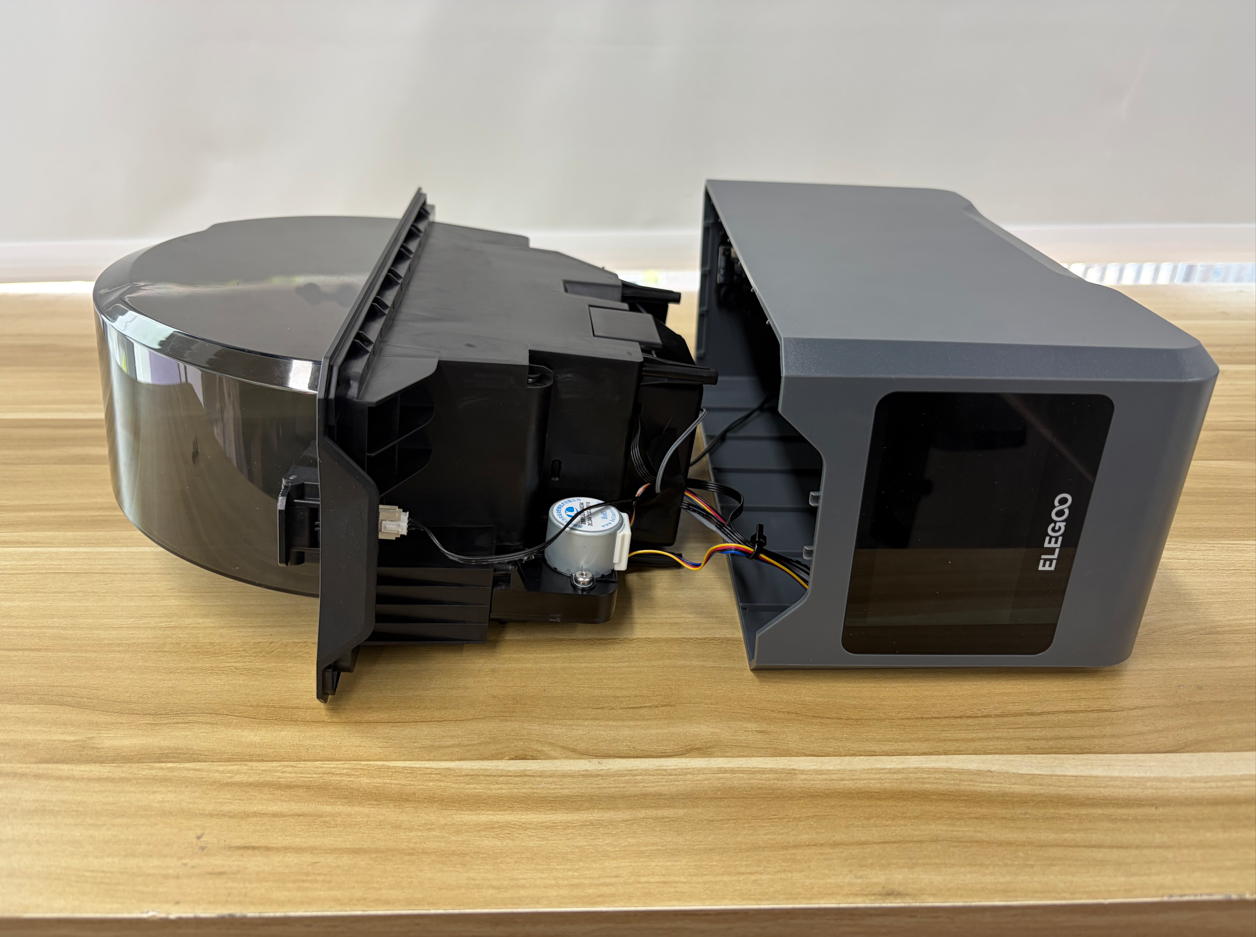
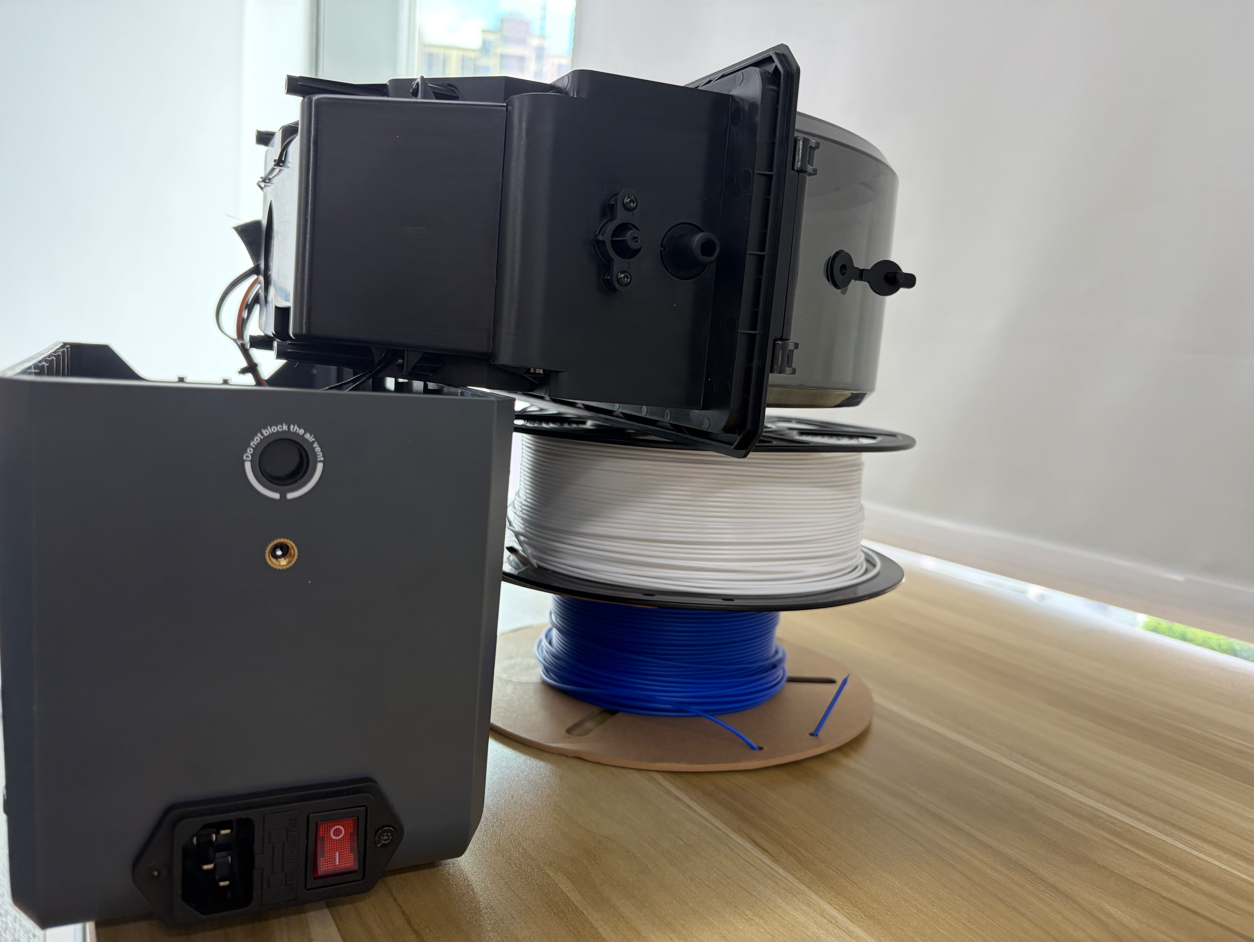
- Adjust the machine so that the bottom cover faces downward, and ensure the internal components are placed securely.
Note: For easier operation, place the two rolls of filament between the inner tray assembly and the top cover as temporary support to prevent the inner tray assembly from hanging.
¶ Remove the Air Duct Protection Assembly
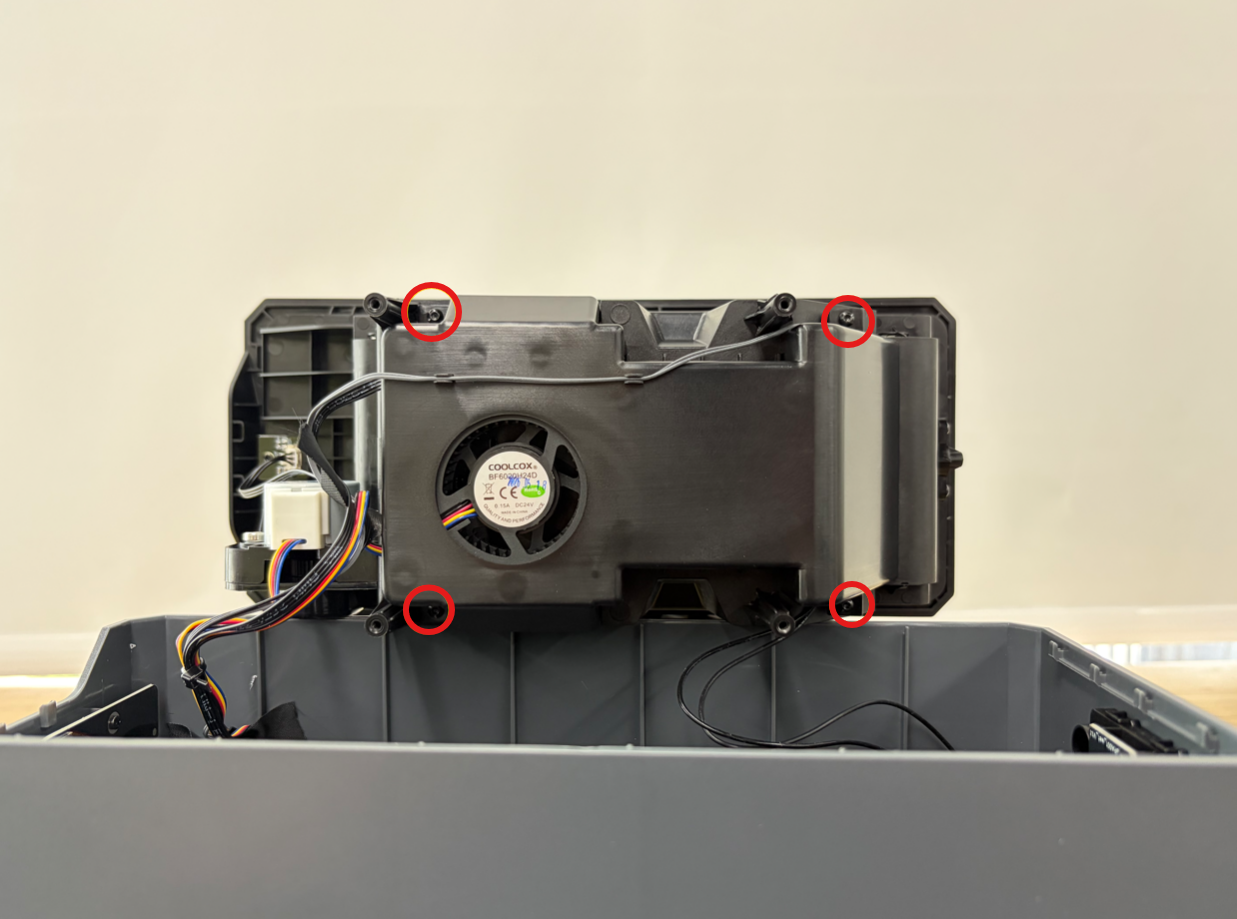
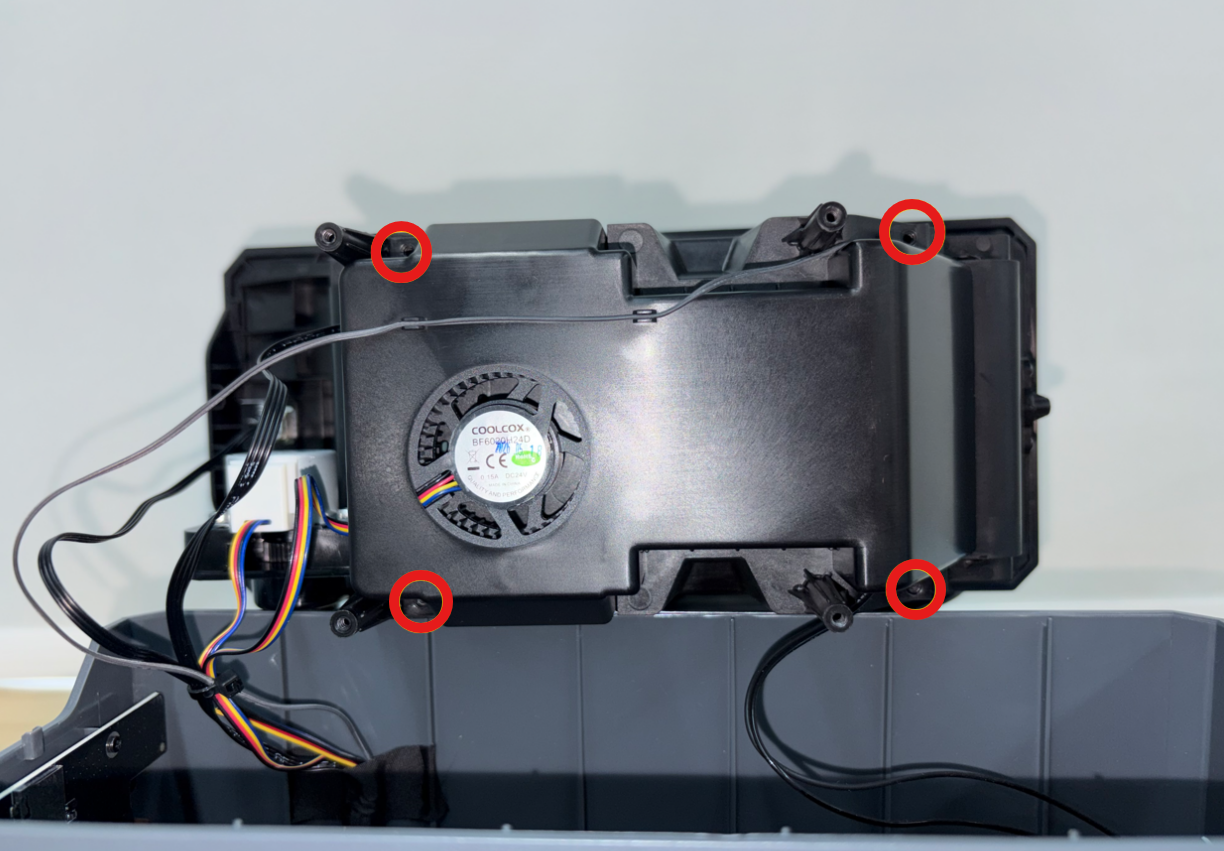
- Use a 1.5 mm Allen Key to remove the four screws securing the air duct protection assembly.
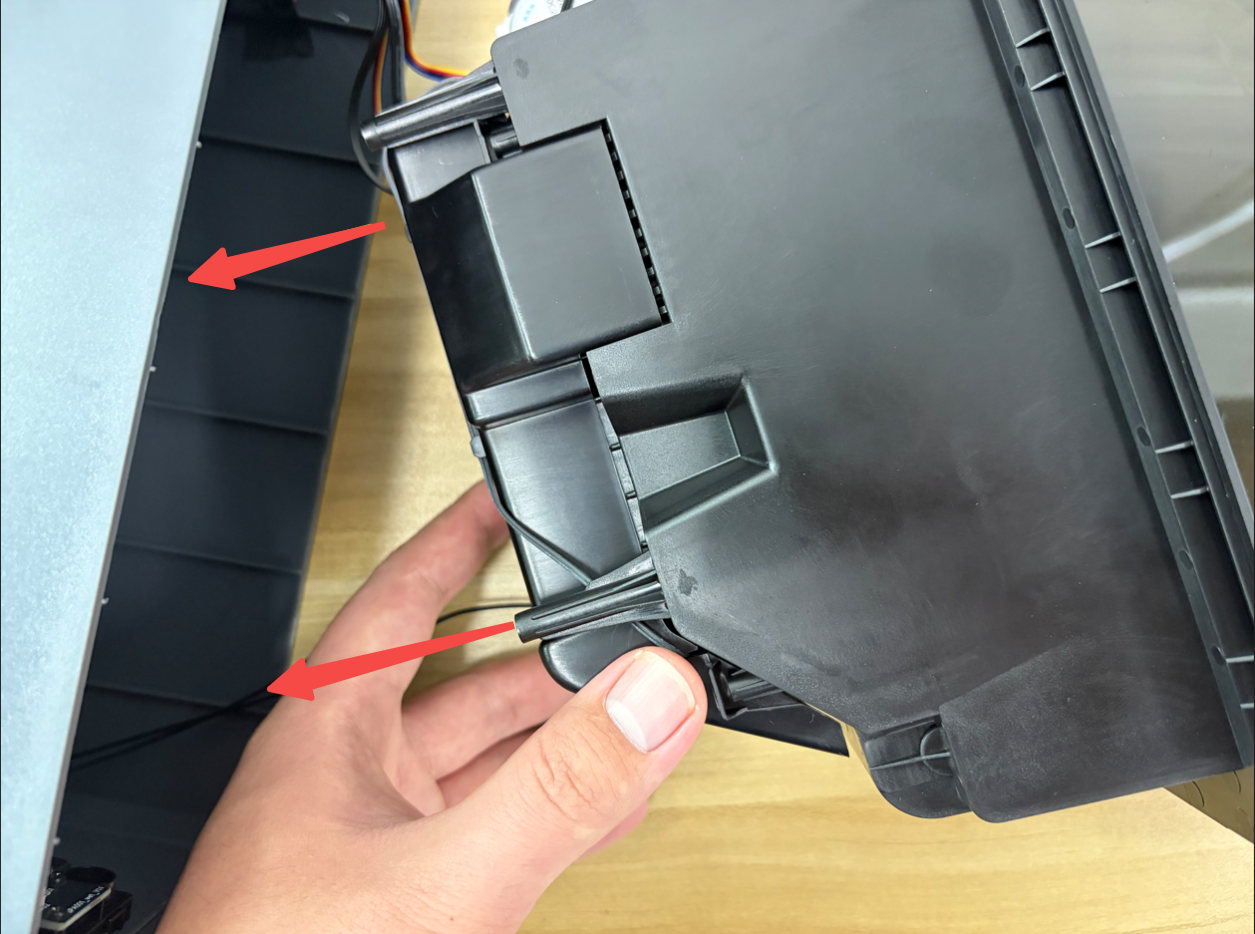
- Slowly separate the inner tray assembly from the bottom cover.
¶ Remove the Tape
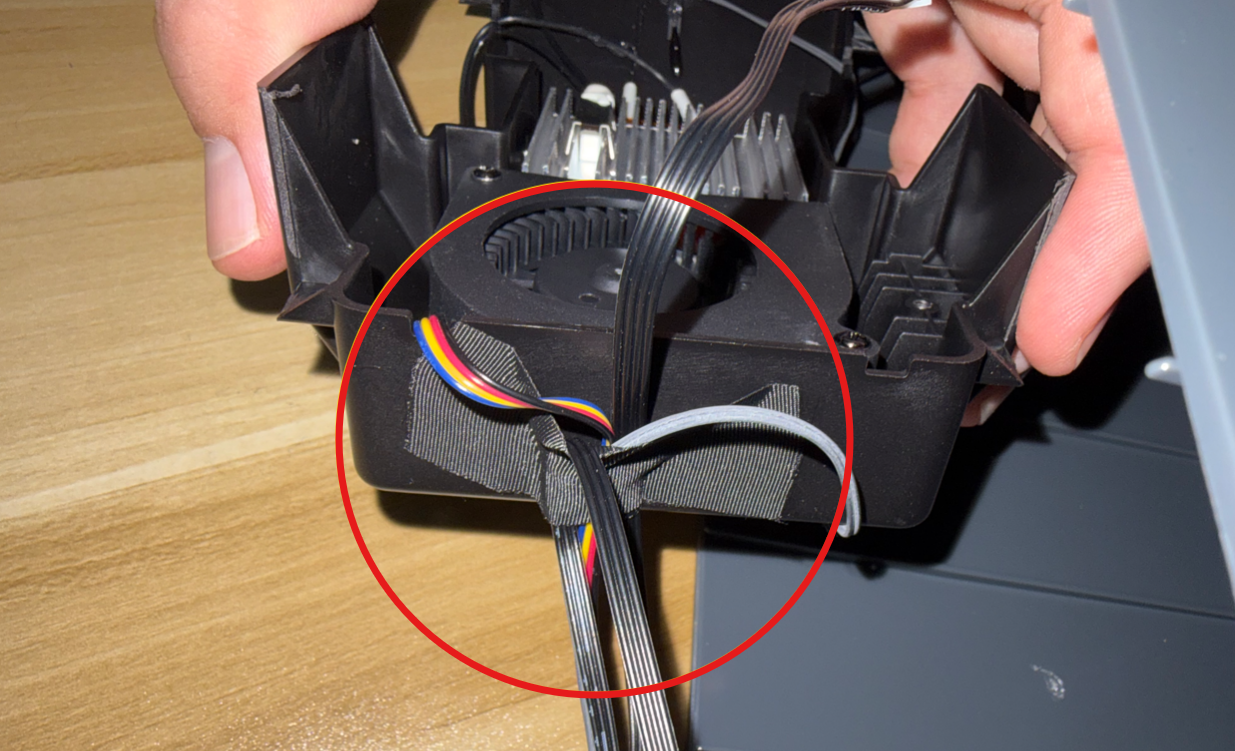
Remove the tape securing the side of the inner tray assembly and the edge of the bottom cover. Keep the tape for reinstallation.
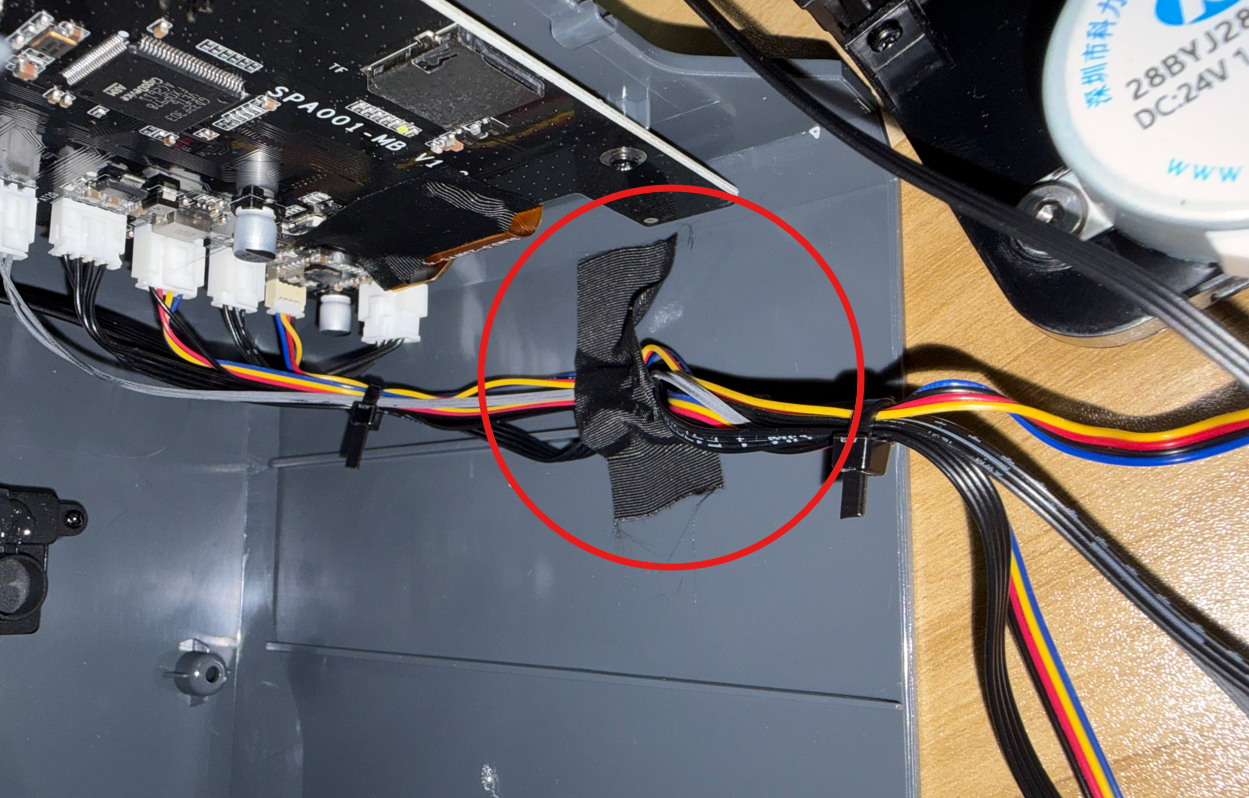
¶ Remove the Fan Assembly
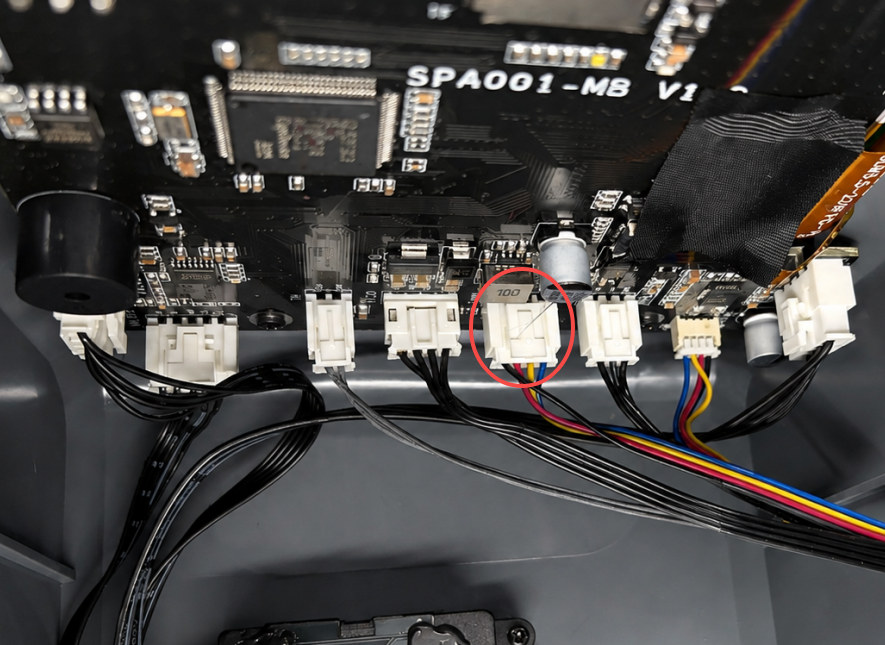
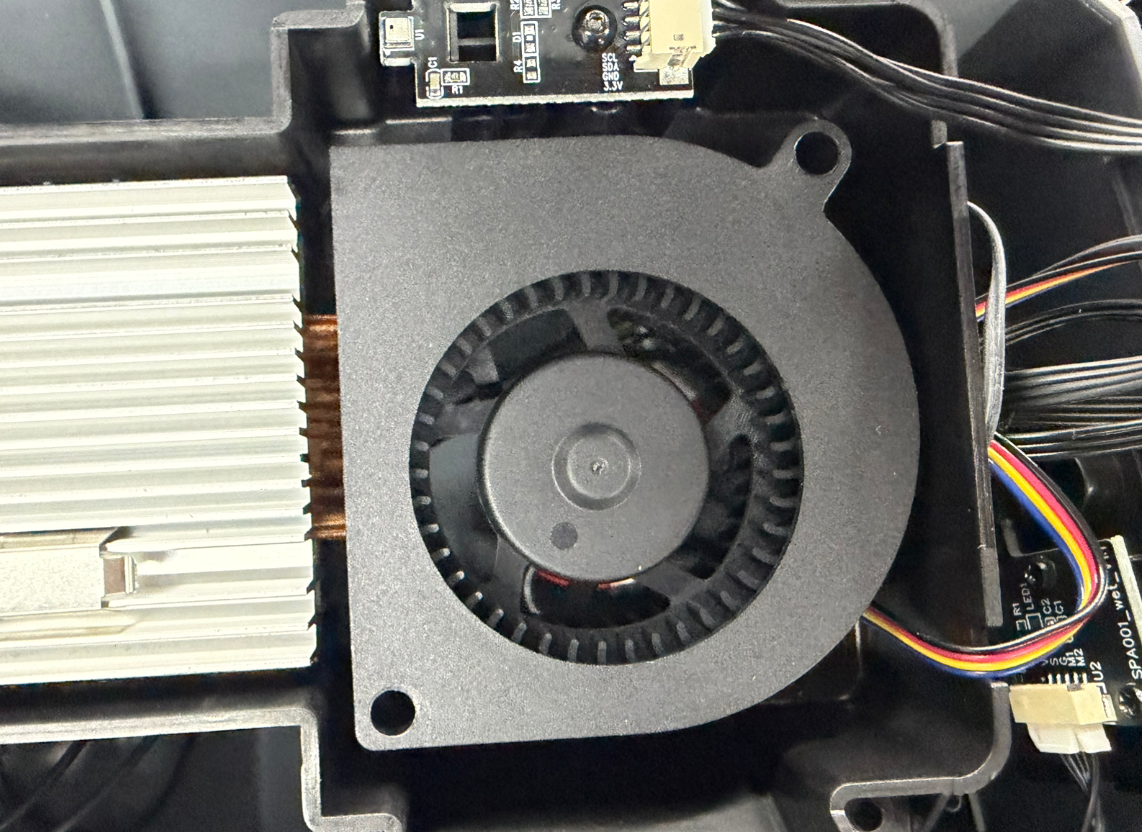
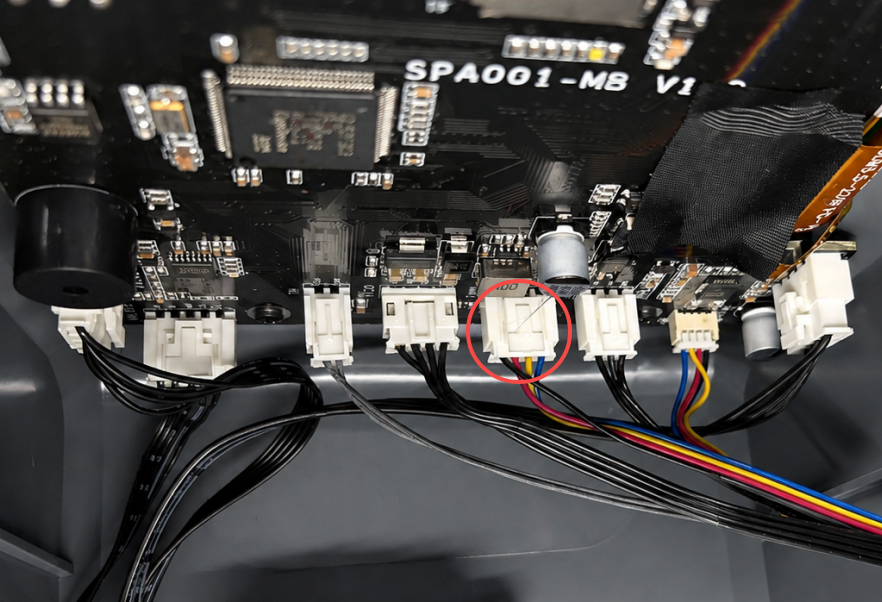
- Disconnect the fan cable from the FAN0 port on the Mainboard.
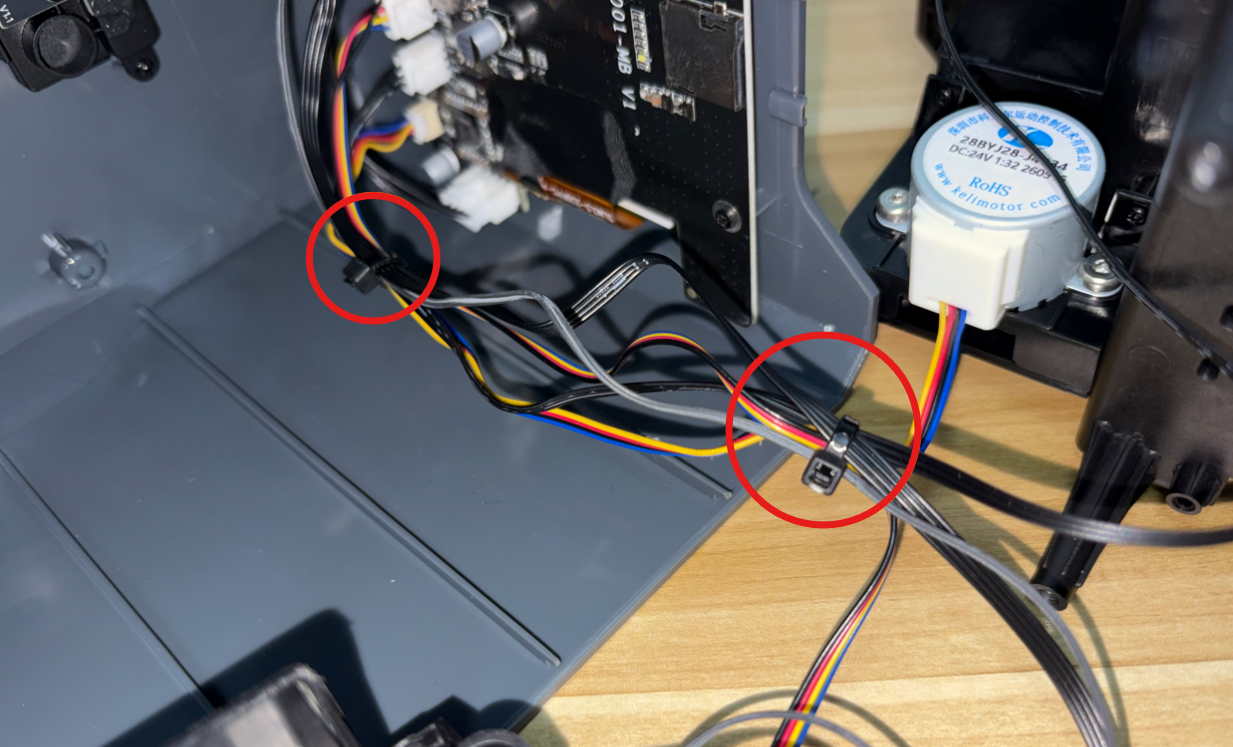
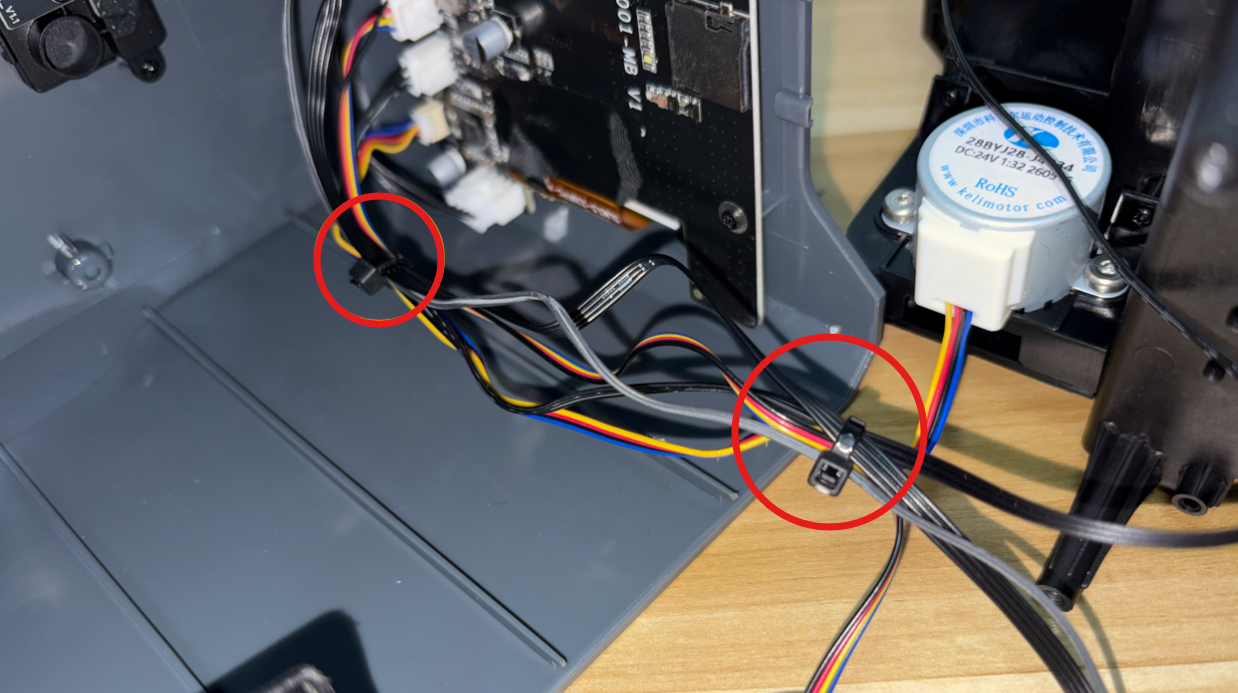
- Cut the two cable ties securing the fan cable.
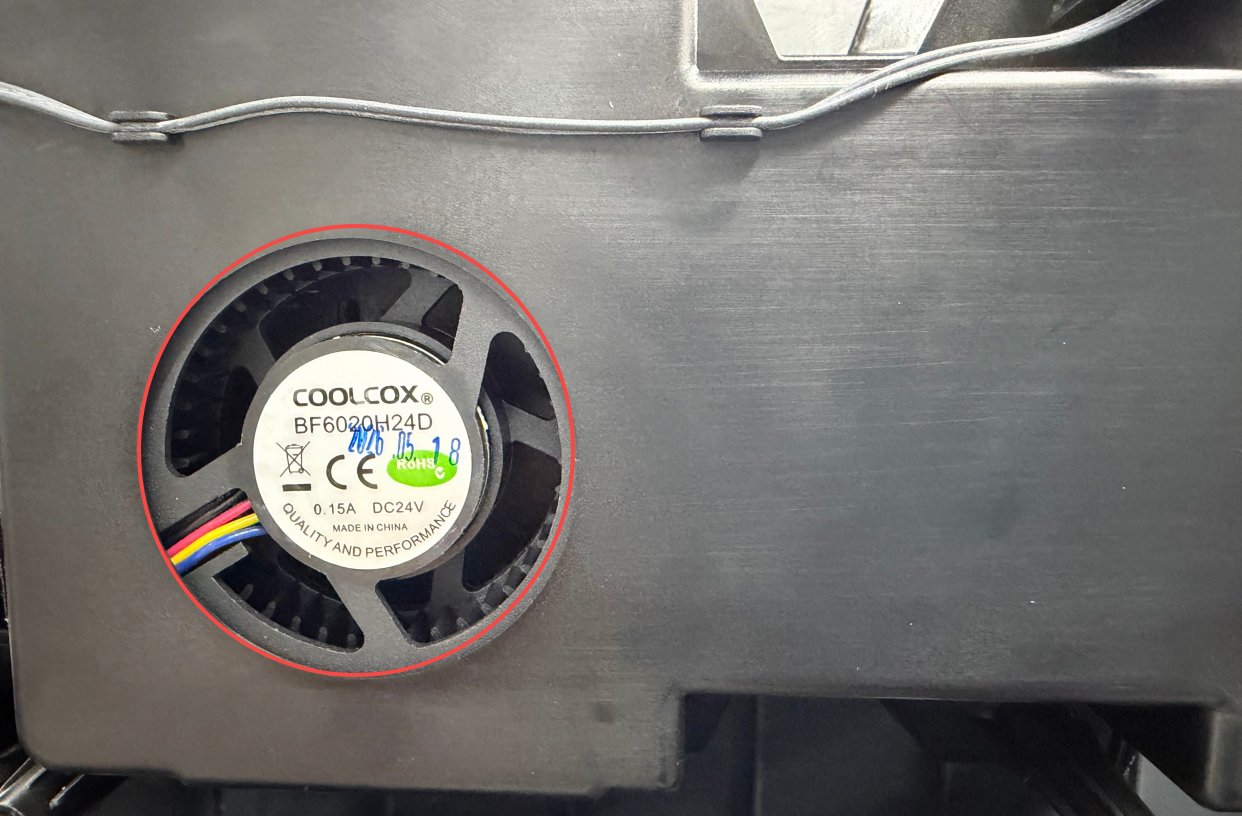
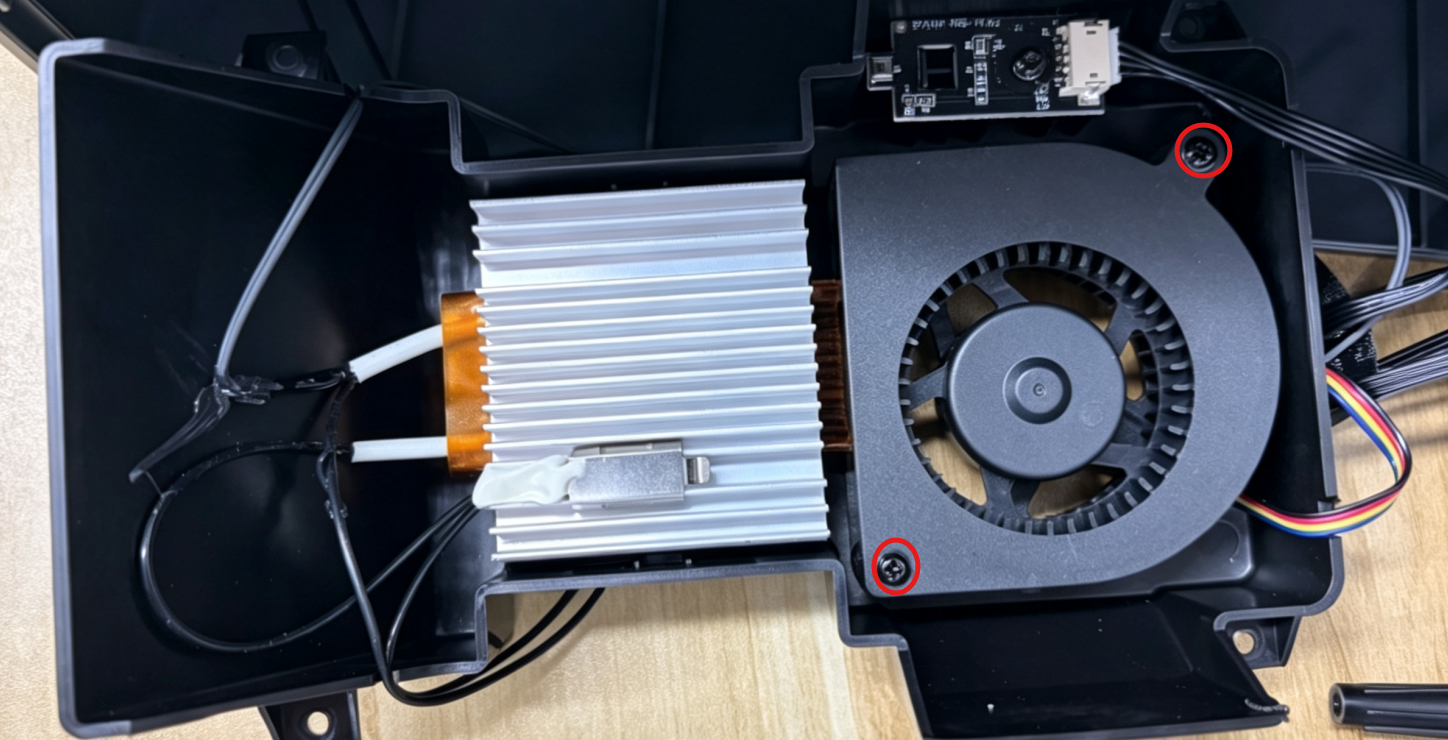
- Use a Phillips Screwdriver to loosen and remove the two screws securing the fan assembly.
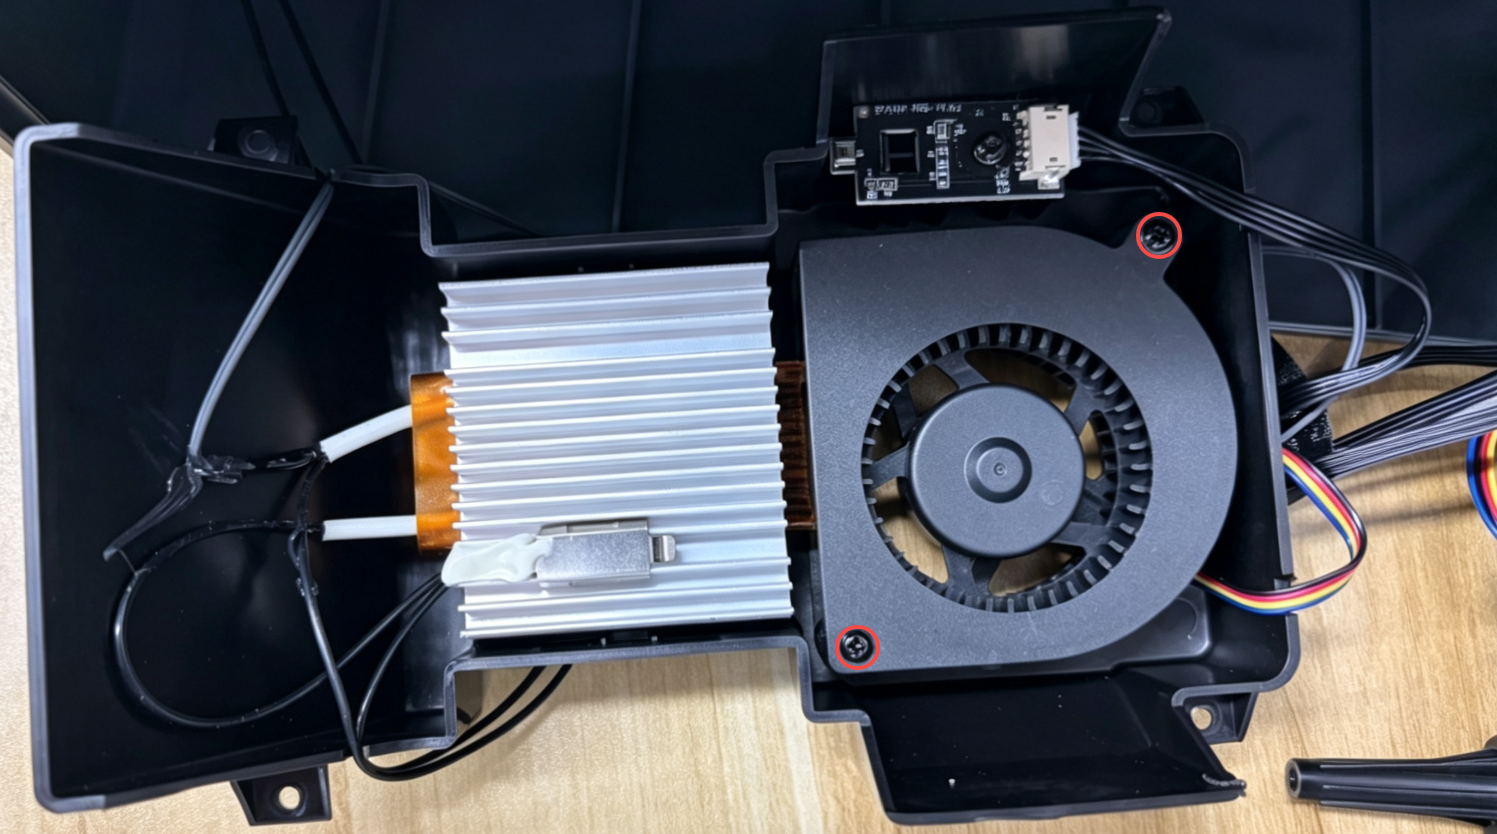
- Gently push the fan assembly out from the back of the air duct protection assembly and remove it.
¶ Installation Steps
¶ Install the Fan Assembly
- Prepare the new fan assembly.
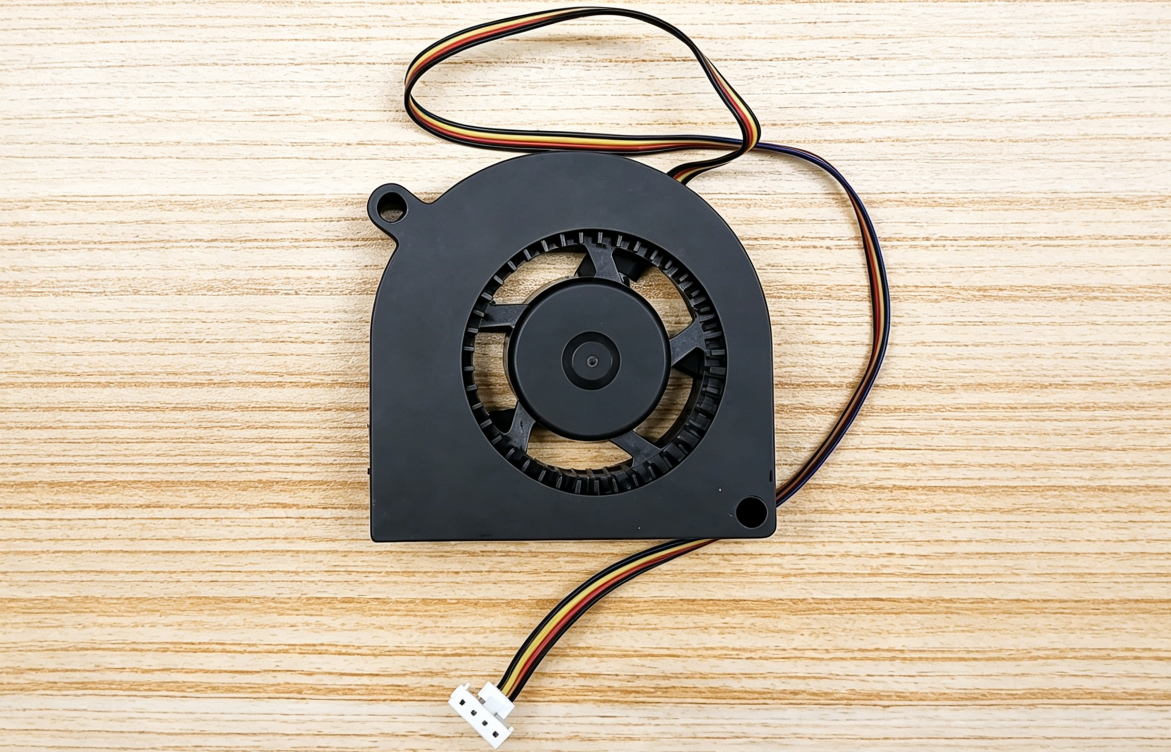
- Connect the fan cable to the FAN0 port on the Mainboard, and ensure the connector is fully inserted.
- Use the new cable ties to secure the fan cable with other cables, and cut off the excess cable ties to prevent interference with the installation of the bottom cover.
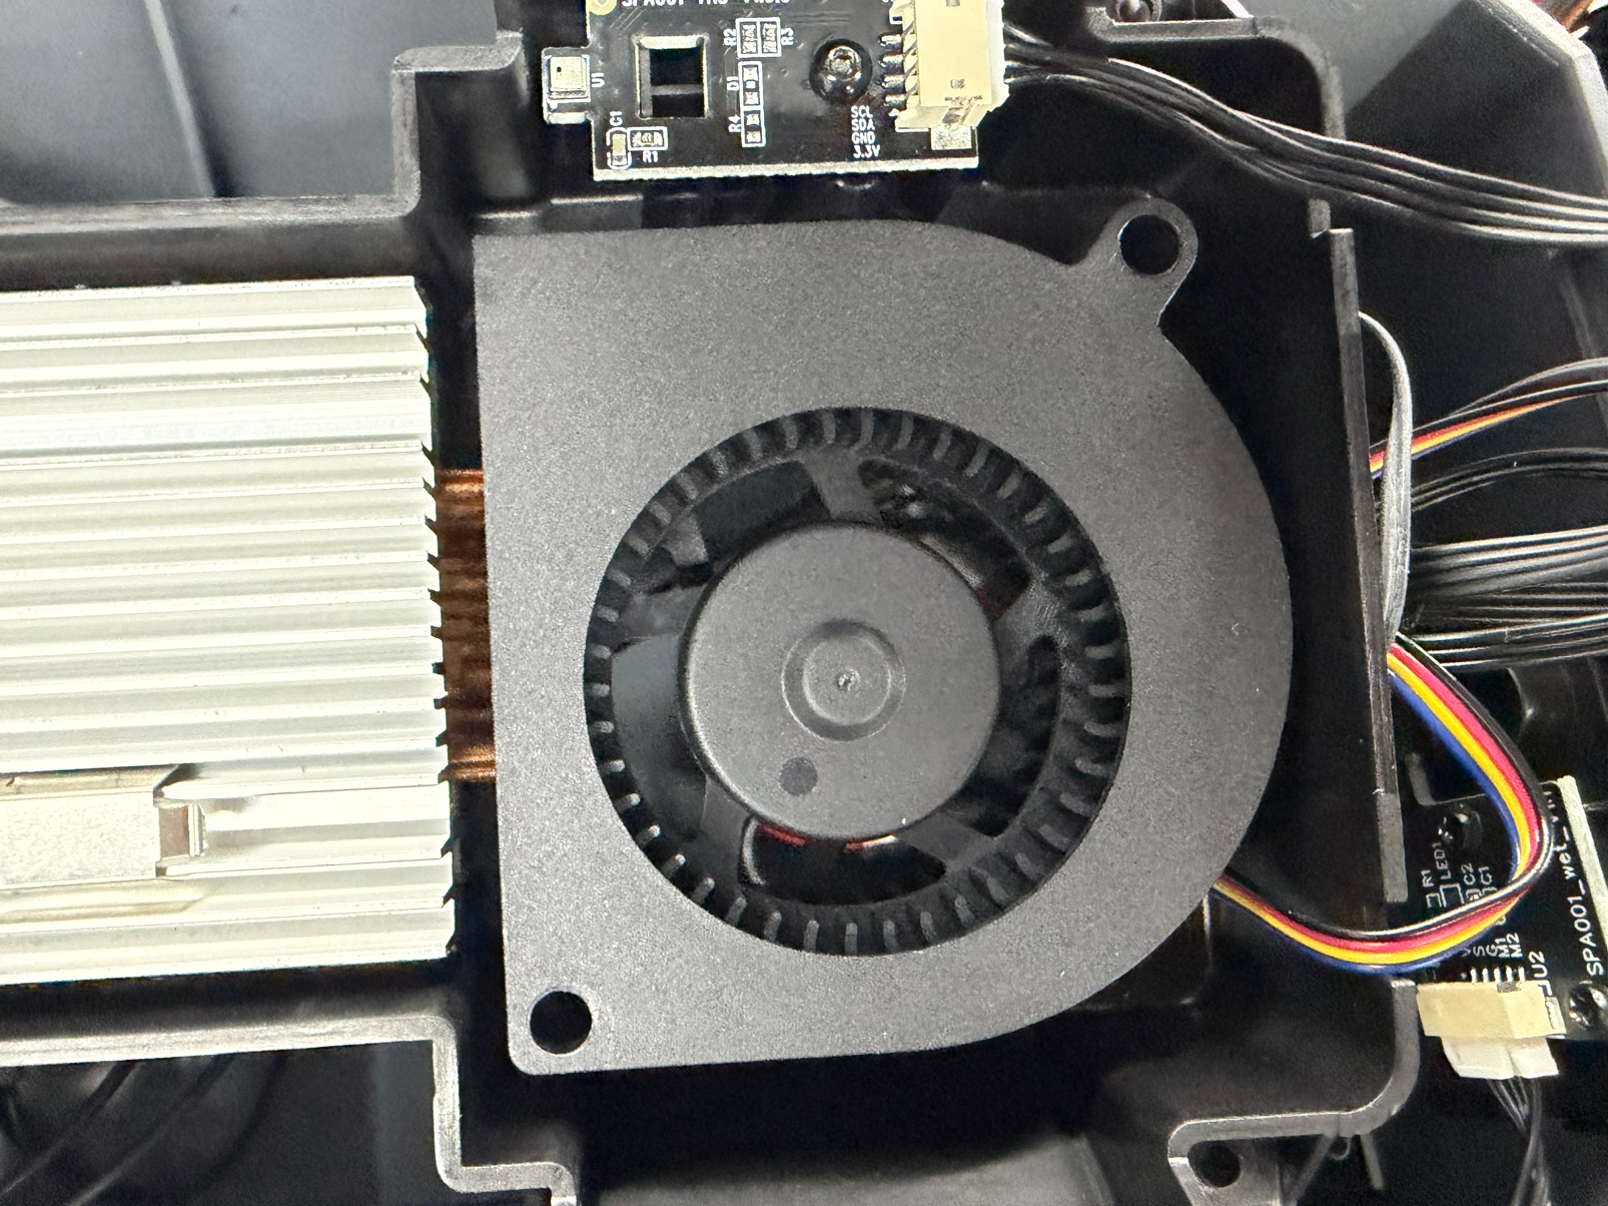
- Install the fan assembly back into the air duct protection assembly.
- Use a Phillips Screwdriver to tighten the two screws securing the fan assembly.
¶ Reattach the Tape
Reattach the removed tape to the side of the inner tray assembly and the edge of the bottom cover, and ensure the tape is firmly attached.
¶ Install the Air Duct Protection Assembly
- Organize the cables and place them into the groove on the edge of the air duct protection assembly to ensure the cables are not pinched.
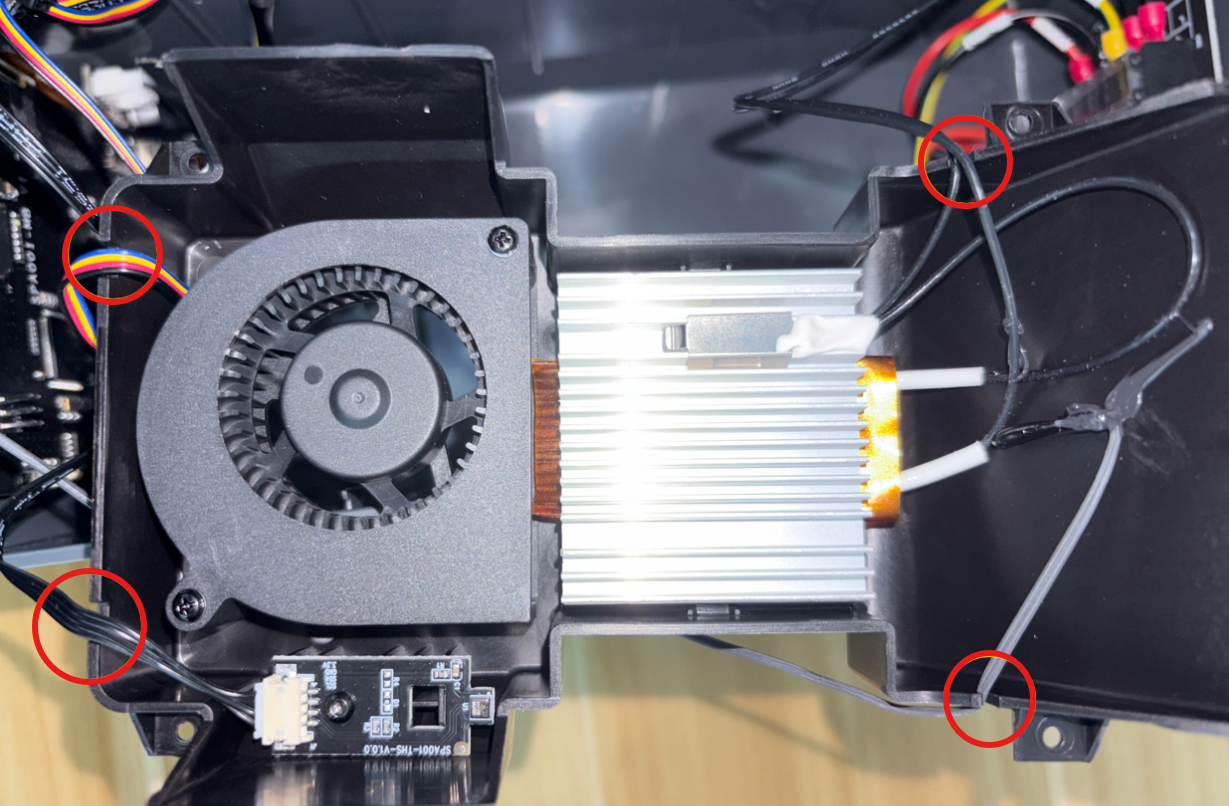
- Slowly close the air duct protection assembly and confirm that the internal cables are not trapped.
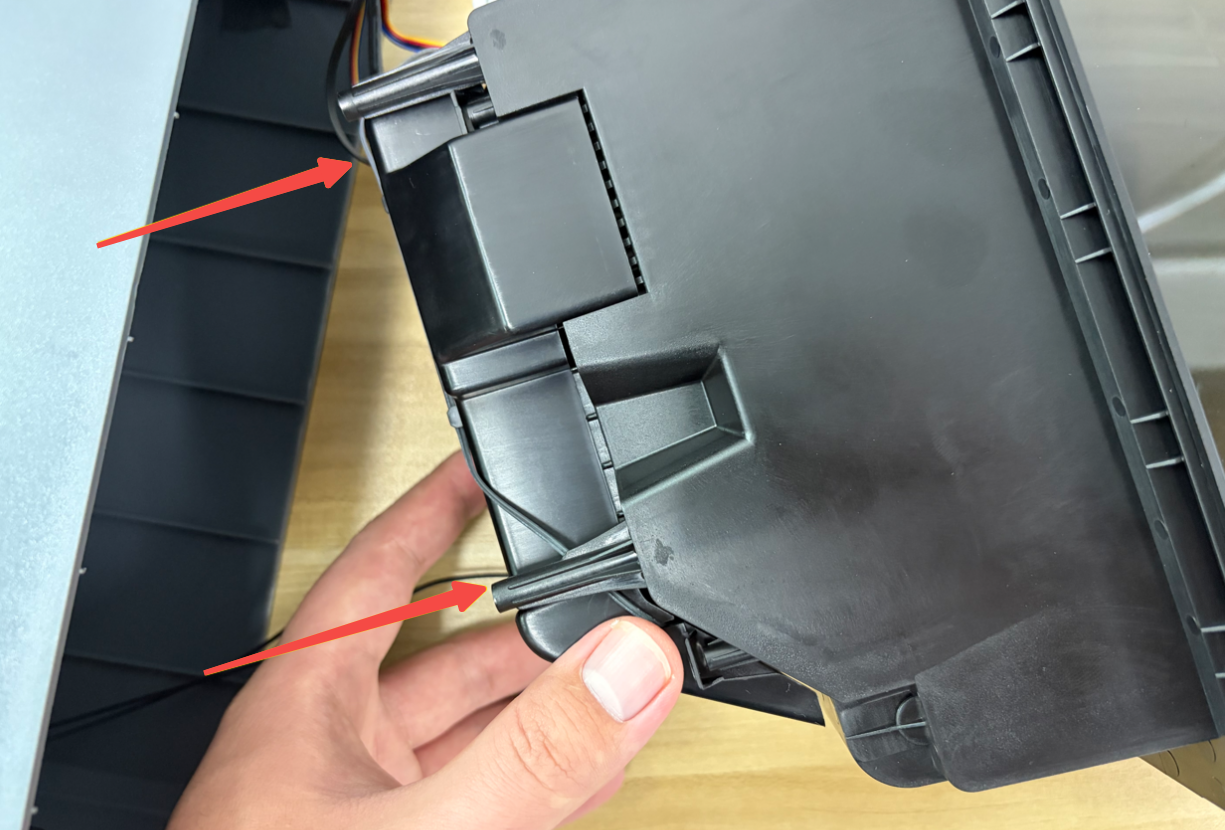
- Use a 1.5 mm Allen Key to install the four screws securing the air duct protection assembly.
¶ Secure the Bottom Cover
- Align the inner tray assembly with the installation position of the bottom cover and install it. Ensure the edges are fully aligned.
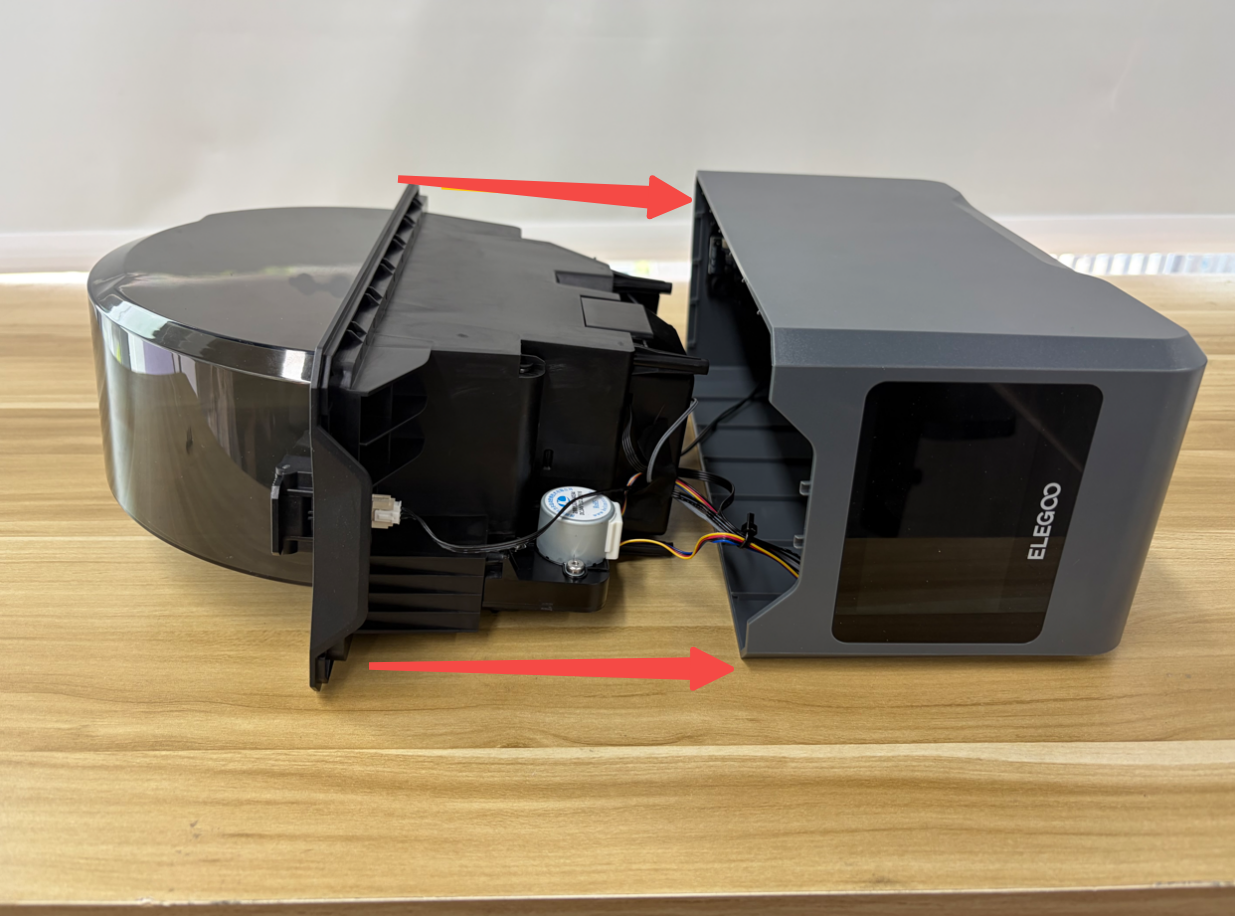
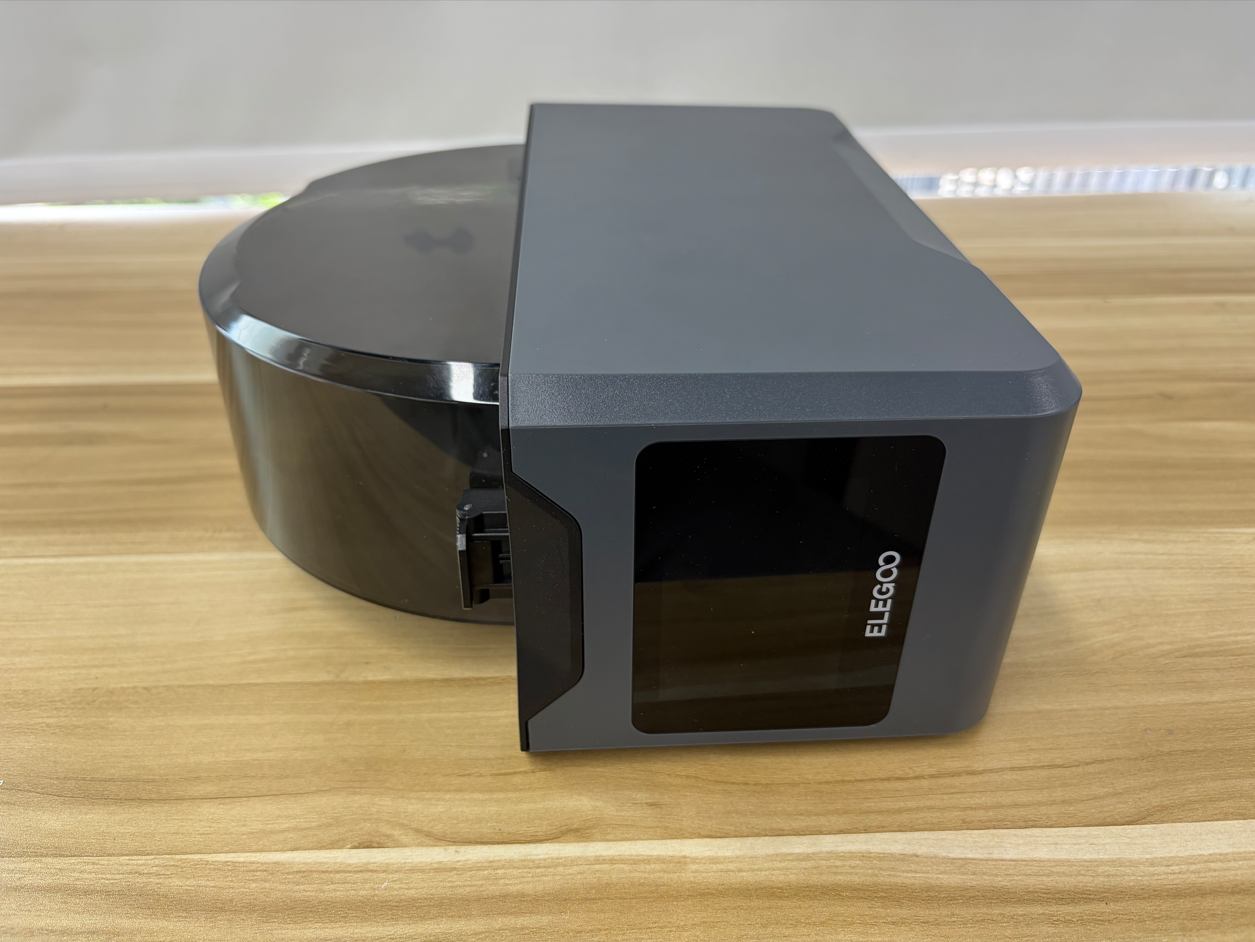
- Tighten the four screws securing the bottom cover.
¶ Verification
-
Place the H1 HT upright.
-
Connect the power cord and turn on the power switch.
-
Select the filament type, insert the filament, and tap Start drying filament.
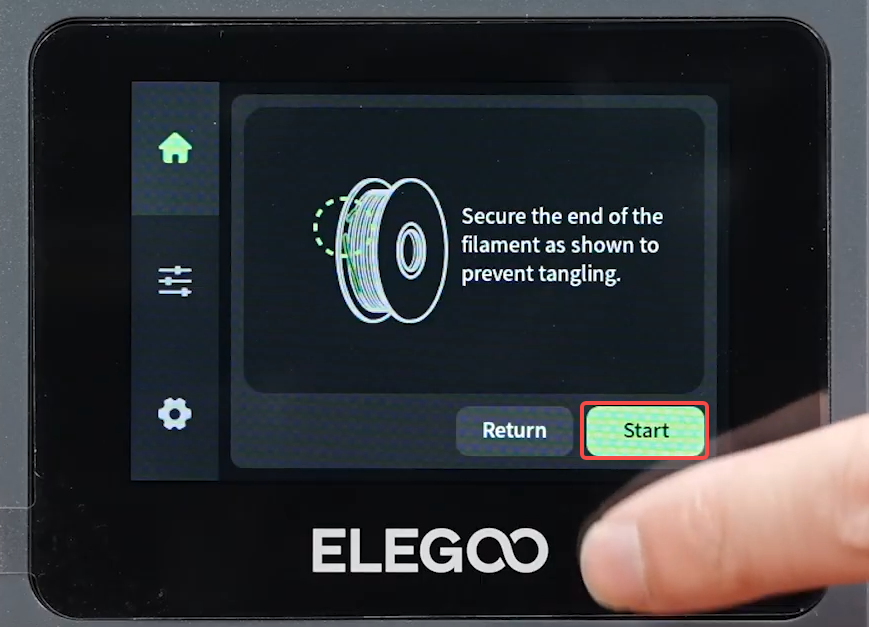
- During the filament drying process, confirm that the fan operates normally, runs smoothly without abnormal noise, and that the device does not display any abnormal alarms. This indicates that the fan assembly replacement is complete.
¶ Help us improve
If you have any ideas about the wiki pages, please let us know via ELEGOO official feedback channel