¶ Fault Symptoms
- After printing is completed, there is no cured resin on either the build plate or in the resin tank.
- When the LCD screen Exposure Test is started from the Touch Screen, the LCD screen displays normally, but the UV light does not turn on.
¶ Possible Causes
- An incorrect adapter specification is being used.
- The constant-current board connector is loose.
- The UV light board is faulty.
- The constant-current board is faulty.
- The mainboard has an abnormal UV power output.
¶ Required Tools
- 2.0 mm Allen key
- Multimeter
¶ Troubleshooting Steps
Note: Before troubleshooting, open the UV cover and remove the build plate and resin tank to facilitate subsequent inspection.
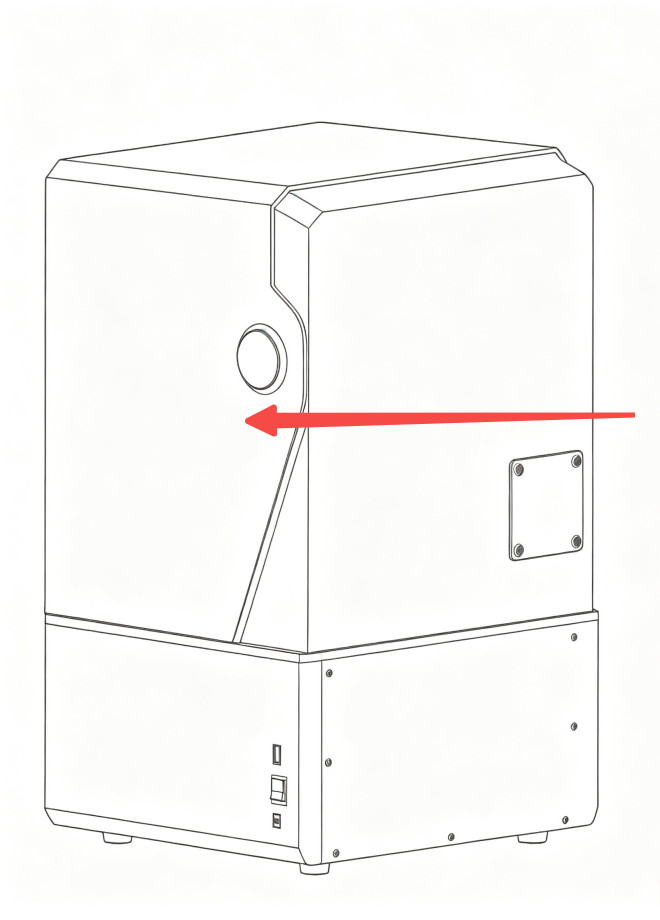
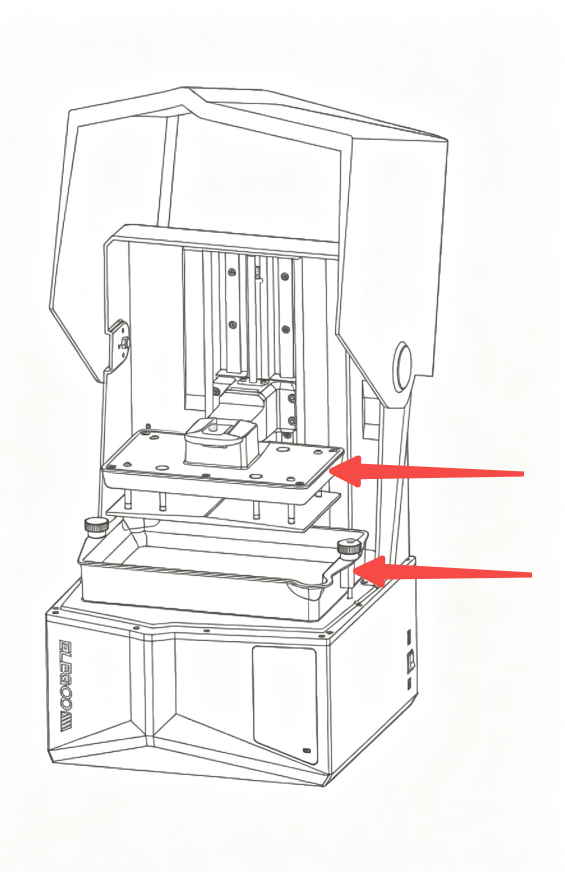
¶ 1. Check the Adapter Specification
- Check the specification label on the back of the adapter. The default adapter specification for Saturn 4 is 24 V, 6 A.
- If the adapter specification is incorrect, replace it with a 24 V, 6 A adapter.
- If the adapter specification is correct, continue with the following troubleshooting steps.
Note: MERCURY series printers use 12 V adapters. Saturn 4 requires an adapter rated at 24 V, 6 A. Do not use a 12 V adapter with Saturn 4, as the UV light may not work properly.
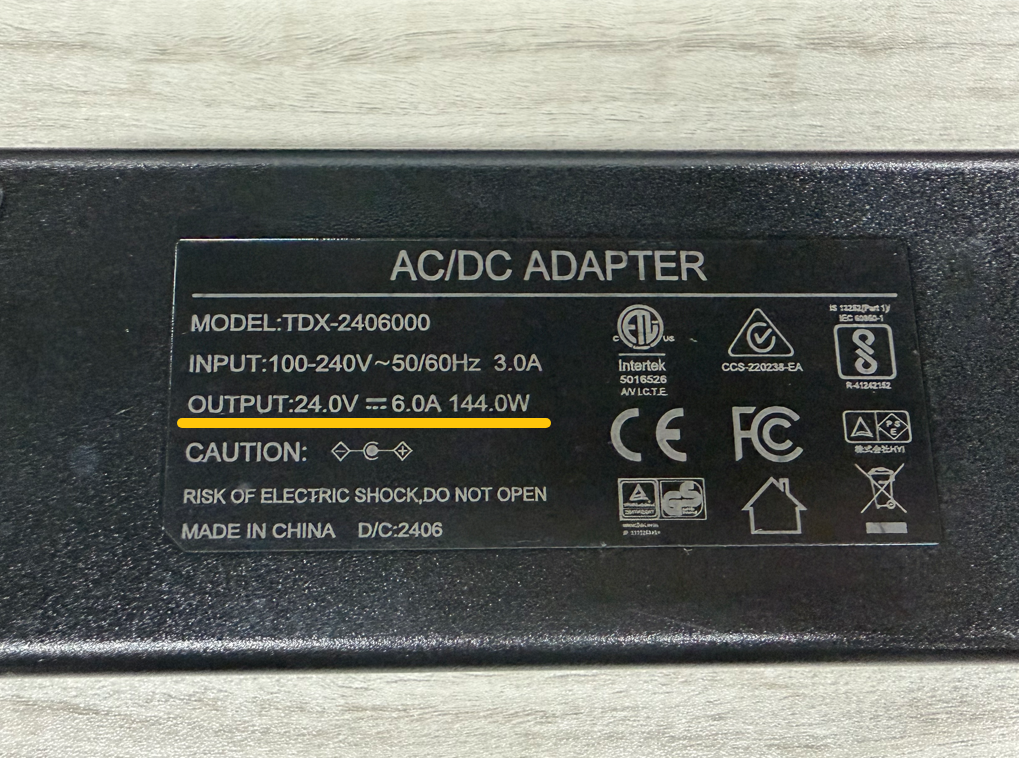
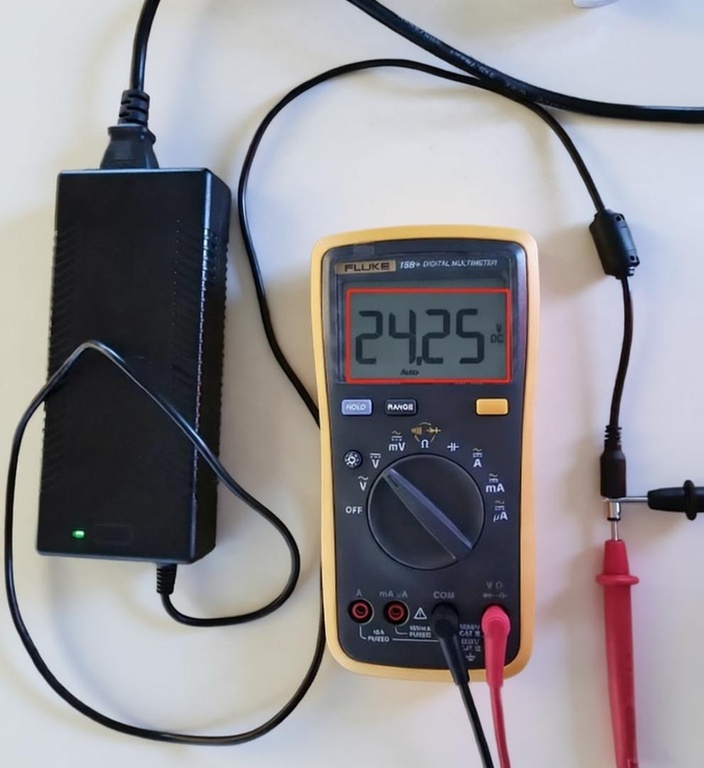
- If a multimeter is available, check the adapter output voltage. The rated output voltage should be 24 V. If a multimeter is not available, skip this step.
¶ 2. Check the UV Light Port Connector
- Turn off the power switch and unplug the adapter.
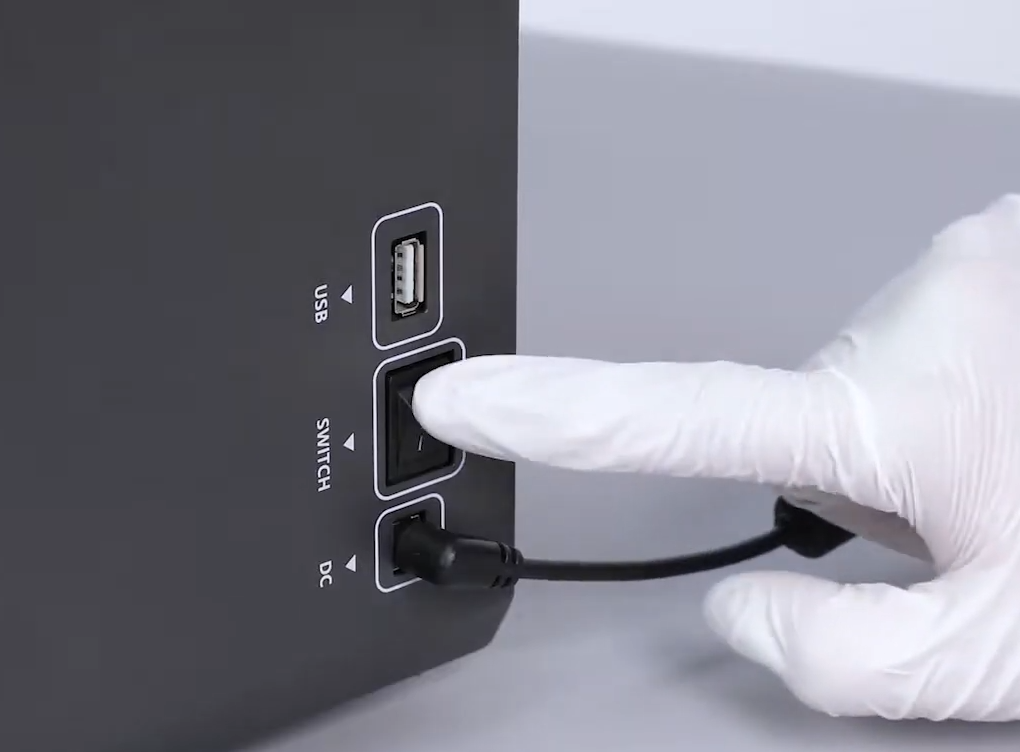
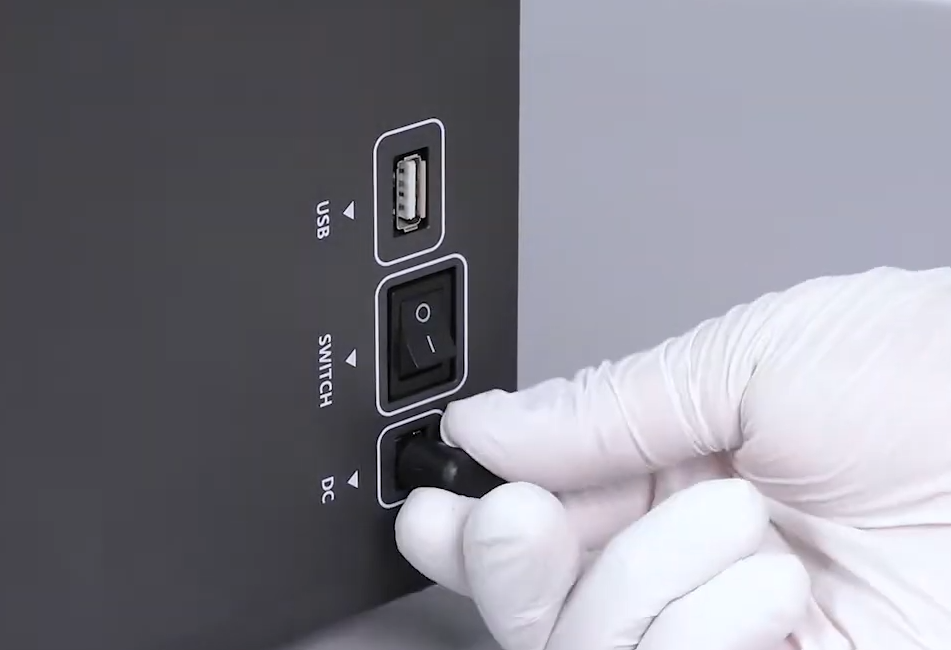
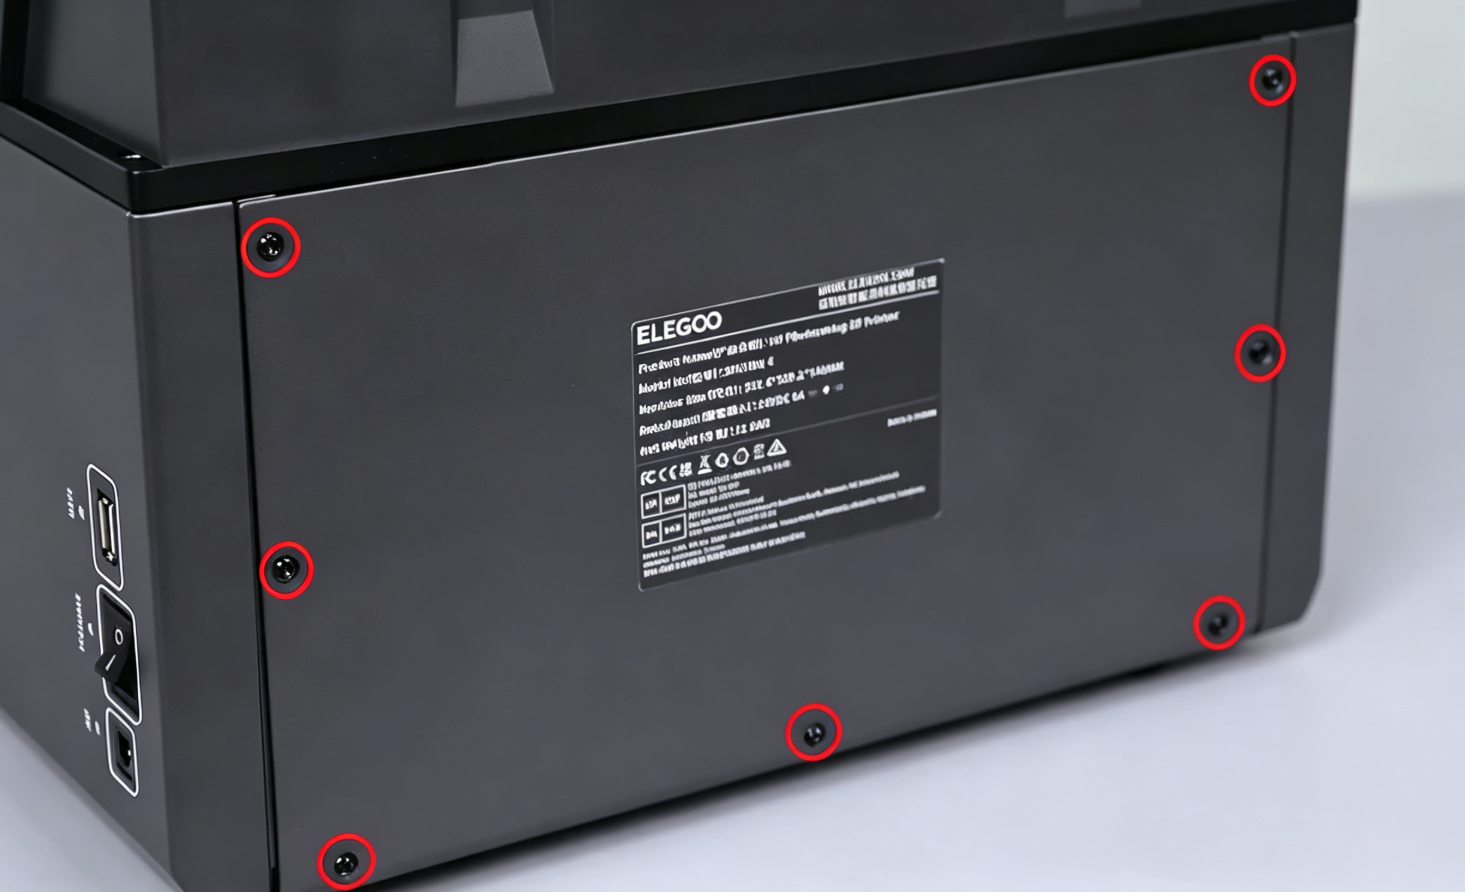
- Use a 2.0 mm Allen key to remove the 7 screws securing the rear cover, and then remove the rear cover.
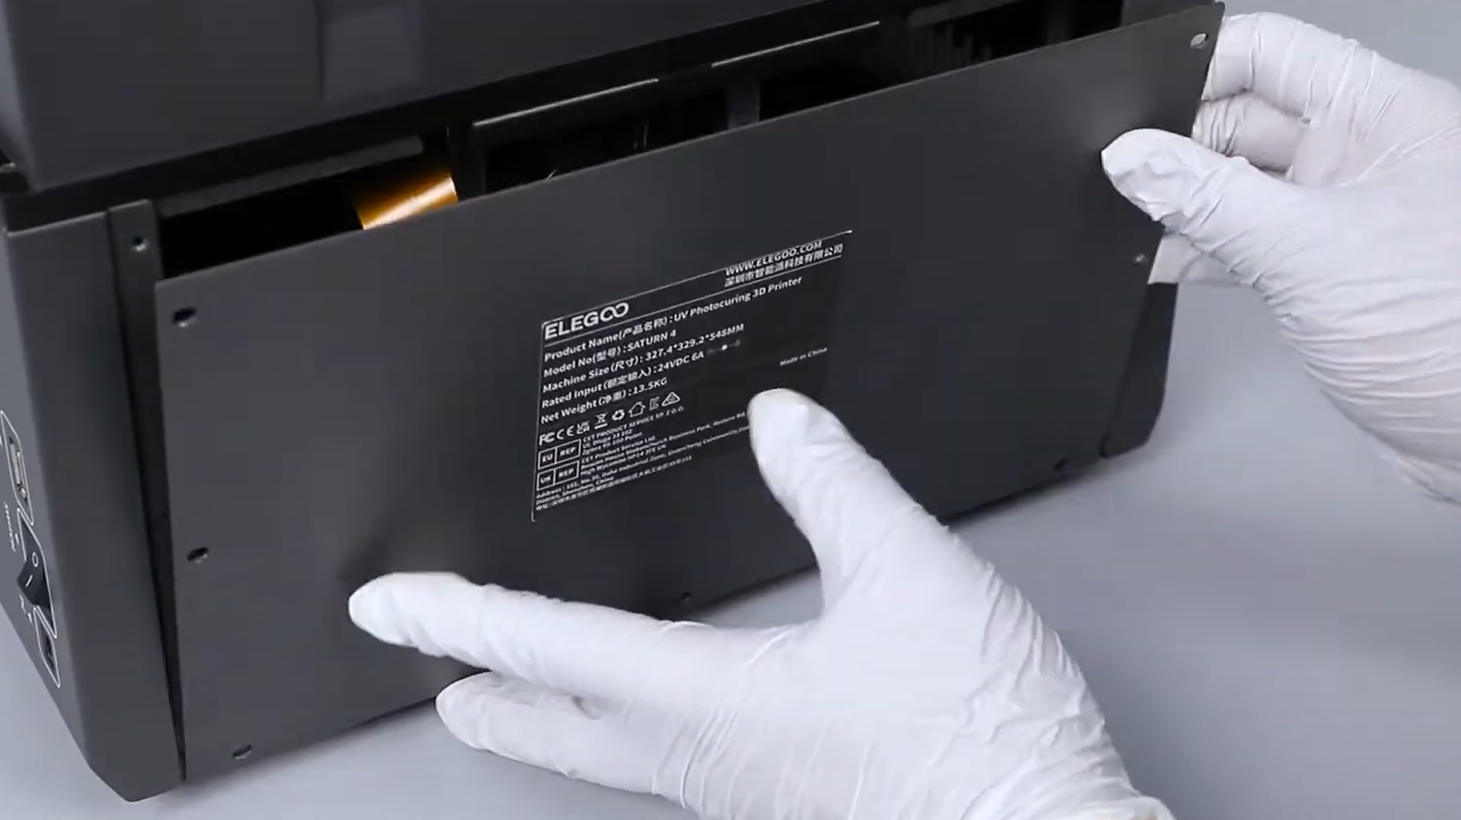
- Check whether the connector at the marked location is loose.
Note: The UV Light Port connector is secured with hot glue. If the connector is firmly connected, do not remove the hot glue or forcibly pull out the connector.
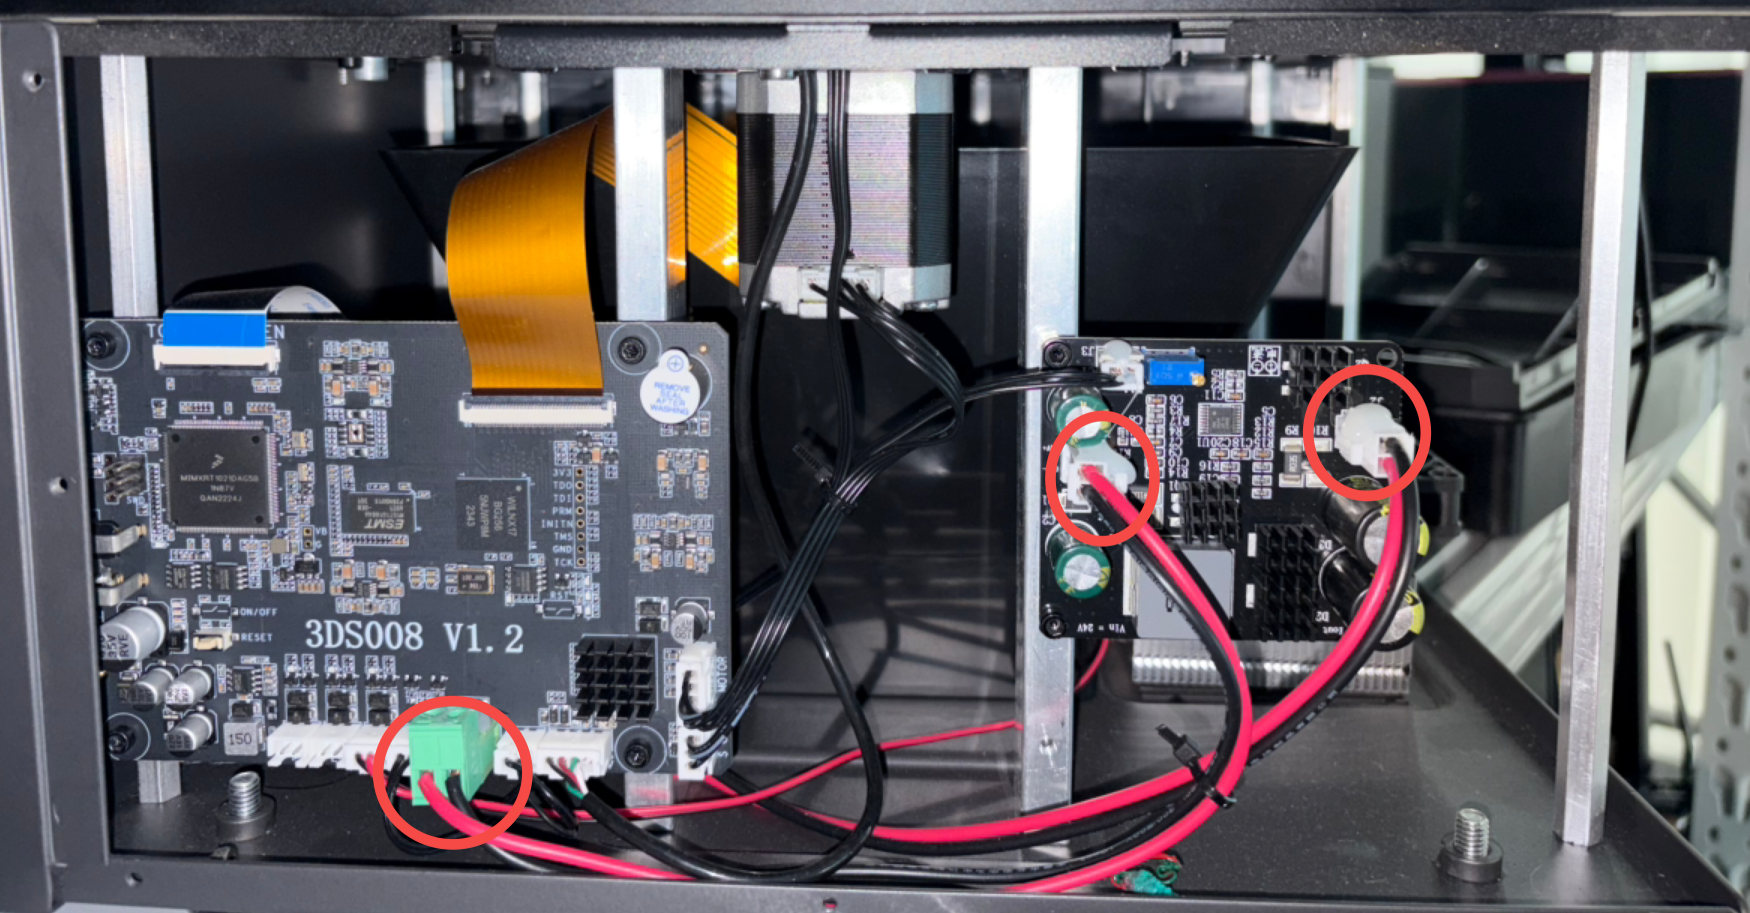
- If the UV Light Port connector shows signs of burning, melting, or discoloration, immediately turn off the printer and unplug the adapter. Take photos and contact Technical Support. Do not use the printer until the issue has been resolved.
- If the connector is loose, reconnect it and make sure it is securely connected.
- If the UV Light Port connector is secure, continue with the following troubleshooting steps.
¶ 3. Check the Mainboard Output Voltage
Caution: This step requires a live-voltage measurement using a multimeter. If you do not have a multimeter or do not have experience performing live-voltage measurements, skip this step. During measurement, make sure the multimeter probes only contact the specified measurement points. Avoid touching other electronic components or exposed terminals to prevent short circuits or damage to the printer.
- Turn on the printer.
- Start the LCD screen exposure test from the touch screen (Tool > Screen Exposure > Text).
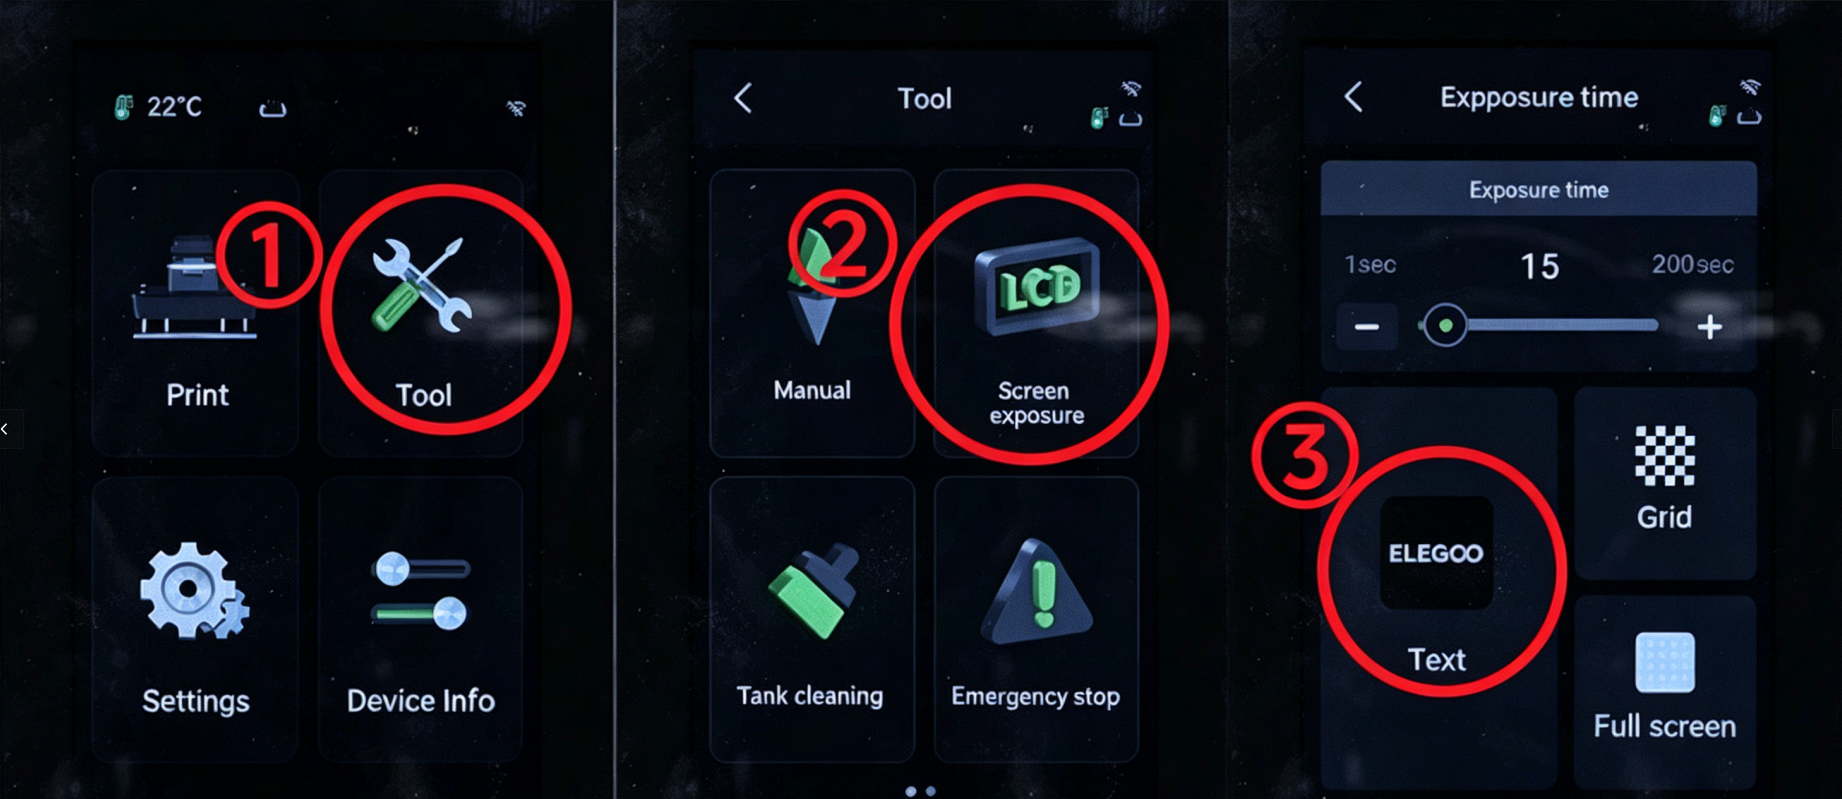
- Use a multimeter to check whether there is output voltage at the UV Light Port.
Note: If a multimeter is not available, skip this step. Be careful not to touch other electronic components during the measurement to prevent a short circuit.
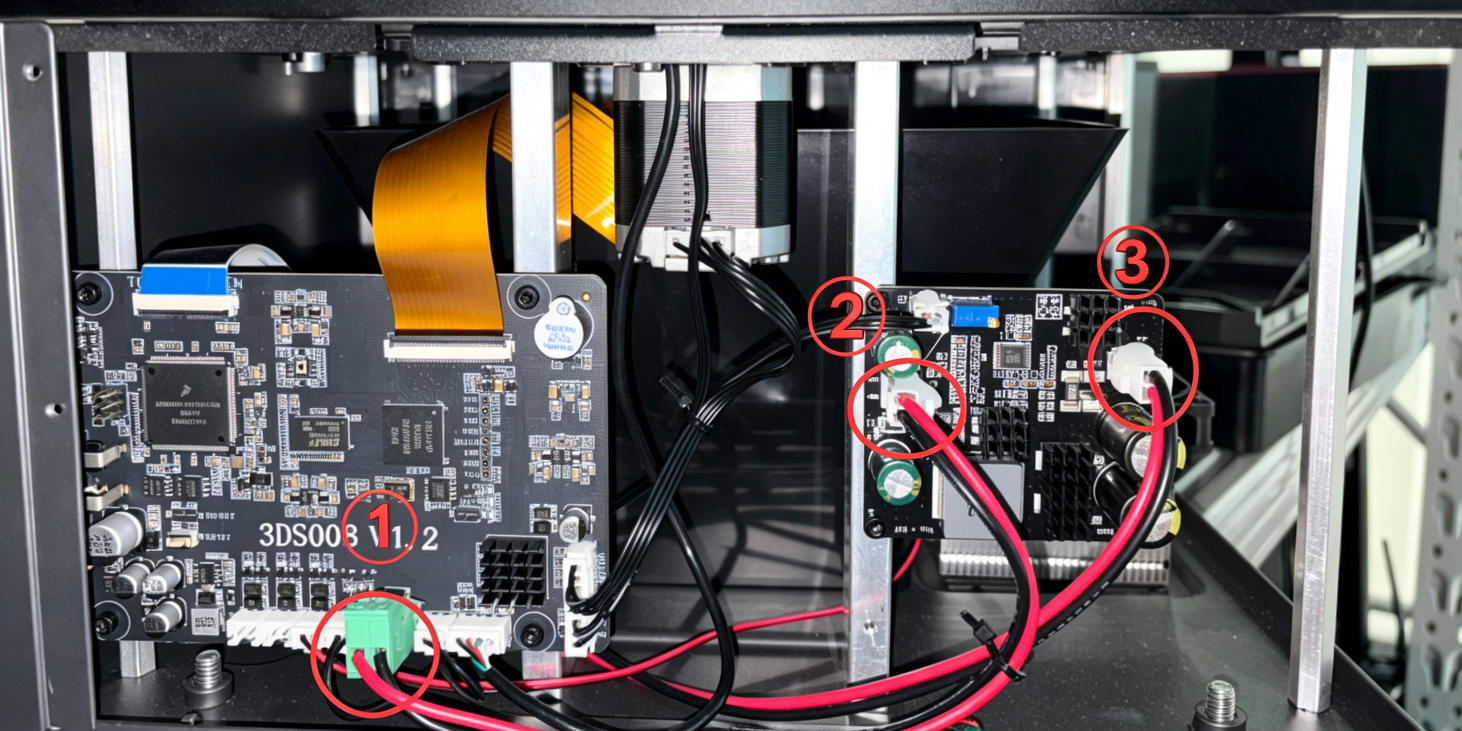
Measurement Points:
- Measurement Point ①: Mainboard UV output
- Measurement Point ②: Extension cable output
- Measurement Point ③: Constant-current board output
Note: Under normal conditions, the output voltage at ① and ② should be approximately 24 V, and the output voltage at ③ should be approximately 25 V.
- ① No output voltage: The UV output from the mainboard may be abnormal.
- ① Has output voltage, ② Has no output voltage: The connector at measurement point ② may be loose or have poor contact.
- ① and ② Have output voltage, ③ Has no output voltage: The constant-current board may be faulty.
- ①, ②, and ③ all have normal output voltage, but the UV light remains off: The UV light board may be faulty.
¶ Contact Technical Support
If the issue persists after completing all the troubleshooting steps above, contact Technical Support at 3dp@elegoo.com and provide the following information:
- Check result — Whether the adapter specification is correct.
- Check result — Whether the UV Light Port connector is loose, burned, or damaged.
- Check result — Whether the adapter output voltage is 24 V and stable. If a multimeter is not available, skip this item.
- Check result — Whether there is output voltage at measurement points ①, ②, and ③, and whether the voltage is stable. If a multimeter is not available, skip this item.
¶ Help Us Improve
If you have any suggestions or feedback about our wiki pages, please let us know through the ELEGOO official feedback channel.