¶ Fault Symptoms
The touch screen does not turn on after the printer is powered on.
¶ Possible Causes
- A USB flash drive was connected when the printer was powered on, causing a system startup issue.
- The adapter is faulty.
- The firmware is corrupted, or an incompatible firmware version is installed.
- The touch screen cable is not properly connected.
- The mainboard is faulty.
- A component connected to the mainboard is short-circuited.
¶ Tools Required
- Multimeter
- Spare 24 V Adapter
- 2.0 mm Allen key
- 2.5 mm Allen key
- 75% isopropyl alcohol
¶ Troubleshooting Steps
¶ 1. Remove the USB Flash Drive and Restart the Printer
Turn off the printer, remove the USB flash drive, and then turn on the printer again. Check whether the touch screen turns on normally.
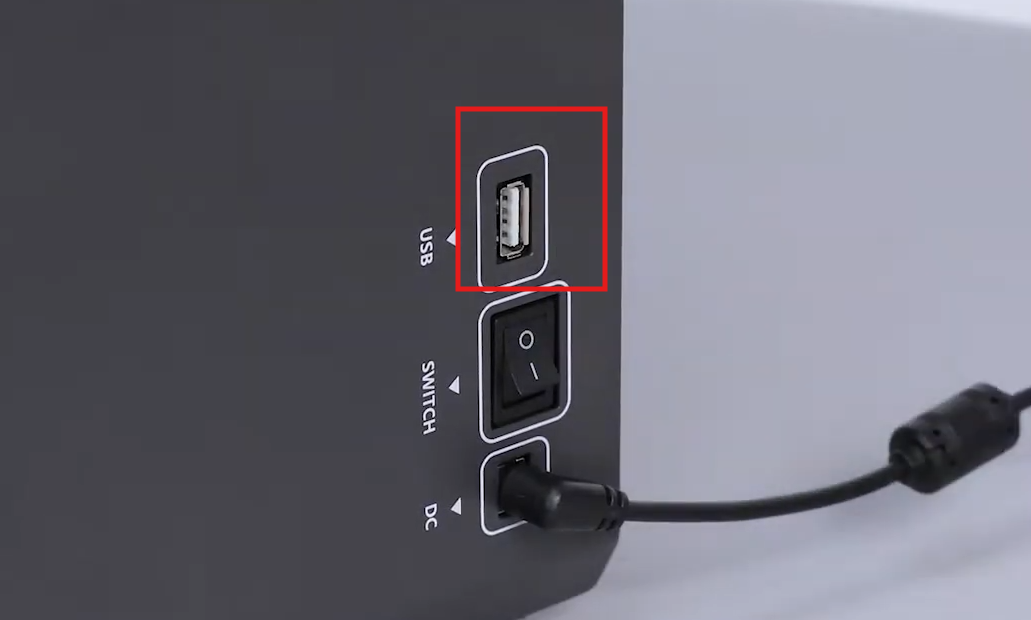
- If the touch screen turns on normally, troubleshooting is complete.
- If the touch screen still does not turn on, proceed to Step 2.
¶ 2. Check the Adapter
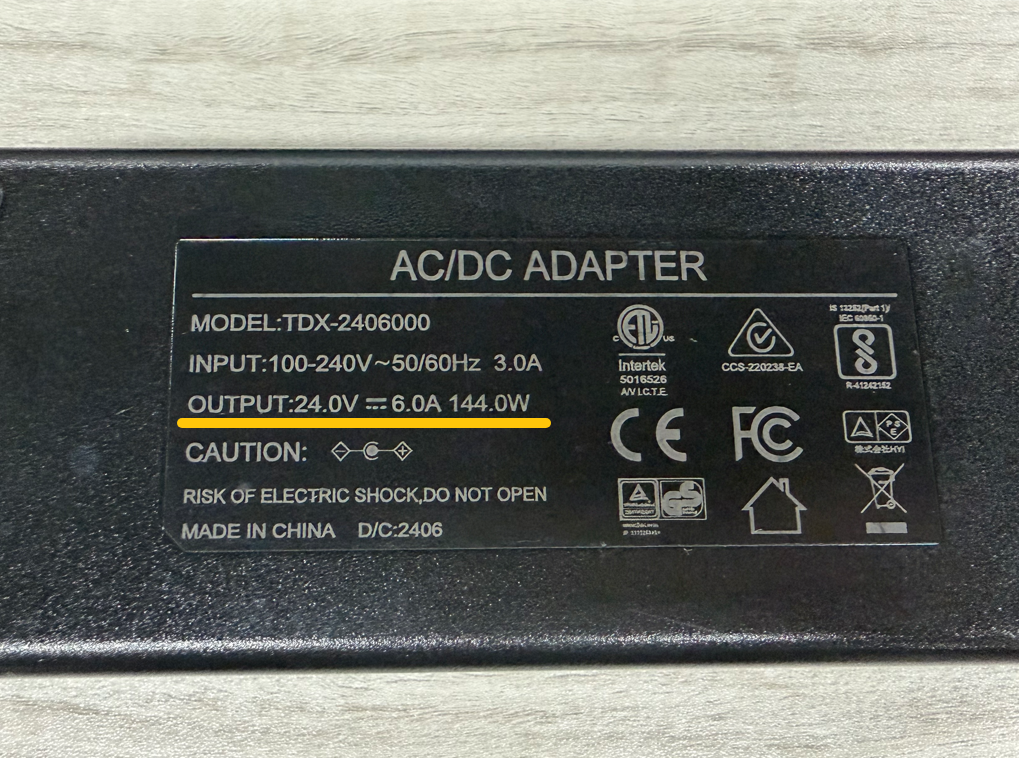
- If a multimeter is available, use it to measure the adapter output voltage. Confirm that the output voltage is approximately 24 V and remains stable. If a multimeter is not available, check whether the adapter indicator light is on normally. The indicator light can only be used as a preliminary check and cannot confirm that the adapter output is normal.
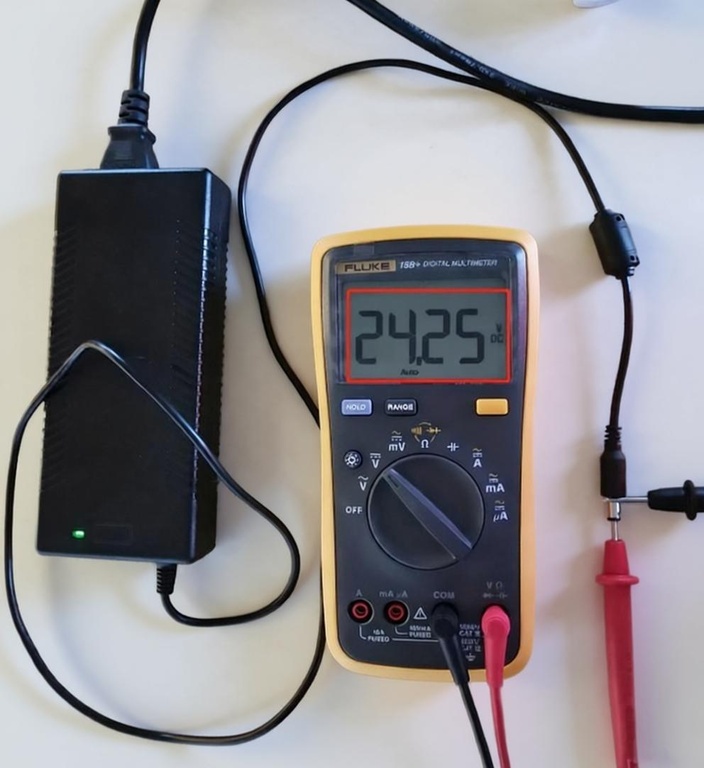
- If a spare adapter with the same specifications as the original adapter is available, use it to test the printer. If the touch screen turns on normally after replacing the adapter, the original adapter may be faulty and should be replaced.
¶ 3. Reinstall the Firmware
Download the firmware for Saturn 4 from the ELEGOO official download page and follow the official firmware update instructions.
Download the following firmware file:
Saturn 4 - V2.3.60-20240606-V7.zip
Copy the downloaded firmware file to the root directory of a USB flash drive, insert the USB flash drive into the printer, and restart the printer. The printer will automatically detect the firmware file and start the update.
Note: Make sure that the downloaded firmware is fully compatible with the printer model. Using firmware intended for another model may prevent the printer from starting normally.
Note: Do not modify the firmware file name or file extension.
¶ 4. Reconnect the Touch Screen Cable on the Touch Screen Side
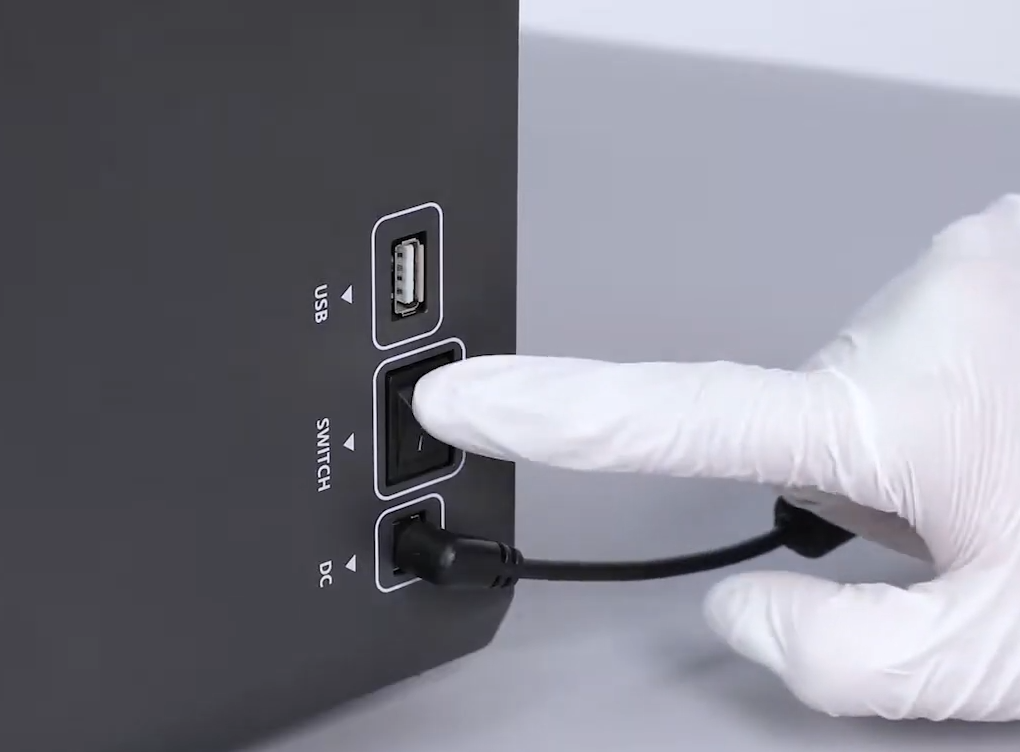
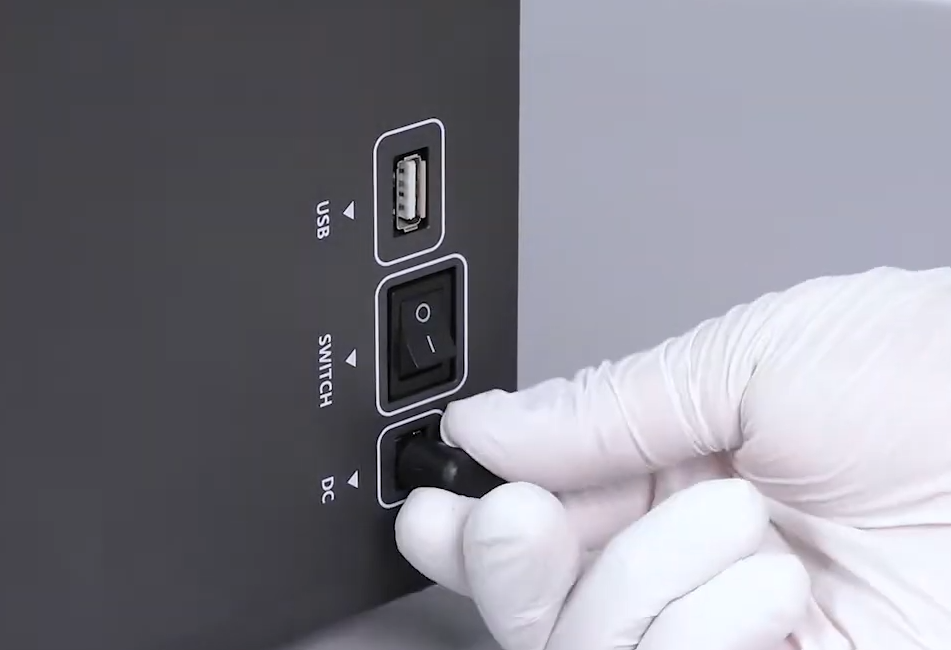
- Turn off the printer using the power switch and disconnect the adapter.
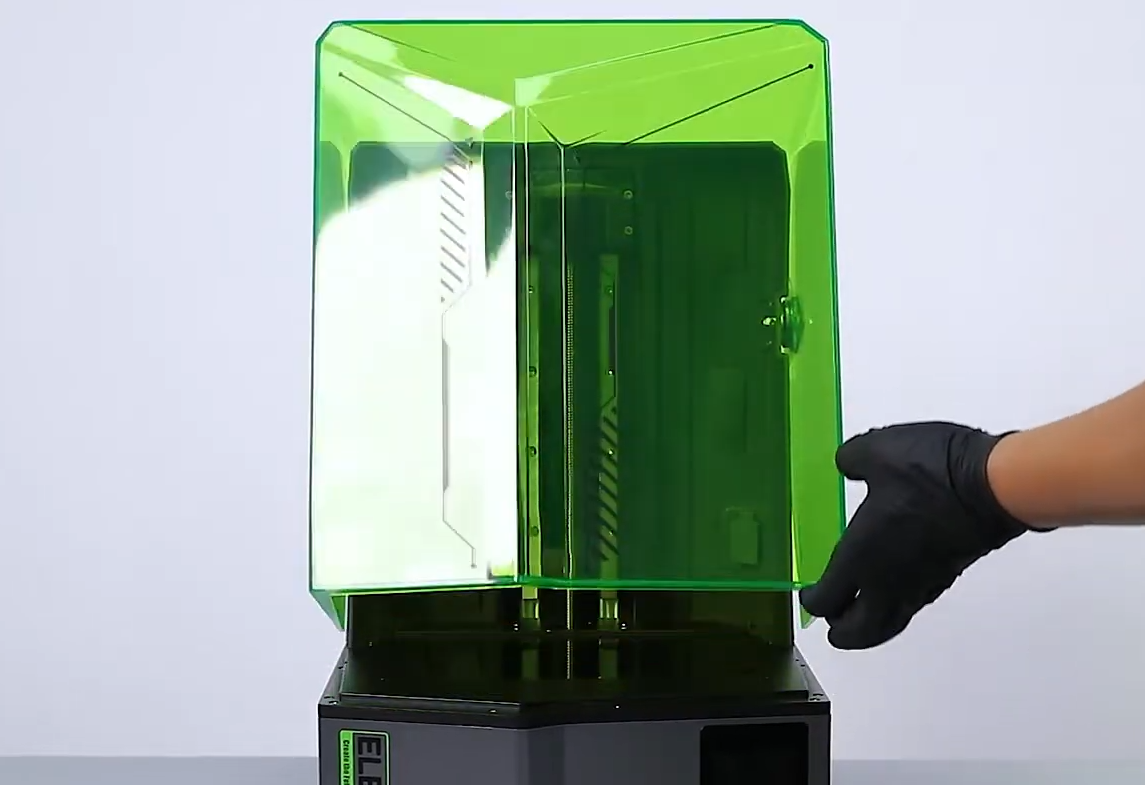
- Open the UV cover.
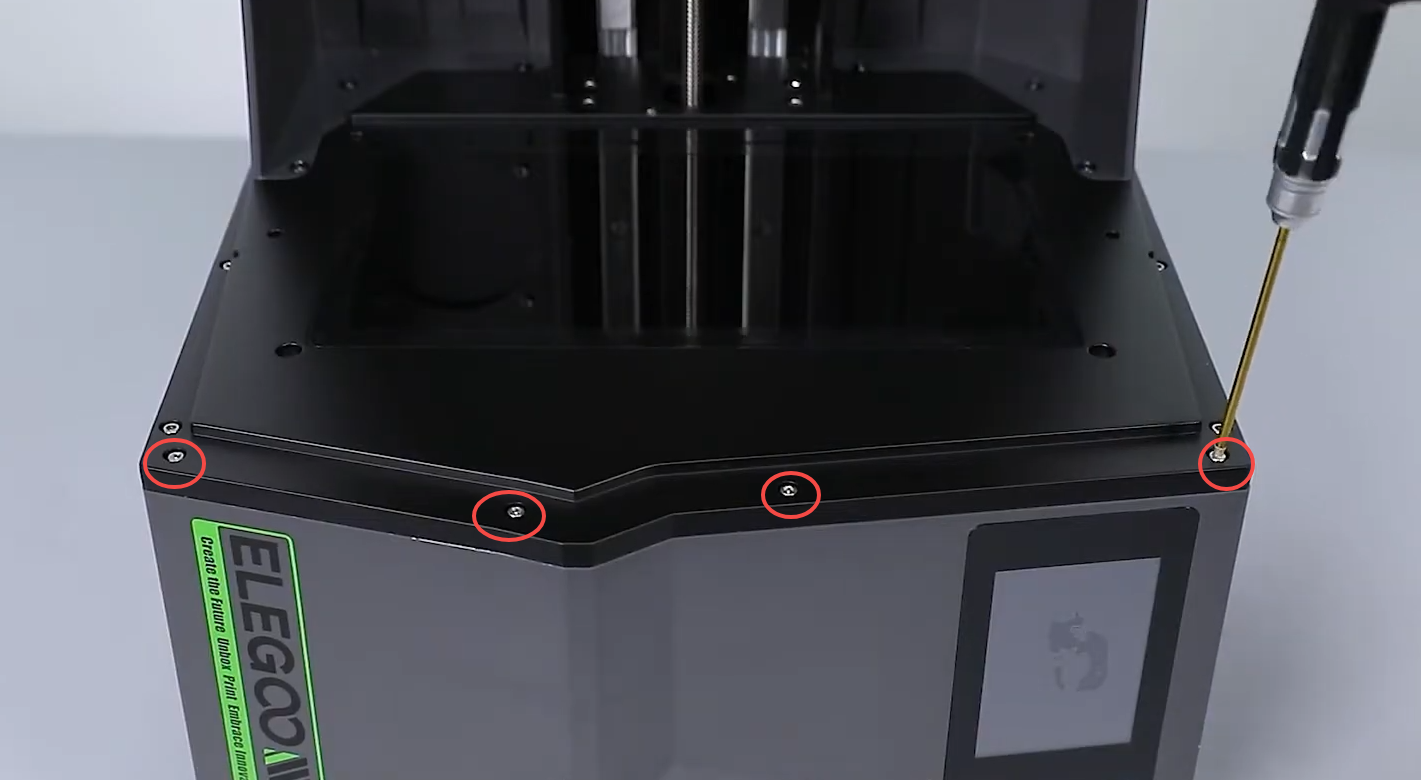
- Use a 2.5 mm Allen key to remove the four screws securing the center panel of the front cover.
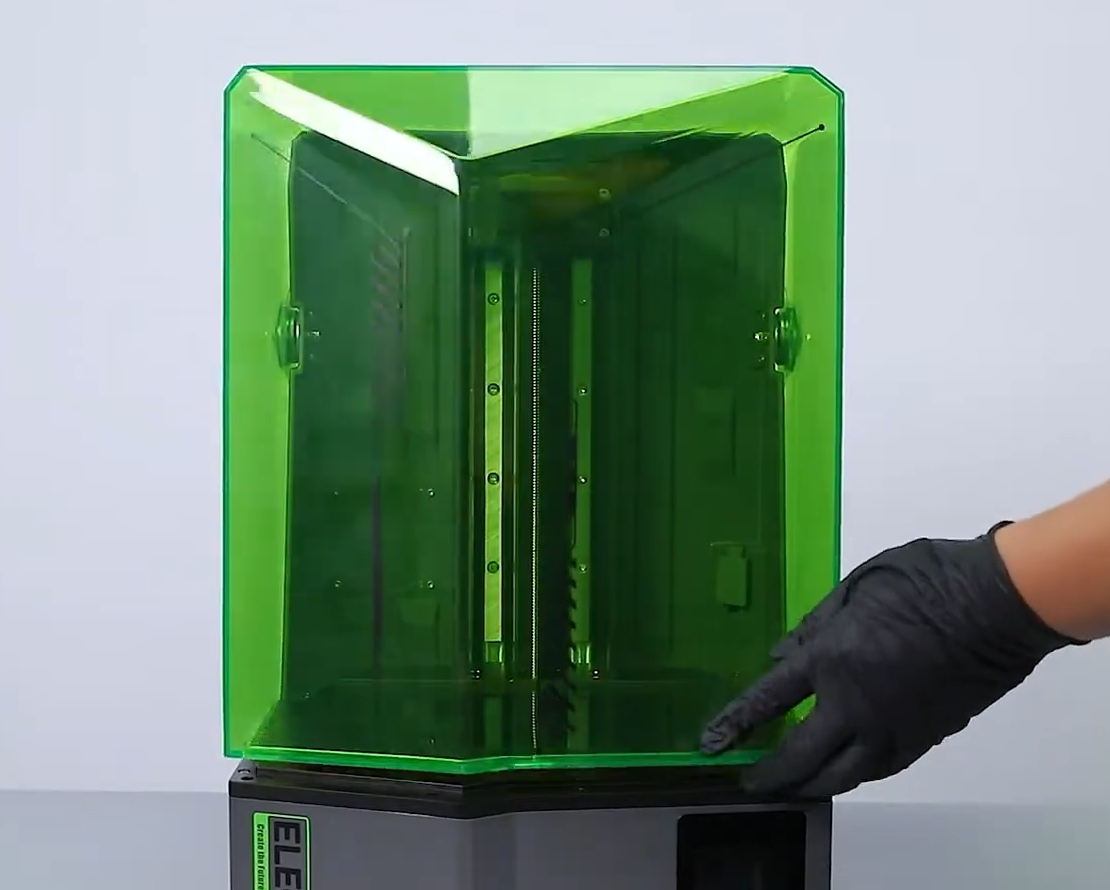
- Return the UV cover to its original position.
- Place the printer flat. Use a 2.5 mm Allen key to remove the four screws securing the bottom of the front cover.
Note: If there is resin in the resin tank, remove the resin tank before laying the printer flat to prevent resin from leaking.
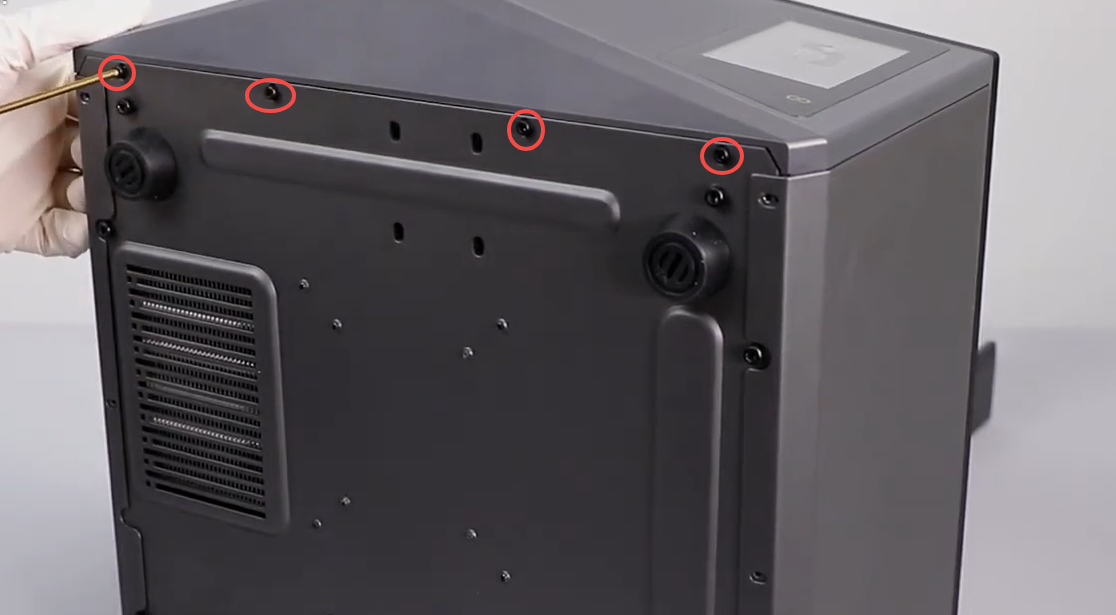
- Slowly open the front cover.
Note: When opening the front cover, be careful with the internal cables to avoid pulling or damaging them.
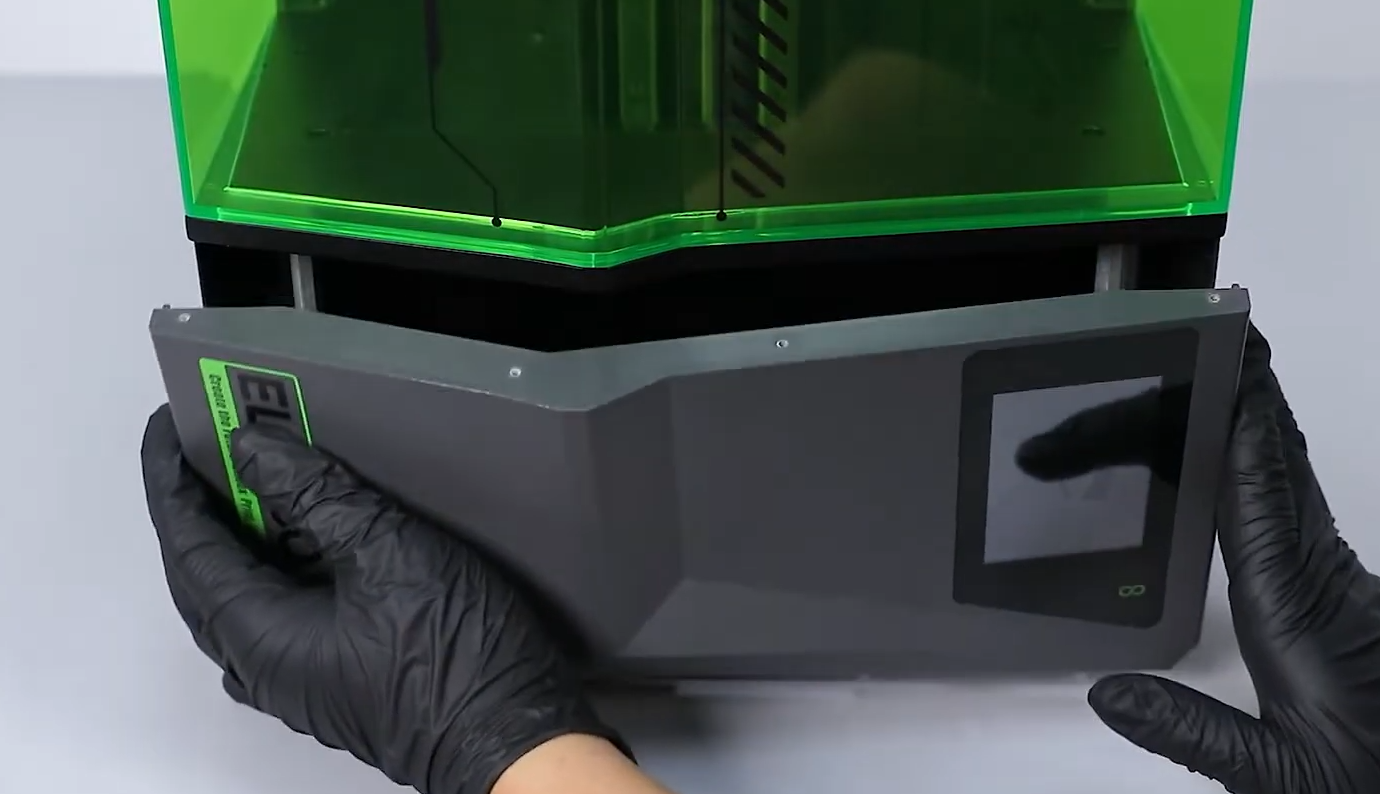
- Lift the locking tab on the touch screen cable connector, and disconnect the touch screen cable.
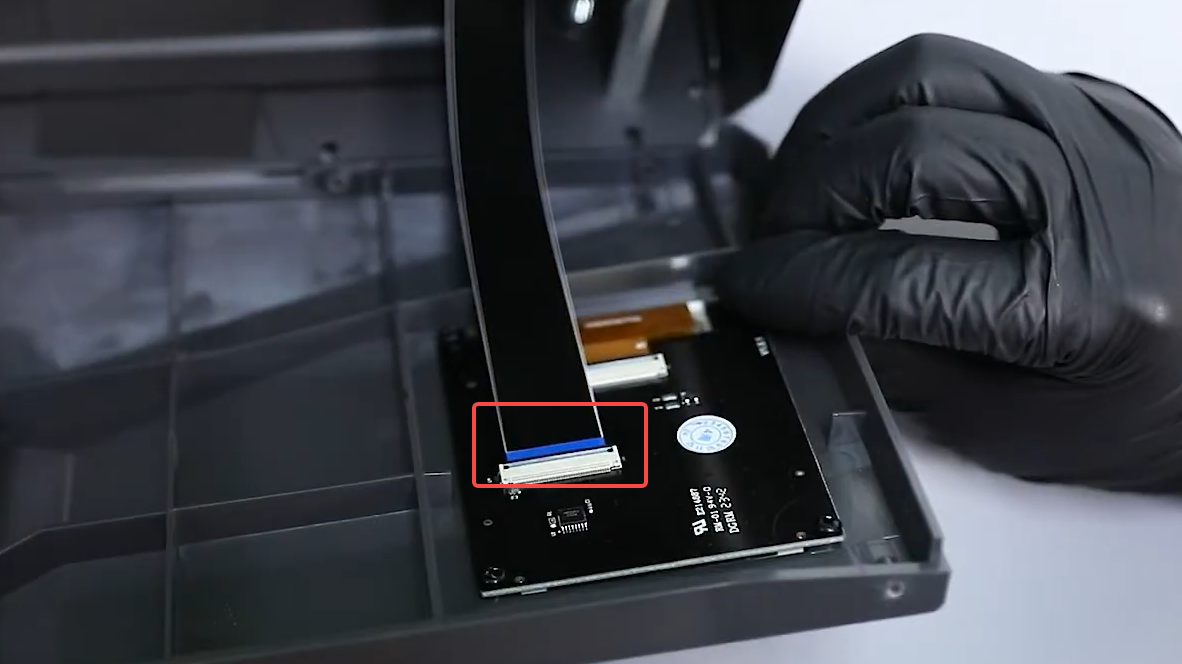
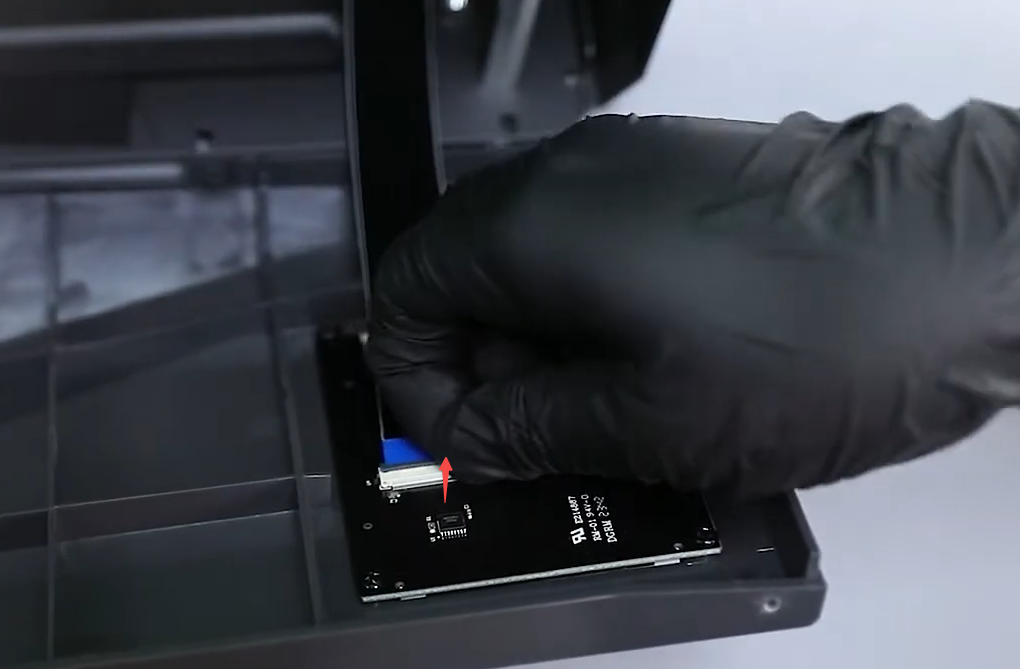
- Check the cable and connector for damage, bending, foreign objects, or signs of oxidation. If the cable is damaged, deformed, or otherwise defective, replace the touch screen cable. If foreign objects are found in the connector, clean the connector and reinstall the cable.
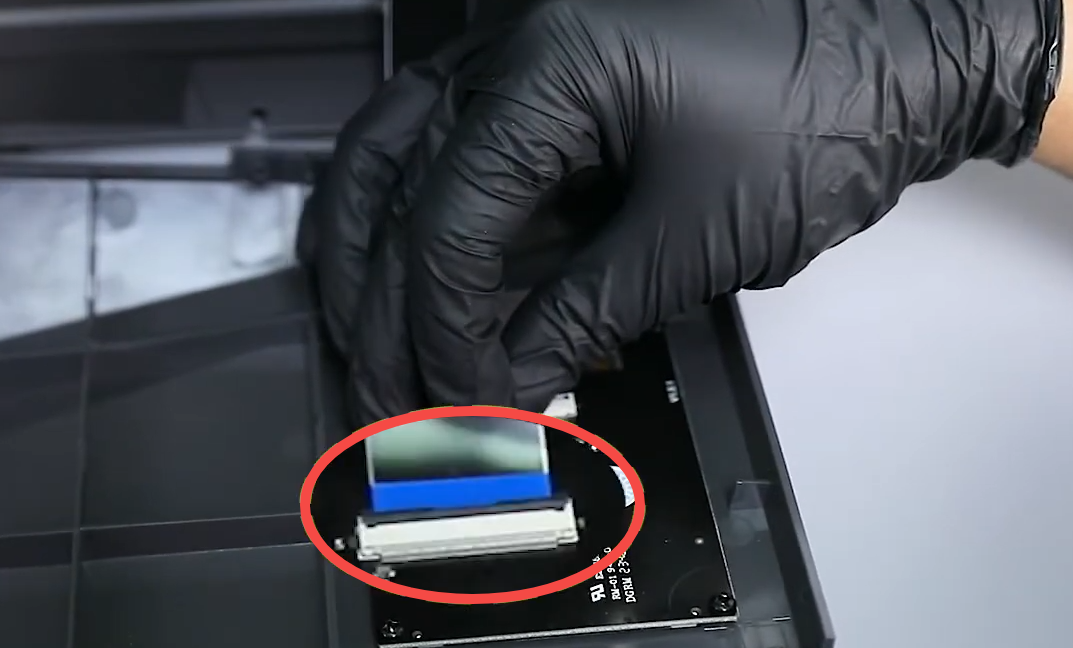
Reinstall the front cover, connect the adapter, and turn on the printer. Check whether the touch screen turns on normally.
- If the touch screen turns on normally, troubleshooting is complete.
- If the touch screen still does not turn on, proceed to Step 5.
¶ 5. Reconnect the Touch Screen Cable on the Mainboard Side
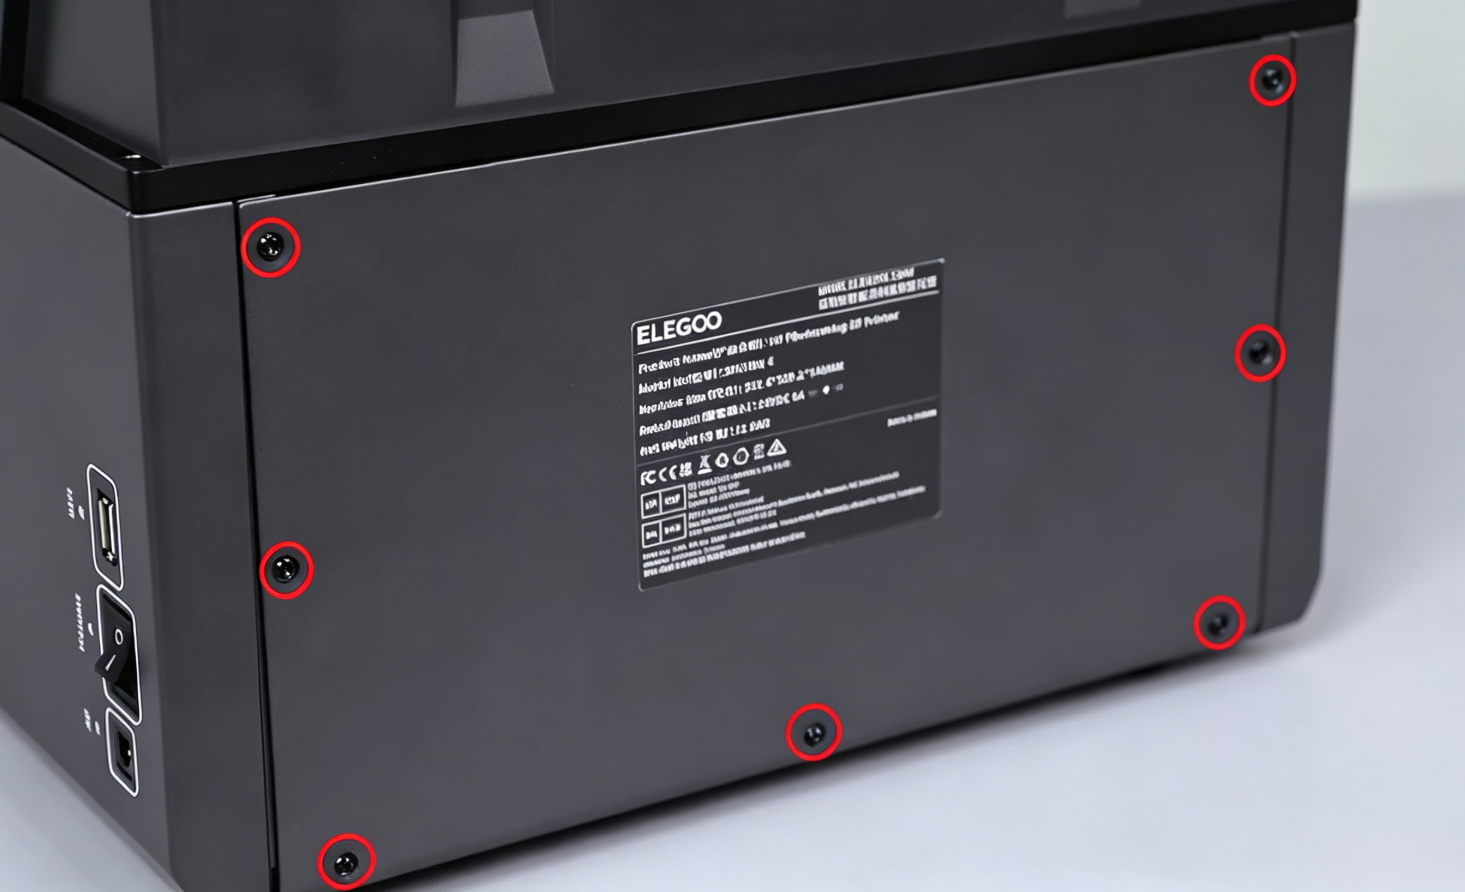
- Use a 2.0 mm Allen key to remove the seven screws securing the rear cover, and then remove the cover.
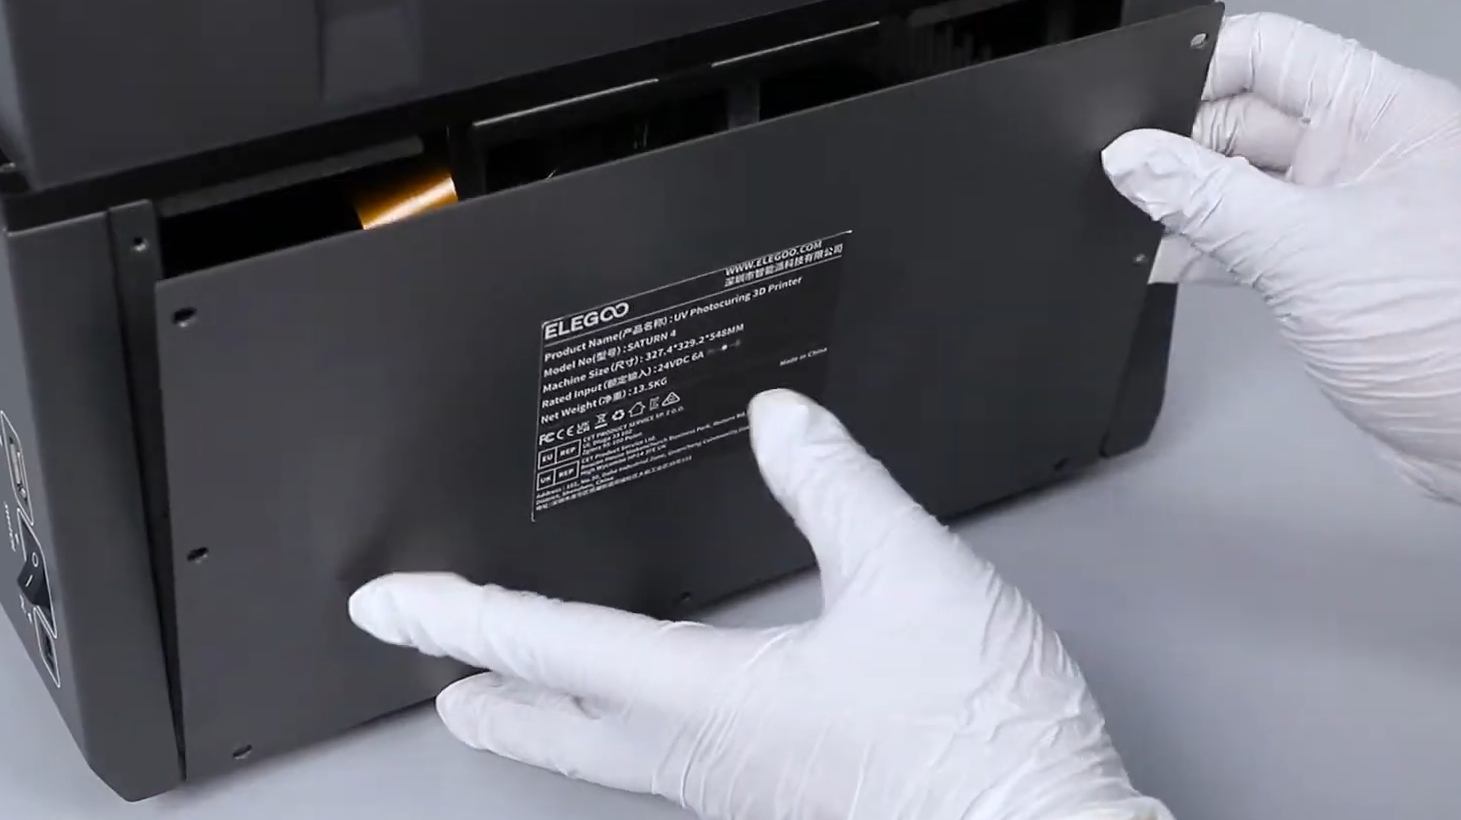
- Remove the tape securing the touch screen cable.
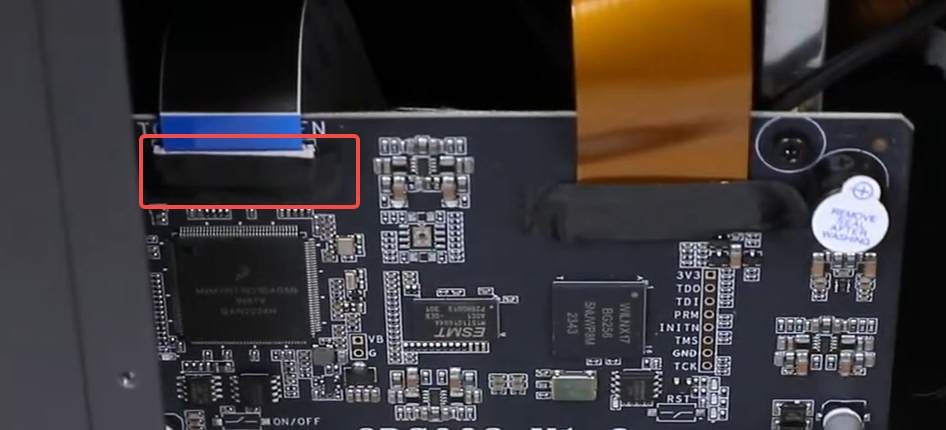
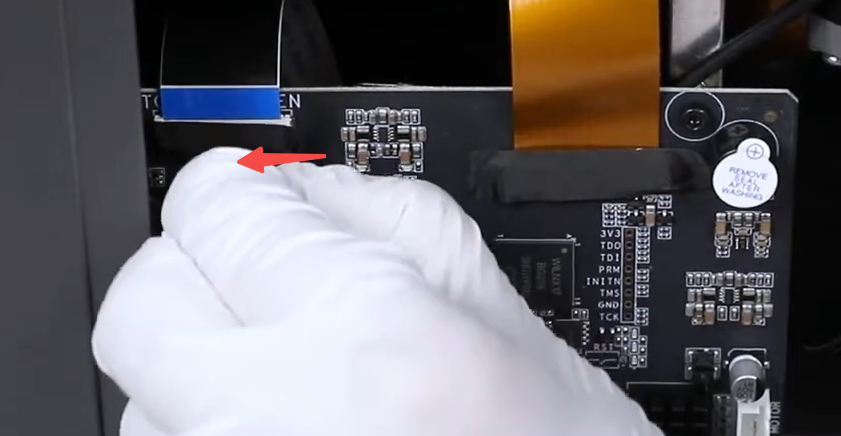
- Lift the locking tab on the touch screen cable connector on the mainboard.
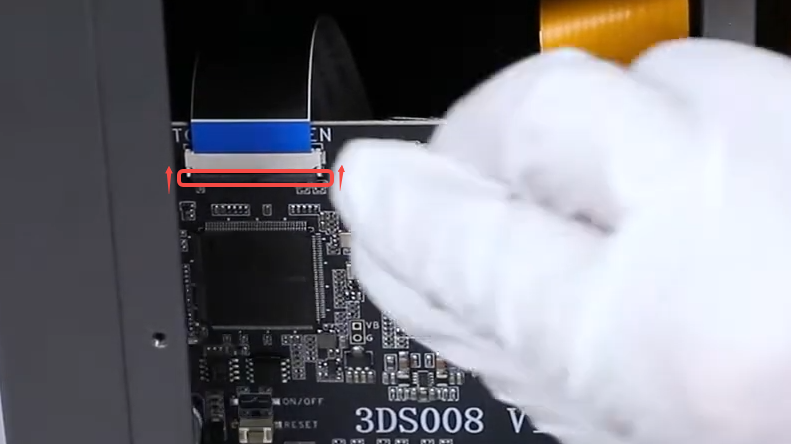
- Check the cable and connector for damage, bending, foreign objects, or signs of oxidation. If the cable is damaged, deformed, or otherwise defective, replace the touch screen cable. If foreign objects are found in the connector, clean the connector and reinstall the cable.
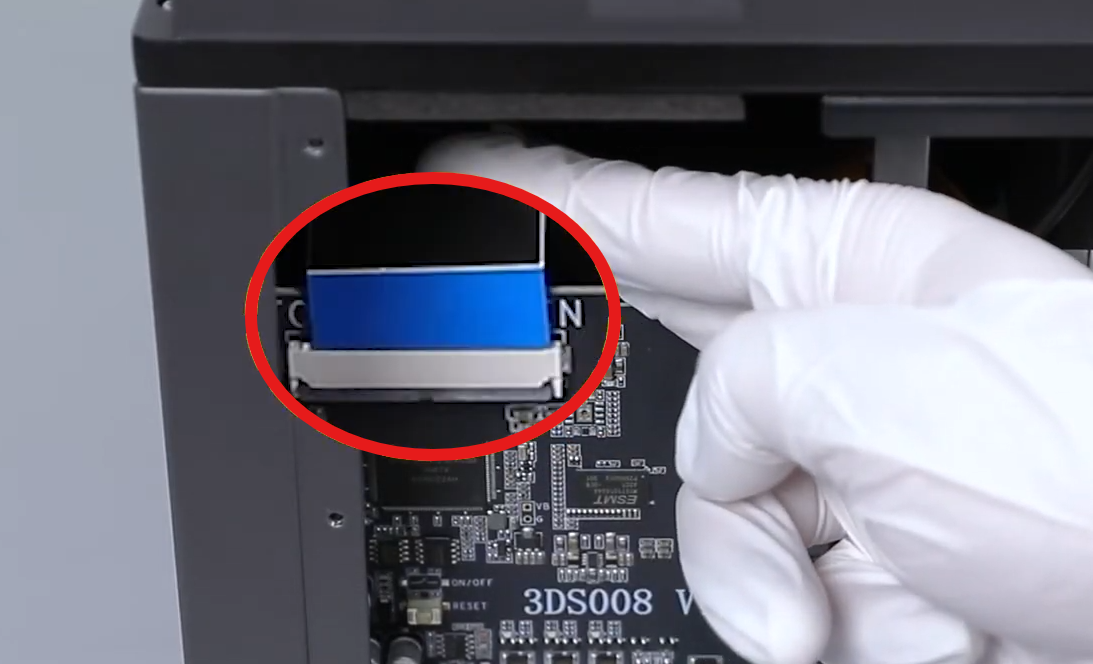
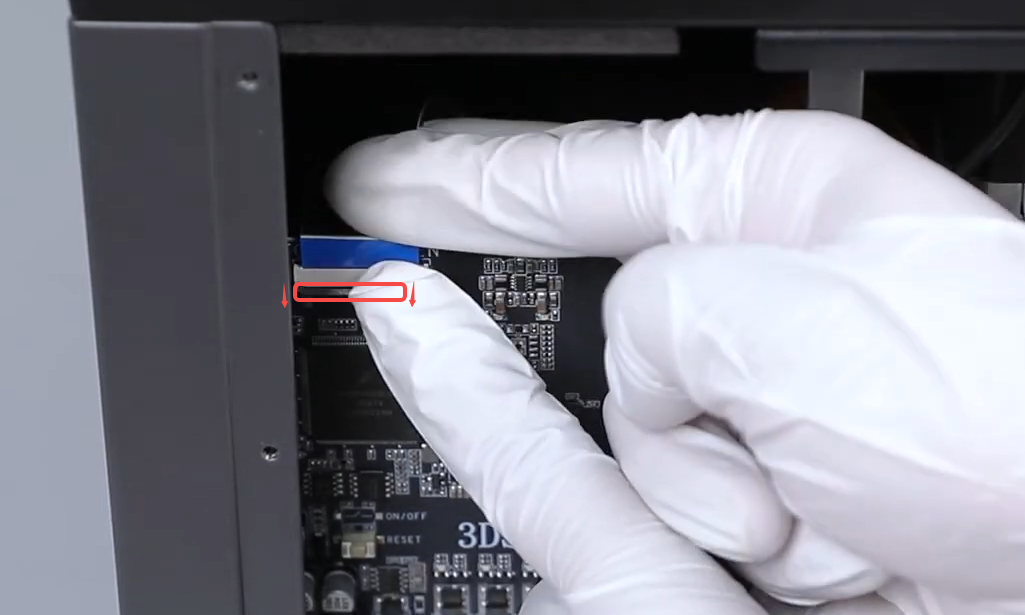
Reinstall the rear cover, connect the adapter, and turn on the printer. Check whether the touch screen turns on normally.
- If the touch screen turns on normally, troubleshooting is complete.
- If the touch screen still does not turn on, proceed to Step 6.
¶ 6. Check the Mainboard Indicator Light
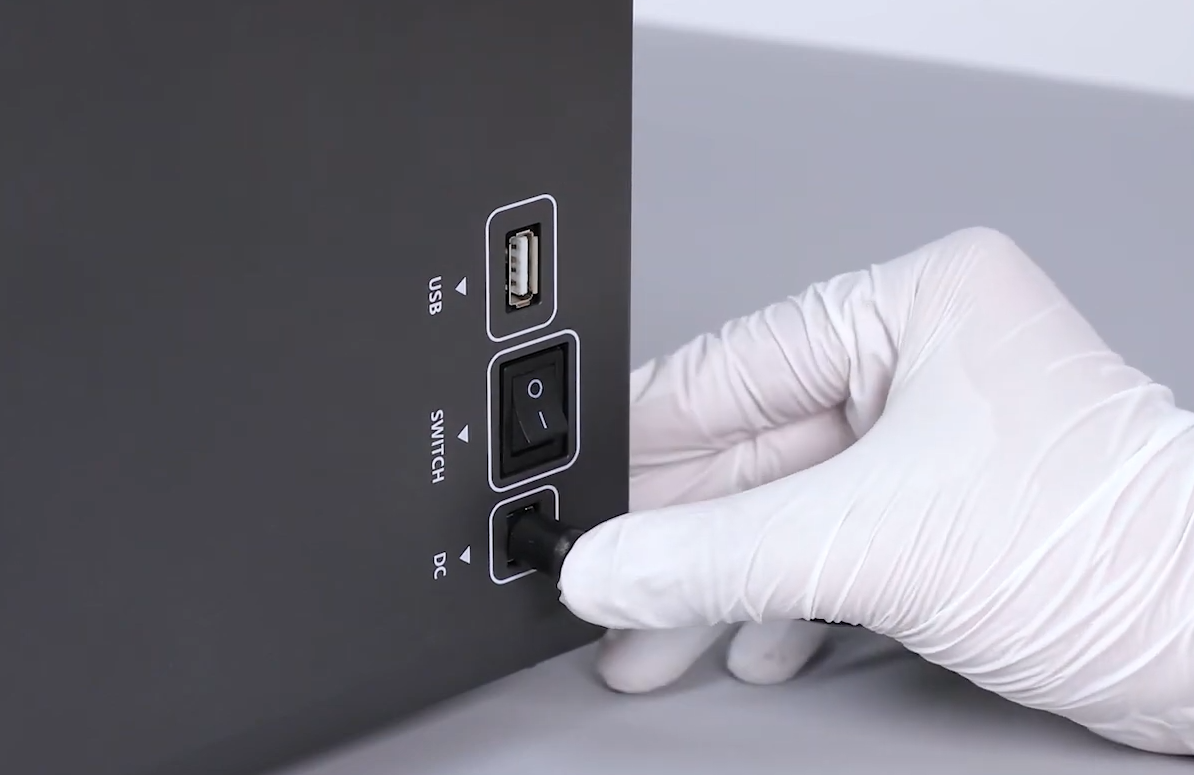
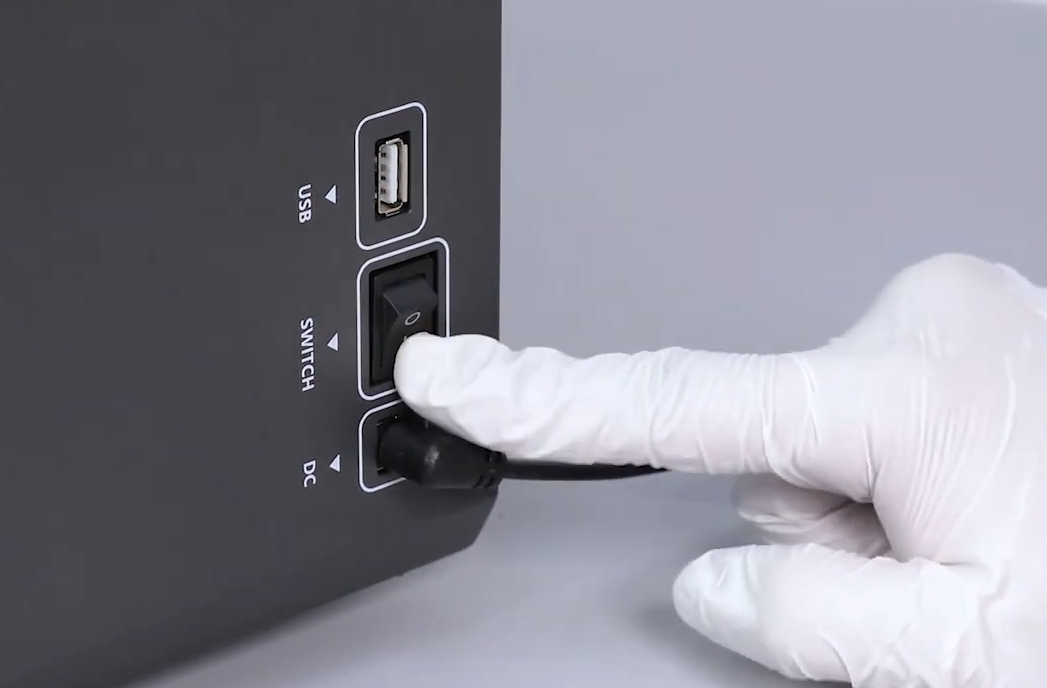
- Connect the adapter to the printer and turn on the power switch.
- Check whether the indicator light at the corresponding position on the mainboard turns on normally. The image below shows the normal status.
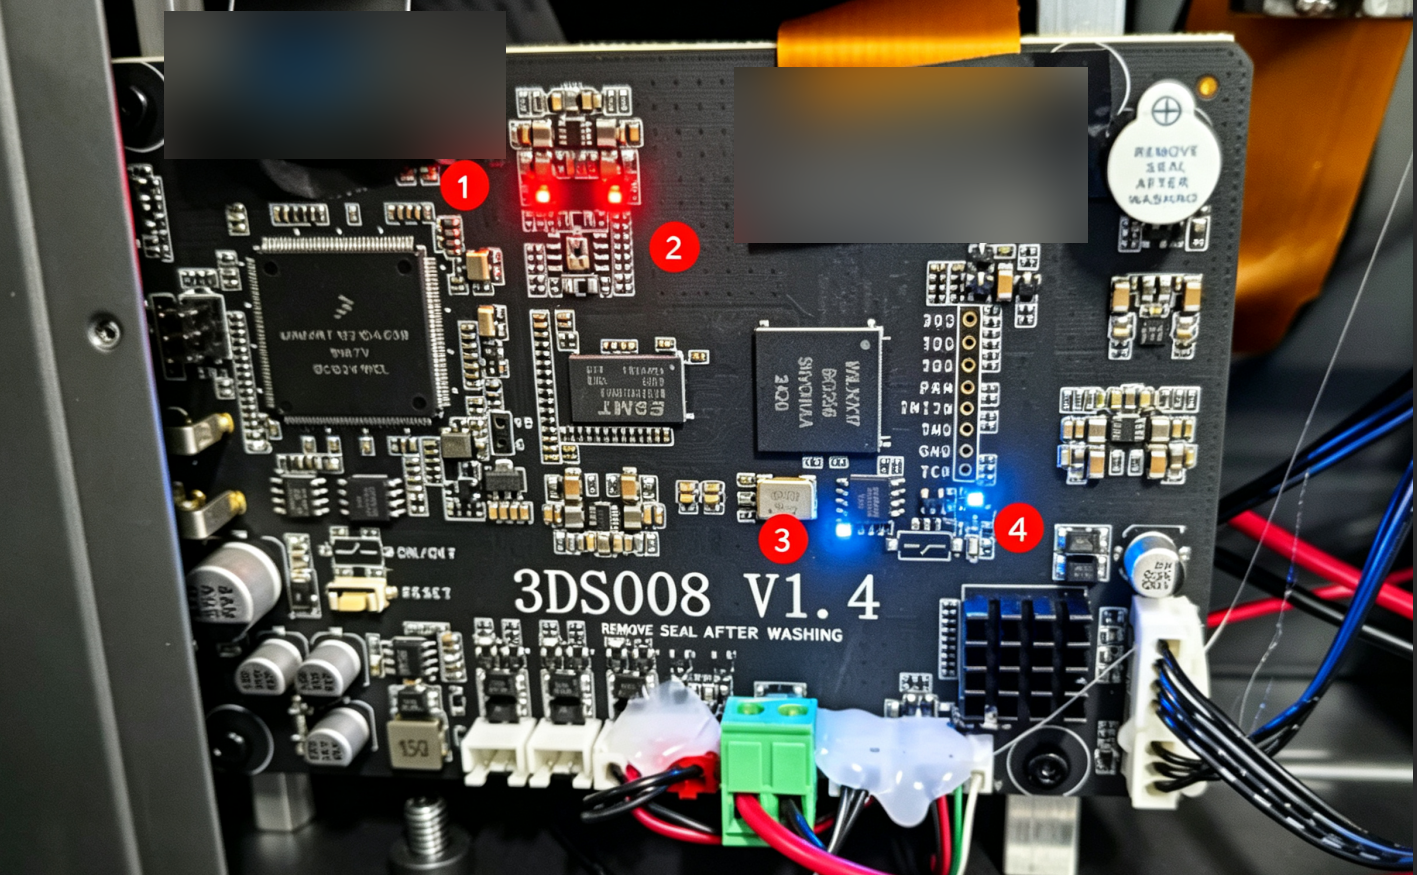
If the mainboard indicator light does not turn on, the mainboard may have a power supply issue or be faulty, or a component connected to the mainboard may be short-circuited. Proceed to Step 7 for further troubleshooting.
¶ 7. Check Whether a Component Connected to the Mainboard Is Short-Circuited
- Turn off the printer and disconnect the adapter.
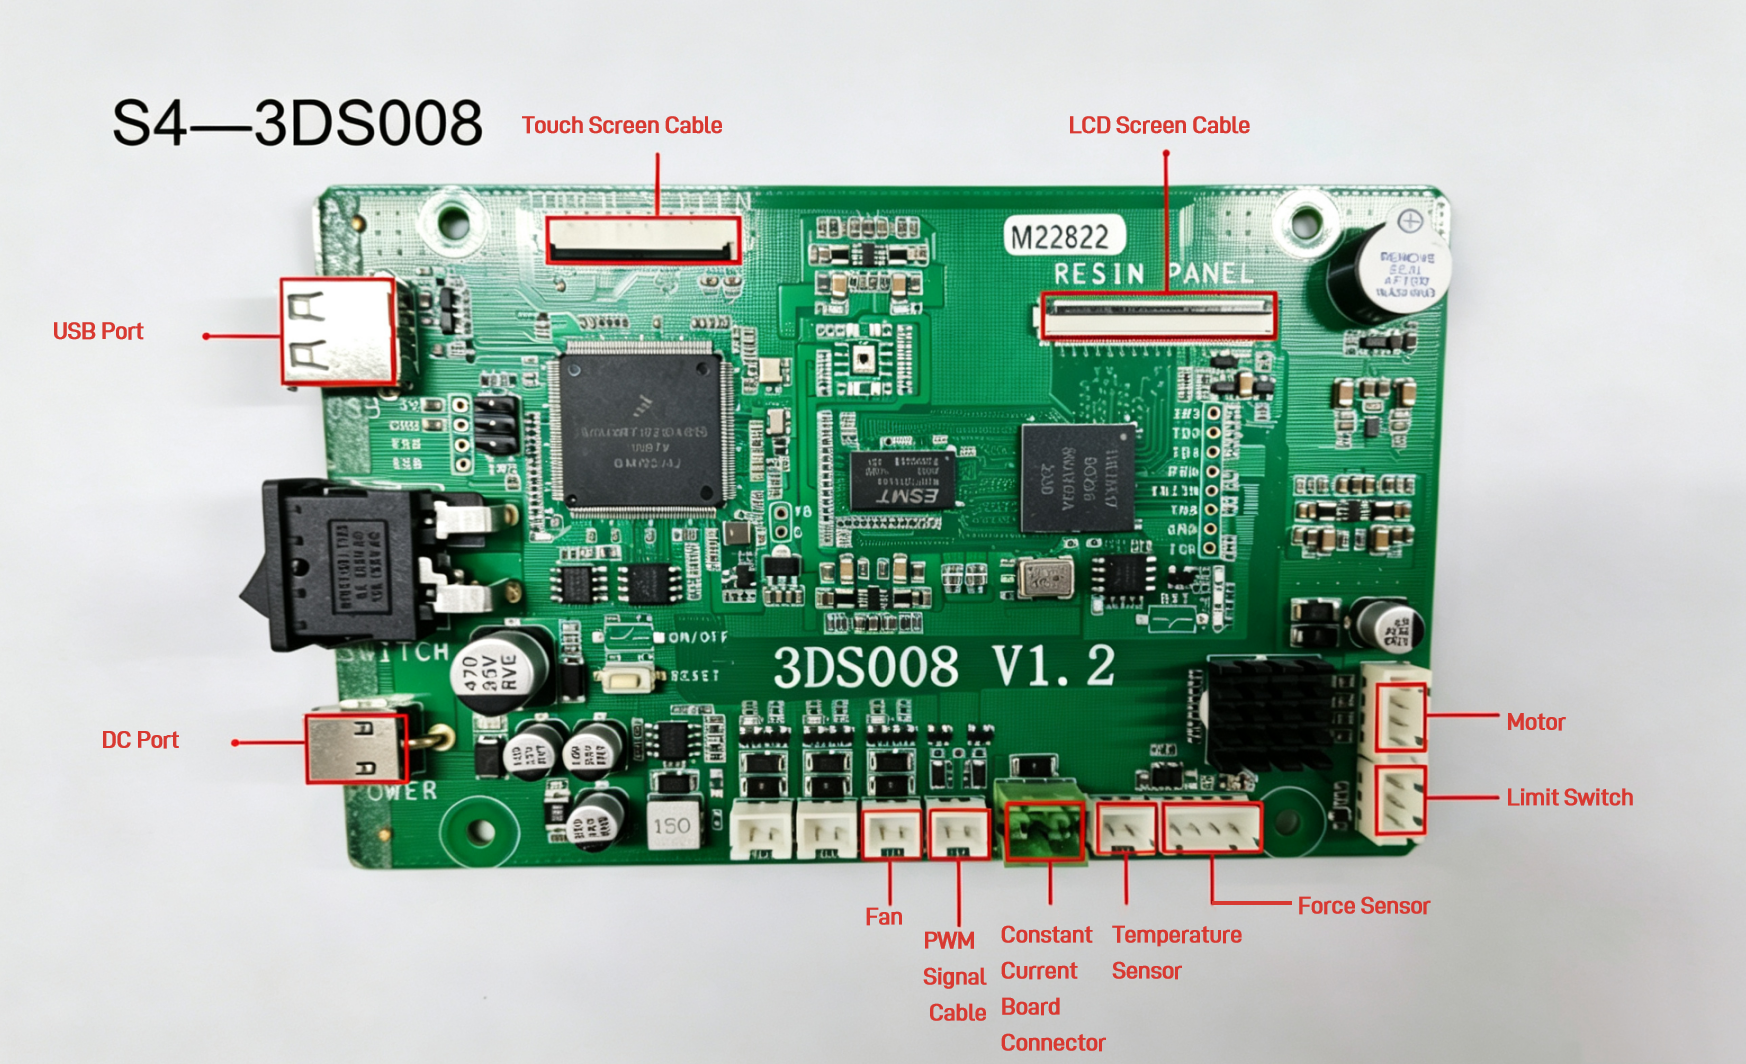
- Disconnect all connectors at the positions marked in the image below.
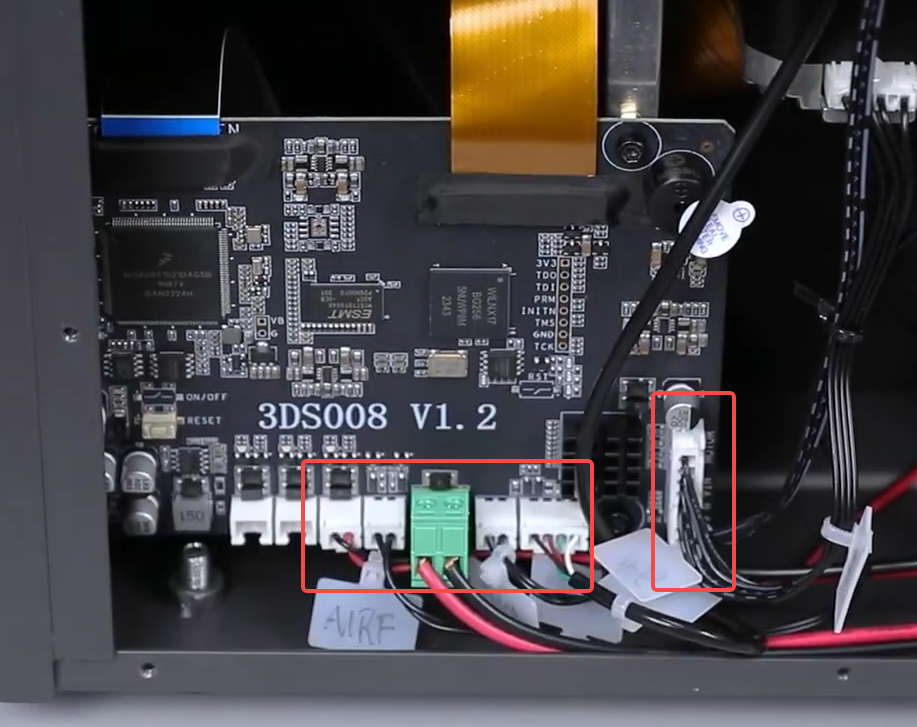
Tip: If the hot-melt adhesive on the plug is difficult to remove, turn off the printer and disconnect the adapter. Apply a small amount of 75% isopropyl alcohol to the adhesive. Wait until the adhesive separates from the plug, then carefully remove the adhesive and disconnect the plug.
- Connect the adapter to the printer and turn on the power switch.
- If the touch screen turns on normally, turn off the printer and reconnect only one component at a time. After reconnecting each component, power on the printer again and check the status of the touch screen. Repeat this process until you identify the component that causes the touch screen to stop turning on.
- If the touch screen stops turning on after reconnecting a specific component, the component, its cable, or the corresponding port may be faulty. Record the corresponding port name and contact our technical support team for further assistance.
¶ Contact Technical Support
If you encounter any issues during troubleshooting, contact our technical support team and provide the results of Steps 1–7.
- After removing the USB flash drive and restarting the printer, does the touch screen turn on?
- Is the adapter output voltage normal? Does the touch screen turn on when using the spare adapter?
- Does the touch screen turn on after updating the firmware?
- Does the touch screen turn on after reconnecting the touch screen cable on the touch screen side?
- Does the touch screen turn on after reconnecting the touch screen cable on the mainboard side?
- Does the mainboard indicator light turn on normally after powering on the printer?
- After disconnecting all cables except those for the touch screen, power supply, and LCD screen, does the touch screen turn on?When reconnecting the components one by one, after which port is connected does the touch screen stop turning on?
¶ Help us improve
If you have any ideas about the wiki pages, please let us know via ELEGOO official feedback channel