¶ Fault Phenomena:
- During the power-on self-test or manual self-test, the system reports a "Z-axis motor status" error.
- When manually controlling the motor to rise or lower, the motor fails to move correctly, makes noise, or does not respond at all.
¶ Fault Causes:
- Resin leakage and curing inside the motor
- Poor contact of the motor connector
- Motor failure
- Mainboard failure
¶ Tools Required for Troubleshooting:
- 2.5mm hex screwdriver
- 2.0mm hex screwdriver
¶ Troubleshooting Steps:
¶ 1. Check for cured resin in the motor area
If resin has leaked into the motor, it may cause the motor to burn out, posing a safety hazard. It is recommended to replace the motor with a new one.
.png)
¶ 2. Check the screws securing the motor/anti-backlash nut
Inspect whether the screws at the marked positions are loose. If loose, tighten them clockwise.
.png)
.png)
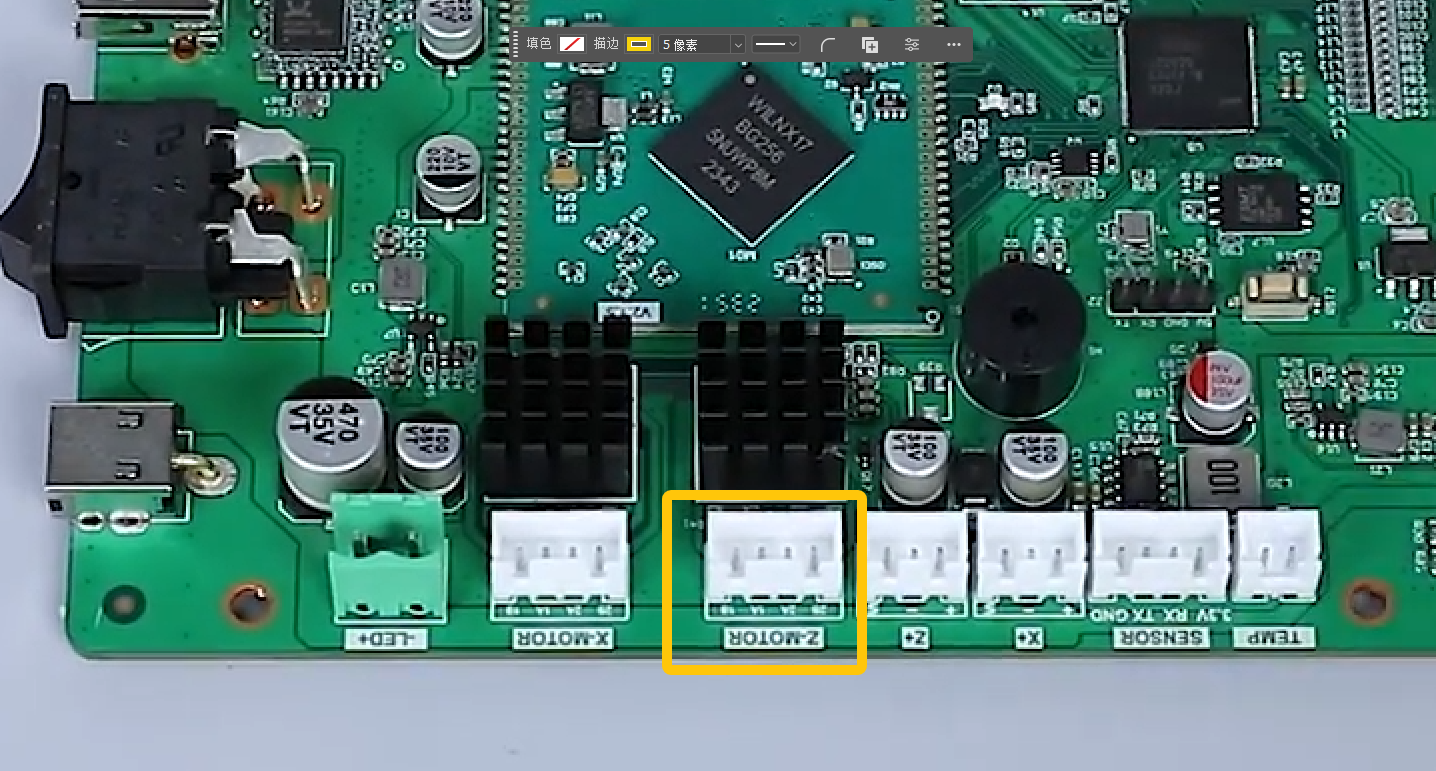
¶ 3. Check the Z-motor connector
a. Turn off the printer power switch and unplug the adapter.
b. Remove the screws securing the rear panel and take off the rear panel.
.png)
c. Reconnect the Z-motor connector.
.png)
¶ 4. Check for screw rod deformation and lack of lubrication on the guide rails
a. Inspect the surface of the screw rod and guide rails for deformation or damage.
b. The screw rod and guide rails require regular cleaning and lubrication. It is recommended to clean their surfaces with a lint-free cloth and then apply grease to them.
.png)
¶ 5. Check if the spring cable is tangled
The spring cable is located at the marked position. If it is tangled, refer to the video below to reinstall it.
Video link: https://www.youtube.com/watch?v=9Xh4VSeqhSY
.png)
.png)
¶ 6. Loosen the anti-backlash nut to test the Z-motor
a. Use a 2.5mm screwdriver to remove the two screws shown below.
.png)
b. Support the cantilever arm and temporarily place it at the bottom.
.png)
c. Control the Z-axis movement via the touchscreen.
- If the Z-motor moves, the anti-backlash nut needs to be replaced.
- If the Z-motor does not move, the mainboard or Z-motor may be damaged. Proceed to step 7 for further troubleshooting.
- Test whether the Z-motor is faulty
a. Turn off the printer power switch and unplug the power cord.
b. Unplug both the X and Z motor connectors.
.png)
c. Insert the X-motor connector into the Z-socket.
d. Plug in the power cord and turn on the printer power switch. Wait for the printer to self-test.
- If the middle plate moves upward during the Z self-test, the Z-motor or motor cable is faulty. Replace the Z-motor and Z-motor cable.
Immediately turn off the printer power when you confirm the middle plate is moving upward to prevent the X-motor from continuing to run and causing damage to components.
.gif)
- If the middle plate remains stationary during the Z self-test, the mainboard is damaged and needs to be replaced.