¶ Fault Symptoms
- Abnormal noise occurs during printing.
- Abnormal noise or vibration occurs during X/Y-axis movement.
- Abnormal sounds occur during homing or idle movement.
- Stuttering, vibration, or step loss occurs during movement.
¶ Possible Causes
- Incorrect timing belt tension.
- X/Y-axis motor cable damaged, connector loose, or motor damaged.
- Damaged mainboard port.
¶ Required Tools
- 2.0 mm Allen key
¶ Troubleshooting Steps
¶ 1. Identify the Noise Source of the X/Y-axis Motors
Note: This step requires turning on the printer power before performing the following checks and adjustments.
¶ 1. Check the X-axis Motor
- On the touchscreen, tap X-axis homing and check whether abnormal noise occurs.
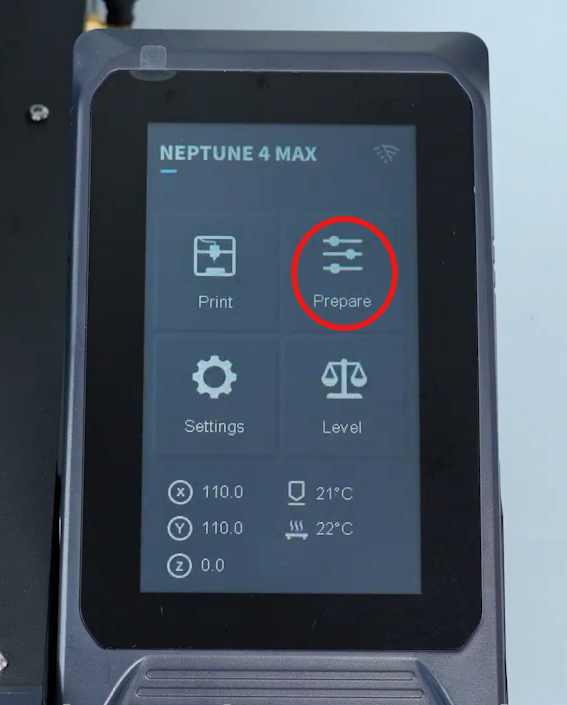
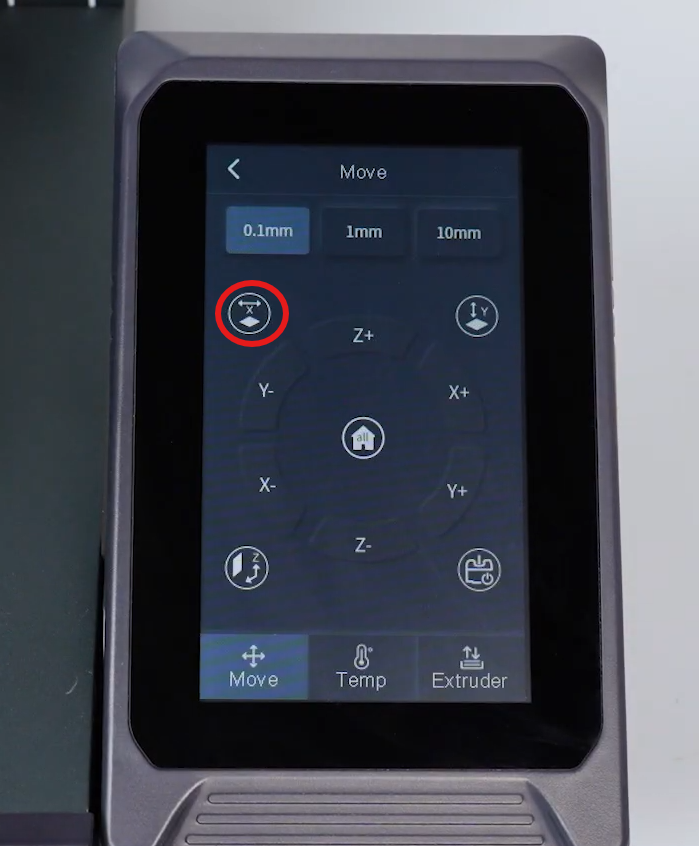
If abnormal noise occurs during X-axis homing, focus on checking the X-axis timing belt, X-axis motor, X-axis motor cable, and X-axis motor port on the mainboard.
¶ 2. Check the Y-axis Motor
- On the touchscreen, tap Y-axis homing and check whether abnormal noise occurs.
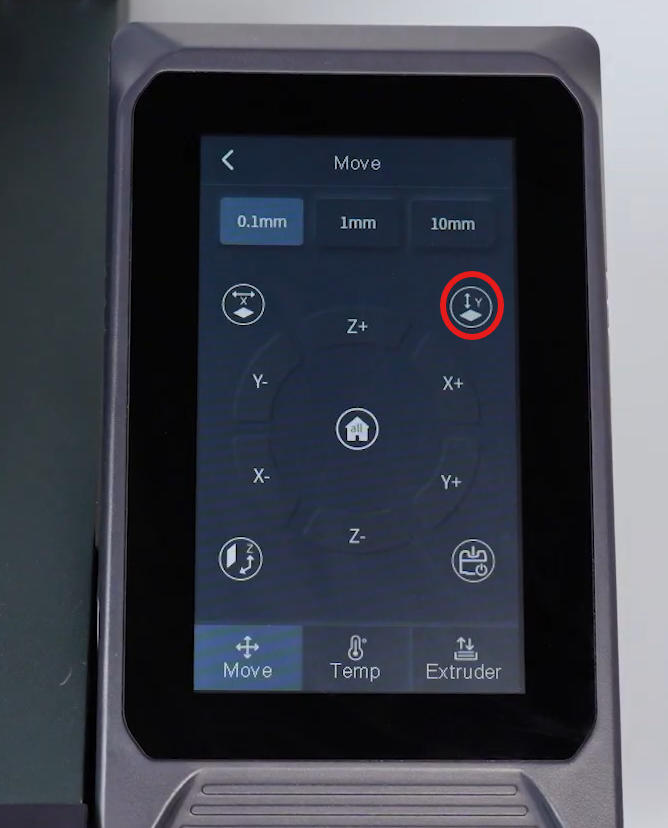
If abnormal noise occurs during Y-axis homing, focus on checking the Y-axis timing belt, Y-axis motor, Y-axis motor cable, and Y-axis motor port on the mainboard.
¶ 2. Check the Tension of the X/Y-axis Timing Belt
Note: Turn off the printer power before performing the following checks and adjustments.
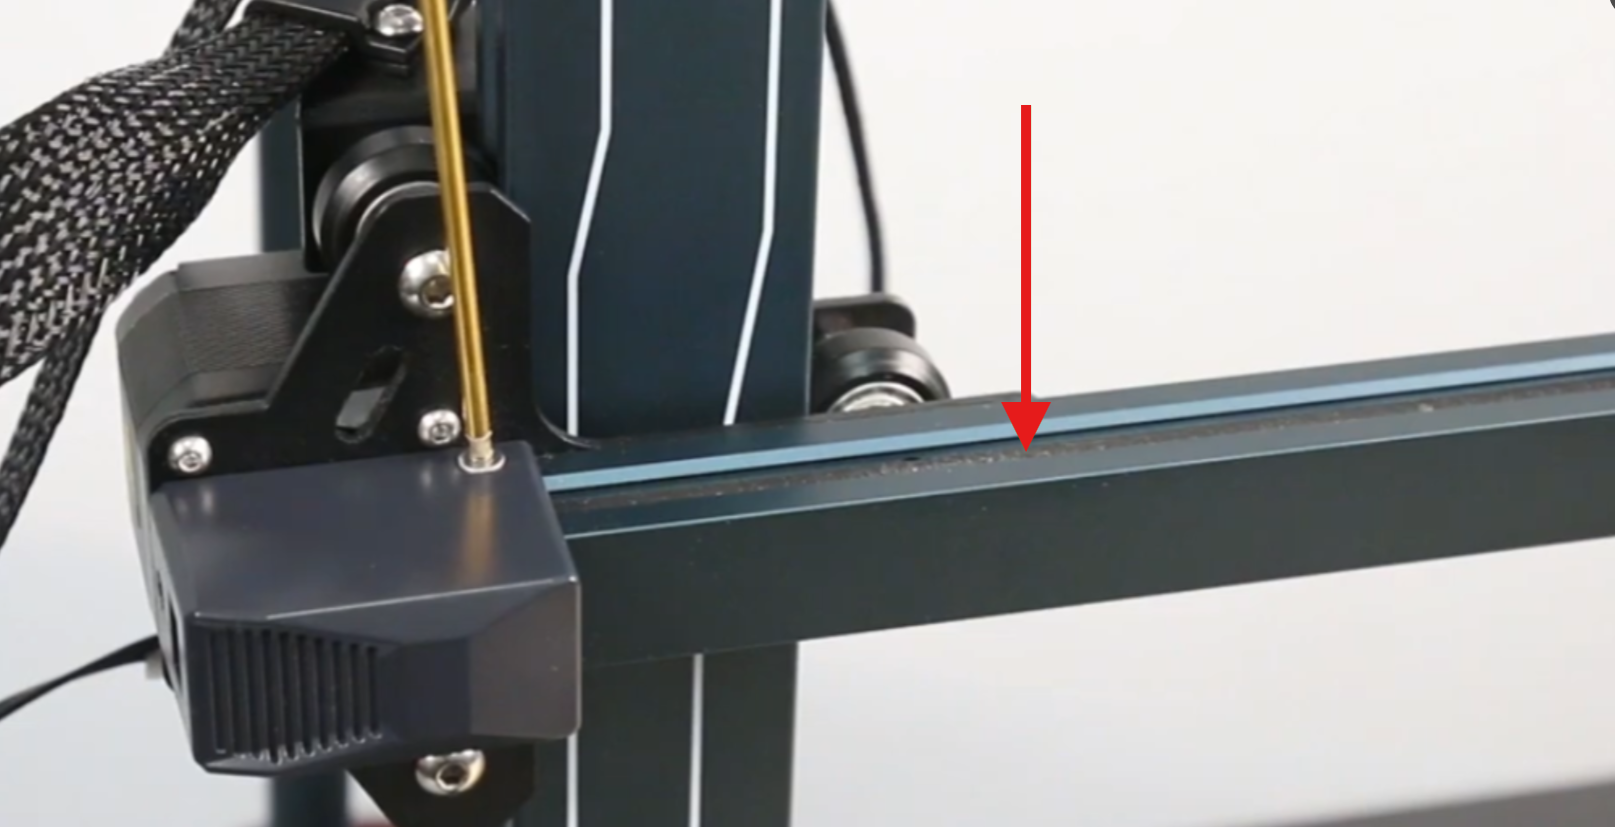
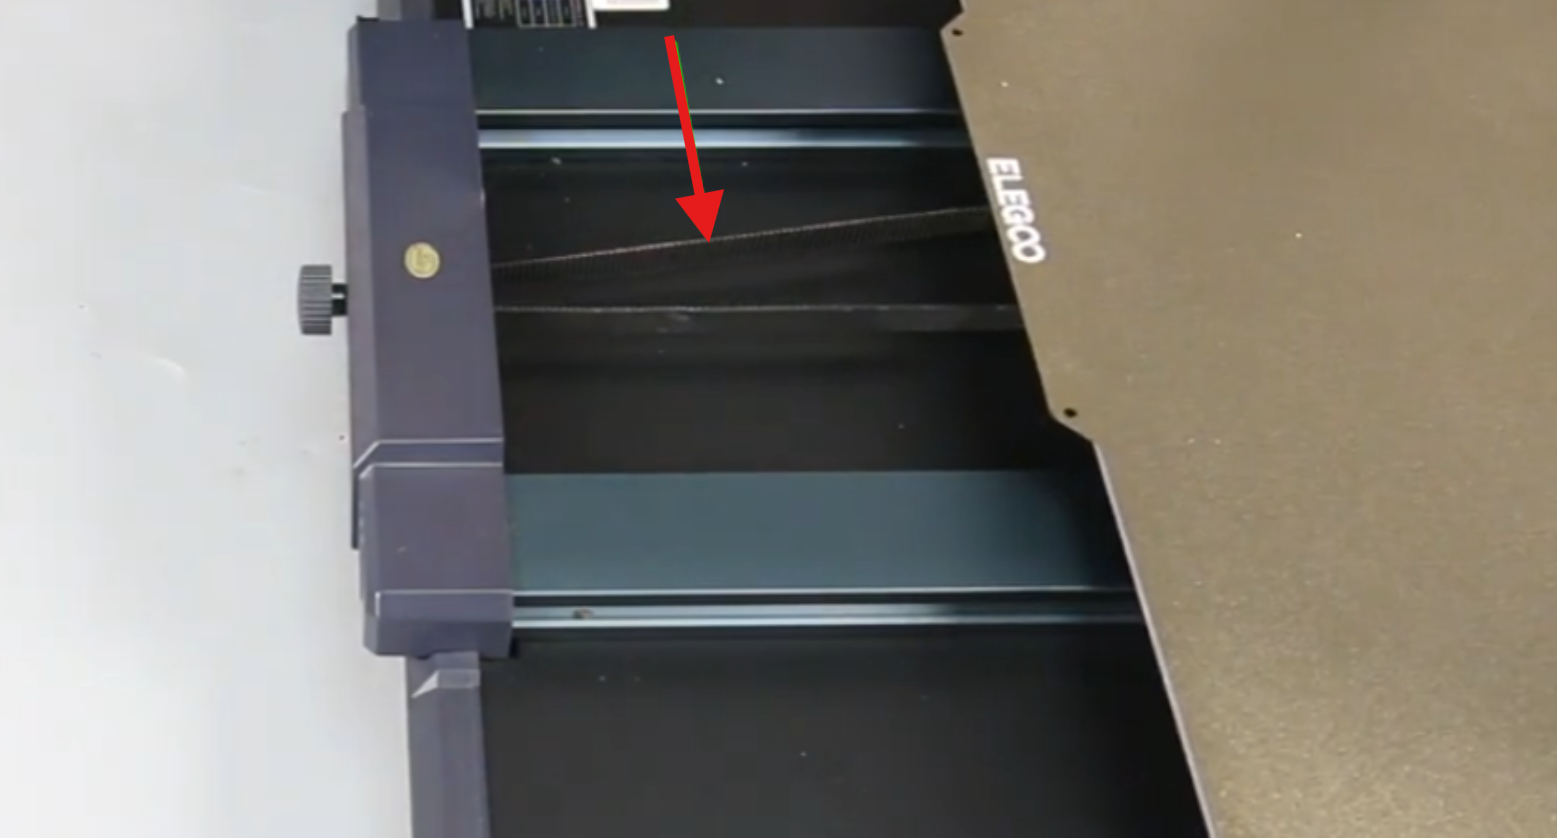
- Please refer to the following timing belt adjustment/replacement videos to check whether the X/Y-axis timing belts are loose and whether the belt tension adjustment components are damaged.
X-axis timing belt replacement video:
https://youtu.be/QMrwGdqvW90
Y-axis timing belt replacement video:
https://youtu.be/ofCnxNq-ZPs
¶ 3. Check the X/Y-axis Motor Cables and Connectors
Note: Turn off the printer power before performing the following checks and adjustments.
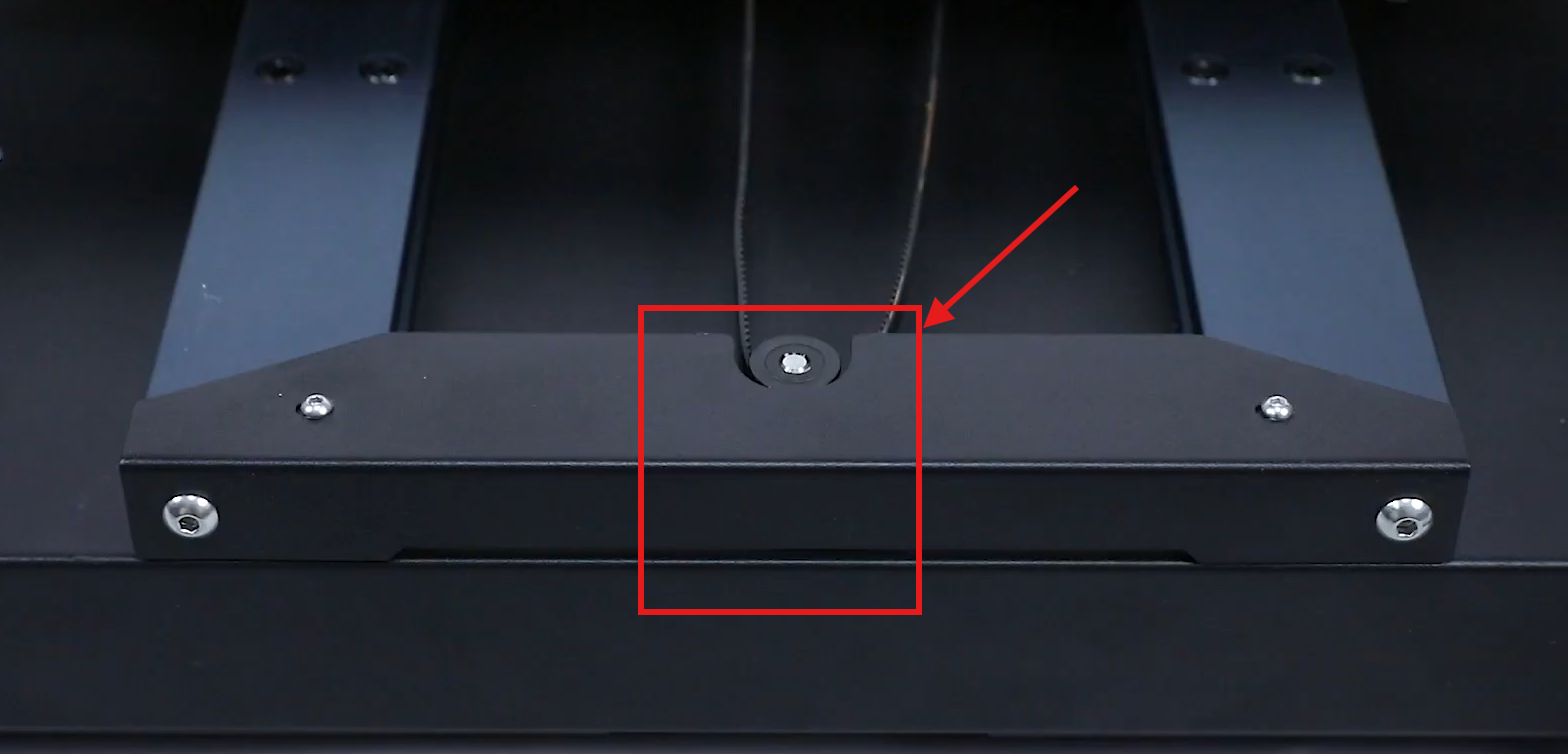
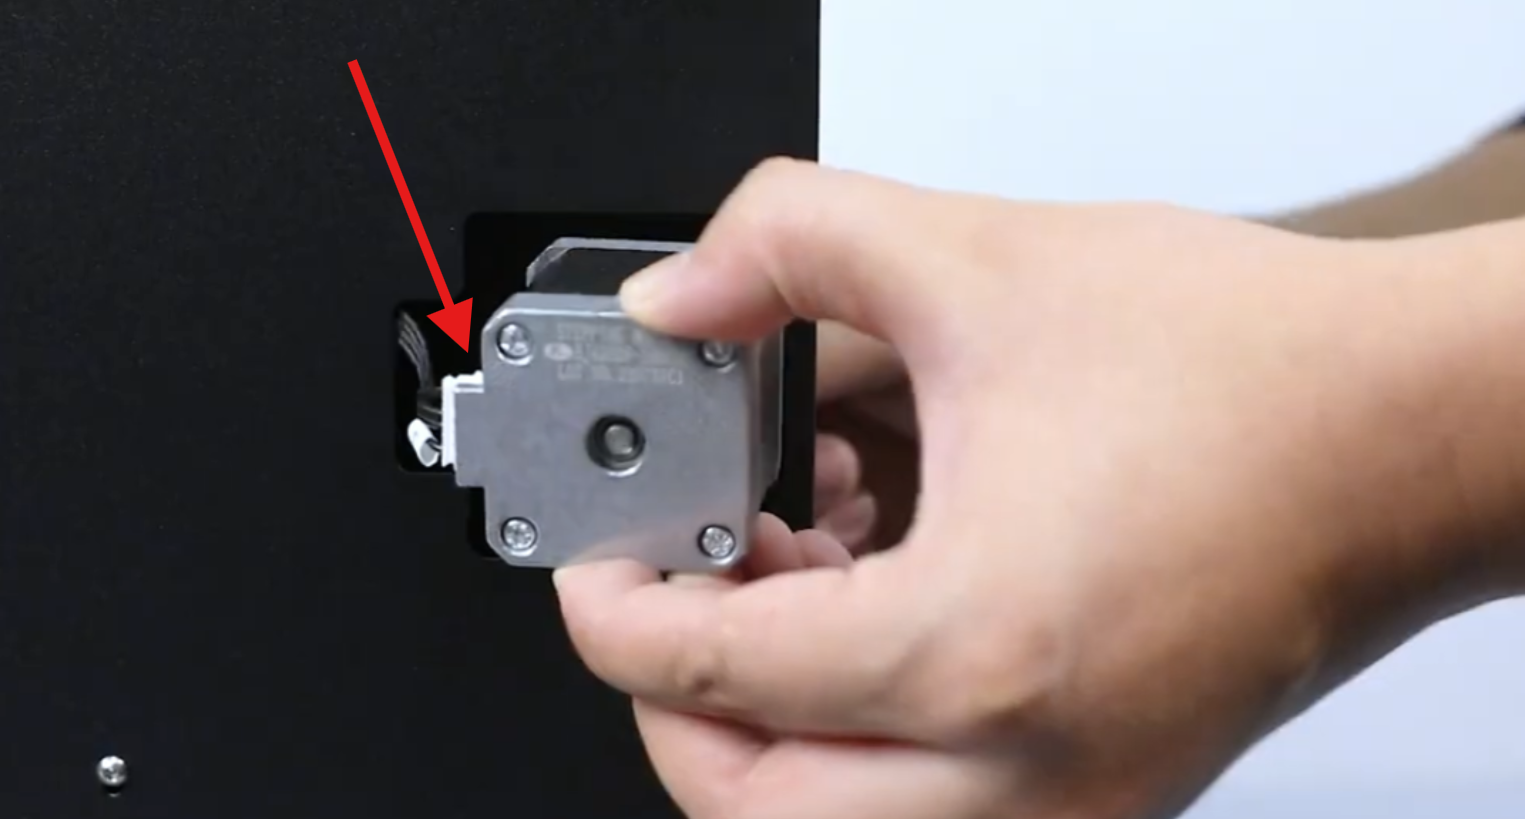
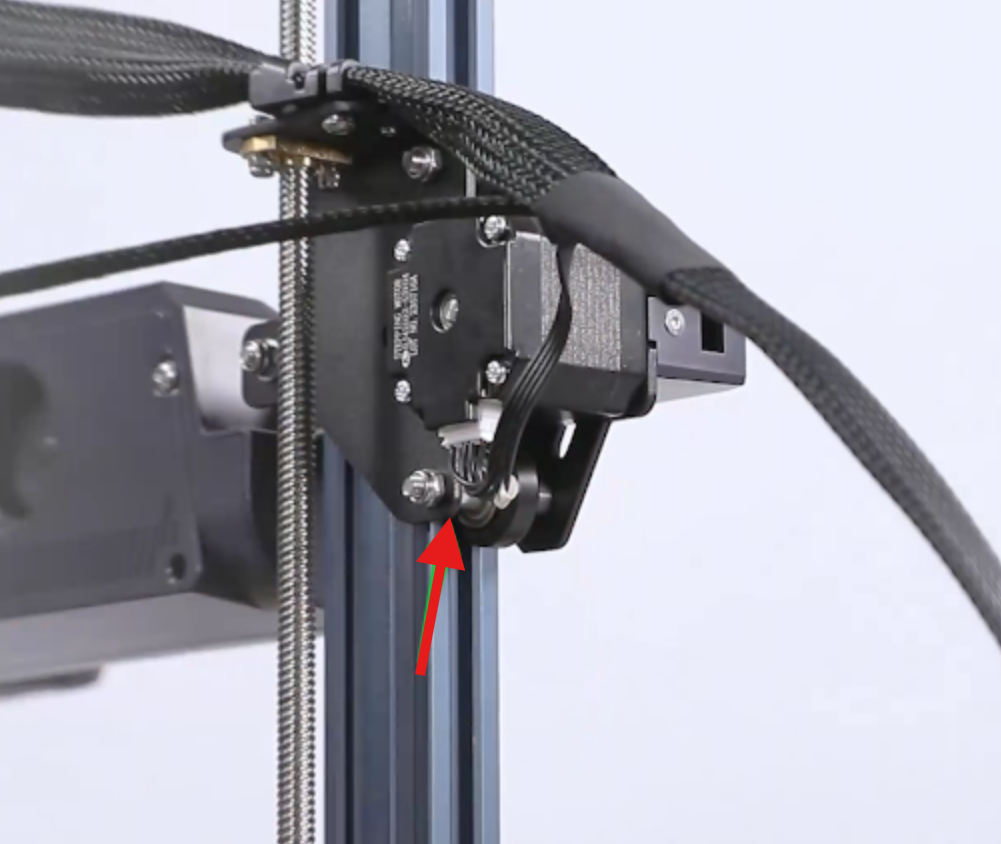
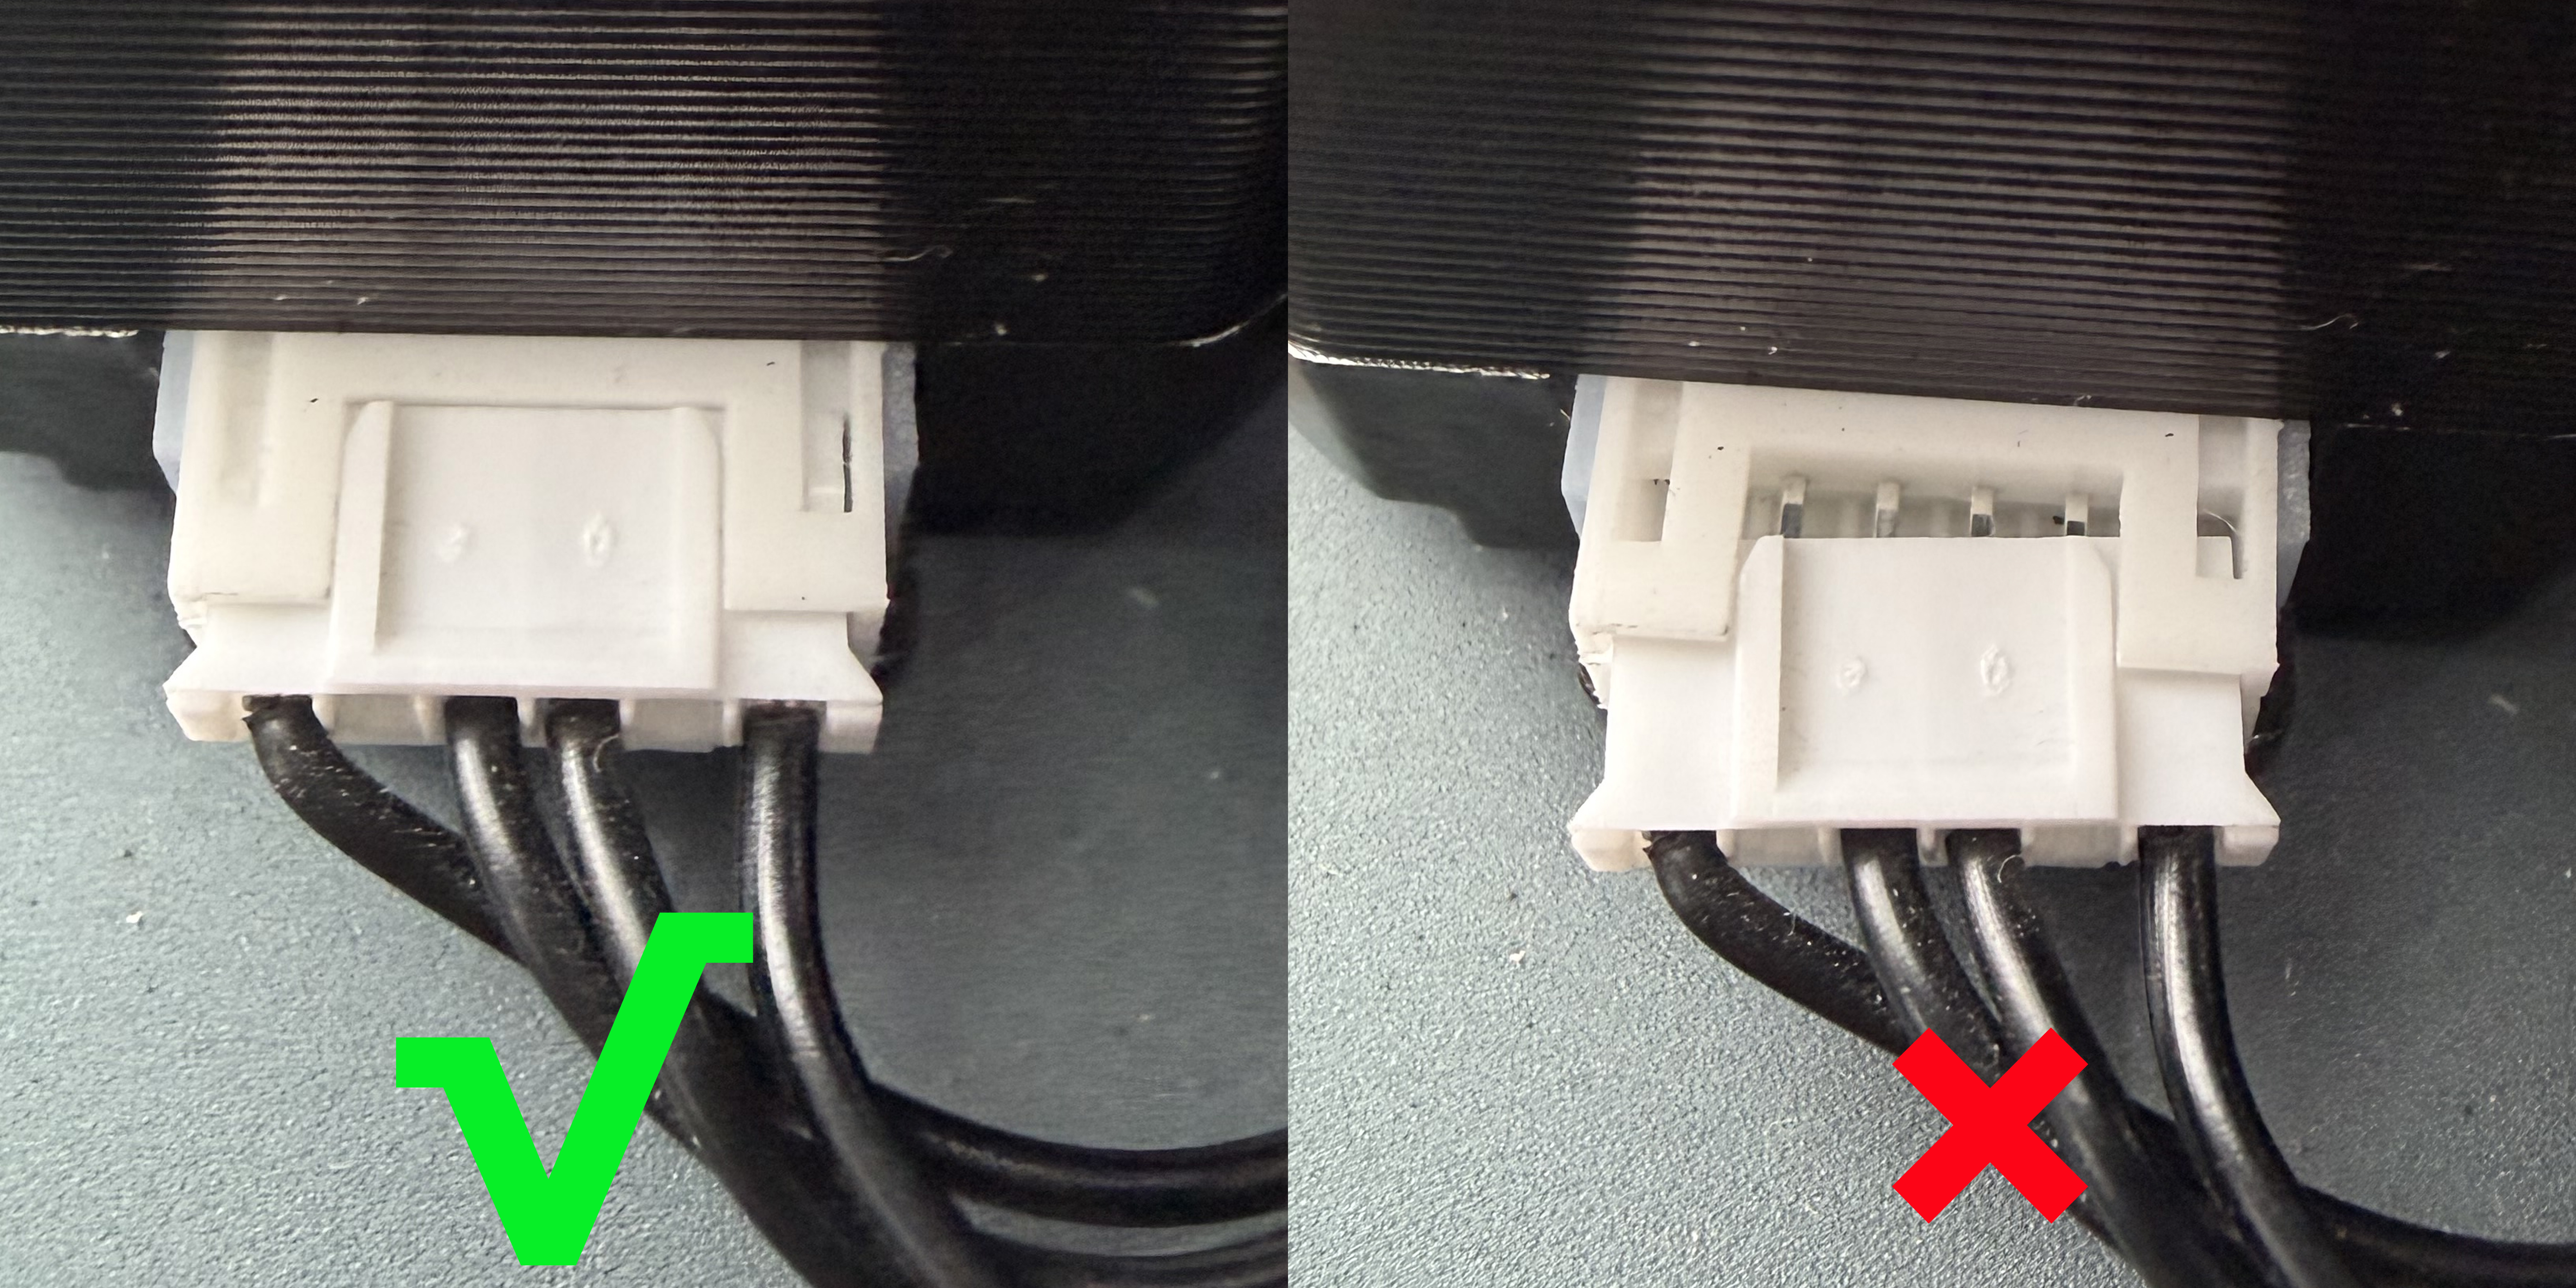
- Check whether the X/Y-axis motor cables are damaged and whether the motor connectors are loose according to the following images.
- When checking the Y-axis motor, place the printer on its side to access the motor position.
¶ 4. Check the X/Y-axis Motor Ports on the Mainboard
Note: Turn off the printer power before performing the following checks and adjustments.
- Remove the bottom cover.
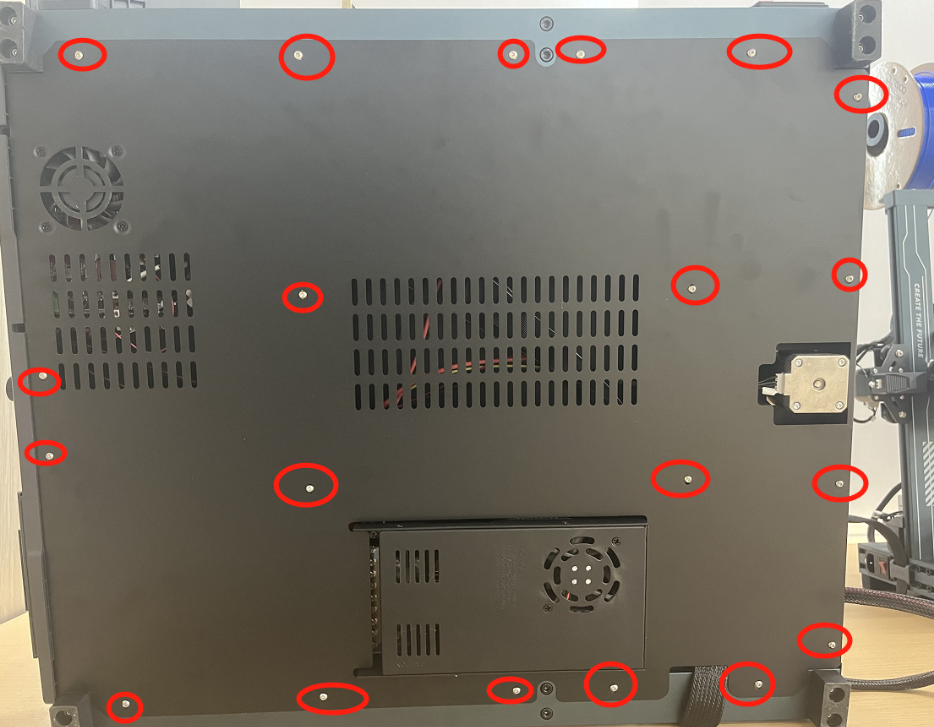
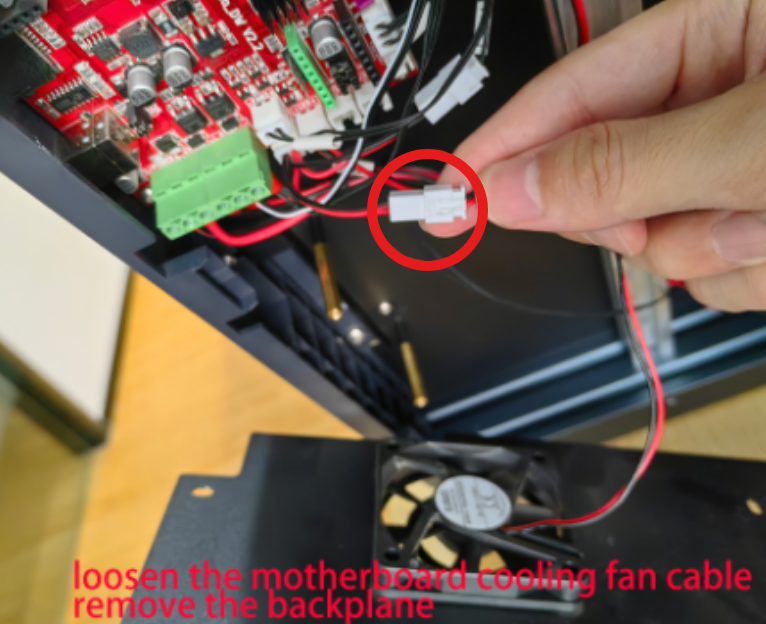
- For easier operation, disconnect the mainboard fan connection cable.
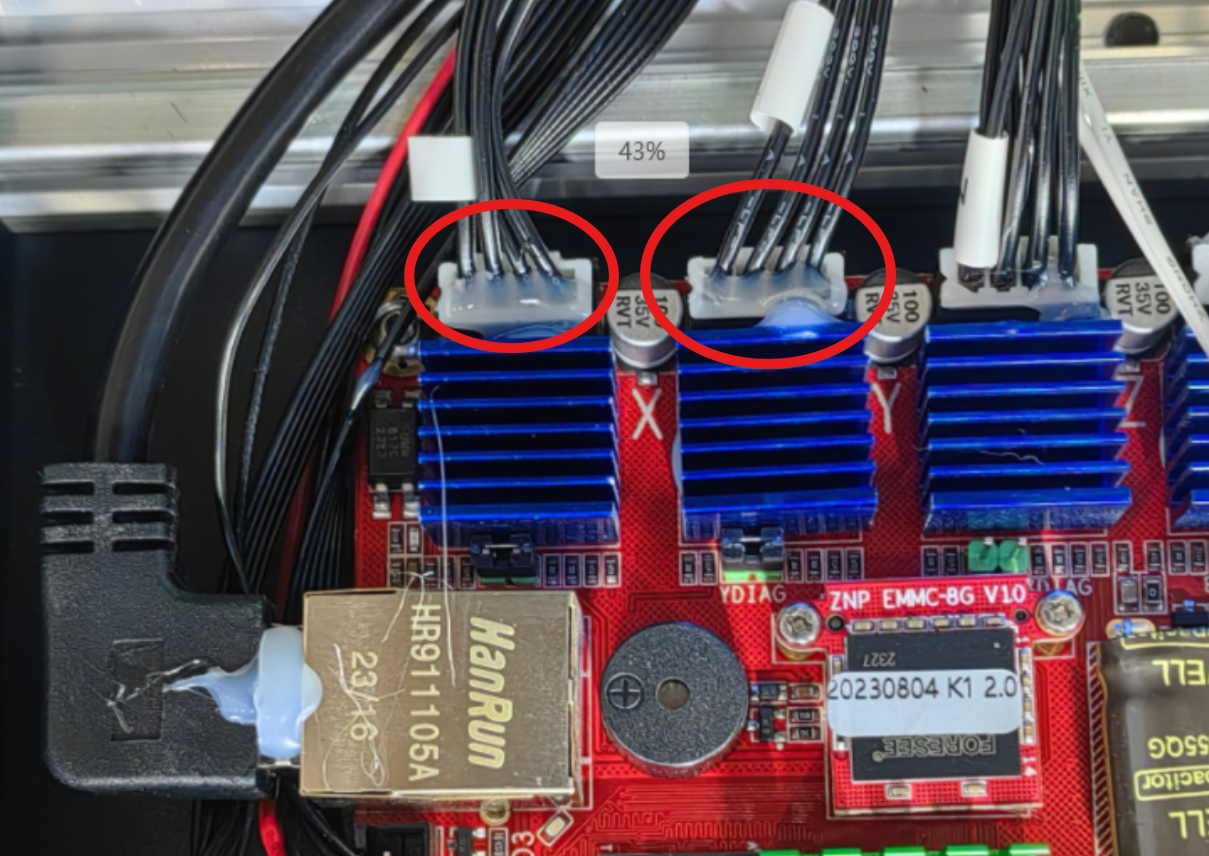
- Check whether the motor connector of the axis generating the noise is loose. It is recommended to reconnect the connector.
Reminder:
The connector has been fixed with hot melt glue before shipment. If no looseness or poor contact is found, do not remove the hot melt glue.
¶ 5. Check the X/Y-axis Motor at the Noise Source
Note: This step requires turning on the printer power before performing the following checks and adjustments.
¶ 1. If the Noise Occurs During X-axis Motor Movement
It is recommended to swap the X-axis motor cable and Z-axis motor cable on the mainboard.
After swapping the cables, turn on the printer again:
- Tap Z+ on the touchscreen to drive the swapped X-axis motor and check whether it operates normally.
- If the X-axis motor operates normally without abnormal noise, the mainboard port is faulty and the mainboard needs to be replaced.
Note:
The Z- movement is unavailable until the printer completes homing.
- If the X-axis motor still produces abnormal noise during operation, the X-axis motor is faulty and needs to be replaced.
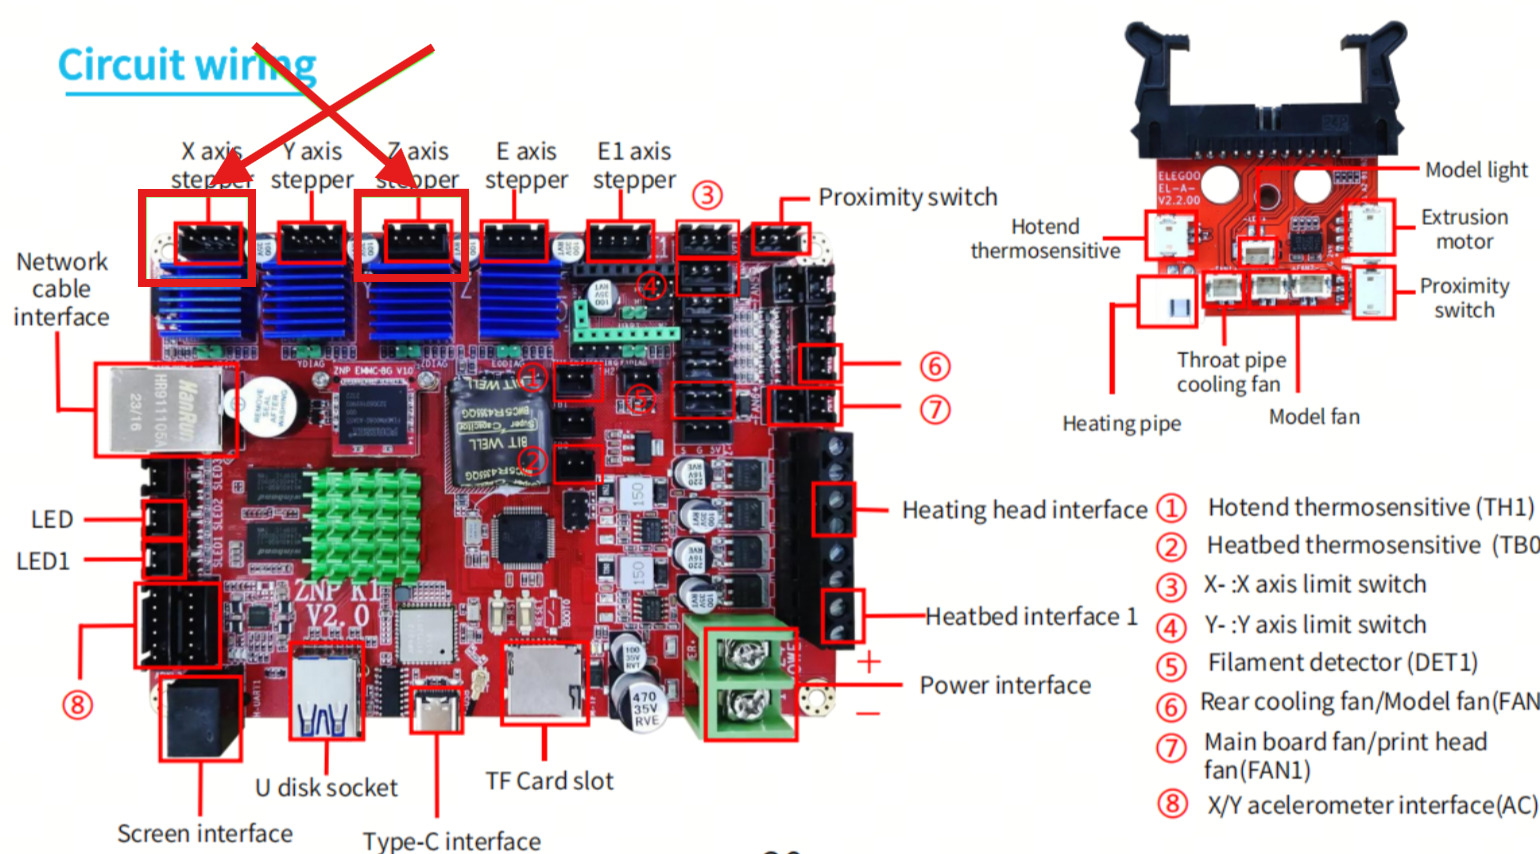
¶ 2. If the Noise Occurs During Y-axis Motor Movement
It is recommended to swap the Y-axis motor cable and Z-axis motor cable on the mainboard.
After swapping the cables, turn on the printer again:
- Tap Z+ on the touchscreen to drive the swapped Y-axis motor and check whether it operates normally.
- If the Y-axis motor operates normally without abnormal noise, the mainboard port is faulty and the mainboard needs to be replaced.
Note:
The Z- movement is unavailable until the printer completes homing.
- If the Y-axis motor still produces abnormal noise during operation, the Y-axis motor is faulty and needs to be replaced.
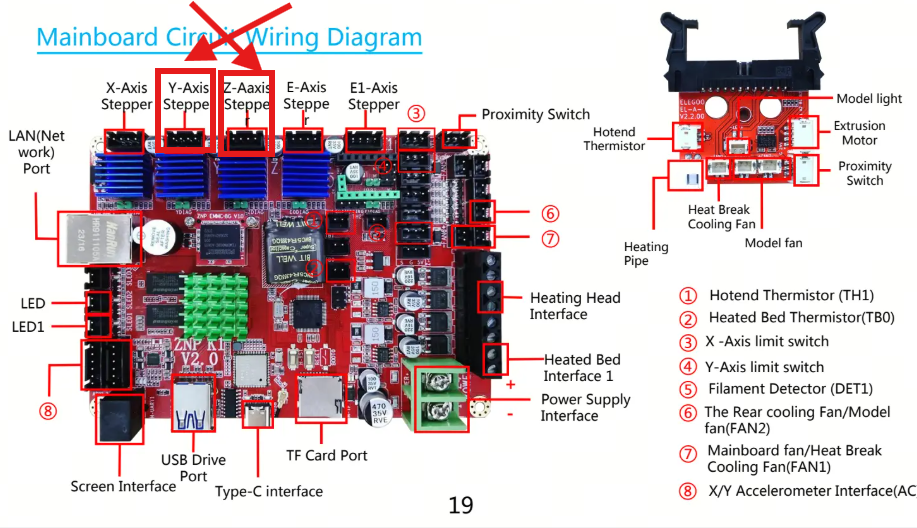
¶ Issue Not Resolved
If the abnormal motor noise issue is still not resolved after following the above troubleshooting steps, please provide the following information and contact our technical support team (3dp@elegoo.com) for further assistance:
- Video showing individual X/Y-axis homing.
- Video showing abnormal noise during operation.
- Status of the X/Y-axis timing belt tension.
- Whether the X/Y-axis motor cable is damaged and whether the X/Y-axis motor connector is loose.
- Whether the X/Y-axis motor cables on the mainboard side are damaged and whether the motor connectors are loose.
- Motor operation status after swapping the motor cables on the mainboard side.
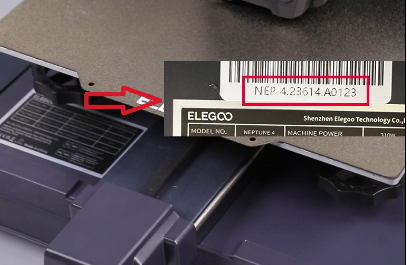
- Provide the machine SN code.
SN code format:
NEP X.XXXXX.XXXXX
¶ Help us improve
If you have any ideas about the wiki pages, please let us know via ELEGOO official feedback channel