¶ Fault Symptoms
After turning on the printer power switch, the touch screen does not light up.
¶ Possible Causes
- Incorrect power supply voltage setting
- Blown fuse
- Loose touch screen ribbon cable
- Mainboard failure
- Power supply failure
- Touch screen failure
¶ Required Tools
- 2.0mm Allen key
- Multimeter
¶ Troubleshooting Steps
¶ 1. Check the Power Supply Voltage
Reminder:
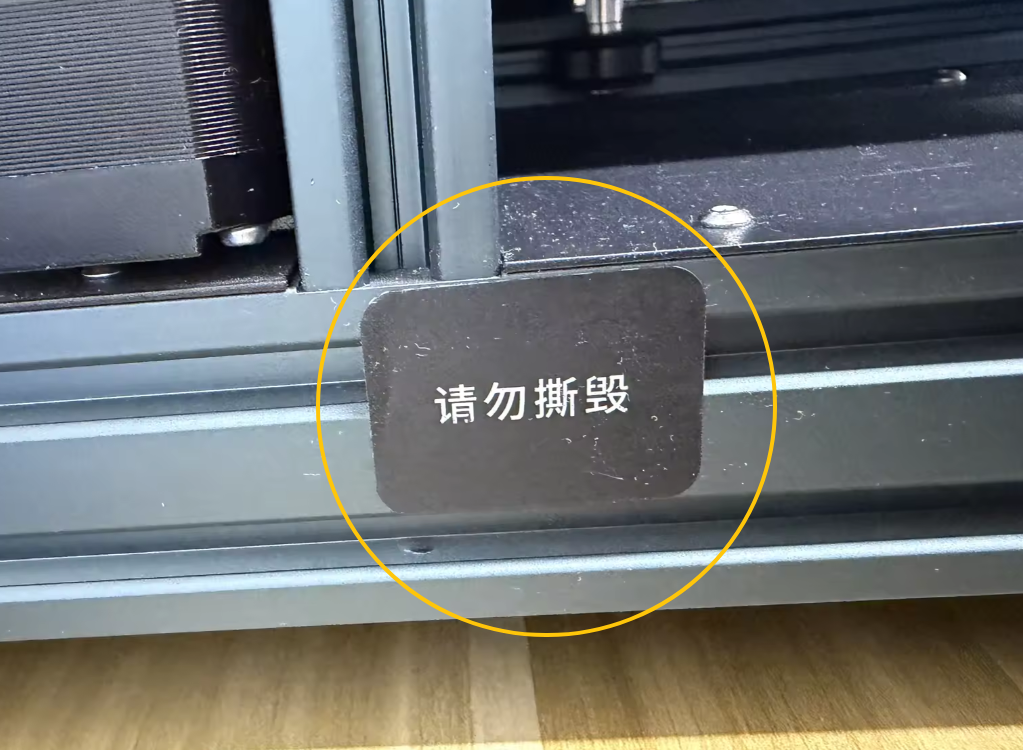
Some batches of printers have the power supply voltage preset before shipment. If a sticker is attached to the voltage selector switch, skip this step and proceed to Step 2 for further troubleshooting.
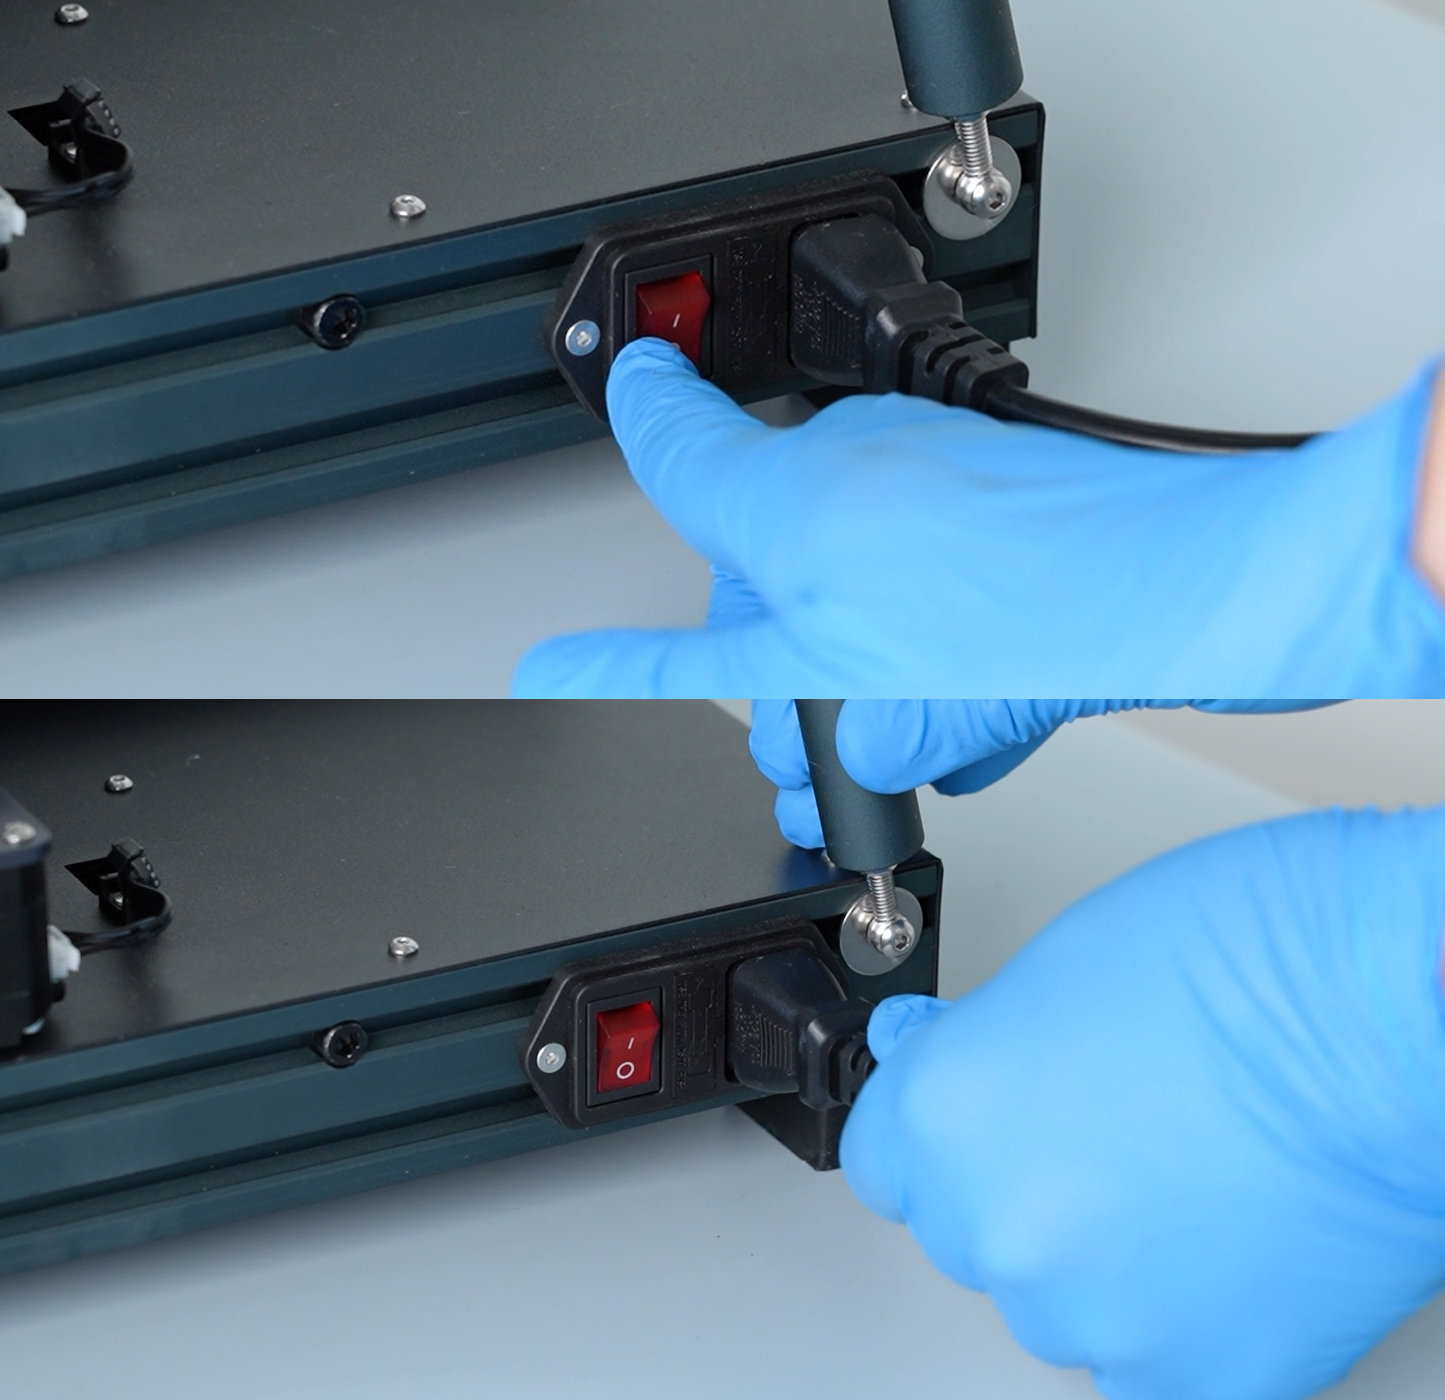
¶ 1. Turn off the printer power switch and unplug the power cord.
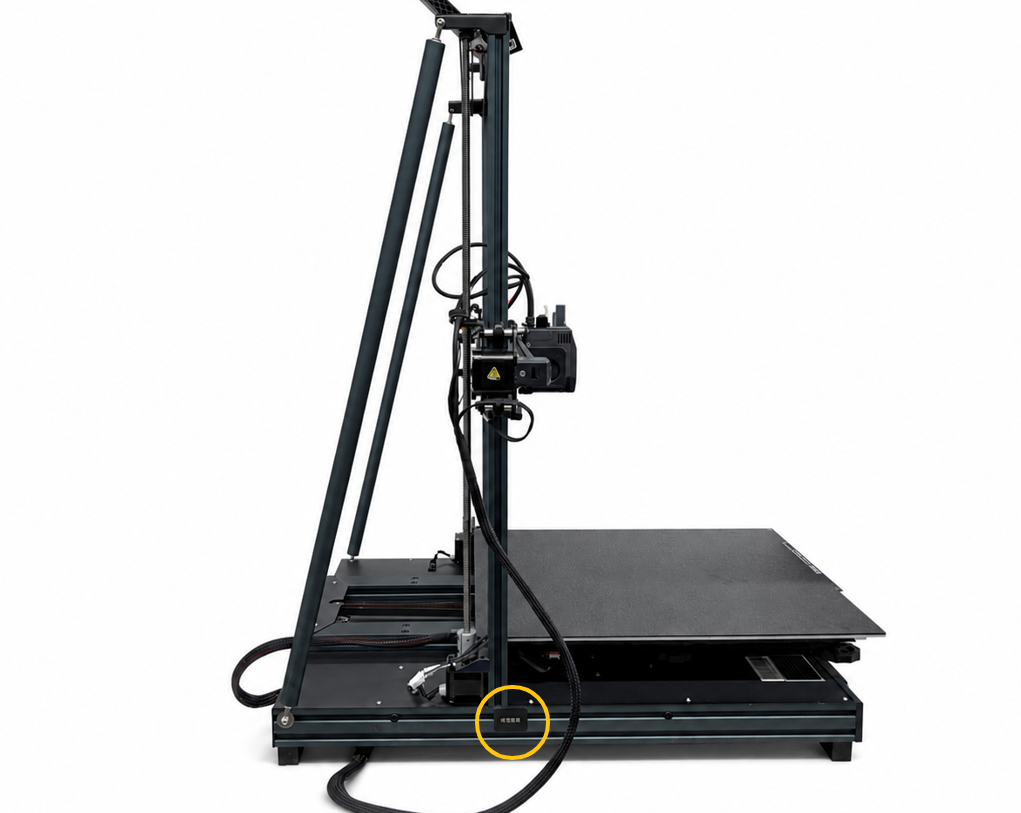
¶ 2. Locate the power supply voltage selector switch on the left side of the printer.
Reminder:
The adjustment switch is located deep inside the power supply. If it is difficult to see the voltage setting, use a phone flashlight or a flashlight to illuminate this area.
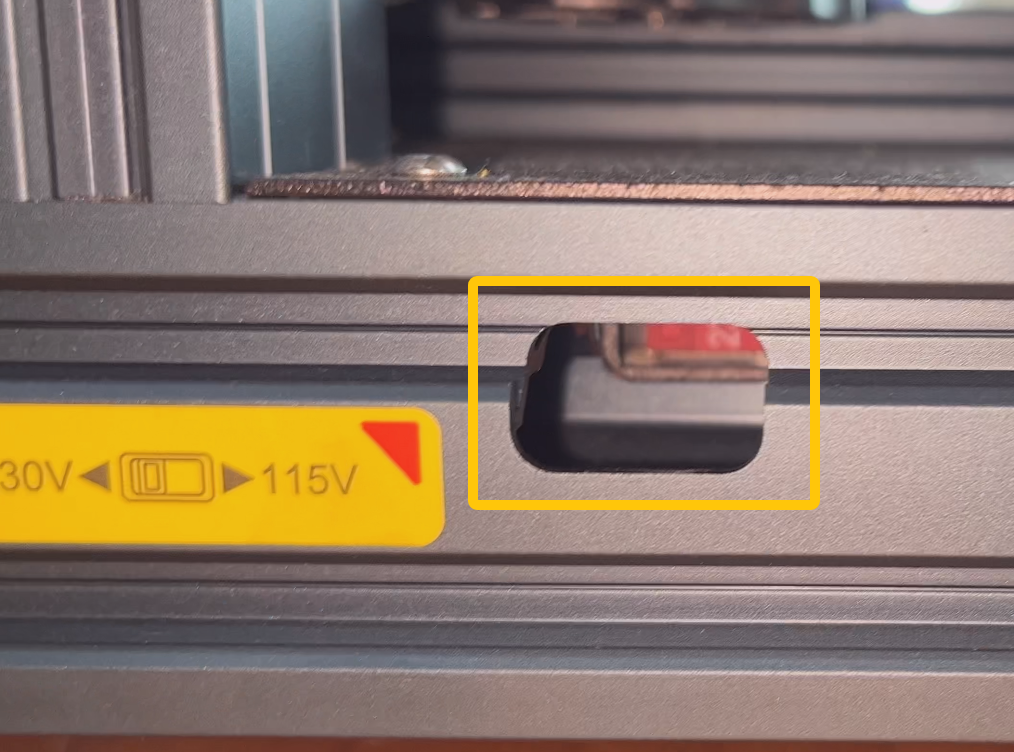
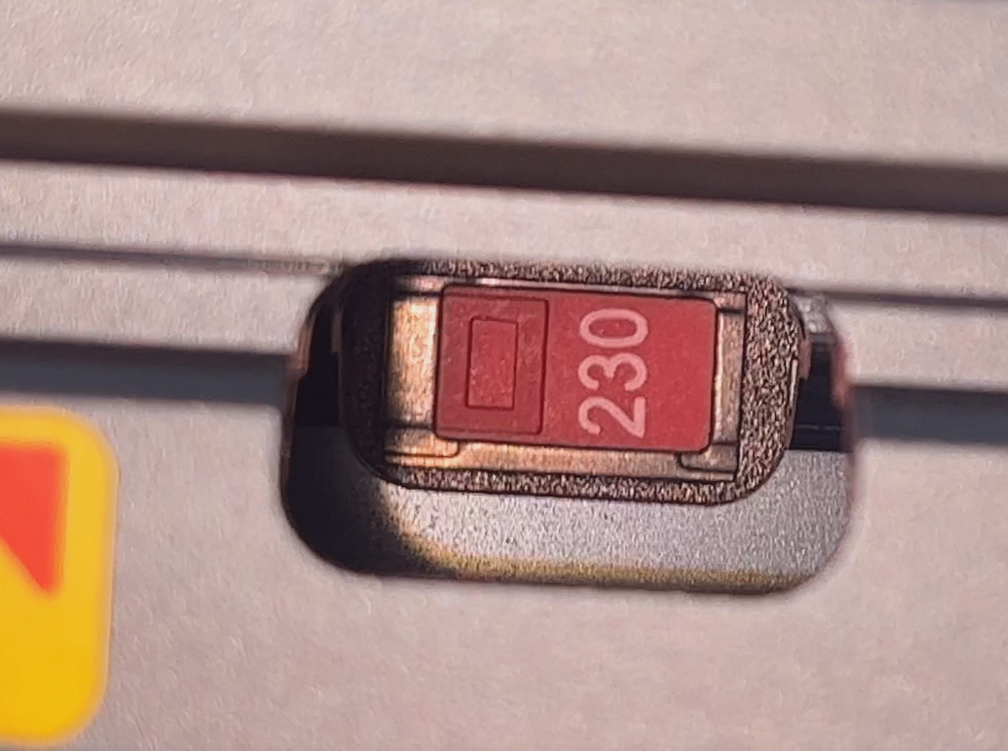
¶ 3. Check whether the power supply voltage is set correctly.
Adjust the voltage according to the local mains voltage.
- If the standard mains voltage is 110V, adjust it to 115V.
- If the standard mains voltage is 220V, adjust it to 230V.
Reminder:
Before adjusting the voltage, make sure to turn off the power switch and unplug the power cable.
- If the power supply voltage is set incorrectly, adjust it to the correct voltage setting and reconnect the printer to test.
- If the power supply voltage is set correctly, continue with the following troubleshooting steps.
¶ 2. Check the Fuse
¶ 1. Turn off the power switch and unplug the power cord.
¶ 2. Remove the fuse as shown below.
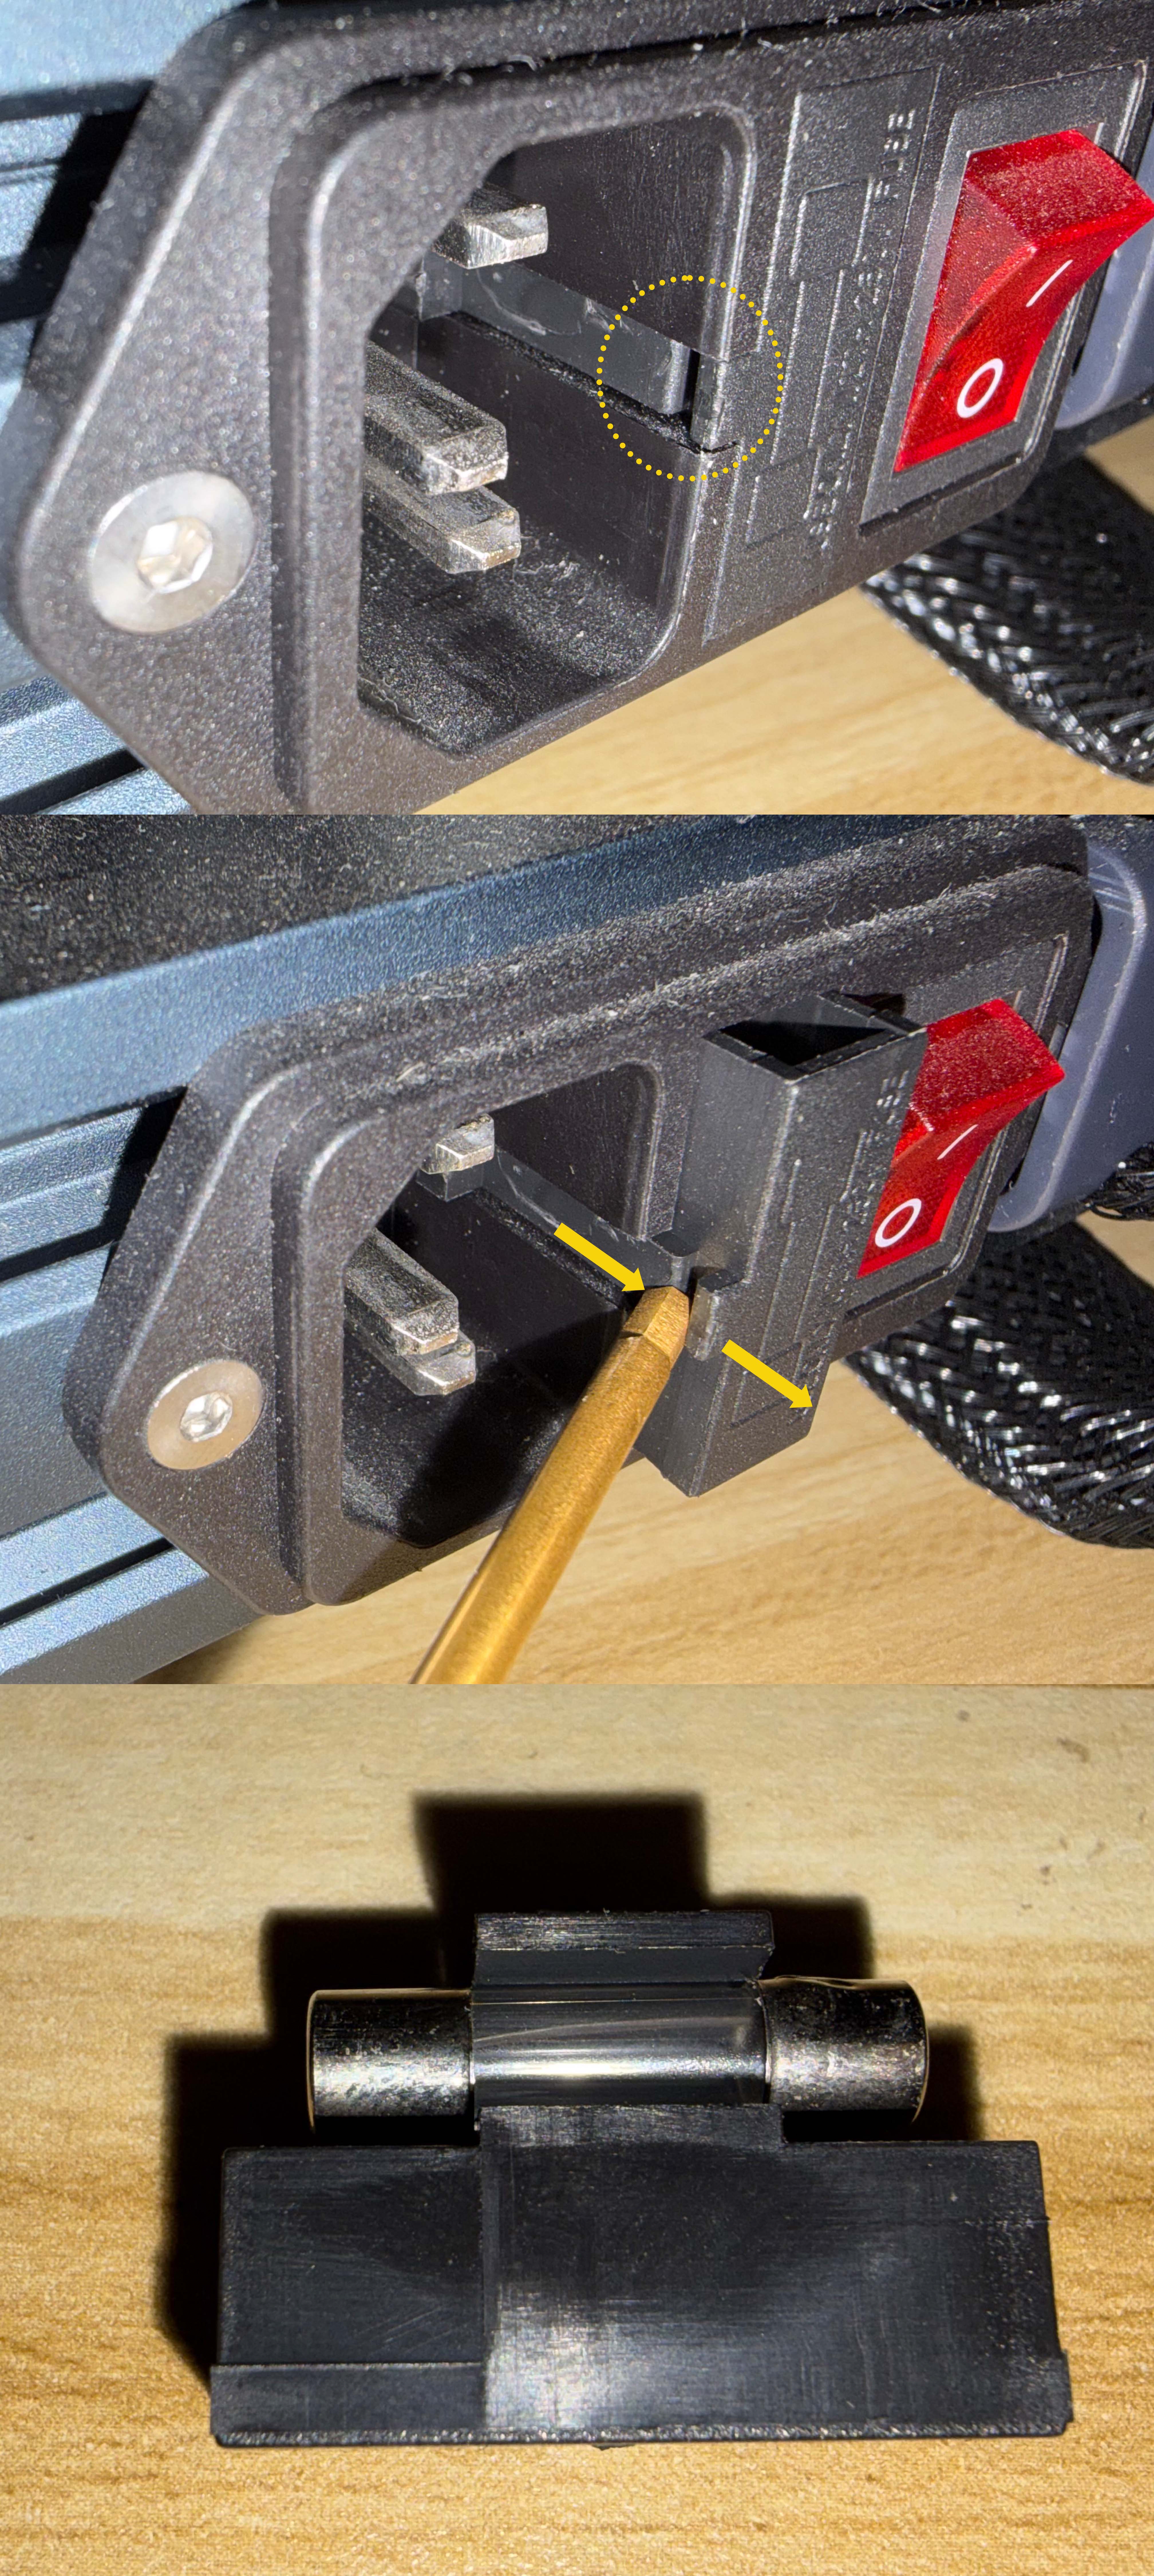
¶ 3. Check whether the fuse is blown.
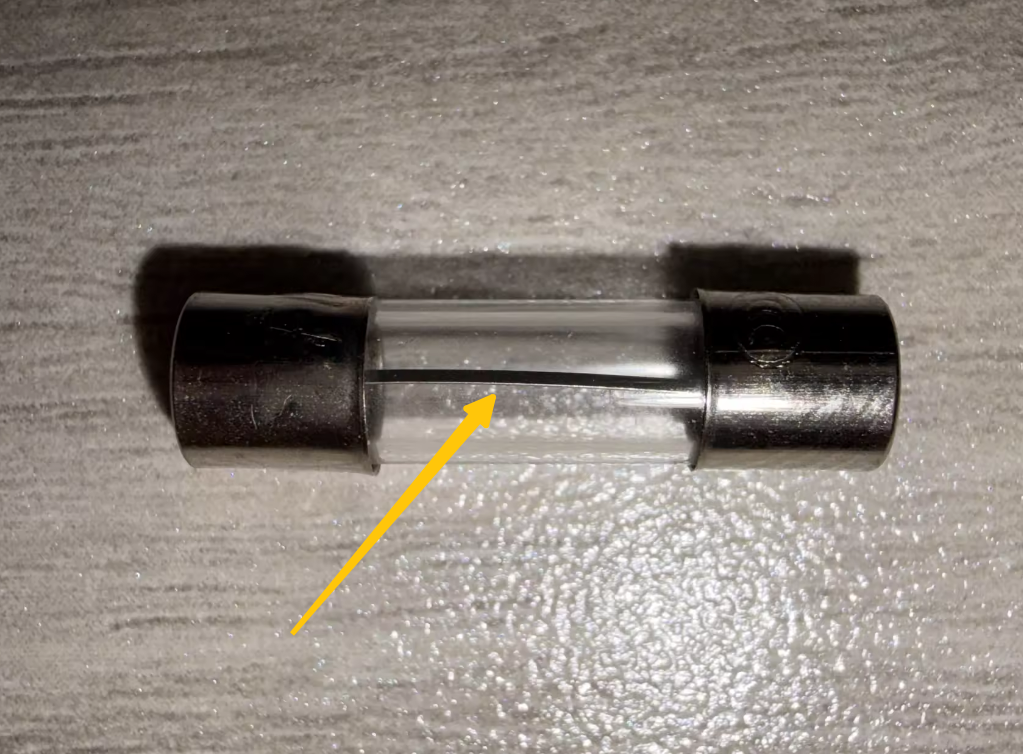
- If the fuse is damaged, replace it with a new fuse.
Reminder:
The fuse specification is AC 250V/10A. If the fuse is damaged, a replacement fuse can be purchased from a hardware store or Amazon.
- If the fuse is normal, continue with the following troubleshooting steps.
¶ 3. Check the Touch Screen Ribbon Cable
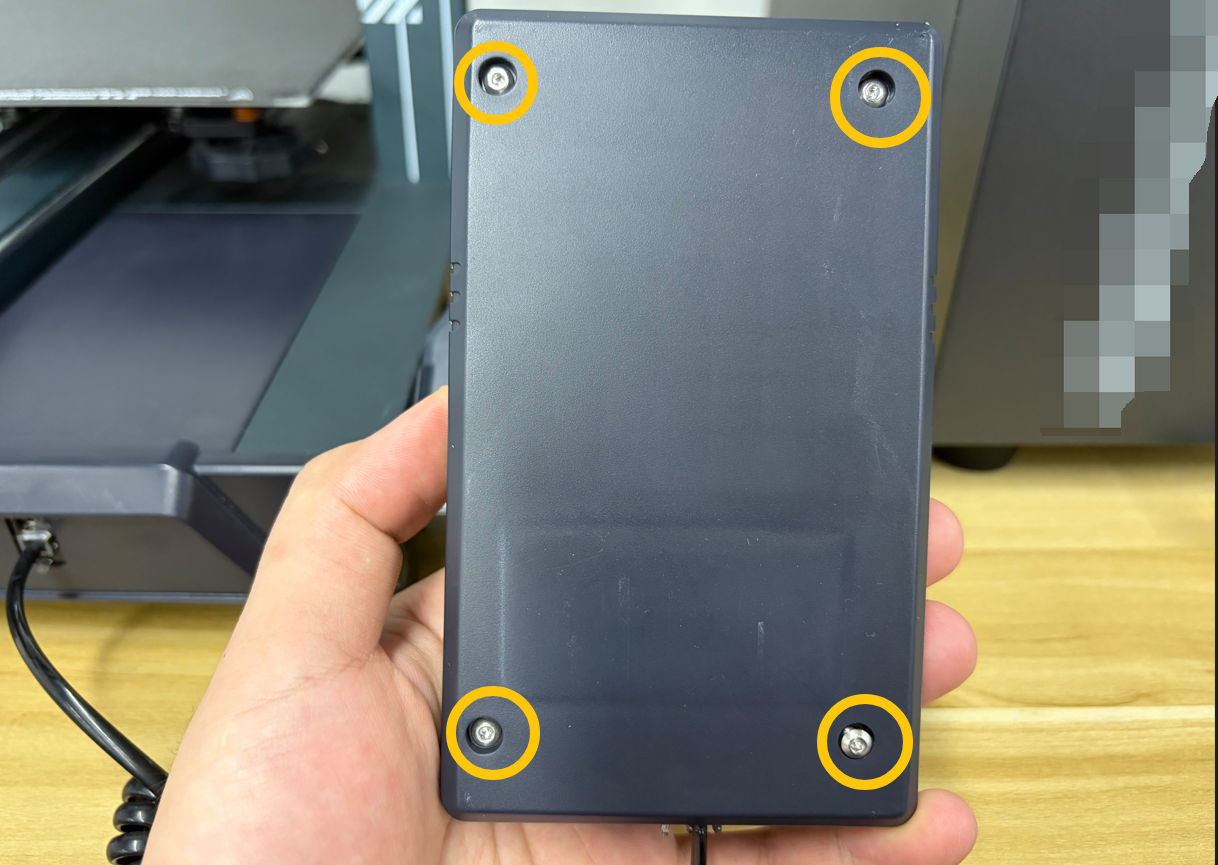
¶ 1. Turn over the touch screen.
Locate the four fixing screws on the back. Use a 2.0mm Allen key to remove the four screws securing the rear cover of the touch screen, then remove the rear cover.
¶ 2. Check whether the three ribbon cable connections and connectors shown in the image are loose.
The image below shows the normal connection condition.
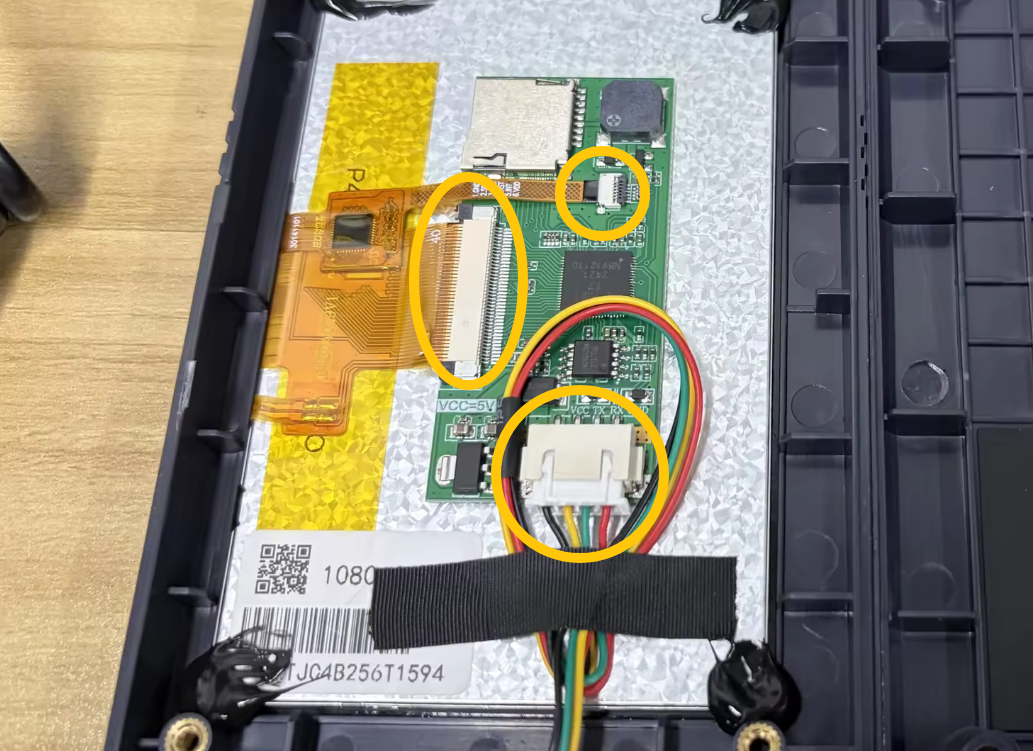
- If any ribbon cable or connector is loose, reconnect the ribbon cable and connector as shown above.
- If the ribbon cable and connectors are not loose, continue with the following troubleshooting steps.
¶ 4. Check the Power Indicator Light
Reminder:
Remove the filament spool in advance to prevent it from falling and being damaged.
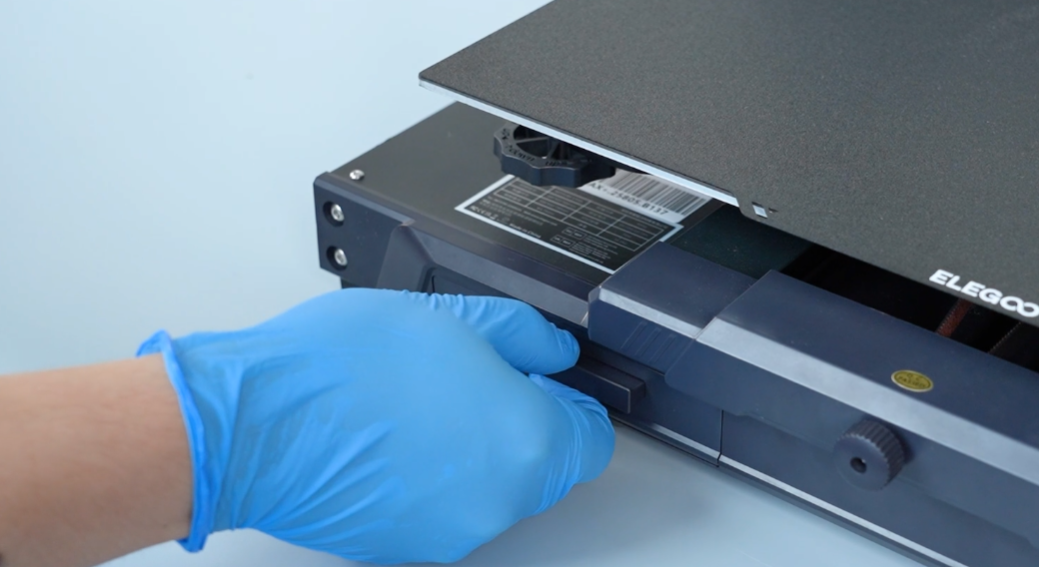
¶ 1. Remove the drawer.
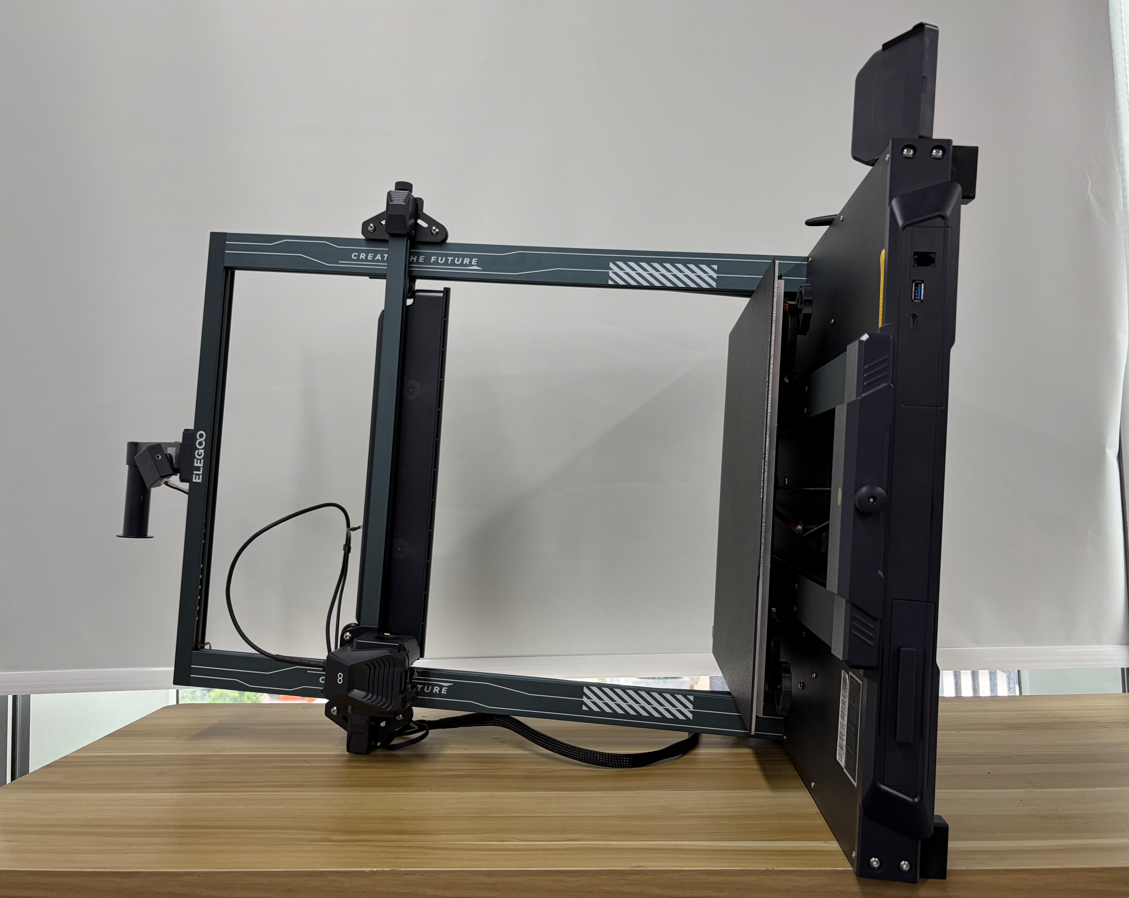
¶ 2. Turn the printer over and place it temporarily on the table with the touch screen side facing upward.
¶ 3. Locate the power indicator light.
Refer to the image below.
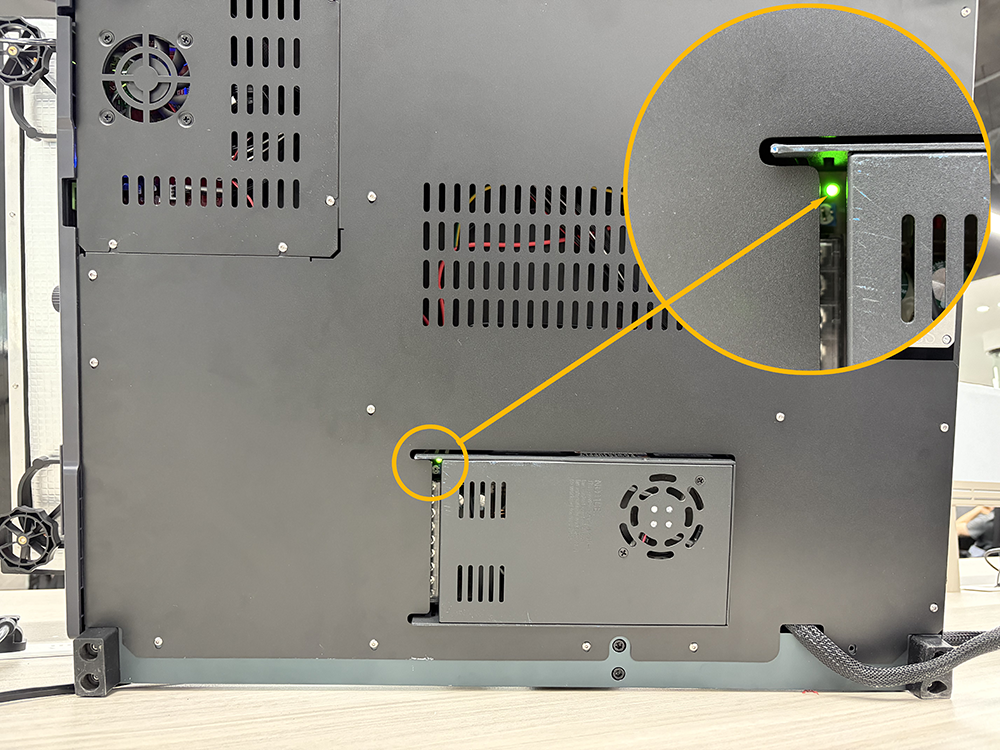
¶ 4. Connect the printer to power and check whether the power indicator light turns on.
- If the power indicator light does not turn on, the power supply may be faulty.
- If the power indicator light turns on, either the mainboard or the touch screen may be faulty.
¶ 5. Check the Mainboard Indicator Lights
¶ 1. Turn off the printer power switch and unplug the power cord.
¶ 2. Use a 2.0mm Allen key to remove the 17 screws securing the bottom cover.
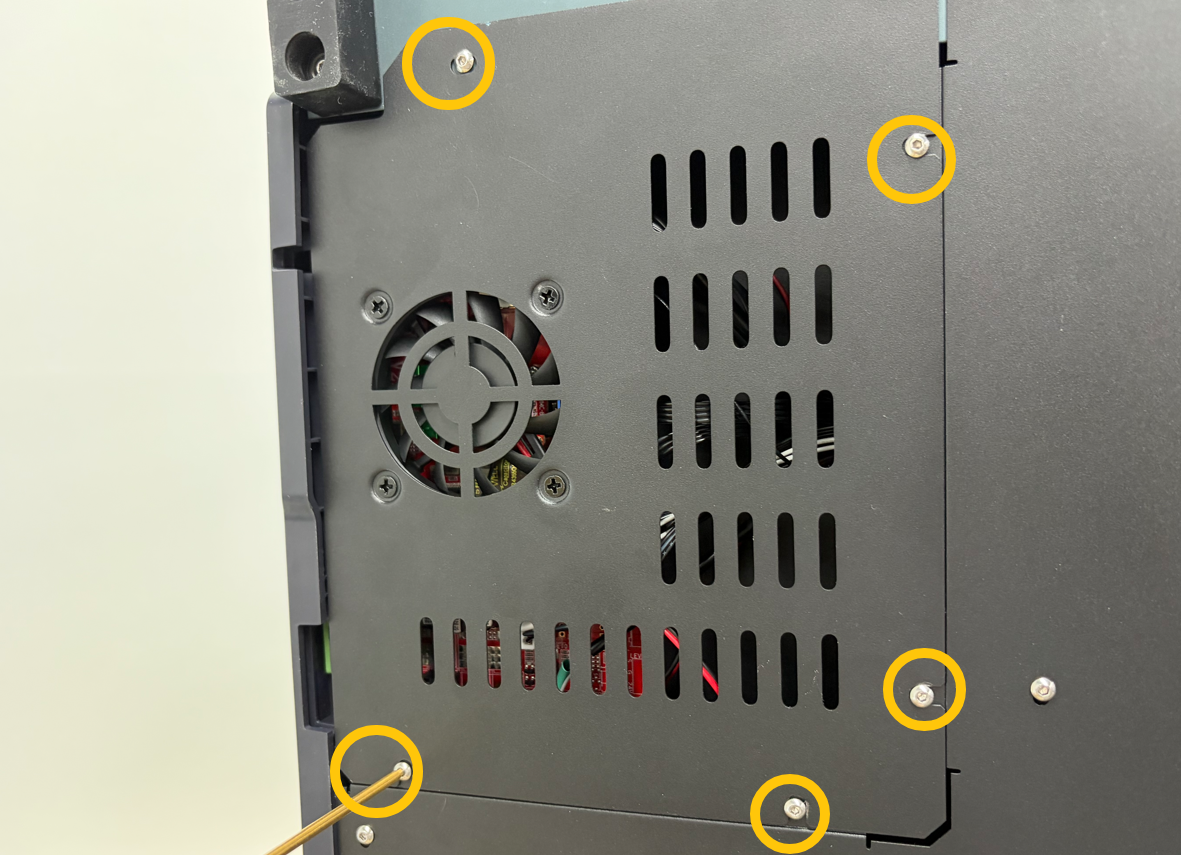
¶ 3. Slowly open the bottom cover and disconnect the mainboard fan connector.
Then remove the bottom cover.
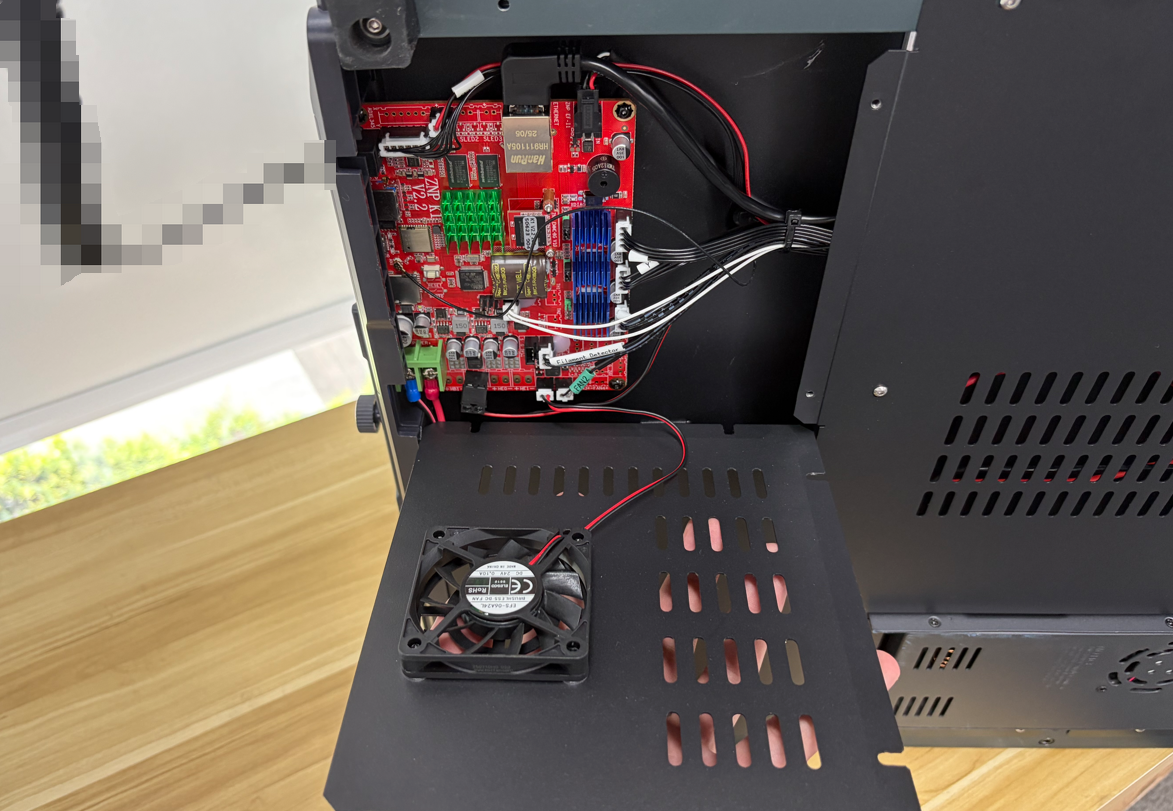
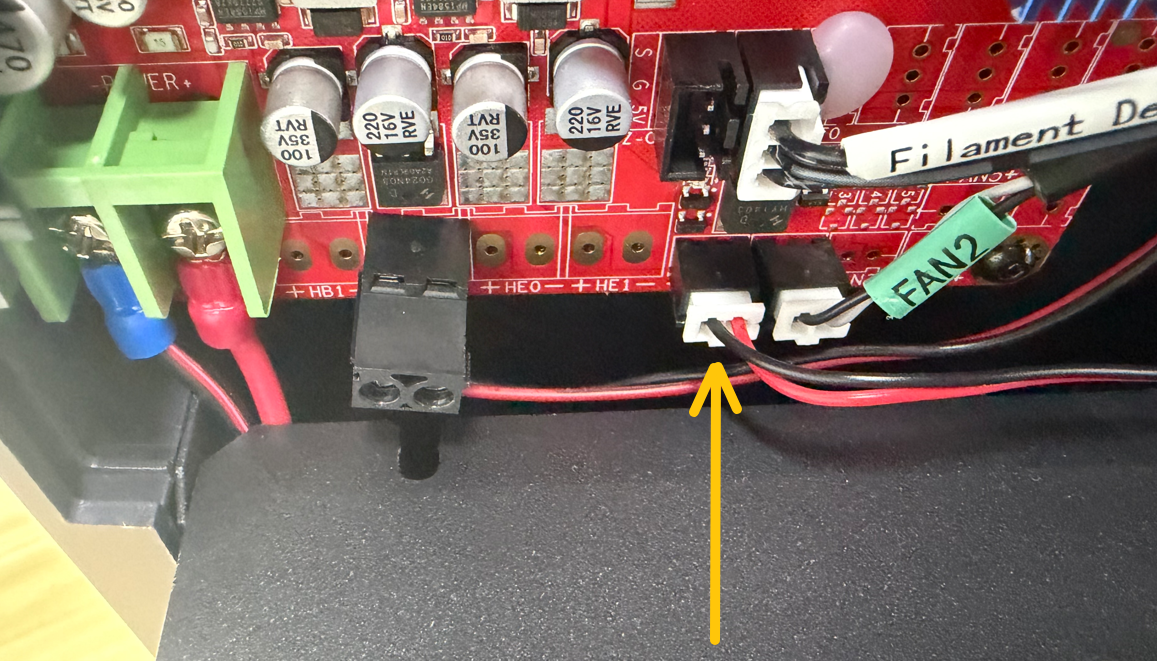
¶ 4. Connect the power cord and turn on the printer power switch.
¶ 5. Wait approximately 50 seconds, then check whether the four indicator lights shown in the image are on.
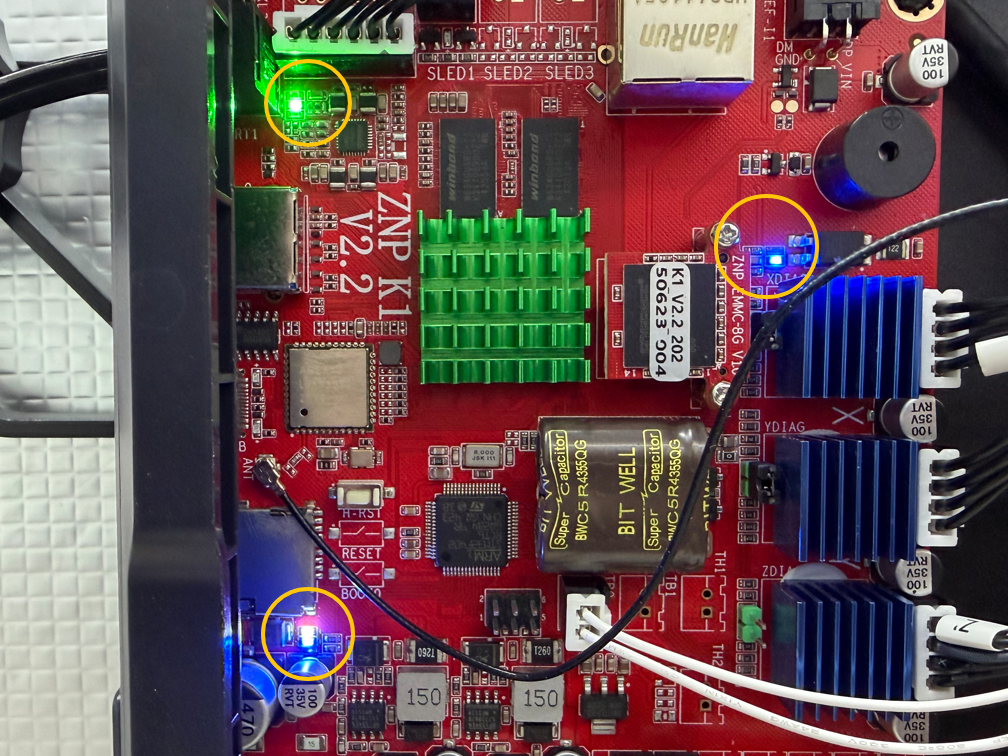
- If the mainboard indicator lights do not turn on, the mainboard may be faulty.
- If the mainboard indicator lights turn on, the touch screen may be faulty.
¶ 6. Check the Power Supply Output Voltage
Reminder:
This step requires a multimeter and experience using a multimeter. If you do not have a multimeter, you can skip this step.
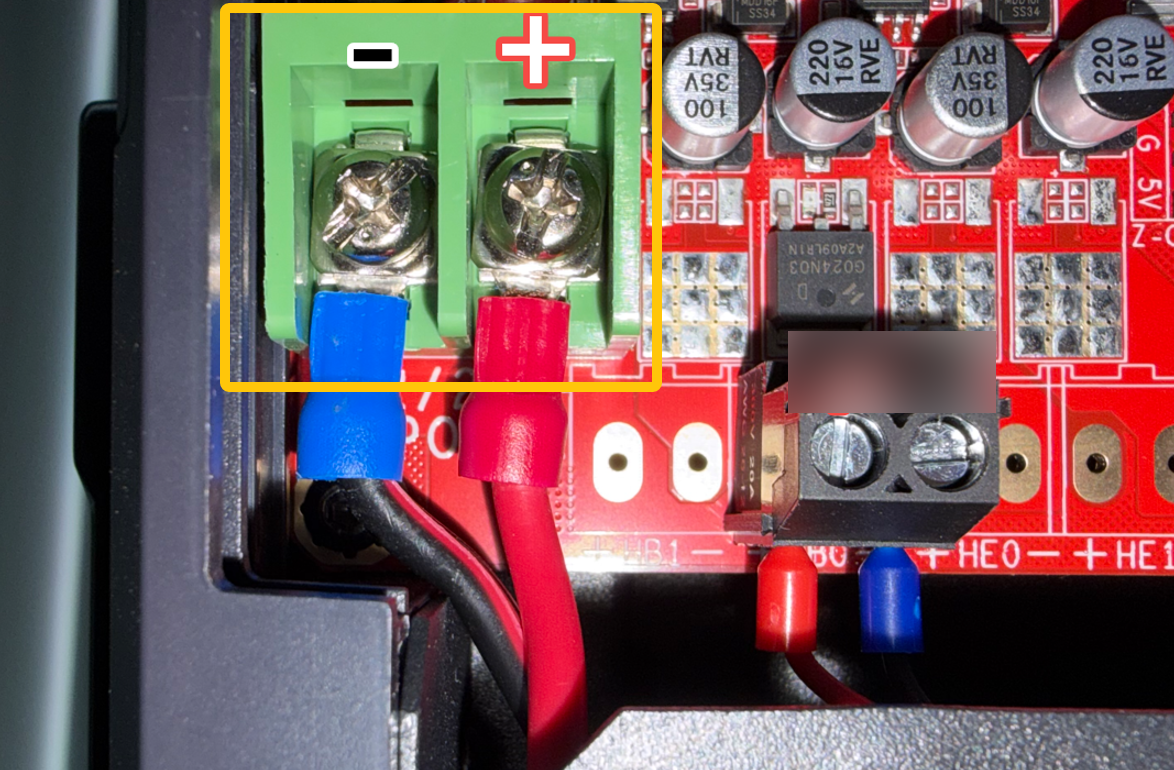
¶ 1. Set the multimeter to the DC 200V range.
¶ 2. Measure the voltage at the mainboard power input port and check whether it is 24V and stable.
- If there is no output voltage or the voltage is unstable, the power supply is faulty and needs to be replaced.
¶ Contact Technical Support
If the issue is still not resolved after completing all the troubleshooting steps above, please provide the following information when contacting technical support:
Email: 3dp@elegoo.com
- Is the power supply voltage set correctly?
- Is the fuse damaged?
- Is the touch screen ribbon cable loose or damaged?
- Does the power indicator light turn on after switching on the printer?
- Do the mainboard indicator lights turn on after switching on the printer?
- Does the power supply output a stable 24V voltage?
(Skip this step if you do not have a multimeter.)
¶ Help us improve
If you have any ideas about the wiki pages, please let us know via ELEGOO official feedback channel