¶ Operation Steps for Each Model
The steps below are based on Centauri Carbon 2 Combo. For other models, skip the steps related to parts that are not installed.
| Model | Action | Steps to Skip |
|---|---|---|
| Centauri Carbon 2 Combo | Follow all steps | None |
| Centauri Carbon 2 | Follow all steps | None |
| Centauri 2 Combo | Follow all steps | None |
| Centauri 2 | Follow all steps | None |
¶ Required Tools
- 2.0mm Allen key
¶ Preparation
- Turn off the printer power switch and unplug the power supply cable
¶ Tutorial Video
¶ Disassembly
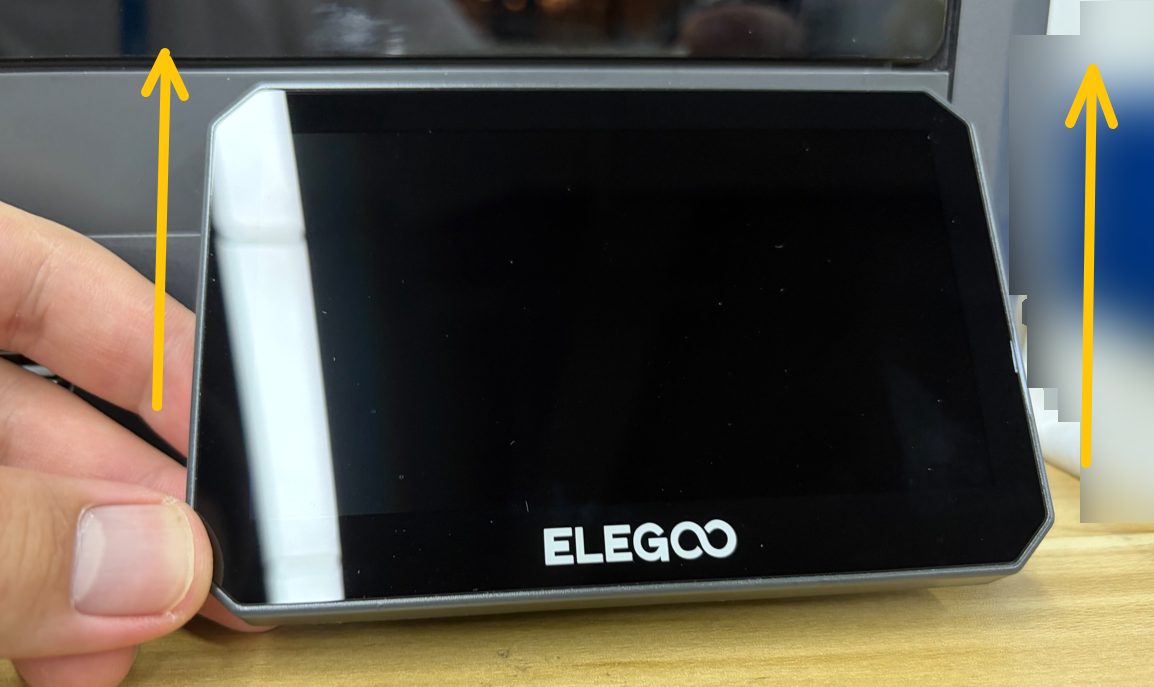
¶ Remove the Touch Screen
- Lift the touch screen upward
-
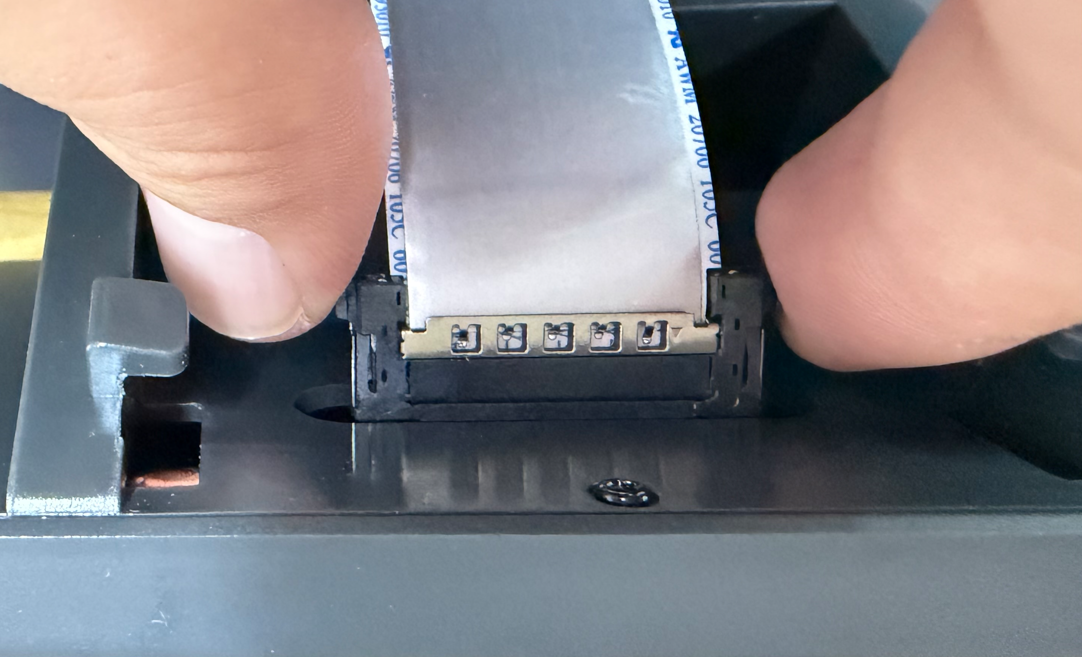
Hold both sides of the ribbon cable connector
-
While holding both sides of the connector, unplug the touch screen ribbon cable connector and remove the touch screen
Caution: Do not pull the ribbon cable forcefully during operation to avoid damaging the cable or interface

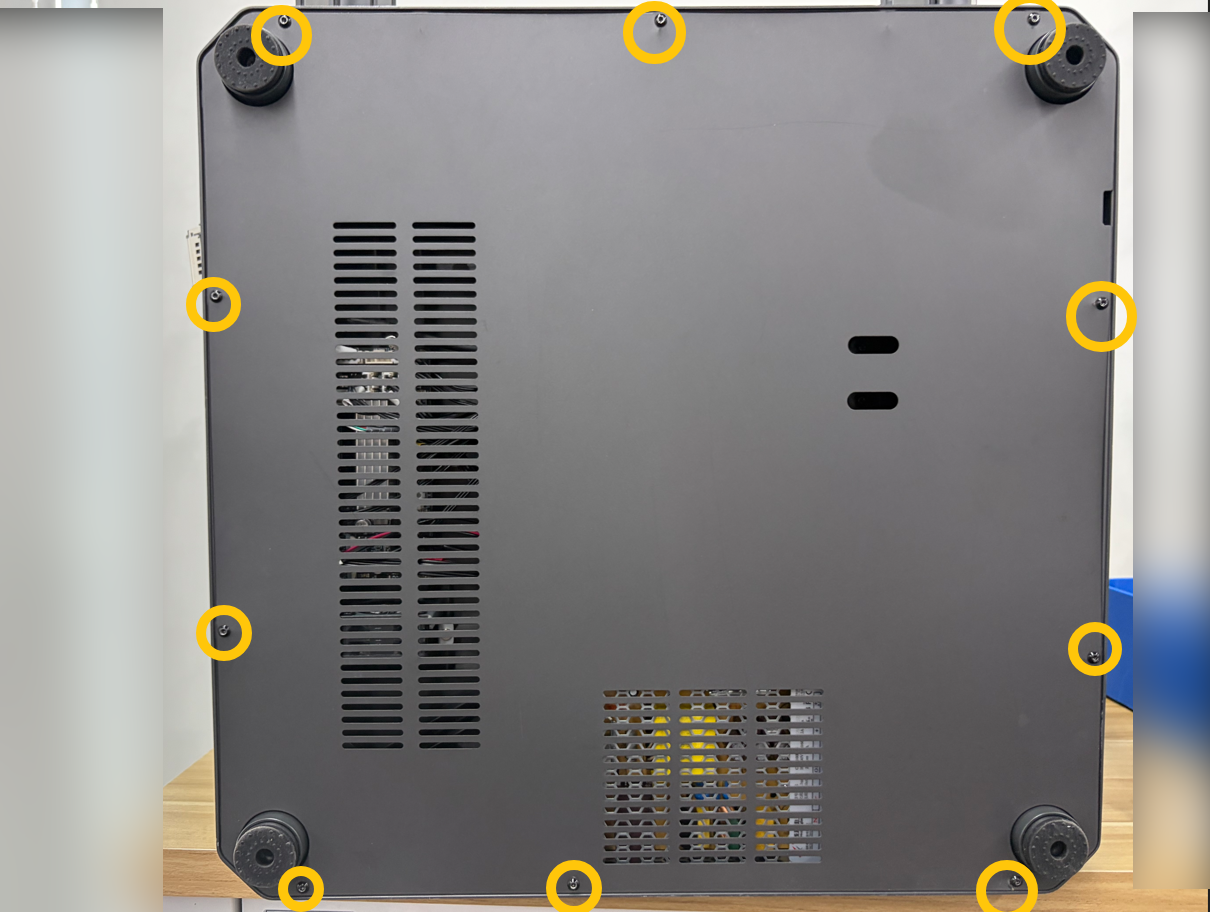
¶ Remove the Bottom Cover
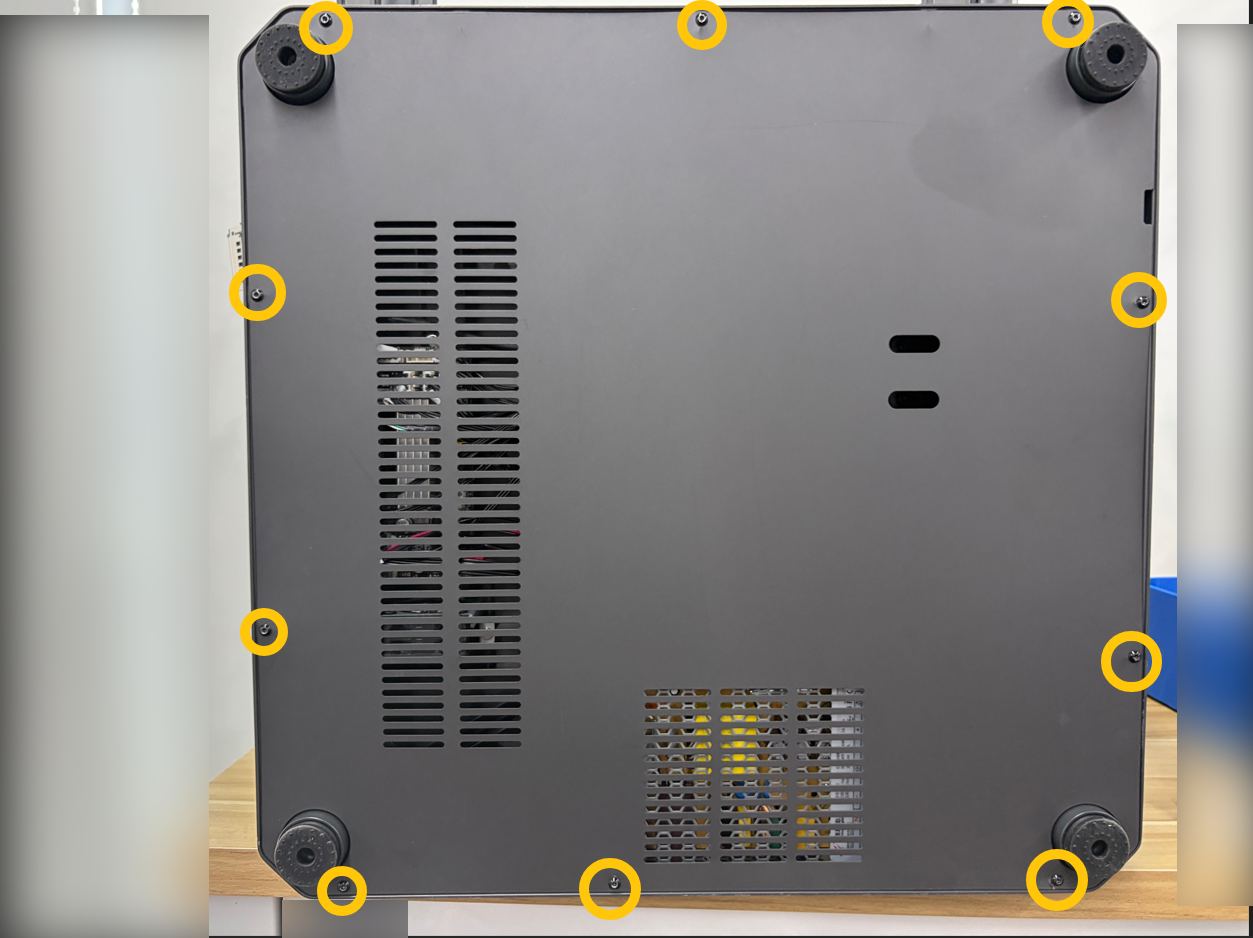
- Use a 2.0mm Allen key to remove the ten screws securing the bottom cover, then remove the plate
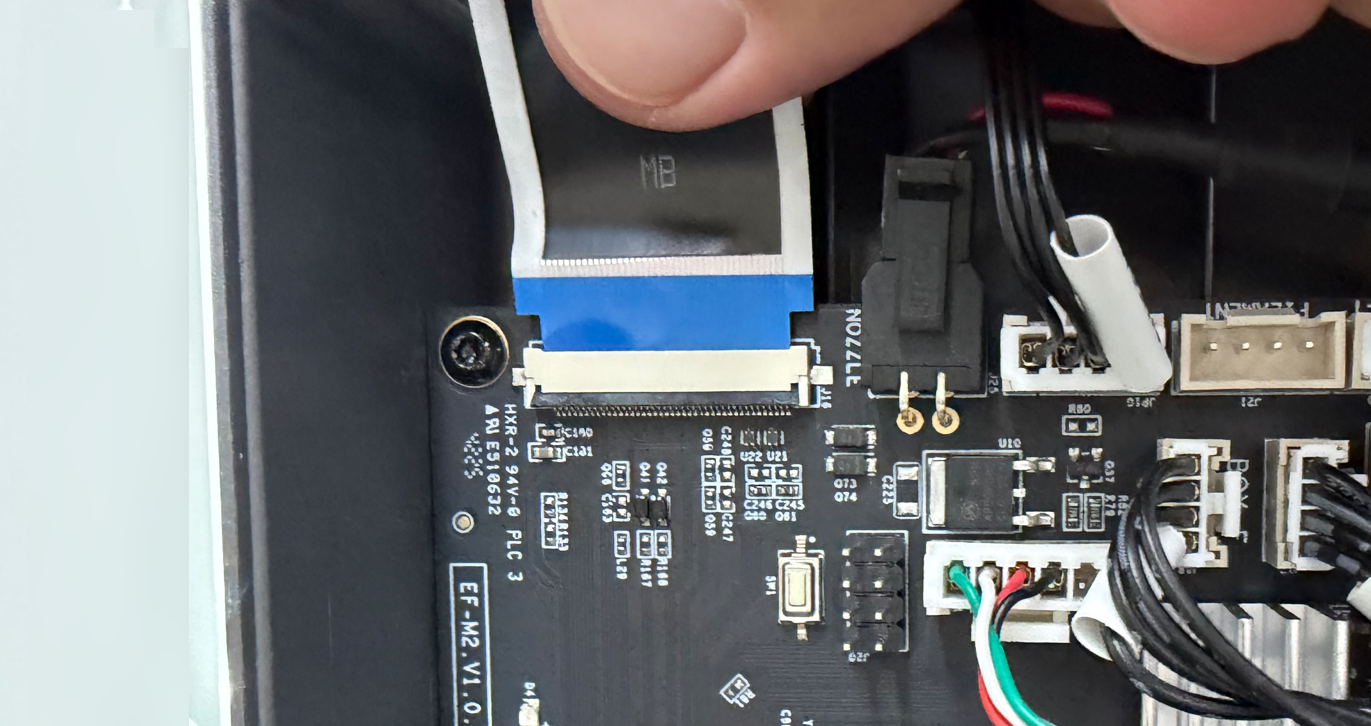
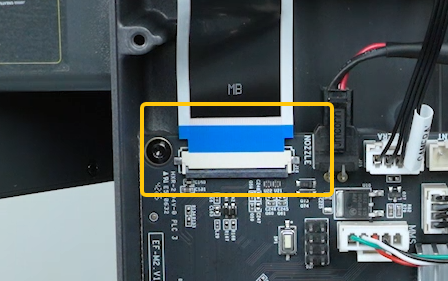
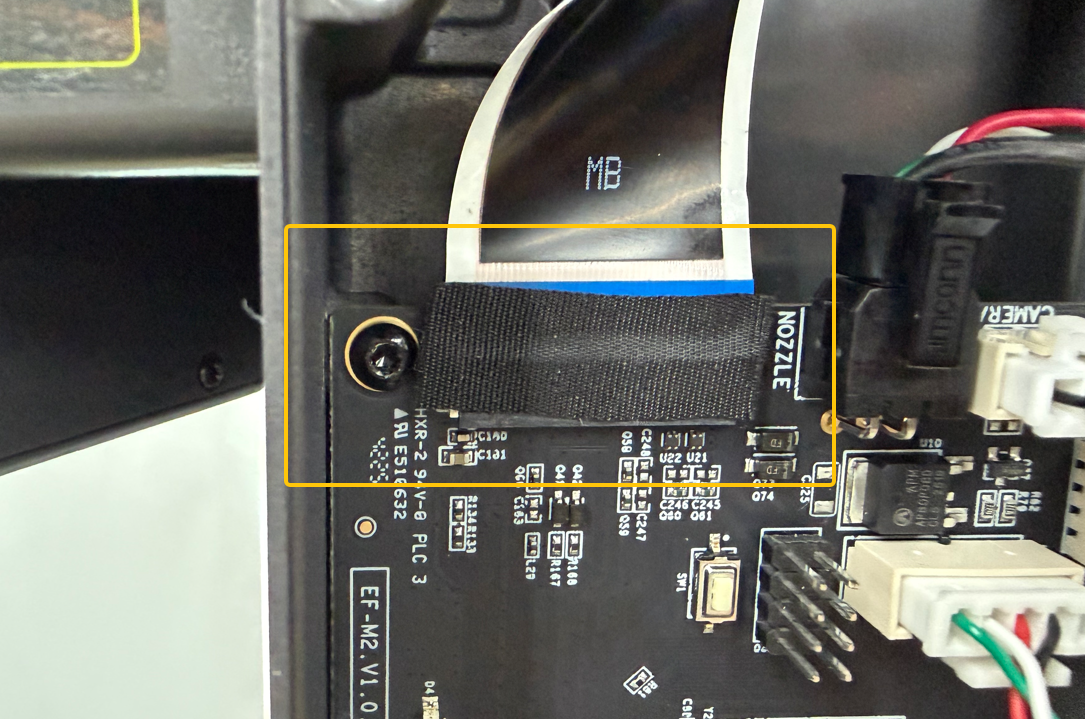
¶ Remove the Touch Screen Ribbon Cable
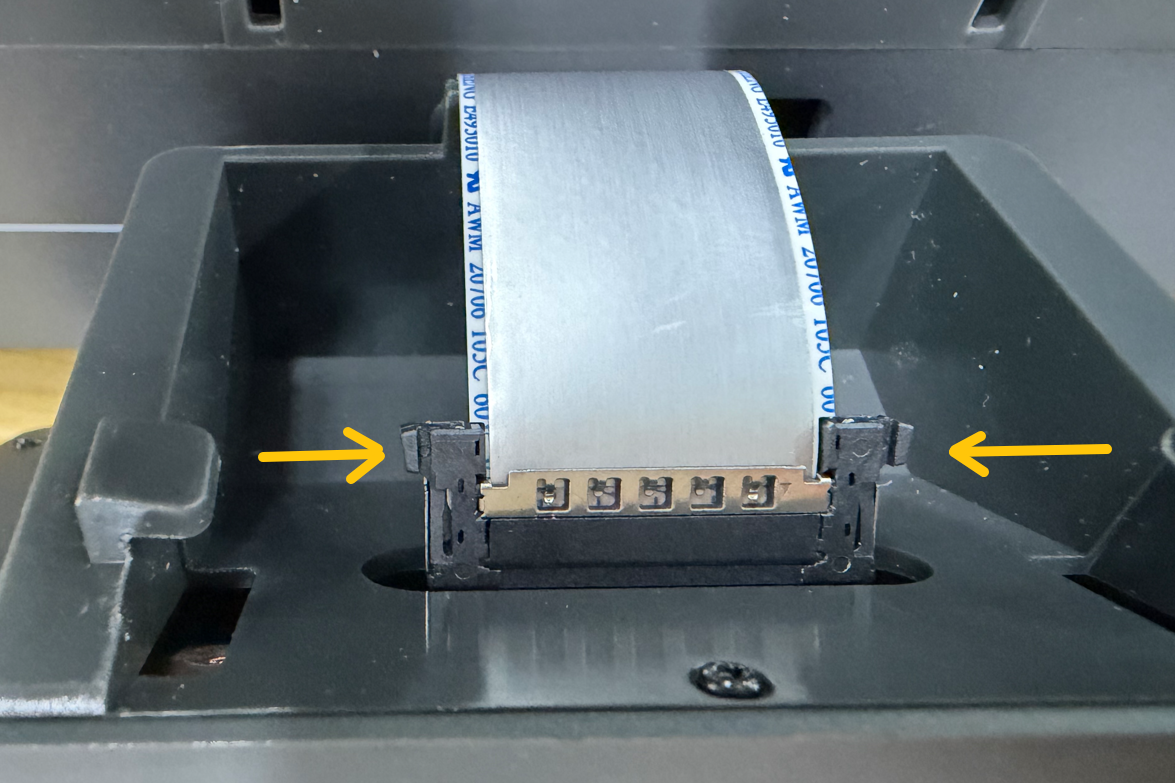
- Remove the tape securing the touch screen ribbon cable
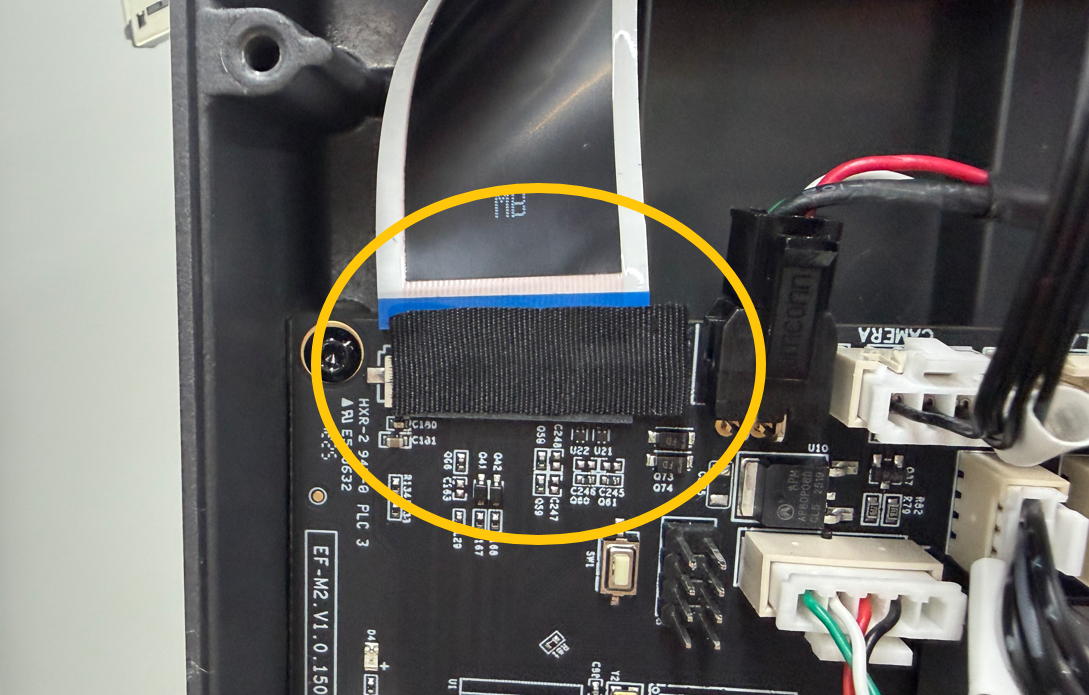
- Open the latch and unplug the touch screen ribbon cable

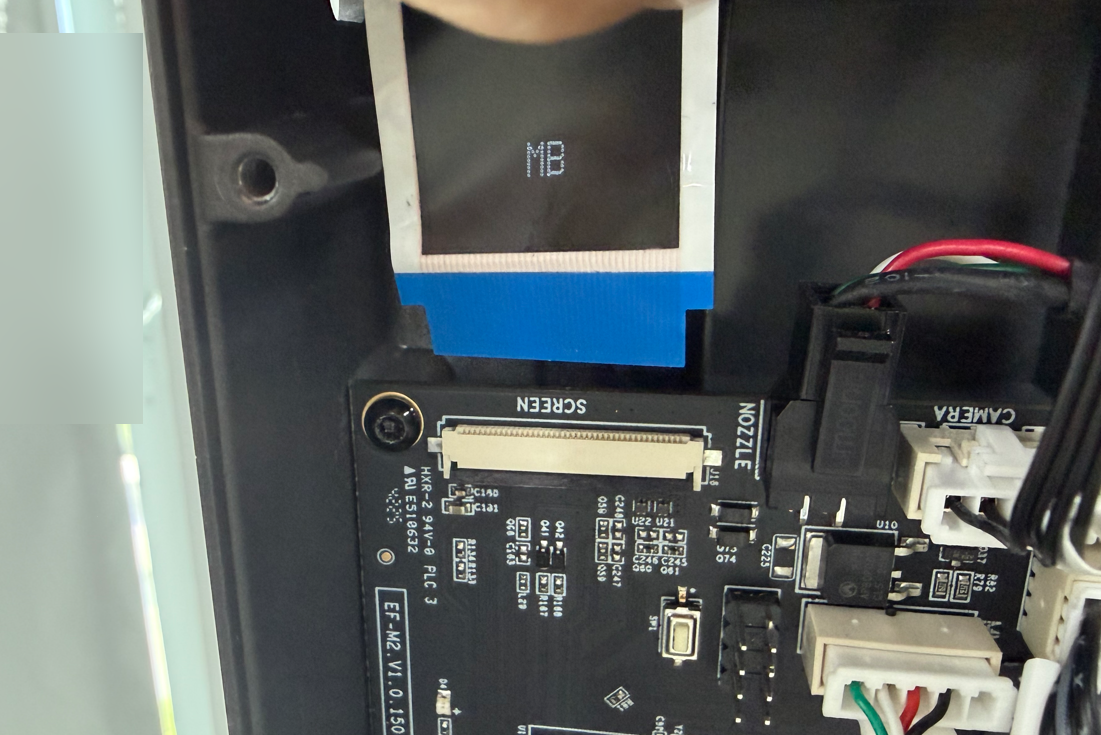
- Remove the old touch screen ribbon cable
¶ Installation
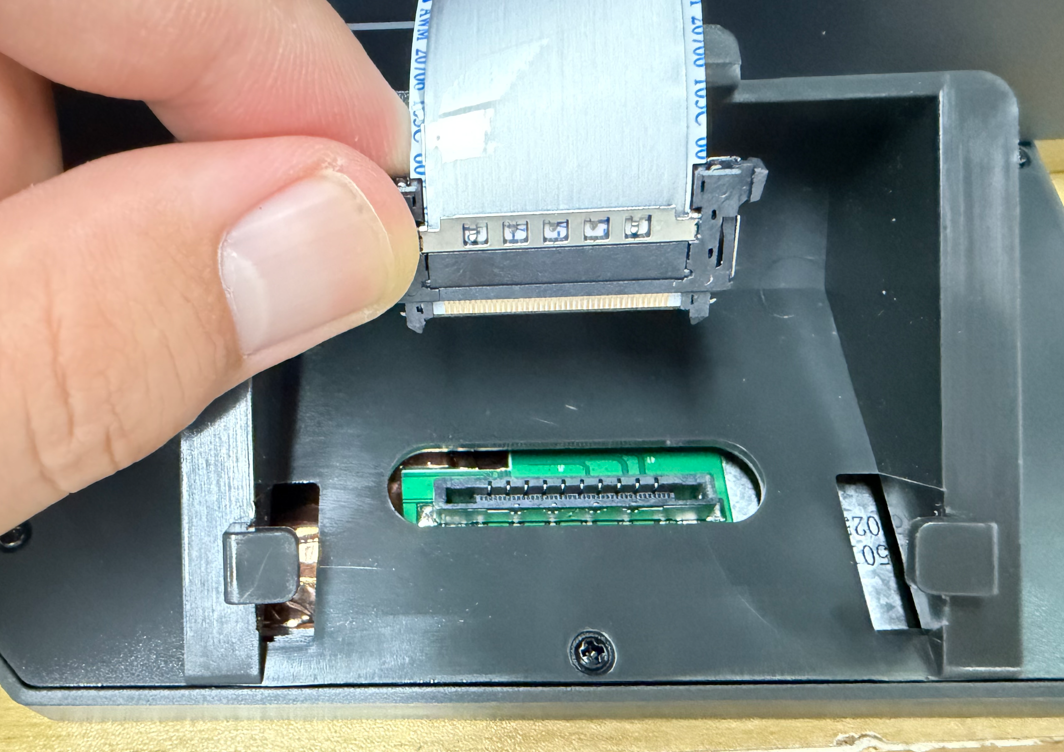
¶ Install the Touch Screen Ribbon Cable
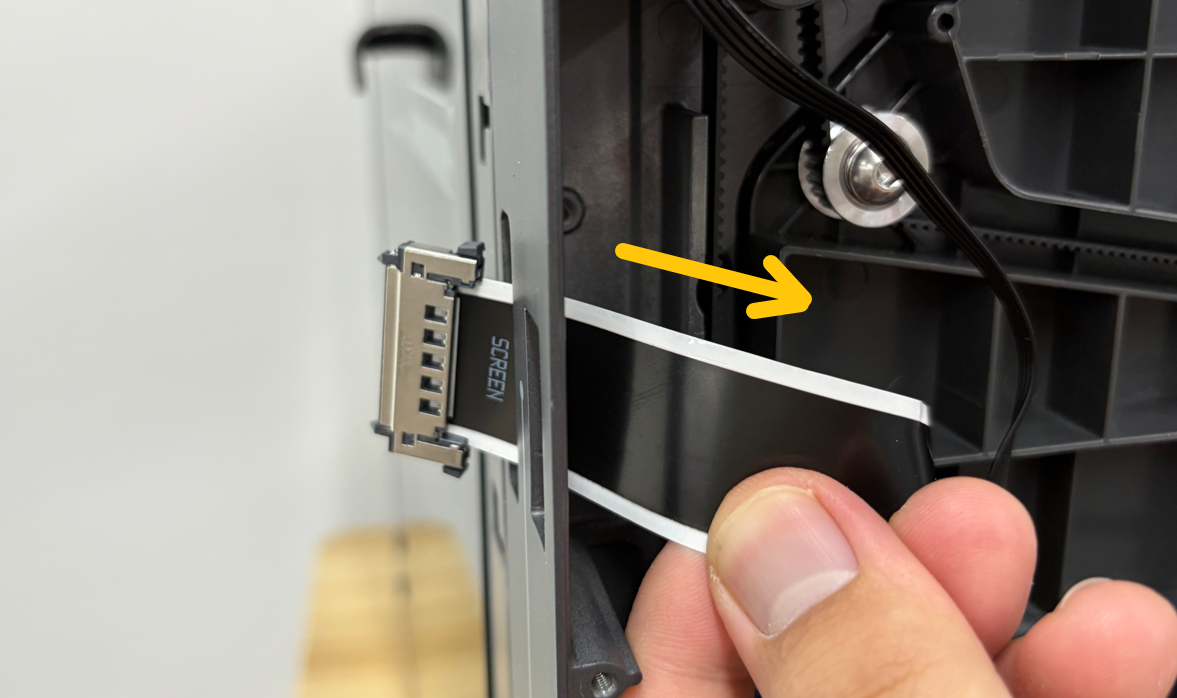
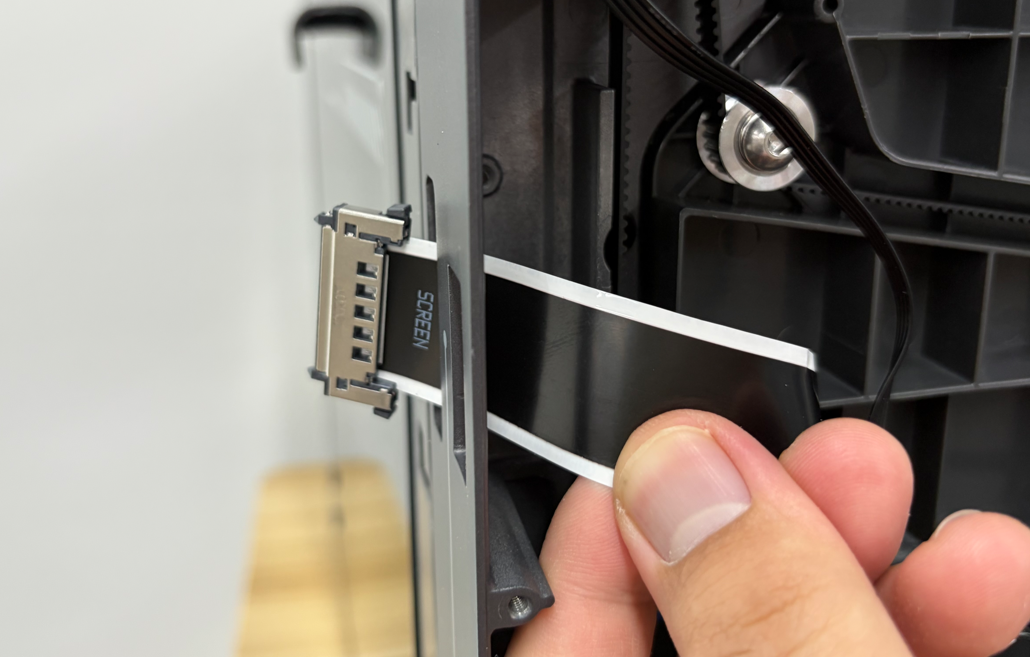
- Route the new touch screen ribbon cable through the base slot
- Insert the touch screen ribbon cable into the mainboard port and lock the latch
Note: The blue side of the ribbon cable must face upward when inserted. Keep the cable straight during insertion and ensure it is fully seated before locking the latch
¶ Install the Touch Screen
- Insert the touch screen ribbon cable connector back into its original position
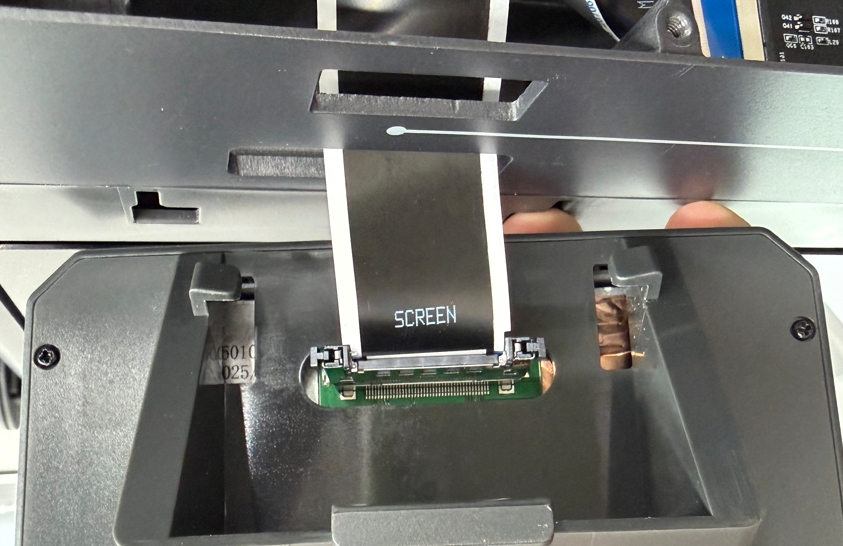
- Align the rear buckle of the touch screen with the base slot and place it back into position

- Check the touch screen ribbon cable on the mainboard side to ensure it is not tilted or loose
- Reapply the tape to its original position
¶ Install the Bottom Cover
- Place the bottom cover back into position and tighten the ten screws
¶ Verification
- Plug in the power supply cable and turn on the printer power switch
- Confirm that the touch screen lights up and all touch buttons respond correctly
- Touch screen cable replacement is complete
¶ Help us improve
If you have any ideas about the wiki pages, please let us know via ELEGOO official feedback channel