¶ Fault Symptoms
- Abnormal noise occurs during printing.
- Abnormal noise occurs during movement.
- Vibration or abnormal noise occurs during idle movement or homing.
¶ Possible Causes
- The timing belt tension is too tight or too loose (abnormal X/Y-axis tension).
- Linear rods lack lubrication or contain dust/debris.
- Stepper motor resonance or motor damage.
- Abnormal fan noise.
- The frame or base is not placed evenly, causing amplified vibration.
¶ Required Tools
- 2.0 mm Allen key
- 2.5 mm Allen key
- Lubricating grease
- Lint-free cloth
- Alcohol
¶ Troubleshooting Steps
¶ 1. Check the Printer Placement
- Place the printer on a sturdy, flat, and stable surface. Avoid placing it on glass tables, hollow tables, or unstable stands, as these surfaces may amplify vibration and noise.
- Gently press the four corners of the printer to check whether the machine shakes. If any movement is detected, adjust the printer placement or place suitable pads underneath before testing again.
- After adjustment, perform homing or idle movement again to confirm whether the abnormal noise has disappeared.
¶ 2. Check the Fans
¶ 2.1 Test Fan Operation
- Open the fan control page.
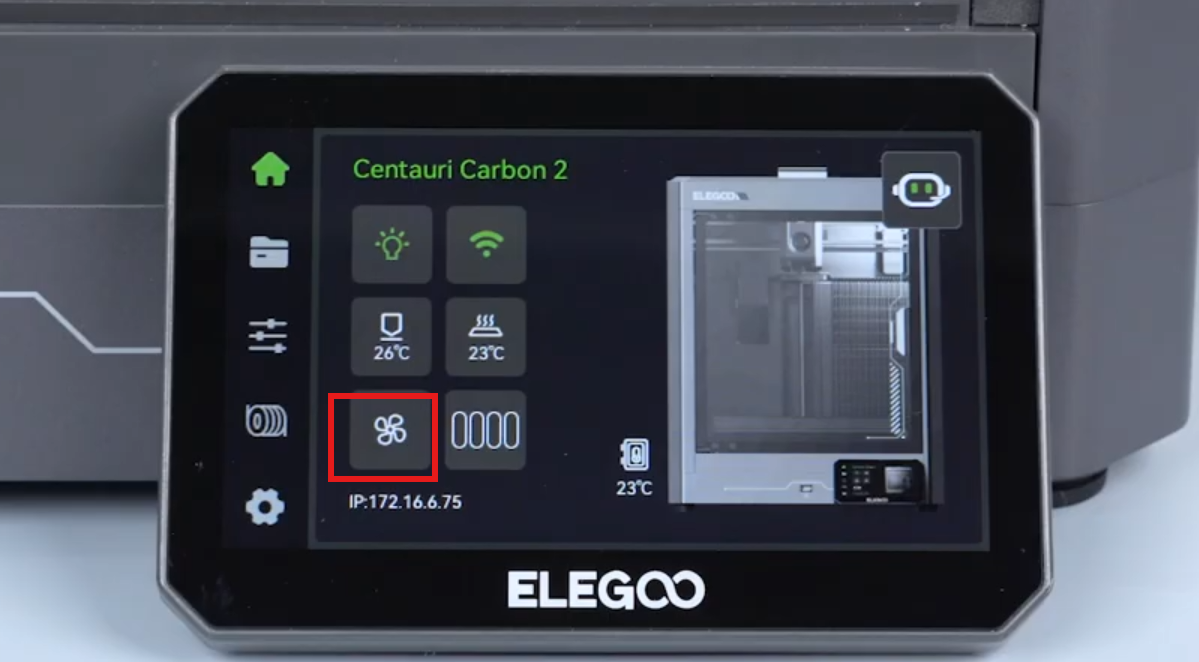
- Use the touch screen to turn each fan on and off individually.
- Observe the fan operation status and check for abnormal noise or unstable operation.
Note:
Only enable one fan at a time during testing to determine whether the noise appears or disappears with the corresponding fan.
If the noise is confirmed to come from a specific fan, replace the corresponding fan assembly.
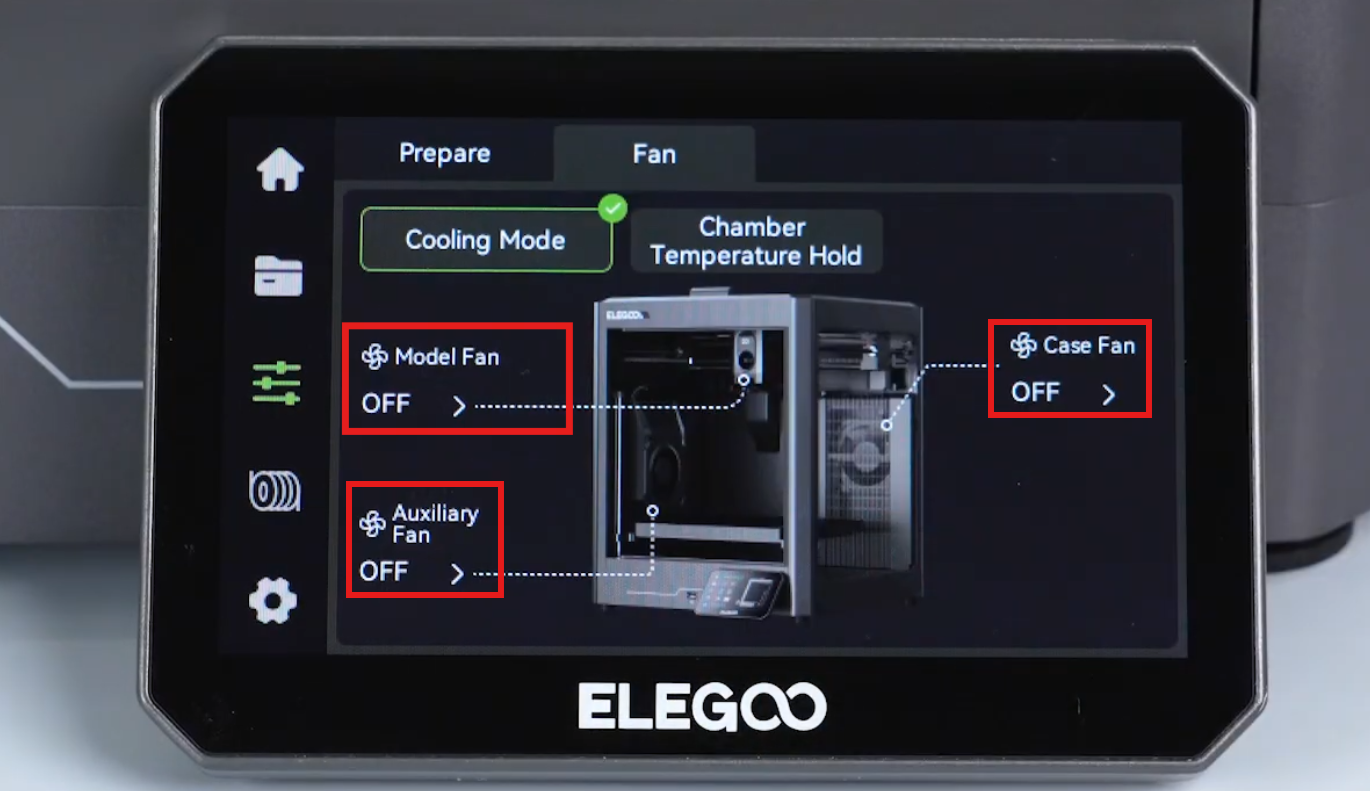
If no fan noise is detected, continue checking to locate the source of the noise.
¶ 3. Check the X/Y Timing Belt
- Loosen the four screws on the X/Y-axis tensioner and readjust the timing belt tension to eliminate vibration or abnormal noise caused by improper belt tension.
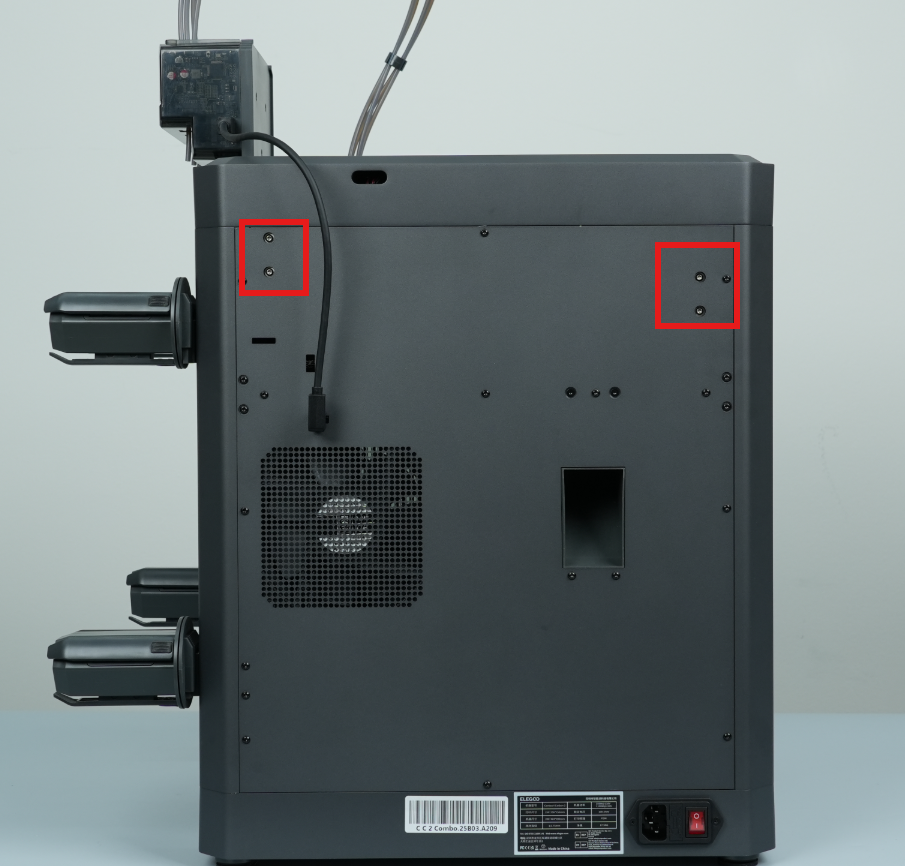
- Manually move the Tool Head back and forth several times to allow the belt tension to redistribute evenly and stabilize.
- Check whether the timing belt has any signs of wear, missing teeth, cracks, fraying edges, or obvious misalignment.
- Tighten the X/Y-axis tensioner screws.
If the abnormal noise disappears after adjustment, the issue is related to abnormal timing belt tension. Otherwise, continue to the next step.
¶ 4. Check the X/Y Axis Linear Rods
¶ 4.1 Test X/Y Axis Movement
On the touch screen, click X+ / X- and Y+ / Y- separately to test:
- X-axis movement only
- Y-axis movement only
Test the X-axis and Y-axis separately to identify which axis is causing the abnormal noise.
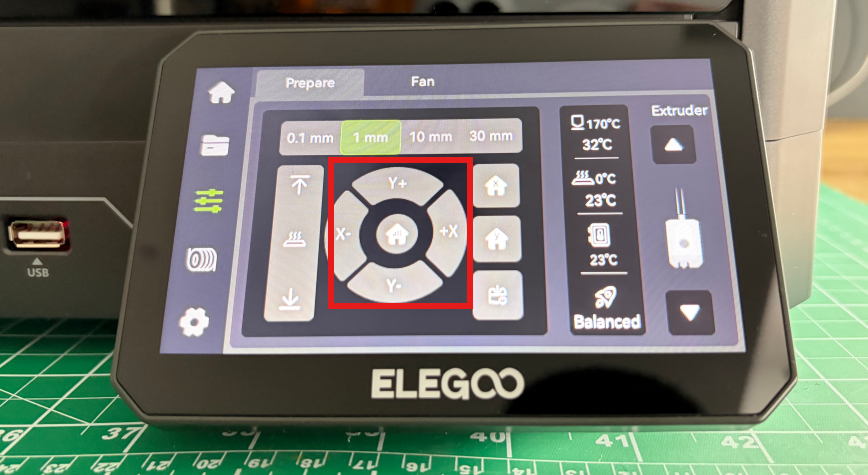
Note:
If abnormal noise occurs only on one axis, prioritize checking the linear rods, timing belt, and motor of that axis.
¶ 4.2 Clean and Lubricate the Linear Rods
- Clean the X/Y-axis linear rods using a lint-free cloth and alcohol.
- Apply lubricating grease to the X/Y-axis linear rods.
- Manually move the X/Y axis back and forth to evenly distribute the grease.
Note:
Apply a small and even amount of grease. Excessive grease may attract dust.
After applying grease, manually move the Tool Head back and forth to confirm whether the movement is smooth and whether there is noticeable resistance, sticking, or rough movement.
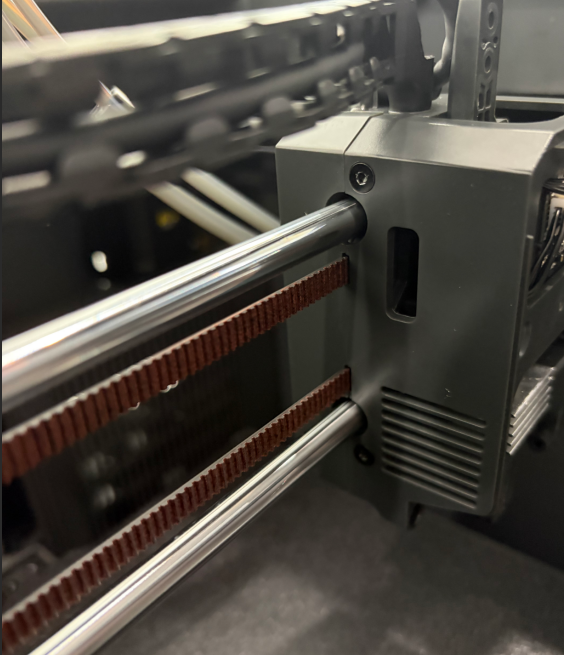
¶ 4.3 Check Linear Rod Condition
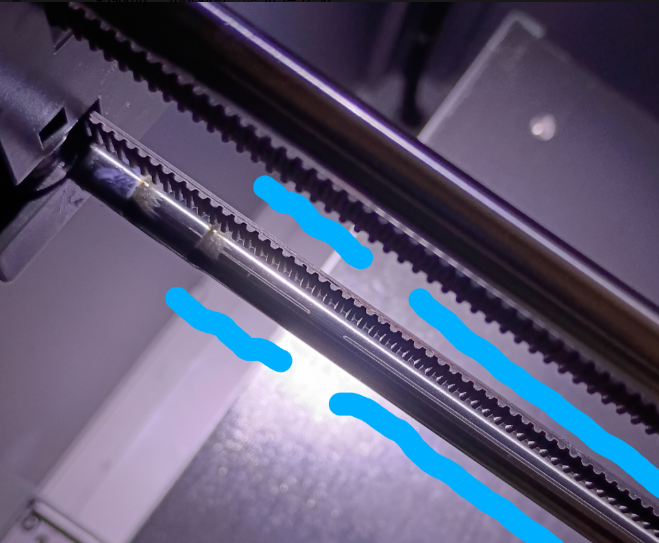
Check the surface of the linear rods for:
- Scratches
- Dents
- Rust
- Coating peeling
Replace the corresponding linear rod if any of these issues are found.
¶ 5. Check X/Y Motor Running Status
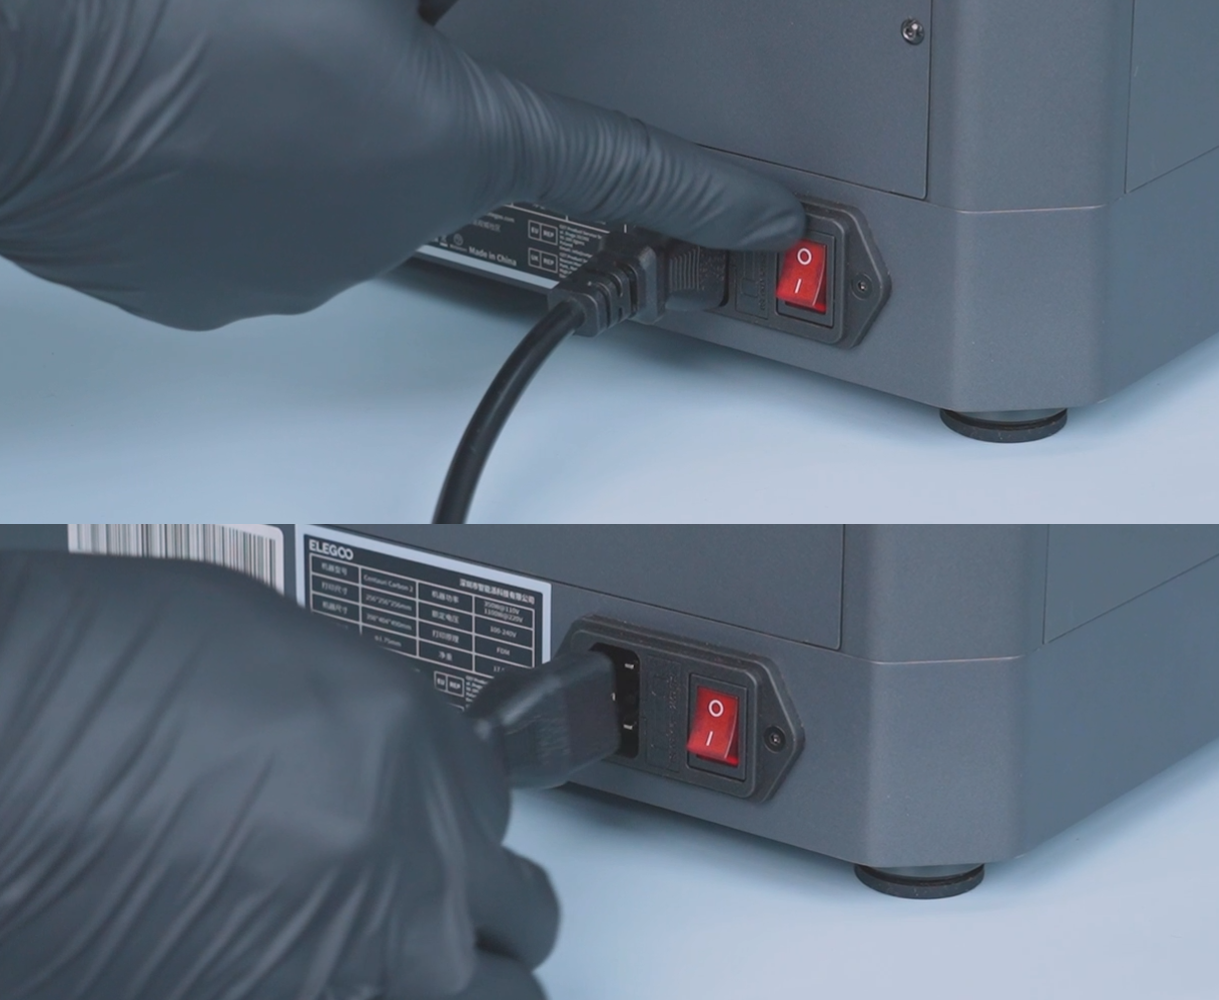
Warning:
Before operation, turn off the printer. Disconnect the motor cable before powering on the printer again.
Do not hot-plug motor connectors.
Note:
For the inspection method of the XY motor and cable, refer to the following video:
To avoid resonance interference caused by both motors running simultaneously, disconnect the X-axis and Y-axis motors separately and test each axis individually.
¶ 5.1 Check the Y-axis Motor
- Disconnect the X-axis motor cable.
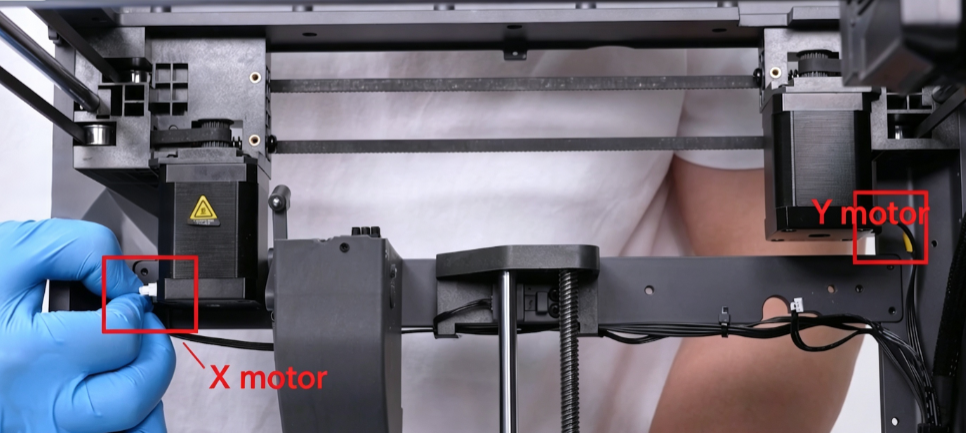
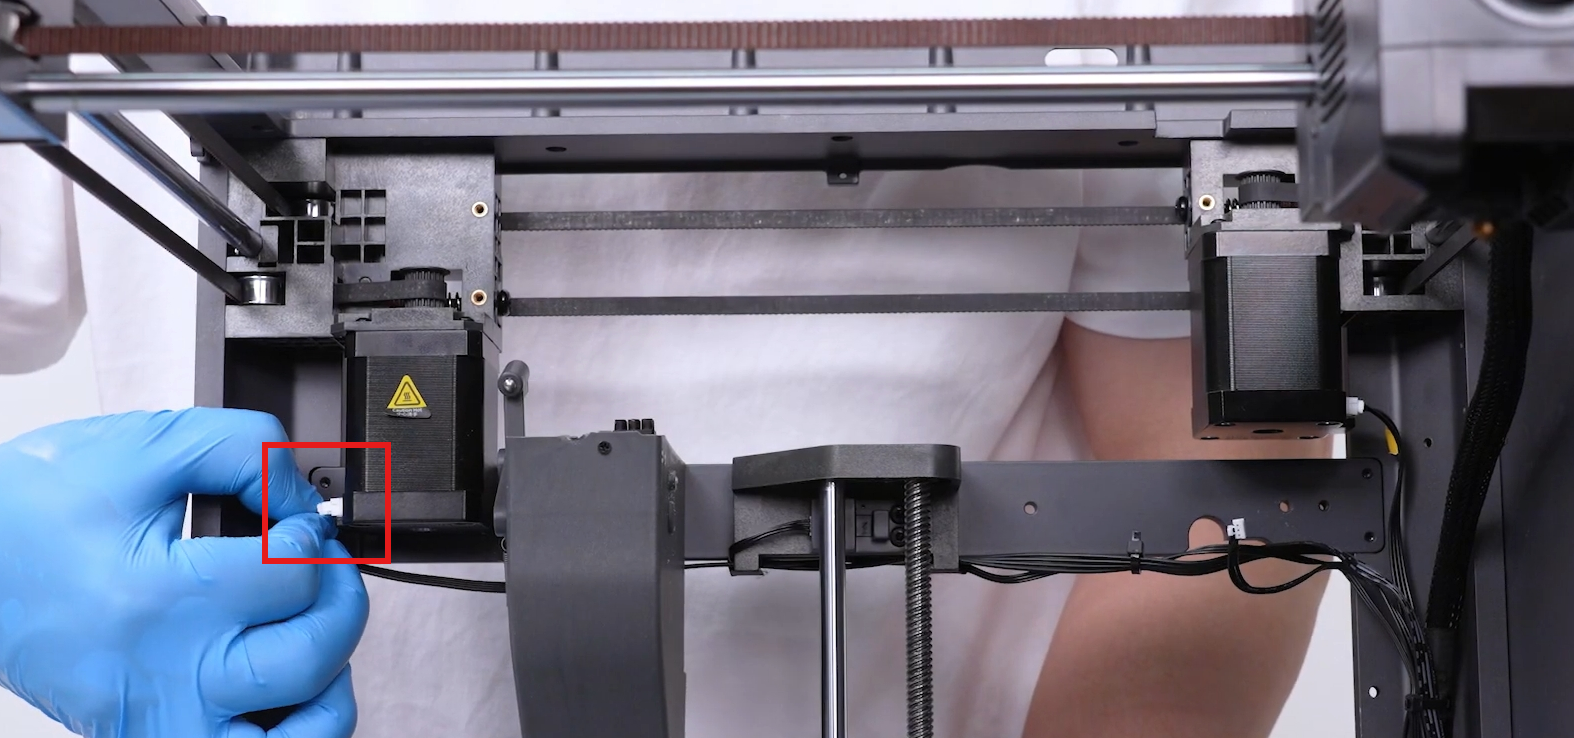
- Turn on the printer and perform homing.
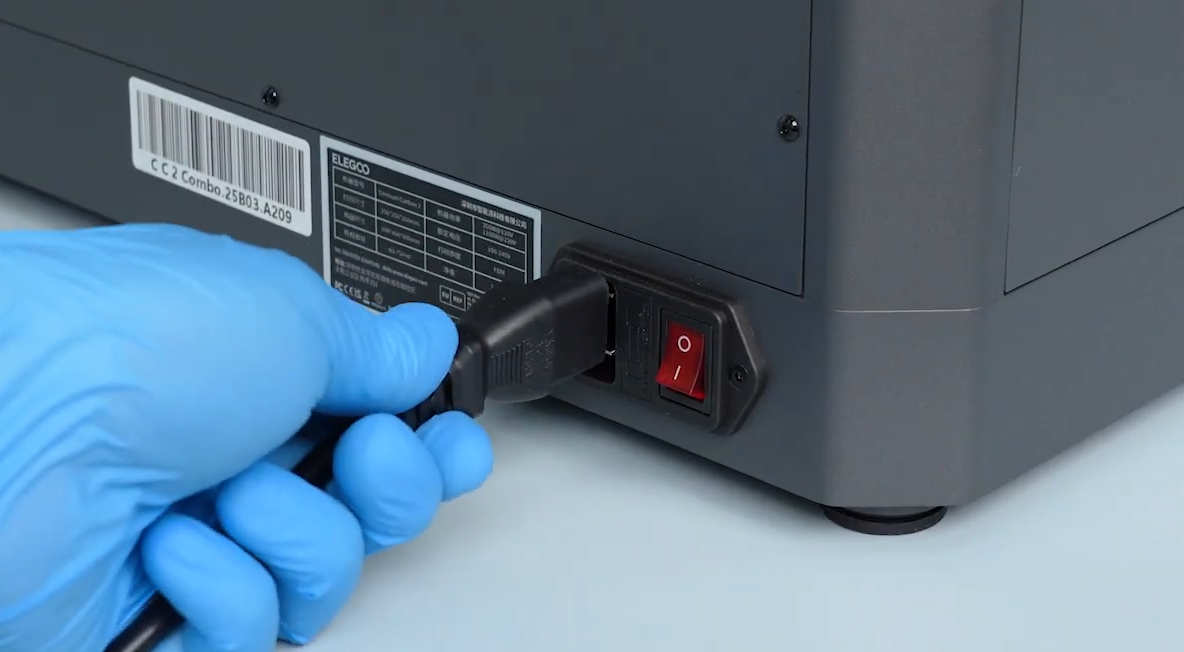
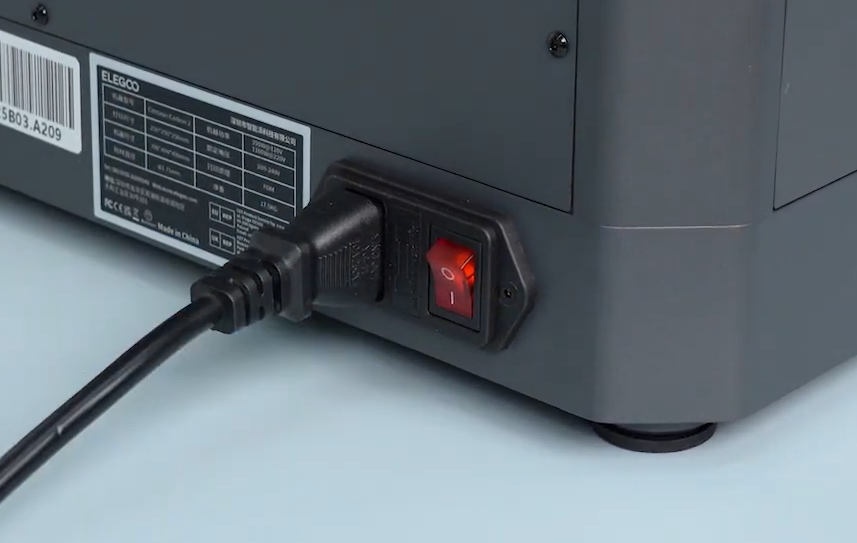
- Check whether the Y-axis motor produces abnormal noise during operation.
- If abnormal noise still occurs when only the Y-axis motor is running, the issue is related to the Y-axis motion system. Continue checking the motor cable and mainboard driver (Steps 6 and 7).
- If no noise occurs during Y-axis-only operation, reconnect the X-axis motor cable and continue checking the X-axis motor.
¶ 5.2 Check the X-axis Motor
- Turn off the printer and disconnect the Y-axis motor cable.
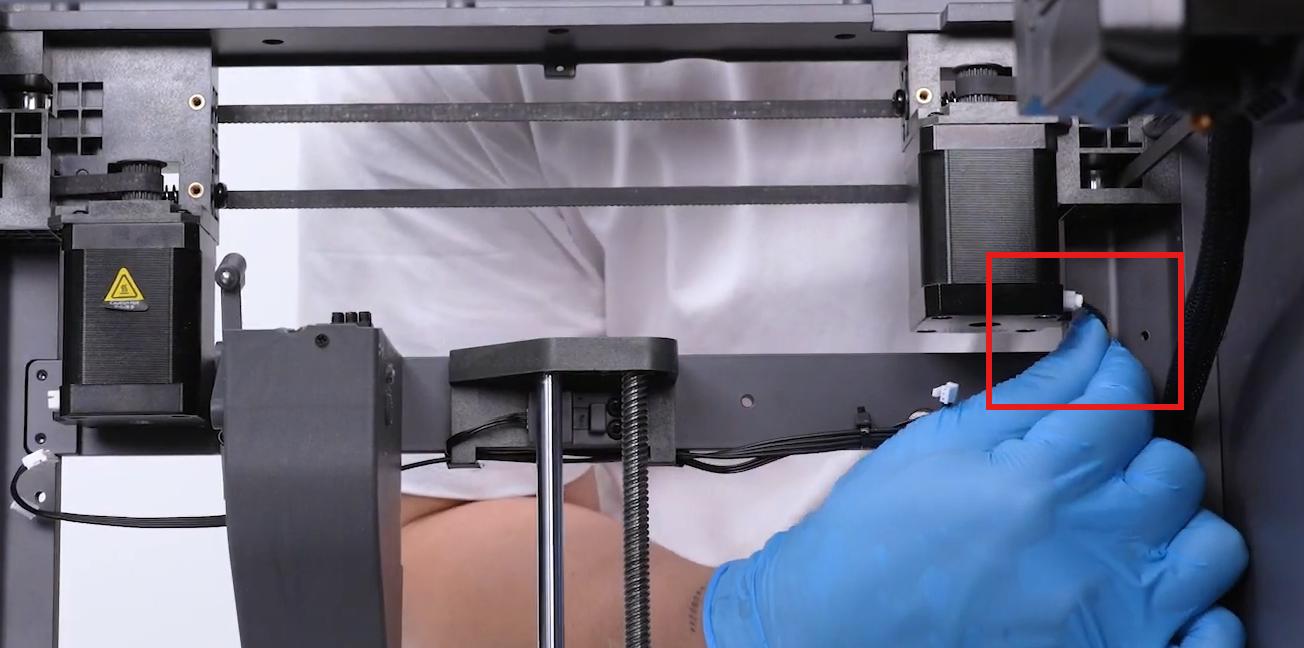
- Turn on the printer again and perform homing.
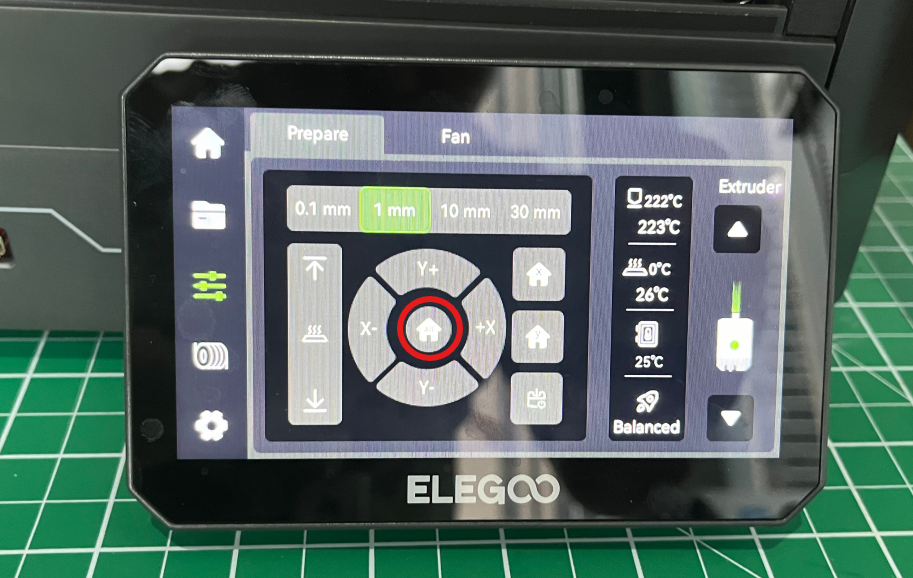
Check whether the X-axis motor produces abnormal noise during operation.
- If abnormal noise still occurs when only the X-axis motor is running, the issue is related to the X-axis motion system. Continue checking.
- If neither the X-axis nor Y-axis produces abnormal noise during individual testing, the issue may only occur during dual-axis movement or printing.
Reconnect the Y-axis motor cable and continue checking the motor cables and mainboard driver (Steps 6 and 7).
¶ 6. Check the XY Motor Cable
-
Turn off the printer power.
-
Check whether the motor cable has:
- Damaged insulation
- Bending damage
- Pinching marks
- Wear
Replace the motor cable if any damage is found.
- Check whether the X/Y motor connectors are loose.
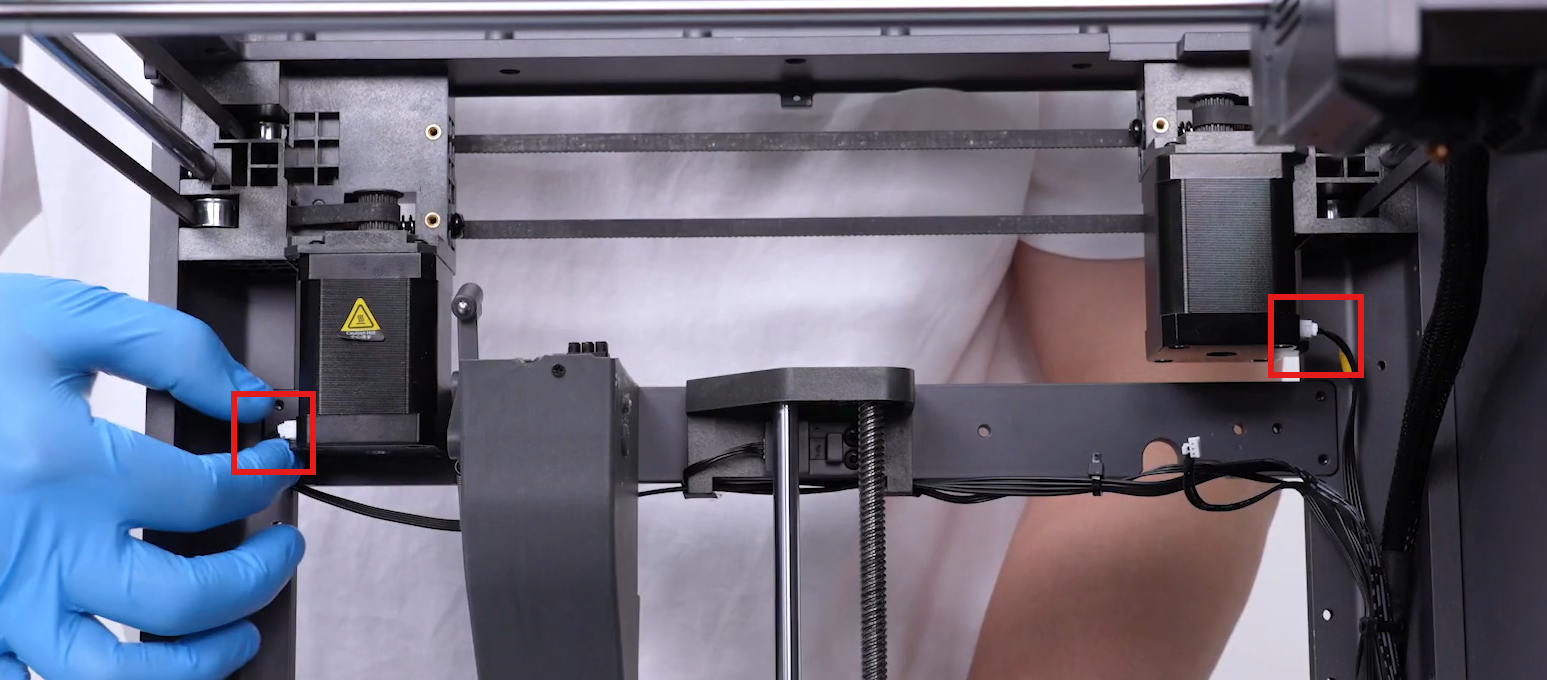
If loose, disconnect and reconnect the cable.
When reconnecting the connector, make sure it is fully inserted and check whether the terminals are loose.
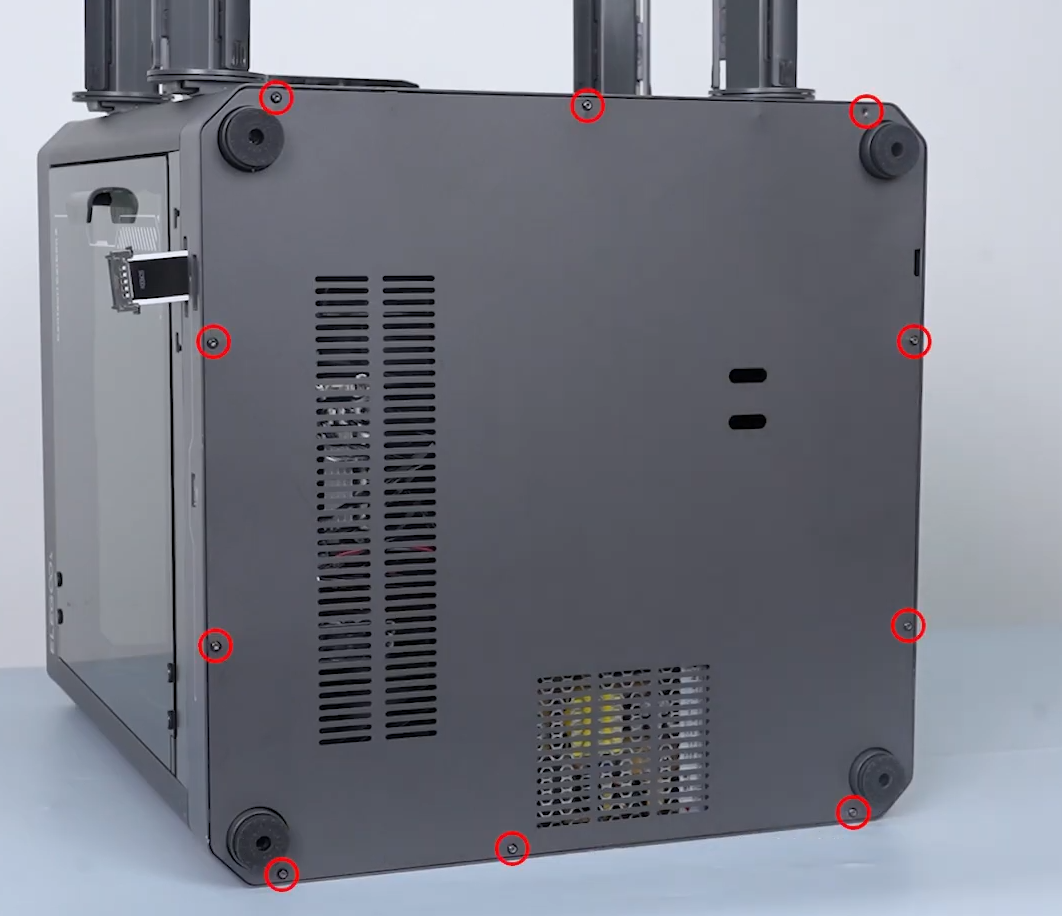
- Use a 2.0 mm Allen key to loosen the 10 screws securing the bottom cover.
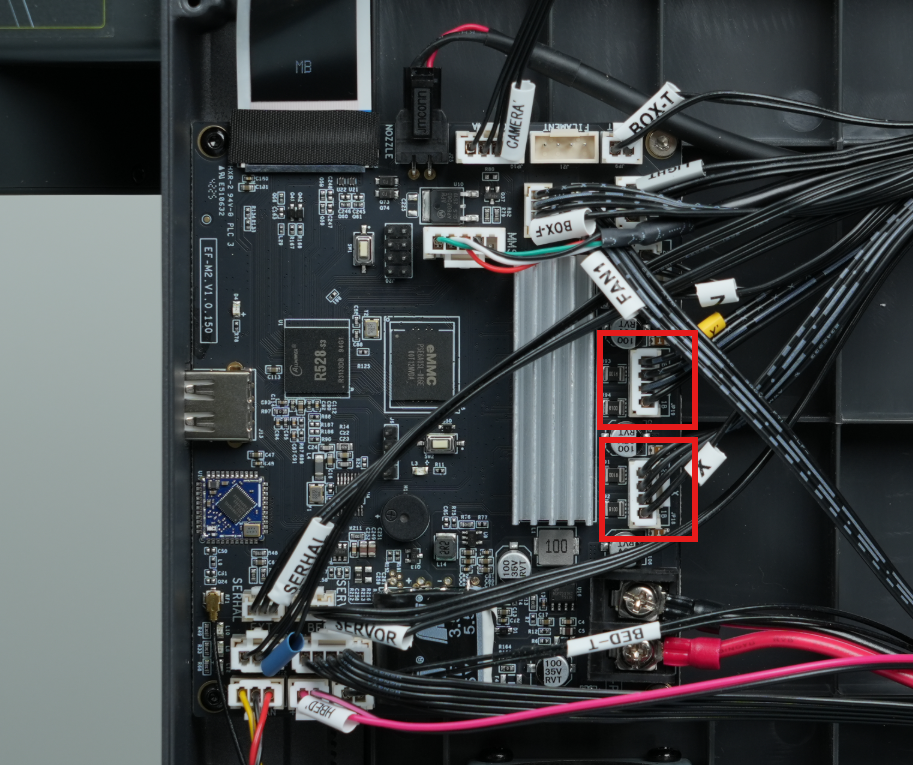
- Reconnect the X/Y motor cables on the mainboard and ensure the connections are secure.
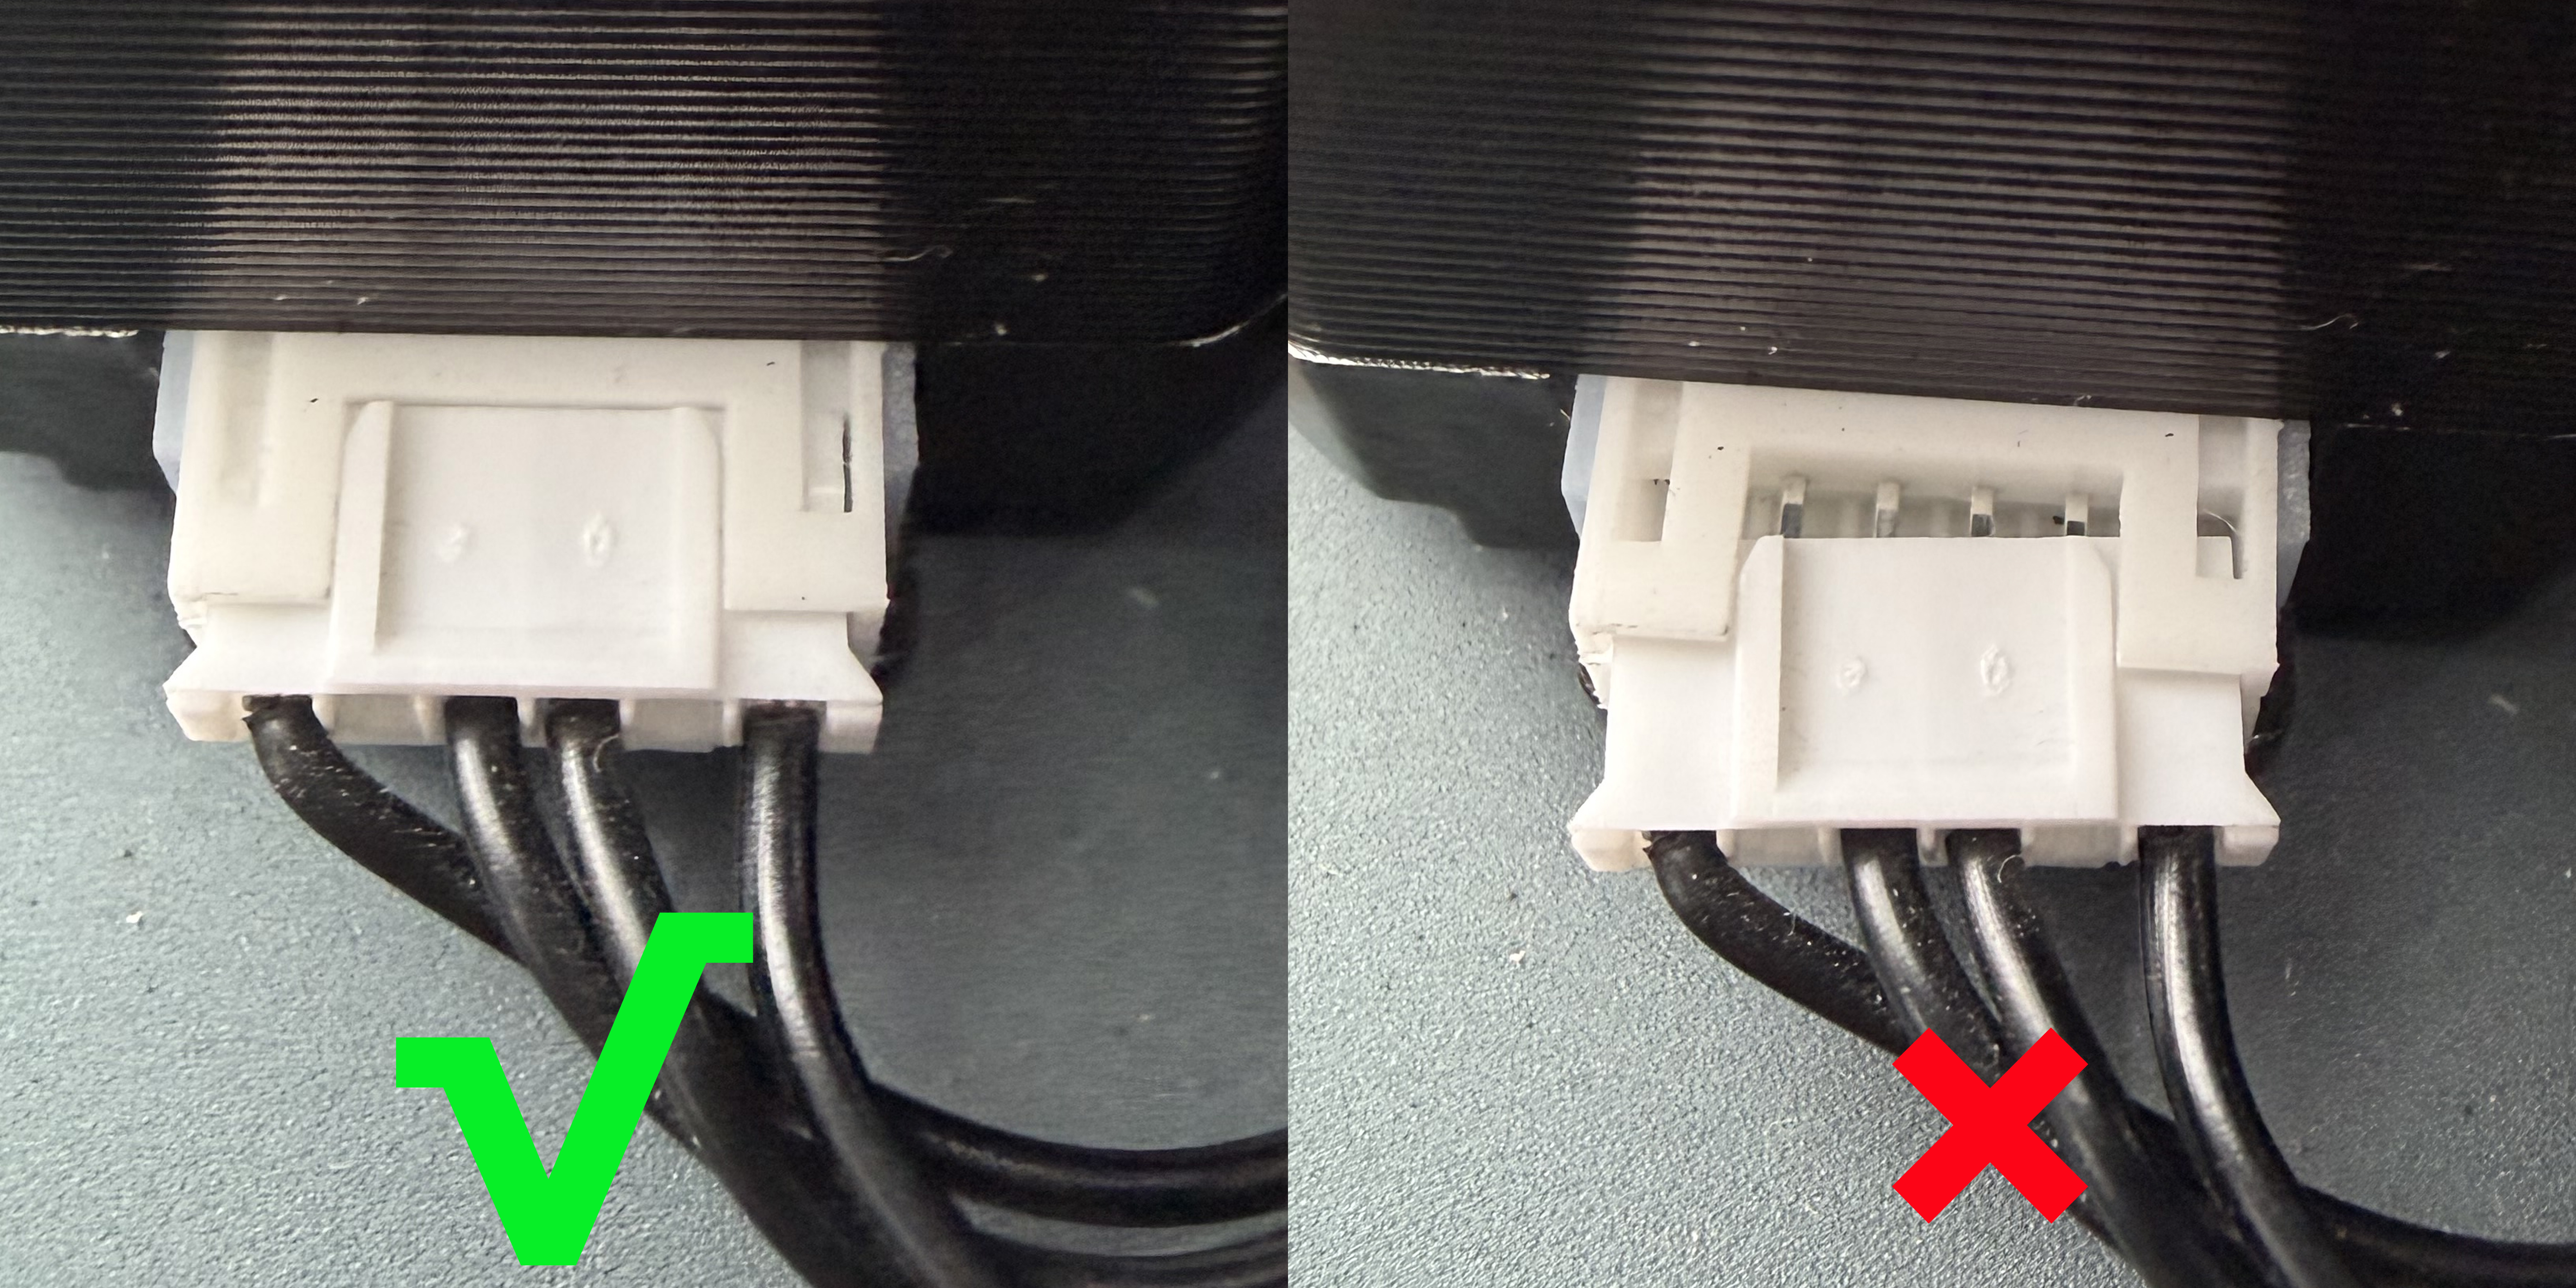
- If damaged cable insulation, burned terminals, or deformed connectors are found during inspection, replace the corresponding cable.
- Restart the printer and check whether the issue remains.
If the issue persists, continue troubleshooting according to the steps below.
¶ 7. Swap X/Y Motor Interfaces for Testing
By swapping the X/Y motor interfaces, you can determine whether the issue comes from the motor and cable or from the mainboard driver.
Reminder:
Turn off the printer and disconnect the power supply cable before unplugging or reconnecting motor connectors.
¶ 7.1 Check the X-axis Interface
- Disconnect the X-axis and Y-axis motor connectors from the mainboard.
- Connect the Y-axis motor cable to the X-axis interface on the mainboard.
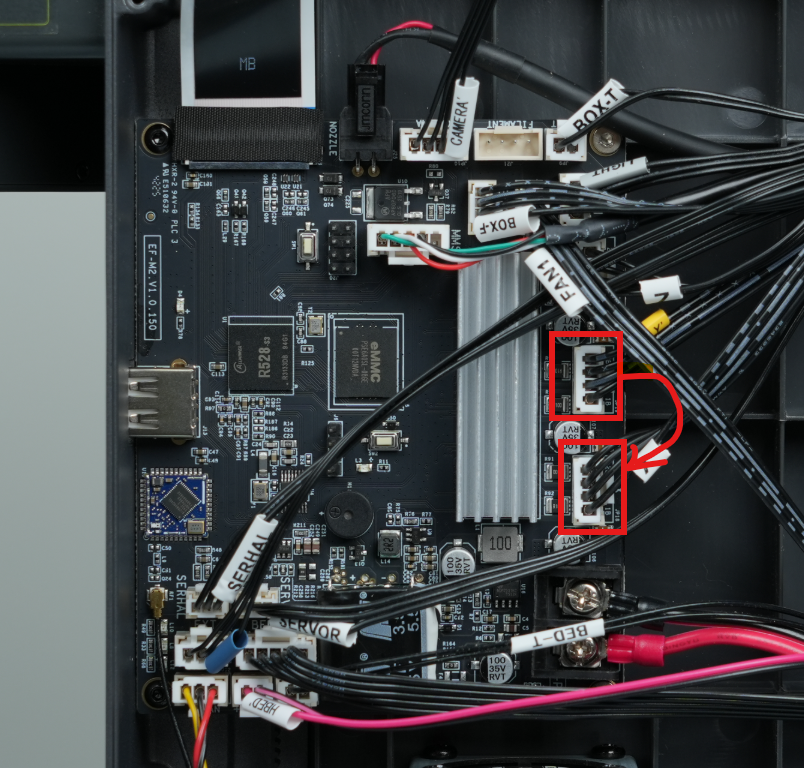
- Power on the printer and perform homing.
- Observe the Y-axis motor operation.
-
Runs normally without abnormal noise:
The X-axis driver on the mainboard functions normally. The issue is caused by the X-axis motor or motor cable. Replace the faulty component.
-
Vibration, shaking, or abnormal noise occurs:
The X-axis driver on the mainboard may be faulty. Replace the mainboard.
¶ 7.2 Check the Y-axis Interface
- Turn off the printer and disconnect the power supply cable.
- Connect the X-axis motor cable to the Y-axis interface on the mainboard.
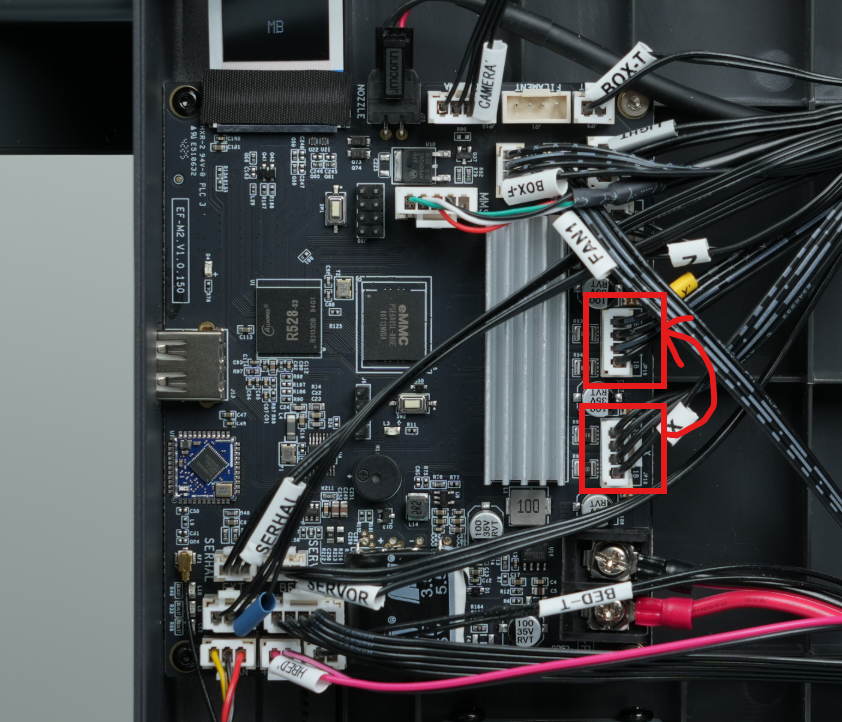
- Power on the printer and perform homing.
- Observe the X-axis motor operation.
-
Runs normally without abnormal noise:
The Y-axis driver on the mainboard functions normally. The issue is caused by the Y-axis motor or motor cable. Replace the faulty component.
-
Vibration, shaking, or abnormal noise occurs:
The Y-axis driver on the mainboard may be faulty. Replace the mainboard.
¶ Issue Not Resolved
Please send the following information to the technical support email:
- Video showing abnormal noise.
- Whether the printer shakes and whether adjusting the placement improves the noise.
- Whether the abnormal fan has been identified and whether the noise disappears after turning off the fan.
- Whether the timing belt has abnormalities and whether adjusting the belt tension improves the noise.
- Whether the noise comes from the X-axis or Y-axis and whether lubrication improves the issue.
- Results of individual X/Y-axis testing and which axis produces noise.
- Whether the motor cable has abnormalities and whether reconnecting the cable improves the issue.
- Results after swapping motor interfaces and whether the noise follows the interface.
- Printer SN code.
¶ Help us improve
If you have any ideas about the wiki pages, please let us know via ELEGOO official feedback channel