https://youtu.be/jzTZK1T4sUQ
- Download and install ELEGOO Cura.
https://github.com/ELEGOO-3D/ELEGOO-Cura4.8.0/releases/tag/4.8.0_1.1.1.0
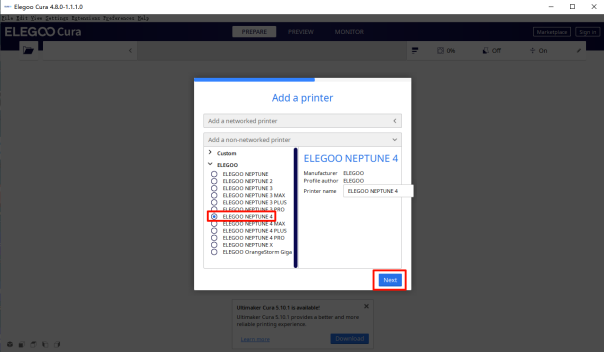
- If you open the ELEGOO Cura software for the first time, the software will automatically pop up the software introduction content, and you can select “Agree”, “Next” and “Skip”.


- Click “Add a non-networked printer” to set a sutable model, select and click “Next”, the software will automatically jump to the main interface.
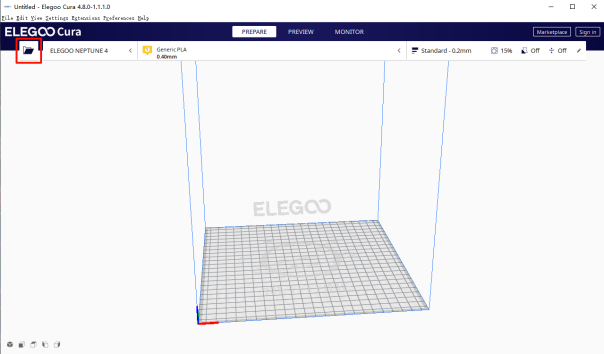
- Click the "folder" icon in the upper left corner of the software, the software will automatically pop up the folder self-recording interface, then find the 3D model and click to open.
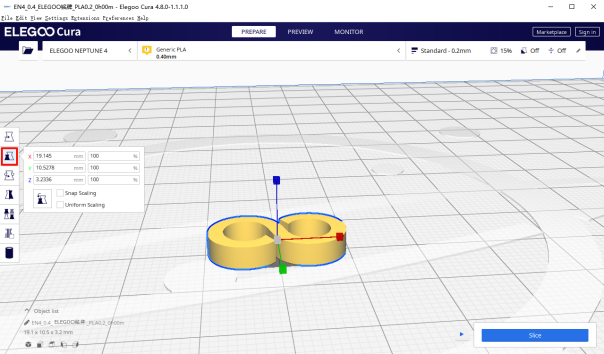
- When a model is selected, the buttons in the left function bar are highlighted.
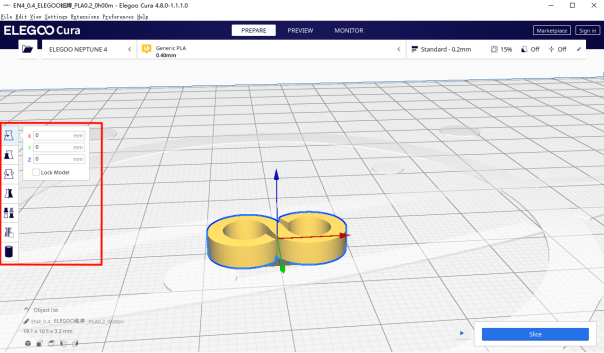
- After clicking the move button, you can long press the left mouse button to select the model required to move and you can directly drag the model to the target position.

- Click the zoom button to modify the size of the model or the size percentage to adjust the model size.
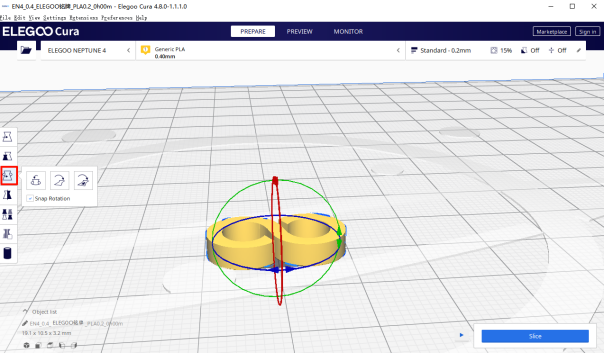
- Clicking the rotate button will pop up three shortcuts: reset, flatten, and select the face to align with the build board, depending on the actual situation of the model.
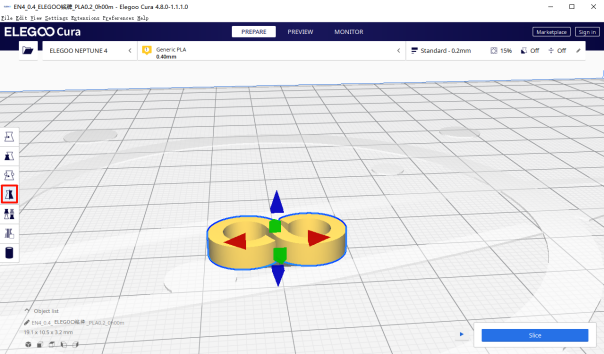
- After clicking the mirror button, the model will appear with arrow icons in six directions, you can click the coordinate arrow in the selected direction with the left mouse button, and the model will be mirrored in this direction.
- Select the Support Interceptor button, then you can click on the point where you don not need to build a support structure, this will generate a small block at that point in case you add a support structure at this point, select it again and left-click on the generated small square to delete this small block.
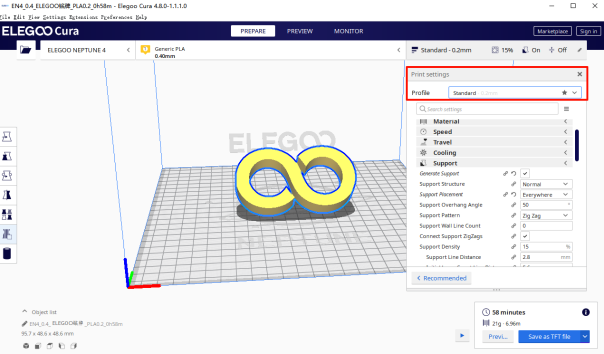
- On the right side of the software is the model management bar, and in general, the default parameter slicing settings are sufficient.
- Printing temperature: Set according to the manufacturer's consumables temperature recommendation, for high-speed printers, the printing temperature is increased by 10 degrees on top of the recommended temperature.
(e.g. set to 200 degrees on Neptune3pro, 210 degrees on Neptune4)

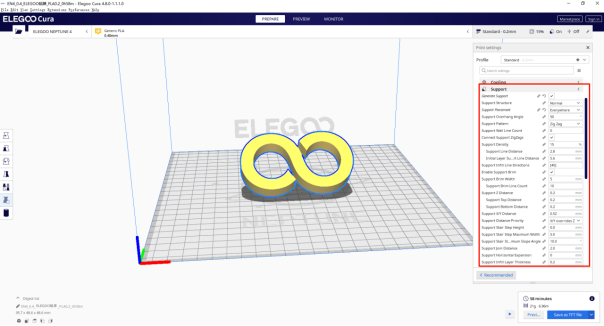
- Generate supports: For the part of the model that is suspended or the part suspended at a large angle, you need to add supports for printing, and choose whether to support it according to the geometry of the model and printing needs.
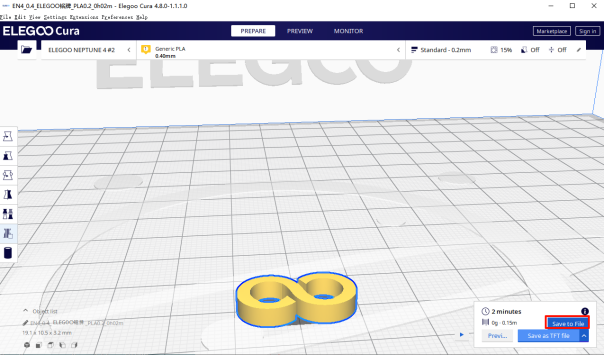
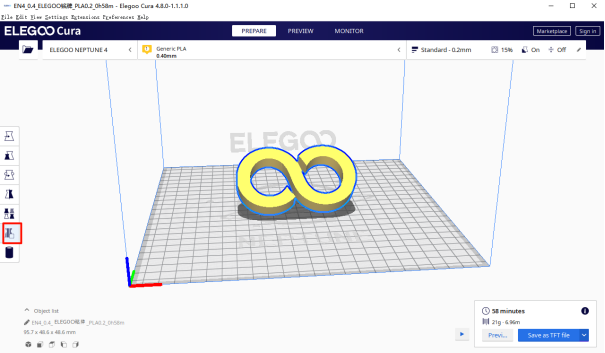
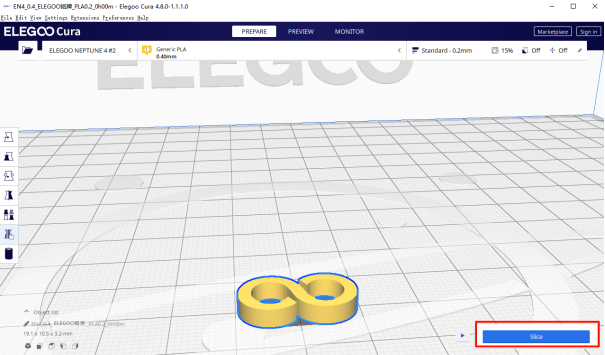
- After setting the parameters, click "Slice".
- Select "Save as TFT file", this option will save the file with a preview image that will display the model on the printer.
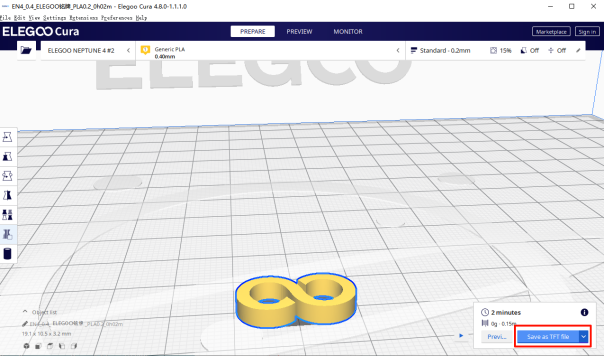
- If you select Save to File, the saved file will not have a preview image.