¶ Brief Description
- Applicable Device: M1 Ultra
- Connection Method: Wired USB Connection
When ELEGOO Scan cannot connect to the scanner, follow this guide to check the connection mode, cable, USB data connection, and macOS permissions in sequence.
¶ Troubleshooting Symptoms
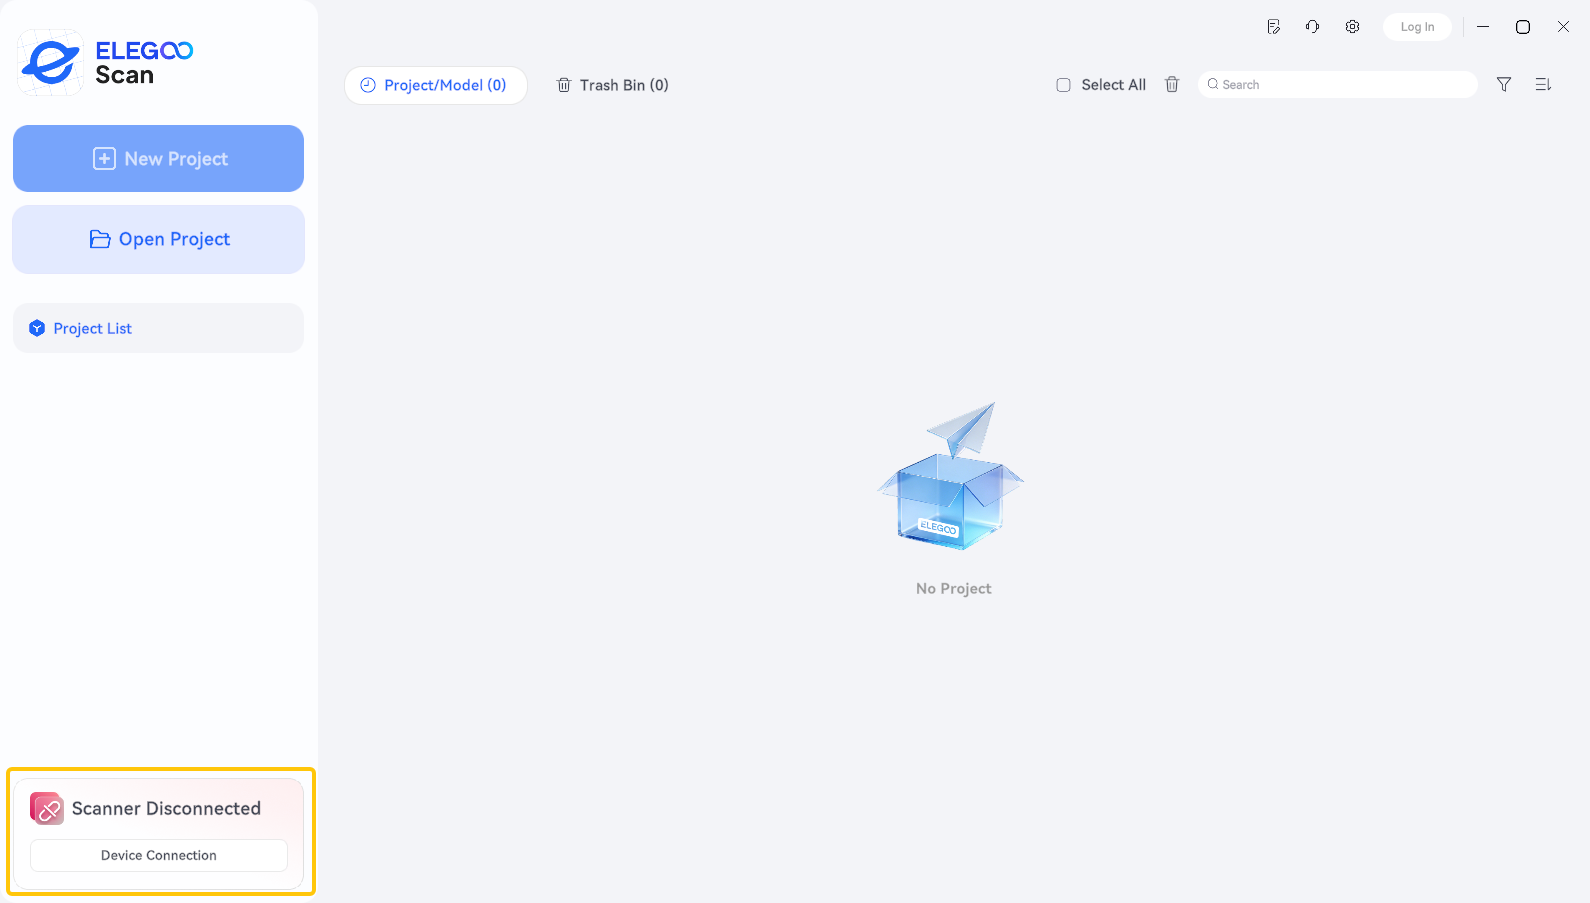
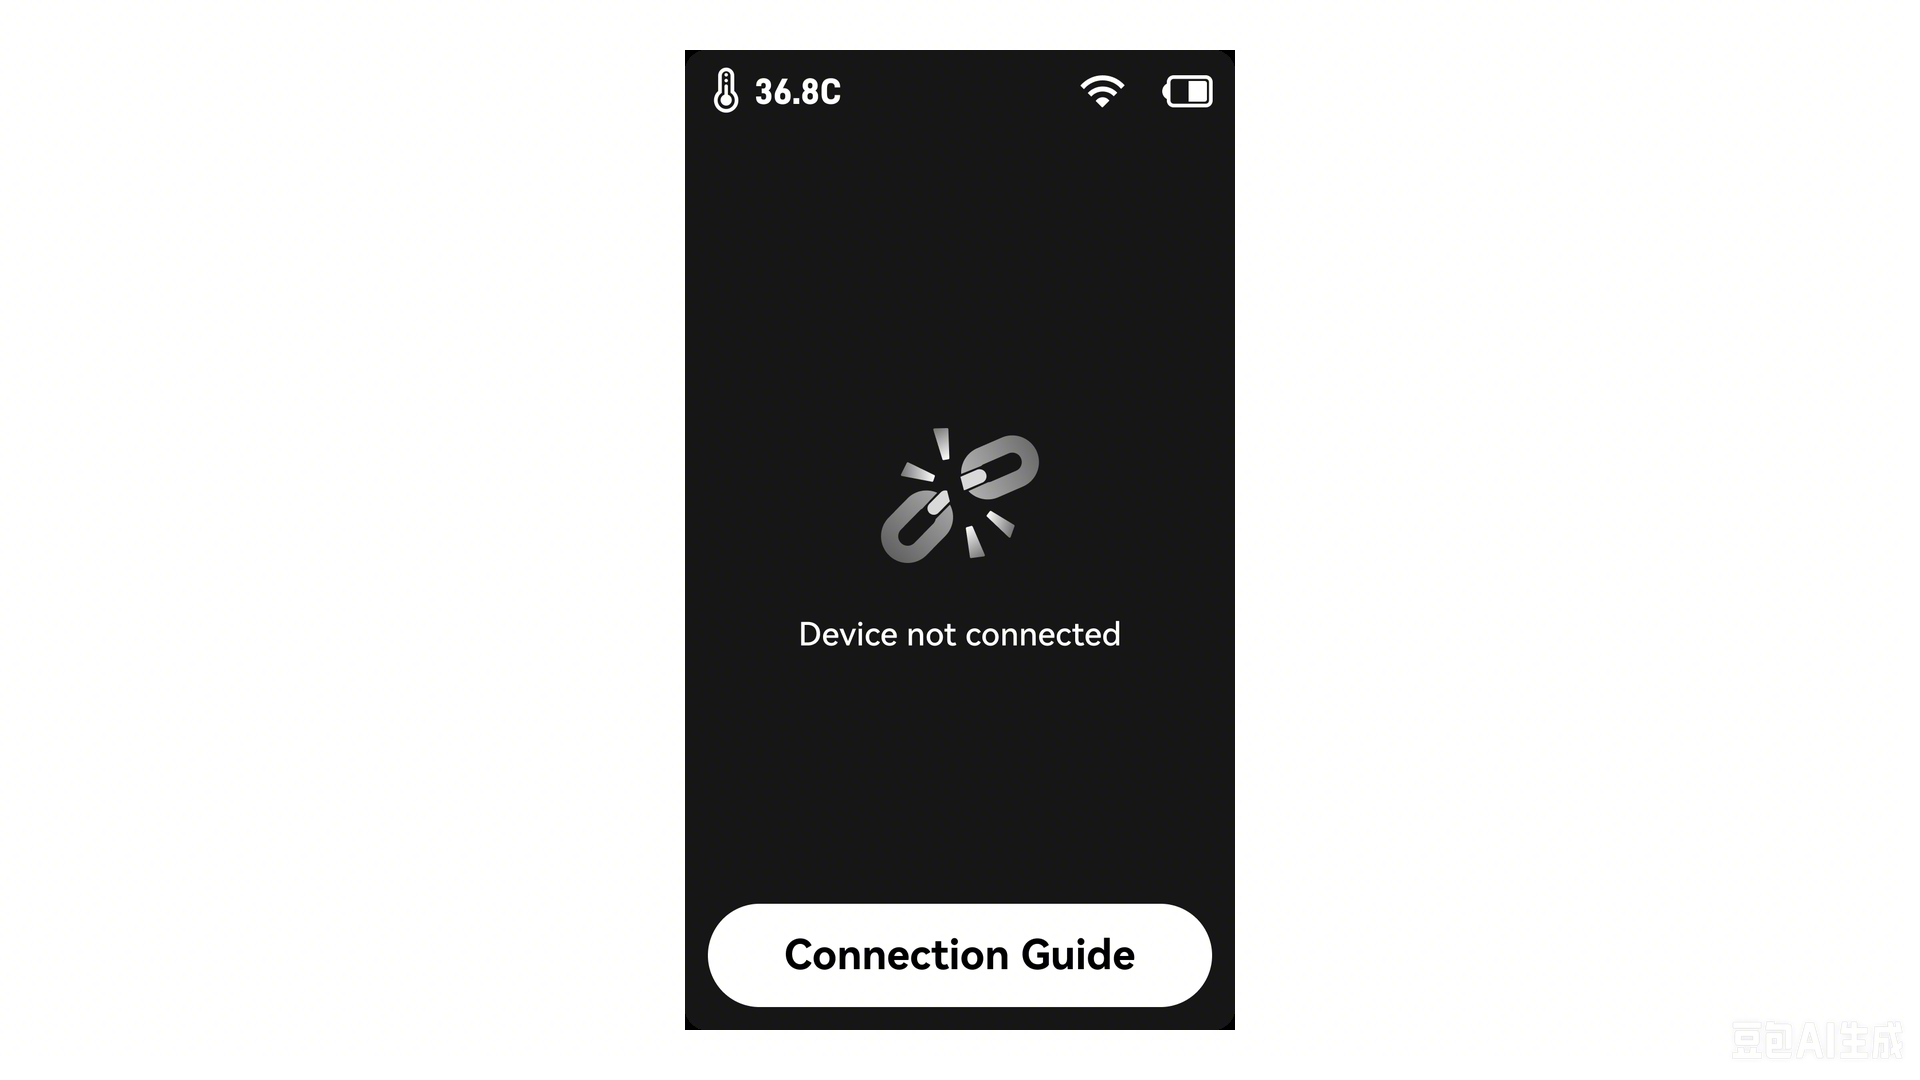
The software displays "Scanner Disconnected" or "USB connection failed", while the scanner screen displays "Device not connected".
First, check whether macOS recognizes the USB device, then troubleshoot the software.
¶ Check Mac Configuration Before Troubleshooting
| Item | Minimum Requirements | Recommended Configuration |
|---|---|---|
| Operating System | macOS 14 or later | macOS 14 or later |
| Chip | Apple M2 | Apple M4 or later |
| Memory | 16 GB or more | 32 GB or more |
How to check: Apple menu → About This Mac.
¶ Troubleshooting Steps
¶ 1. Confirm That the Scanner Is in USB Mode
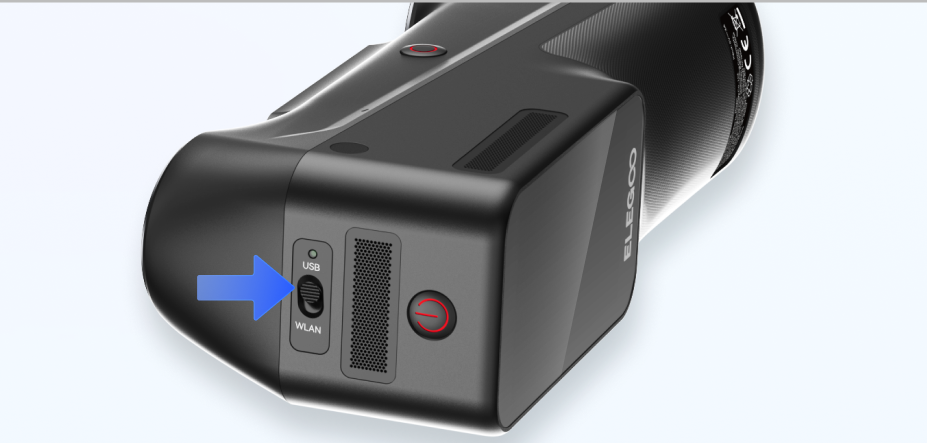
Set the USB/WLAN switch on the top of the scanner to USB. The scanner will restart automatically after the connection mode is changed.
Note: Do not assume that the scanner is in USB mode simply because the cable is connected. If the scanner remains in WLAN mode, connecting the cable does not establish a USB data connection.
¶ 2. Check the Cable Connections
Use the USB 3.0 data&charge cable supplied with the device.
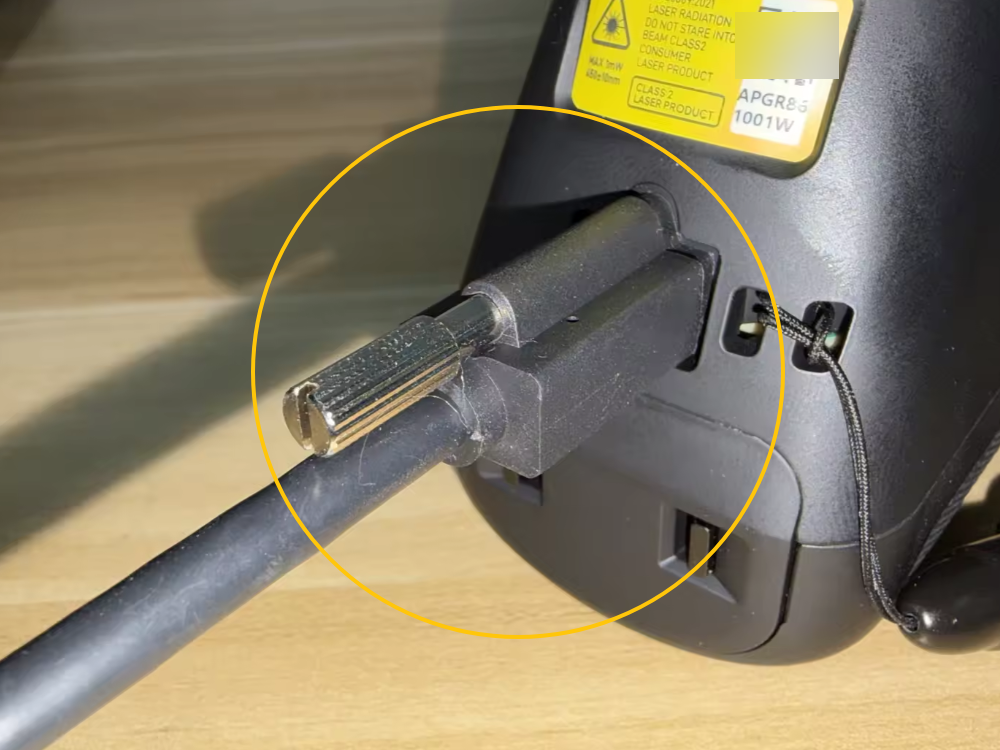
Insert the end with the locking screw into the scanner's USB-C port and tighten the screw. Gently pull the connector to make sure it is securely attached. Connect the other end directly to a port on your Mac whenever possible.
Check the cable for damage, bending, or poor contact.
The scanner being able to charge only confirms that power is being supplied. It does not prove that the cable supports data transmission.
If necessary, test with another cable that is confirmed to support USB 3.0 or a higher specification.
¶ 3. Confirm That the Entire Connection Chain Supports USB 3.0
The Mac port, USB cable, and any adapters or hubs must all support USB 3.0 or a higher specification.
USB-C refers only to the connector type. The port color, charging power, and appearance alone cannot confirm the data transfer speed.
During troubleshooting, remove any docking stations, USB hubs, and extension cables. Connect the scanner directly to the Mac.
If an adapter is necessary, check its specifications to confirm that it supports a data transfer rate of at least 5 Gb/s.
For Mac laptops, connect the power adapter at the same time.
¶ 4. Allow USB Accessories to Connect to Your Mac
This step applies to Mac laptops with Apple silicon that may require accessory authorization.
First, unlock your Mac, then disconnect and reconnect the scanner's USB cable.
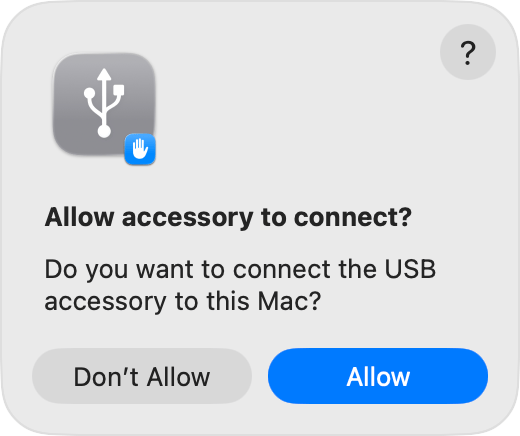
If the "Allow accessory to connect?" prompt appears, click Allow.
The device may still charge even if USB data access is denied.
Settings path: Apple menu → System Settings → Privacy & Security → Accessories → Ask for new accessories.
Depending on the macOS version, the "Ask for new accessories" setting may appear directly at the bottom of the Privacy & Security page without a separate Accessories submenu.
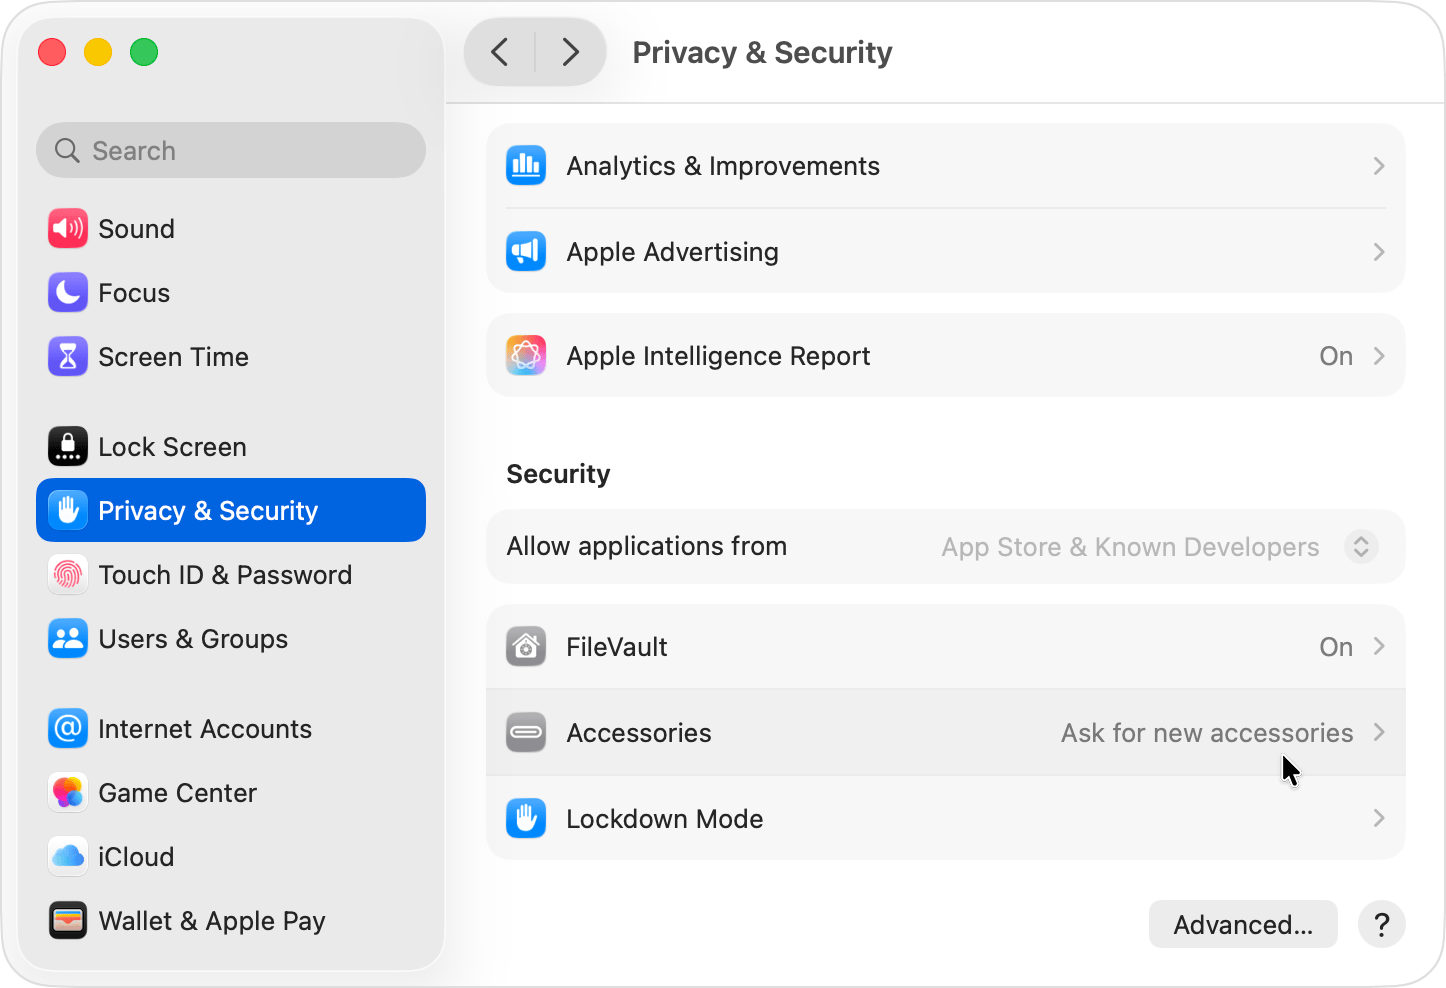
Keep the setting as "Ask for New Accessories". There is no need to change it to "Always Allow" for troubleshooting.
After allowing the current connection, restart ELEGOO Scan.
The interface shown in the screenshots may vary slightly depending on the macOS version.
¶ 5. Check USB Device Recognition and Transfer Speed in System Information
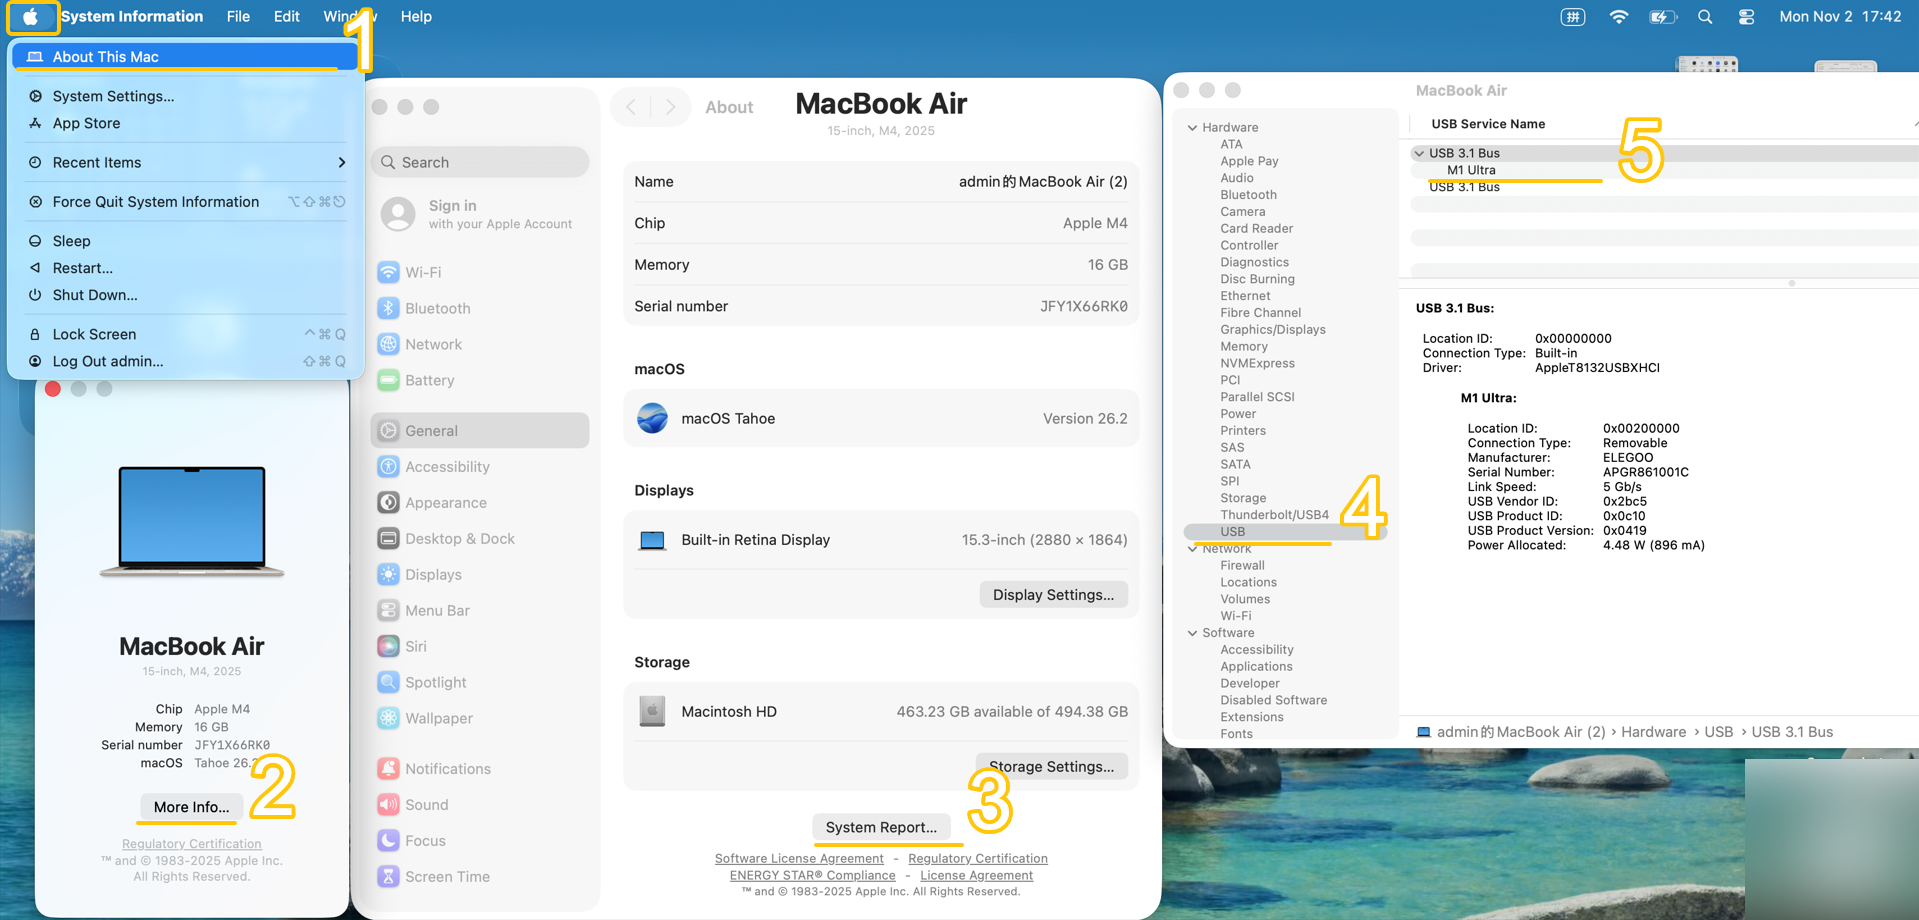
How to open System Information:
System Information → Hardware → USB.
Alternatively:
Apple menu → System Settings → General → About → System Report → Hardware → USB.
Expand the USB device tree and look for a device entry that appears or disappears when you connect or disconnect the scanner.
Reopen System Information to refresh the device list if necessary.
Select the device itself and check the Speed field on the right. Do not rely only on the name of the parent USB bus.
| Observation | Next Step |
|---|---|
| No corresponding device appears | Repeat Steps 1–4. Try another Mac port and USB cable, and test again without adapters or hubs. |
| Up to 480 Mb/s | The current connection has fallen back to USB 2.0. Replace the cable, port, or adapter, then check again. |
| 5 Gb/s or higher | The corresponding USB transfer speed has been established. Continue checking the software and permissions. This alone does not confirm that the scanning function is working properly. |
The device may appear under its model name or as a camera or composite device.
macOS does not require a fixed number of cameras to be displayed, nor does it require an entry named "Integrated Camera". Check the changes before and after connecting the scanner and refer to the actual device information.
¶ 6. Check Login Items and Related sudo Permissions
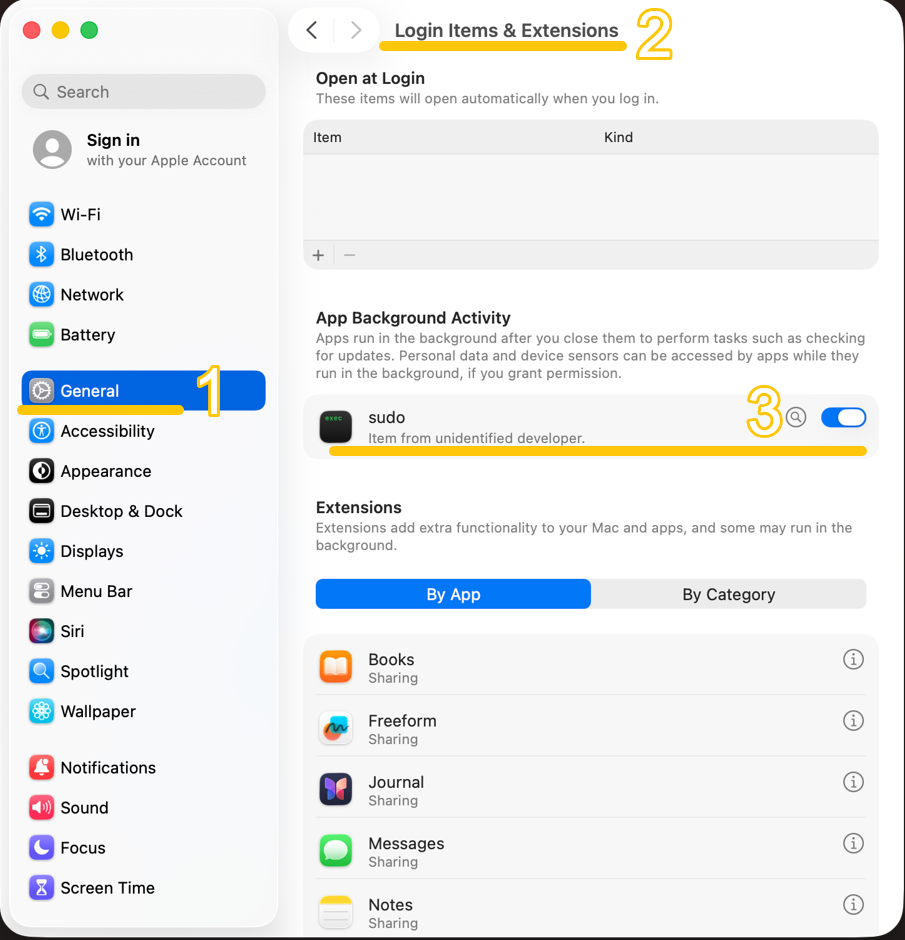
Settings path: Apple menu → System Settings → General → Login Items & Extensions → Allow in the Background / App Background Activity.
In macOS 14, this section is usually named "Login Items".
Find ELEGOO Scan or its confirmed helper programs and check whether background activity has been disabled.
If an item is named "sudo", first check its developer information or file path in the details before enabling it.
If no such item is listed, record the result and continue troubleshooting.
¶ 7. Check RPC-Related Processes
How to open Terminal:
Finder → Applications → Utilities → Terminal.
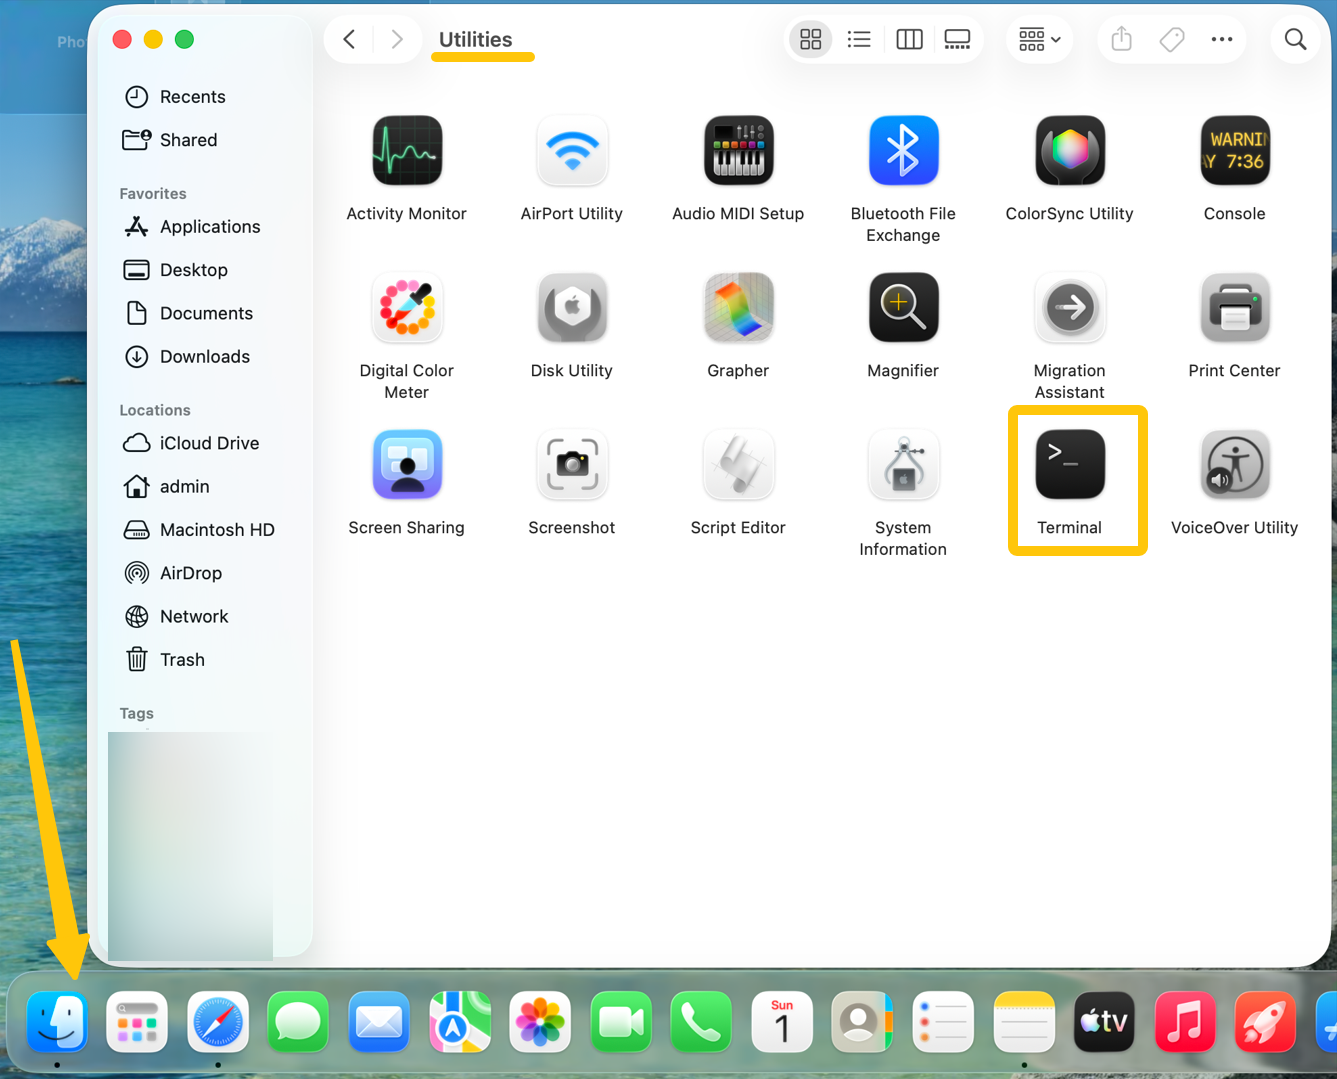
Keep ELEGOO Scan open, enter the following command, and press Return:
ps -A |grep RPC
This command performs a case-insensitive search and prevents the grep command itself from being included in the results.
You do not need to click "OK" or add sudo before the command.
| Command Result | Explanation |
|---|---|
| Related processes appear | Restart RPC according to Step 8. |
| No output | The process may not be running, or the actual service name may not contain RPC. This result alone does not confirm that the service is missing or that the installation has failed. |
¶ 8. Force Quit the Elegoo Server Process and Restart ELEGOO Scan
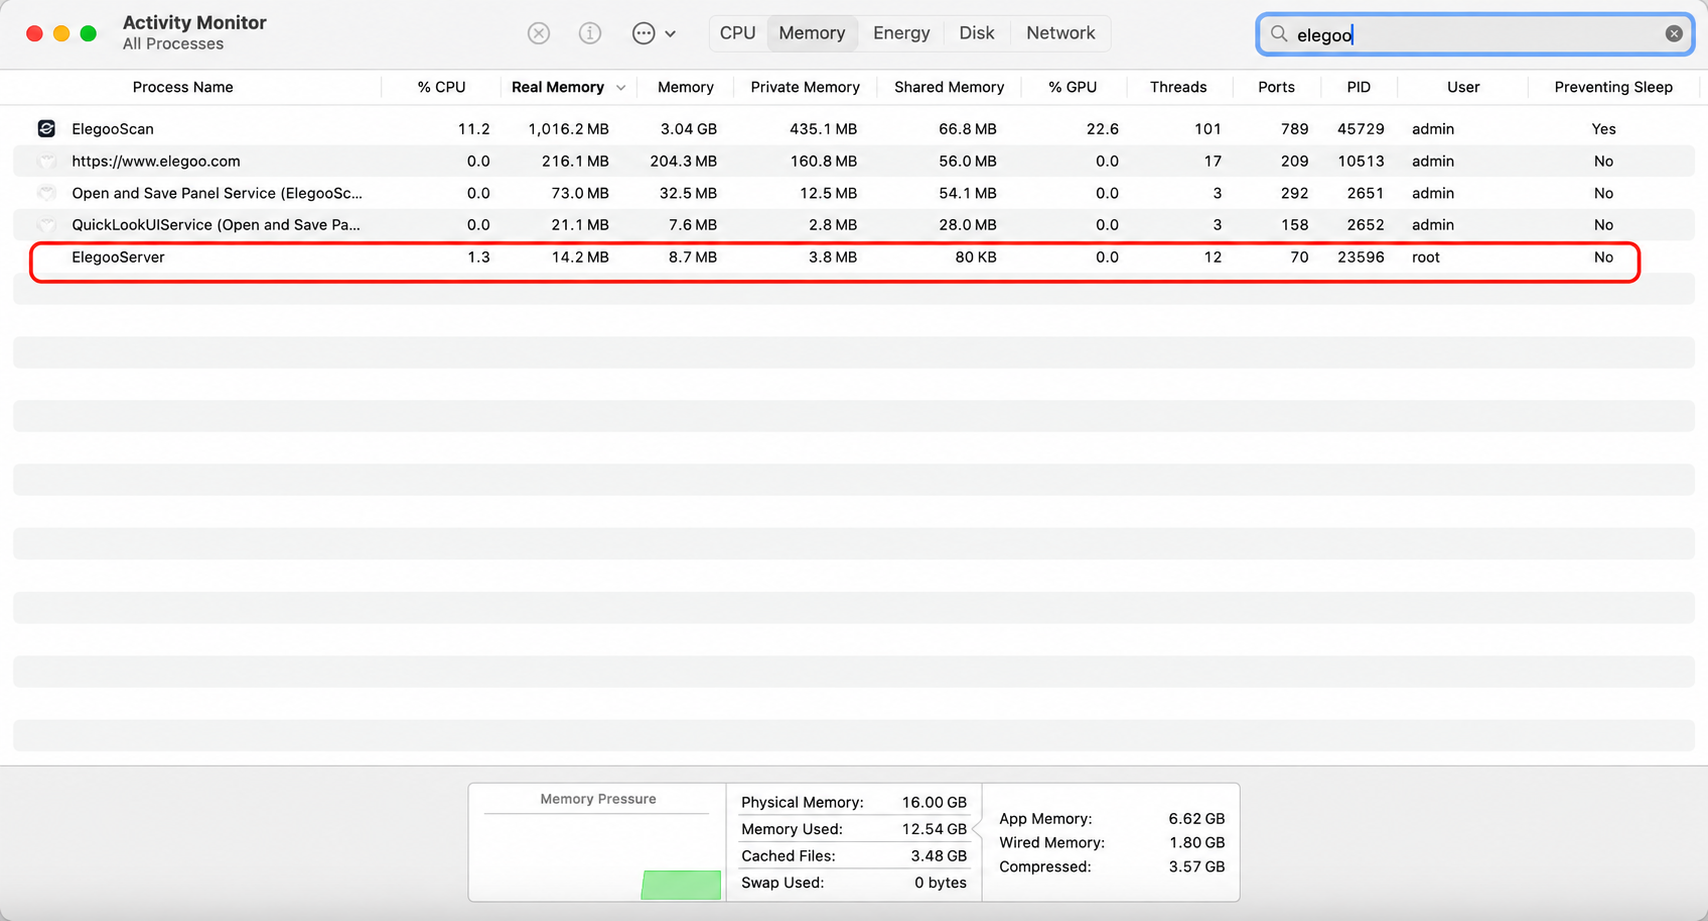
How to open Activity Monitor:
Finder → Applications → Utilities → Activity Monitor → View → Memory.
Search for "elegoo", locate "Elegoo Server", and force quit the process.
After that, restart ELEGOO Scan.
¶ 9. Check Firewall Rules if Necessary
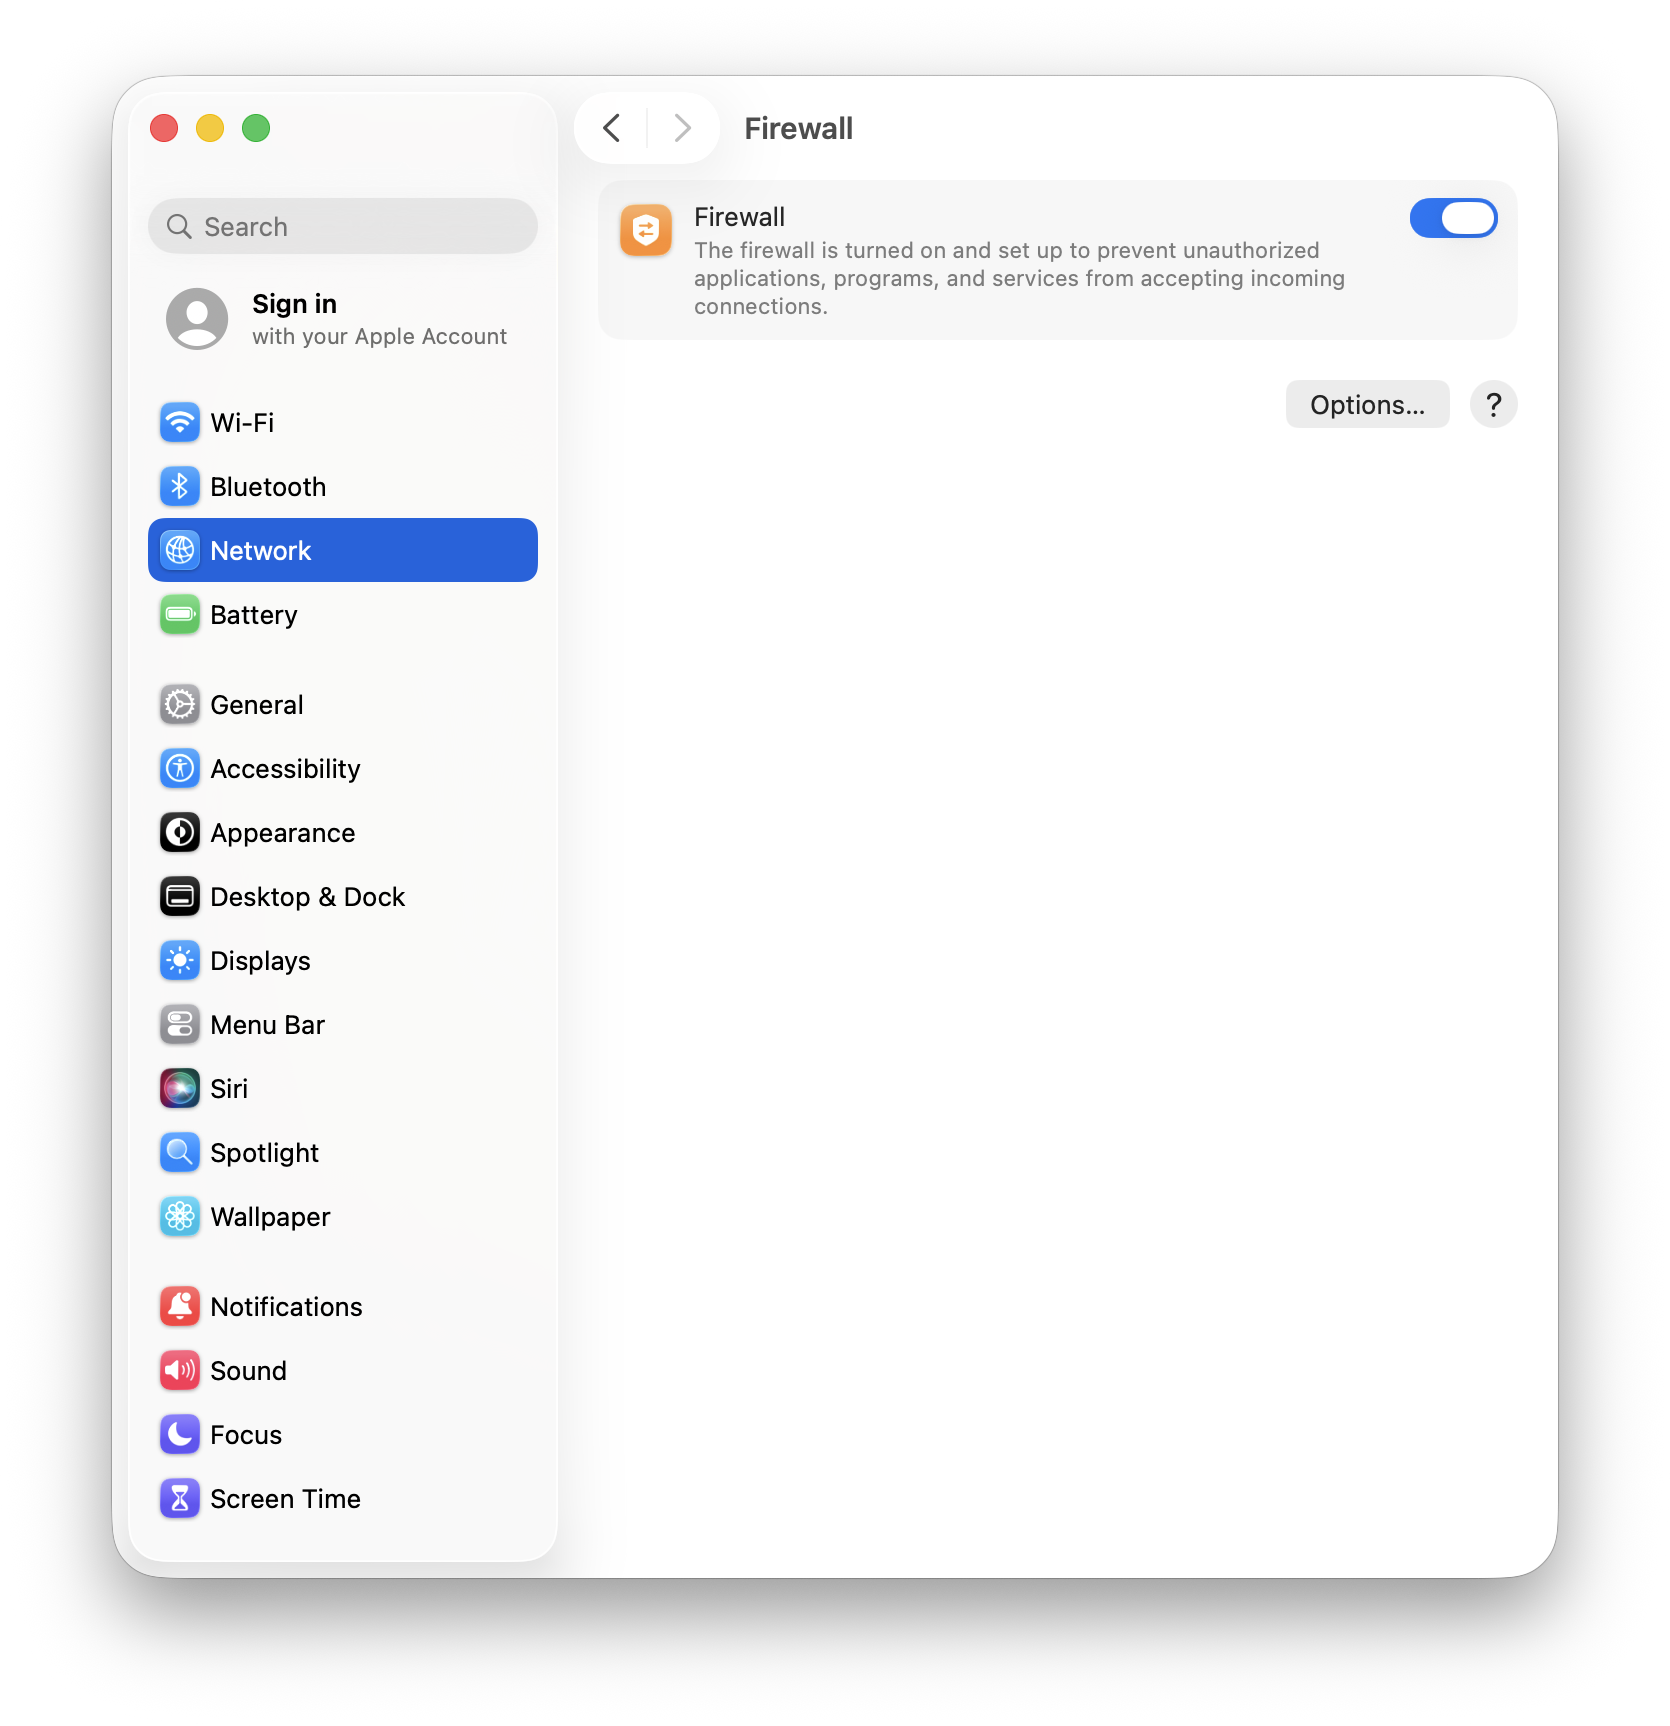
Only perform this step if macOS displays a warning that the software's network communication is blocked or if an explicit blocking rule is listed.
The firewall is not the cause of every USB connection failure. You do not need to disable the entire firewall during troubleshooting.
Settings path: Apple menu → System Settings → Network → Firewall → Options.
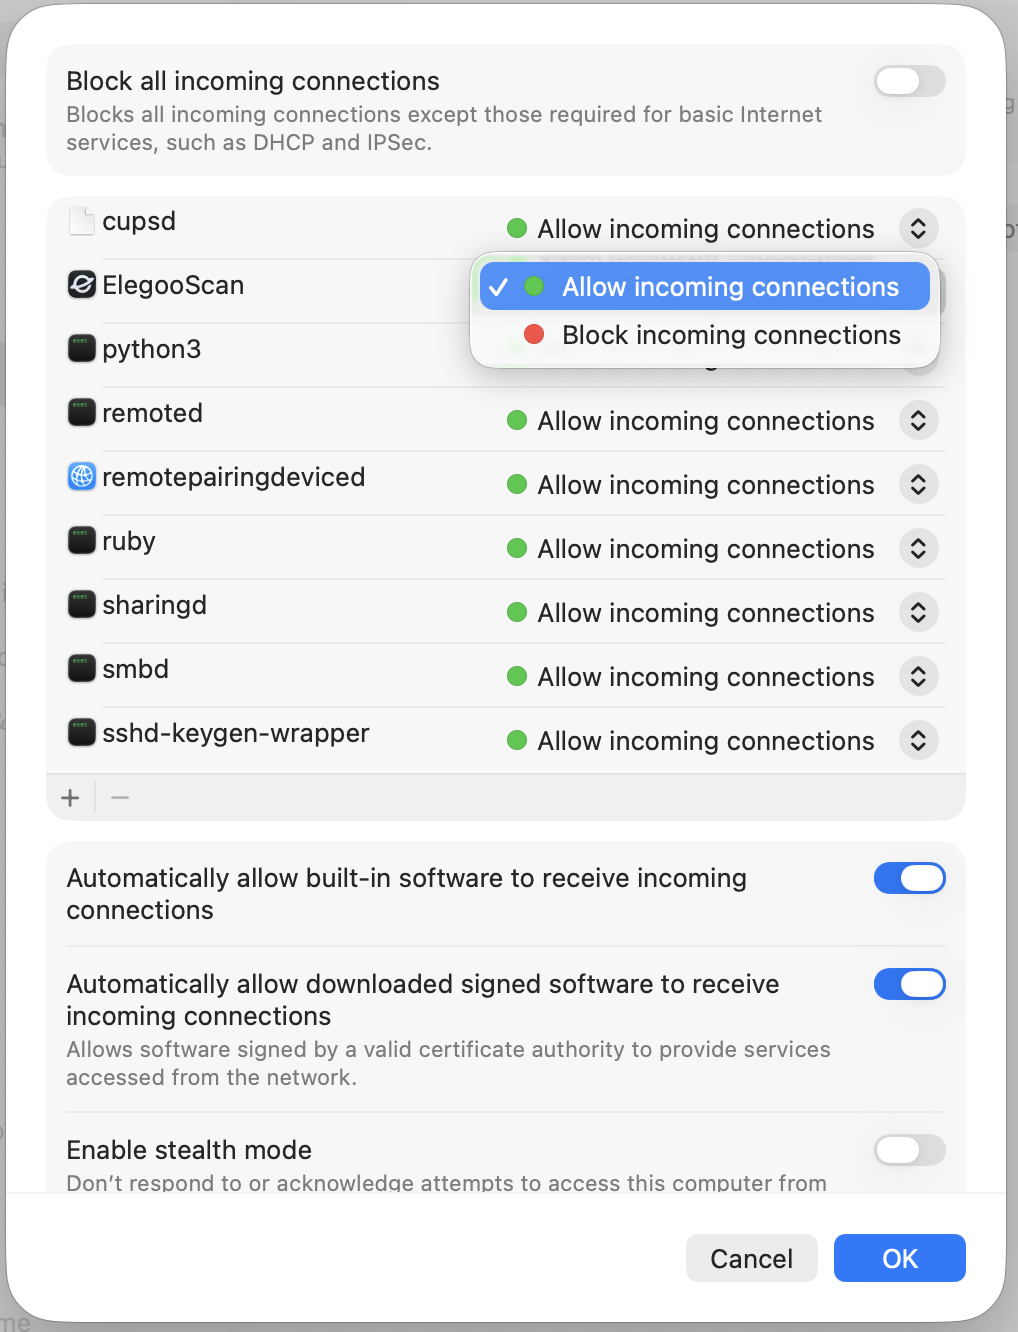
If ELEGOO Scan is set to block incoming connections, change the setting to Allow incoming connections.
Only use the "+" button to add the application if you have confirmed that it is an official program and adding it is necessary.
If the "Options" button or relevant entry is unavailable, simply record the current status. There is no need to enable the firewall just for troubleshooting.
¶ 10. Restart the Devices and Check the Connection Again
Save your work and quit ELEGOO Scan.
Disconnect the scanner's USB cable, restart the scanner, and then reconnect it directly to a verified Mac port using the original cable.
Unlock your Mac and allow the accessory to connect if prompted. Then restart ELEGOO Scan.
If the connection still fails, restart your Mac.
Check whether ELEGOO Scan is an officially released version compatible with your current macOS version.
If reinstallation is necessary, back up your projects first, use the official installation package, and grant the required permissions according to the software prompts.
¶ Recovery Criteria
- The disconnection message disappears and the software displays that the device is connected.
- The scanner screen also indicates a successful connection.
- The scan preview can be accessed in the software.
When using USB mode, the absence of a real-time scanning image on the scanner's touchscreen does not necessarily indicate a disconnection.
¶ Information to Provide If the Connection Still Fails
If the scanner still cannot connect, contact ELEGOO Technical Support through the official support channel and provide the following information. This will help identify whether the issue is related to the USB data connection or the software.
- Mac model, chip, memory, and macOS version; ELEGOO Scan version and M1 Ultra firmware version.
- Full screenshots of the error messages; clear photos of both ends of the USB cable, the Mac port, and any adapters or docking stations used.
- Screenshots showing the USB device name and transfer speed in System Information; test results after trying different cables and ports or connecting the scanner directly.
- Results of the background activity and RPC process checks, if applicable; a video showing how to reproduce the issue and any logs that can be exported from the software.
The log export location may vary depending on the software version. Follow the instructions provided by Technical Support if necessary.
¶ Help us improve
If you have any ideas about the wiki pages, please let us know via ELEGOO official feedback channel .