¶ Upgrade Overview
- Applicable Model: Centauri Carbon 2
- Upgrade Introduction: By installing the upgrade kit, the system can automatically detect the newly added components and upgrade the Centauri Carbon 2 to the Centauri Carbon 2 Combo.
- Main Changes After Upgrade:
- Added CANVAS multi-color printing system: Supports up to 4-color printing, with features including automatic color switching, filament detection, automatic filament loading, and filament tangle prevention.
- Added multi-color filament feeding components: Includes 4-in-1 hub, filament detection components, and related connection components to enable automatic switching between multiple filaments.
- Function status change: The CANVAS system was originally an optional upgrade for Centauri Carbon 2. After the upgrade, it becomes a standard multi-color printing function of Centauri Carbon 2 Combo.
¶ Preparation Before Upgrade
¶ Upgrade Precautions
- Confirm that the device is Centauri Carbon 2.
- Follow the tutorial sequence to complete the hardware installation and ensure that the printer can power on normally.
¶ Upgrade Kit
- 4-in-1 hub
- PTFE Tubes × 4
- PTFE Tube Fixing Block
- Thermal Cover
- CANVAS Module
- CANVAS Mounting Bracket
- Filament Hub Bracket
- Spool Holder Mount × 4
- Spool Holders × 4
- 4-Pin Cable (CANVAS communication cable)
- PM3 × 50 Screws × 2
- PM3 × 6 Screws × 2
- PM3 × 12 Screws × 8
- PM3 × 14 Screws × 2
- PM3 × 8 Screws × 3
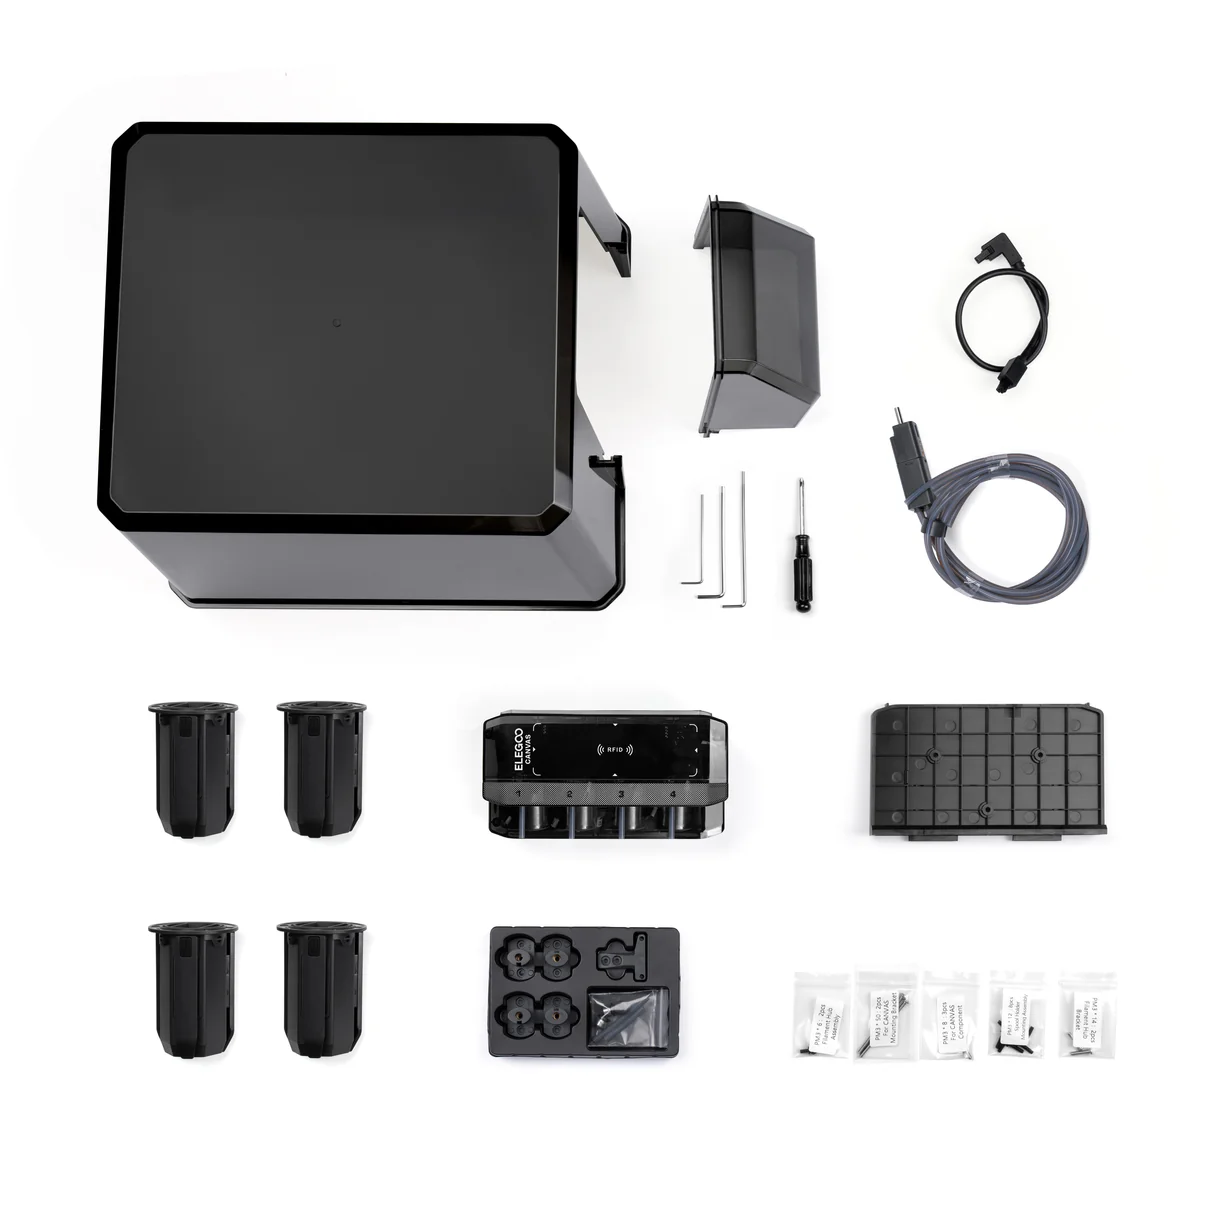
¶ Required Tools
- 2.0 mm Allen key
- 2.5 mm Allen key
- 3.0 mm Allen key
- Phillips screwdriver
¶ Reference Video
https://www.youtube.com/watch?v=6Yh7CshvNF4&list=PLkFeYZKRTZ8bCk7Zdw3ddlDDThl5CVJxJ&index=2
¶ Disassembly Steps
Note: The original spool holders and related components removed during disassembly do not need to be reinstalled after the upgrade. Please keep them properly stored.
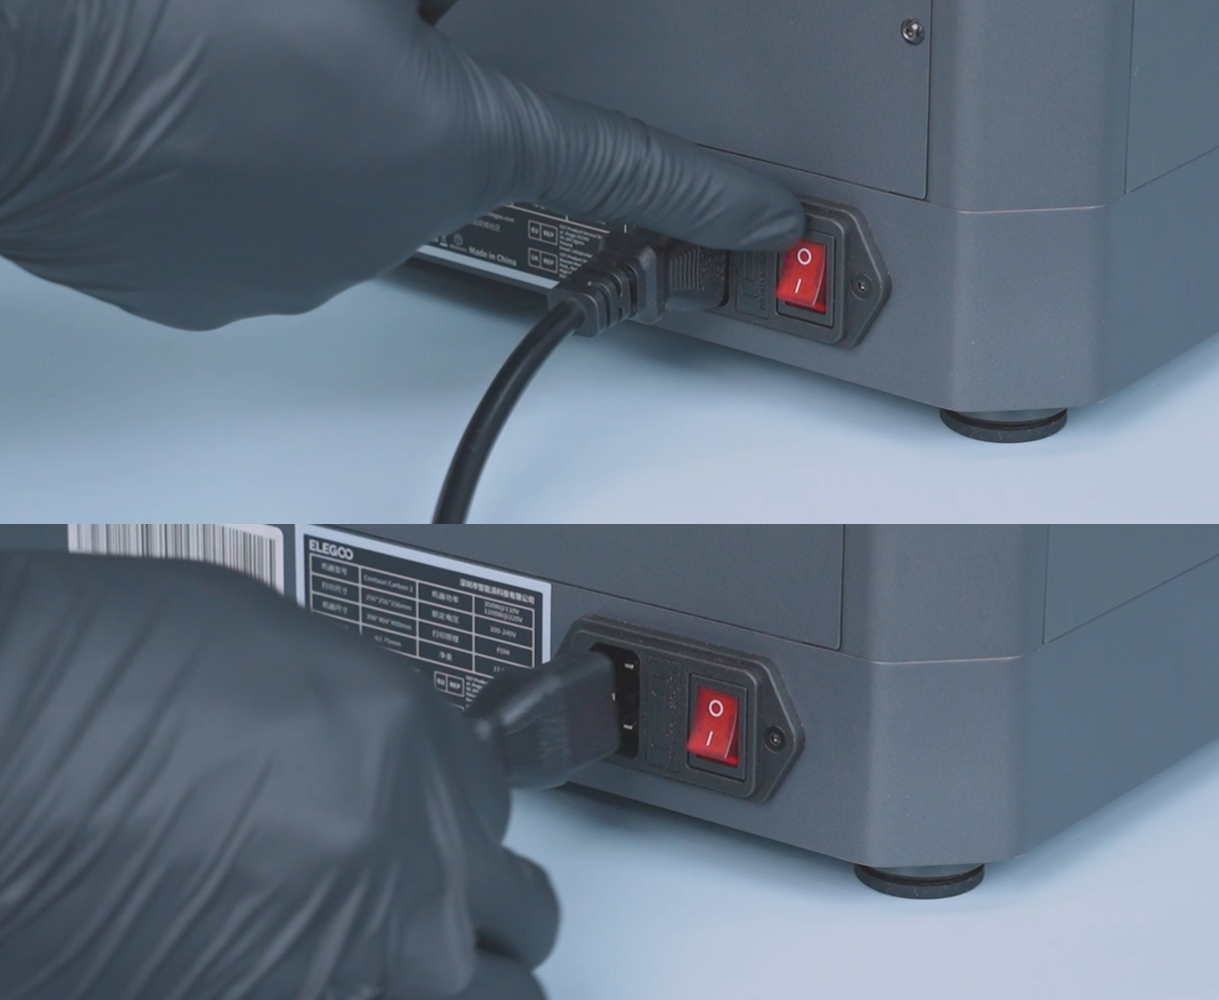
Preparation: Turn off the printer and unplug the power cord.
¶ Remove the Original Spool Holder
- Remove the silicone plug from the spool holder mounting position on the right side panel.
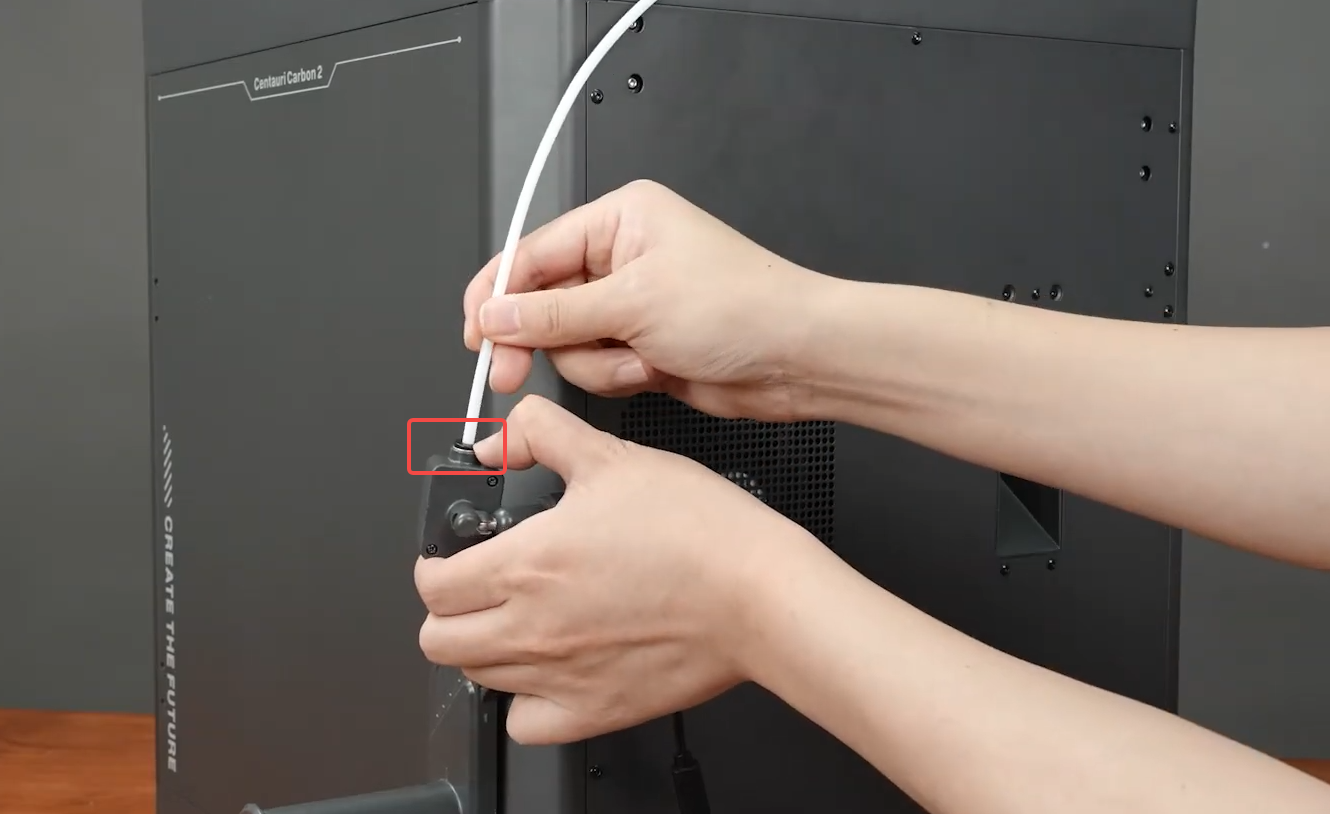
- Disconnect the filament detector cable, press the pneumatic fitting, and remove the original PTFE Tube.
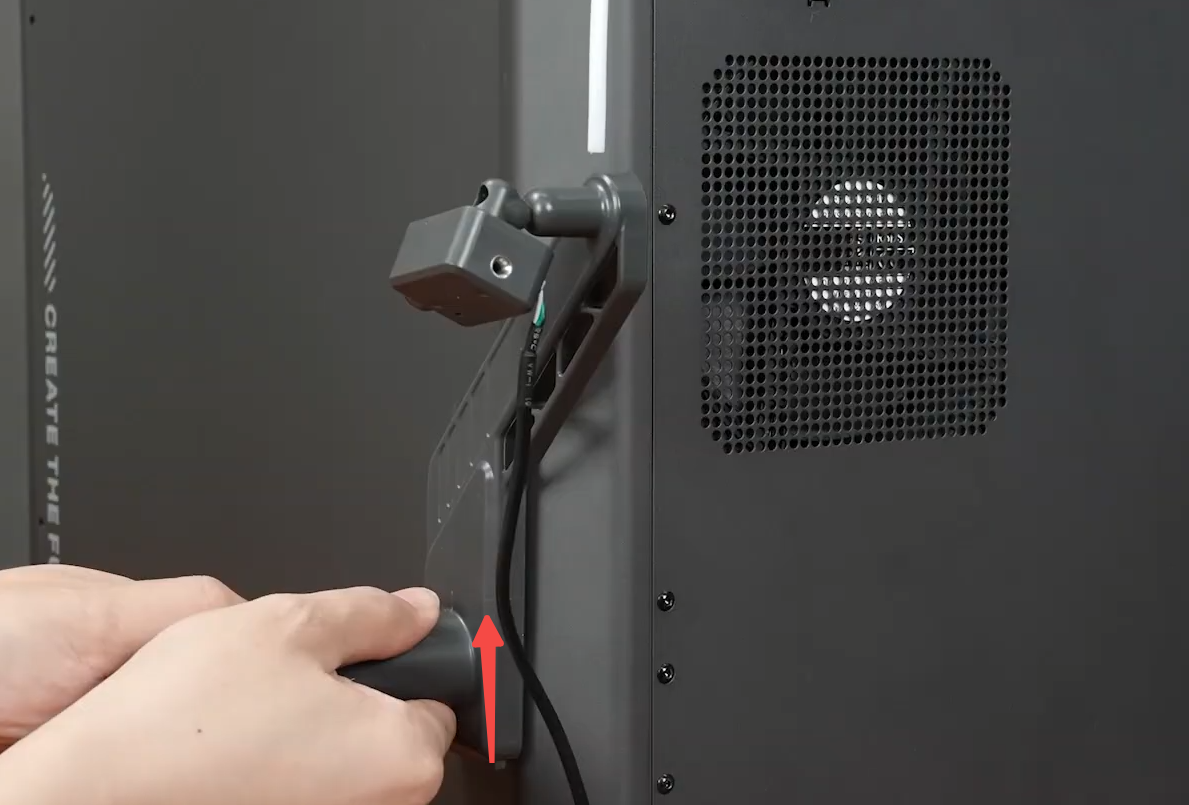
- Push upward and remove the original spool holder.
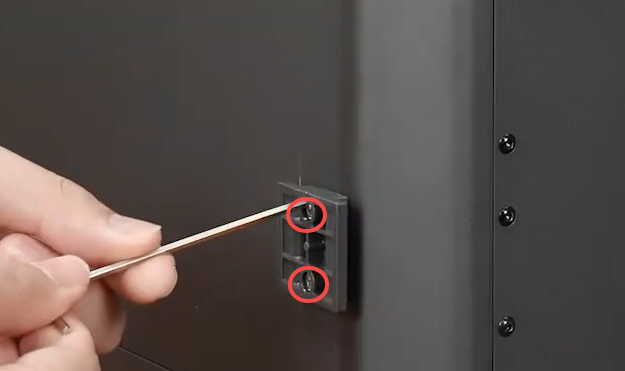
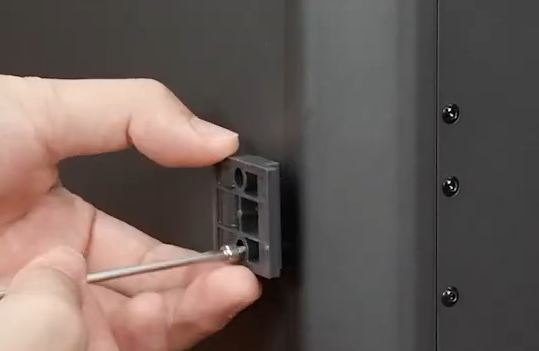
- Use a 2.0 mm Allen key to loosen the screws securing the spool holder fixing block, then remove the fixing block.
¶ Remove the PTFE Tube
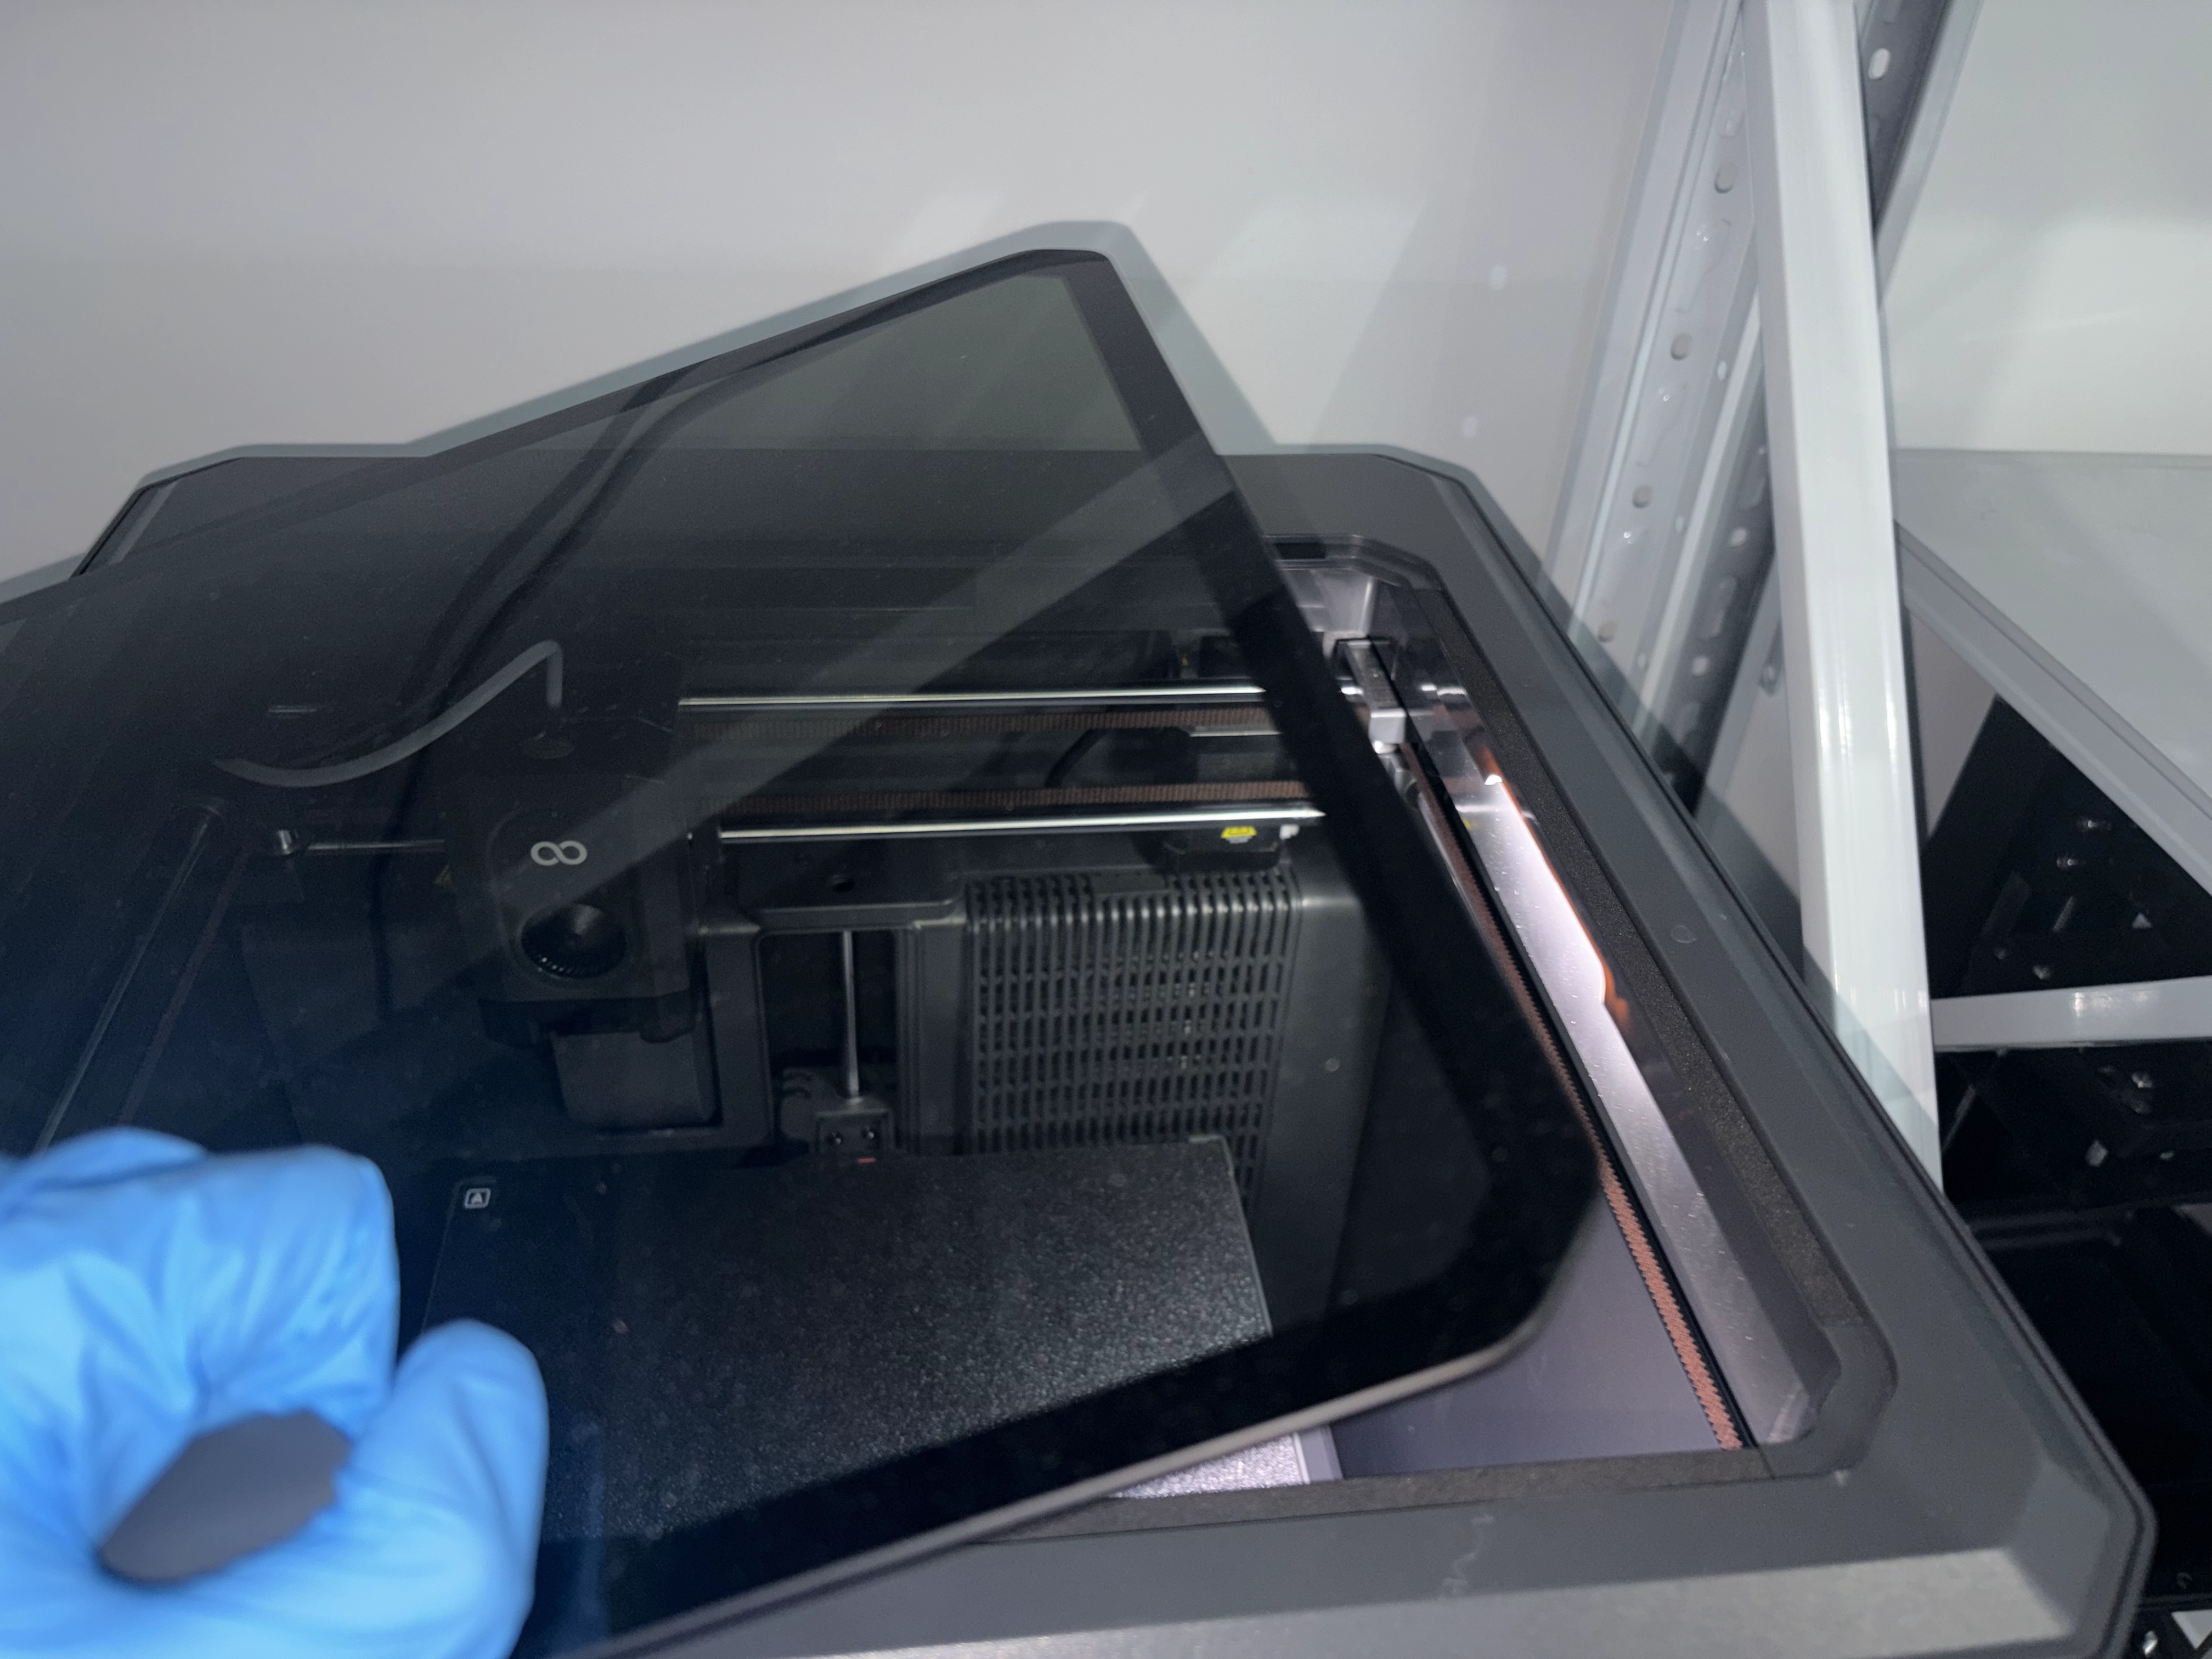
- Remove the original glass top cover of the printer.
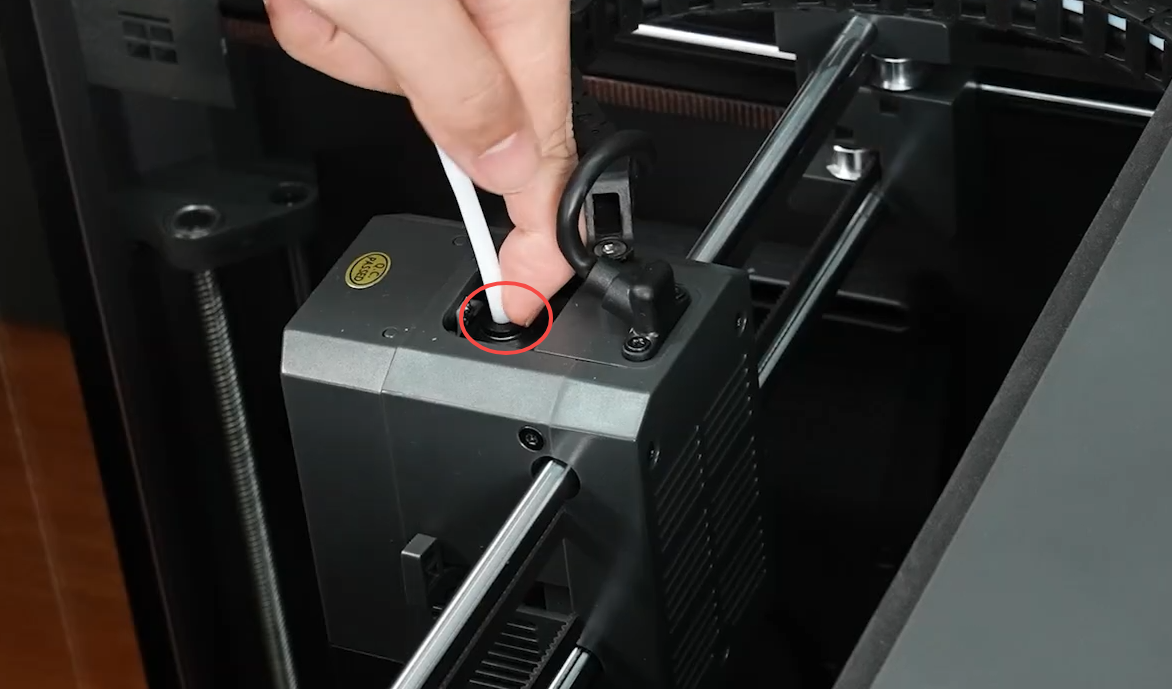
- Press the pneumatic fitting on the tool head and remove the original PTFE Tube.
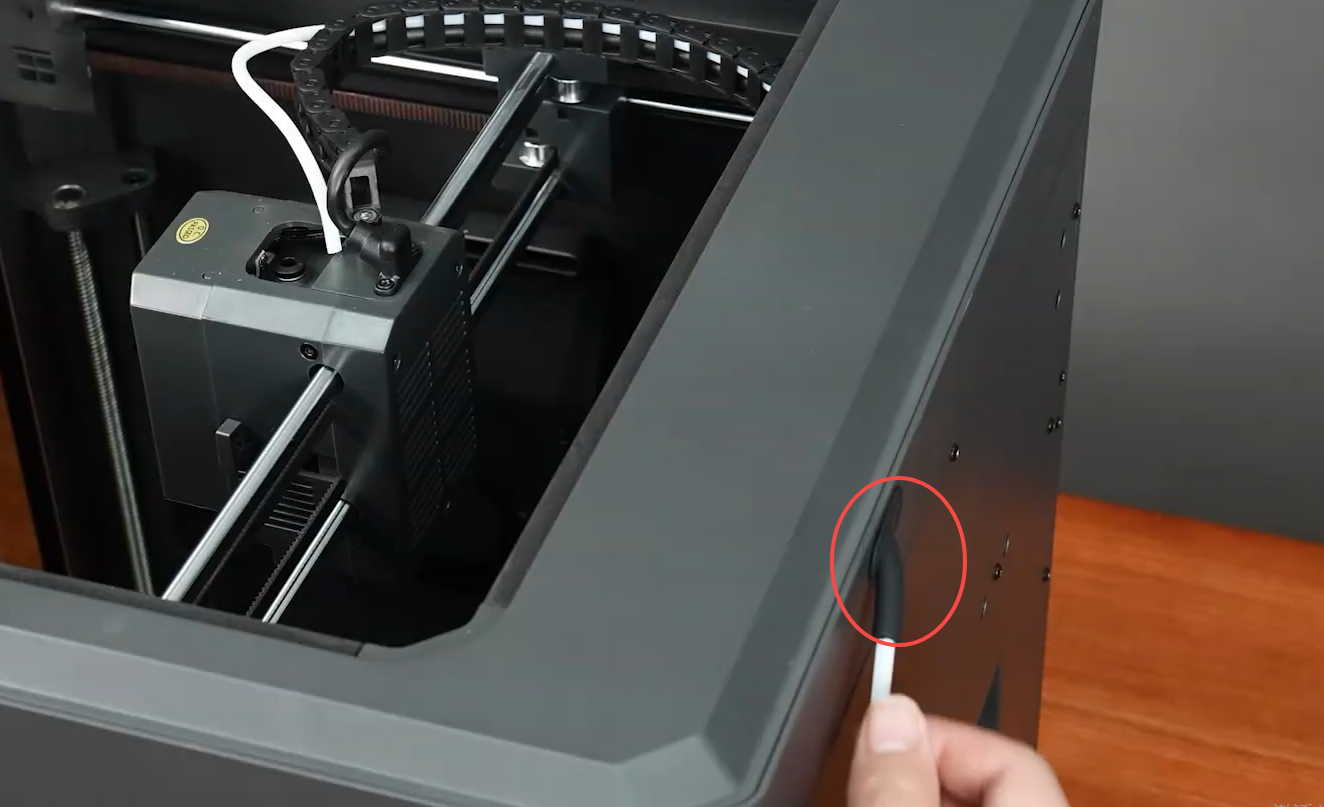
- Pull out the PTFE Tube from the rear side of the printer.
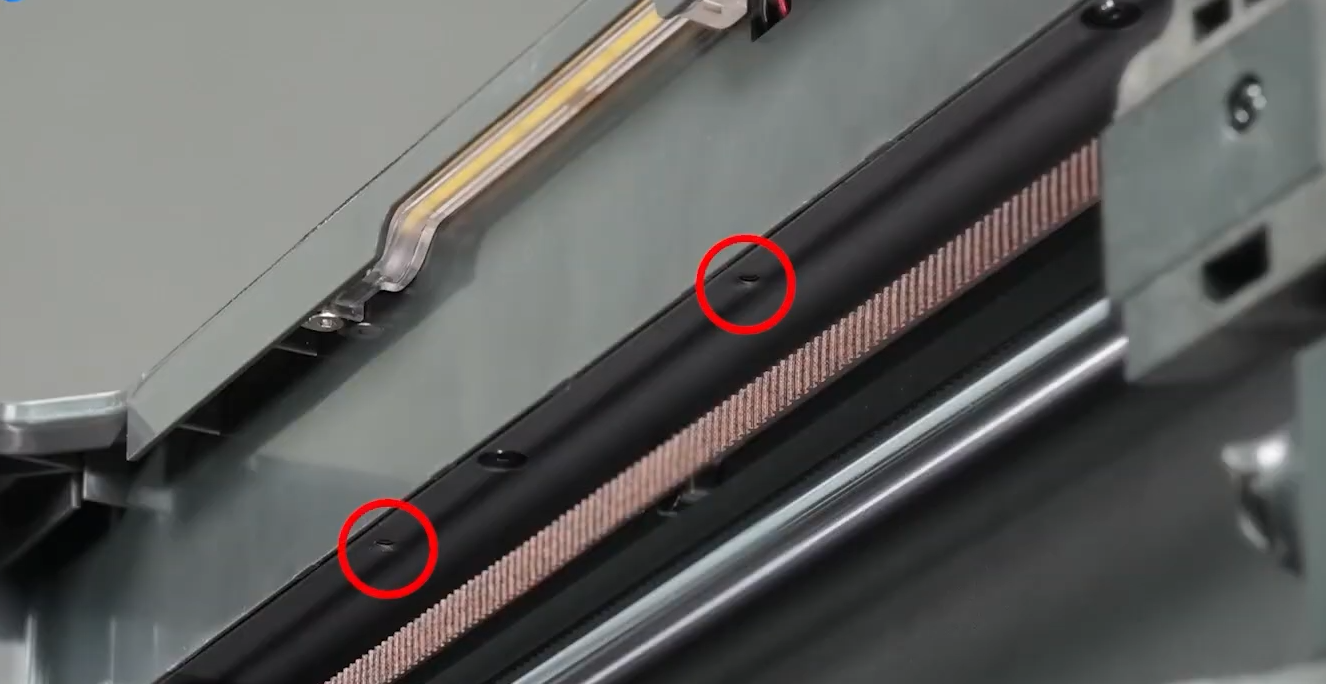
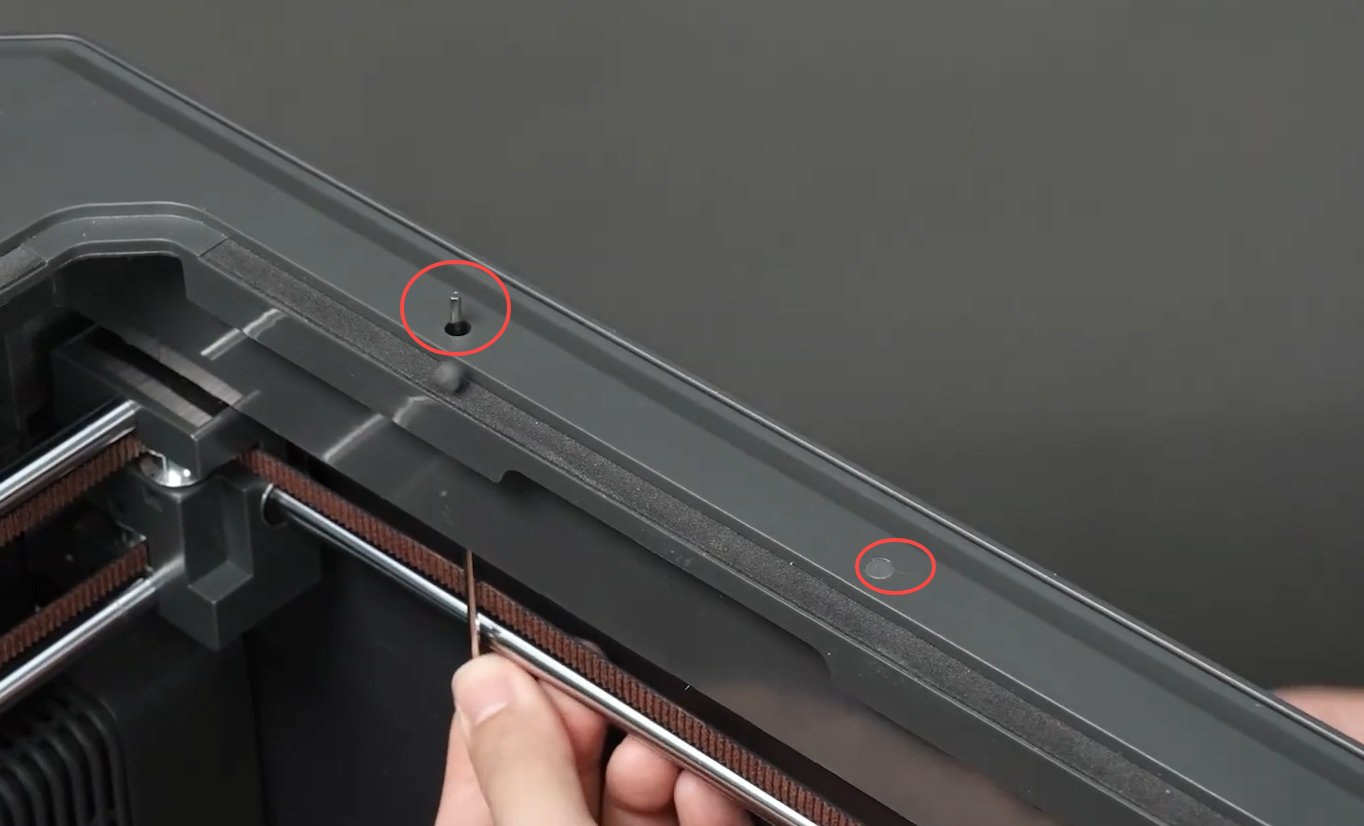
¶ Remove the Silicone Plugs on the Right Side of the Top Frame
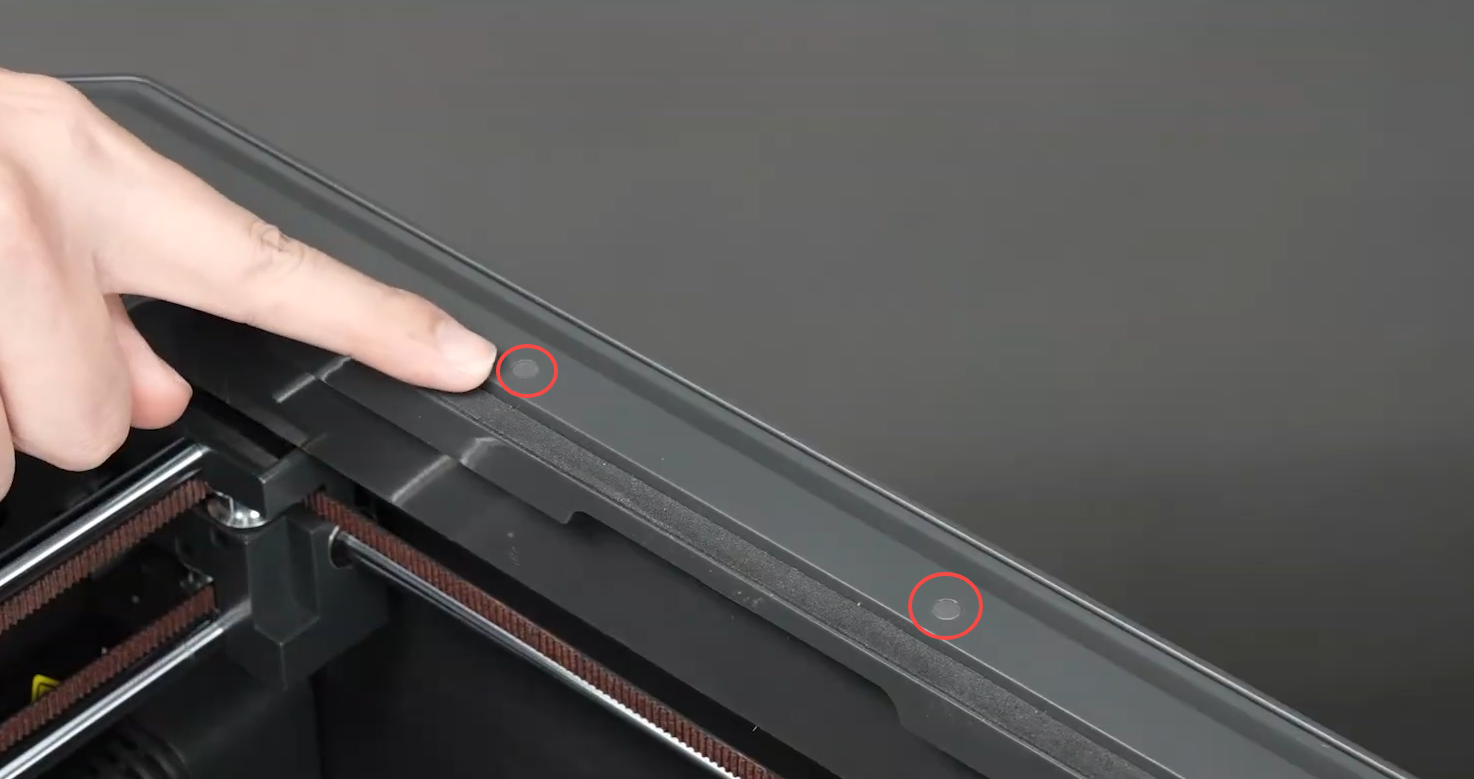
Use a 2.0 mm Allen key to remove the two silicone plugs from the corresponding holes at the bottom of the top frame.
¶ Installation Steps
¶ Install CANVAS
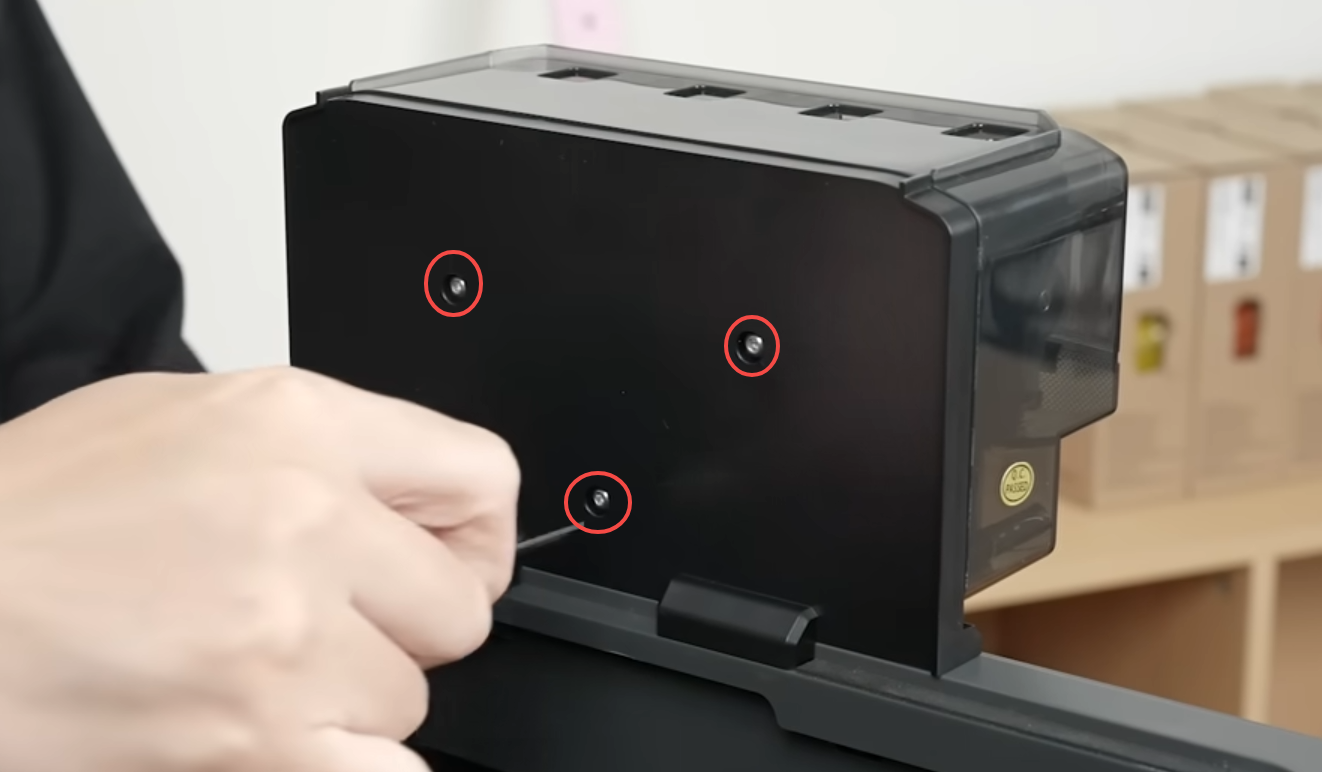
- Place the CANVAS mounting bracket on the right side of the top frame.
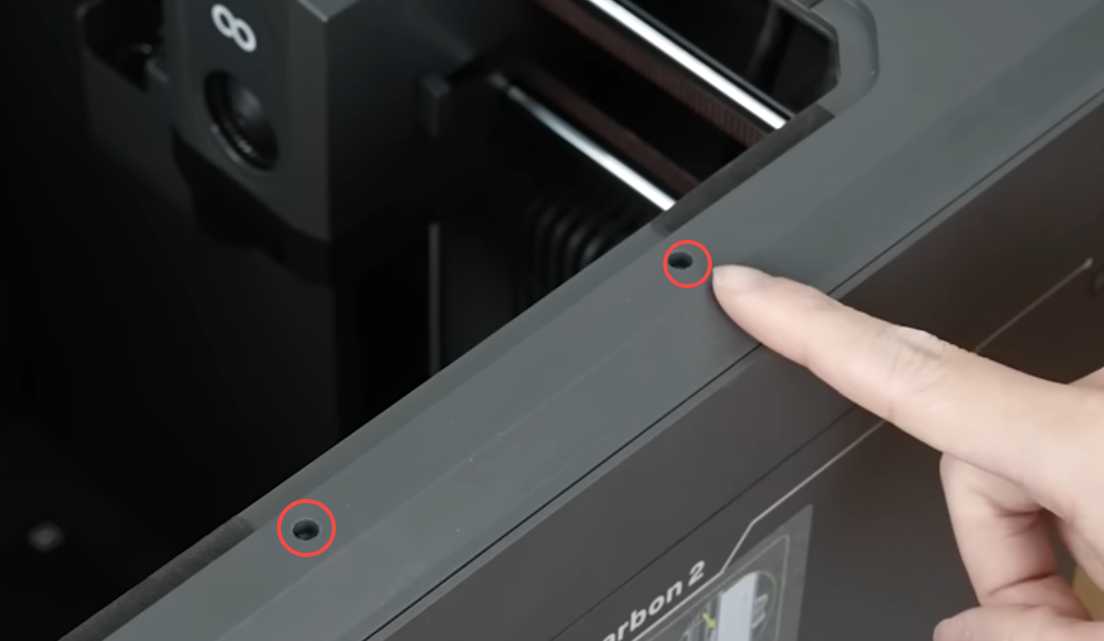
- Install the two PM3 × 50 screws at the positions shown in the figure, and tighten the screws with a 2.5 mm Allen key to secure the CANVAS mounting bracket.
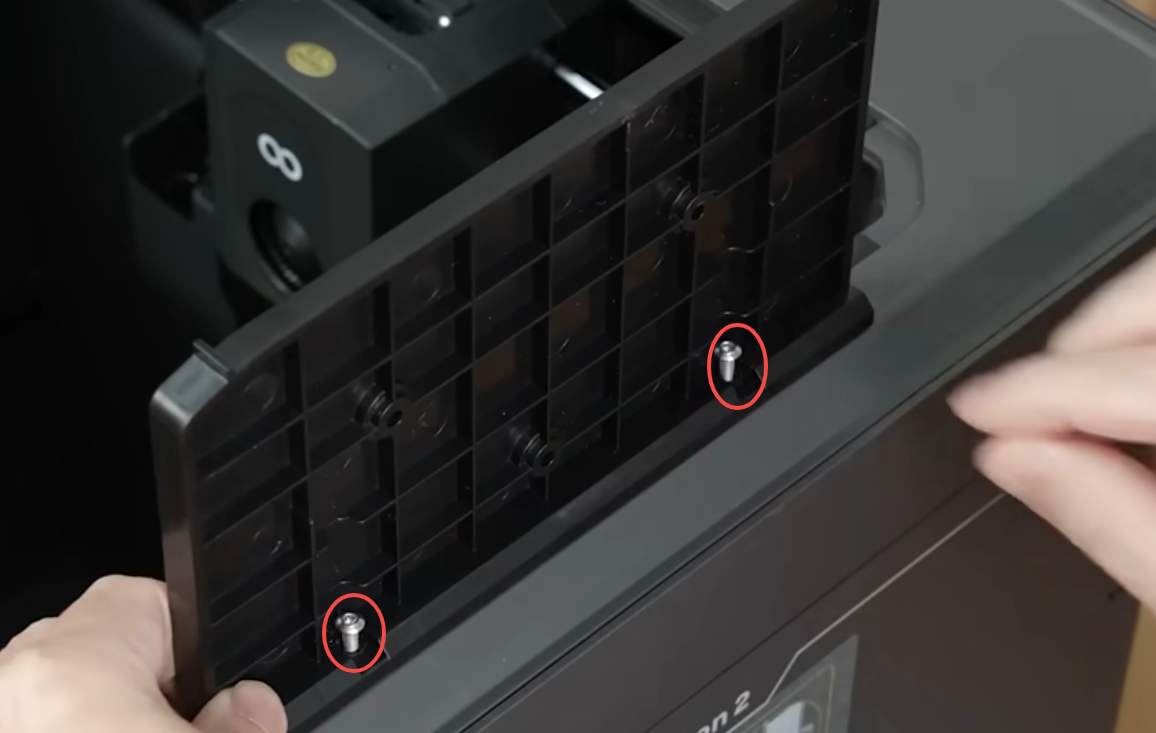
- Use a 2.0 mm Allen key to install and secure the three PM3 × 8 screws on the CANVAS.
¶ Install Filament Hub Bracket
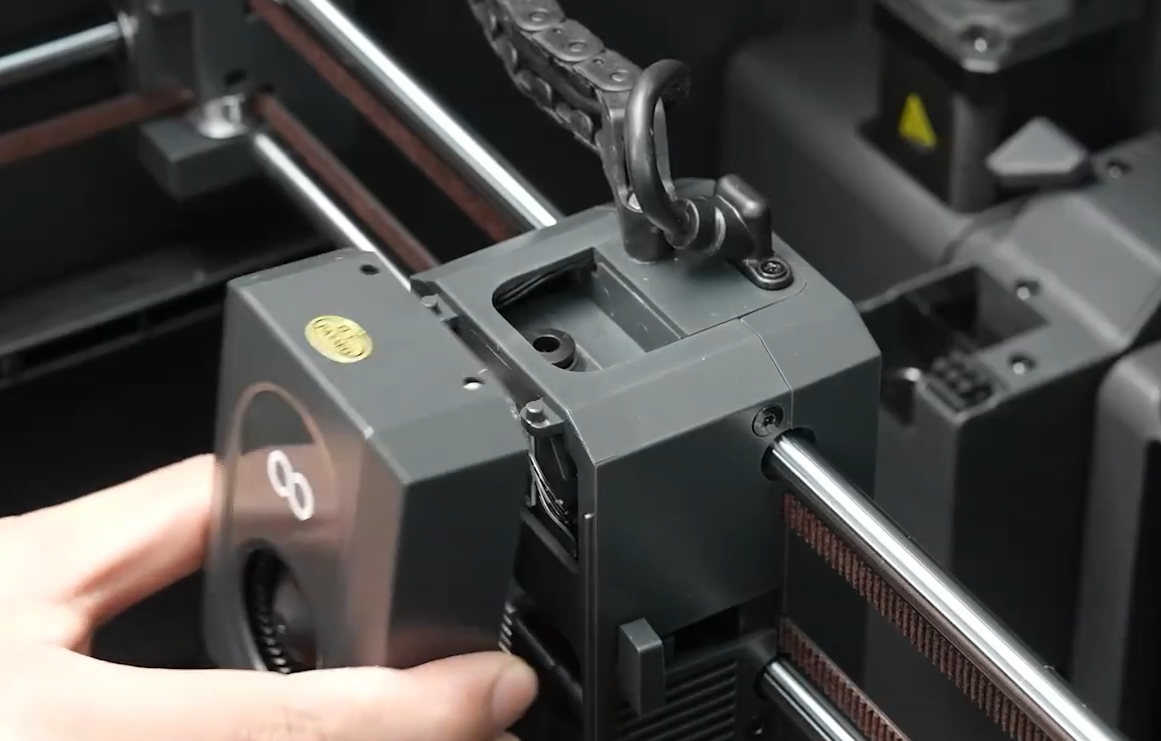
- Remove the tool head fan front cover.
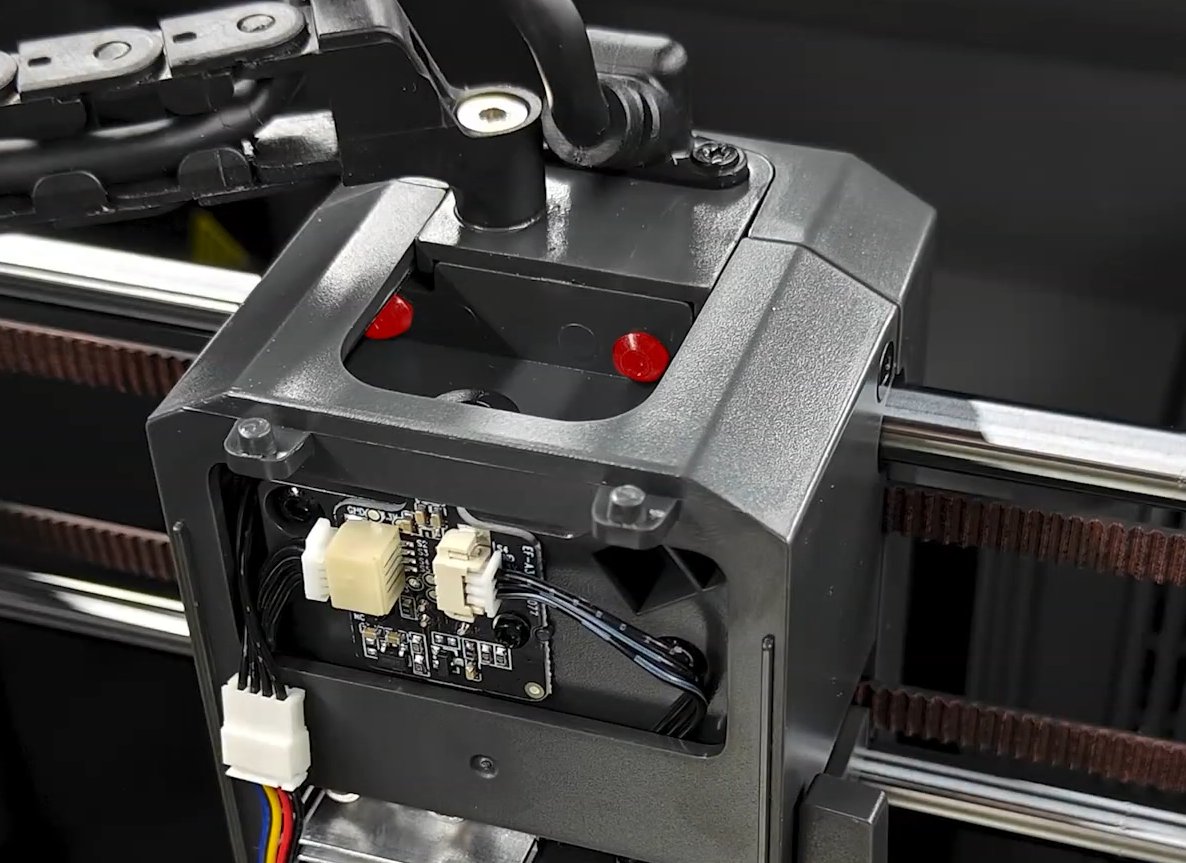
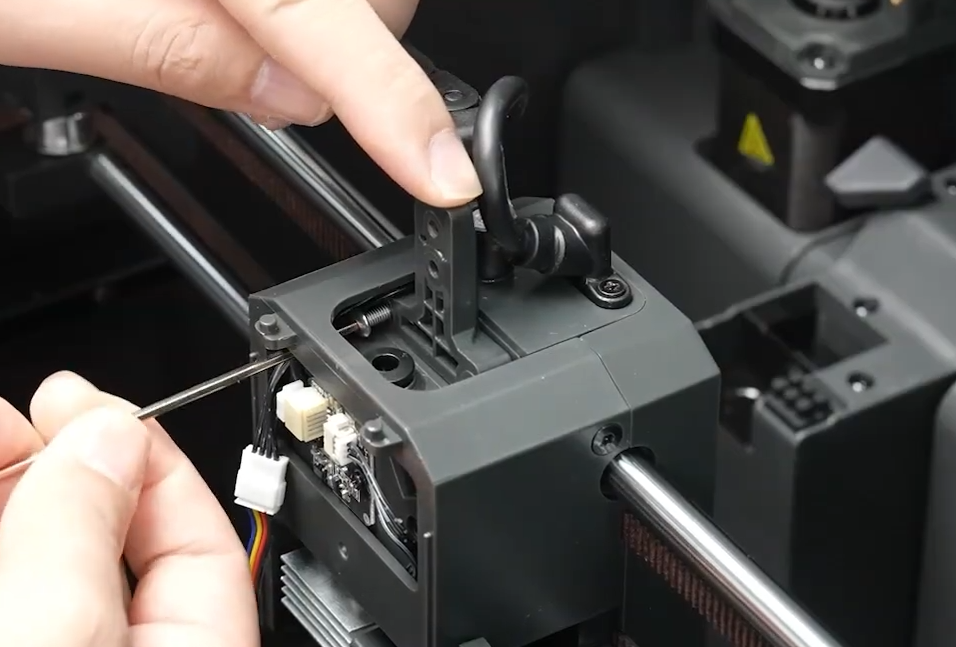
- Use a 2.0 mm Allen key to loosen and remove the two screws in the red-marked area of the tool head shown below.
- Assemble the Filament Hub Bracket with the two PM3 × 14 screws, then install it at the original screw positions.
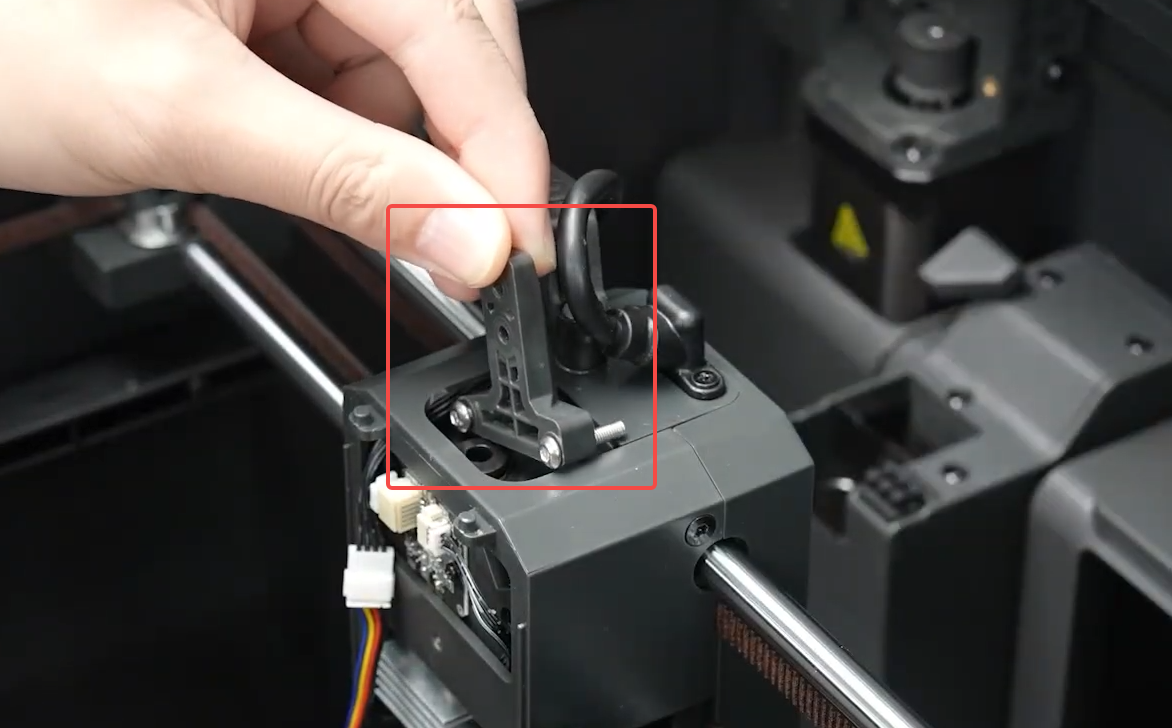
- Use a 2.0 mm Allen key to tighten the two screws.
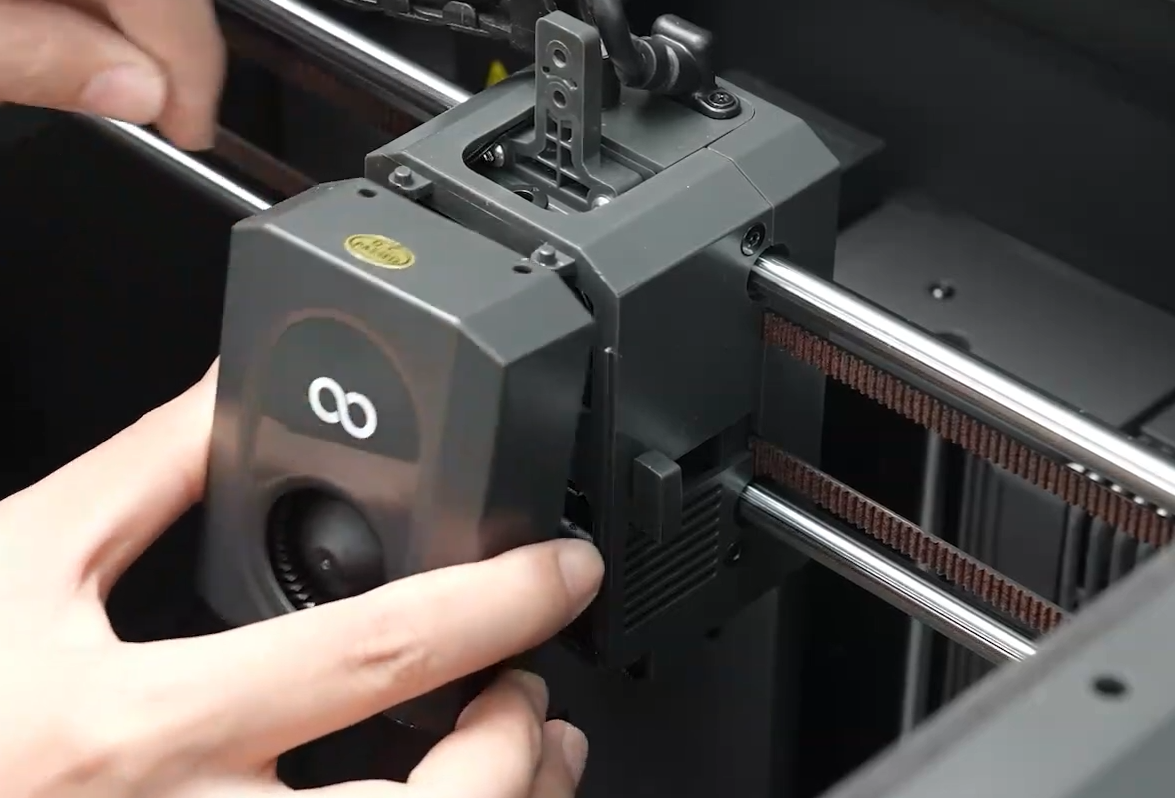
- Reinstall the tool head fan front cover to complete the installation of the Filament Hub Bracket.
¶ Install the 4-in-1 Hub
- Place the 4-in-1 hub at the installation position on the printer.
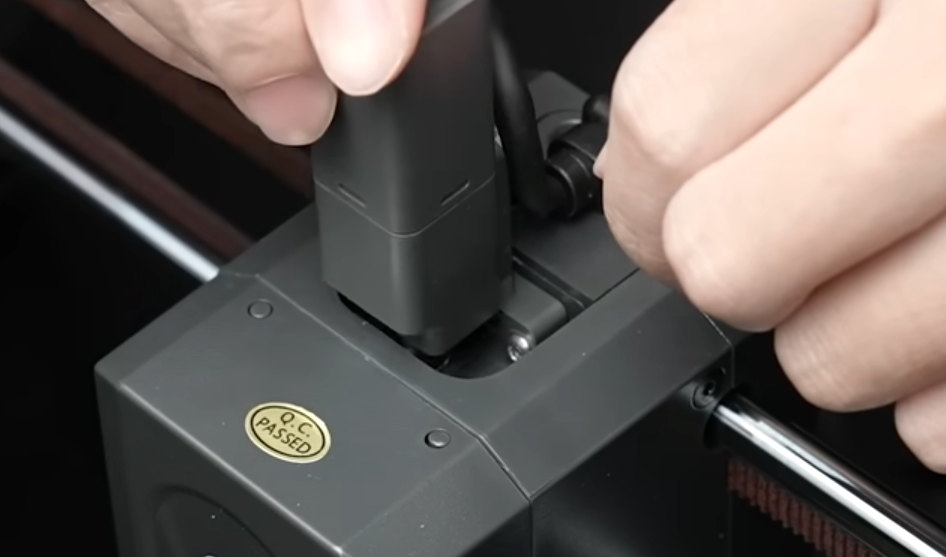
- Use a 2.0 mm Allen key to tighten the two PM3 × 6 screws to secure the 4-in-1 hub.
¶ Install Spool Holder Base
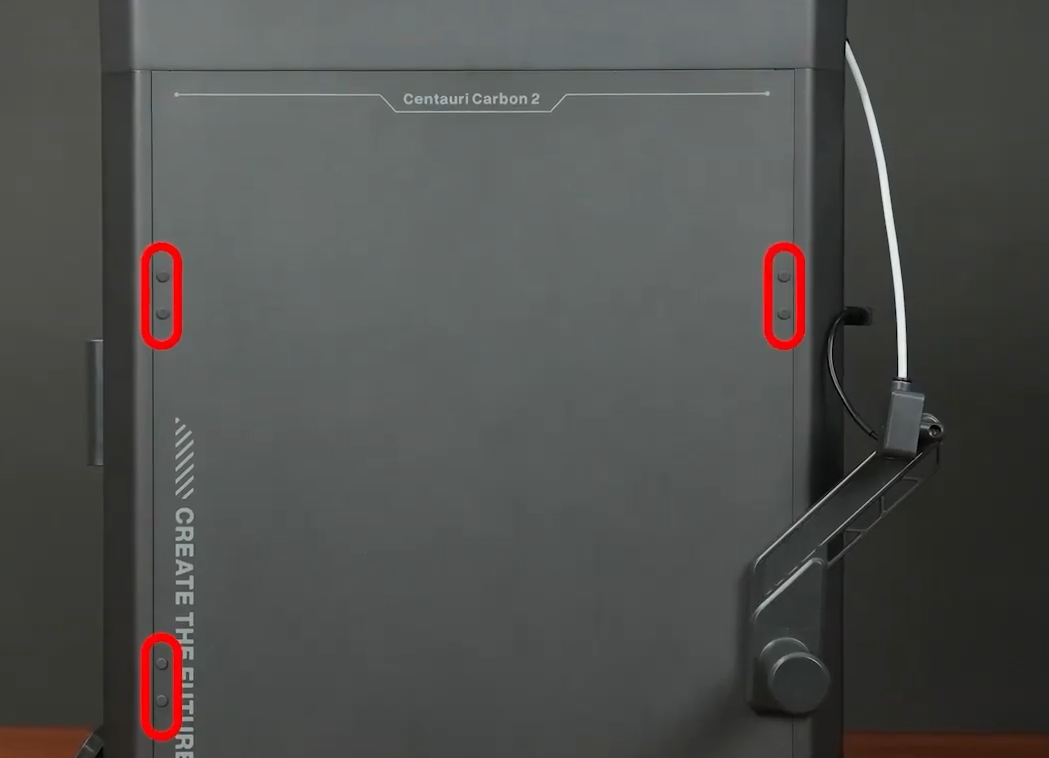
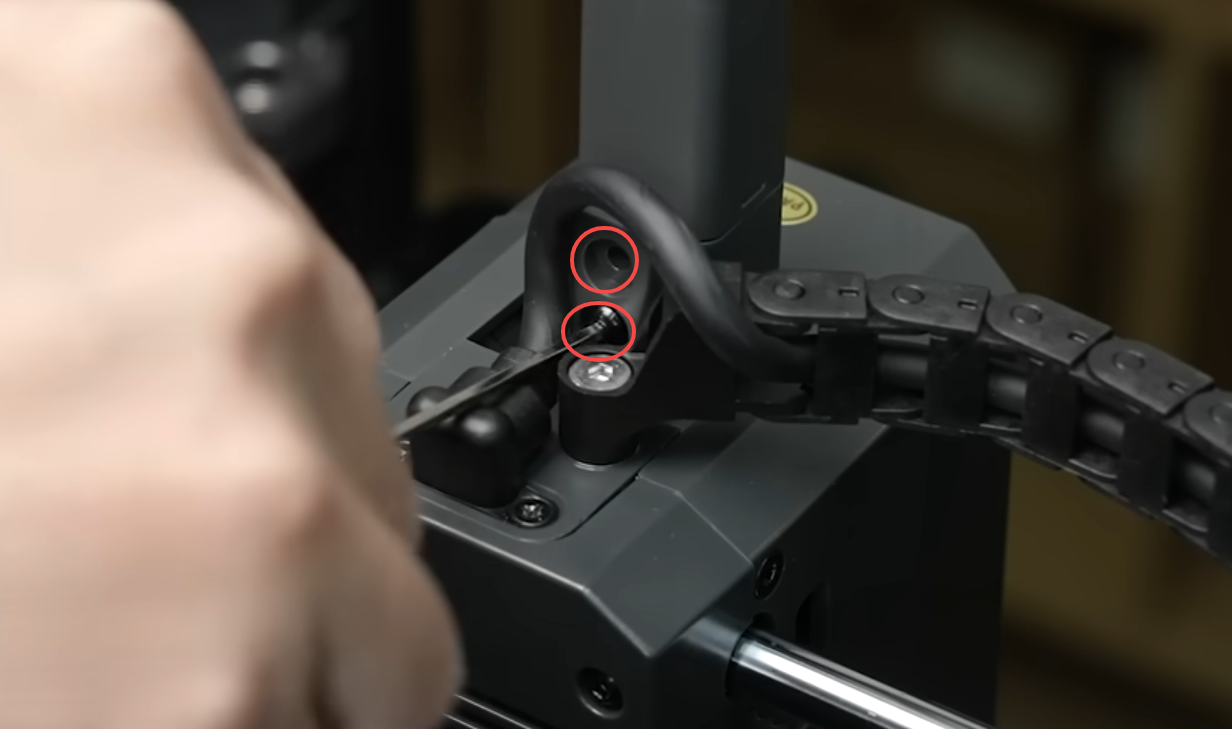
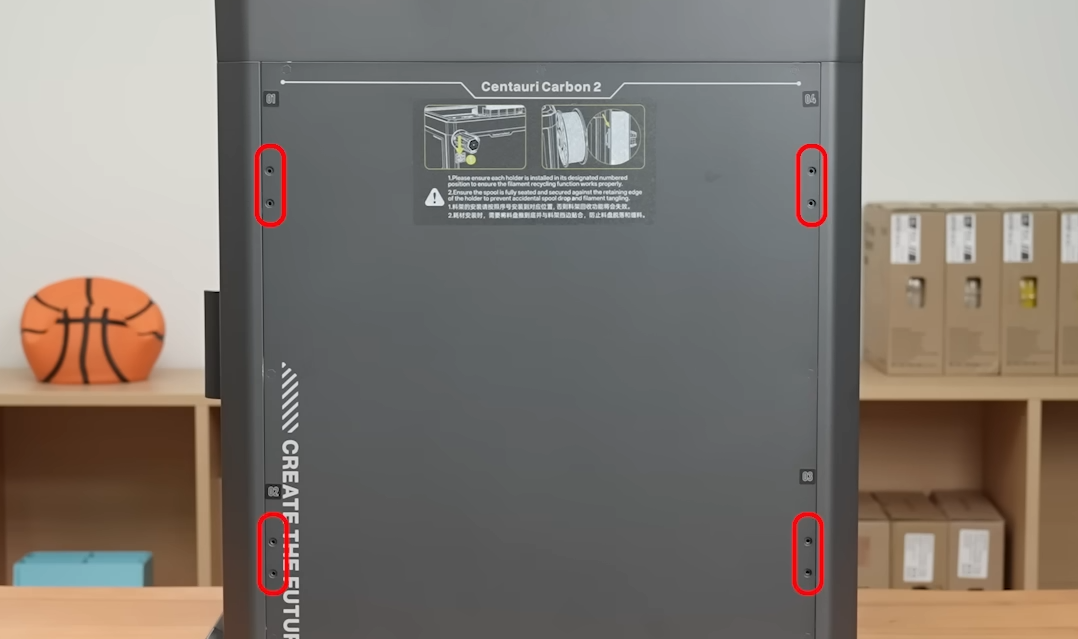
- Install the four spool holder bases at the red-marked positions shown below.
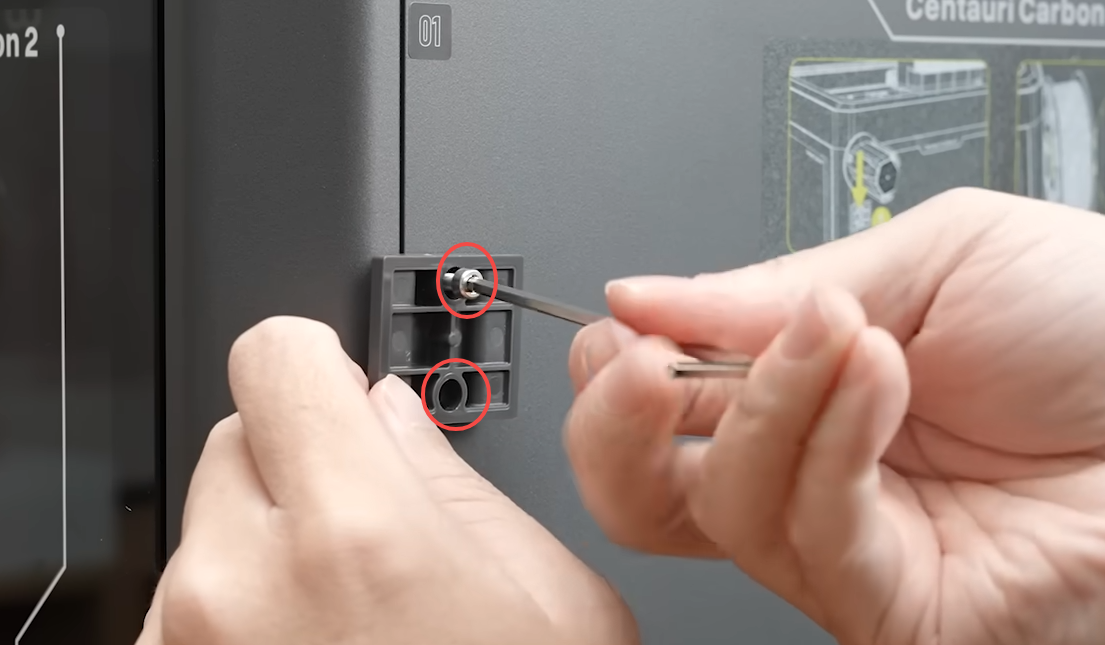
- Use a 2.5 mm Allen key and two PM3 × 12 screws to secure each spool holder base. A total of eight PM3 × 12 screws are required for the four spool holder bases.
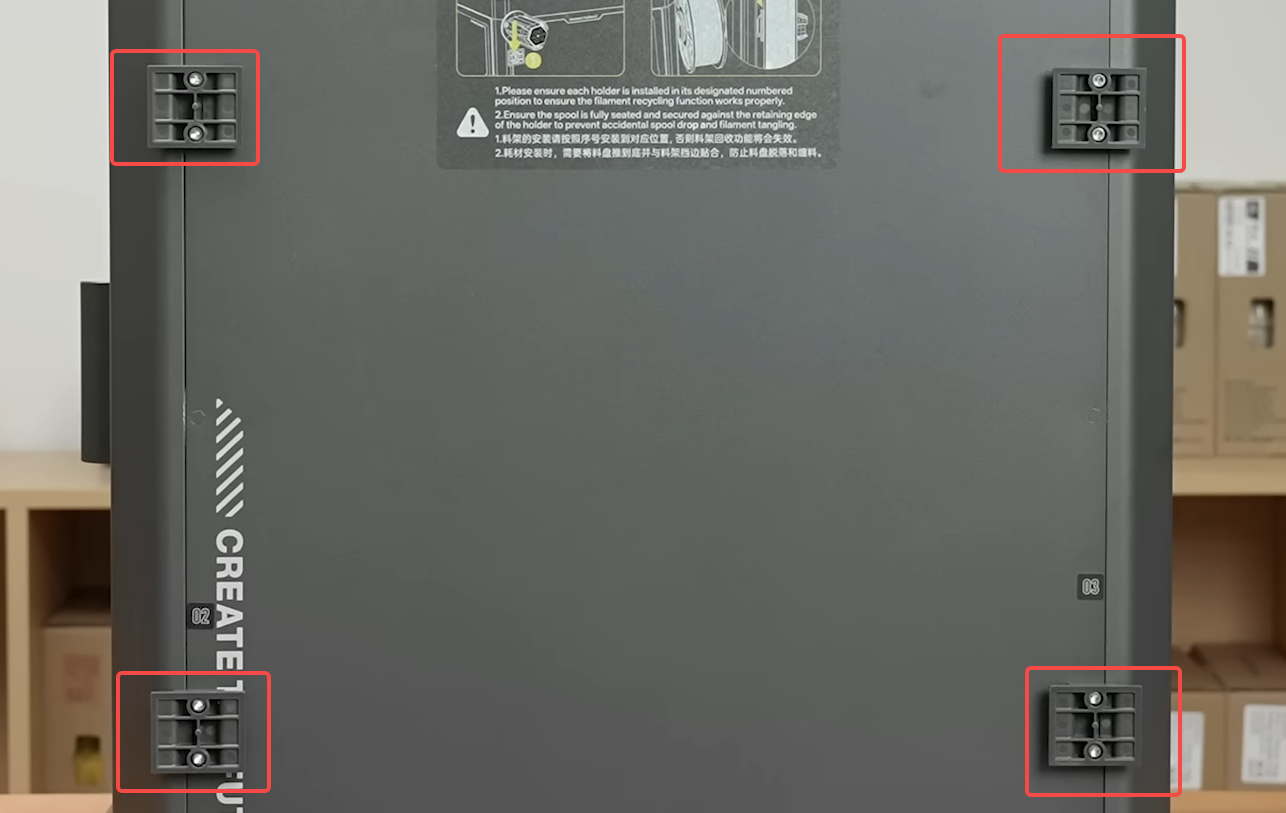
- Repeat Step 2 until all four spool holder bases are secured to the right side panel of the printer.
¶ Install Spool Holders
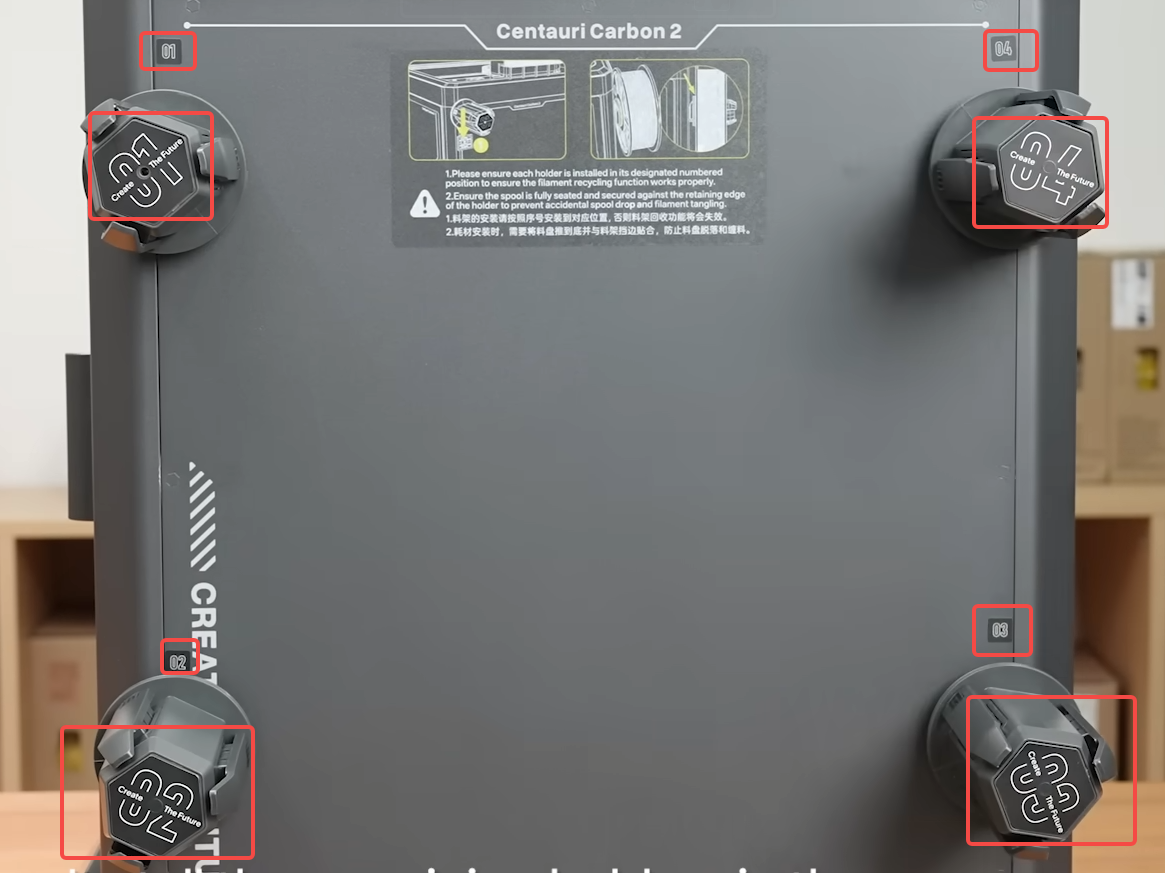
Install the four spool holders according to the corresponding numbers on the right side panel of the printer.
Note: The spool holders must be installed according to the numbers marked on the right side panel of the printer.
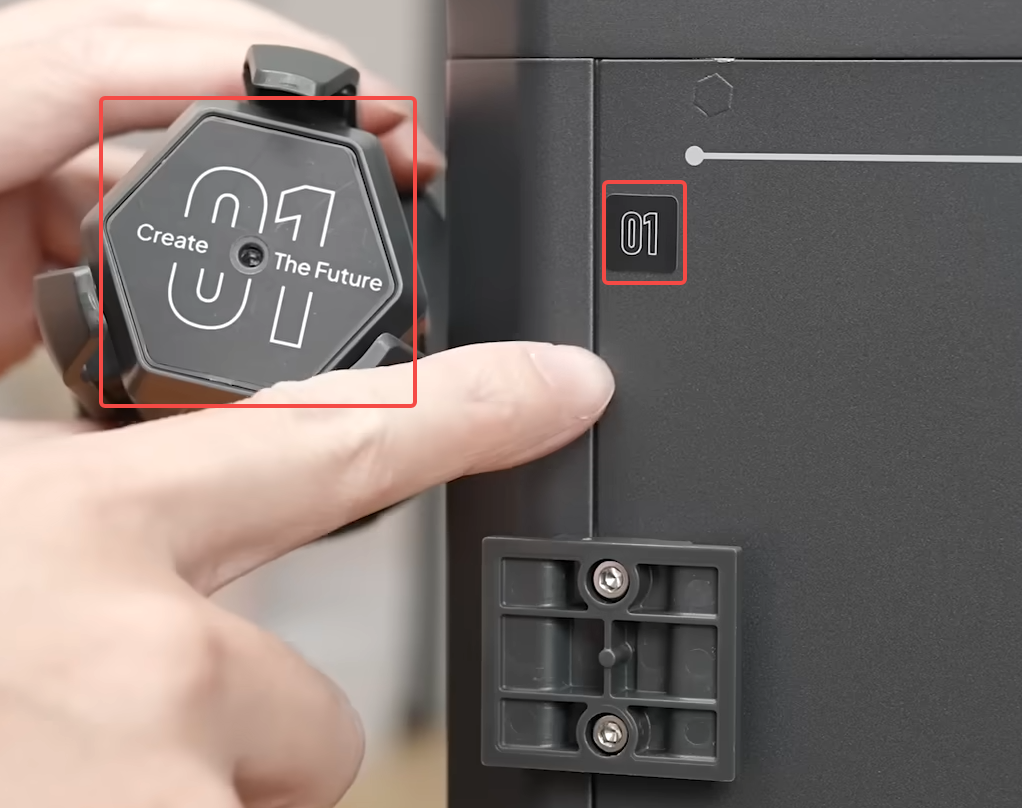
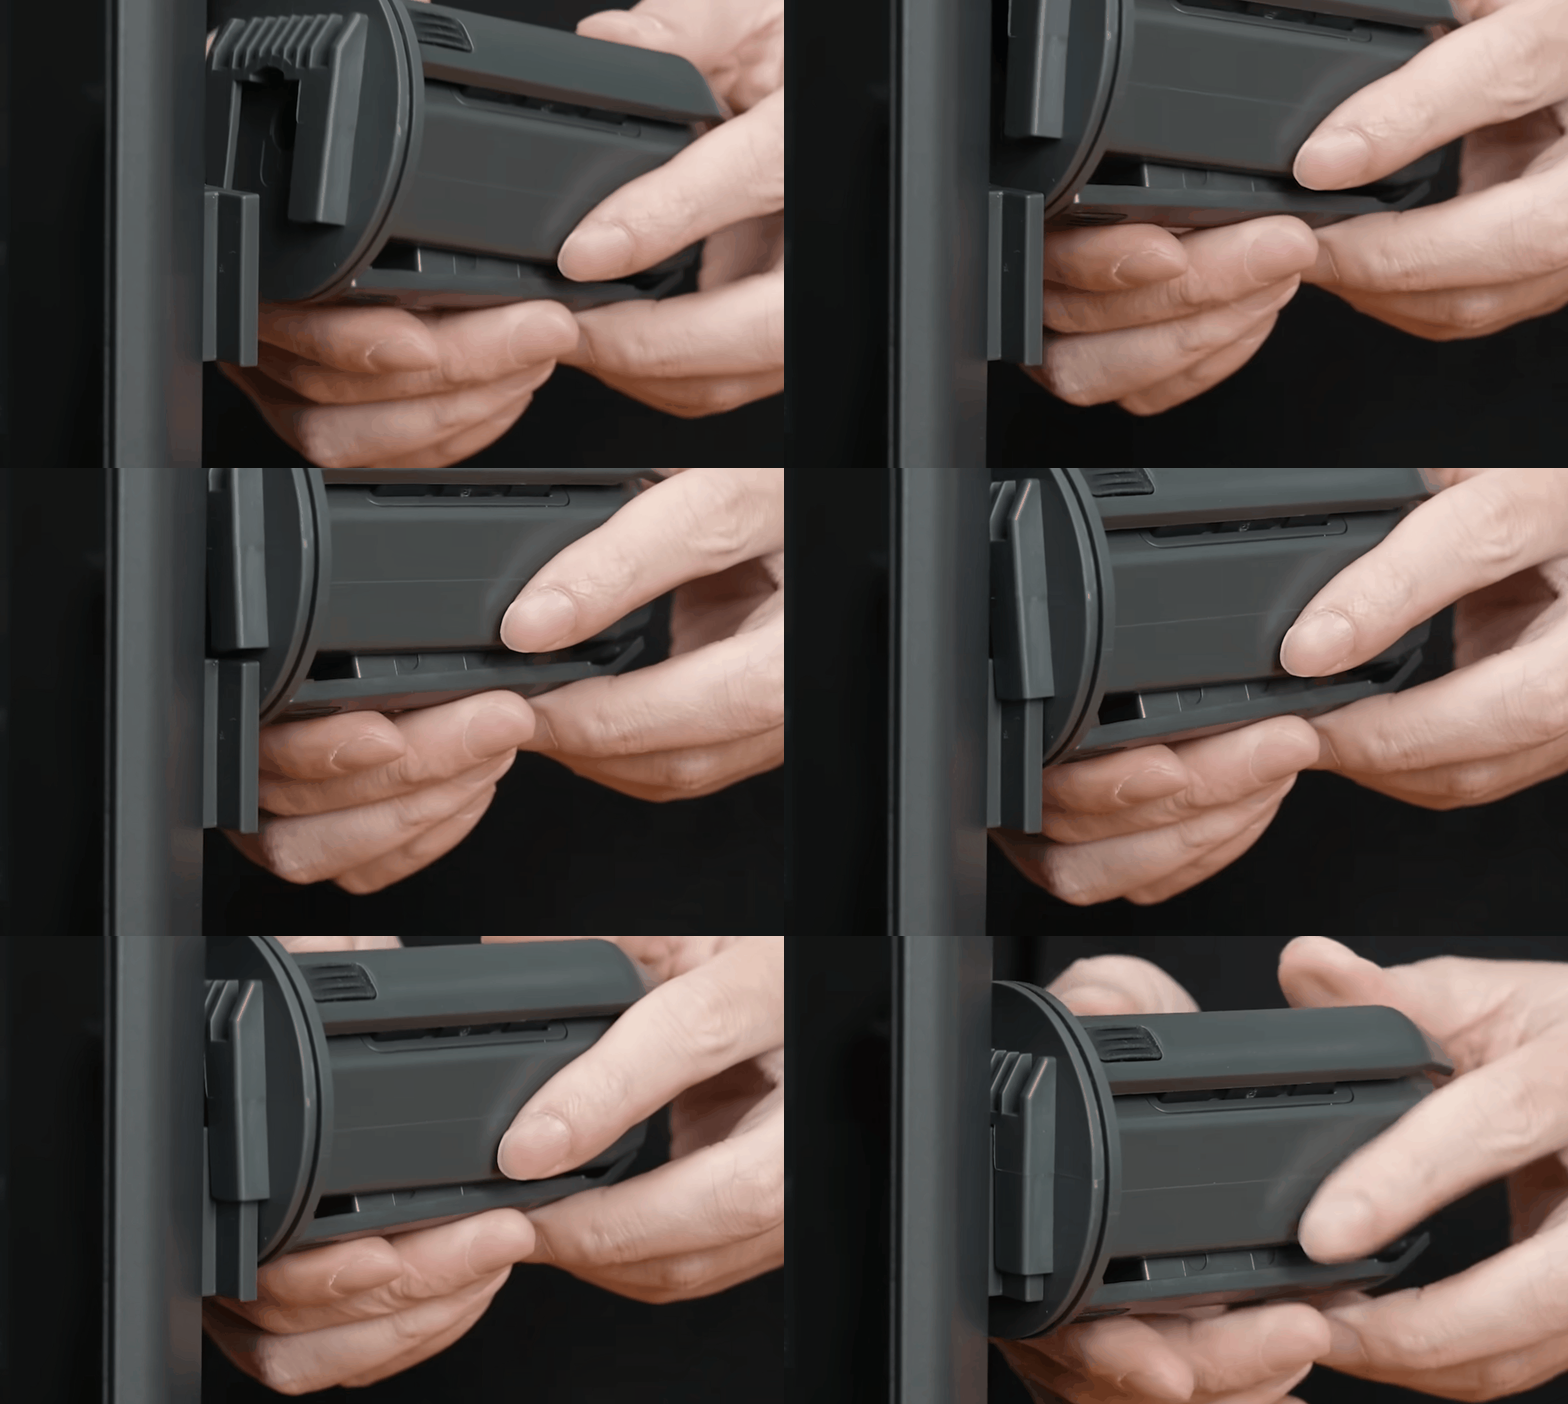
Installation method: Refer to the figure below.
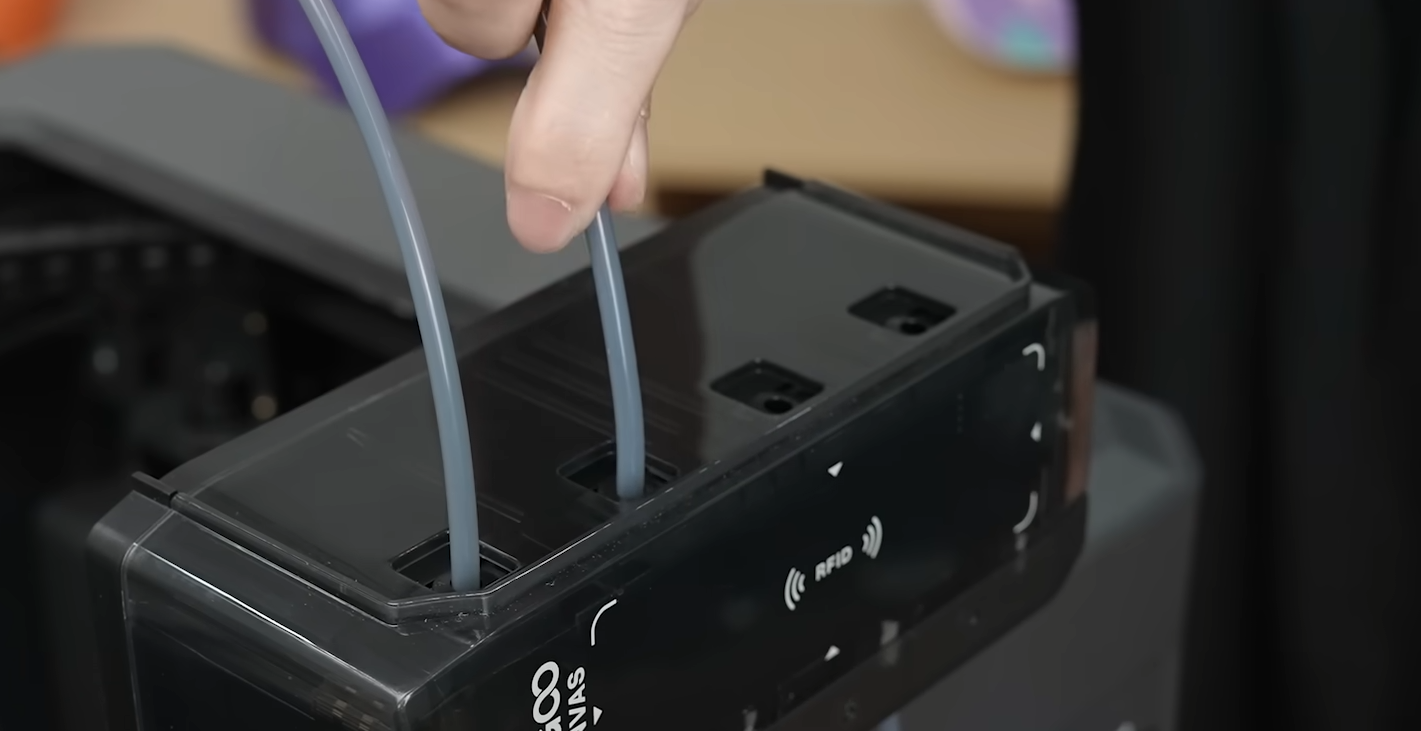
¶ Install PTFE Tube
- Insert the top PTFE Tubes into the corresponding connectors and make sure they are securely fixed.
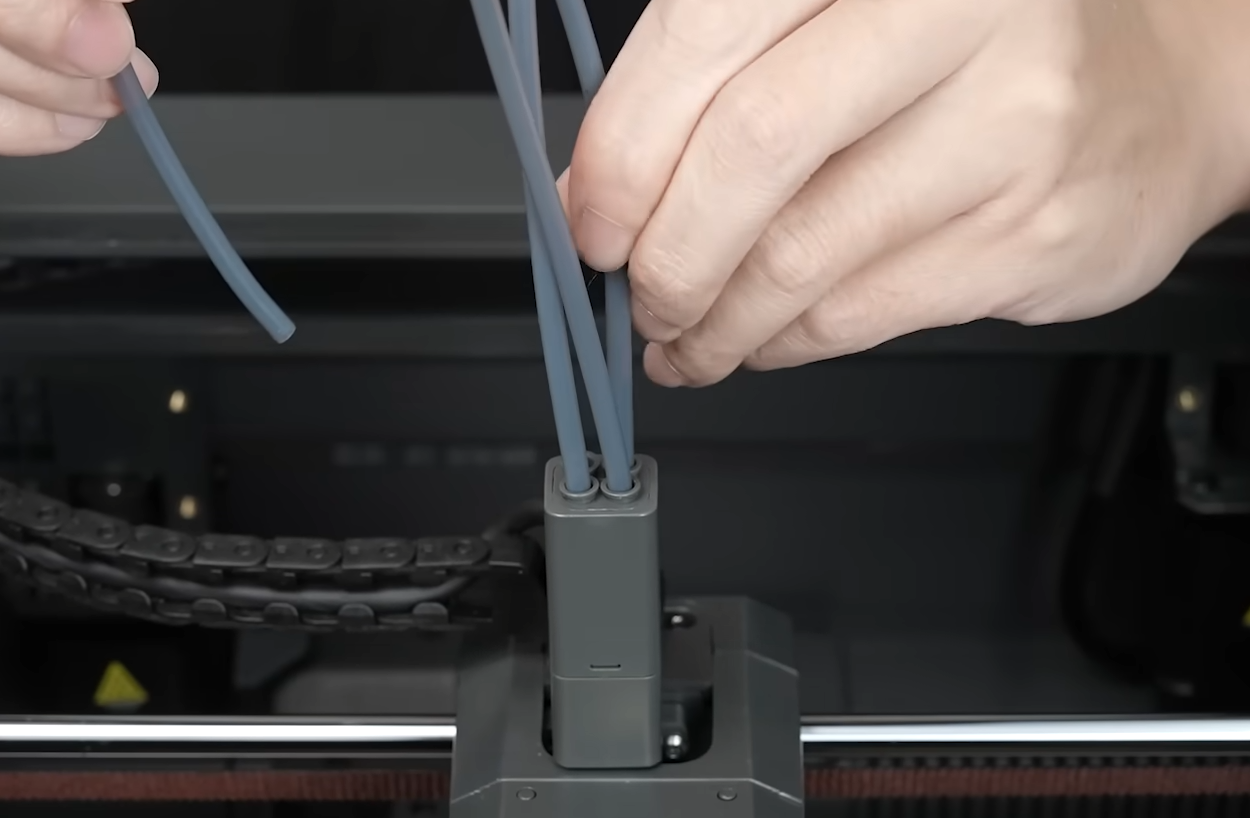
- Insert the PTFE Tubes into the 4-in-1 hub.
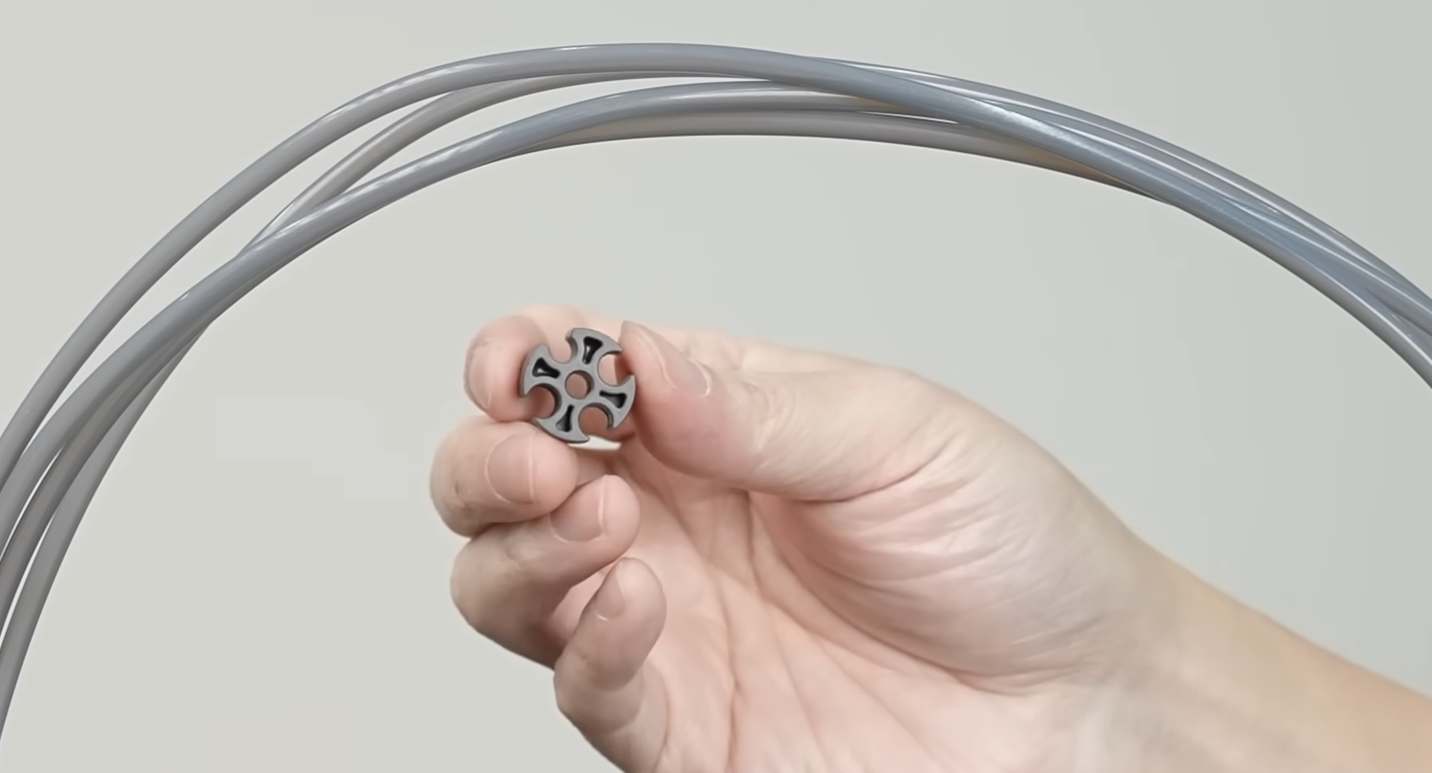
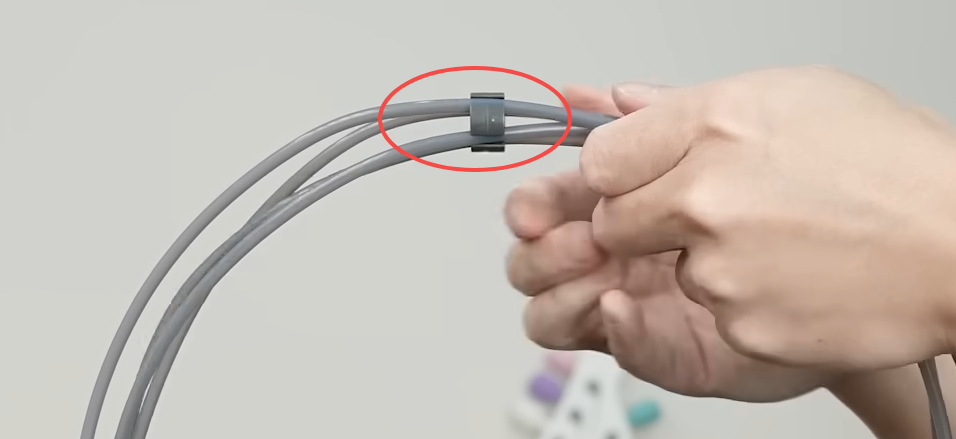
- Secure the PTFE Tube fixing block onto the PTFE Tube.
¶ Install CANVAS Communication Cable
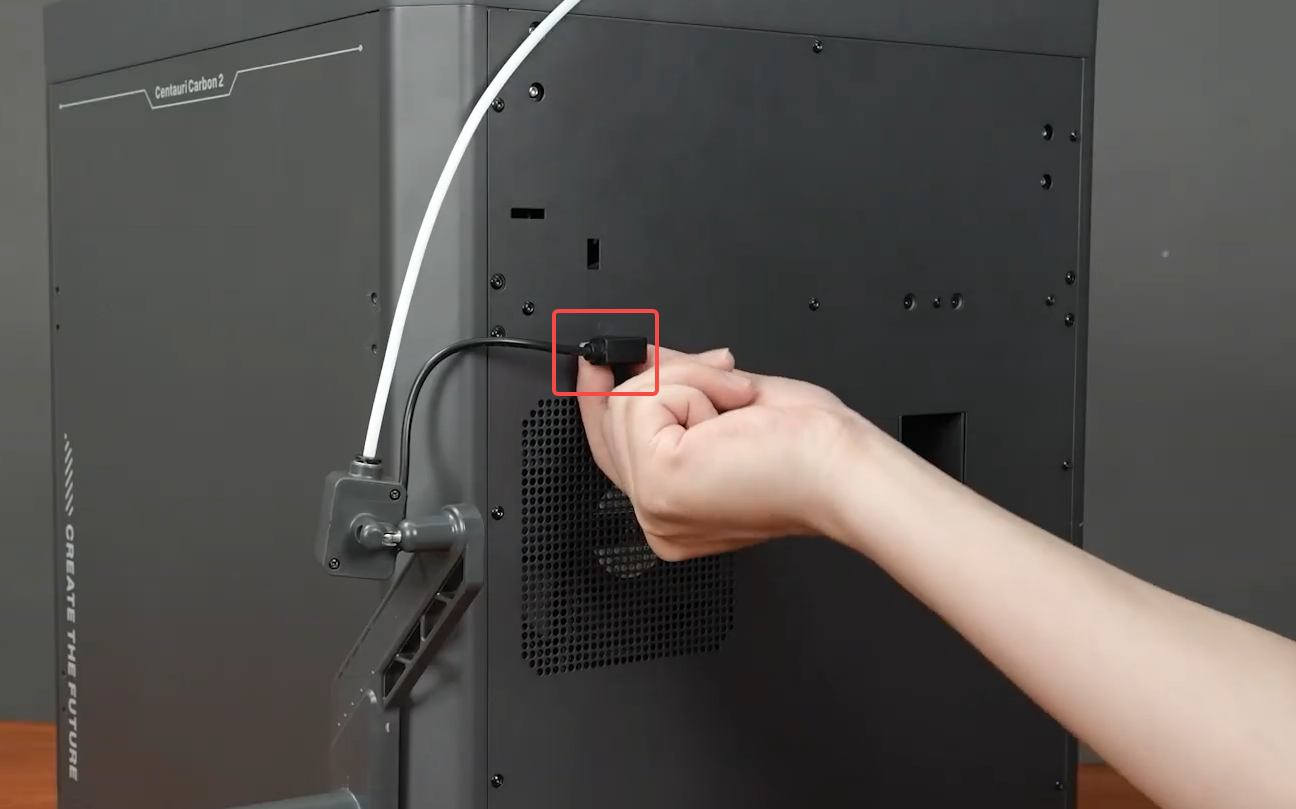
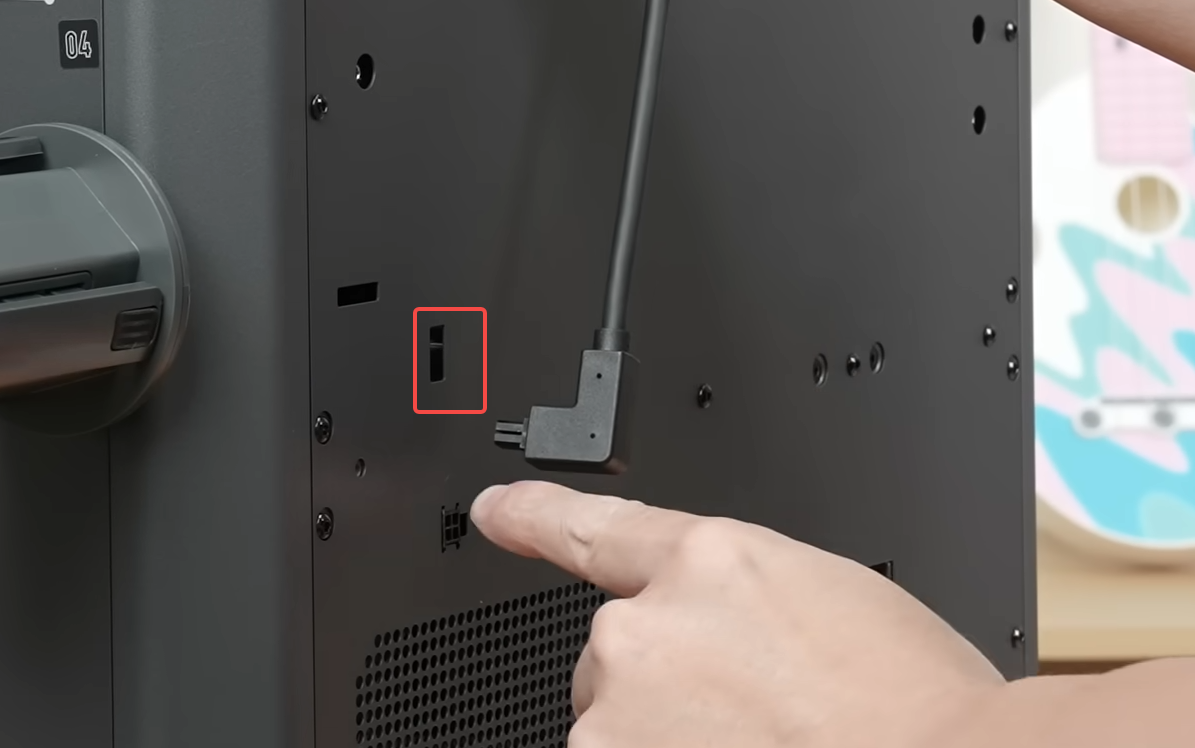
- Connect the CANVAS communication cable to the corresponding interface on the rear enclosure plate.
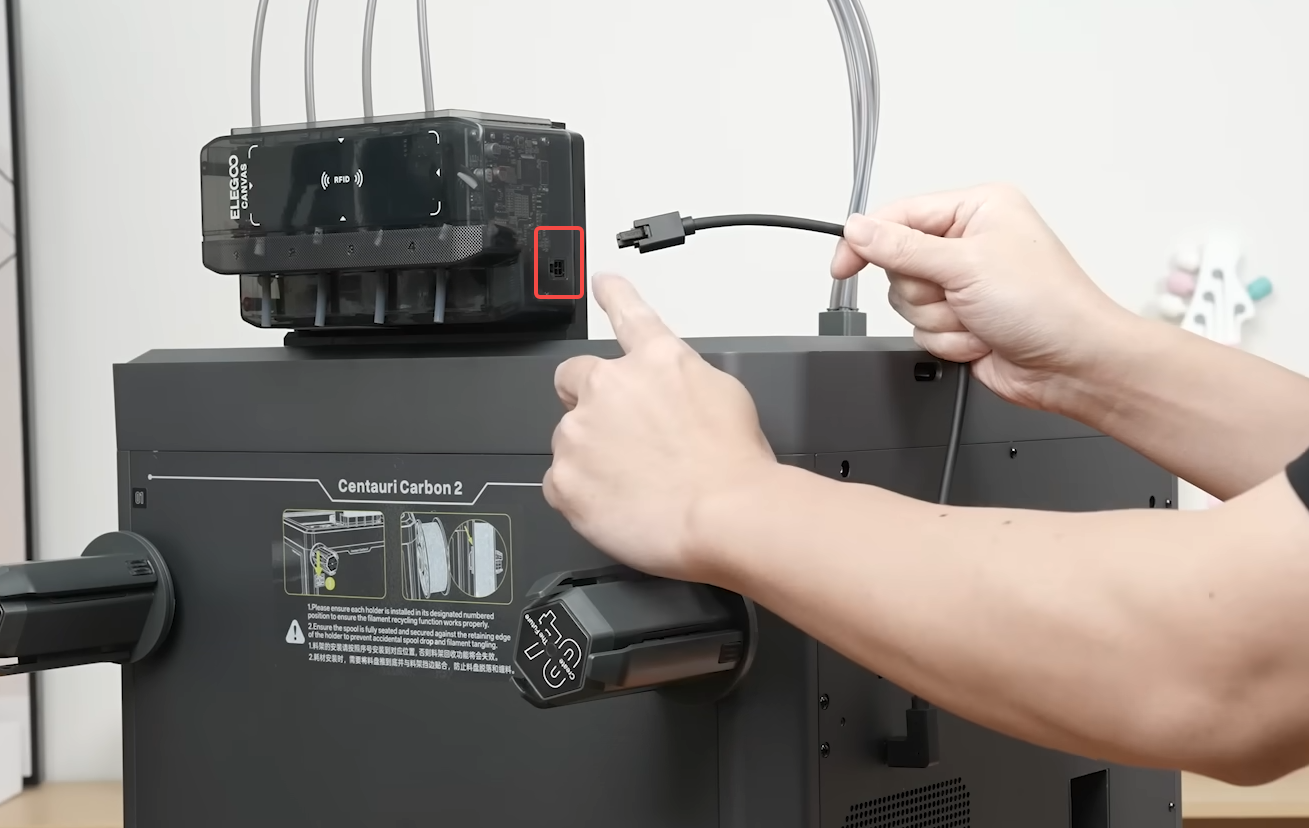
- Connect the CANVAS communication cable to the corresponding port on the CANVAS module and make sure the connector is fully inserted.
¶ Install Thermal Cover
- Assemble the thermal cover as shown below.
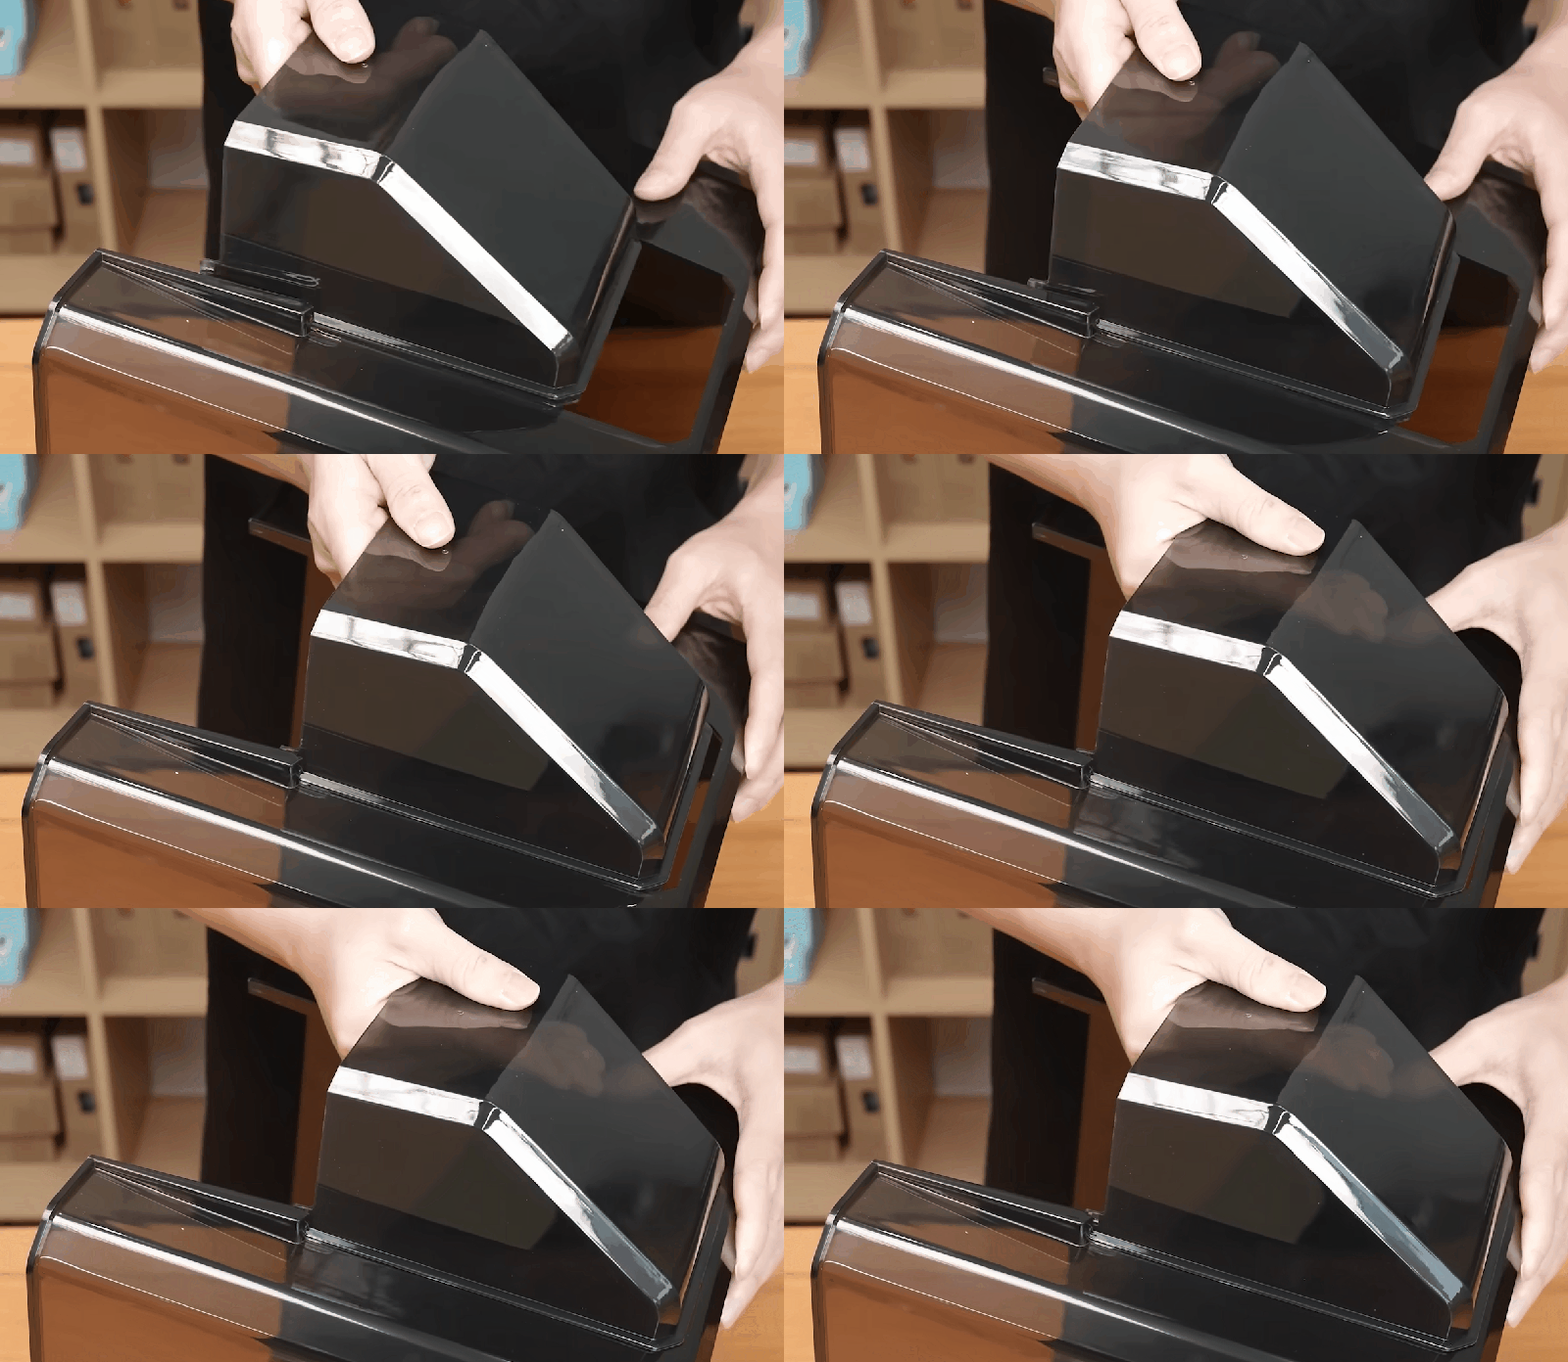
- Place the assembled thermal cover on the top of the printer.
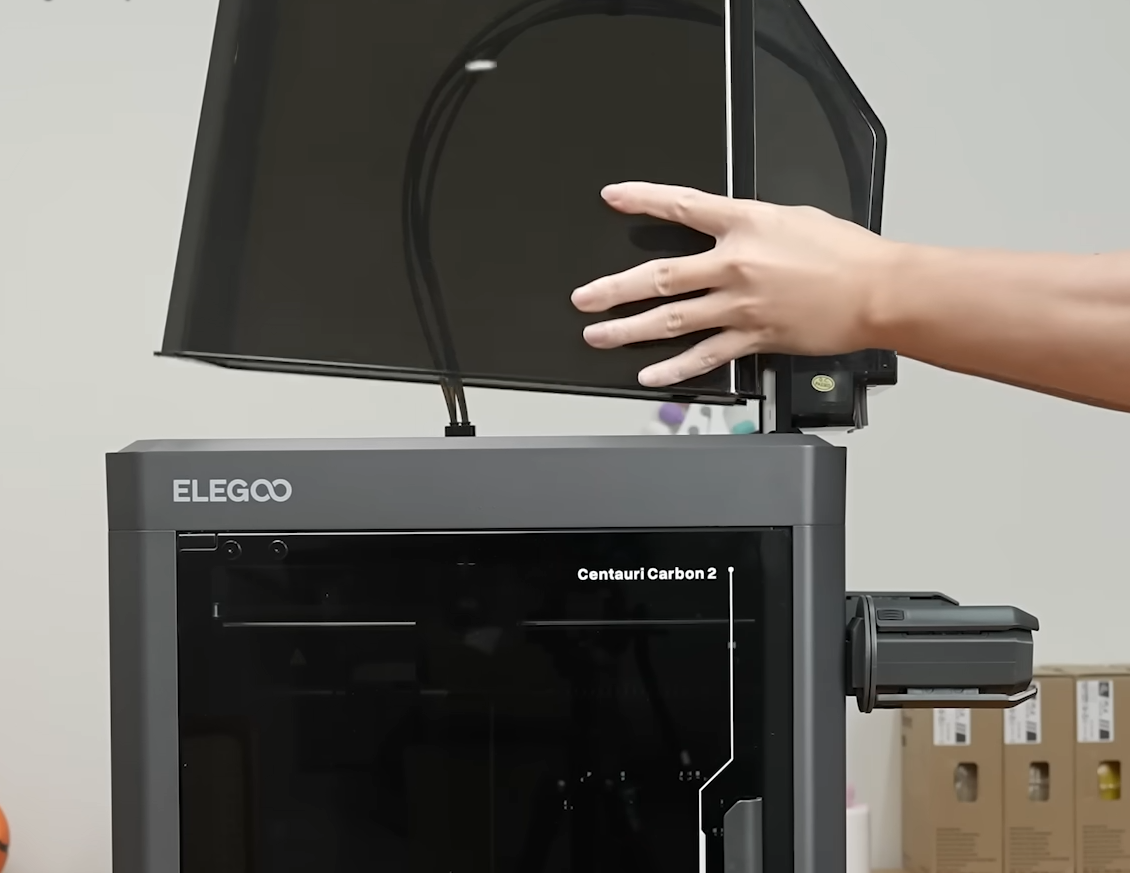
¶ System Detection and Configuration
- Insert the power cord and turn on the power switch.
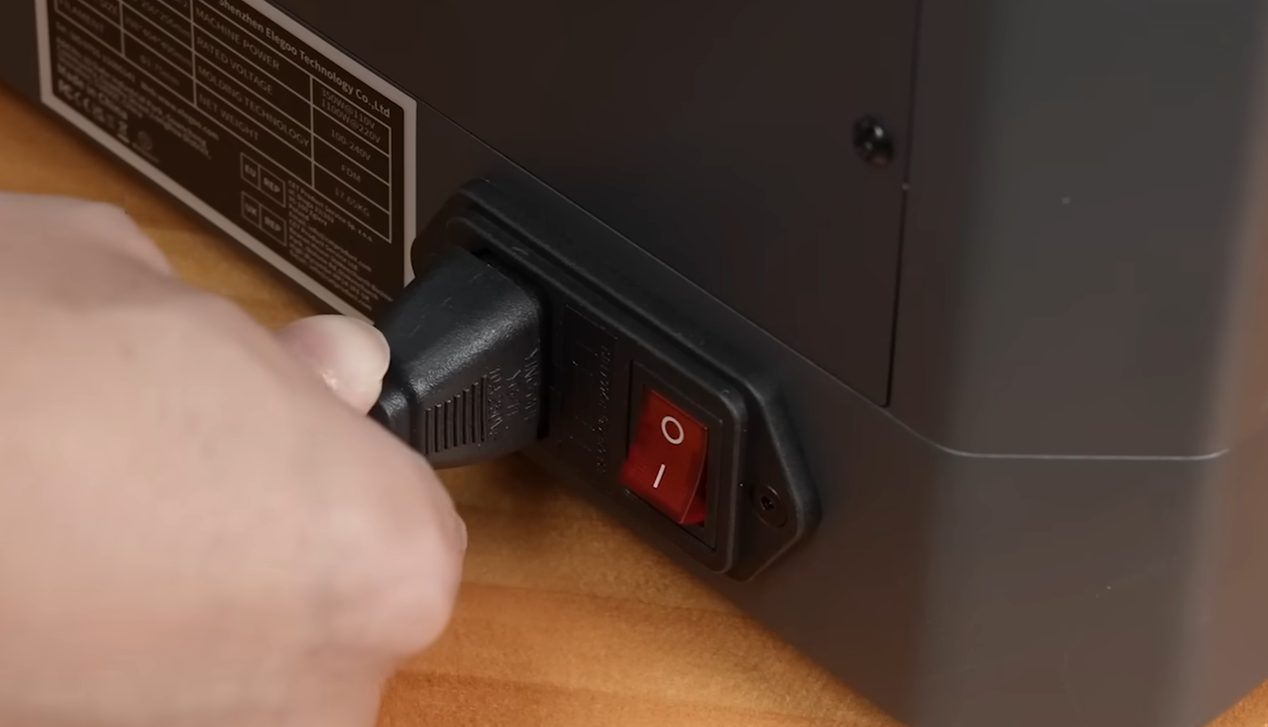
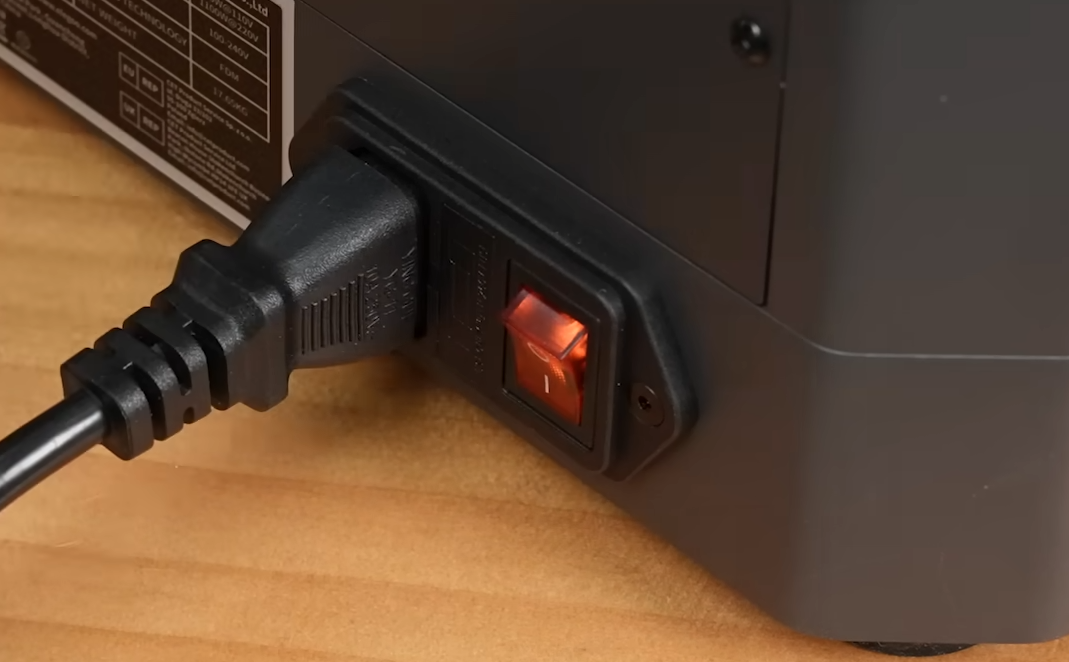
- After powering on, the printer firmware will detect the installed CANVAS module. The system will automatically identify and enable the 4-color printing capability.
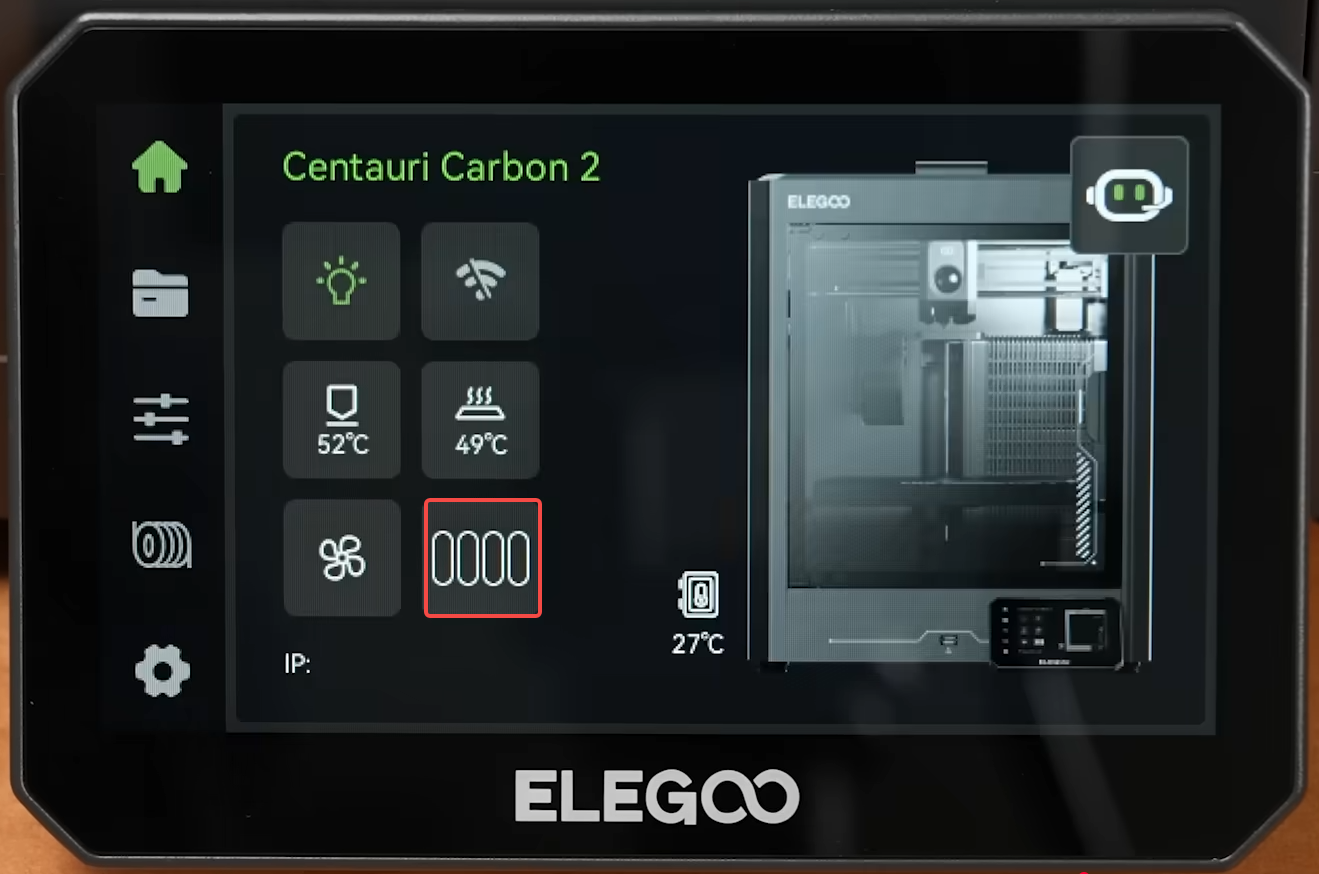
¶ Calibration
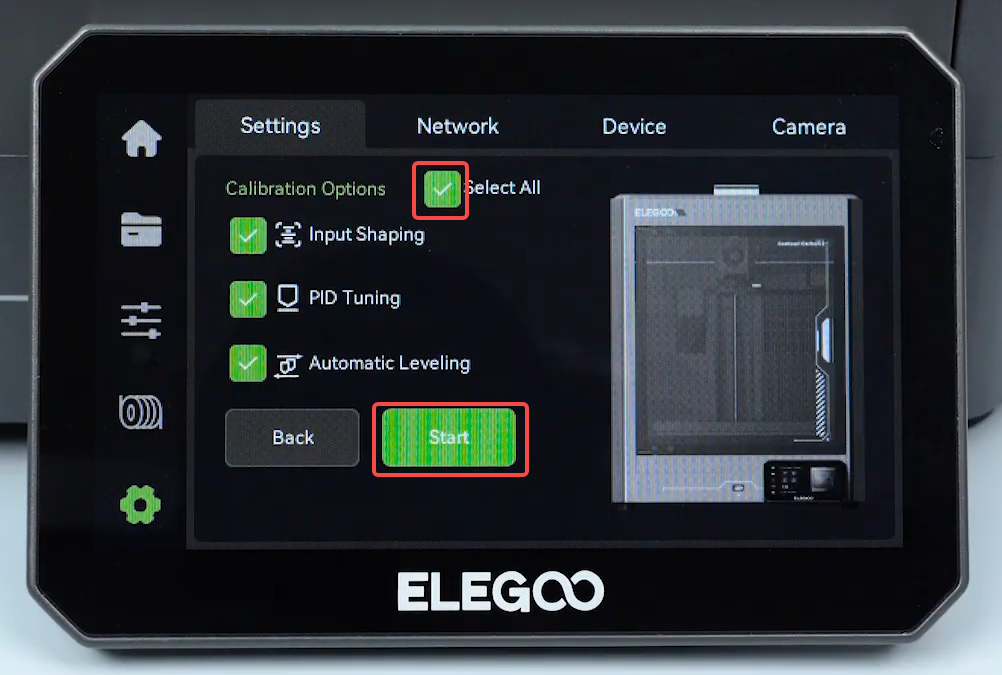
- Tap Settings > Calibration > One-click Self-check > Select All > Start. The printer will start the self-check process.
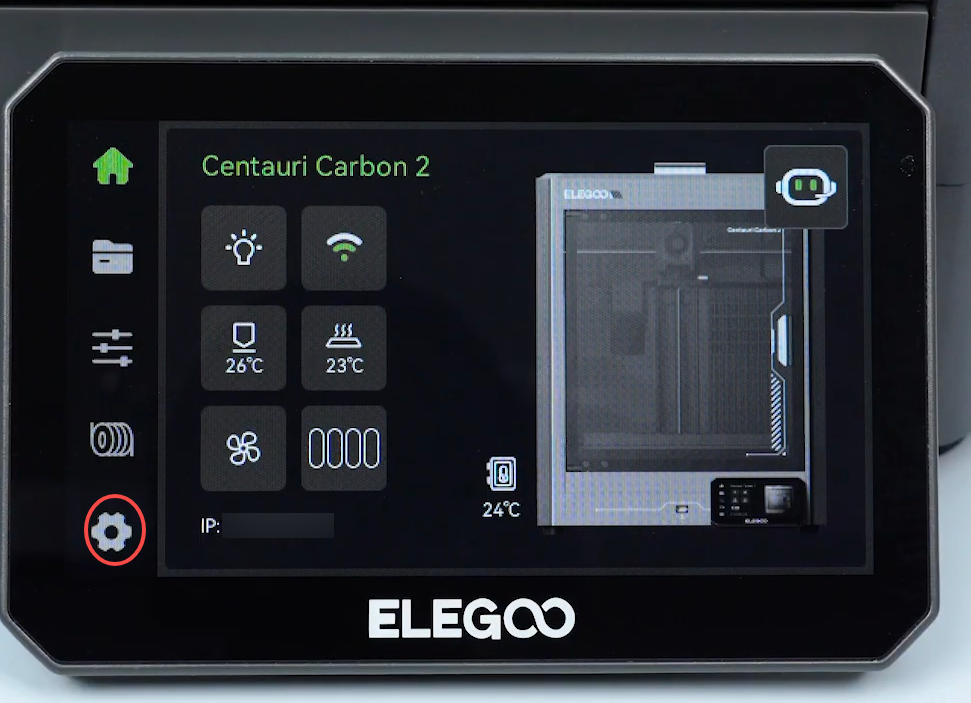
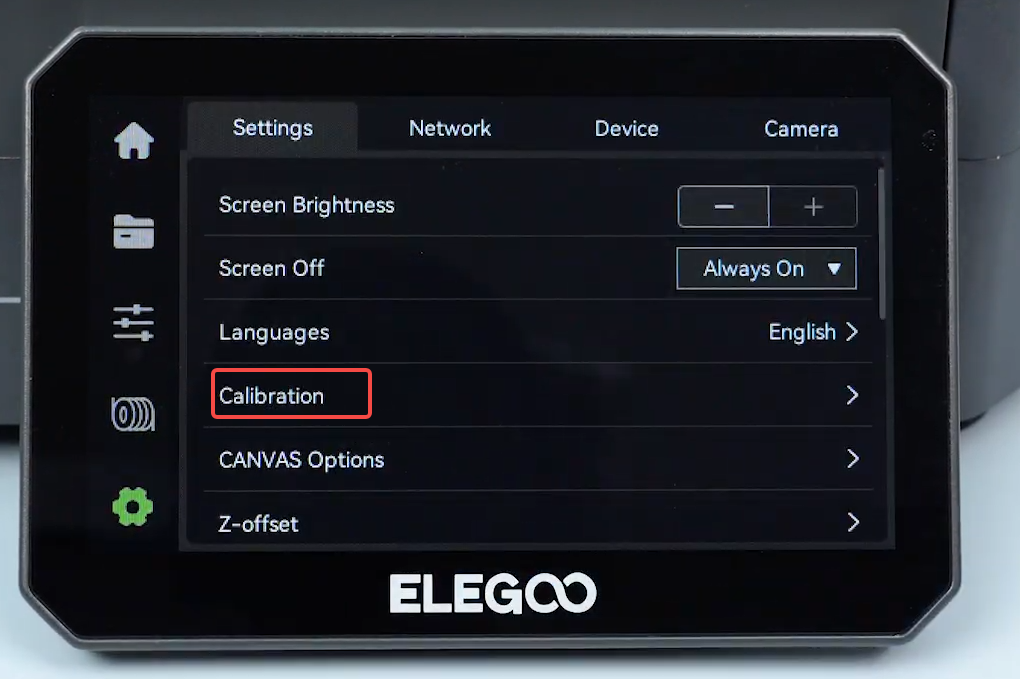
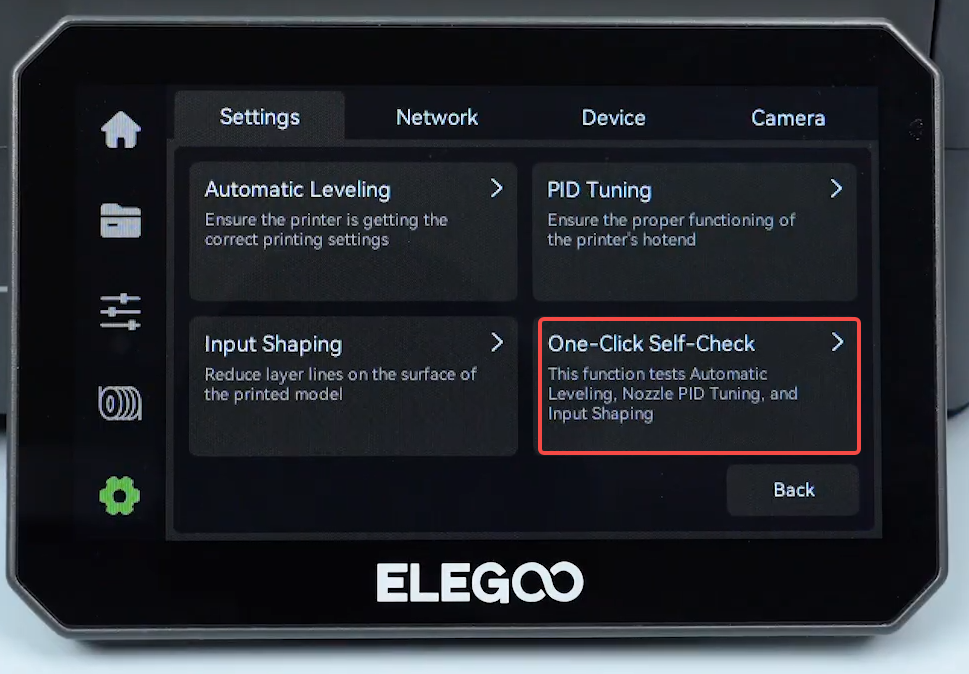
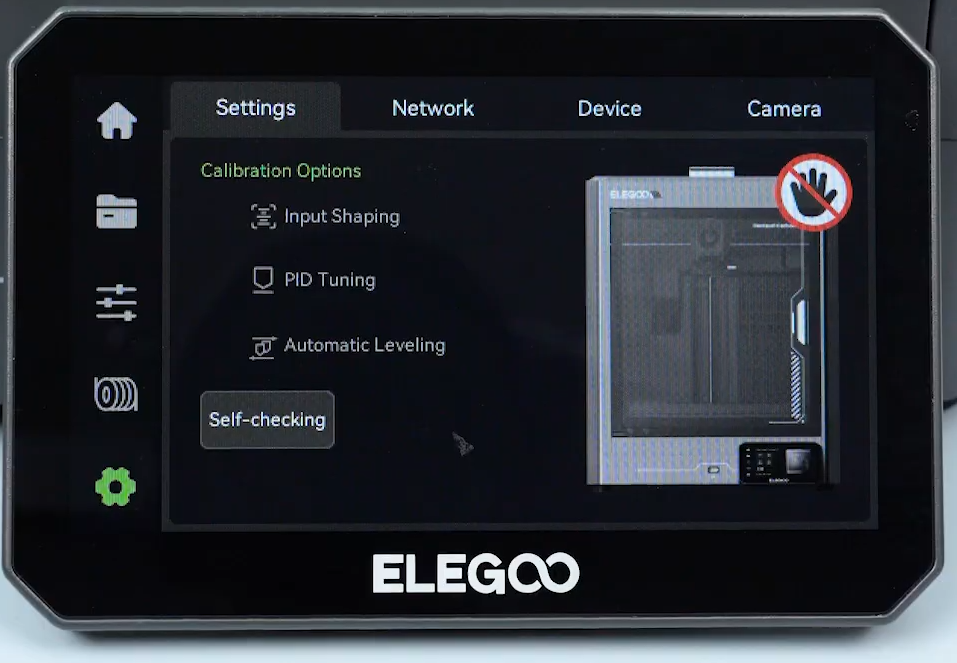
- Wait for the printer to complete the self-check. After the self-check is completed, the printer is ready for normal use.
¶ Help Us Improve
If you have any suggestions or feedback about the wiki pages, please let us know through the ELEGOO official feedback channel.