¶ Reasons
¶ Filament issues
-
The filament diameter is too large.
-
The filament is broke in the 4-in-1 hub.
-
The filament is entangled.
-
High and low temperature filaments are used interchangeably.
-
TPU is printed with Canvas.
¶ Other issues
-
The gearbox is loose or not tightened.
-
The filament rack serial numbers are mixed up.
-
The filament holder and spool are not properly aligned.
¶ Troubleshooting Steps
¶ Tools needed for the troubleshooting
-
A 2.0 mm Allen key
-
A caliper
¶ Things to be noted
-
After printing with high-temperature filament, the printer needs to be flushed. High- and low-temperature filaments should not be used interchangeably, as this may cause printhead clogging. A red light may also illuminate during printing.
-
TPU filaments are soft and elastic. They are easily bent and compressed inside the tube, leading to weak extrusion, clogging, and printing failures. Therefore, TPU printing via Canvas is not supported.
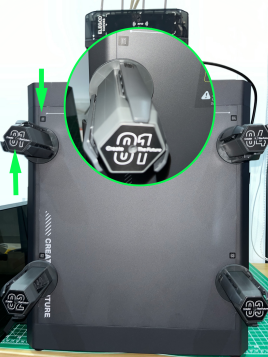
¶ Step 1 Check whether the filament racks are installed in the correct order.
The rack numbers must correspond to the numbers on the chassis. They cannot be mixed up. Otherwise, the filament recycling function will fail, and the filaments may get stuck.
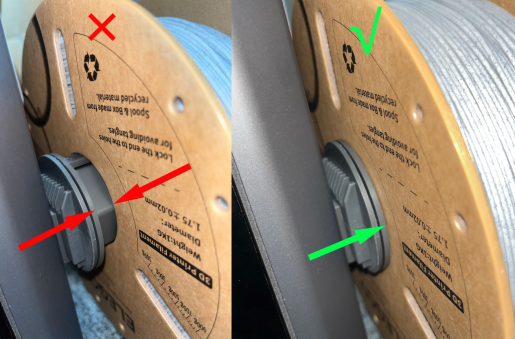
¶ Step 2 Check whether the edges of the filament spool and the filament holder are properly aligned.
If they are not properly aligned, it may cause material to get stuck orthe filament spool to fall off.
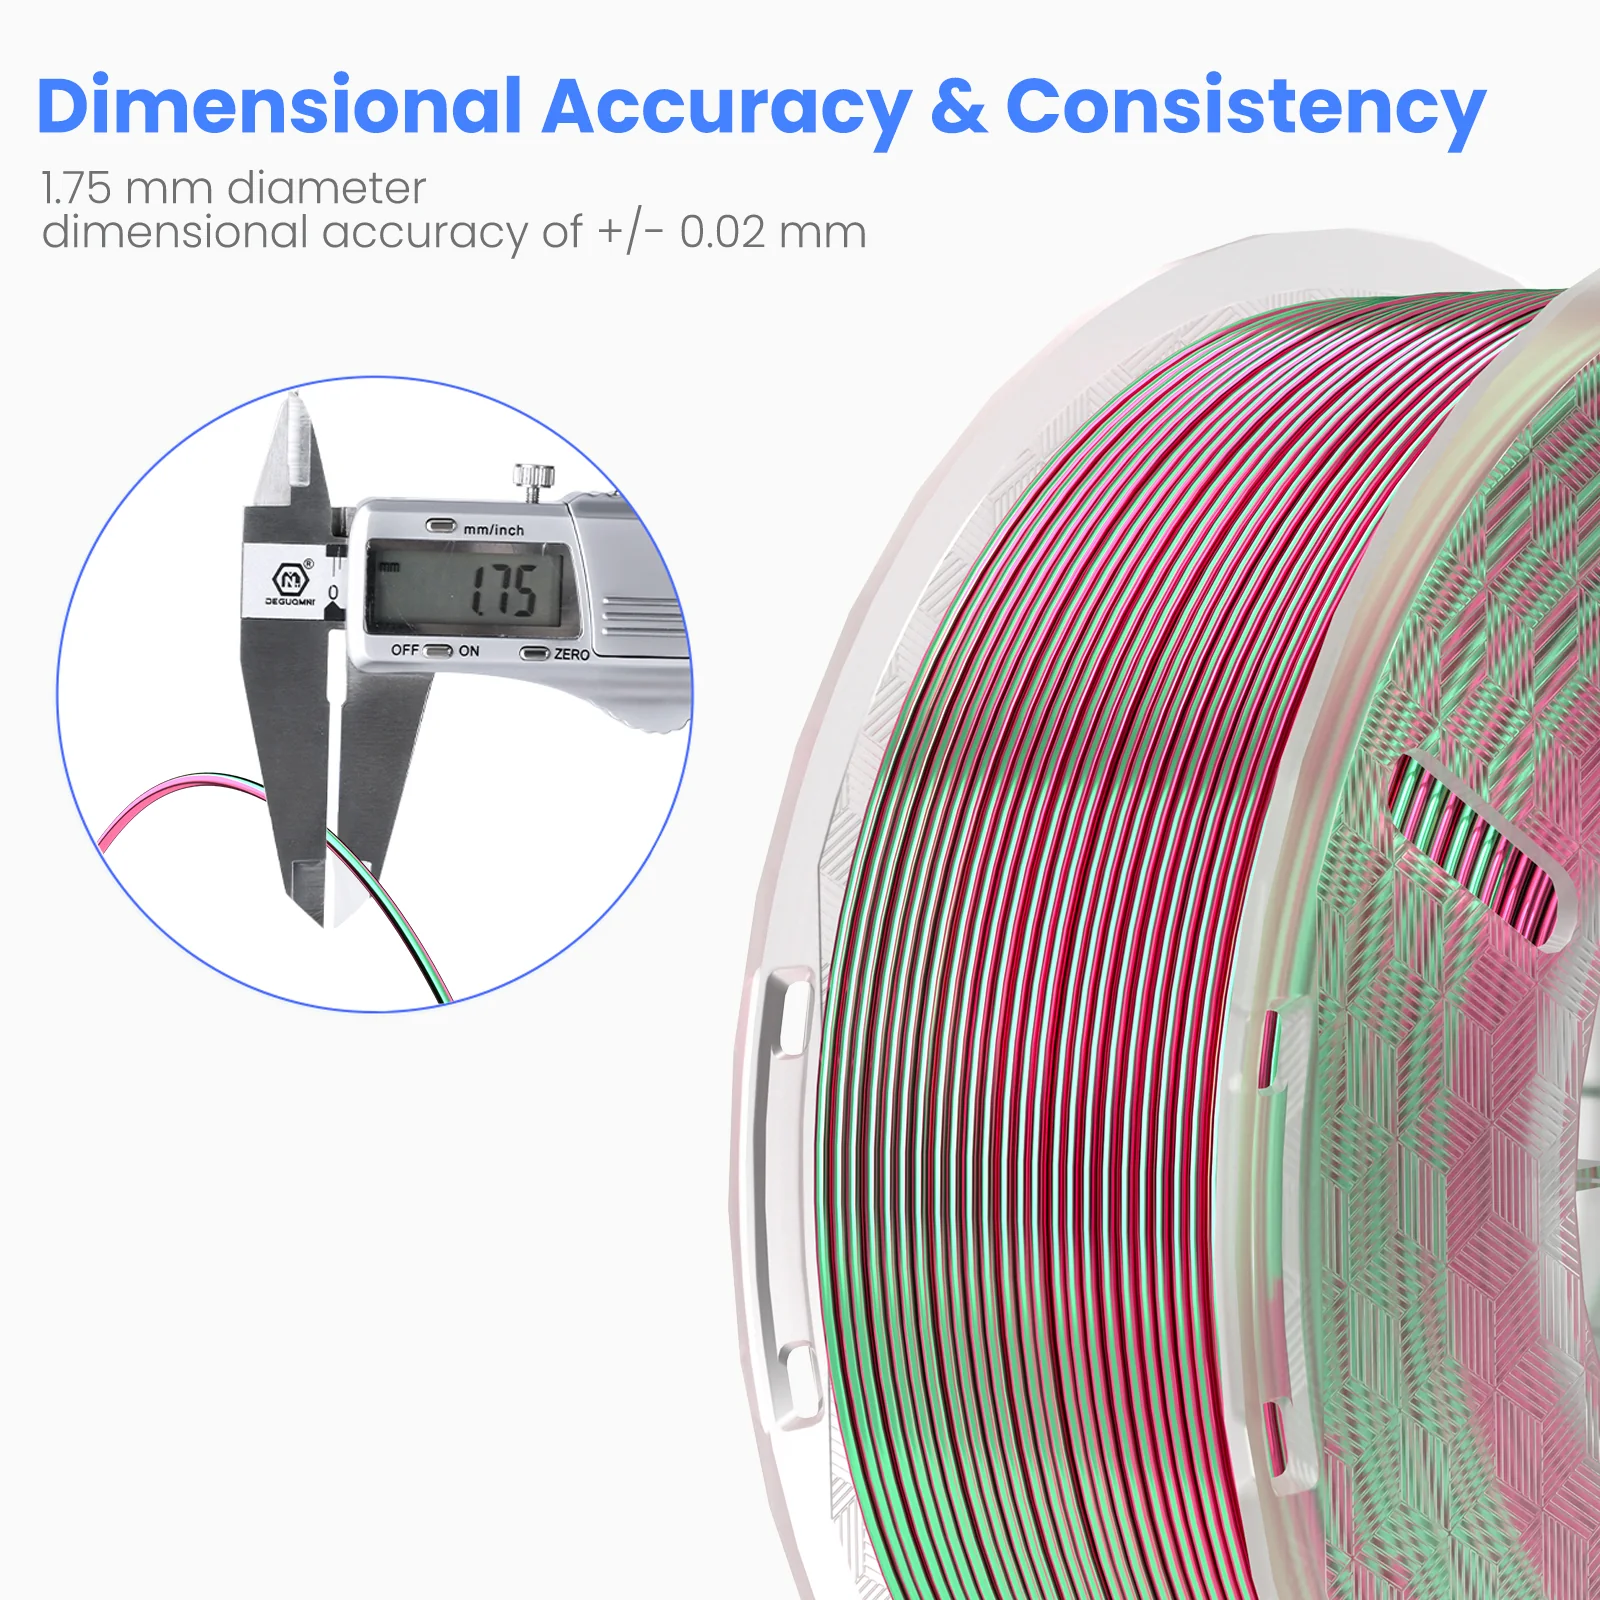
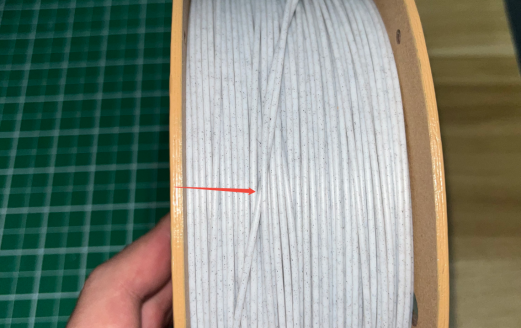
¶ Step 3 Check if the filament diameter is too thick using a caliper.
The inner diameter of the PTFE tube is 2mm. If the filament becomes thicker at any point, the filament may get stuck as it enters the PTFE tube. If you don't have a caliper, you can use other type of filament for testing.
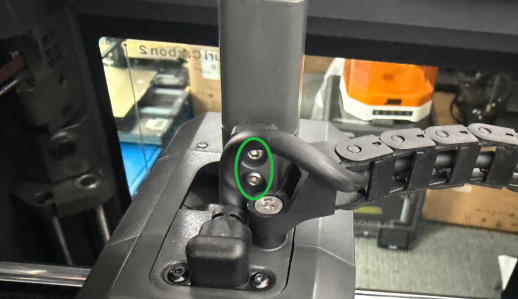
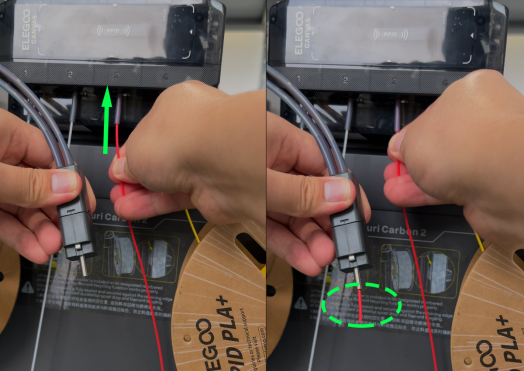
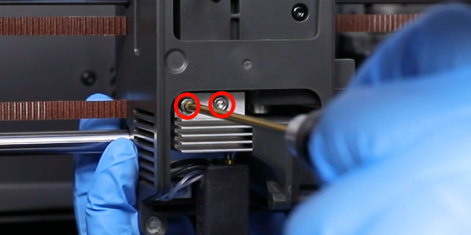
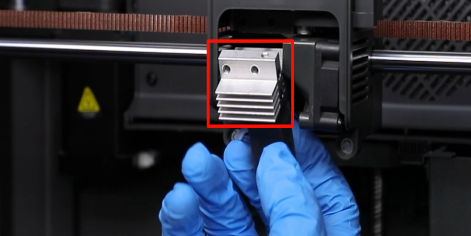
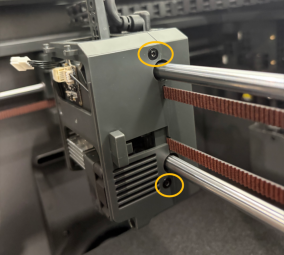
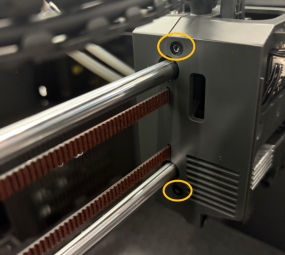
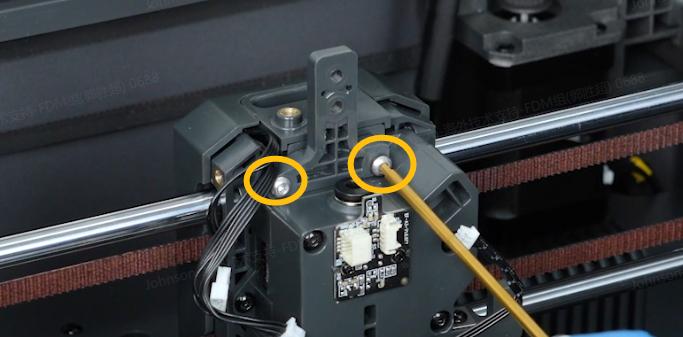
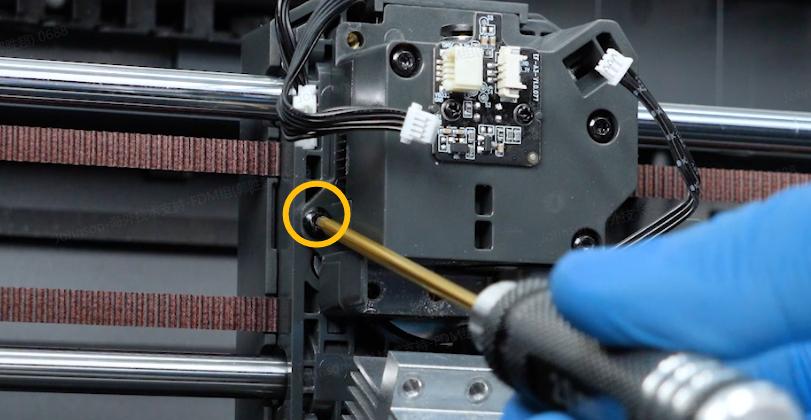
¶ Step 4 Check if the filament is broken in the 4-in-1 hub module.
Loosen the two screws at the marked positions with a 2.0mm screwdriver. After that, pull the 4-in-1 hub upwards.
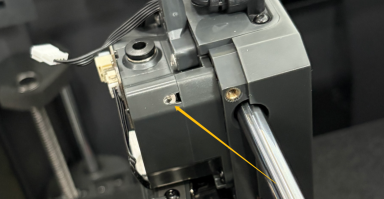
Gently push the filament with your hand and check if the filament can pass through the multi-feed module.
¶ Step 5 Check if the filament is taut and if there is any tangle.
If tangling is found, tighten the filament along its end and pull the end out along the knotted area.
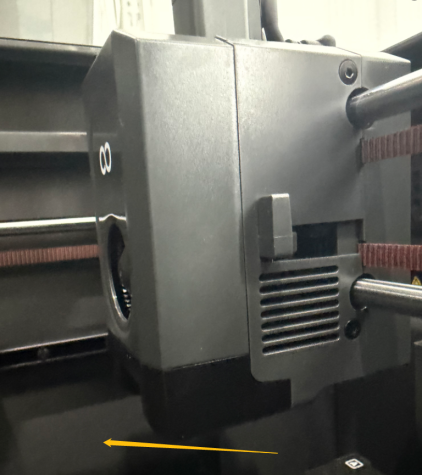
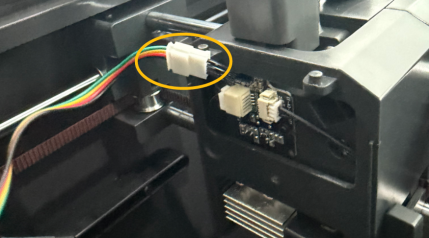
¶ Step 6 Check whether the gearbox can extrude filament normally.
-
Remove the fan cover first.
-
Unplug the cable of the model fan.
-
Remove the screws securing the hot end, but do not unplug the hotend connector.
-
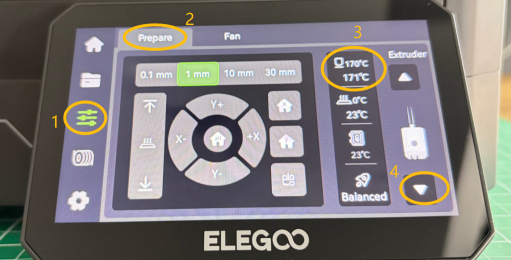
On the touchscreen, select Control → Prepare → Set the nozzle temperature to 170℃ → After the nozzle temperature reaches 170℃, click the ▽ and load filament.
-
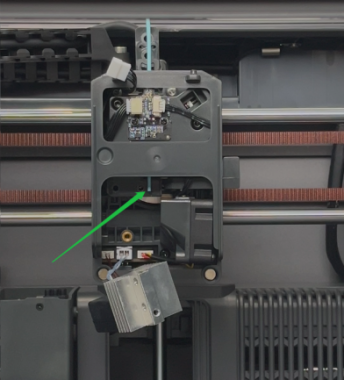
Check if the filament can be pushed to the marked position via the gearbox.
-
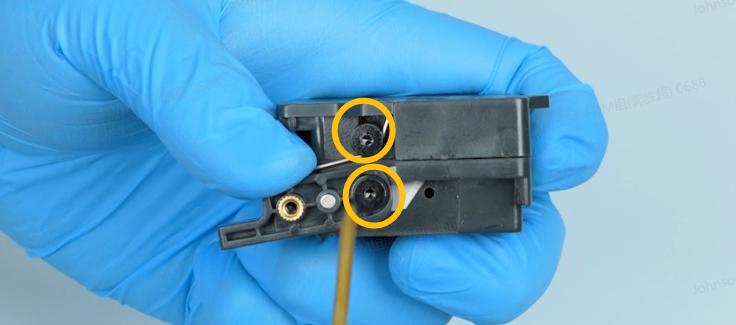
If the filament cannot pass through the gearbox, the gearbox springs need to be tightened. Using a 2.0mm screwdriver, remove the four screws securing the extruder frame one by one.
Turning this screw counterclockwise will tighten the gearbox. Turning it clockwise can loosen the gearbox.
- If the gearbox cannot work normally, it indicates that the filament gets stuck inside the gearbox. Follow the steps below for further troubleshooting.
-
Turn the power switch OFF (symbol "|") and unplug the power supply cable.
-
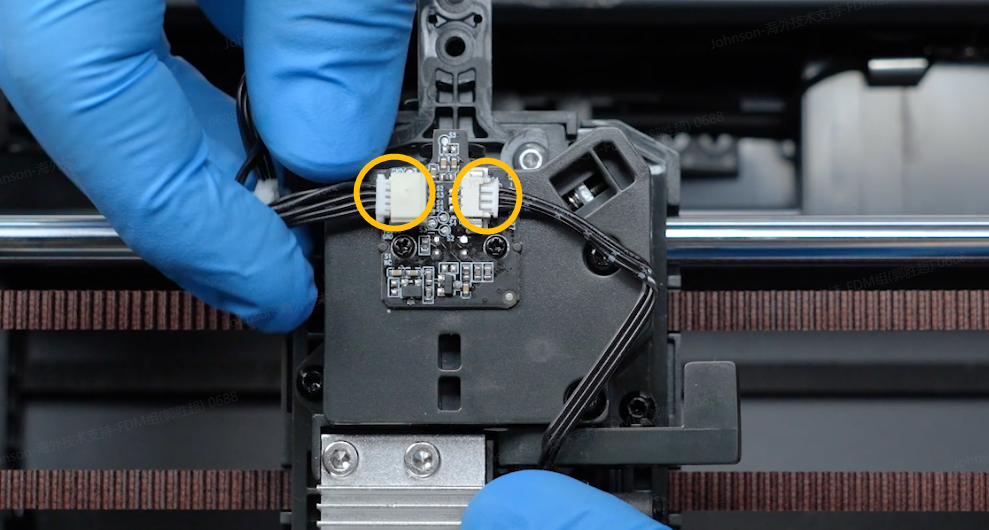
Unplug the two marked cables.
-
Remove the two screws securing the hotend.

-
Remove the two screws securing the 4-in-1 hub holder.
-
Remove the two screws on both sides of the gearbox.

-
Release and remove the screws securing the cutter and the spring. Remove the spring and cutter.
-
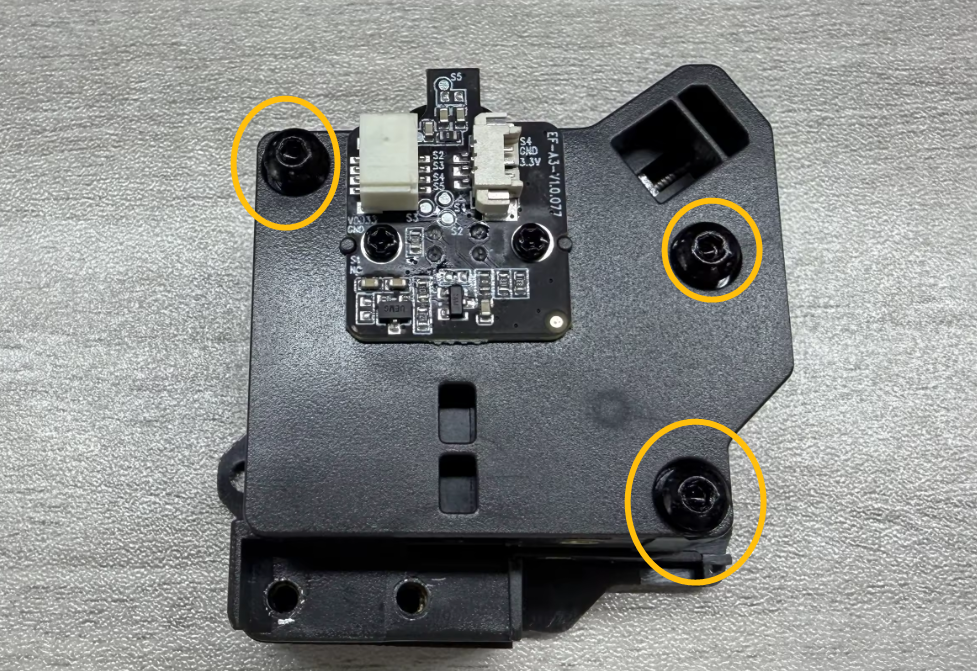
Remove the marked three screws shown in the picture below and remove the back cover of the gearbox.
-
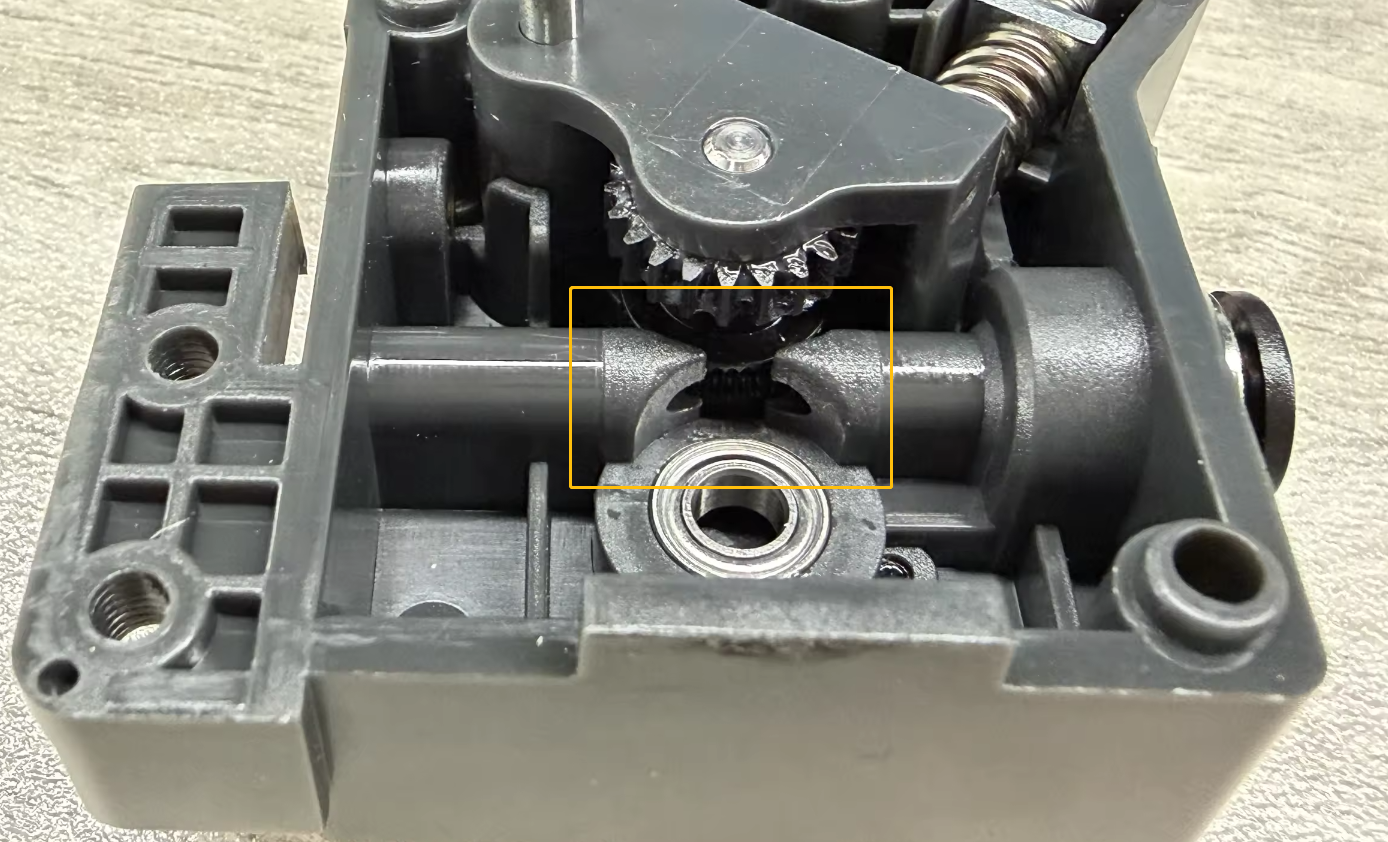
Remove the gear.
Note: If the gear is difficult to remove, loosen the screw on the top-left corner.

-
Check whether the marked area has any filament debris that may obstruct the filament loading.
-
Test whether the gearbox can load filament normally by feeding a piece of filament and rotate the gear manually.
.gif)
¶ Still Have Issues?
If the issue still occurs after you have completed the above troubleshooting steps, record a video showing the malfunctioning CANVAS and contact ELEGOO technical support team.