¶ Issue Description
The touch screen displays Error Code 1263.
¶ Reasons
-
The filament is thick, which causes it to get stuck in the feeder motors.
-
The filament is broken in the feeder motors.
¶ Troubleshooting Steps
¶ Tools needed for troubleshooting
-
A caliper
-
A 1.5 mm Allen key
-
A 2.0 mm Allen key
-
A 2.5 mm Allen key
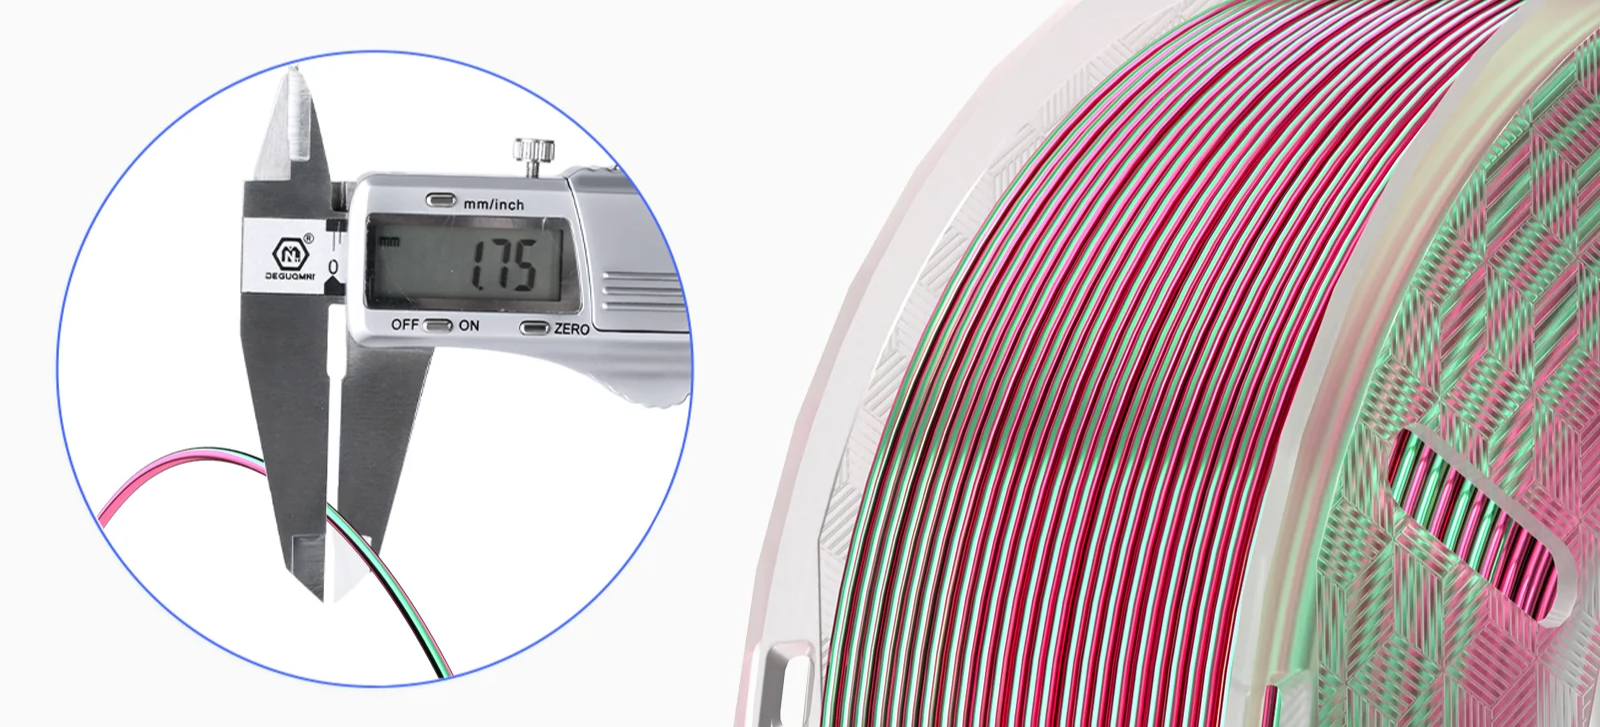
¶ Step 1 Check whether the filament diameter remains stable.
If the filament is thick, the filament may get stuck in the feeder motors and the touch screen displays the error code.
-
If a caliper is not available, you can use other filaments for testing stability.
-
If a caliper is available, refer to the steps below for testing.
How to measure the filament diameter with a caliper:
-
Prepare one meter of filament and select five points on it.
-
Check if the diameter at these points is within the normal tolerance range. For example, the normal tolerance range of ELEGOO PLA is ± 0.02mm.
-
If the filament diameter is unstable, use other filaments and print again.
-
If the filament diameter is stable, refer to Step 2 for further troubleshooting.
¶ Step 2 Locate the component that gets the filament stuck.
-
Push the PTFE tube and loosen the filament.
-
Unplug the filament.
-
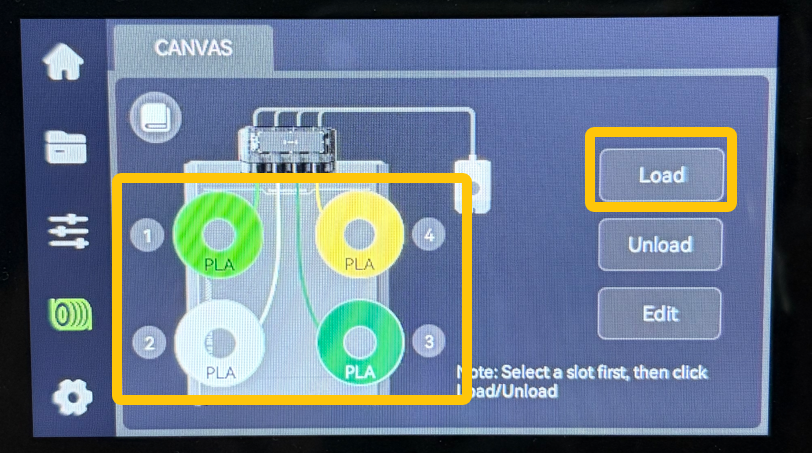
Re-load the filament into the CANVAS. Check whether the filament can be inserted into the PTFE tube normally.
-
If the filament cannot be inserted into the CANVAS, refer to Step 3 for further troubleshooting.
-
If the filament can be inserted into the CANVAS normally, select Load on the touch screen. If the touch screen displays the prompt: Unable to enter the tool head or Feed failure alert, refer to Step 4 and Step 5 for further troubleshooting.
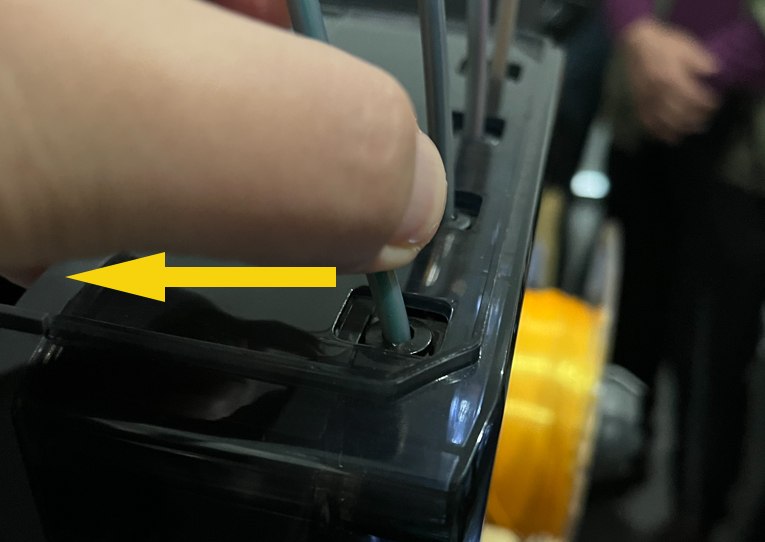
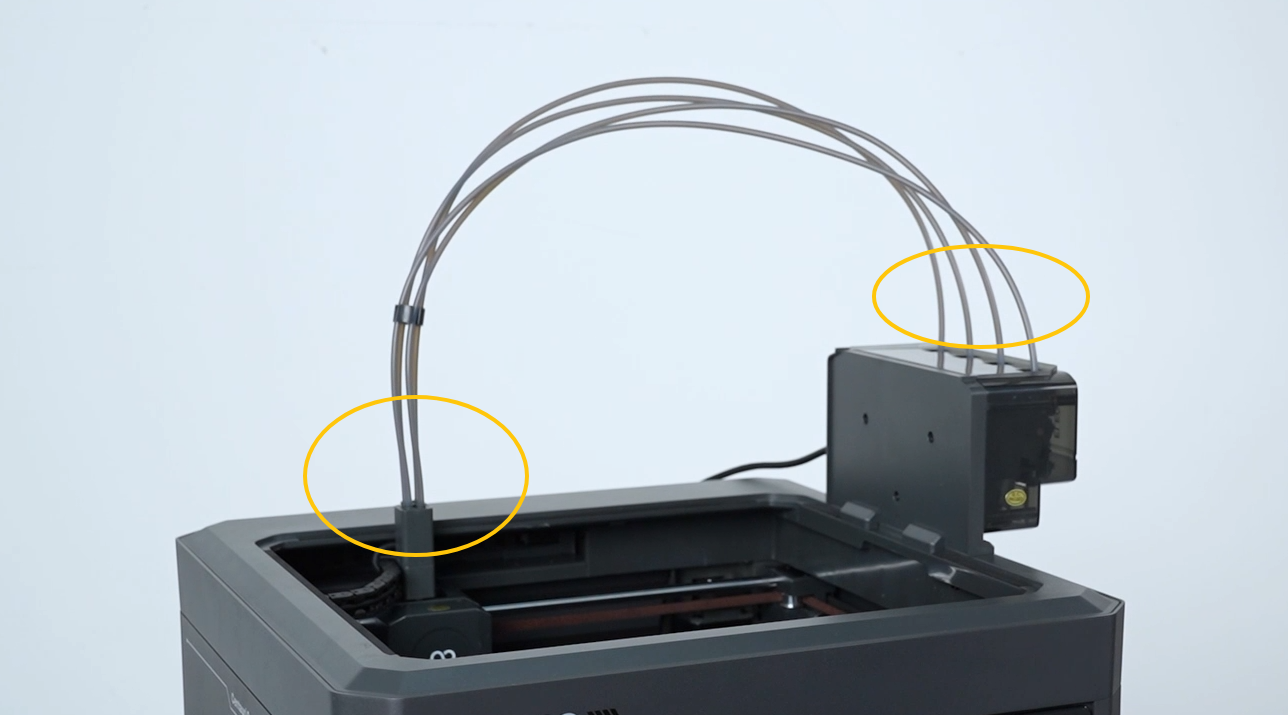
¶ Step 3 Check whether the PTFE tube and the 4-in-1 hub have any residual filament.
-
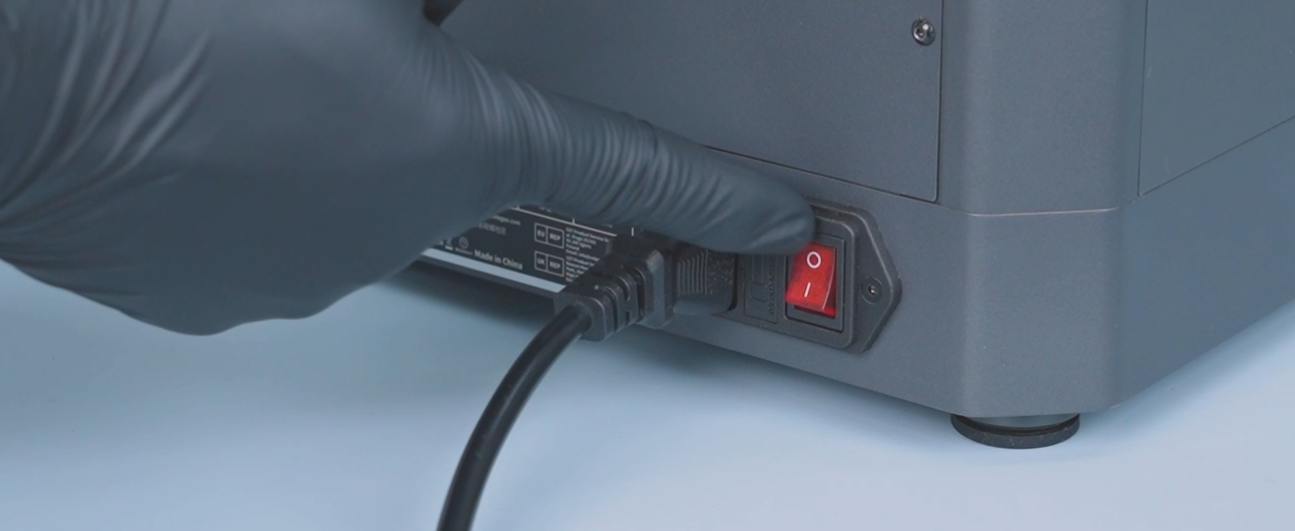
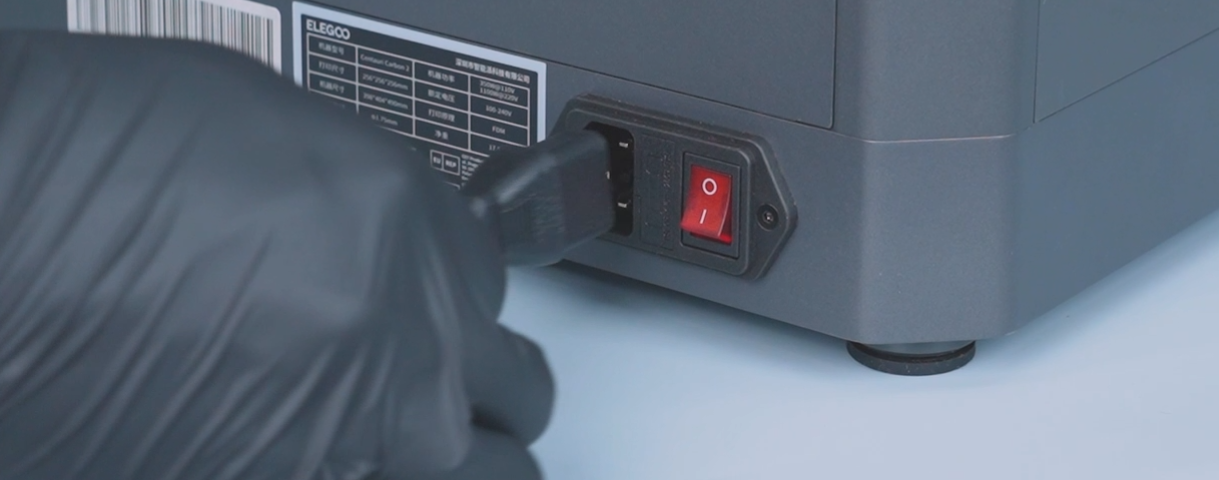
Turn the power switch OFF (symbol "〇") and unplug the power supply cable.
-
Check whether the PTFE tube has any residual filament.
- If the filament is broken in the PTFE tube on the CANVAS side:
a. Gently press the end of the PTFE tube with a pair of tweezers.
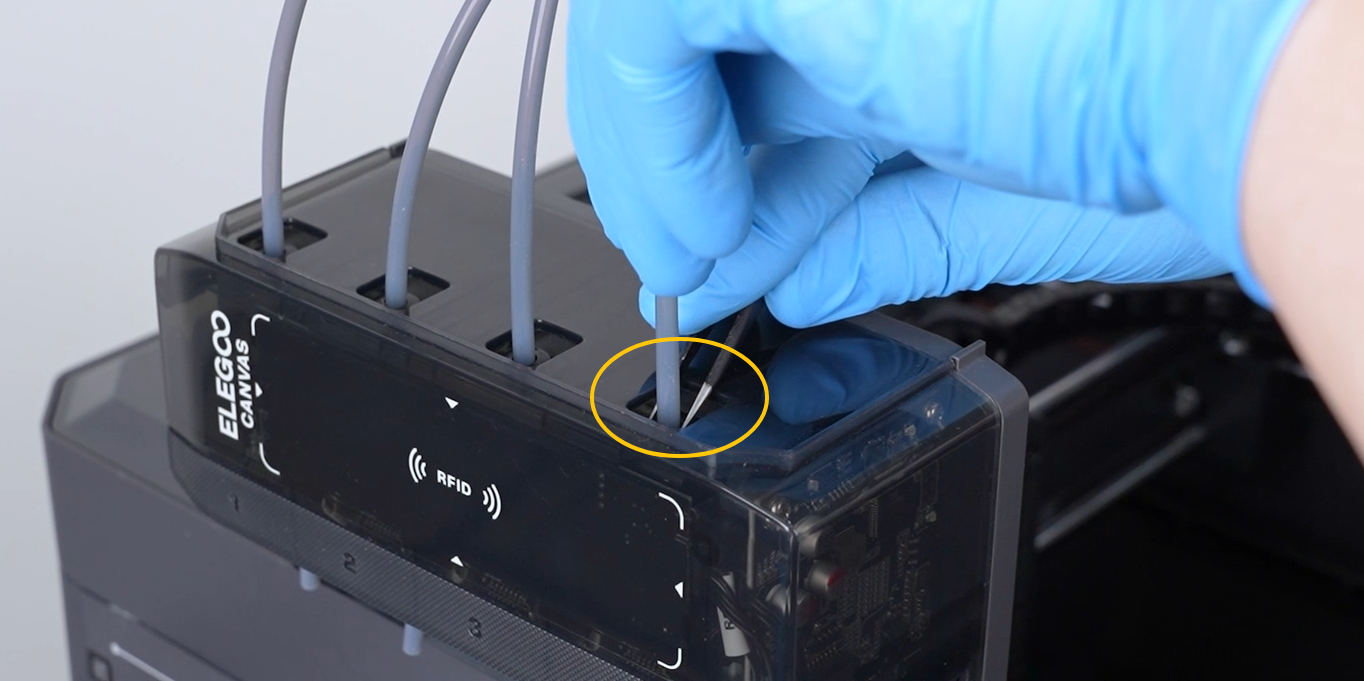
b. Unplug the PTFE tube after it is loose.
c. Remove the broken filament. - If the filament is broken in the PTFE tube on the 4-in-1 hub and remove the broken filament.
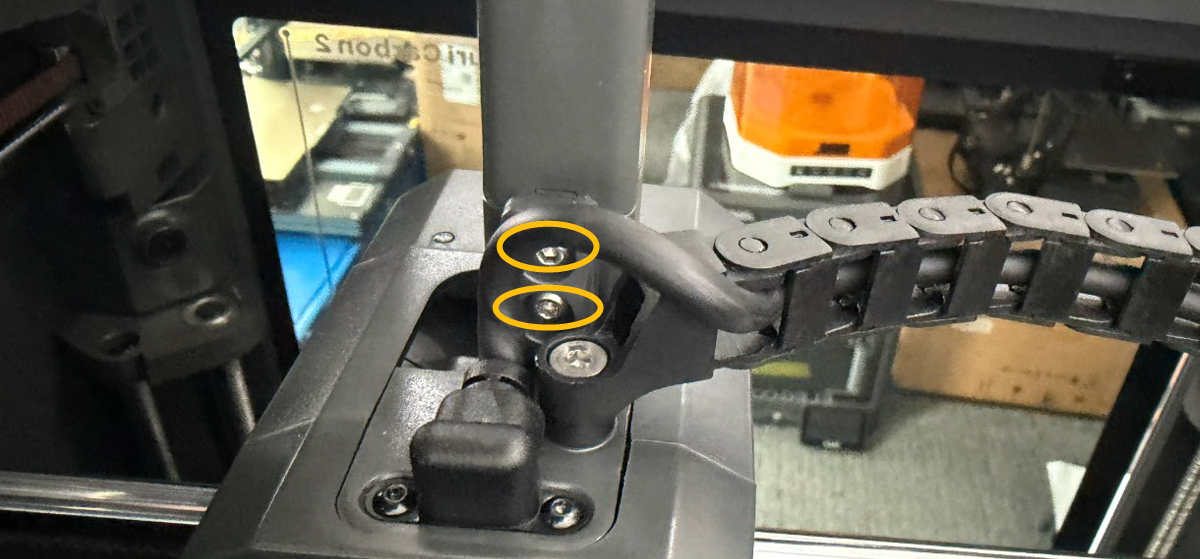
a. Release and remove the screws securing the CAN bus and the tank chain with a 2.0 mm Allen key and a 2.5 mm Allen key respectively. Unplug the CAN bus and the tank chain.
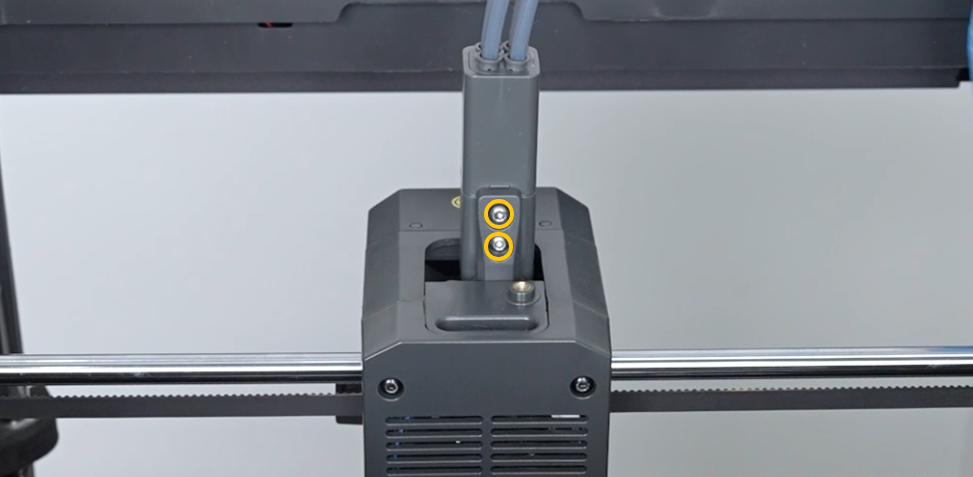
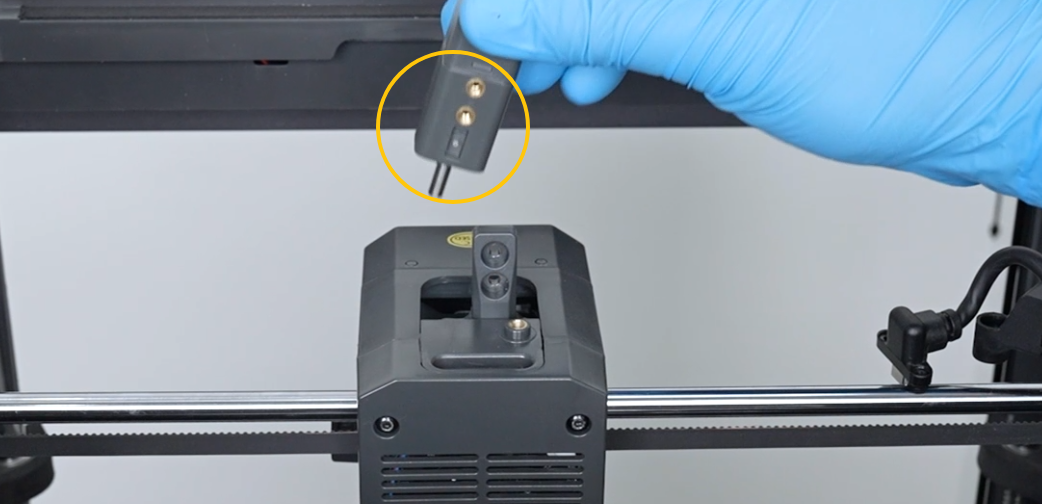
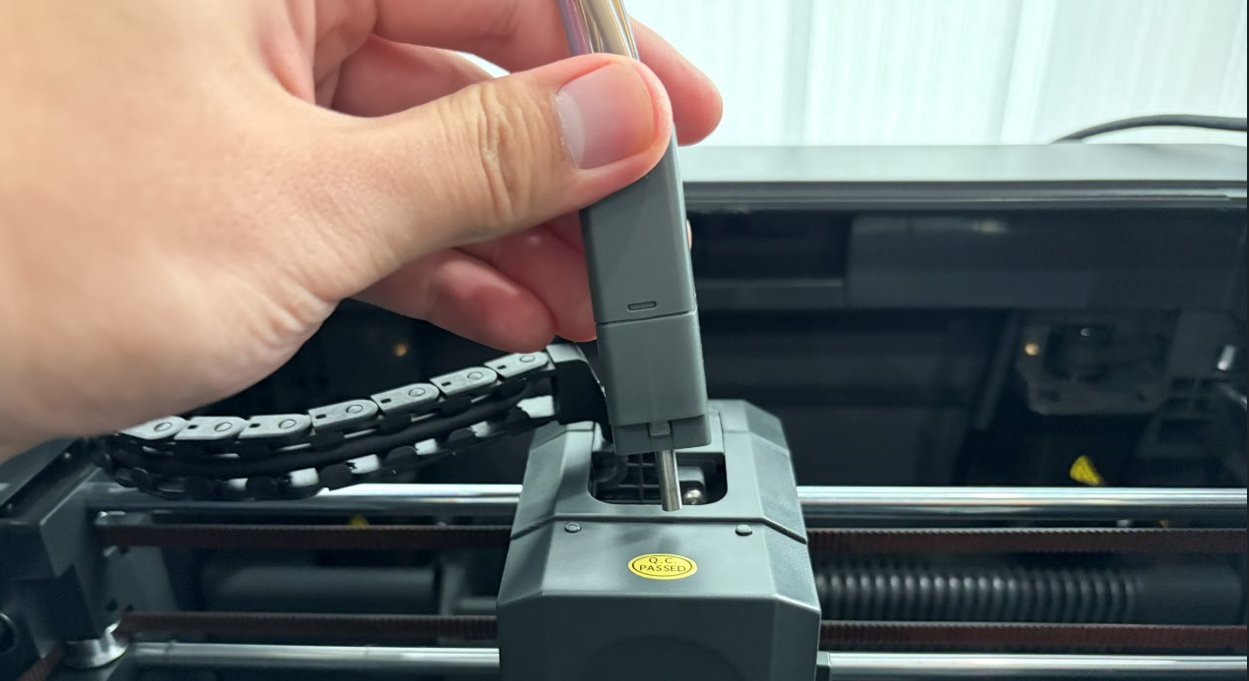
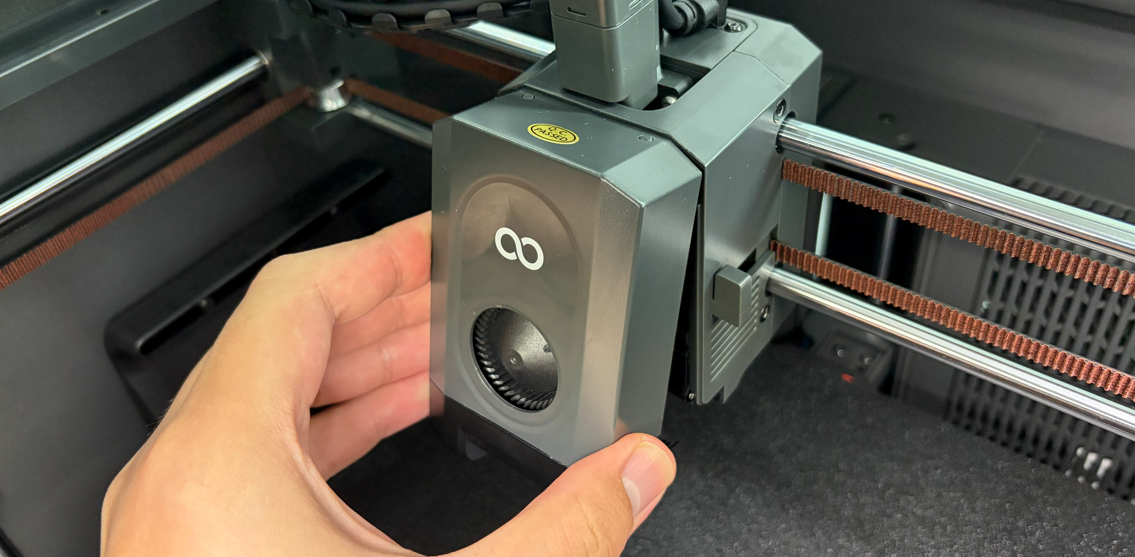
b. Release and remove the two screws securing the 4-in-1 hub with a 2.0 mm Allen key. Remove the 4-in-1 hub.
c. Check whether the 4-in-1 hub and the gearbox has any residual filament.

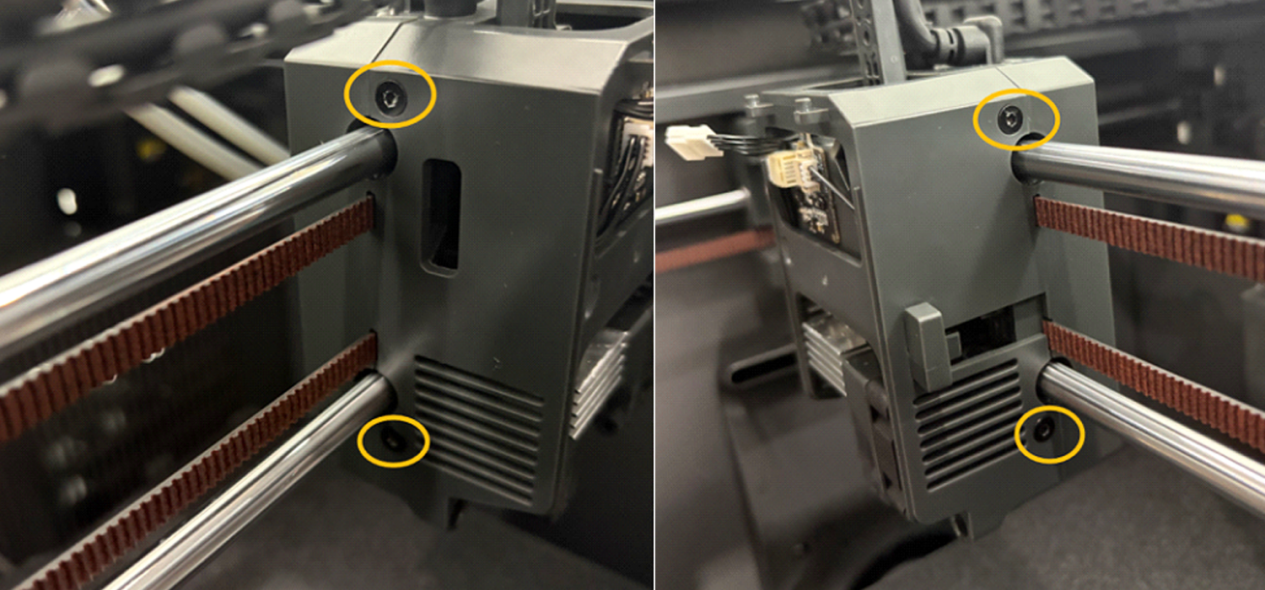
¶ Step 4 Adjust the gearbox tighter.
-
Turn the power switch OFF (symbol "〇") and unplug the power supply cable.
-
Loosen the two screws with a 2.0 mm Allen key.
-
Remove the tool head housing.
-
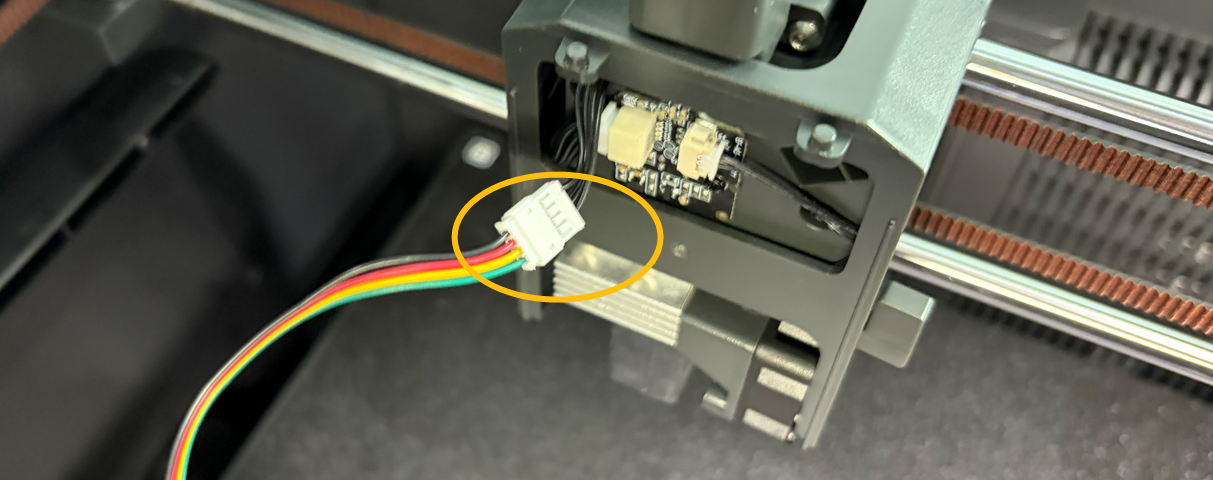
Unplug the cable of the model cooling fan.
-
Remove the two screws securing the hotend with a 2.5mm Allen key.

-
Pull the hotend downward.
Note: Do not unplug the hotend cable.

-
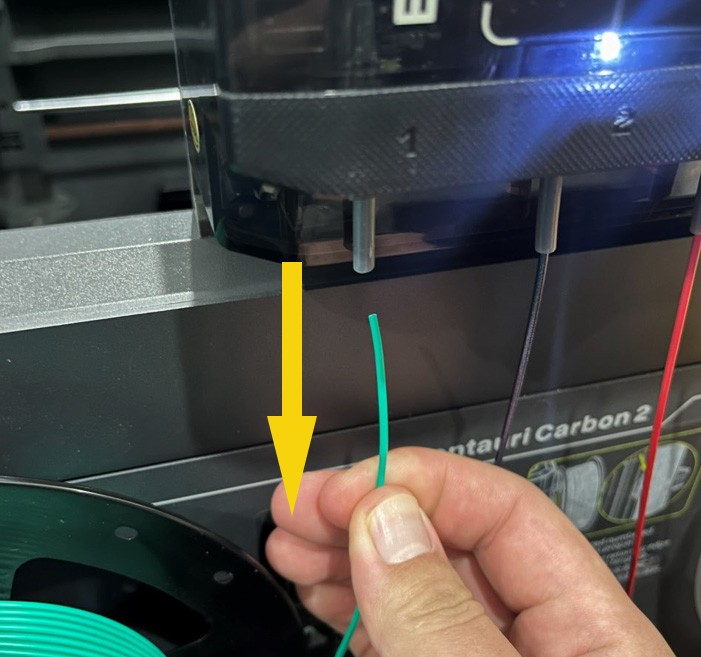
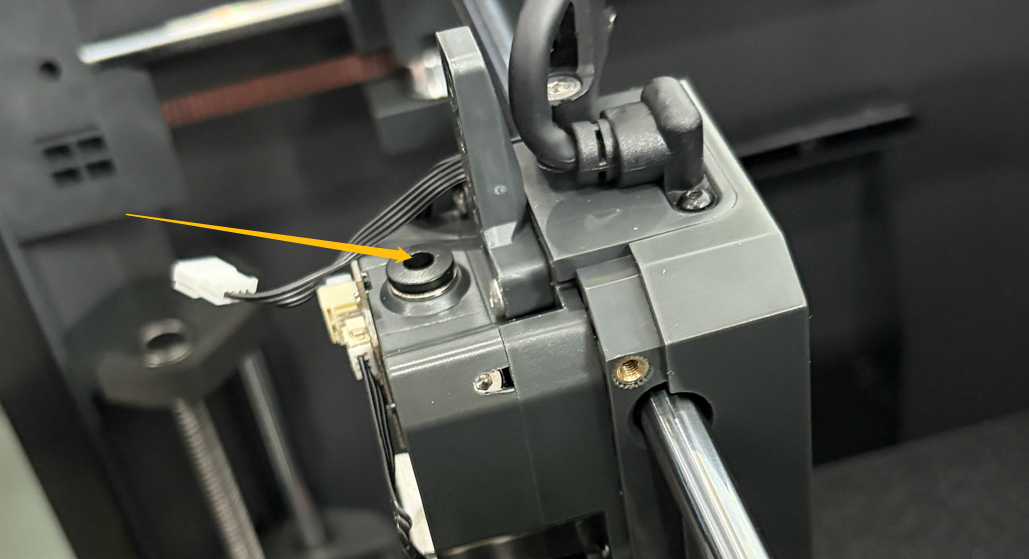
Insert a piece of filament into the marked hole.
-
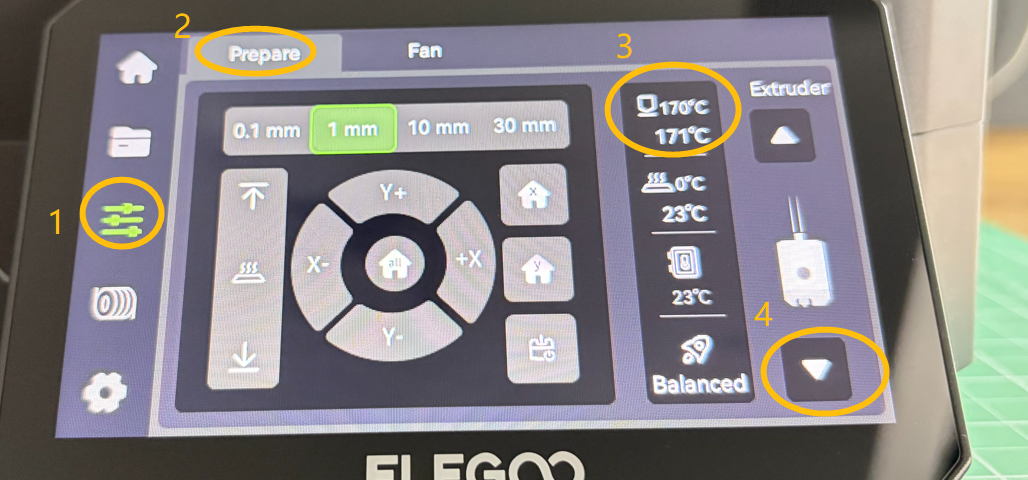
On the touch screen, select Control - Prepare - ▽to extrude the filament.
Note: Do not unload the filament via the filament interface. The interface can trigger the tool head homing process. The hotend is currently unsecured. If the tool head homing process starts, the hotend and the PEI plate may be damaged.
-
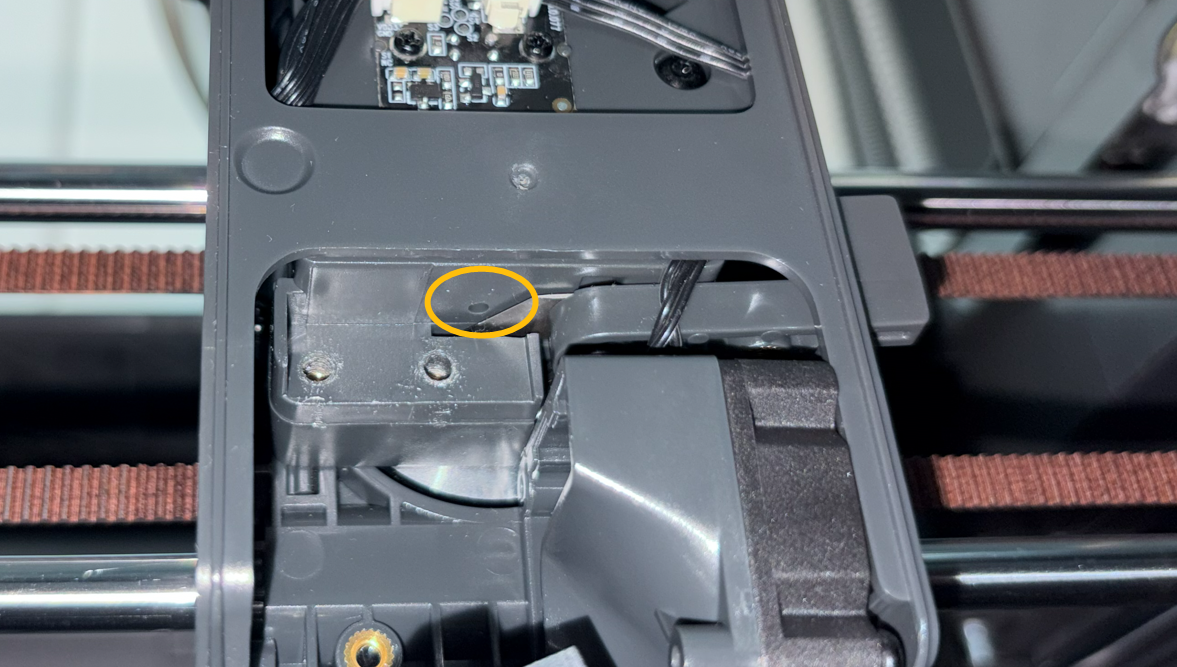
Check whether the filament can be extruded from the hole on the bottom of the gearbox.
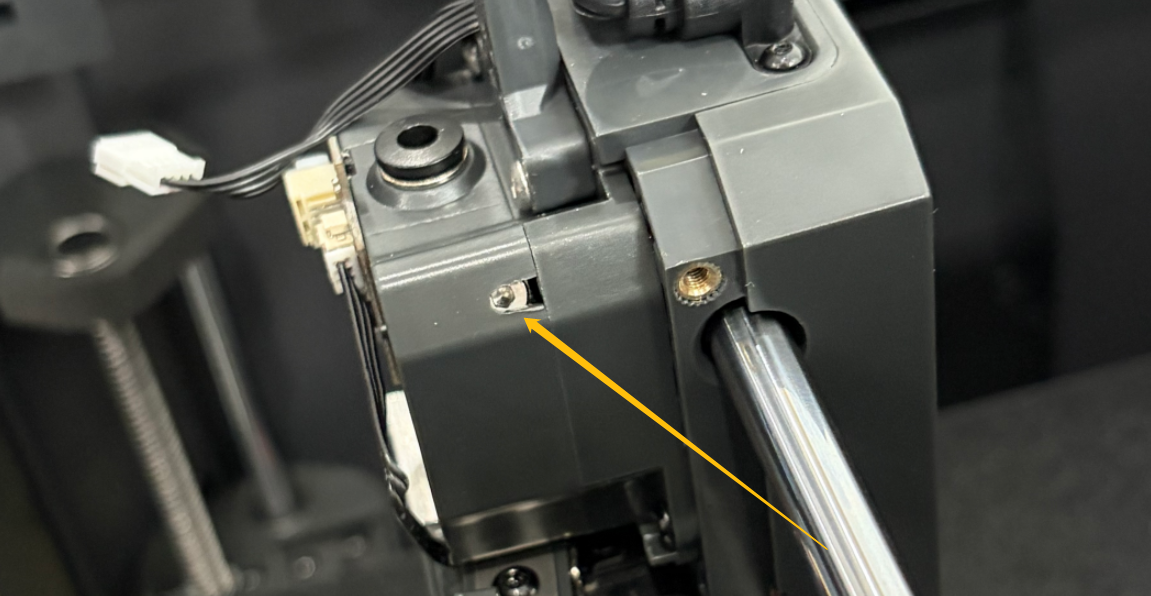
-
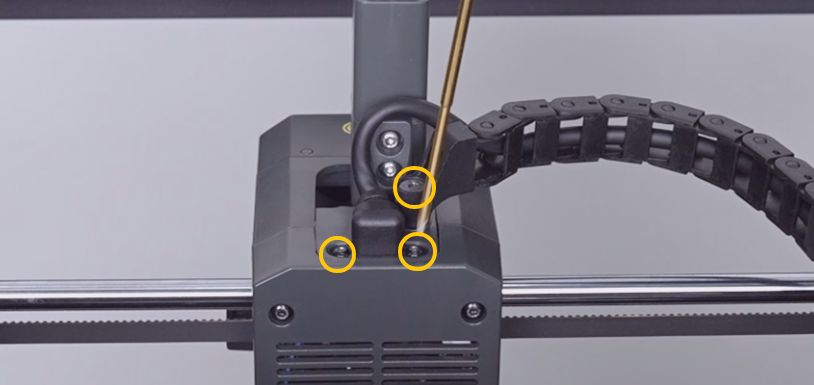
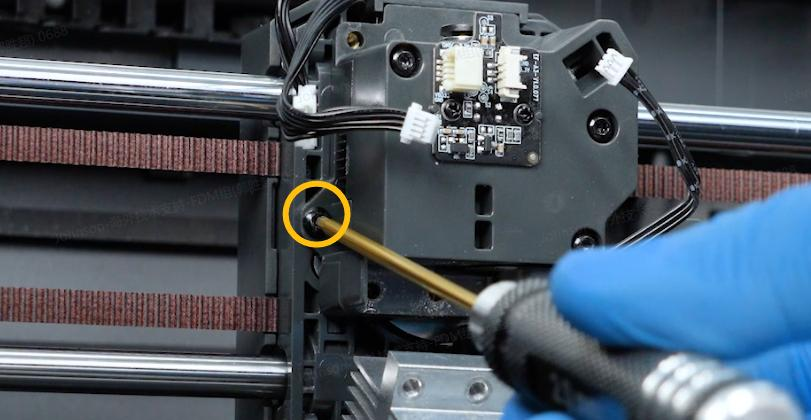
If the filament cannot be extruded, tighten the spring. Release and remove the three screws marked in the picture below, then remove the tool head housing.
-
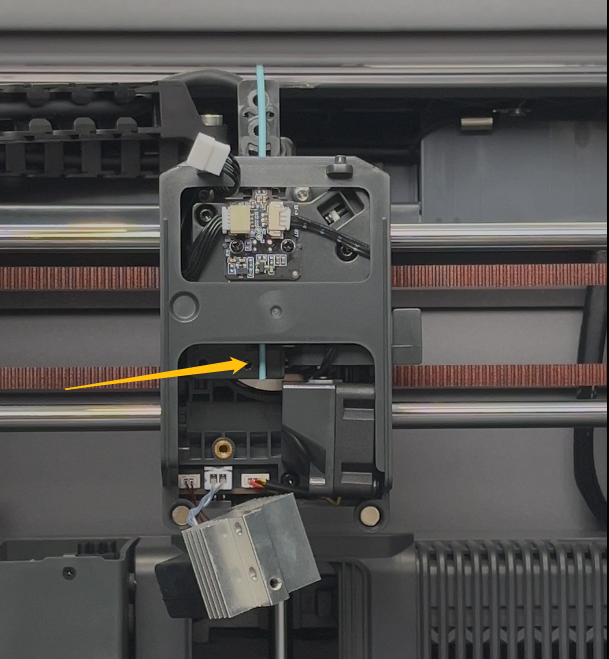
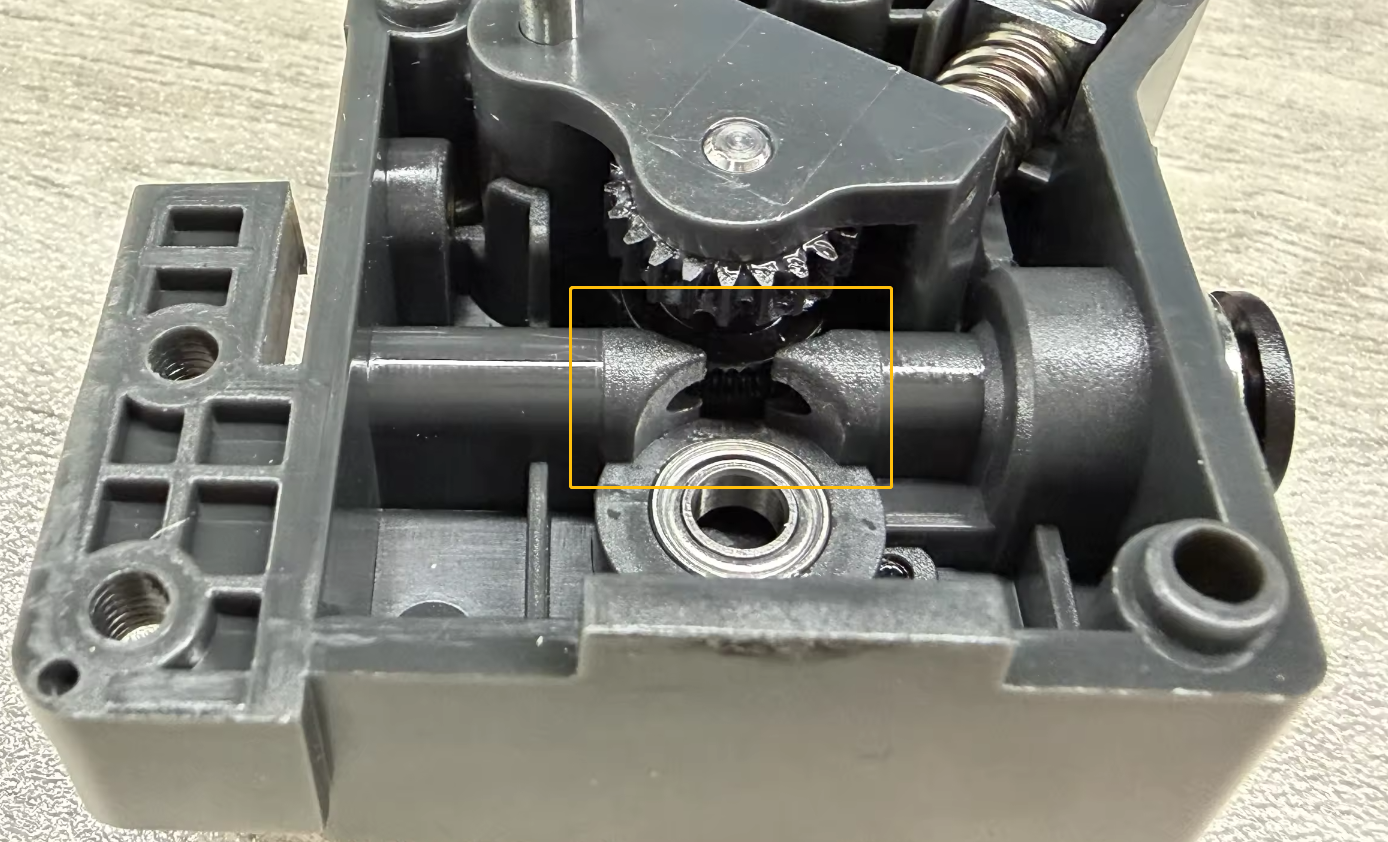
Locate the screw that adjusts the spring. Rotate counterclockwise and tighten the screw to secure the gears.
If the issue still occurs, it indicates that the filament is stuck inside the gearbox. Follow the steps below for further troubleshooting.
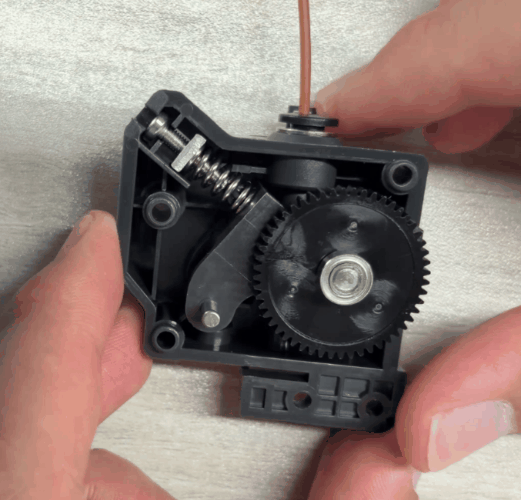
¶ Step 5 Check the inside of the gearbox.
-
Turn the power switch OFF (symbol "〇") and unplug the power supply cable.
-
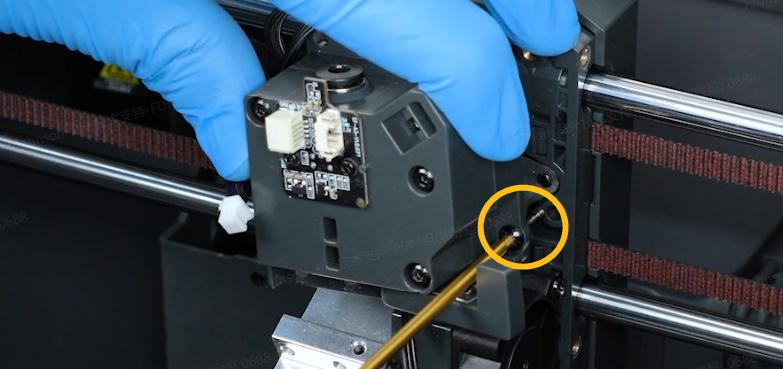
Unplug the marked cables shown in the picture below.
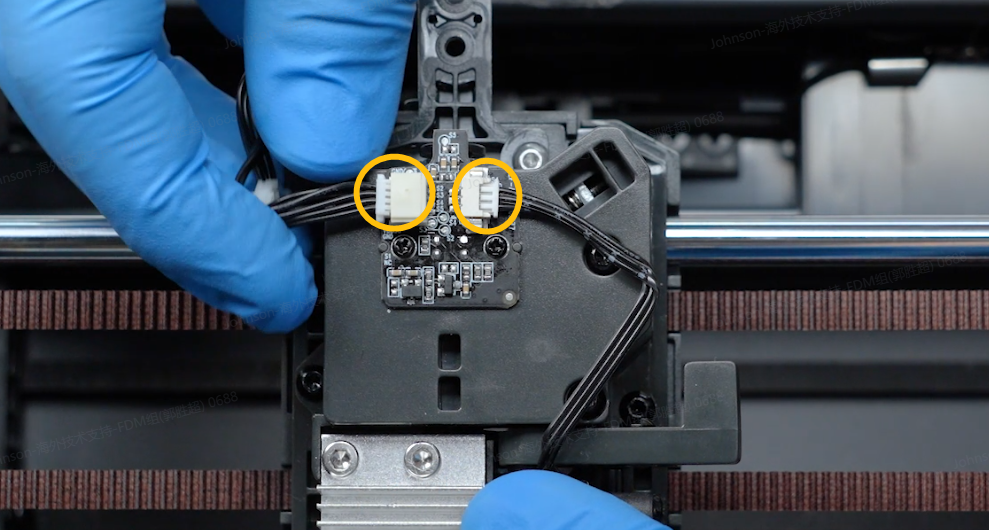
-
Remove the two screws securing the hotend.
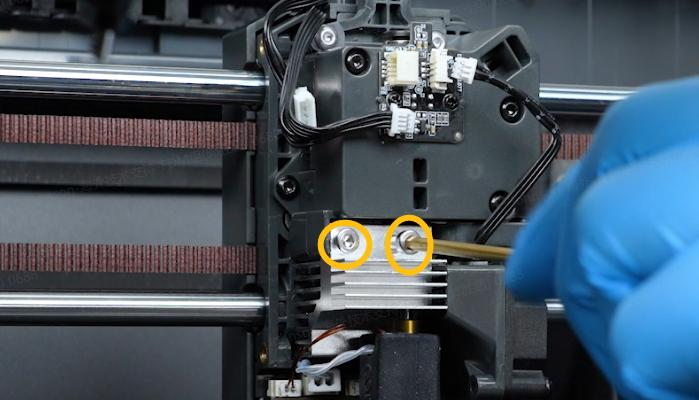
-
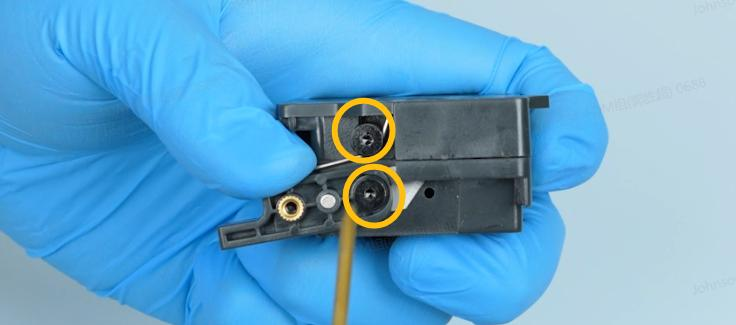
Remove the two screws securing the 4-in-1 hub holder.
-
Remove the two screws on the sides of the gearbox.
-
Remove the screws securing the cutter and spring. Remove the spring and cutter.
-
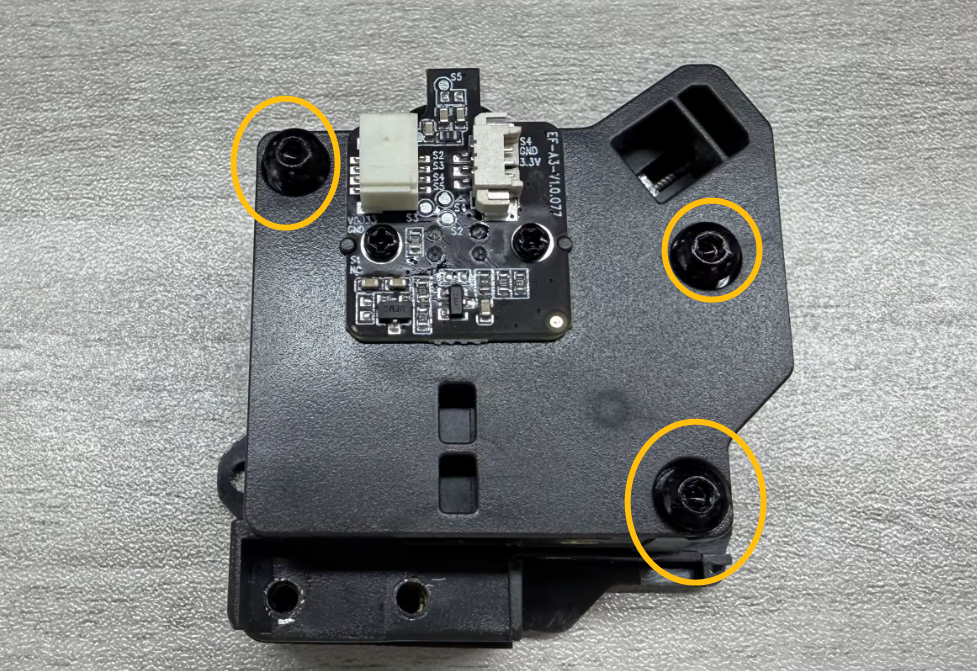
Remove the three marked screws and remove the back cover of the gearbox.
-
Remove the gear. If the gear is difficult to remove, loosen the screw on the top left corner.
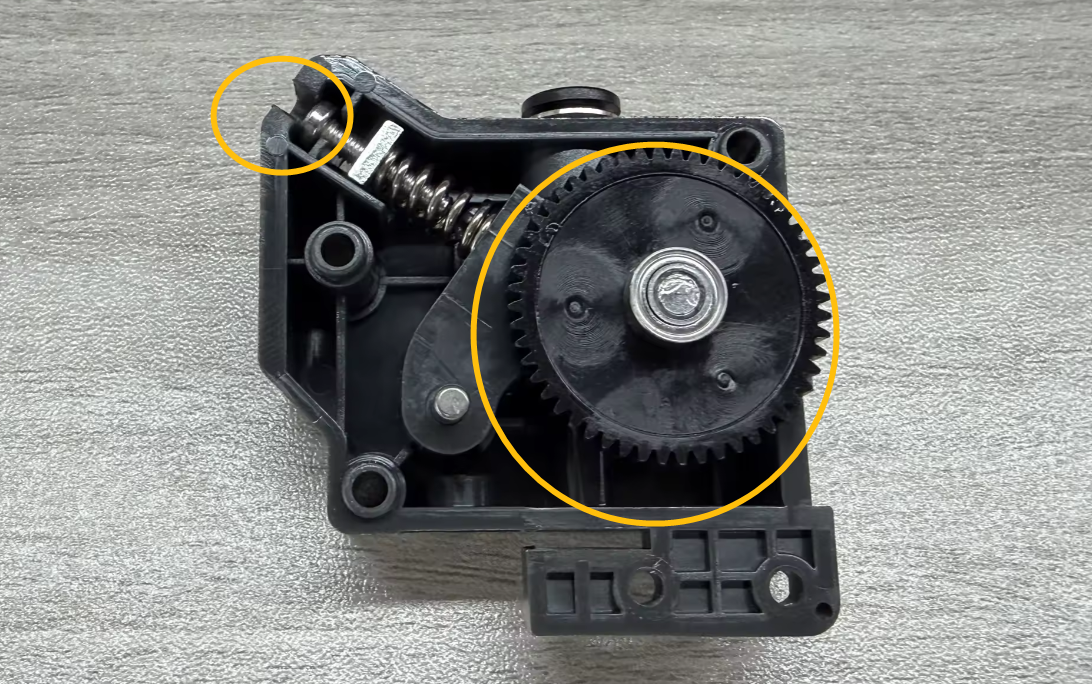
-
Check for any residual filament that may prevent the filament from loading.
After checking, do not restore the gearbox. Insert a piece of filament and rotate the gearbox. Check whether the filament can be extruded normally.