¶ Issue description
The tool head cannot extrude filament normally or cannot extrude enough.
¶ Reasons
¶ Filament issues
- The filament has thickness deviation.
- The filament contains foreign particles.
- The filament setting is incorrect when slicing the model file.
¶ Hardware issues
- The heat break cooling fan is malfunctioning.
- The gearbox is loosely connected.
¶ Other issues
- The room temperature is too high.
- The filament used before has been stuck in the hotend.
- Different 3D printing filaments have been used interchangeably.
¶ Tools needed
- A 2.5 mm Allen key
- A 2.0 mm Allen key
- Filament
- An unclogging tool
- A pair of pincers
- A pair of heat resistant gloves
- A caliper
¶ Troubleshooting steps
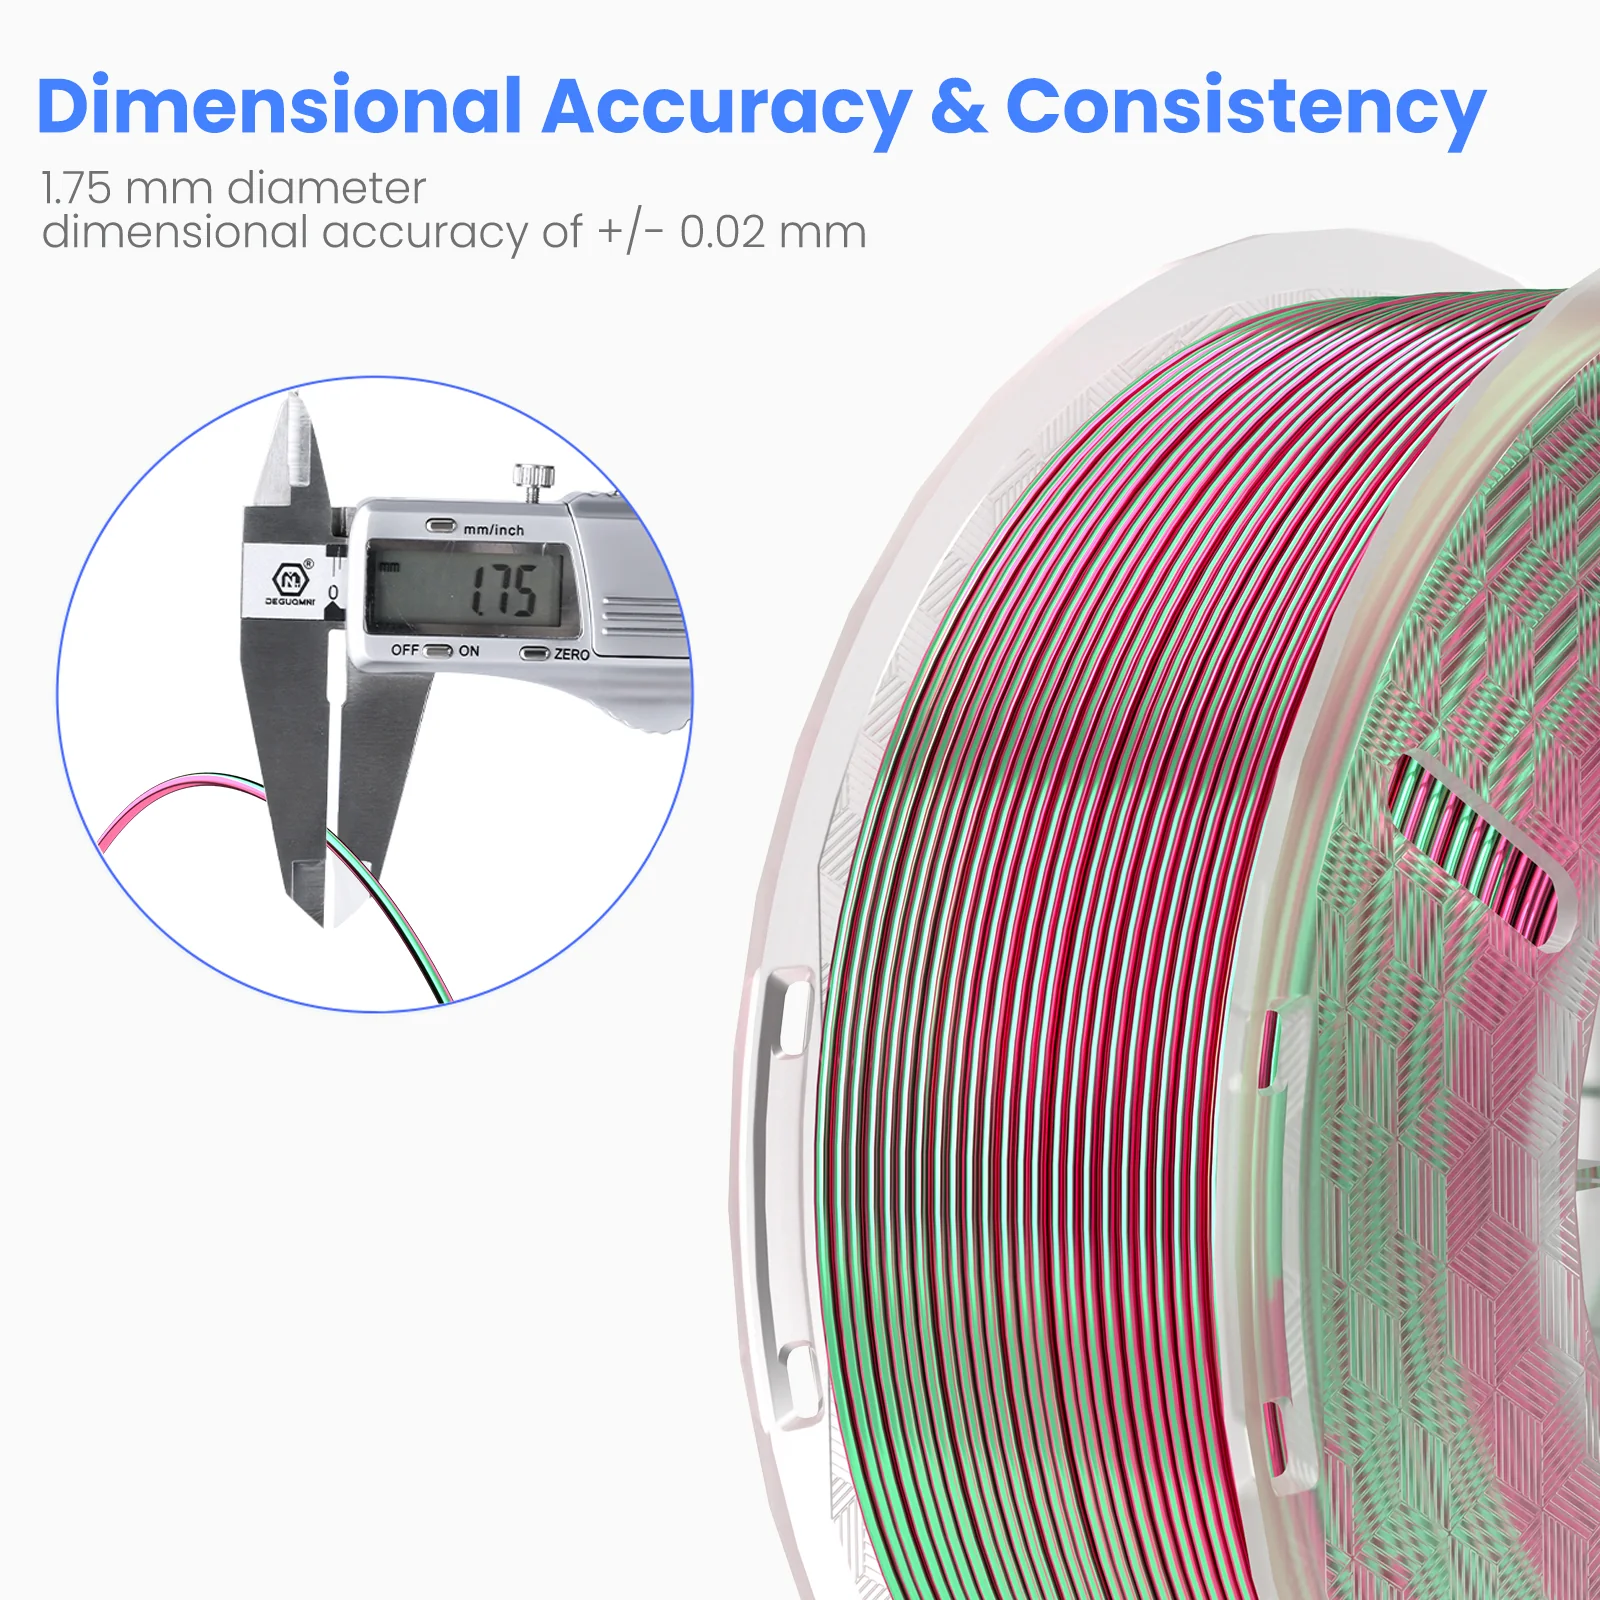
¶ Step 1 Check the filament diameter with a caliper.
The PTFE tube has an inner diameter of 2 mm. If the filament becomes thicker at any point, it may get stuck when inserted into the PTFE tube. If a caliper is not available, alternative filaments can be used for testing.
- Prepare one meter of filament and mark five points on it.
- Check if the diameter of these points is within the normal error range.
For example, the normal error range for ELEGOO PLA is ± 0.02 mm.
¶ Step 2 Check the filament settings of the sliced model file.
- Different types of filament require different nozzle temperatures.
- If the temperature is set too low, the filament will not melt completely, resulting in high viscosity, high extrusion resistance, and blockage of the throat in a semi-molten state.
- If the temperature is set too high, the filament will carbonize and produce particles, or cause thermal creep and blockage.
- When printing with PLA-CF or PETG-CF (PLA or PETG with carbon fiber added), make sure that you use a nozzle with a diameter of 0.4 mm or larger.
The test files saved in the USB flash drive is designed for PLA or PLA+, not suitable for PLA-CF.
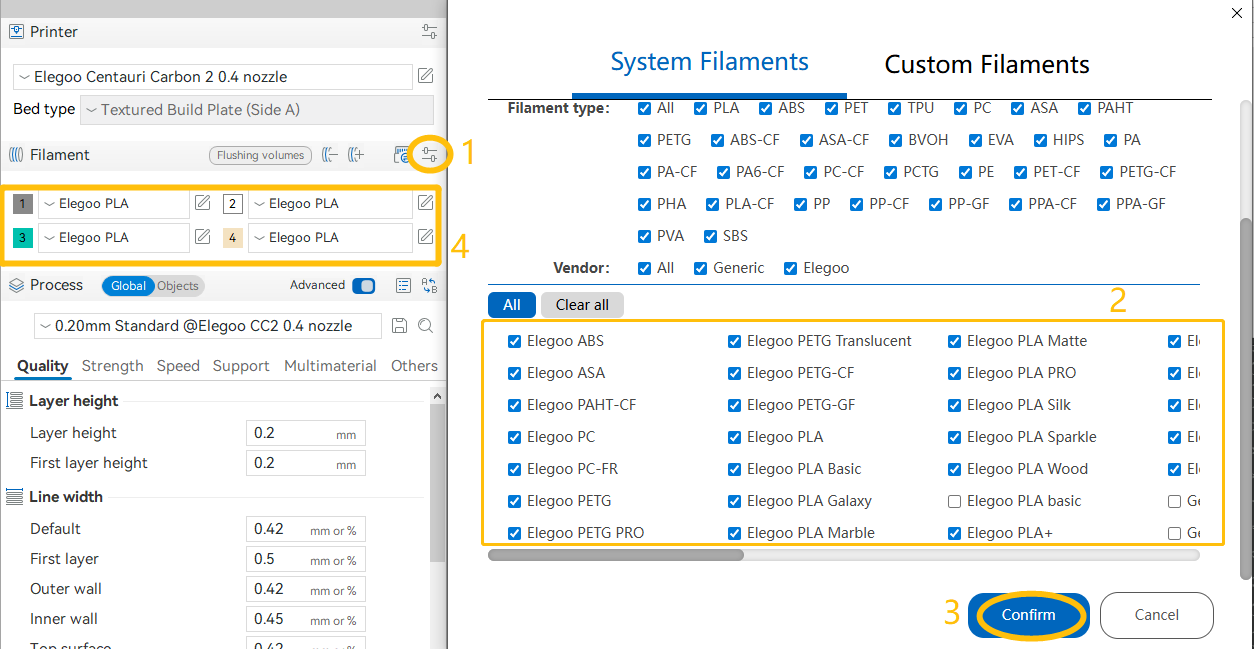
- If you are printing with other types of filaments, confirm the appropriate filament configuration profile in the ELEGOO Slicer. Refer to the picture below and confirm the settings by reloading the model into the ELEGOO Slicer, and re-slicing the file.
¶ Step 3 Check if the temperature in the room where the printer is placed is suitable.
The Centauri Carbon 2 Combo requires an operating temperature range of 5°C to 40°C. If the room temperature exceeds 40°C, the hotend will not dissipate heat sufficiently, leading to thermal creep.Make sure that the printer is placed in a room with a suitable temperature.
¶ Step 4 Check the heat break cooling fan.
A decrease in the speed of the heat break cooling fan, or its failure to rotate, can lead to thermal creep. The heat break cooling fan typically starts functioning immediately when the nozzle heats up.
Set the nozzle temperature to 50°C and check whether the fan begins to rotate or if it occasionally stops.
- If the fan does not rotate at all or intermittently fails to rotate, replace the heat break cooling fan with a new one.
¶ Step 5 Check if the gearbox can extrude filament normally.
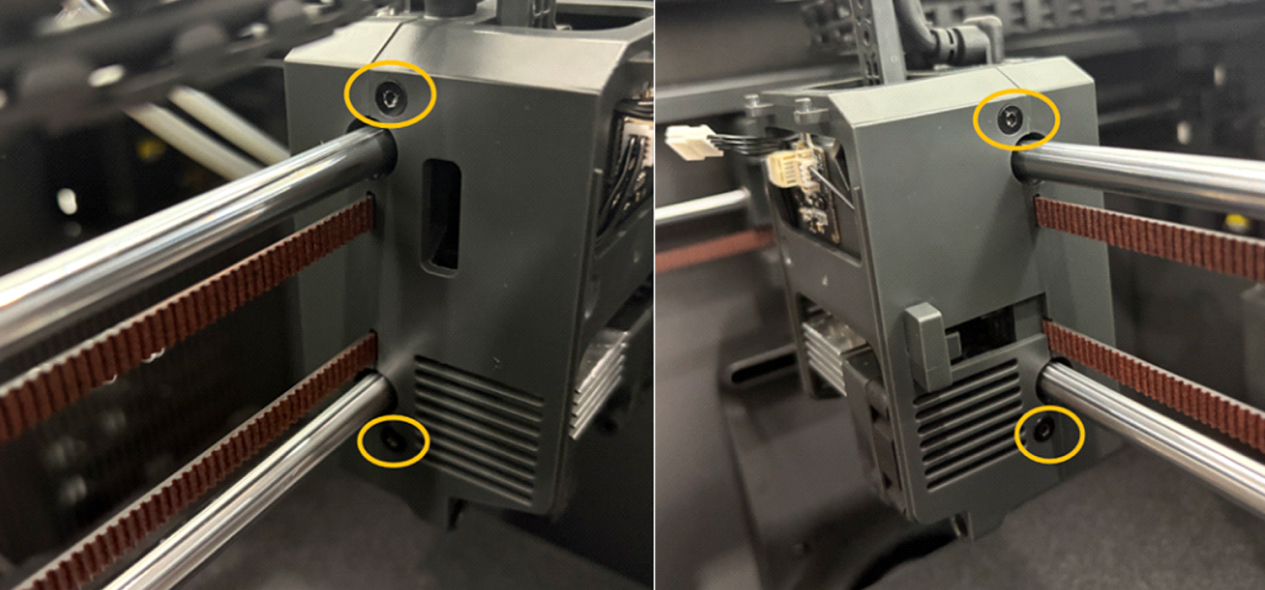
-
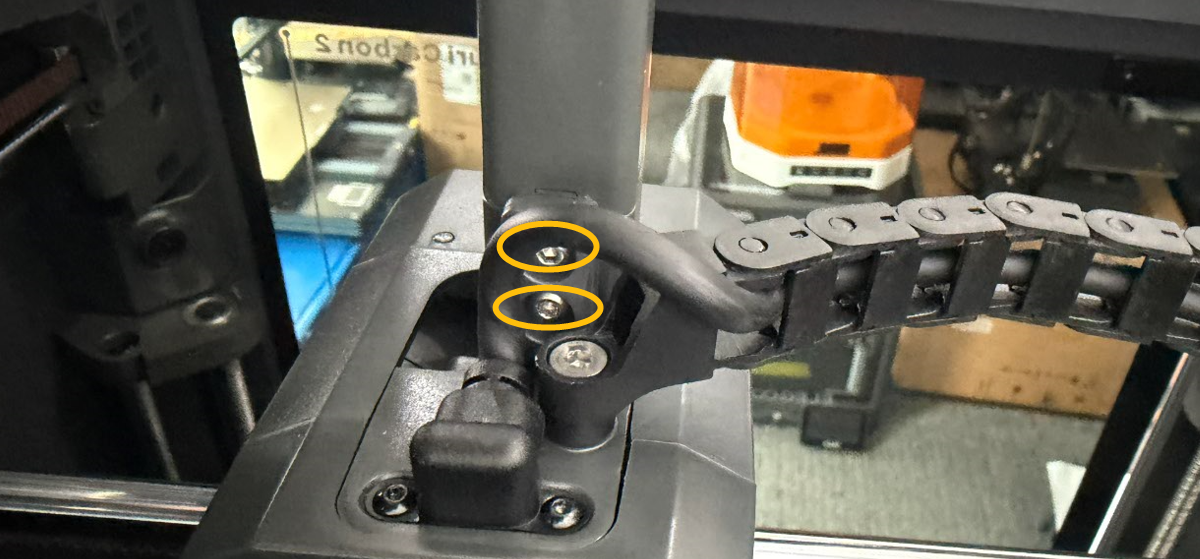
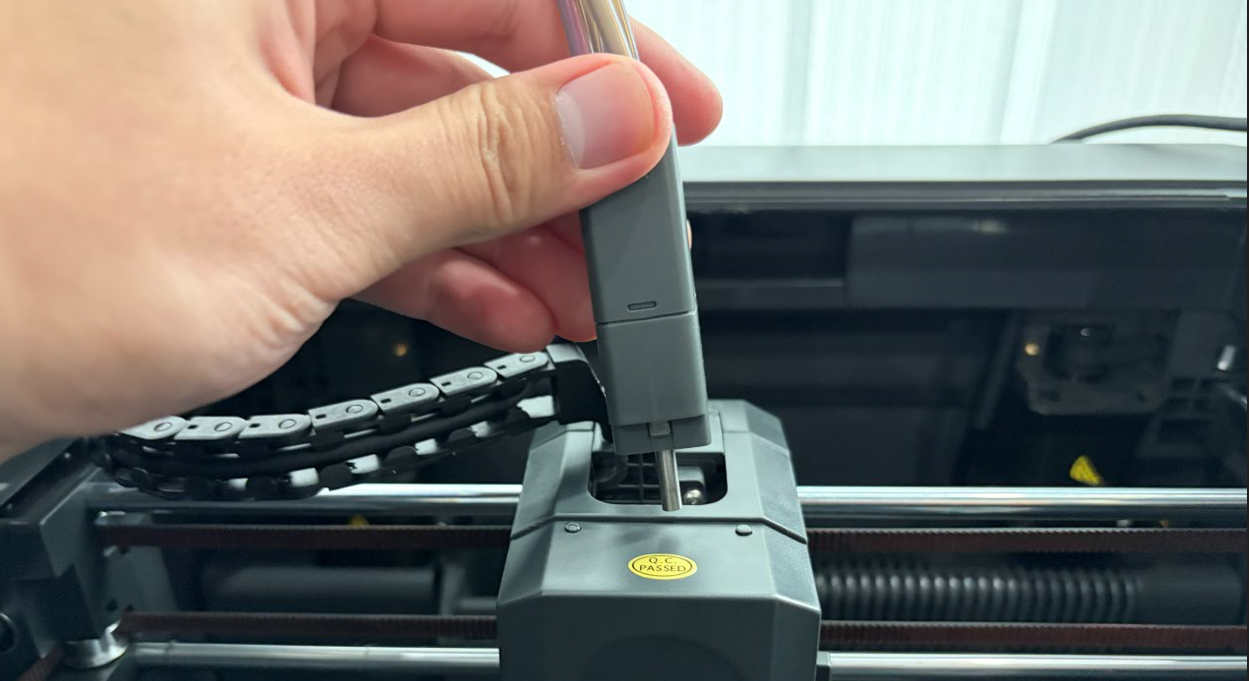
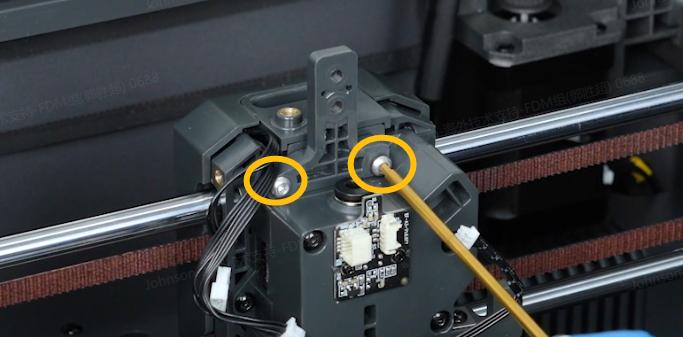
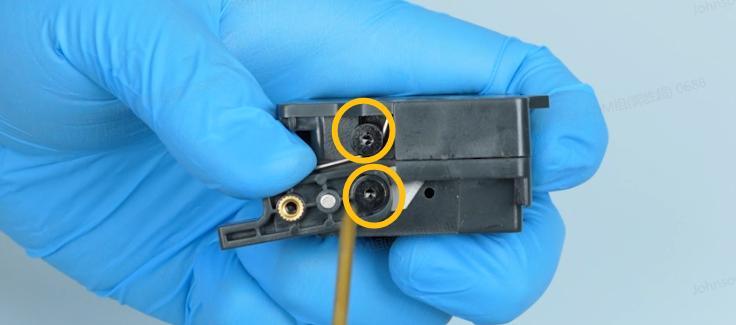
Loosen the two screws at the marked position with a 2.0mm Allen key.
-
Remove the 4-in-1 hub.
-
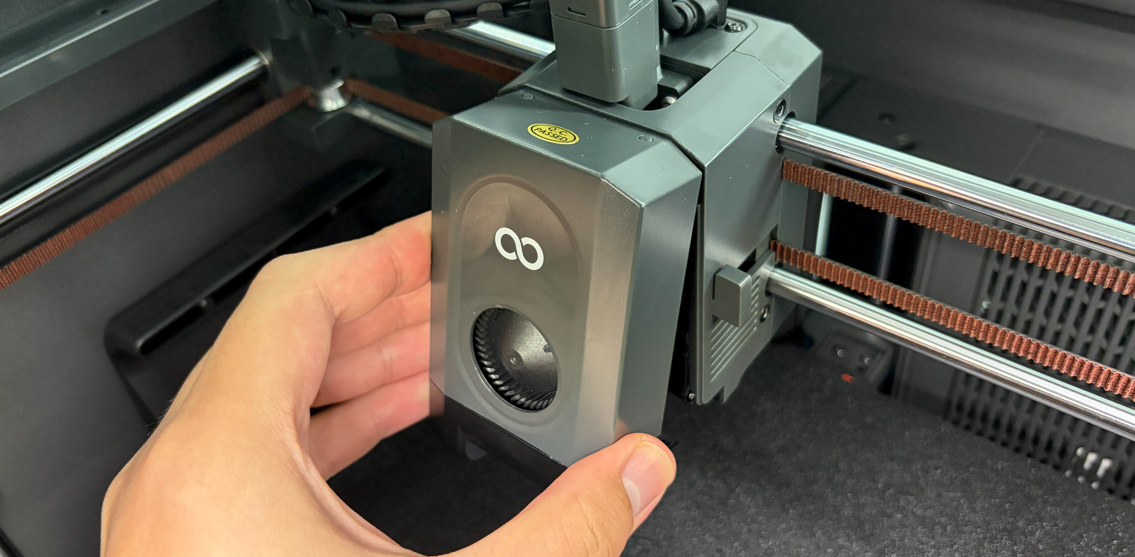
Remove the front cover of the tool head.
-
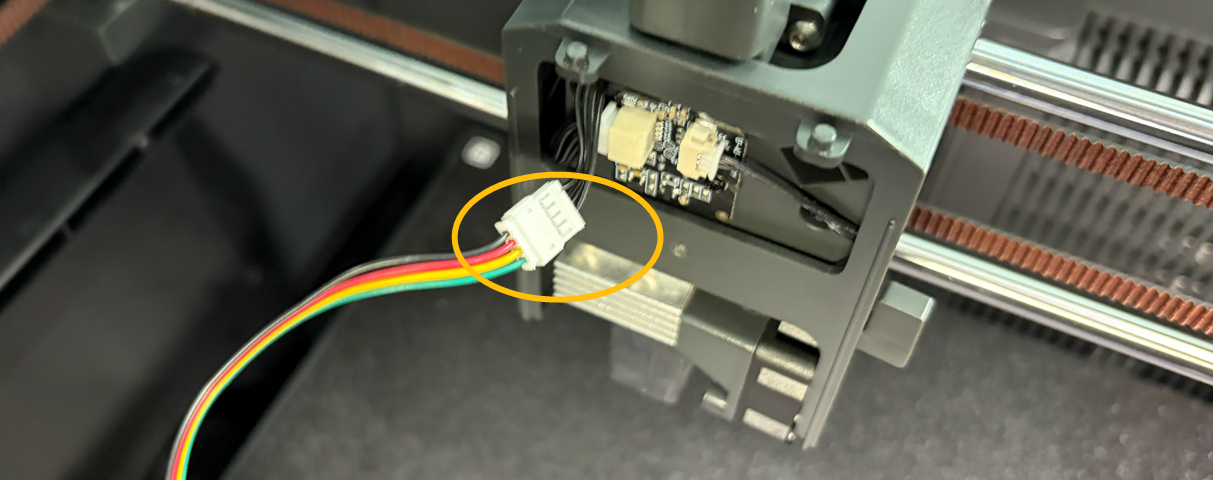
Unplug the cable of the model cooling fan.
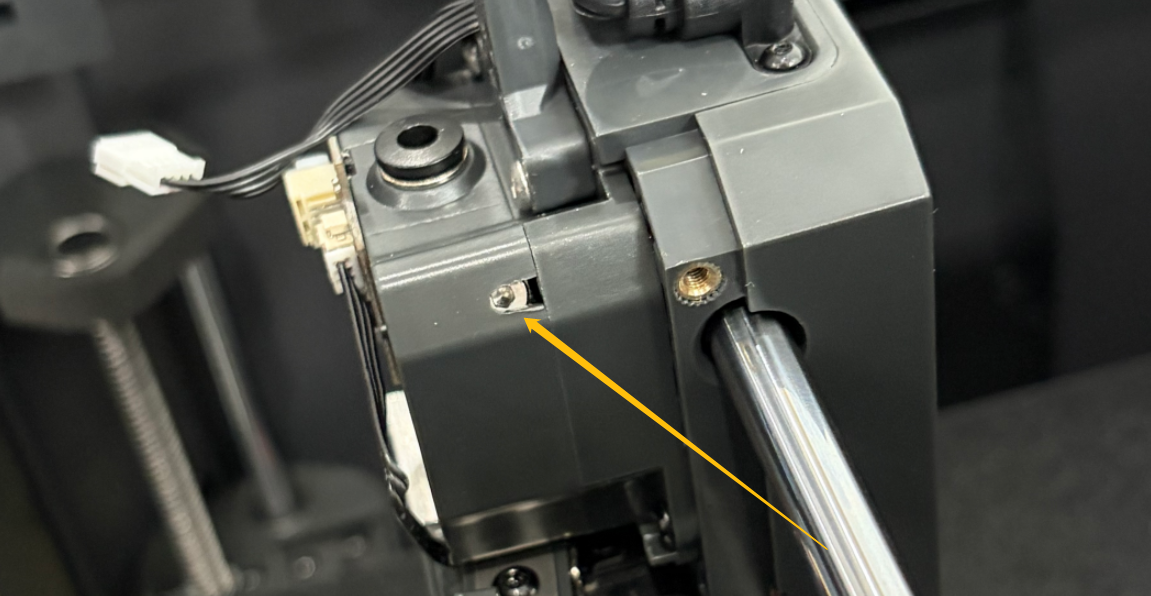
-
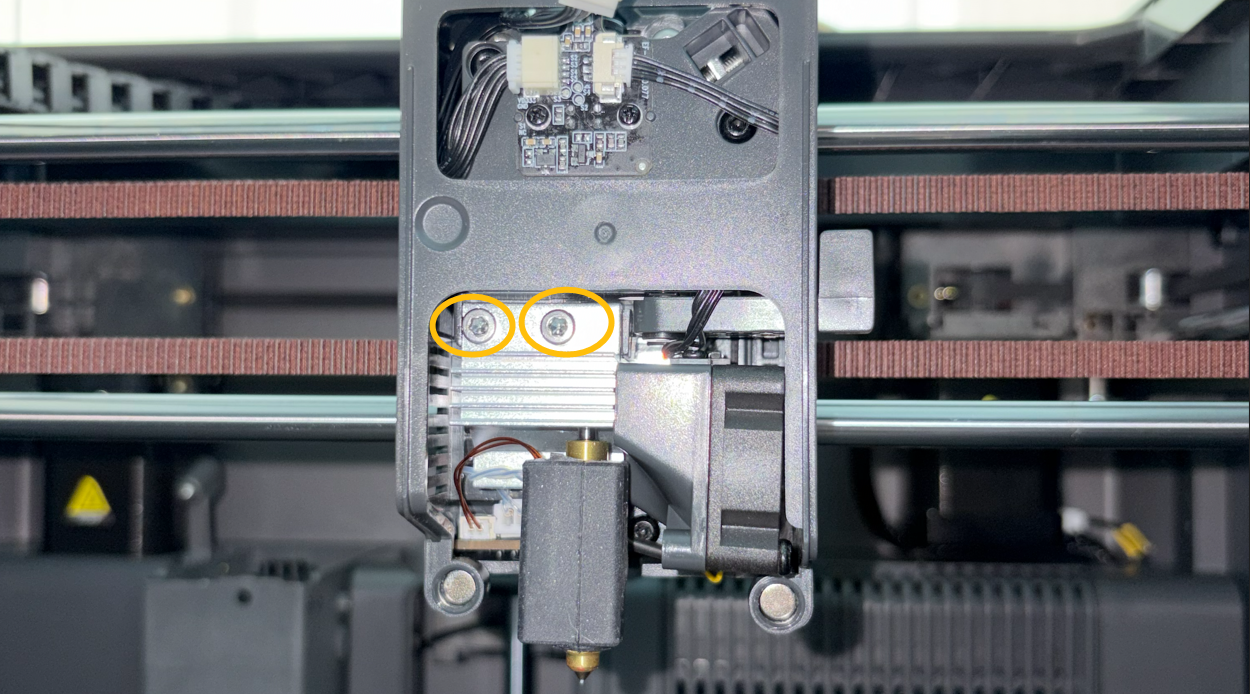
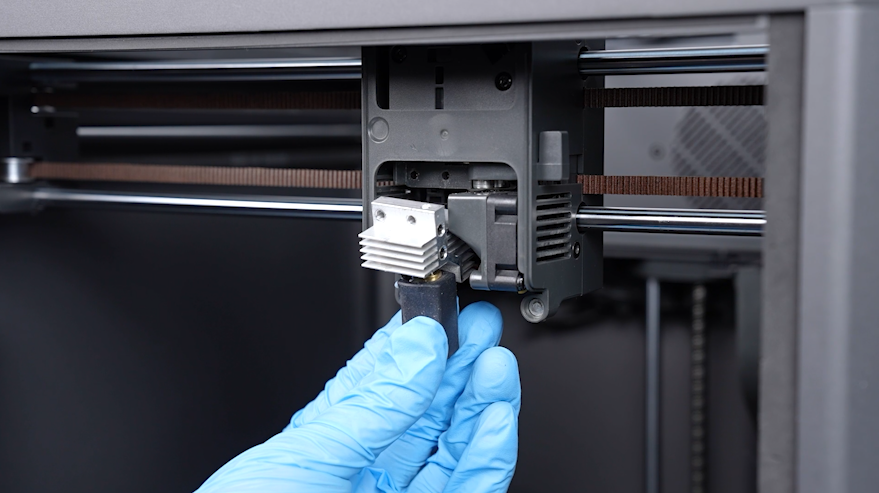
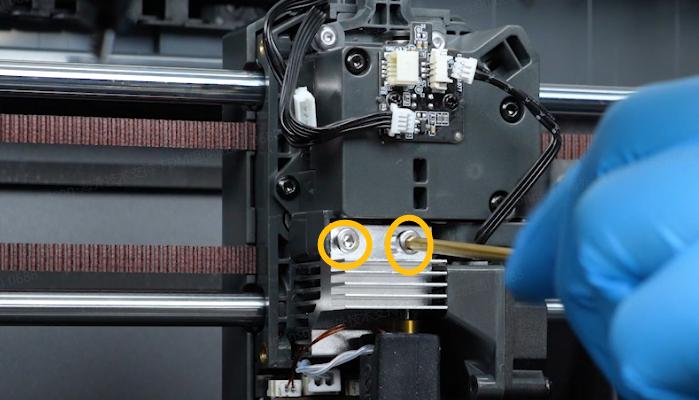
Loosen the screws securing the hotend with a 2.5mm Allen key.
-
Pull down the hotend, but do not remove its cable.
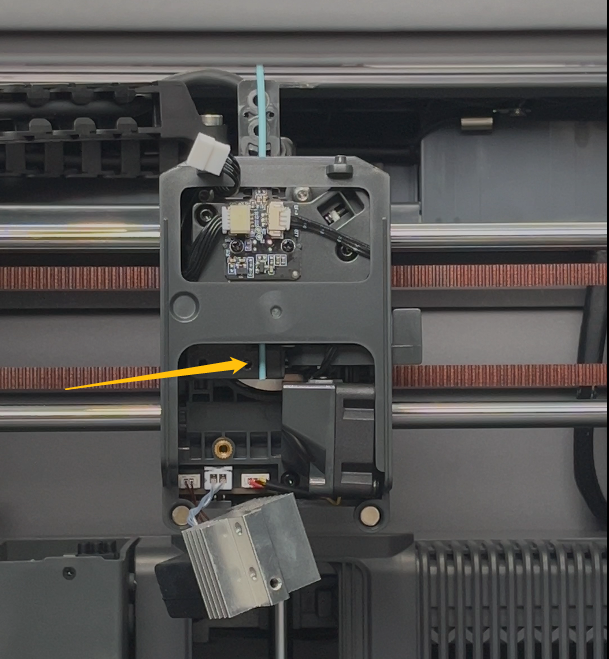
-
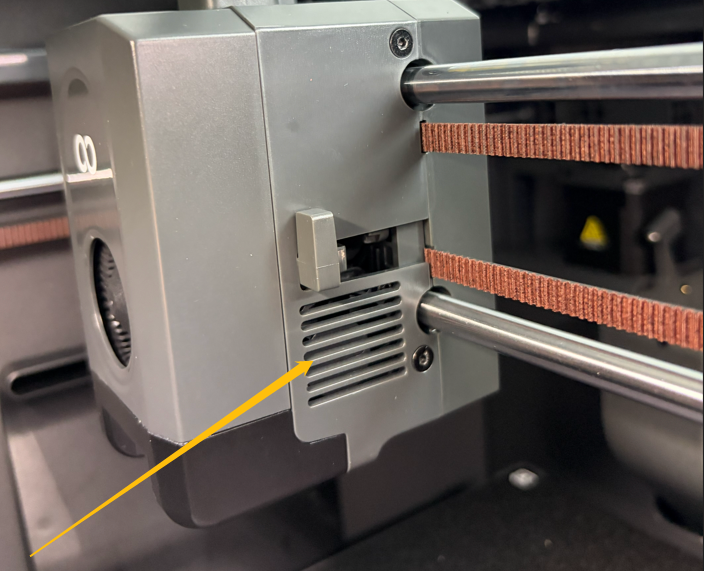
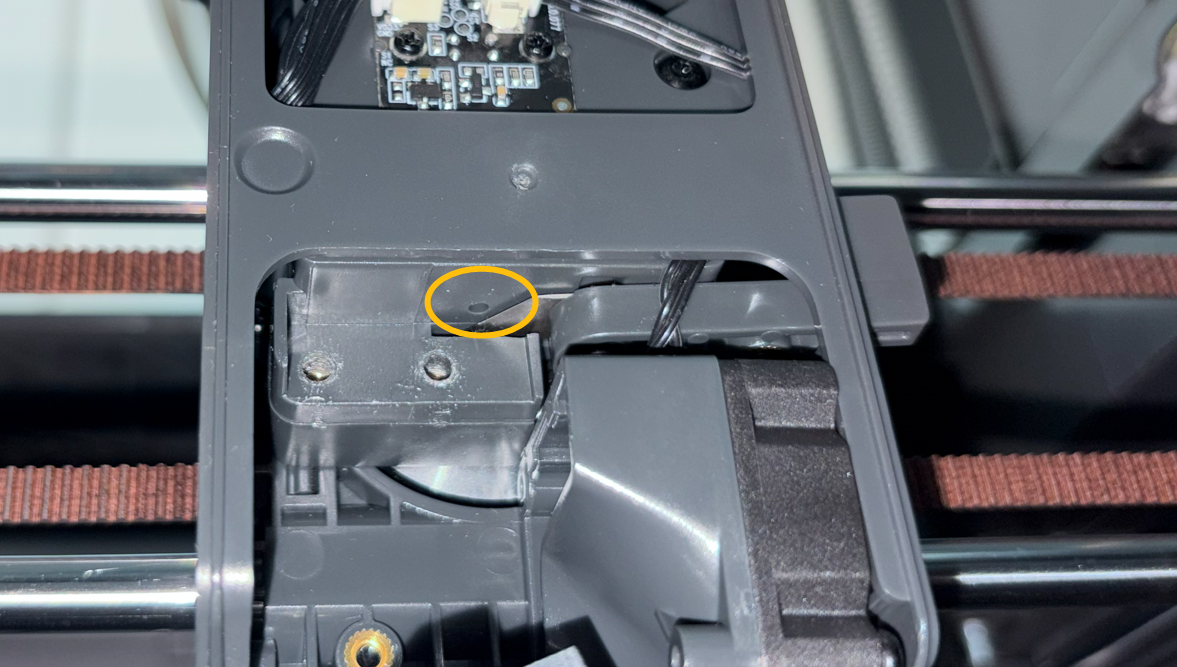
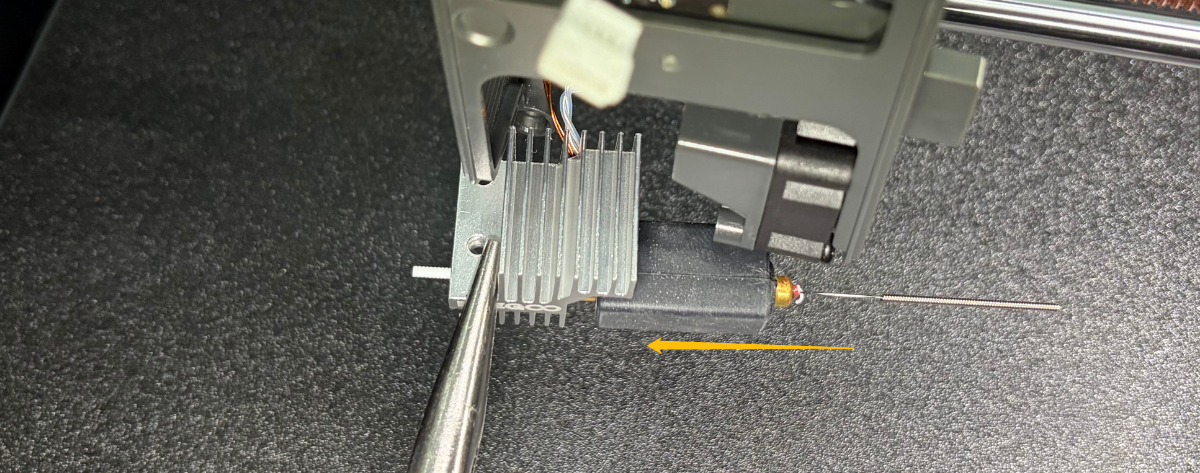
Insert the filament into the marked hole.
-
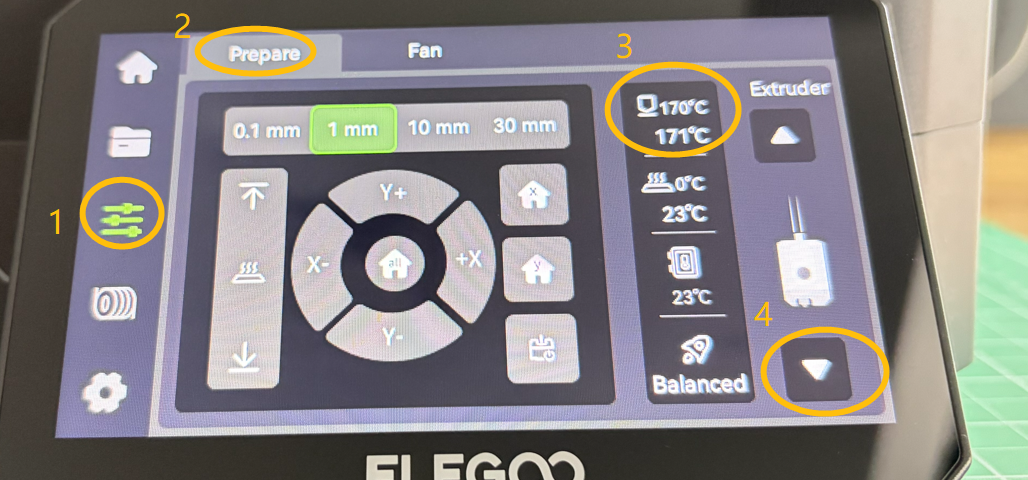
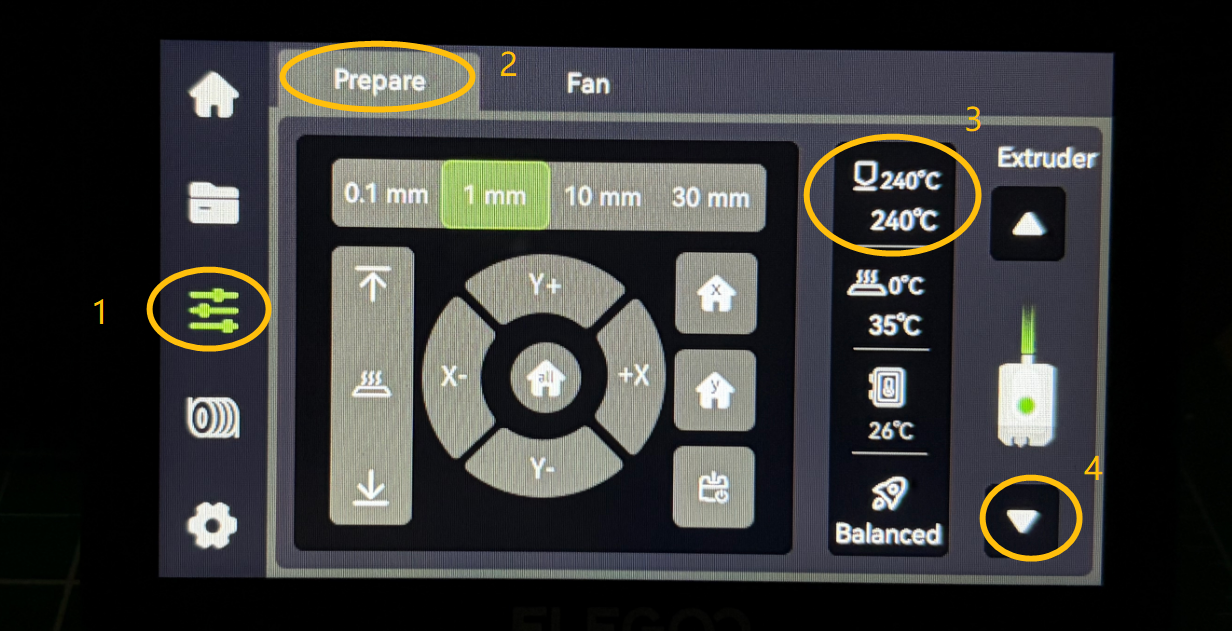
On the touch screen, select Control - Prepare - ▽.
Note: Do not unload the filament via the filament menu. Clicking Load/Unload button will cause the tool head to return to its homing position. As the hotend is not currently secured, the homing process may damage both the hotend and the PEI plate.
-
Check if the filament can be pushed out of the hole under the gearbox at this time.
- If the gears fail to push the filament, follow the steps below to tighten the spring.
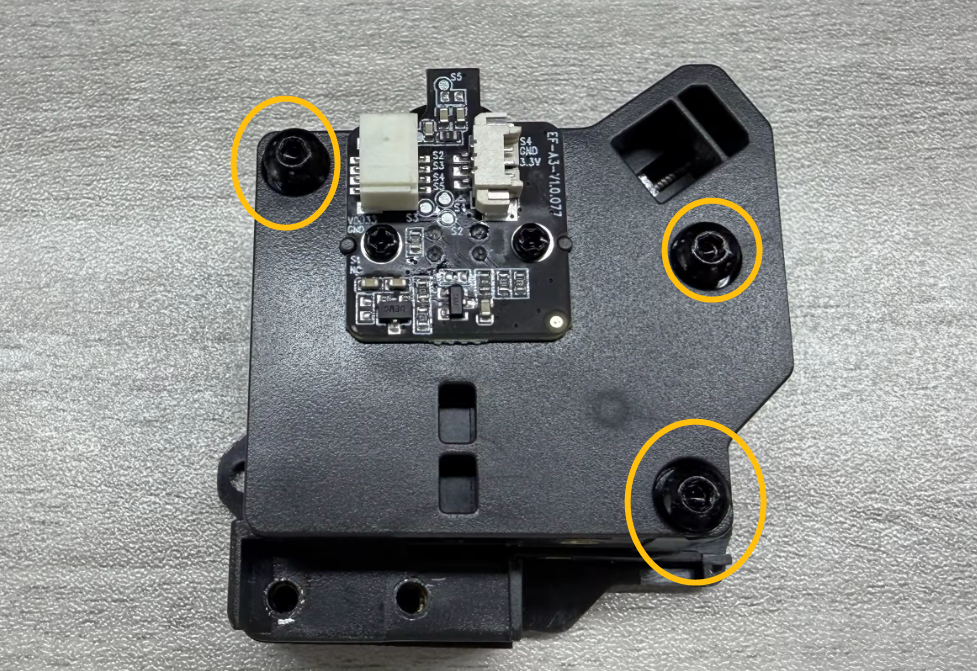
-
Remove the screws marked below and the tool head housing.
-
Tighten the screw that adjusts the spring tension by turning it counterclockwise.
- If the gearbox cannot work normally, it indicates that the filament gets stuck inside the gearbox. Follow the steps below for further troubleshooting.
-
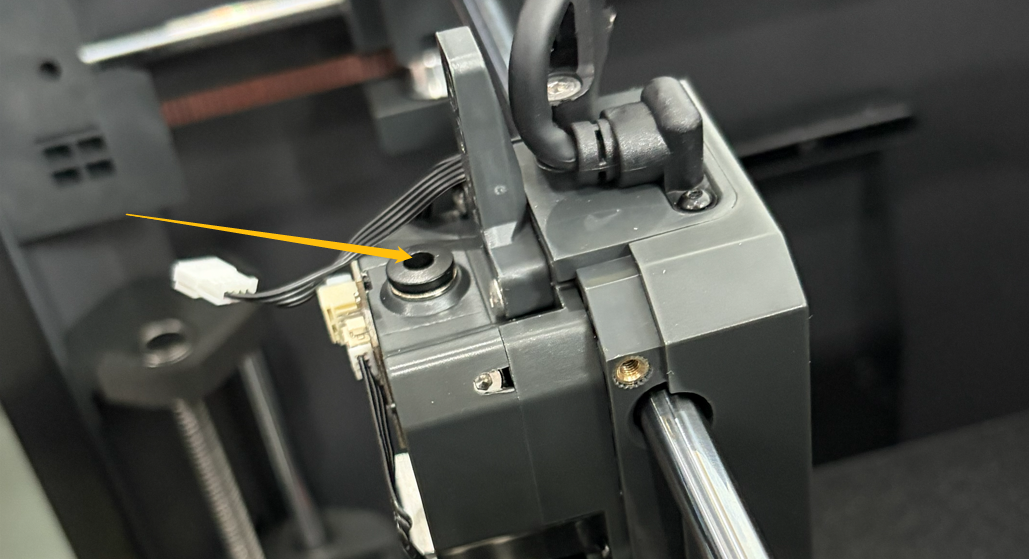
Turn the power switch OFF (symbol "|") and unplug the power supply cable.
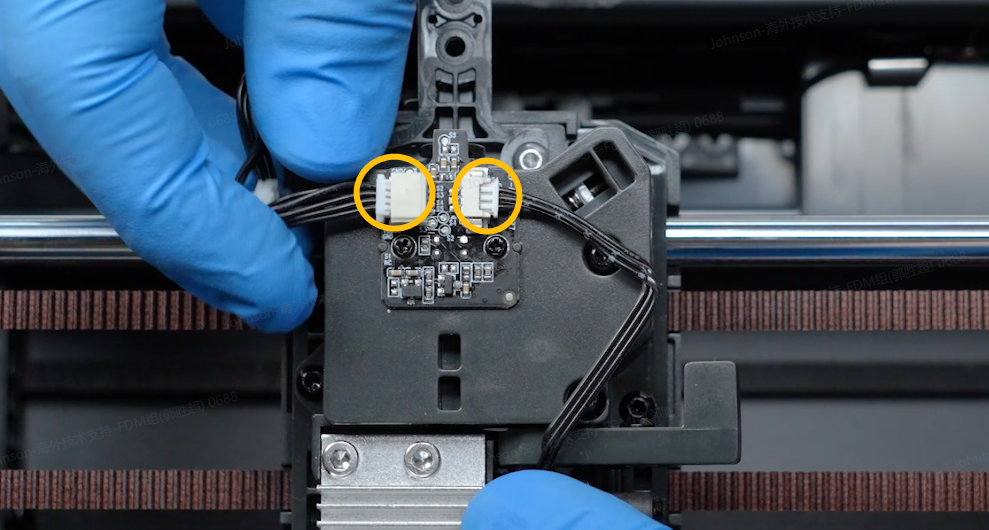
-
Unplug the two marked cables.
-
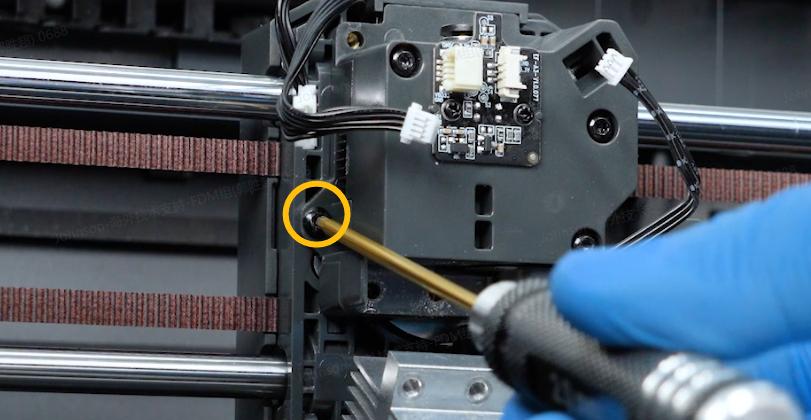
Remove the two screws securing the hotend.
-
Remove the two screws securing the 4-in-1 hub holder.
-
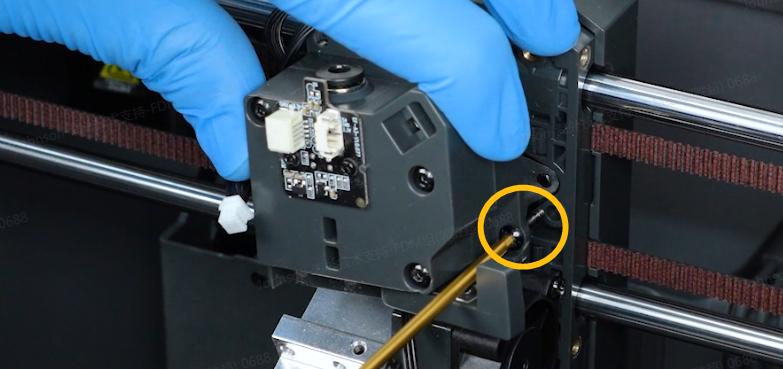
Remove the two screws on both sides of the gearbox.
-
Release and remove the screws securing the cutter and the spring. Remove the spring and cutter.
-
Remove the marked three screws shown in the picture below and remove the back cover of the gearbox.
-
Remove the gear.
Note: If the gear is difficult to remove, loosen the screw on the top-left corner.

-
Check whether the marked area has any filament debris that may obstruct the filament loading.
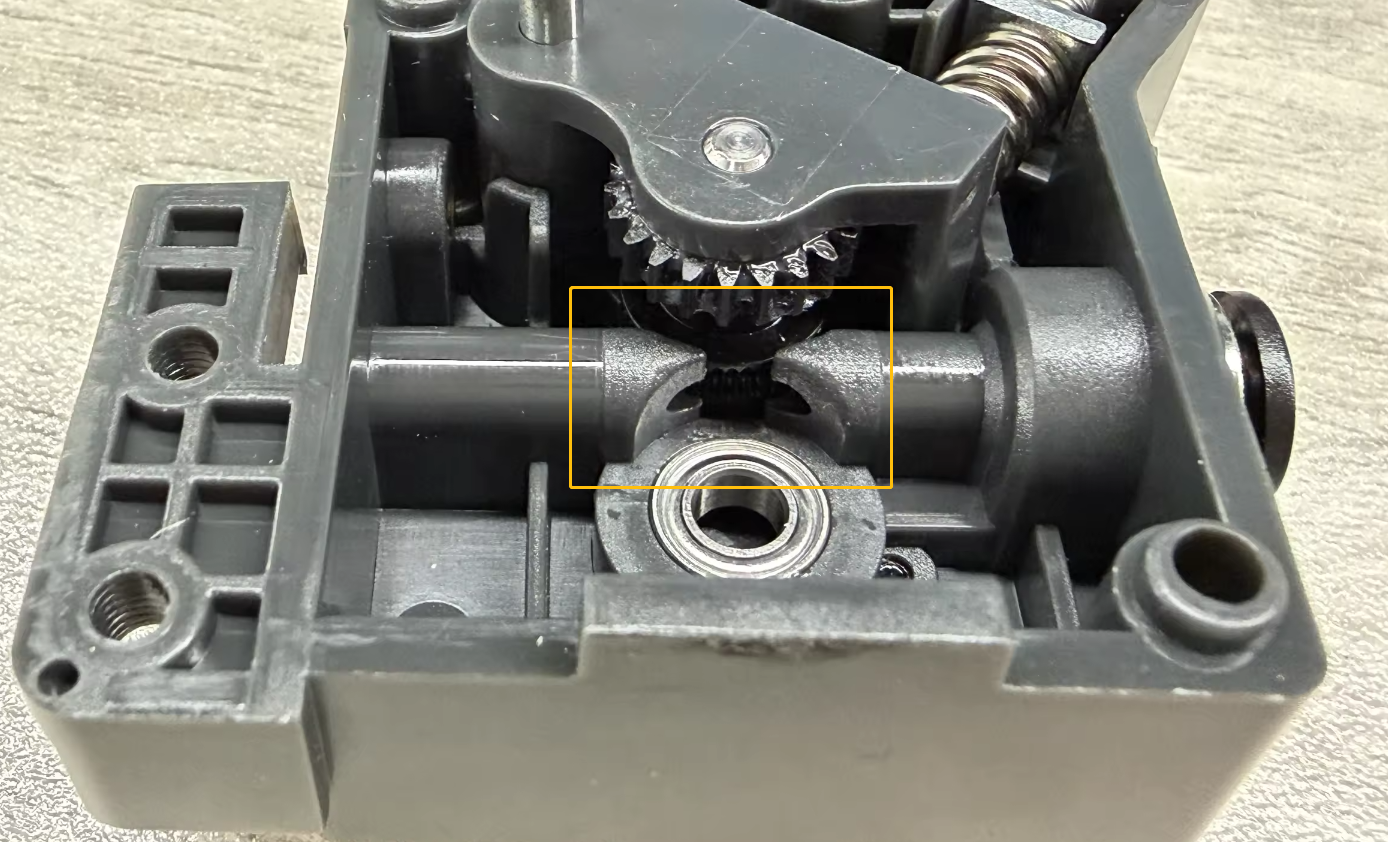
-
Test whether the gearbox can load filament normally by feeding a piece of filament and rotate the gear manually.
¶ Step 6 Unclog the filament.
If the filament is already stuck in the hotend, follow the steps to unclog the nozzle.
-
Reinstall the hotend in its original position.
-
Set the nozzle temperature slightly higher than the nozzle temperature specified in the filament configuration file.
For example, if you are currently printing PLA and the nozzle temperature in the configuration file is 210 ℃, then set the nozzle temperature to 230℃ - 240℃. -
On the touch screen, select Control - Prepare - ▽ and extrude the filament.
-
Check if the filament can be extruded from the nozzle.
Warning: Make sure to close the glass front door to prevent burns from any splashed filament.
- If the filament still cannot be extruded after the steps above, unclog the filament with an unclogging tool.
-
Remove the screws securing the hotend, but do not remove it by leaving the hotend plugged in.
-
Set the heating of the hotend on the touch screen.
Note: The temperature should be slightly higher than the nozzle profile temperature. -
Once the set temperature has been reached, gently push the unclogging tool into the nozzle orifice in the flament feeding direction to dislodge any stuck filament from the hot end.
Warning: Always wear heat-resistant gloves to prevent burns.
- If the filament can extrude but does so insufficiently, perform a cold pull.
-
Set the nozzle temperature to 100 ℃
-
On the touch screen, select Control - Prepare - △ to unload the filament.
¶ Step 7 Clean the high-temperature filament after printing.
High and low temperature filament cannot be used interchangeably, as this may cause clogging warning or red light mid the printing.