¶ Fault Symptom
After turning on the printer, the touch screen does not turn on.
¶ Possible Causes
- The power supply cable is loose, improperly connected, or damaged.
- The power switch is faulty or has poor contact.
- The power supply has no output or abnormal output voltage.
- The touch screen ribbon cable is loose, disconnected, or damaged.
- The mainboard does not receive power or is defective.
- The touch screen is faulty.
¶ Required Tools
- 2.0 mm Allen key
- Multimeter (optional but recommended)
¶ Troubleshooting
¶ Step 1. Check the Power Switch Indicator
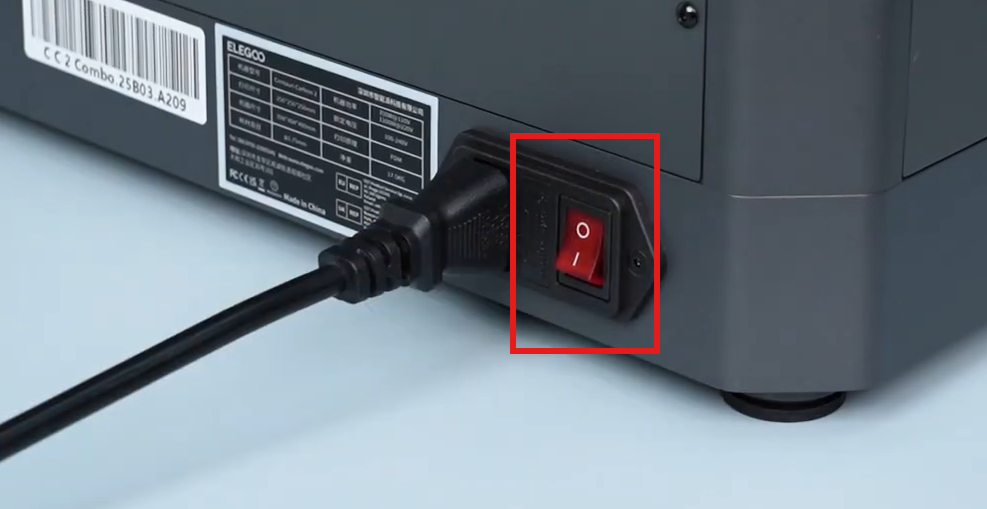
- Make sure the power supply cable is securely connected and the wall outlet is supplying power. Then turn on the printer and check whether the power switch indicator lights up.
If the wall outlet is not supplying power, restore power or try a different outlet before testing again.
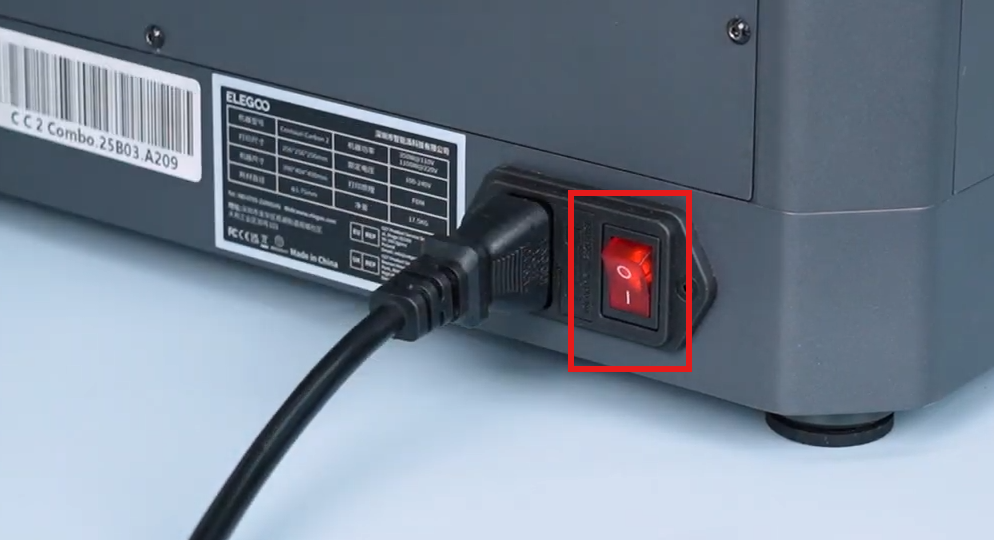
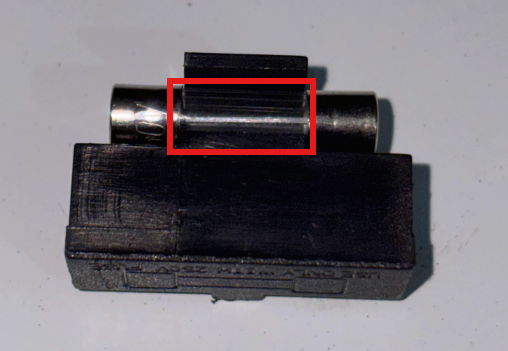
- If the power switch indicator does not light up, turn off the printer and unplug the power supply cable. Remove the fuse from the power switch and inspect the fuse for signs of damage or whether it has blown.
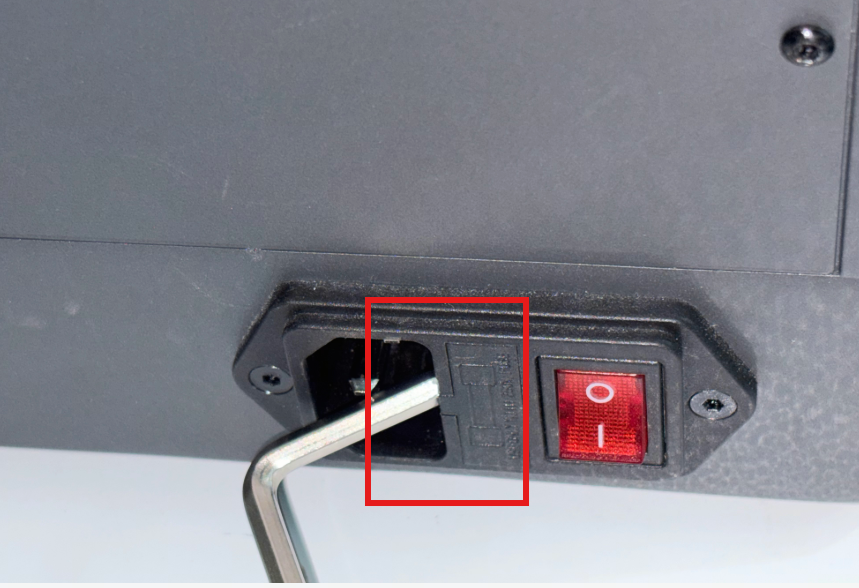
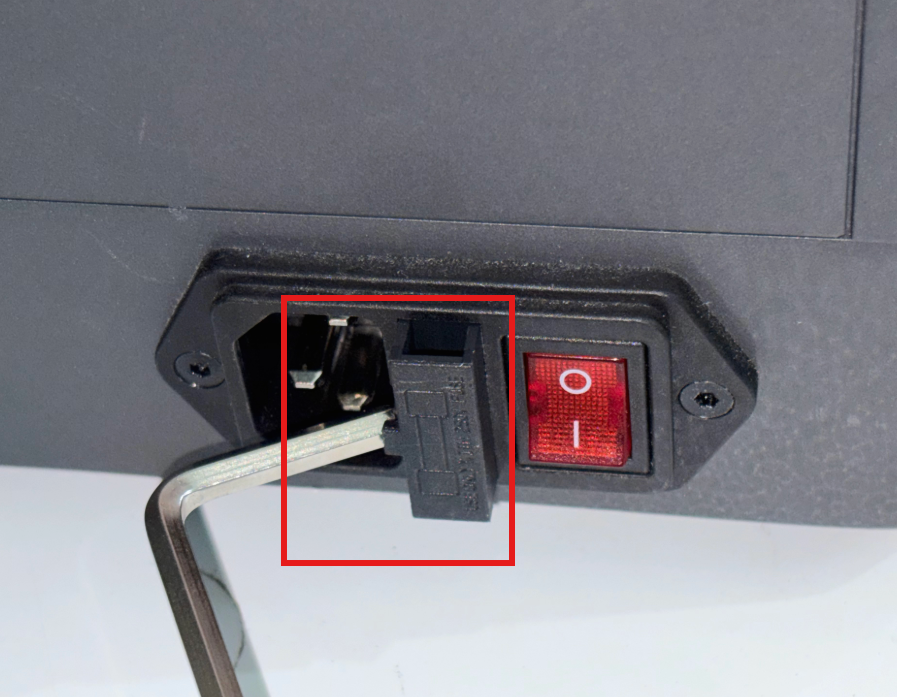
-
If the fuse is damaged or blown, replace it with a new one of the same specification. Do not use a fuse with a higher rating, as this may damage the printer or create a safety hazard.
-
If the fuse is intact, reinstall it correctly before continuing.
¶ Fuse Specifications
| Item | Specification |
|---|---|
| Rated Current | 10 A |
| Rated Voltage | 250 V |
| Size | 5 × 20 mm |
| Type | Glass cartridge fuse |
¶ Step 2. Check the Touch Screen and Ribbon Cable
- Turn off the printer.
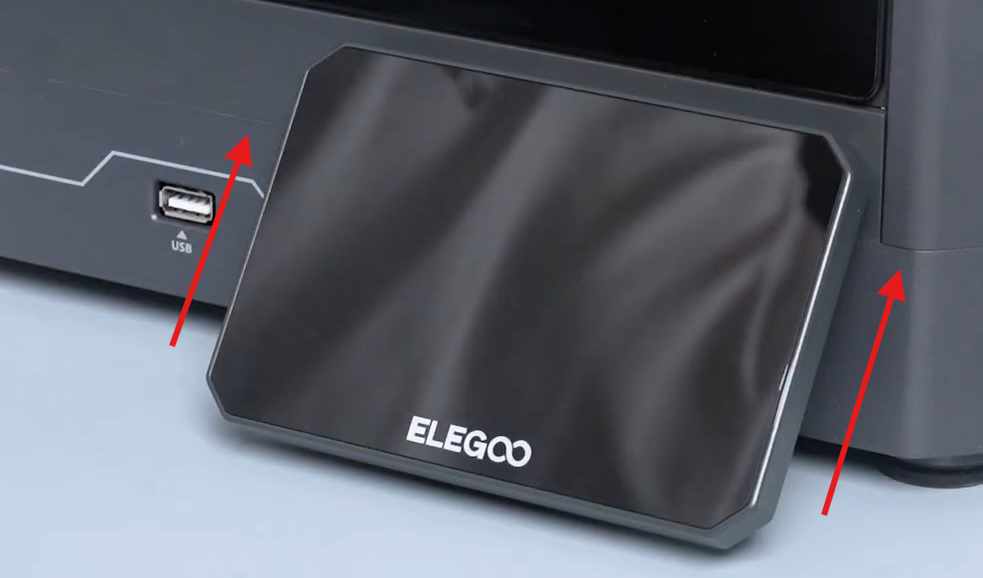
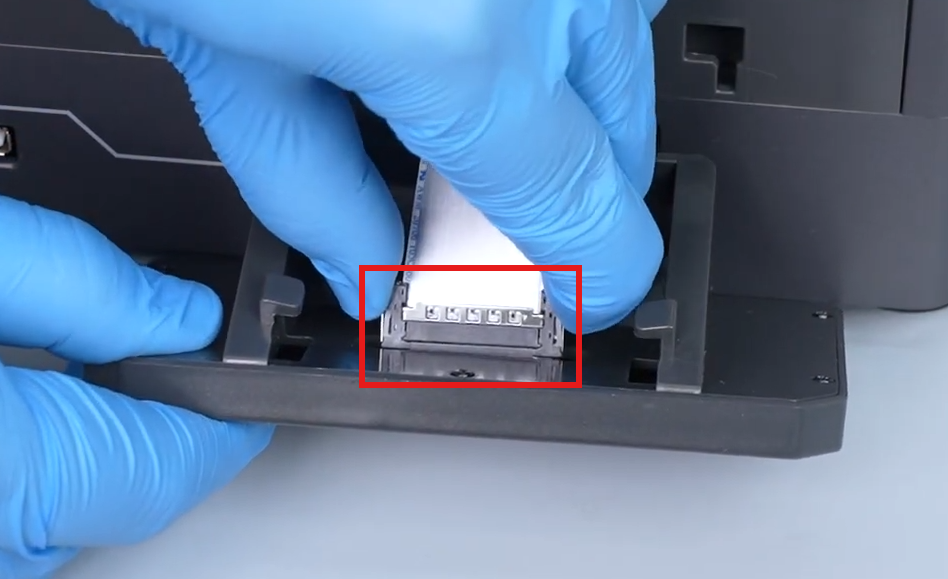
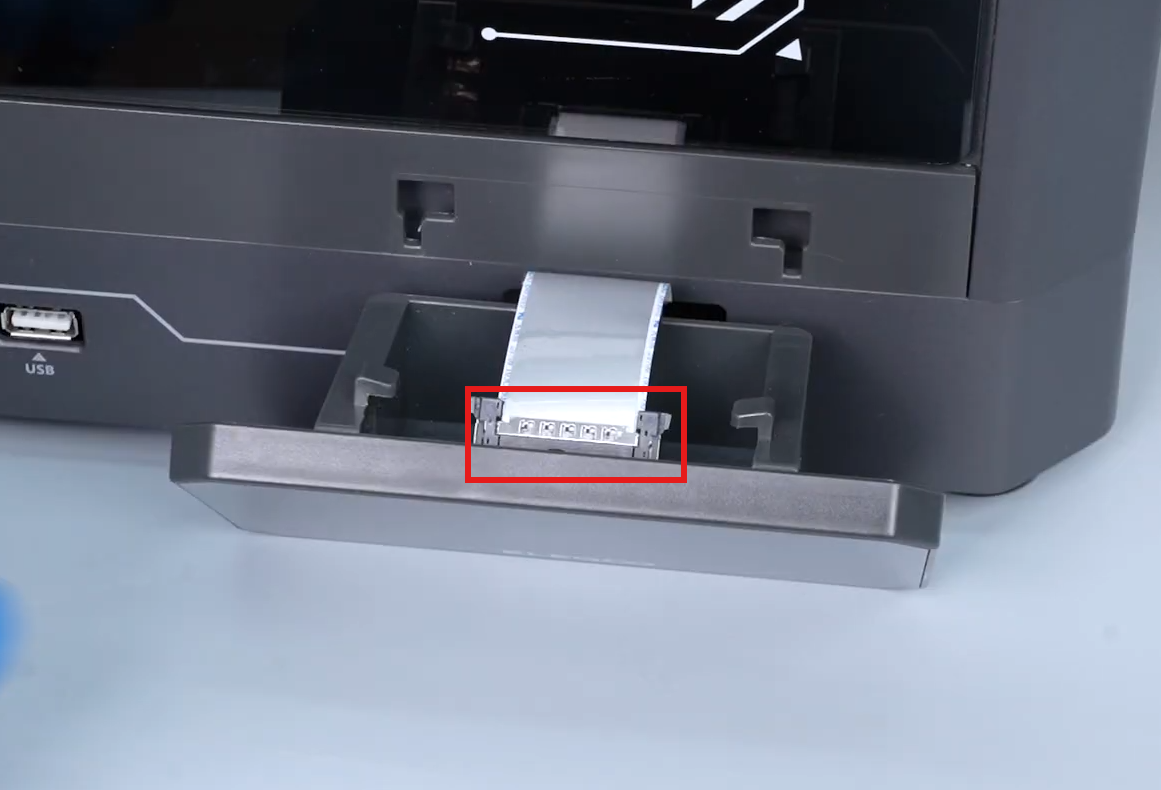
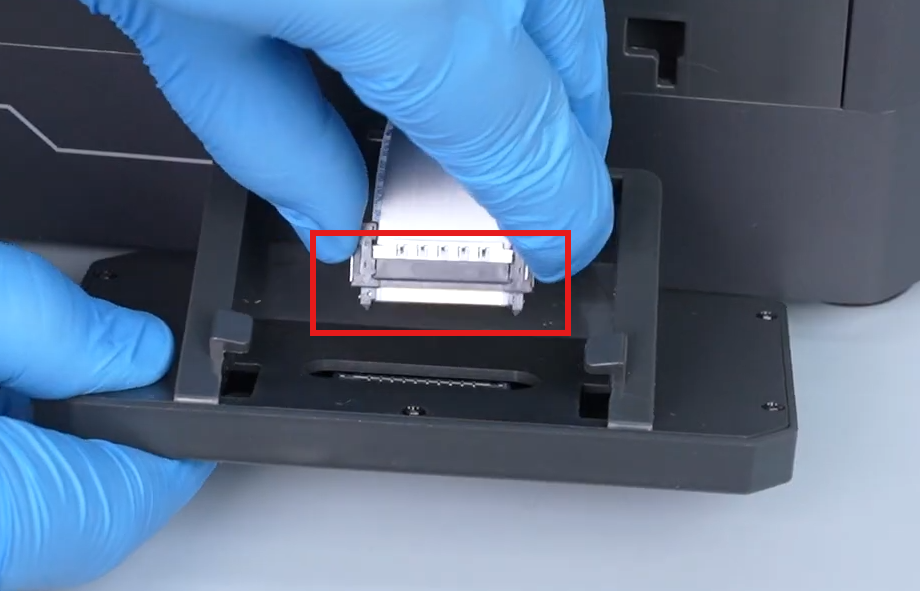
- Remove the touch screen. Press the connector latch to disconnect the touch screen ribbon cable, then inspect the ribbon cable connector for bent, missing, or damaged pins.
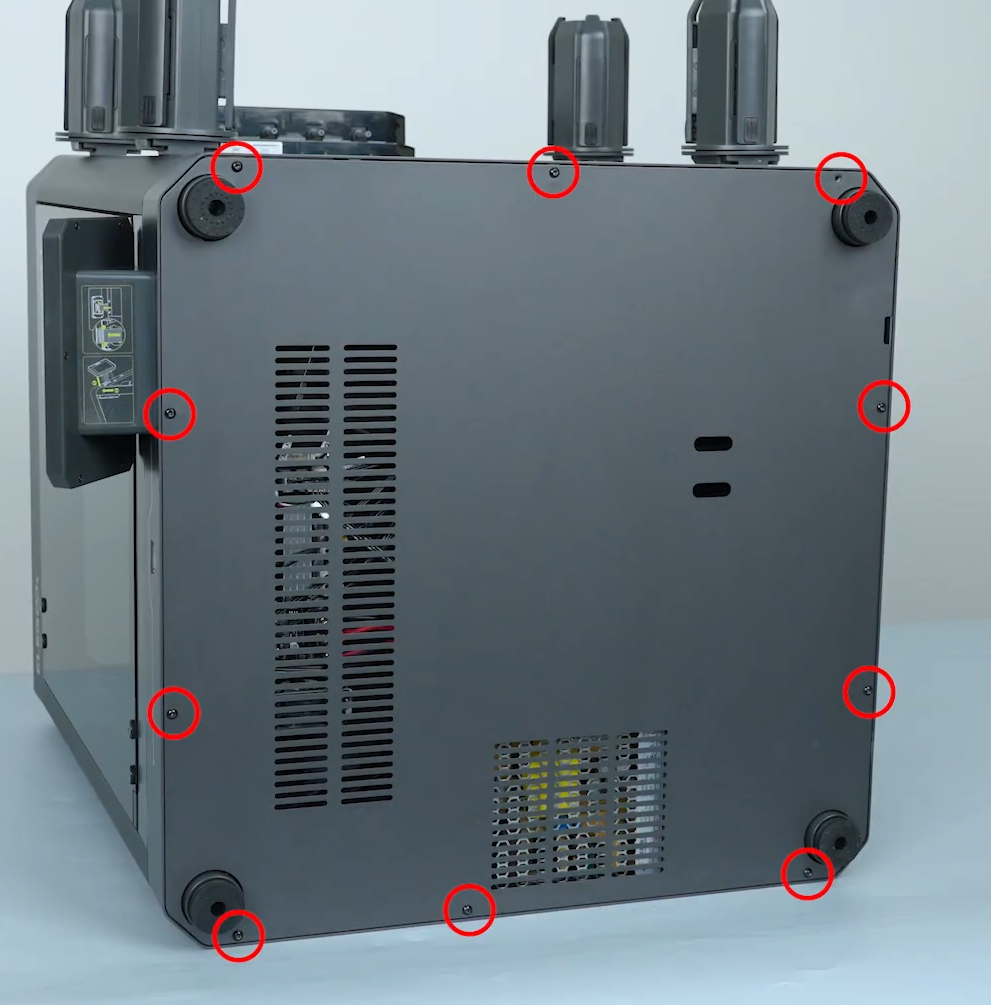
- Using a 2.0 mm Allen key, remove the 10 screws securing the bottom cover.
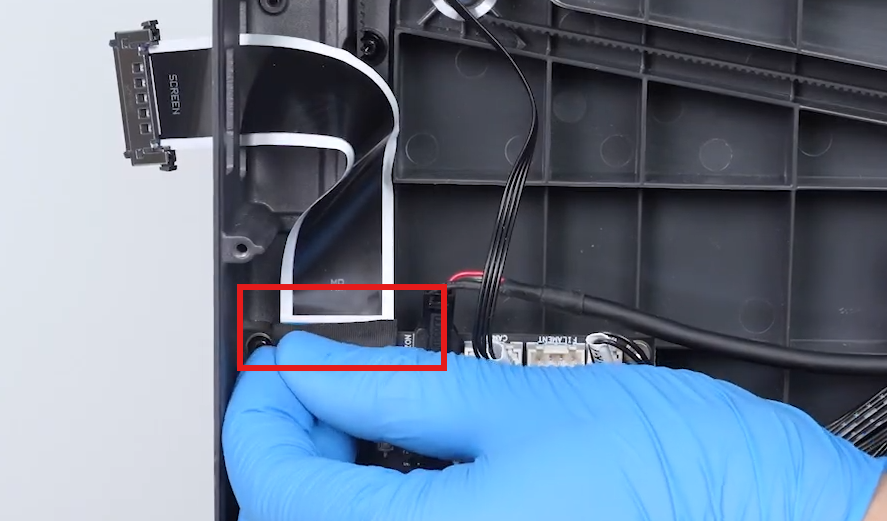
- Peel off the protective tape, lift the locking tab, disconnect the touch screen ribbon cable from the mainboard, and inspect the ribbon cable connector for bent, missing, or damaged pins.
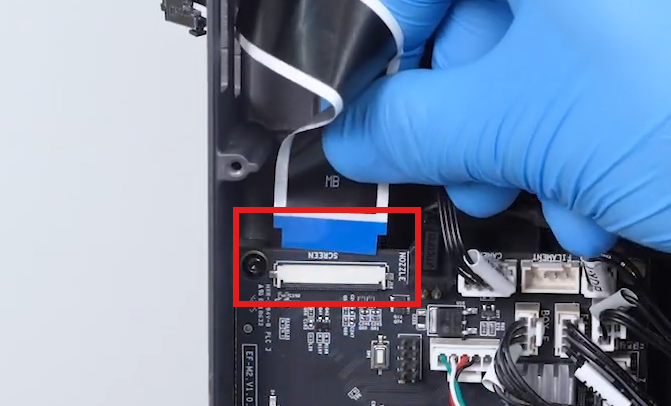
If the ribbon cable has bent pins, broken conductors, burn marks, or other physical damage, replace the touch screen ribbon cable.
If no abnormalities are found, reconnect both ends of the ribbon cable securely and reassemble the printer.
¶ Step 3. Check the Power Supply
Turn on the printer and check whether the power supply indicator LED is illuminated.
Warning
With the bottom cover removed and the printer powered on, do not touch the mainboard or any electronic components, as this may result in electric shock.
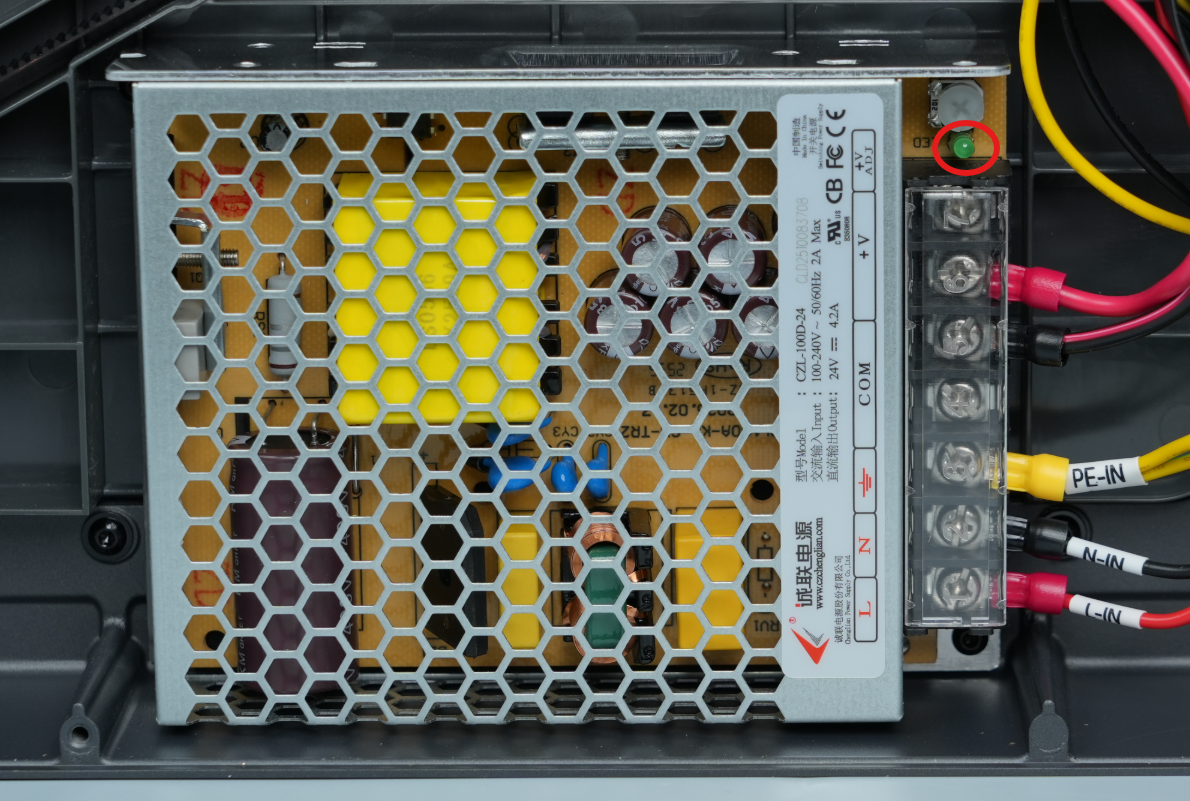
¶ Case 1: Power Supply Indicator Is Off
This indicates that the power supply may be faulty.
Recommendation: Replace the power supply.
¶ Case 2: Power Supply Indicator Is On
Measure the 24 V output of the power supply.
Even if the indicator LED is on, it does not guarantee that the 24 V output is normal.
Attention
When using a multimeter, do not touch any exposed terminals, wires, or electronic components, and ensure the probe tips do not cause a short circuit. If you are not experienced with live electrical measurements, skip any powered measurements and contact Technical Support for assistance.
Note
Perform this test only if you have a multimeter.
If you do not have a multimeter, skip this step, proceed to Step 5, and contact Technical Support for further assistance.
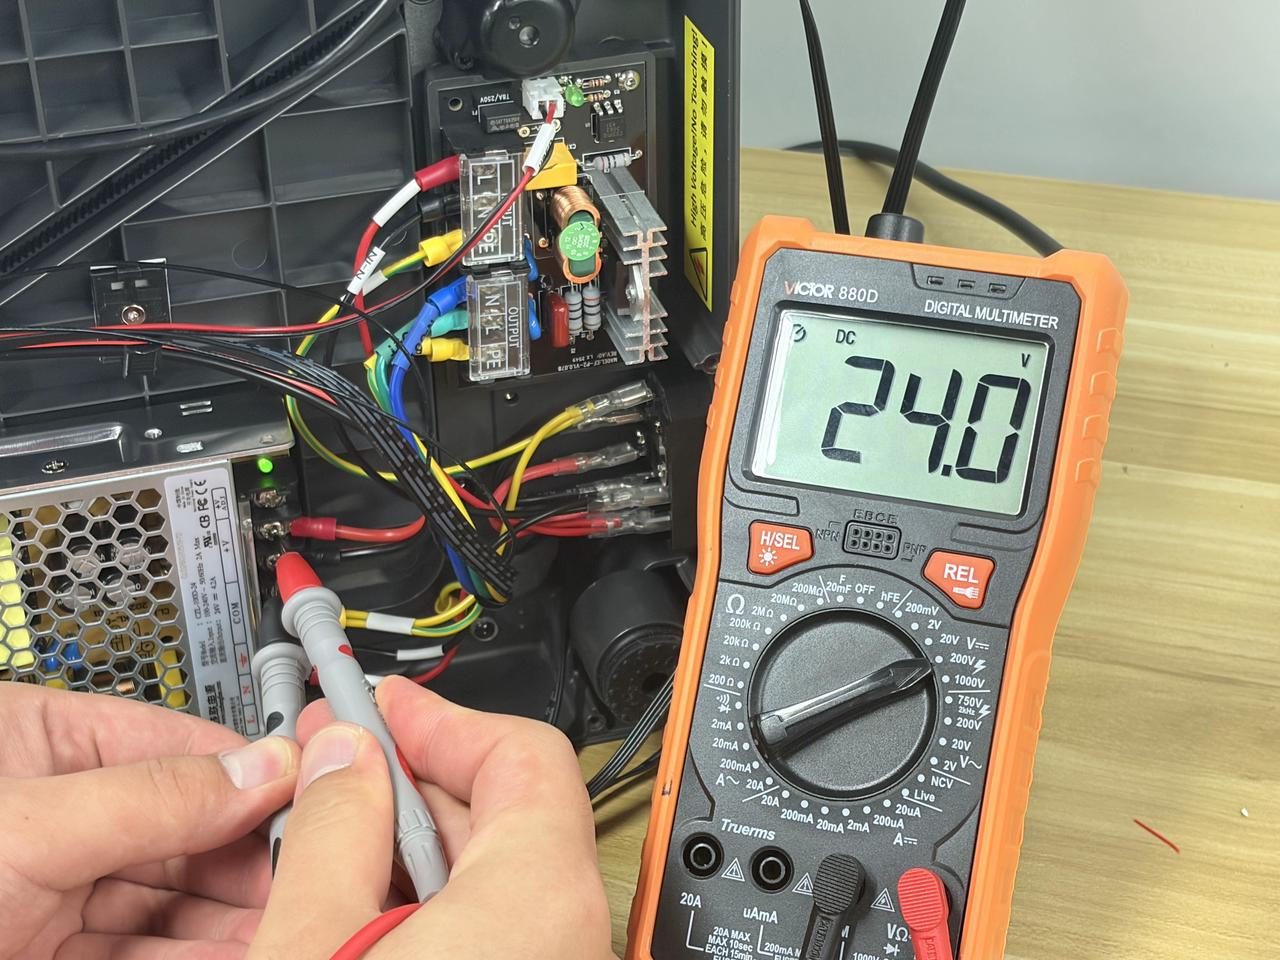
¶ Results
| Result | Recommendation |
|---|---|
| No 24 V Output | The power supply output is abnormal. Replace the power supply. |
| 24 V Output Present | The power supply is operating normally. Continue to Step 4 to check the mainboard indicator LED. |
¶ Step 4. Check the Mainboard Indicator LED
Refer to the image below and check whether the mainboard status LED is illuminated.
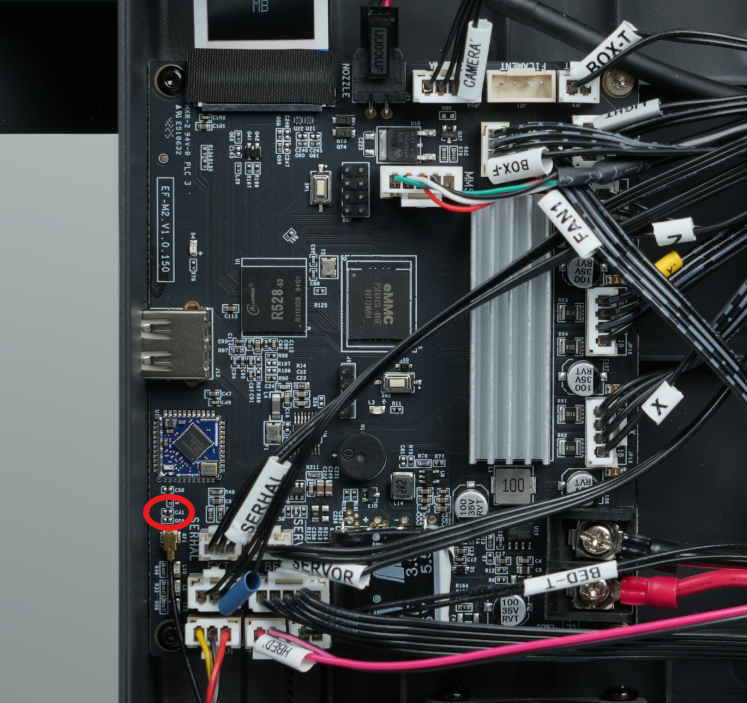
Please report the status of the mainboard indicator LED to our technical support team.
¶ Step 5. Quick Diagnostic Method
If you do not have a multimeter, you can perform the following quick test to help determine whether the touch screen and mainboard are functioning.
Quickly move the tool head by hand.
The stepper motors may generate a small amount of induced voltage, which can temporarily power the touch screen. Observe whether the touch screen briefly lights up.
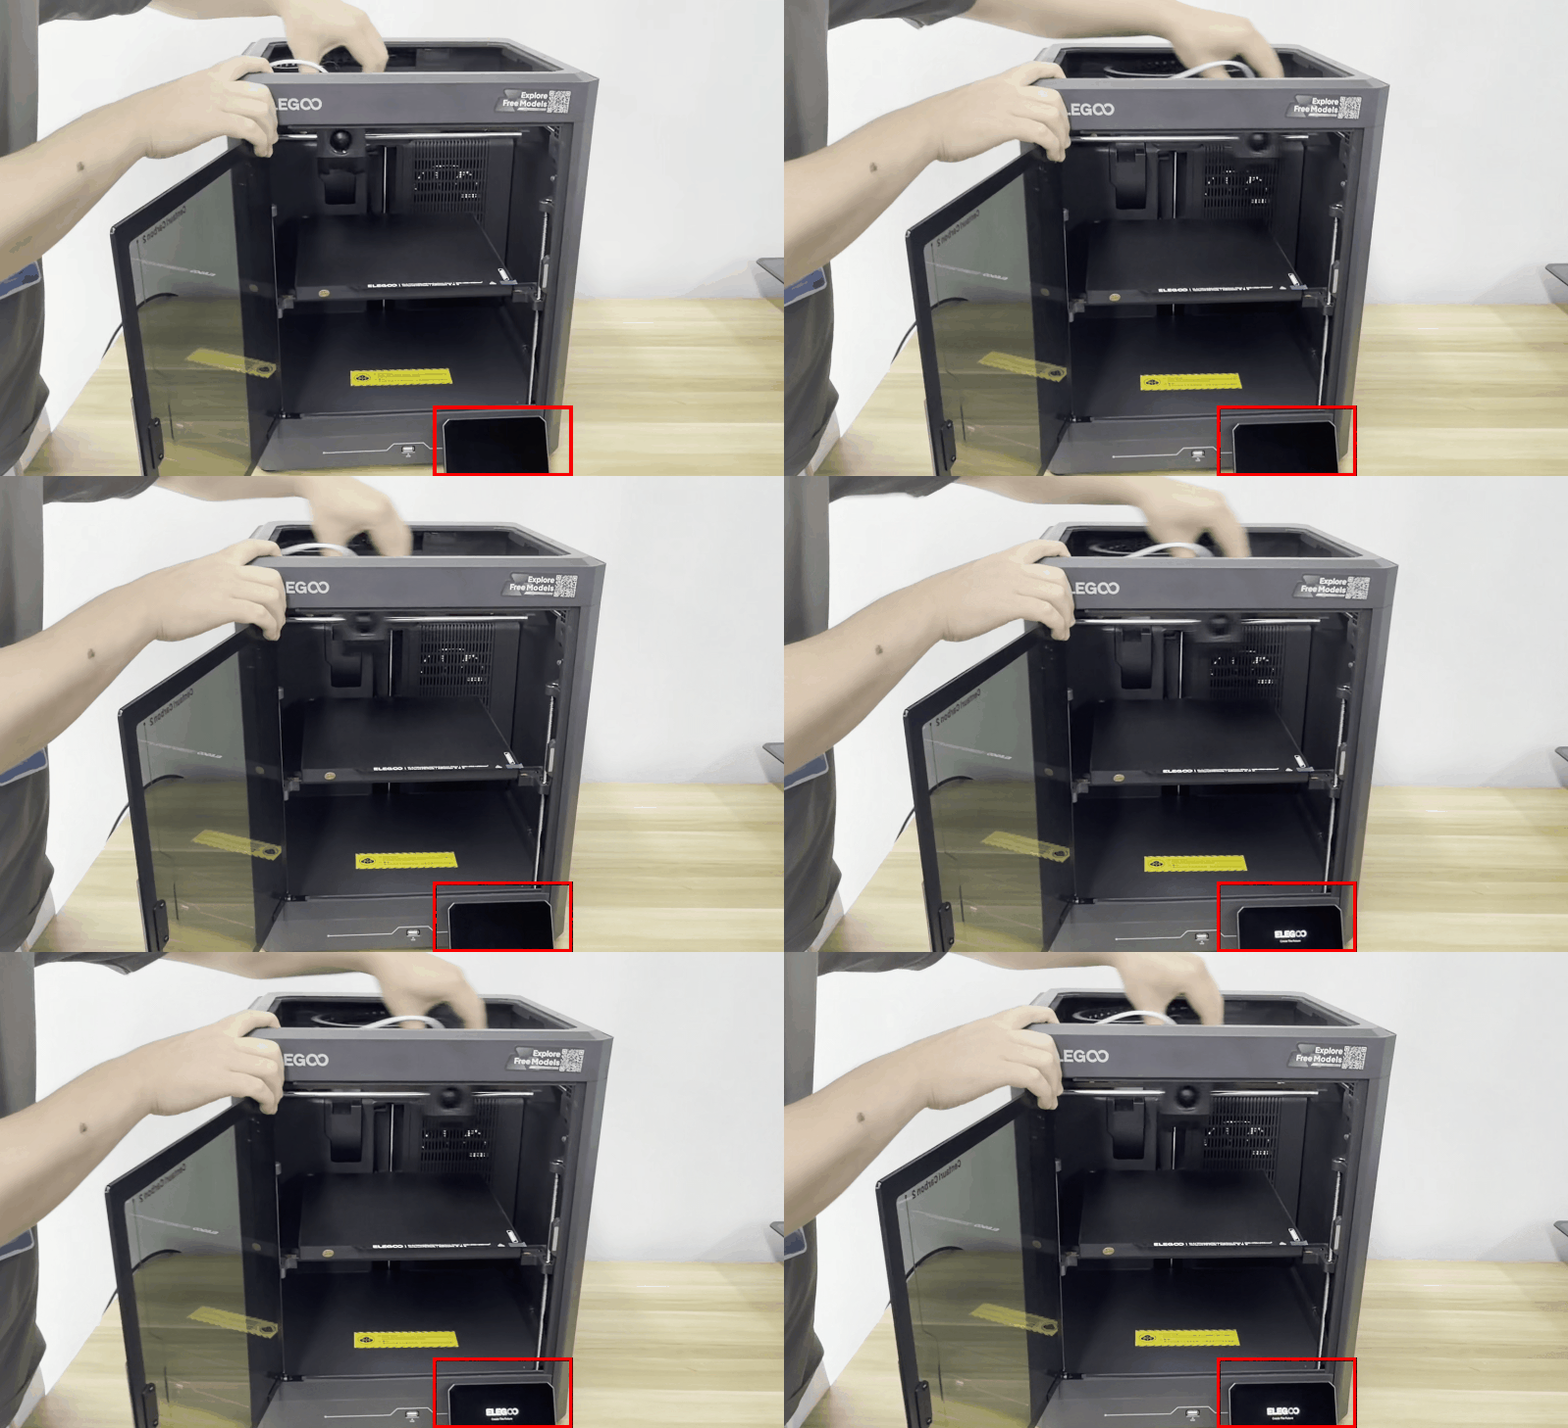
If the touch screen lights up briefly, it generally indicates that both the touch screen and the mainboard are functioning properly.
¶ Feedback Required
If the issue persists after completing all of the troubleshooting steps above, please send the following information to our technical support team at 3dp@elegoo.com.
Please provide photos or videos showing the results of the troubleshooting steps above.
- Is the fuse blown?
- Is the touch screen ribbon cable loose or damaged?
- Is the power supply indicator LED on? If measured with a multimeter, is there a 24 V output?
- Is the mainboard indicator LED illuminated?
- Does the touch screen briefly light up when the tool head is moved quickly by hand?
Based on the information you provide, we will further analyze the issue and recommend the appropriate solution.
¶ Help us improve
If you have any ideas about the wiki pages, please let us know via ELEGOO official feedback channel