¶ Tools and Materials
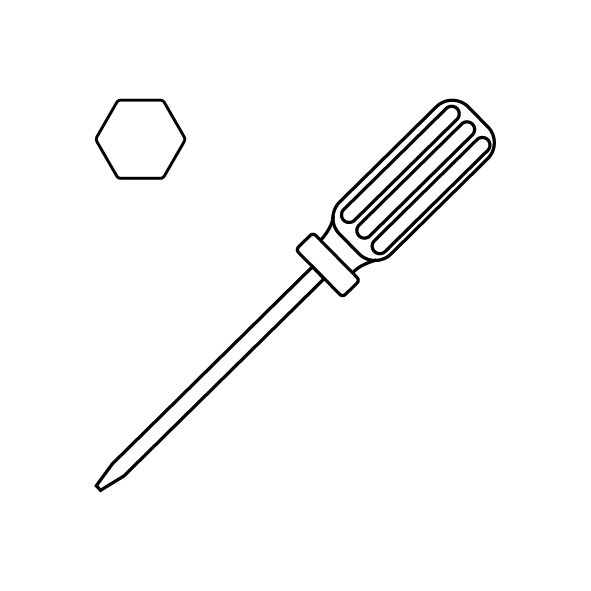
- A 2.0 mm Allen key
- A pair of tweezers
- A new Z-axis motor
¶ Tutorial Video
¶ Instructions
¶ Preparation
Turn the power switch OFF (symbol "〇") and unplug the power supply cable.
¶ Remove the Old Z-Axis Motor
-
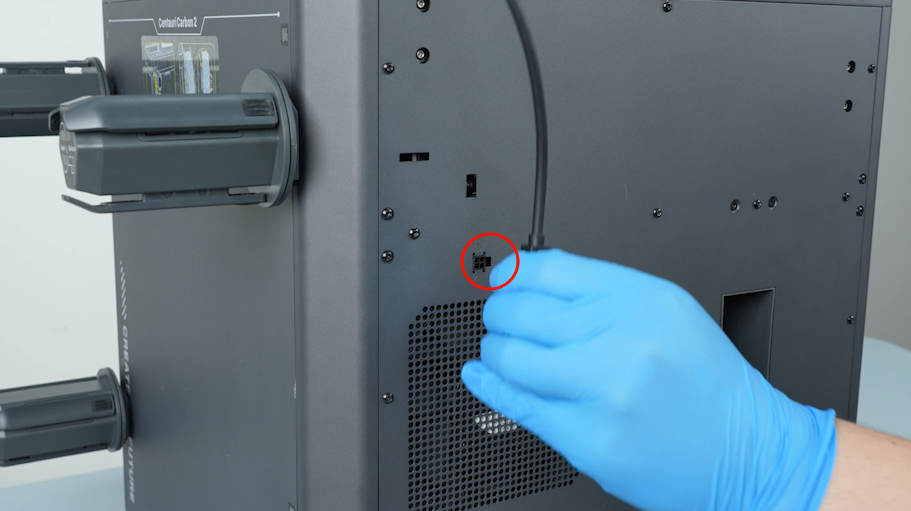
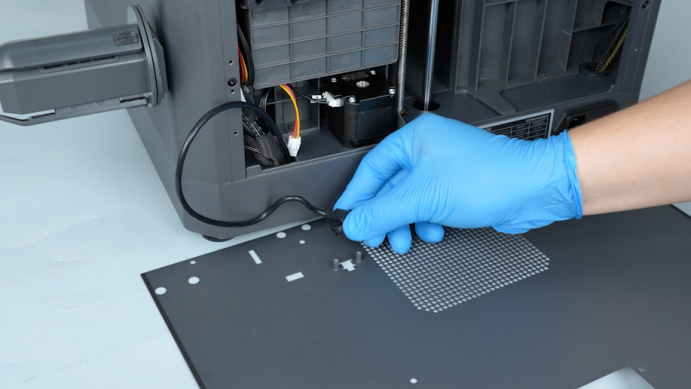
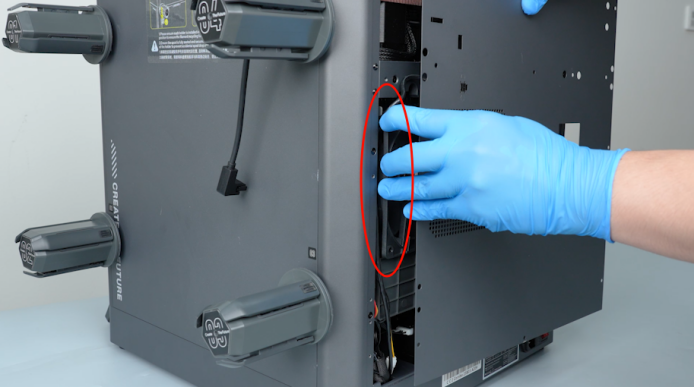
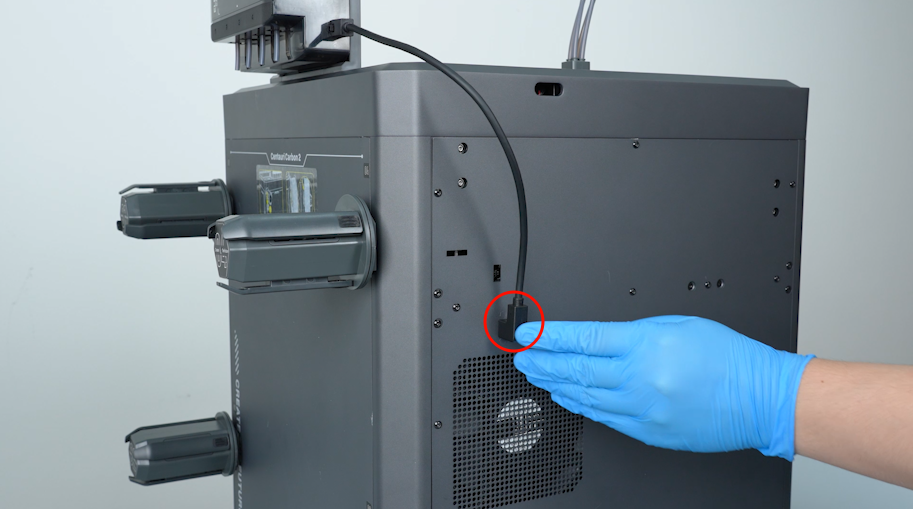
Unplug the connection cable of the CANVAS.
-
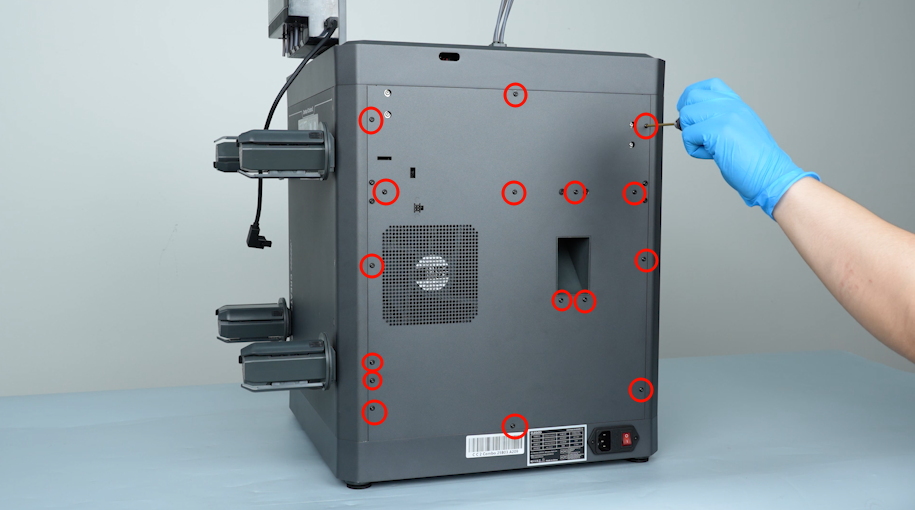
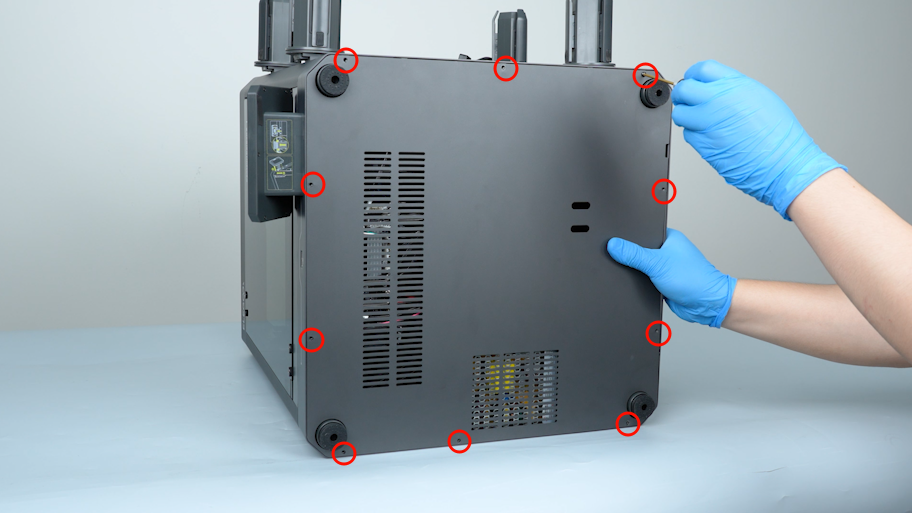
Release and remove the sixteen screws securing the back cover with a 2.0 mm Allen key.
-
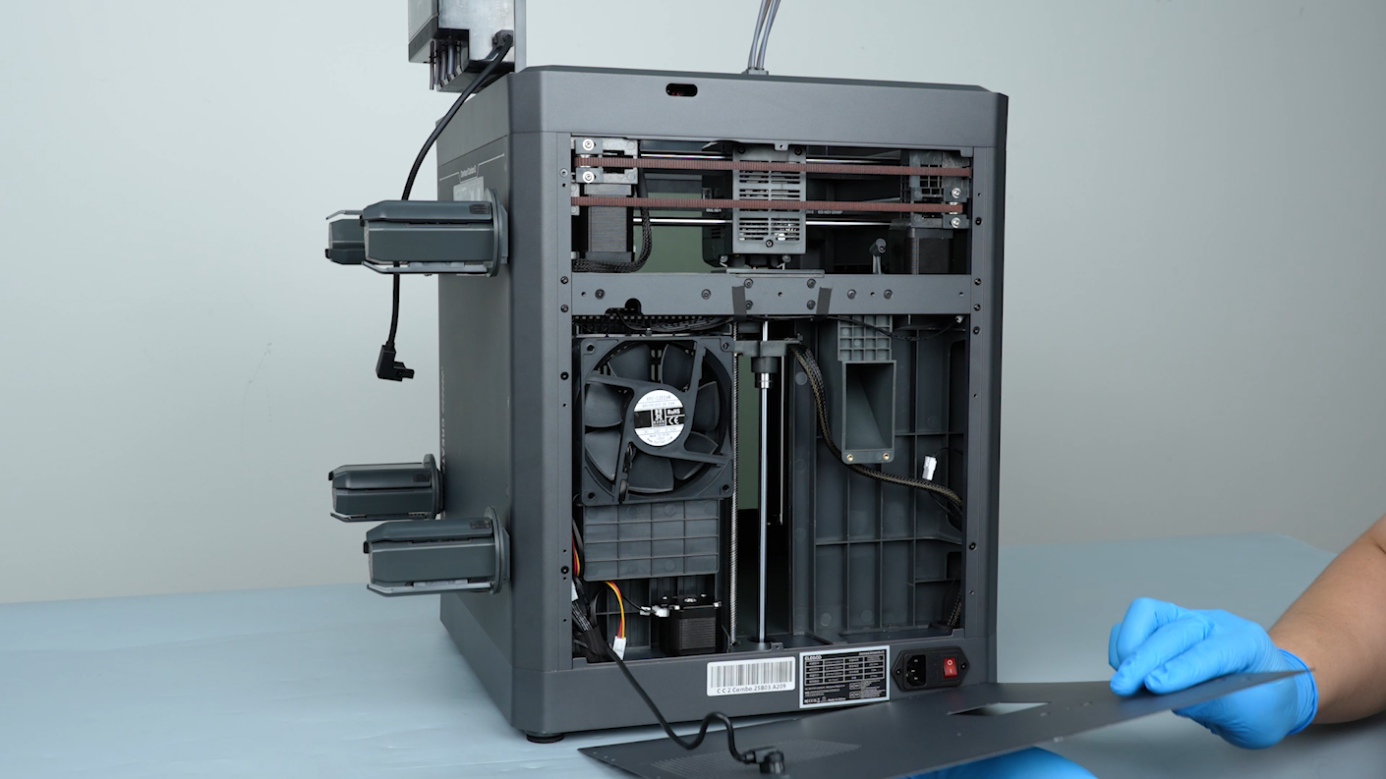
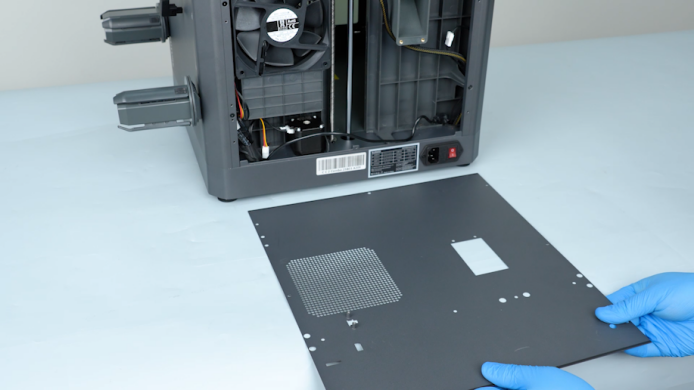
Carefully open the back cover and lay the back cover flat on the table.
-
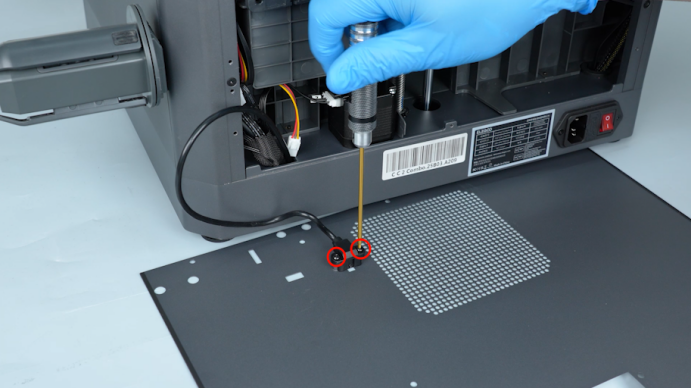
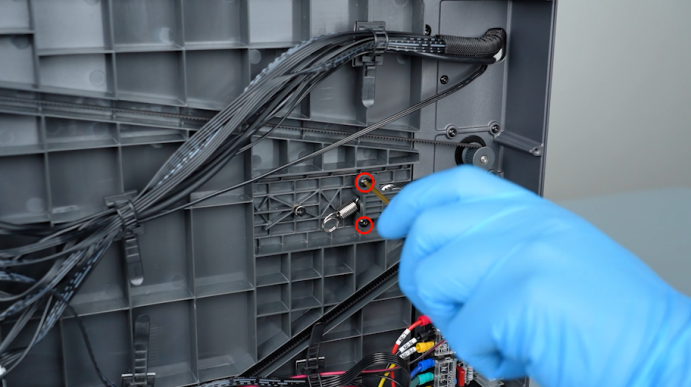
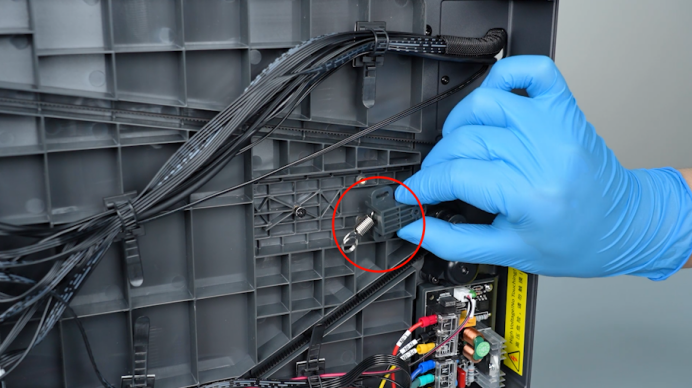
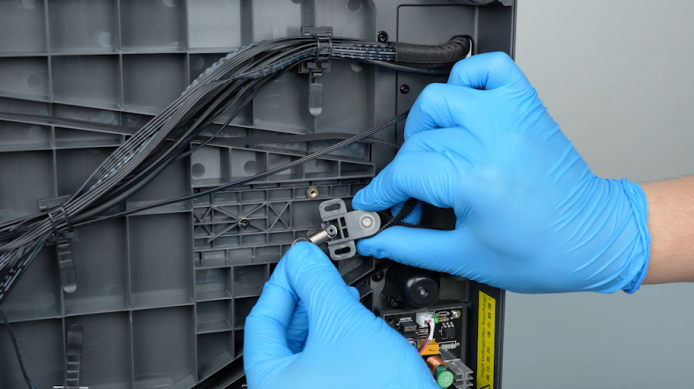
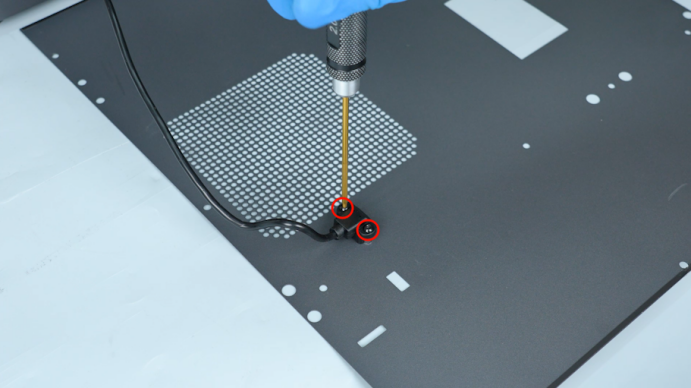
Release and remove the two screws securing the adapter cable of the CANVAS with a 2.0 mm Allen key.Unplug the cable. Remove the back cover.
-
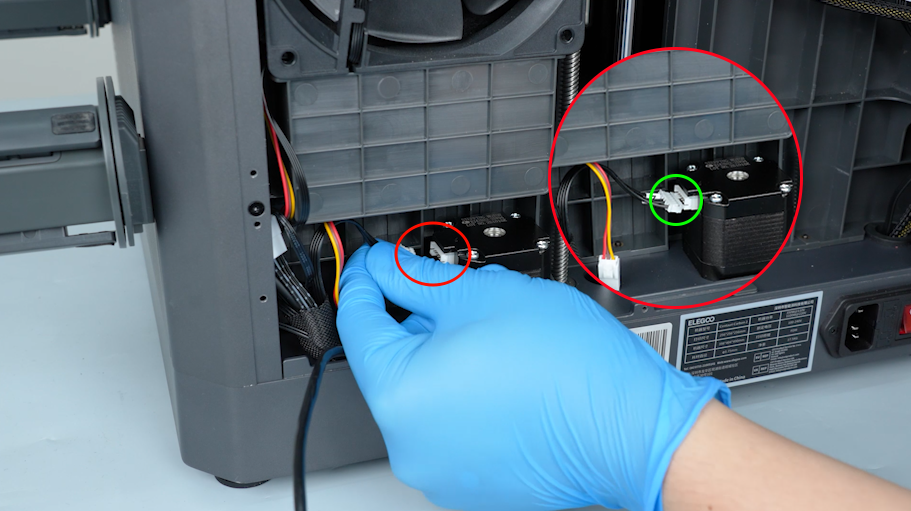
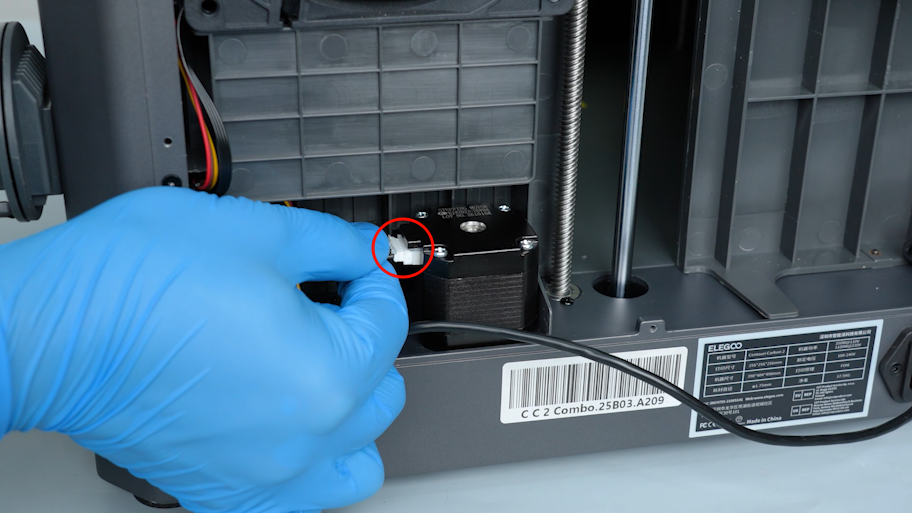
Unplug the Z-axis motor cable.
-
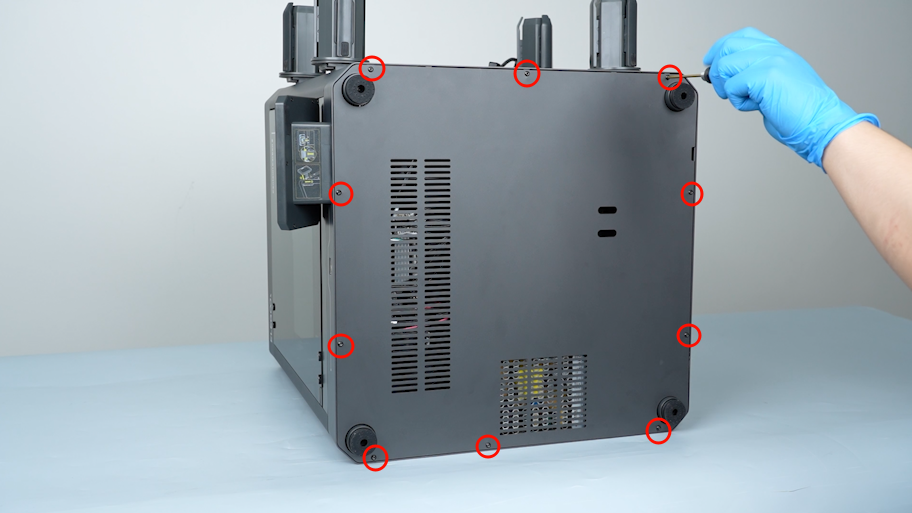
Release and remove the ten screws securing the bottom cover with a 2.0 mm Allen key. Remove the bottom cover.
-
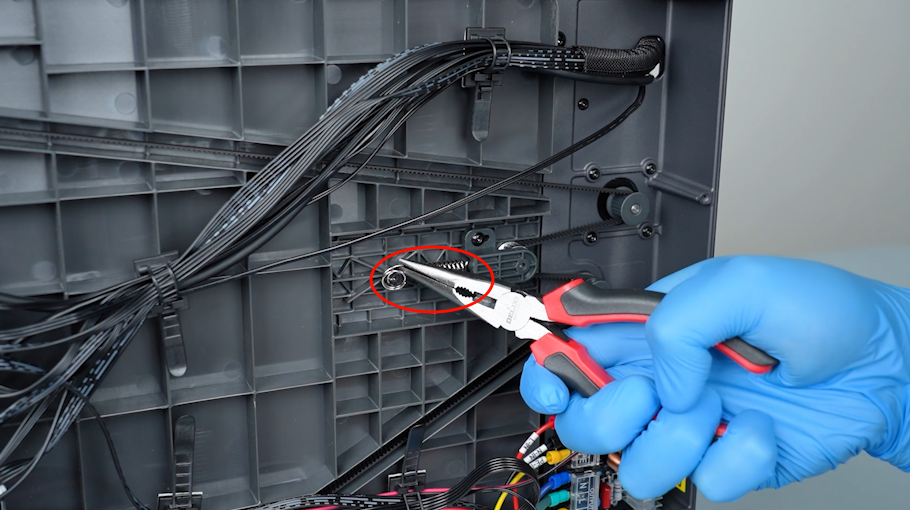
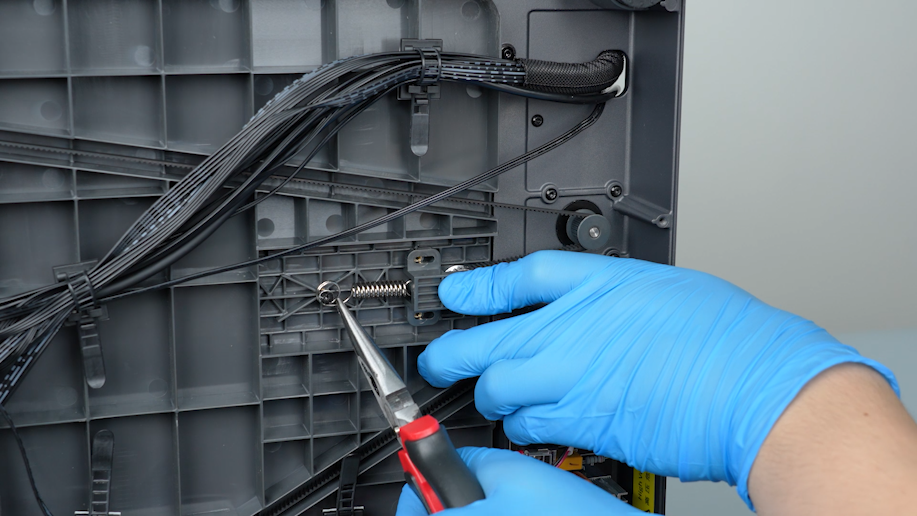
Remove the spring with a pair of pliers.
-
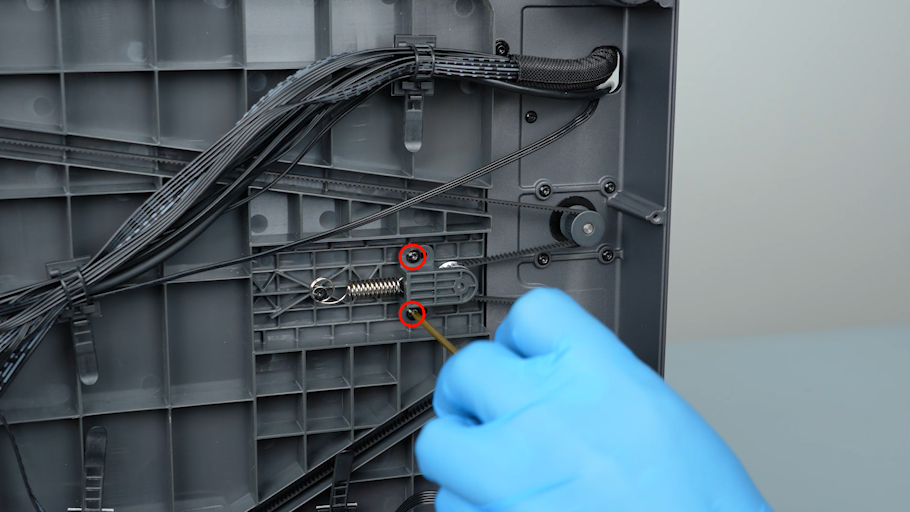
Release and remove the two screws securing the Z-axis timing belt tensioner with a 2.0 mm Allen key.
-
Release and remove the four screws securing the Z-axis motor with a 2.0 mm Allen key. Hold the Z-axis motor when releasing the last screw.

-
Remove the old Z-axis motor.
¶ Install the New Z-Axis Motor
-
Put the new Z-axis motor in the installation position. Hold the Z-axis motor and tighten the four screws securing the Z-axis motor with a 2.0 mm Allen key.
-
Get the spring and put it on the opposite side of the Z-axis belt tensioner.

-
Clamp the spring with a pair of pliers and put it in the installation position. Press the Z-axis timing belt tensioner.
-
Tighten the two screws securing the Z-axis timing belt tensioner with a 2.0 mm Allen key.
-
Get the bottom cover and put it in the installation position. Tighten the ten screws securing the bottom cover with a 2.0 mm Allen key.
-
Plug in the Z-axis motor cable.
-
Get the back cover. Plug the adapter cable of the CANVAS into the back cover. Tighten the two screws securing the adapter cable of the CANVAS with a 2.0 mm Allen key.
-
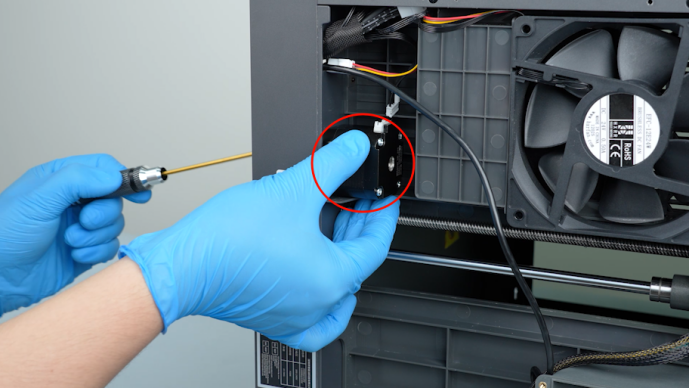
Lift the back cover and put the adapter cable of the CANVAS into the gap besides the chamber fan. Close the back cover.

-
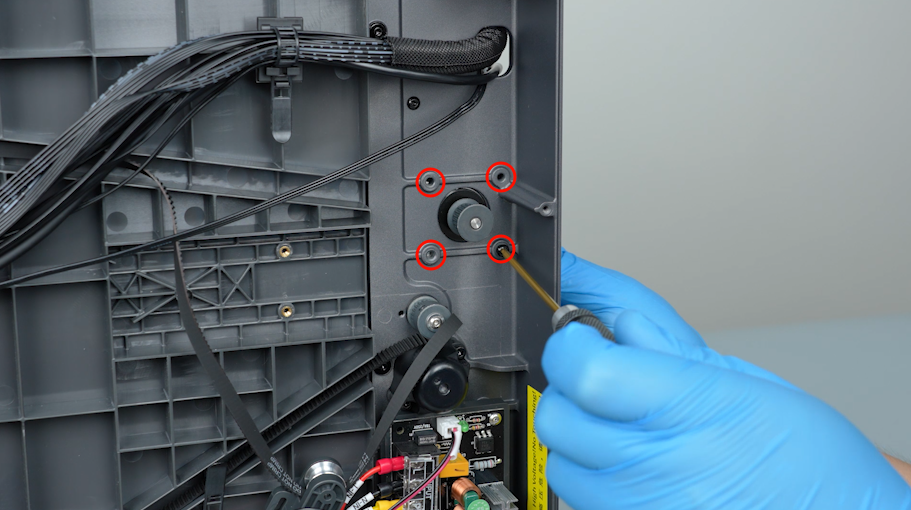
Release and remove the sixteen screws securing the back cover with a 2.0 mm Allen key.
Note: Screws labeled by the red circle are M3*4, and screws labeled by the yellow circle are M3*8.

-
Plug in the connection cable of the CANVAS.
¶ Restart the Printer
-
Plug in the power cord. Turn the power switch ON (symbol "|") .
-
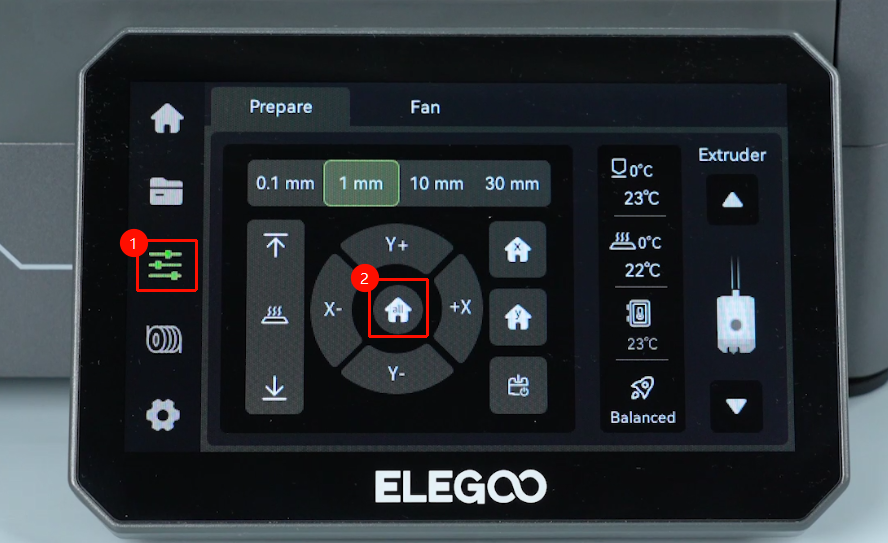
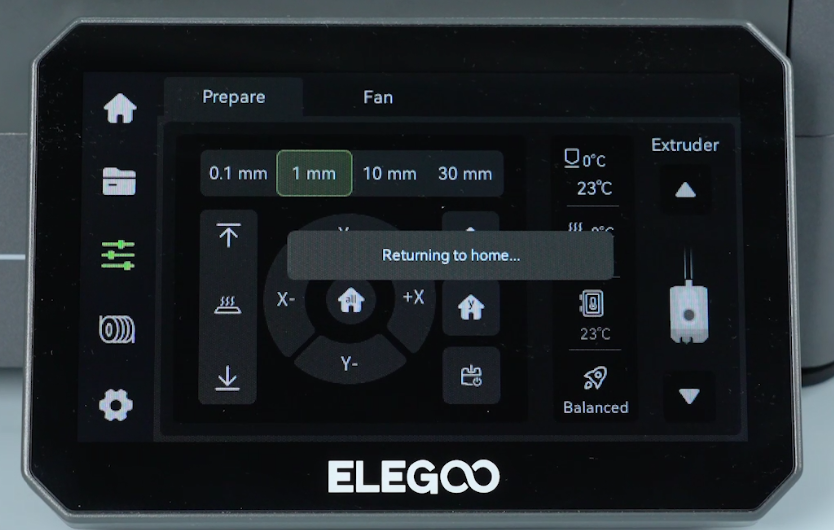
On the touch screen, click Home. After confirming that the Z-axis motor can move up and down normally, the printer is ready for use.