¶ Tools needed for troubleshooting
-
A 2.0 mm Allen key
-
A Phillips screwdriver
-
A pair of tweezers
-
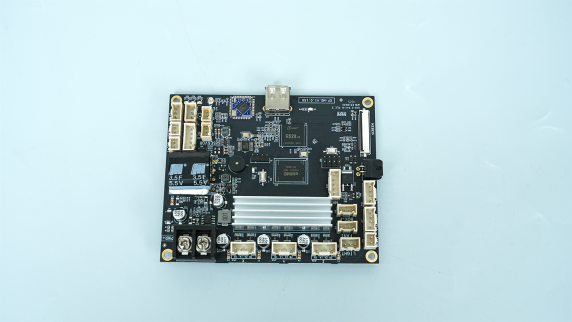
A new motherboard
¶ Tutorial Video
¶ Instructions
¶ Preparation
Turn the power switch OFF (symbol "〇") and unplug the power supply cable.
¶ Remove the old motherboard
-
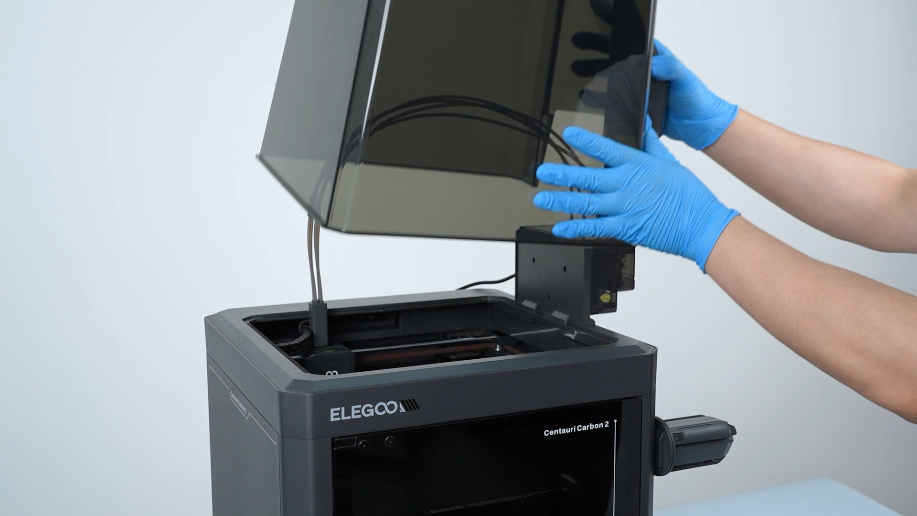
Remove the lid.
-
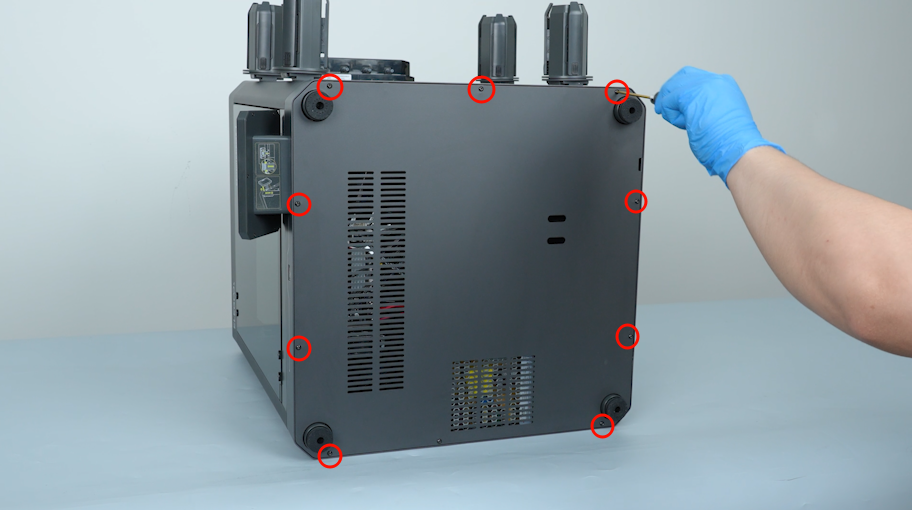
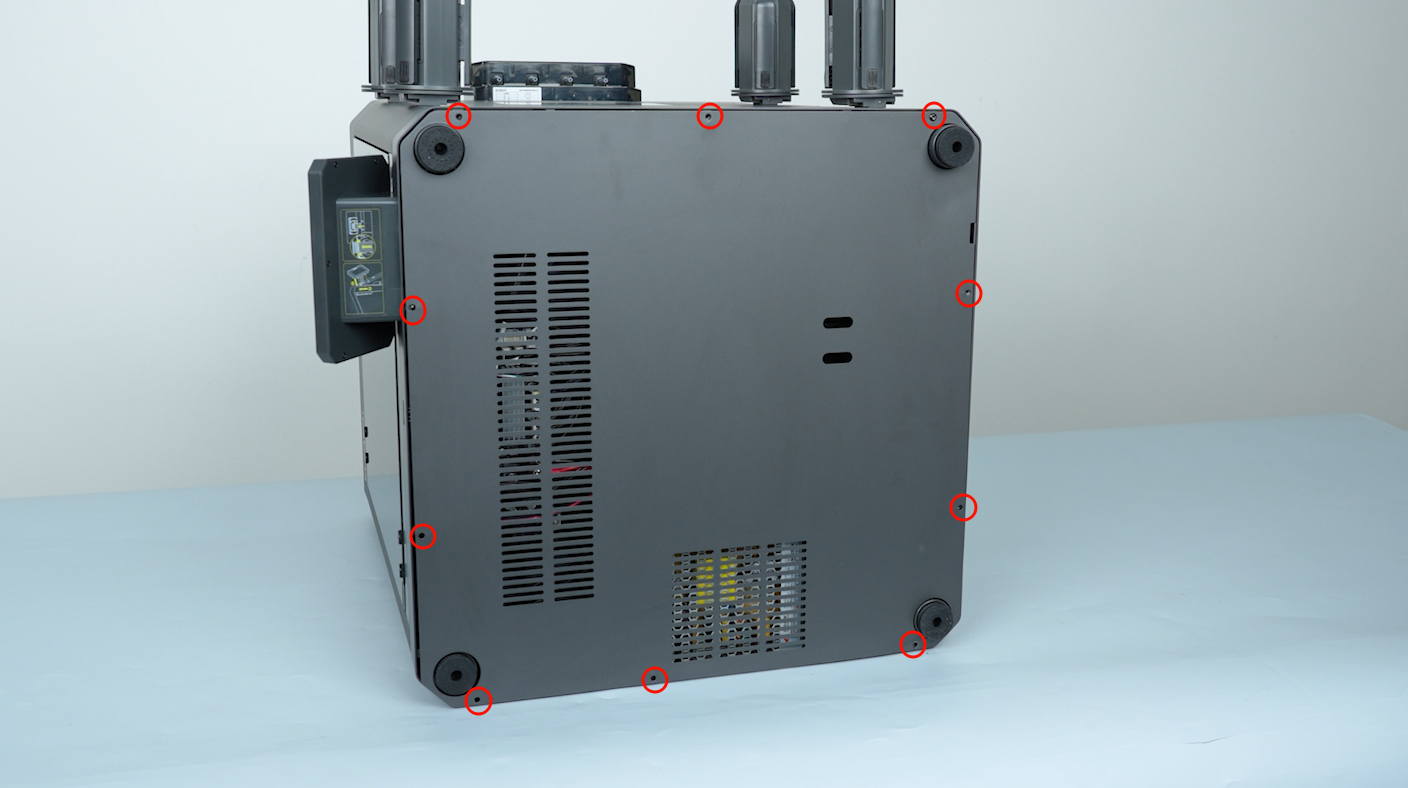
Release and remove the ten screws securing the bottom cover with a 2.0 mm Allen key. Remove the bottom cover.
-
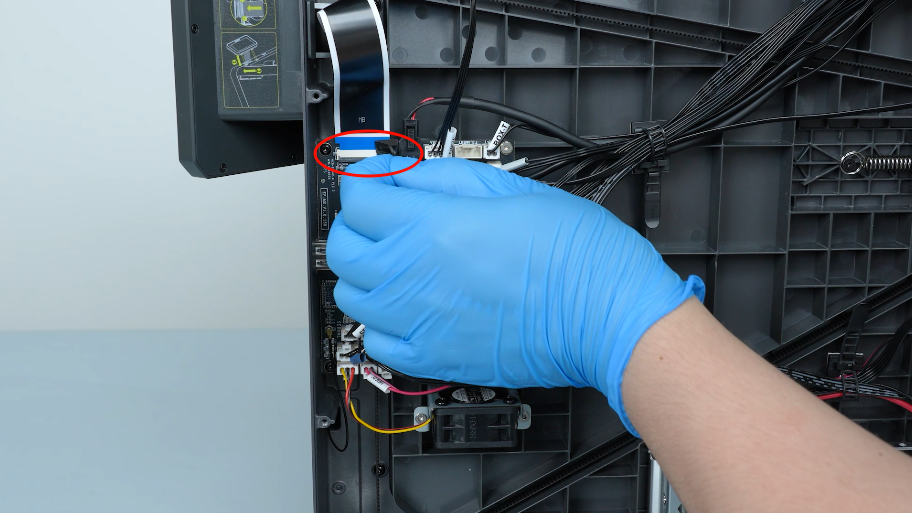
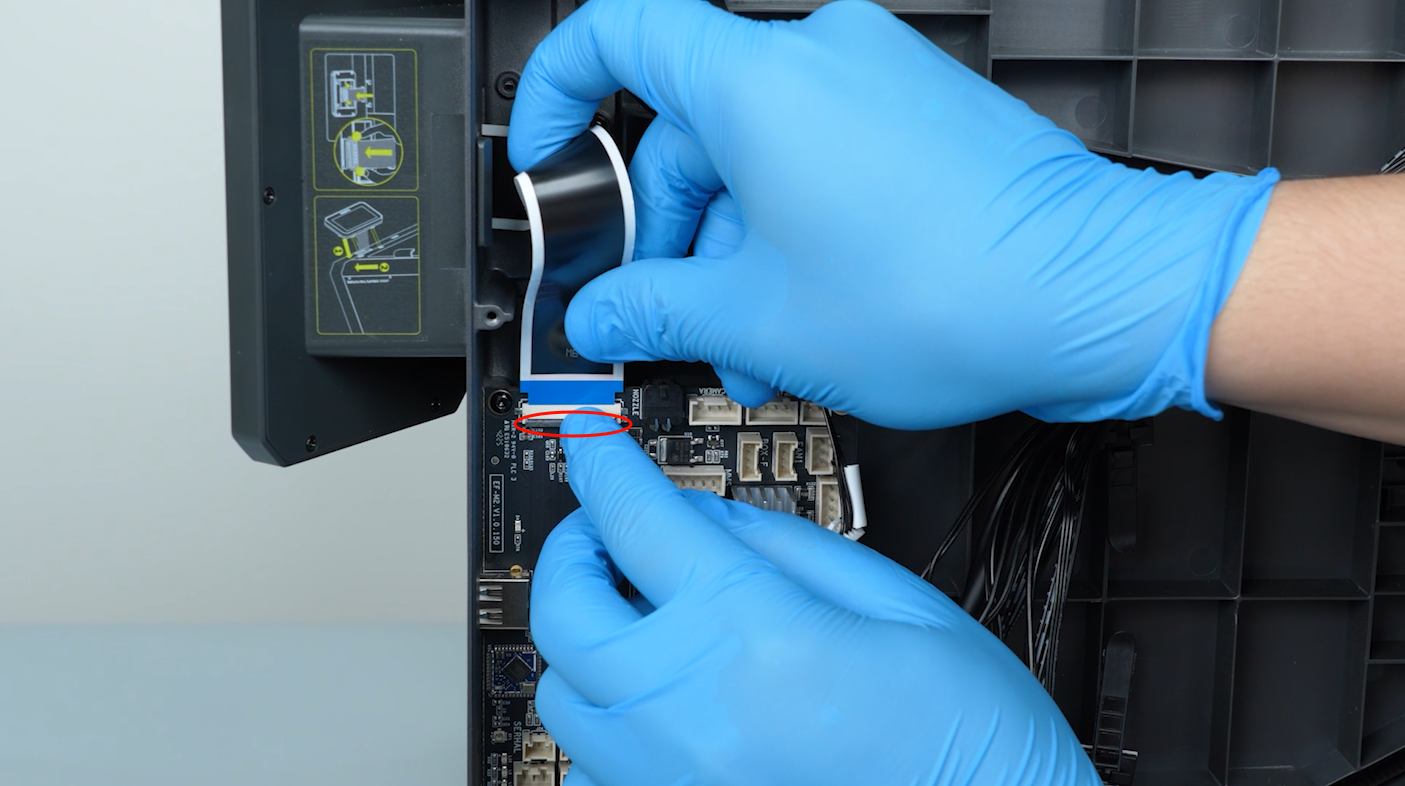
Remove the tape securing the touch screen ribbon cable. Keep the tape at hand as it will be reused later.
-
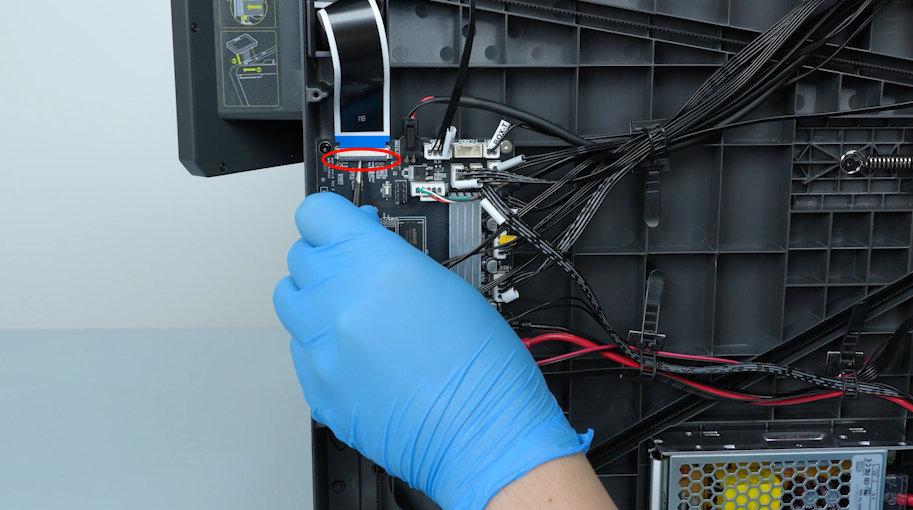
Lift the clip securing the touch screen ribbon cable with a pair of tweezers.
-
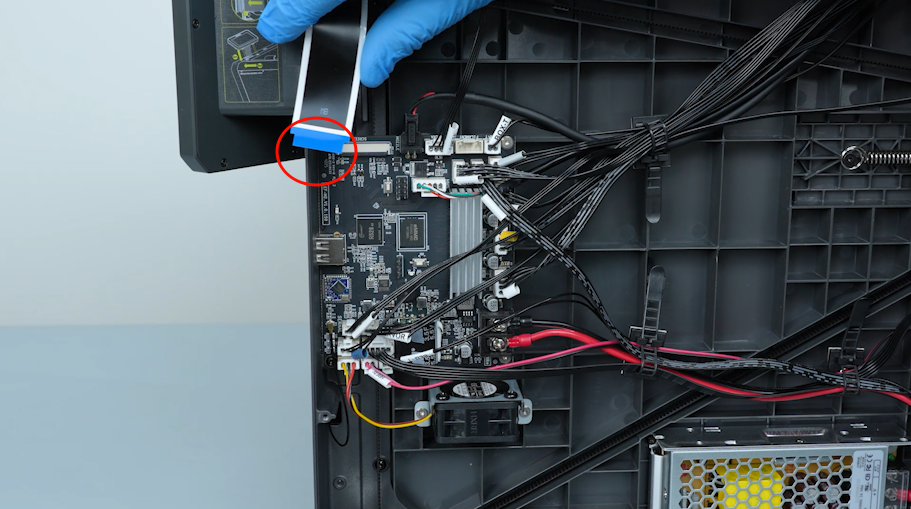
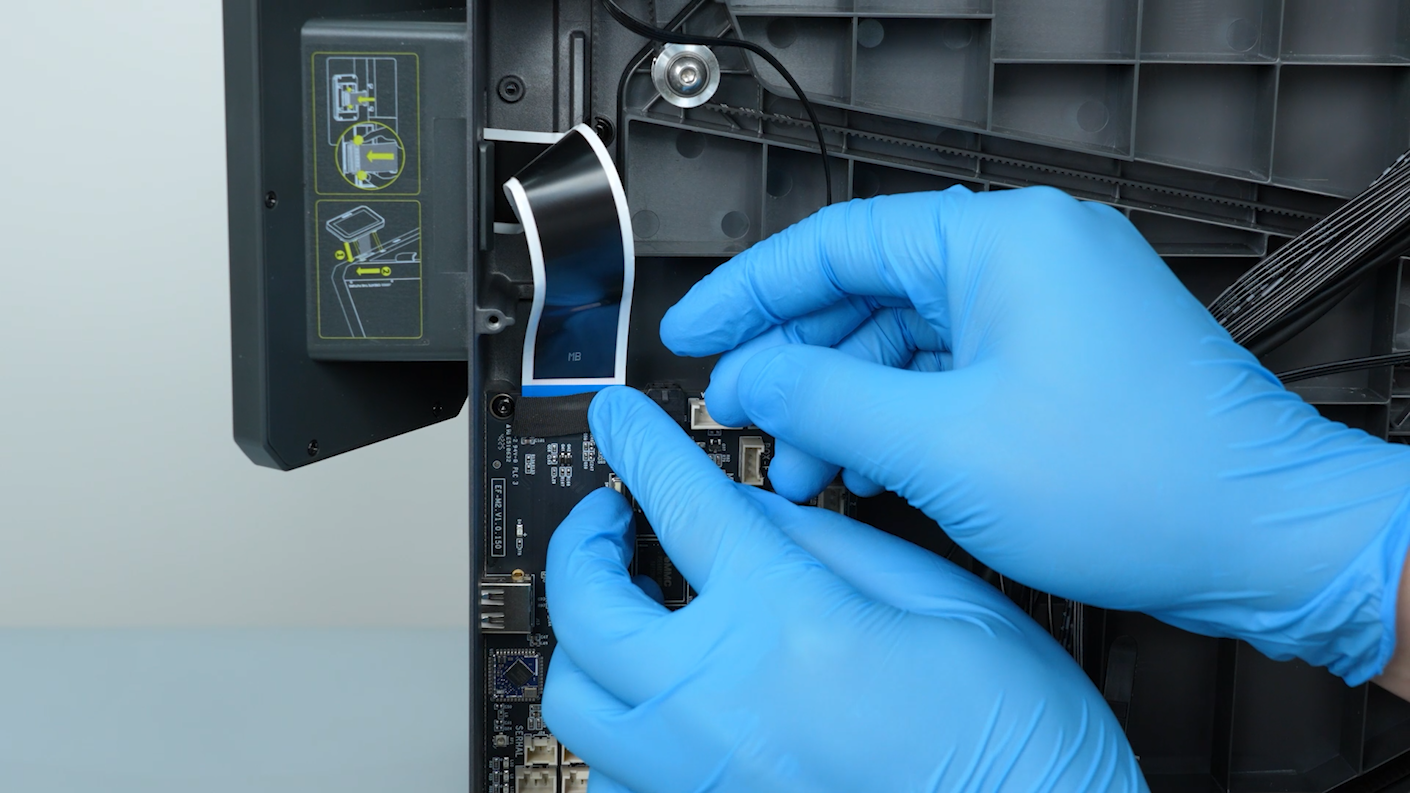
Unplug the touch screen ribbon cable.
-
Unplug the Wi-Fi antenna with a pair of tweezers.
-
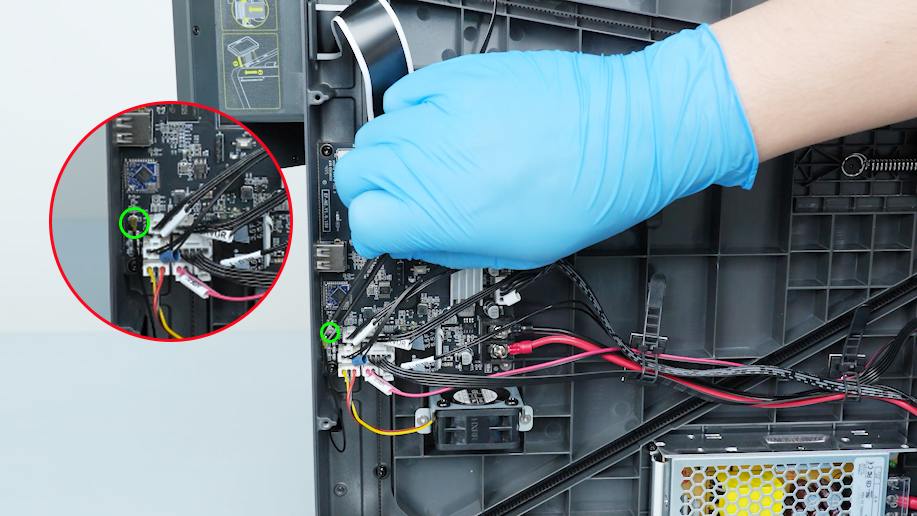
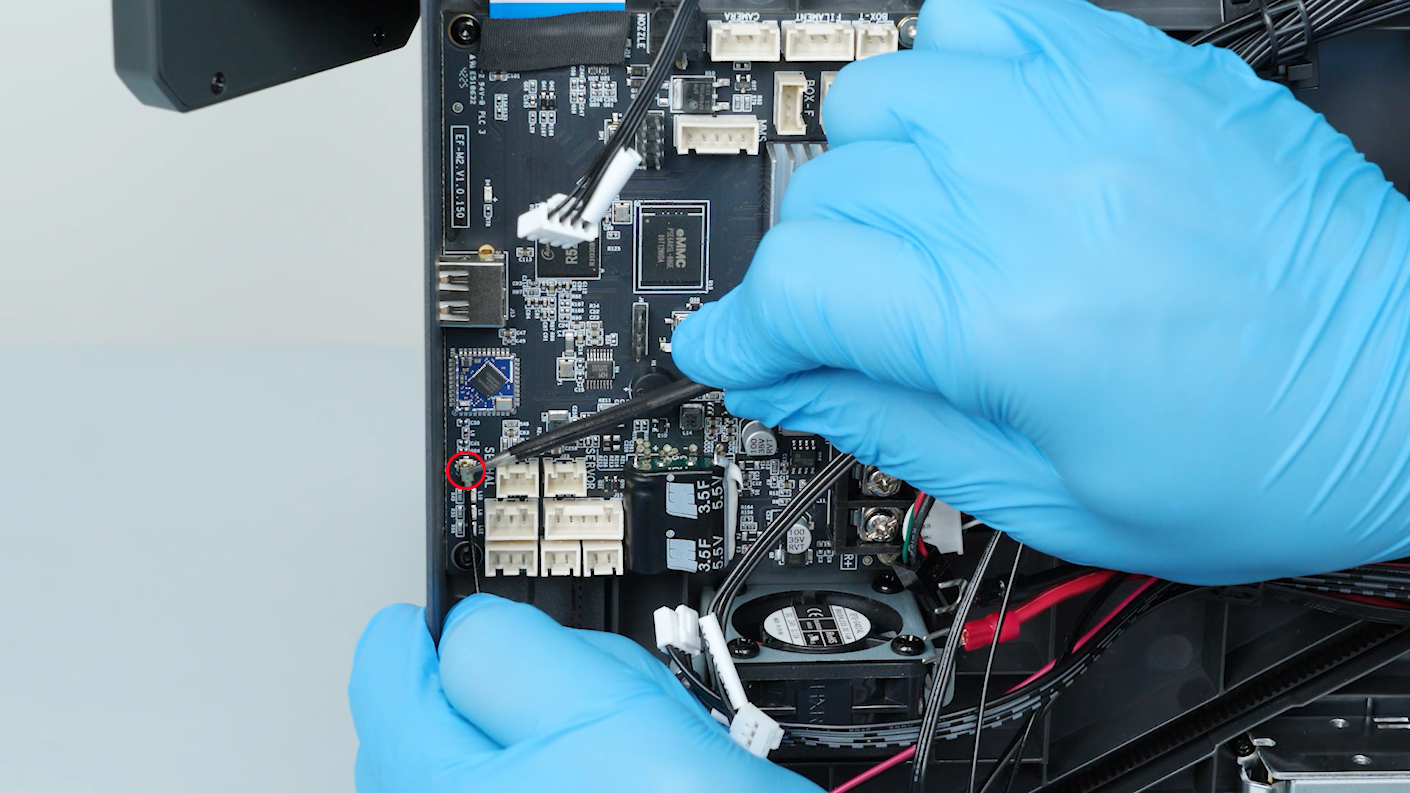
Unplug the cable.
Note:
-
The cable connected to the motherboard has a clip.
-
If the clip cannot be removed easily, you can lift the clip with a pair of tweezers.
-
Unplugging the cable forcibly without lifting the clip may damage the port on the motherboard.
-
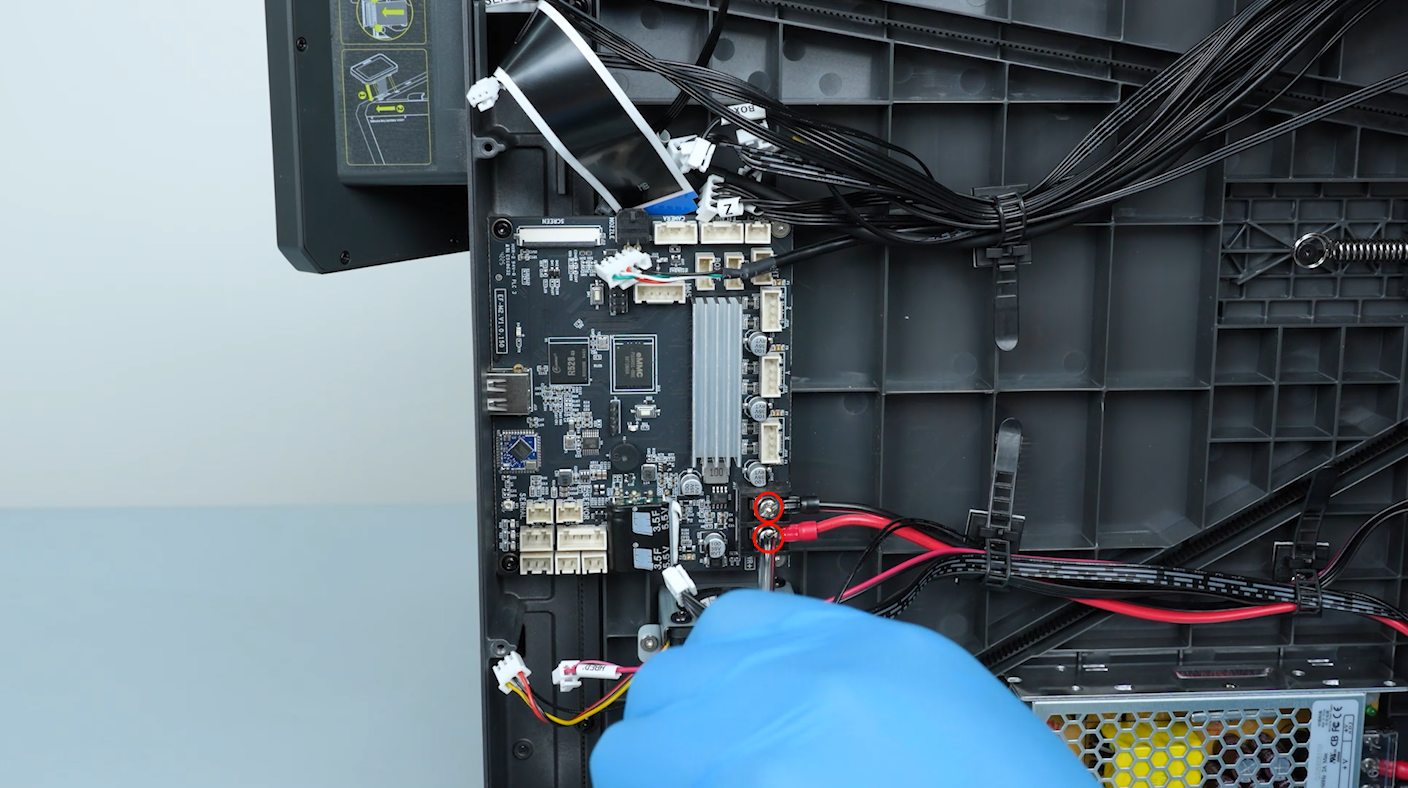
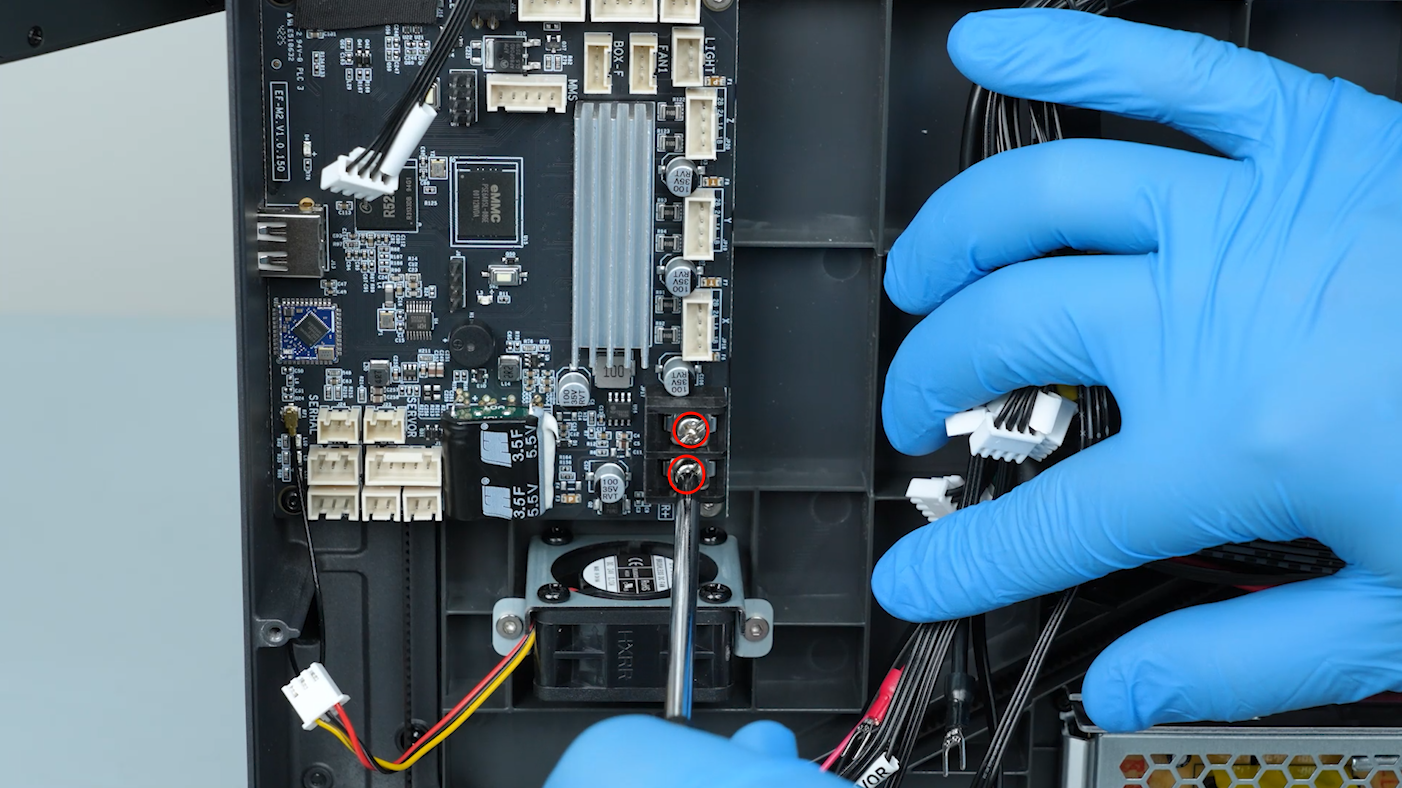
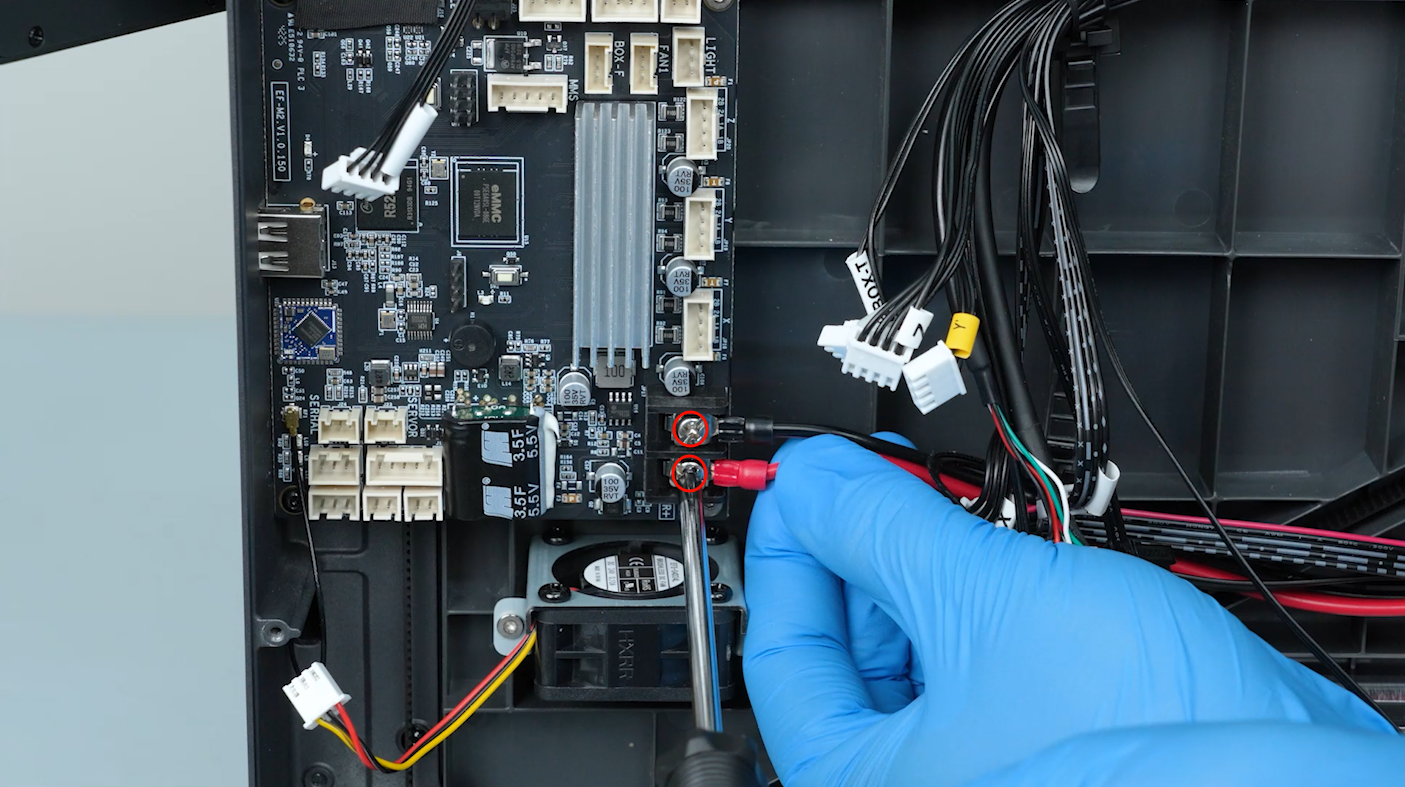
Loosen the screws securing the power supply cables with a Phillips screwdriver. Unplug the power supply cables.
-
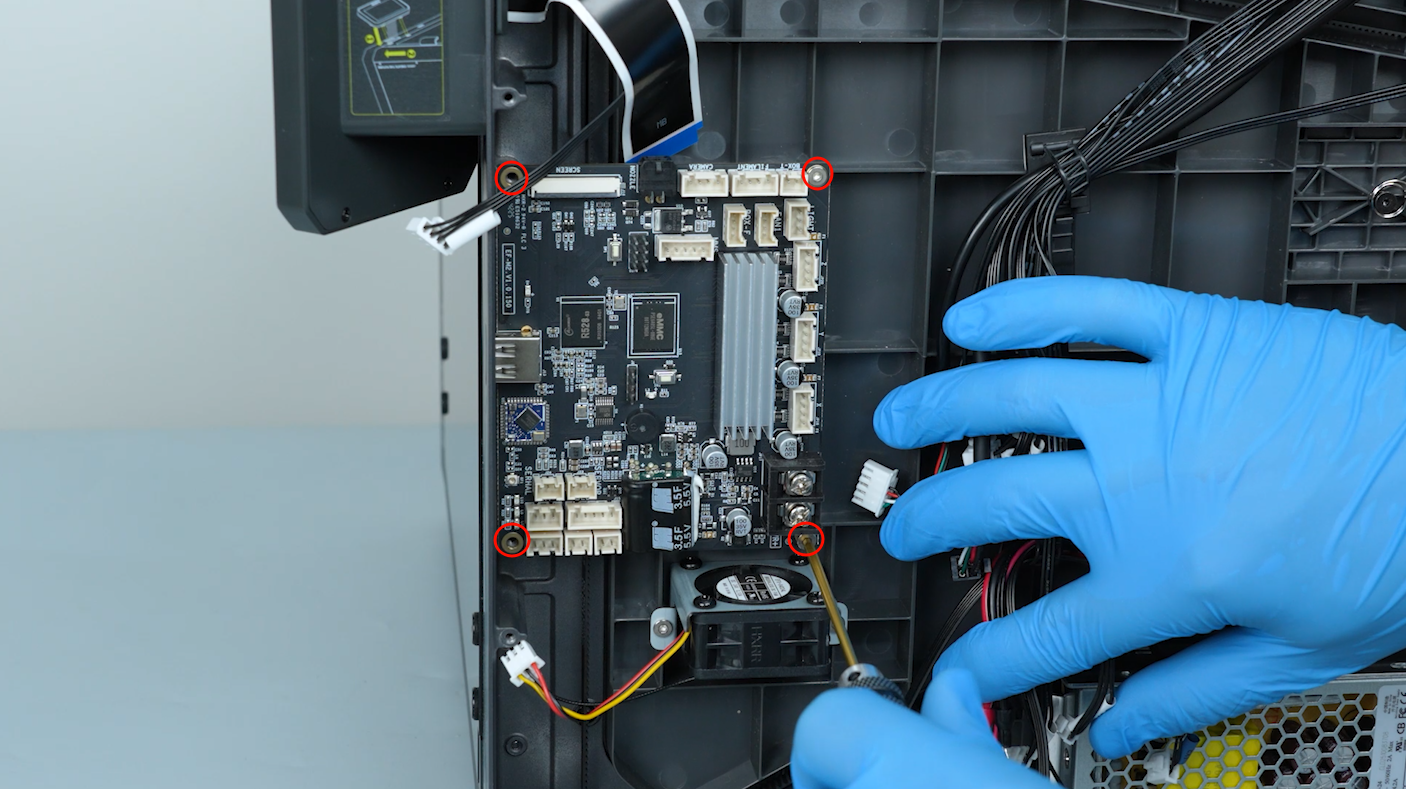
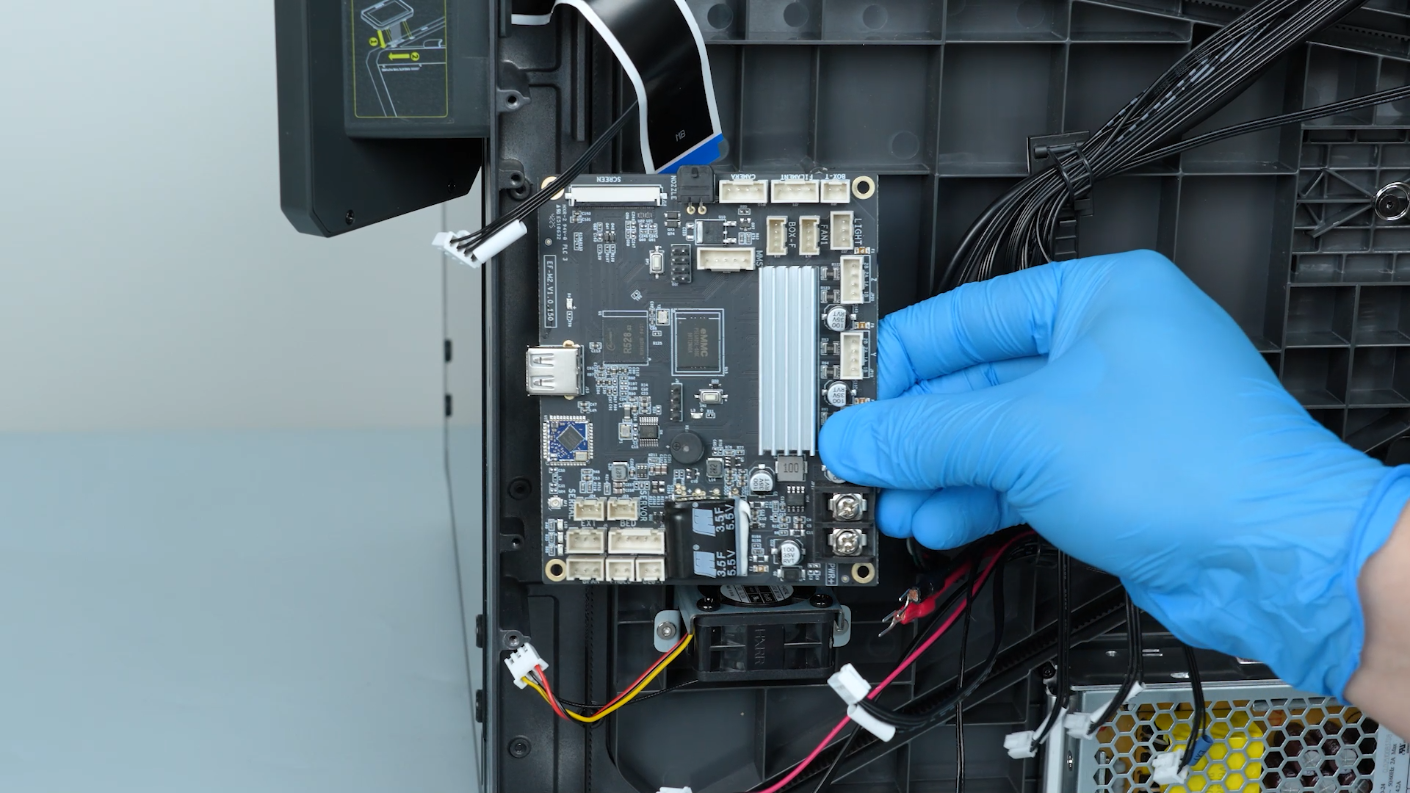
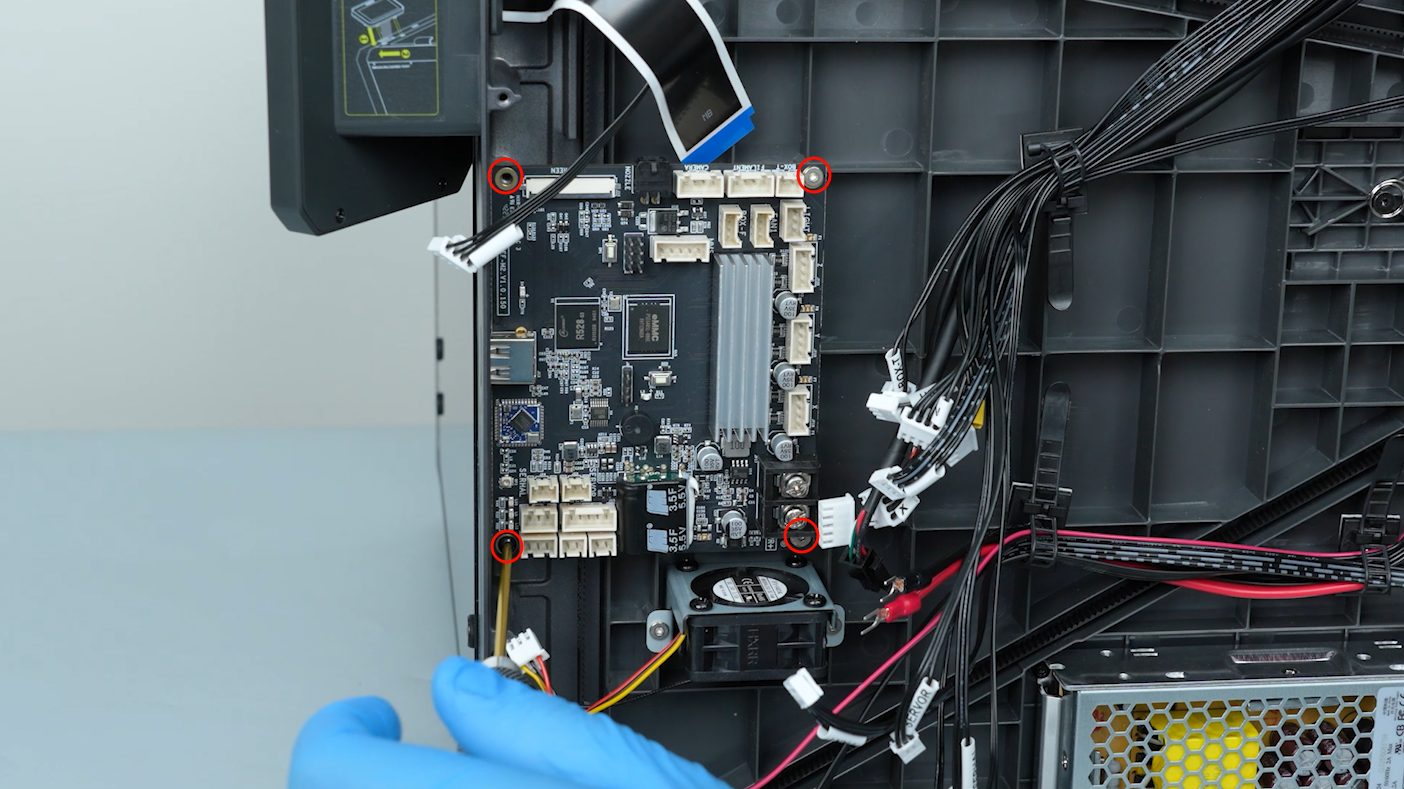
Release and remove the four screws securing the motherboard with a 2.0 mm Allen key. Remove the old motherboard.
¶ Install the new motherboard
-
Tighten the four screws securing the new motherboard with a 2.0 mm Allen key.
-
Plug in the touch screen ribbon cable. Press the clip to secure the ribbon cable.
-
Insert the Wi-Fi antenna and secure it with a pair of tweezers.
-
Loosen the screws securing the power supply cable of the motherboard. Insert the power supply cable. Secure the power supply cable with a Phillips screwdriver.
-
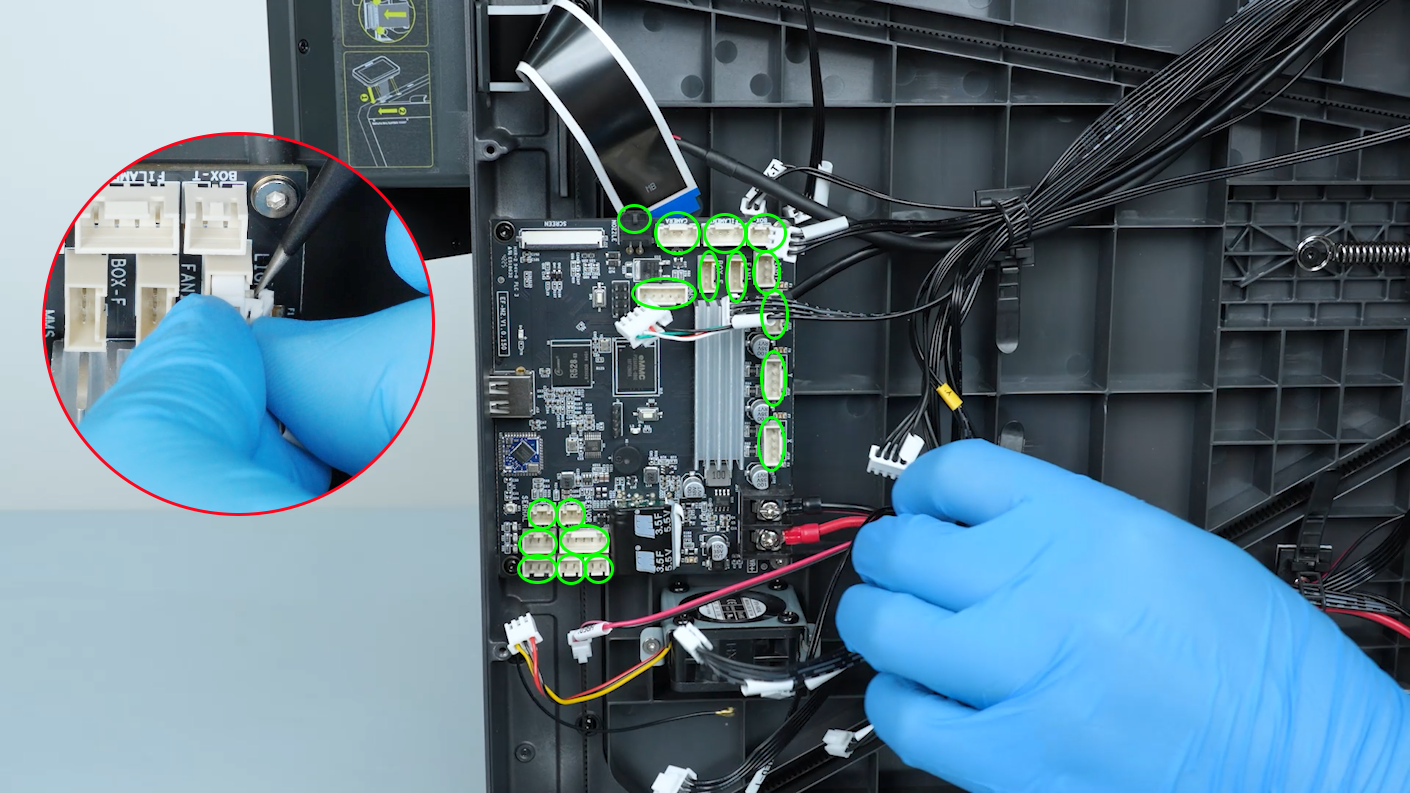
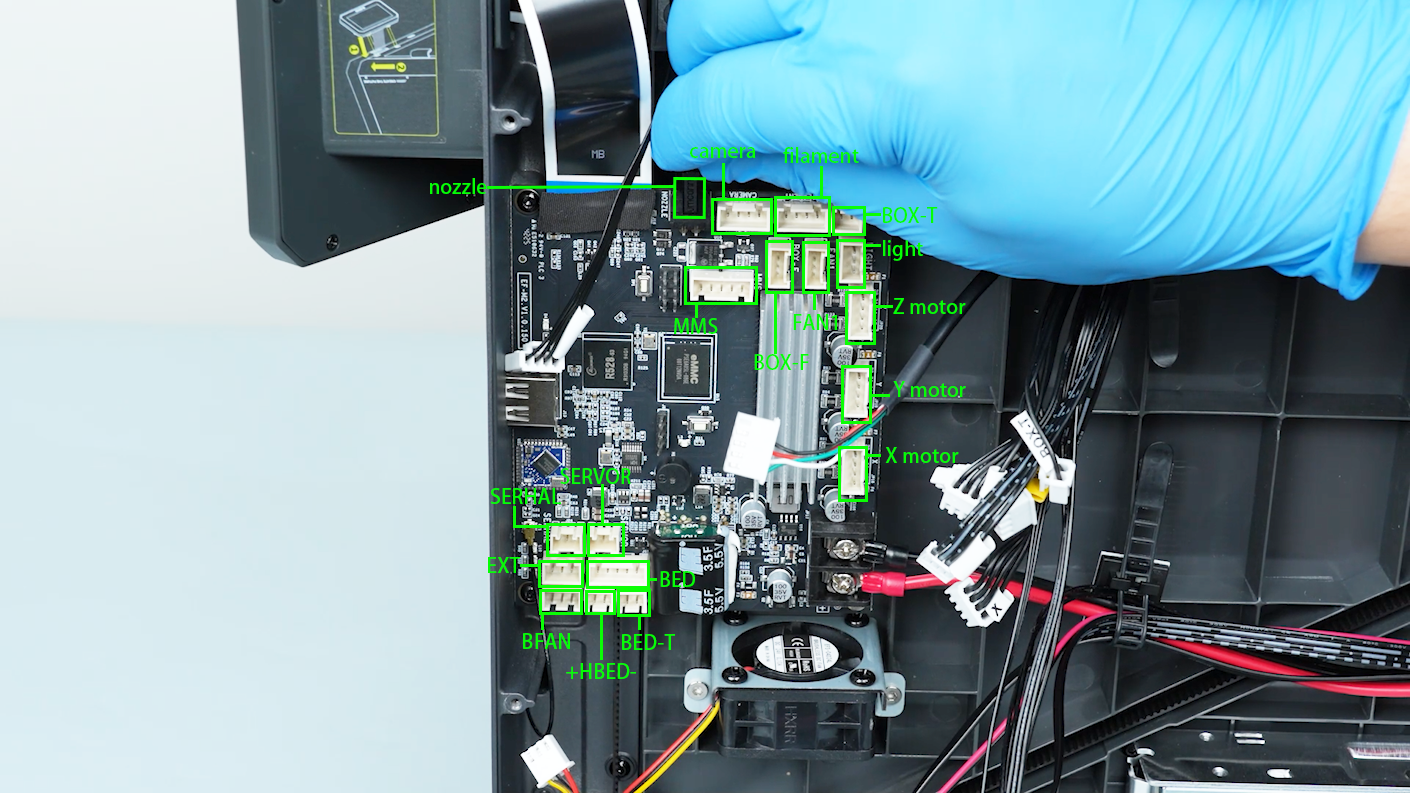
Plug in the cables on the motherboard.
-
Tighten the ten screws securing the bottom cover with a 2.0 mm Allen key.
¶ Restart the printer
-
Plug in the power supply cable. Turn the power switch ON (symbol "|") .
-
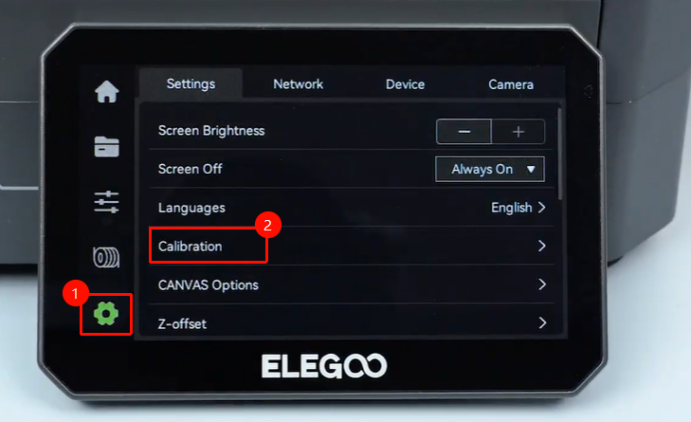
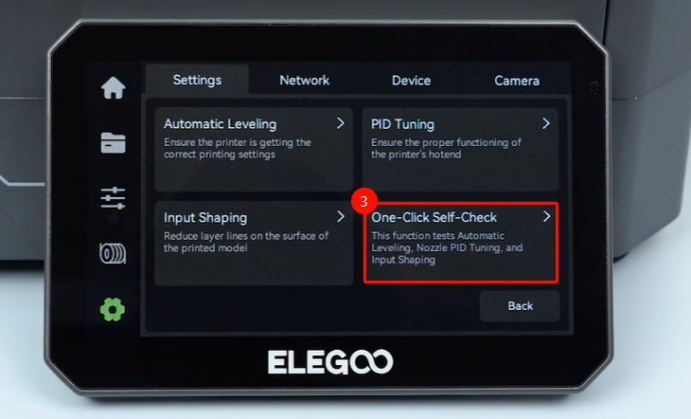
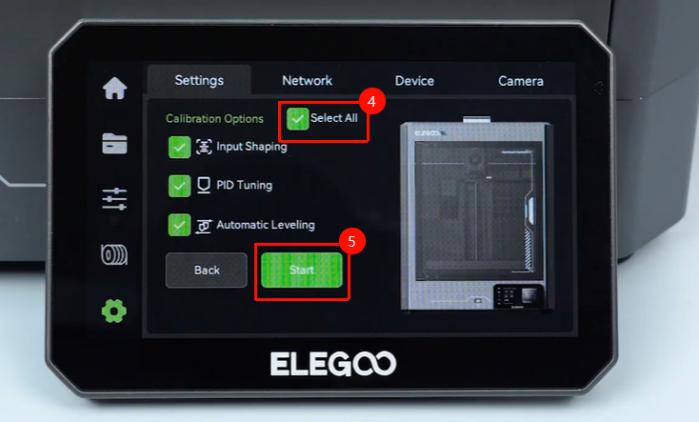
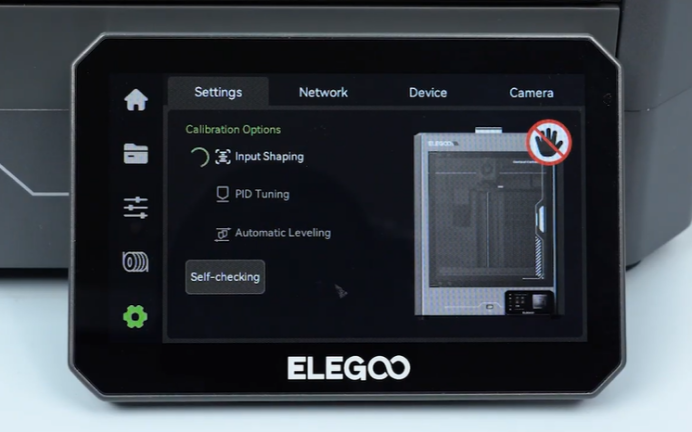
On the touch screen, select Settings - Calibration - One-Click Self-Check - Select All - Start. The printer is ready for use after the self check.