¶ Tools and Materials
- 2.0 mm Allen key
- A Phillips screwdriver
- A new heated bed control board
¶ Tutorial Video
¶ Instructions
Turn the power switch OFF (symbol "〇") and unplug the power supply cable.
¶ Remove the old heated bed control board
-
Remove the lid.

-
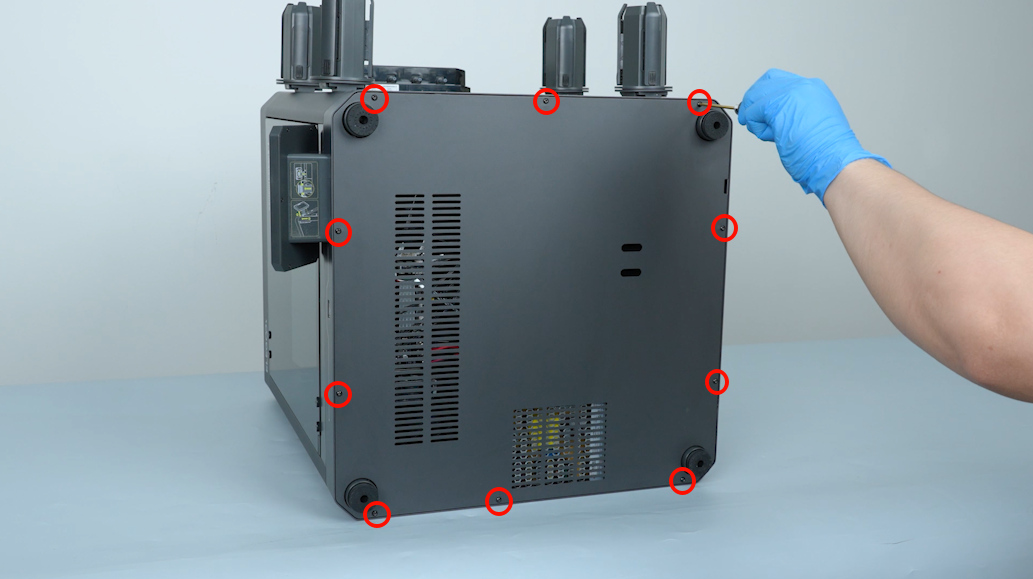
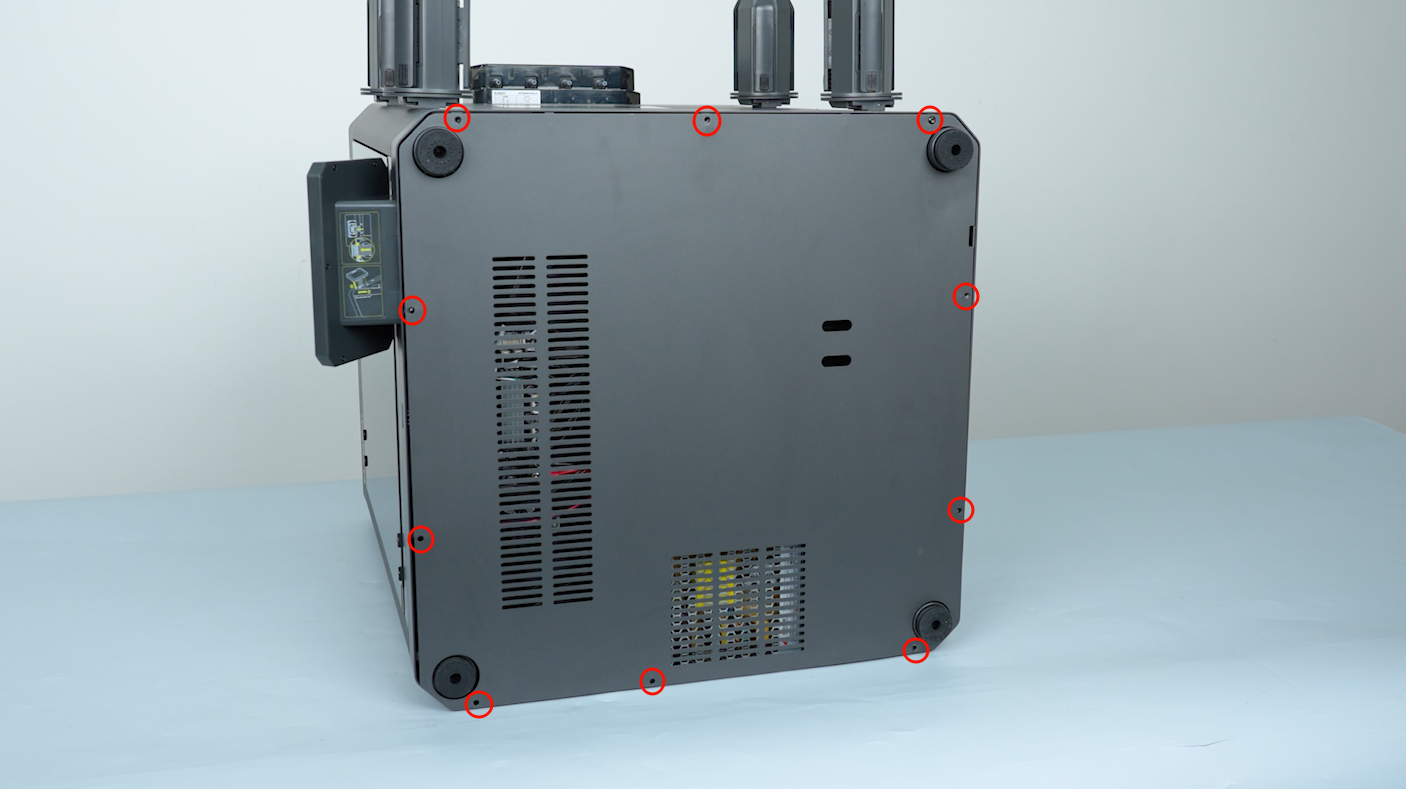
Release and remove the ten screws securing the bottom cover with a 2.0 mm Allen key.
-
Unplug the signal cable of the heated bed control board.
-
Open the cover.
-
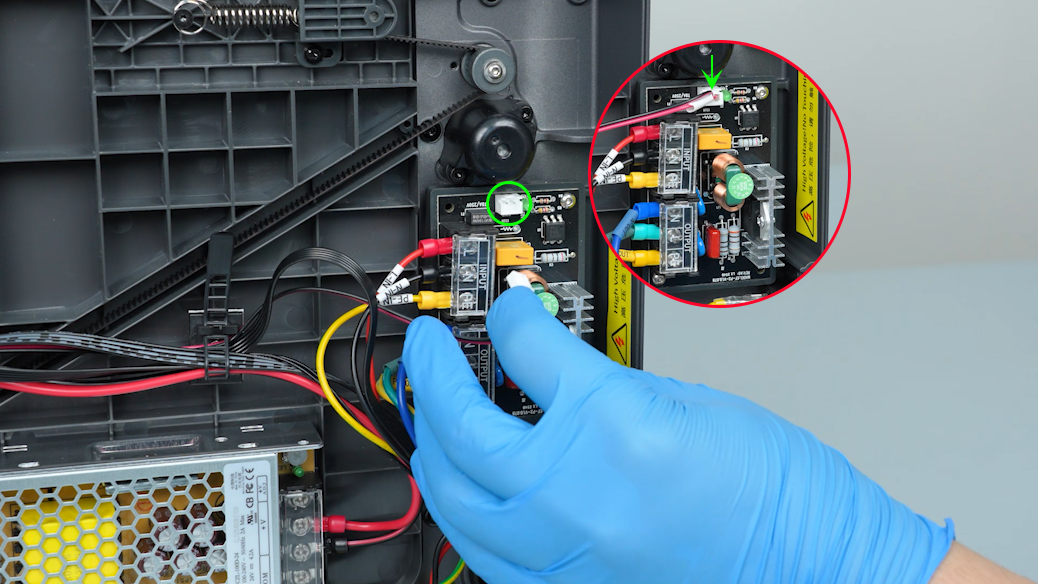
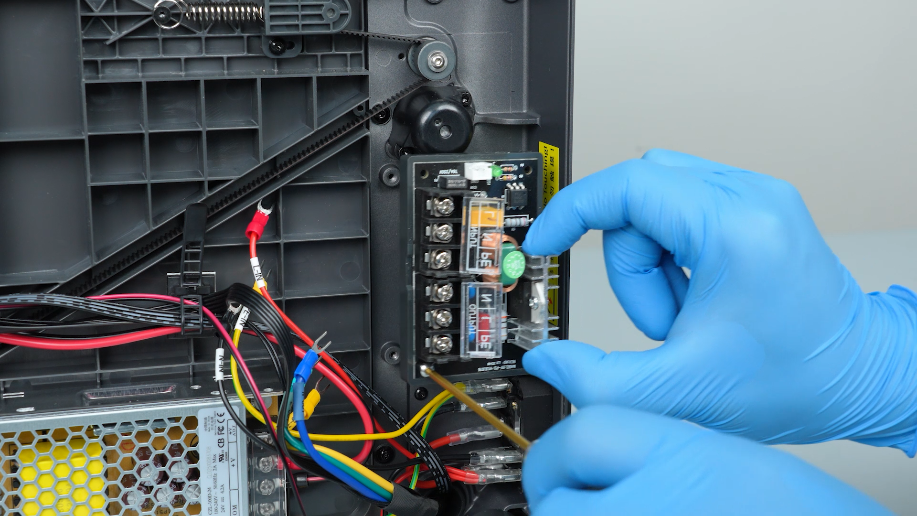
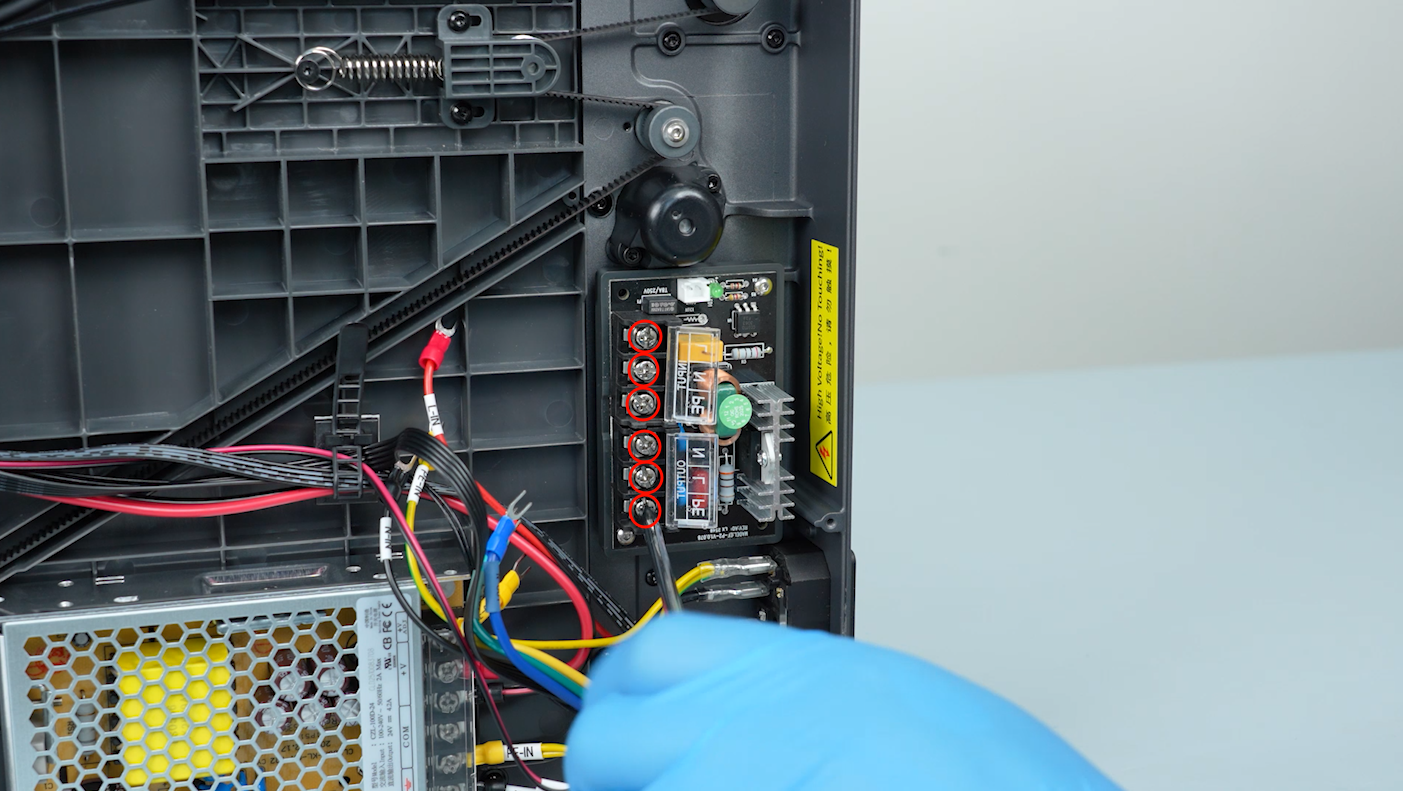
Loosen the screw with a Phillips screwdriver and unplug the input wires and the output wires of the heated bed control board.
-
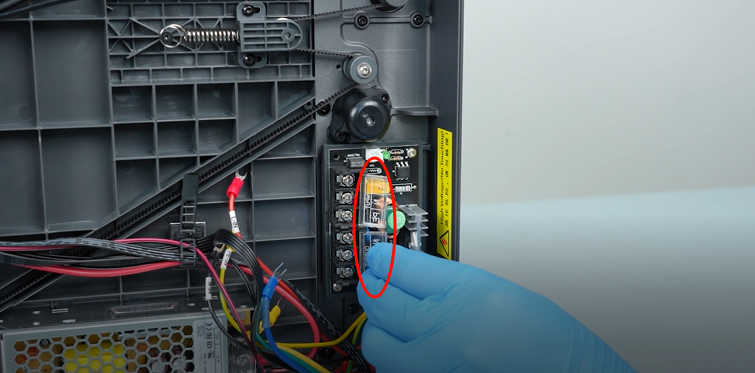
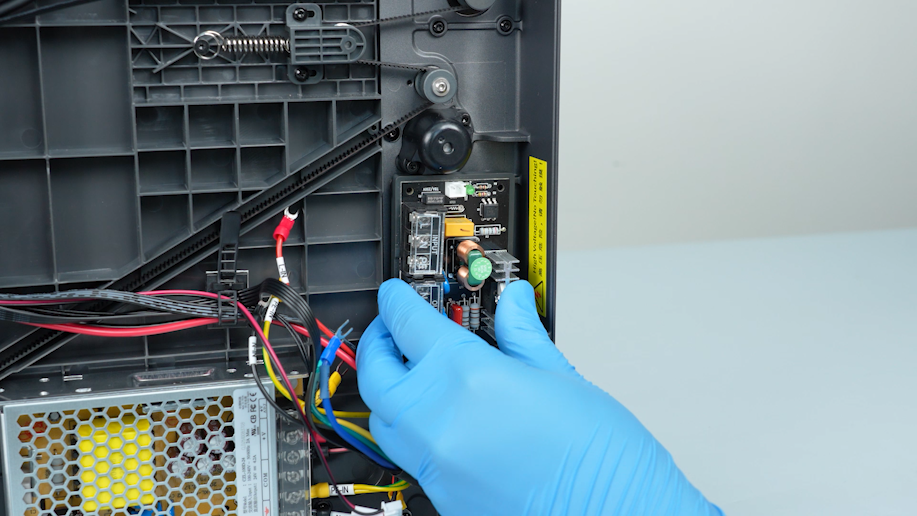
Release and remove the two screws securing the heated bed control board with a 2.0 mm Allen key. Remove the old heated bed control board.

¶ Install the new heated bed control board
-
Put the heated bed control board in the installation position.
-
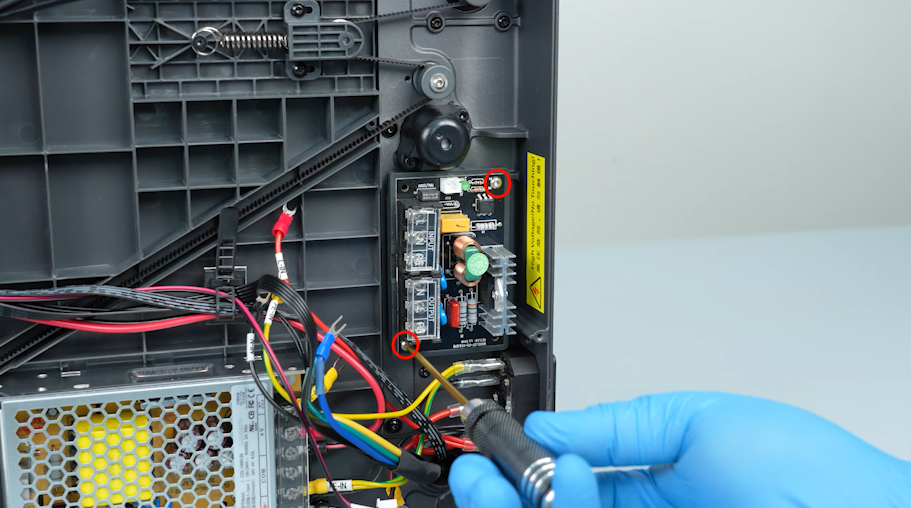
Tighten the two screws securing the heated bed control board with a 2.0 mm Allen key.
-
Open the heated bed control board cover.
-
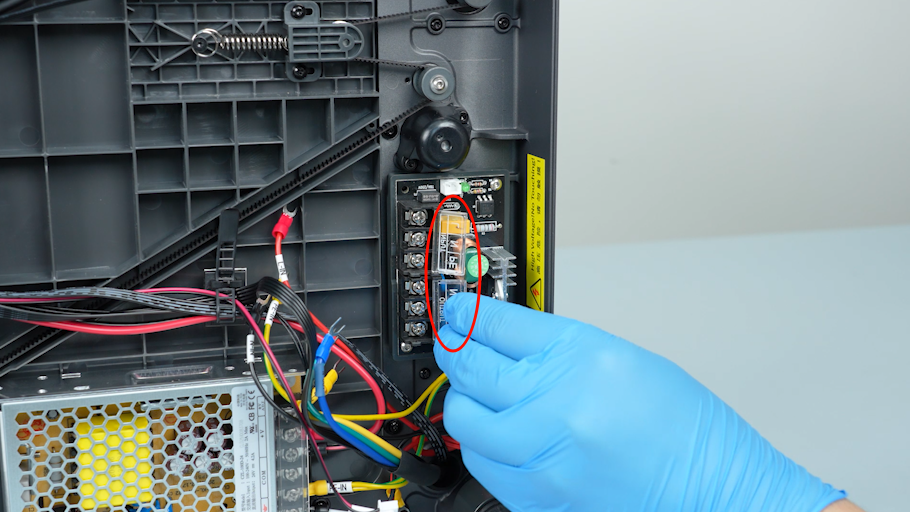
Loosen the screw securing the heated bed control board ports with a Phillips screwdriver.
-
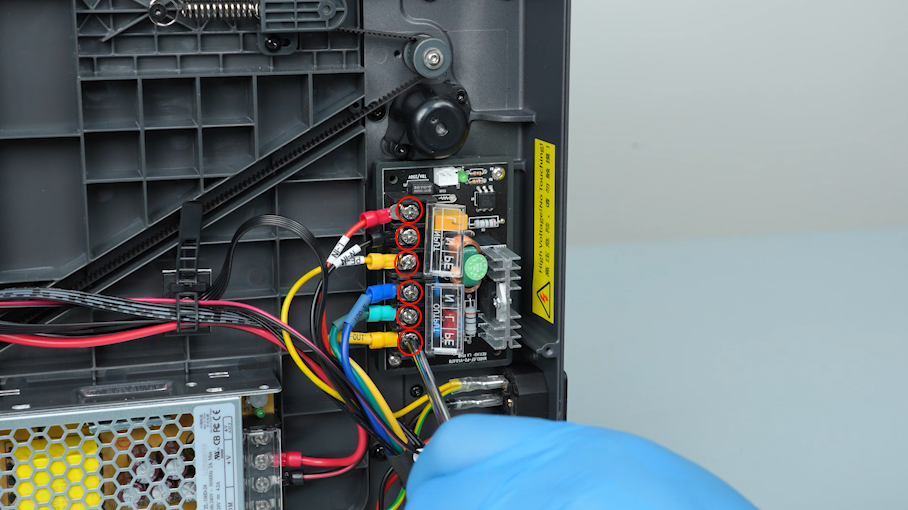
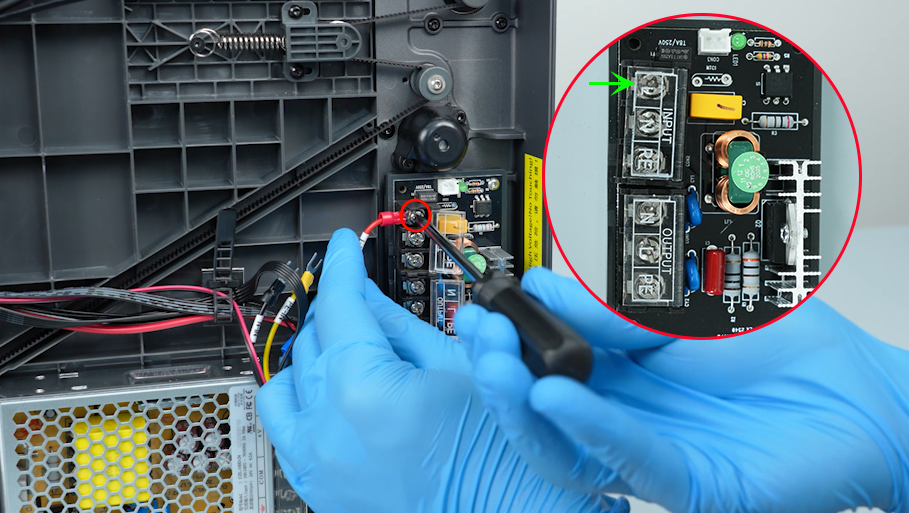
Connect the L-IN red wire to the INPUT-L port. Secure the securing screw with the Phillips screwdriver.
-
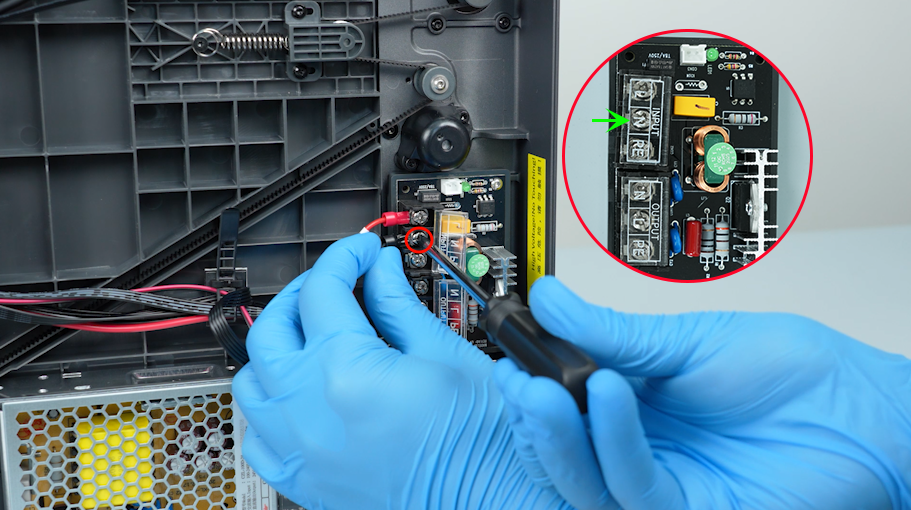
Connect the N-IN black wire to the INPUT-N port. Secure the securing screw with the Phillips screwdriver.
-
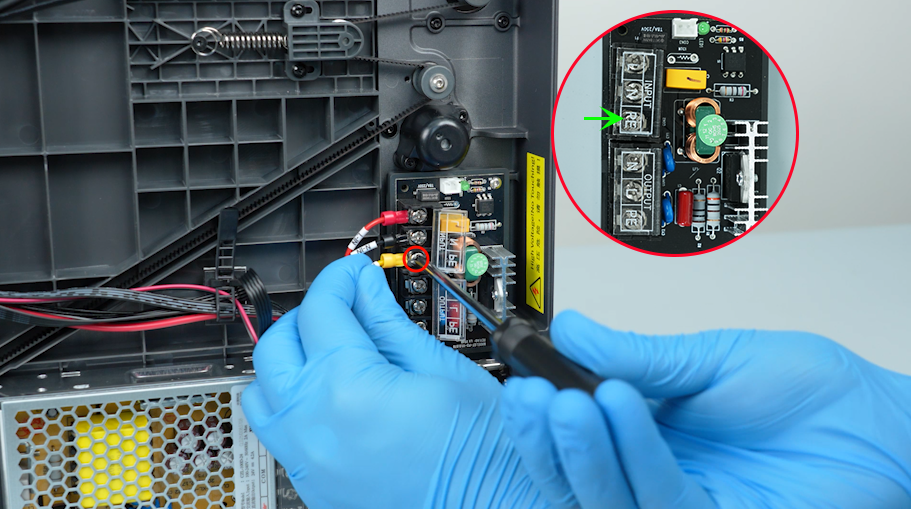
Connect the PE-IN yellow wire to the INPUT-PE port. Secure the securing screw with the Phillips screwdriver.
-
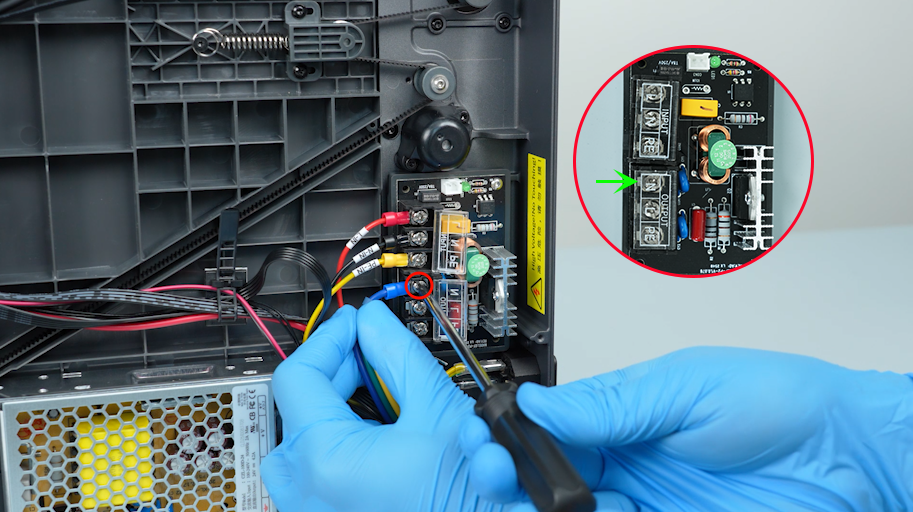
Secure the securing screw with the Phillips screwdriver. Connect the N-OUT blue wire to the OUTPUT-N port. Secure the securing screw with the Phillips screwdriver.
-
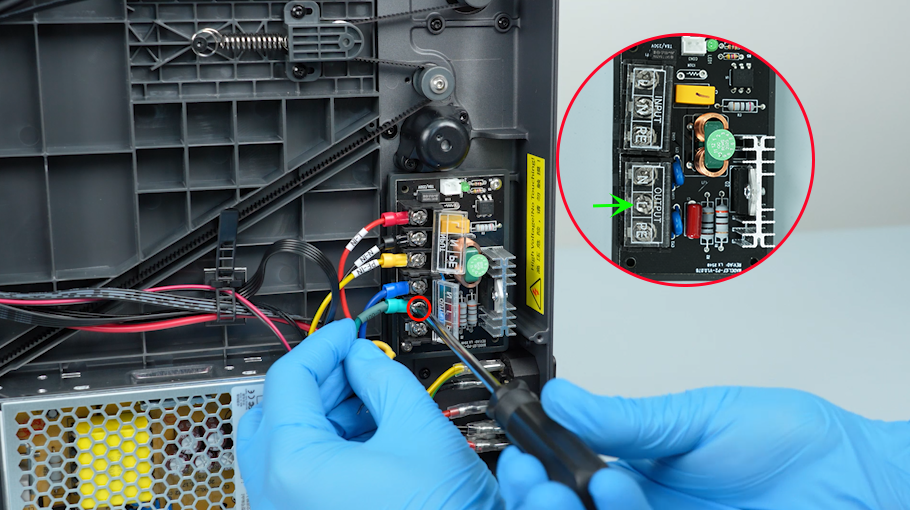
Connect the L-OUT green wire to the OUTPUT-L port. Secure the securing screw with the Phillips screwdriver.
-
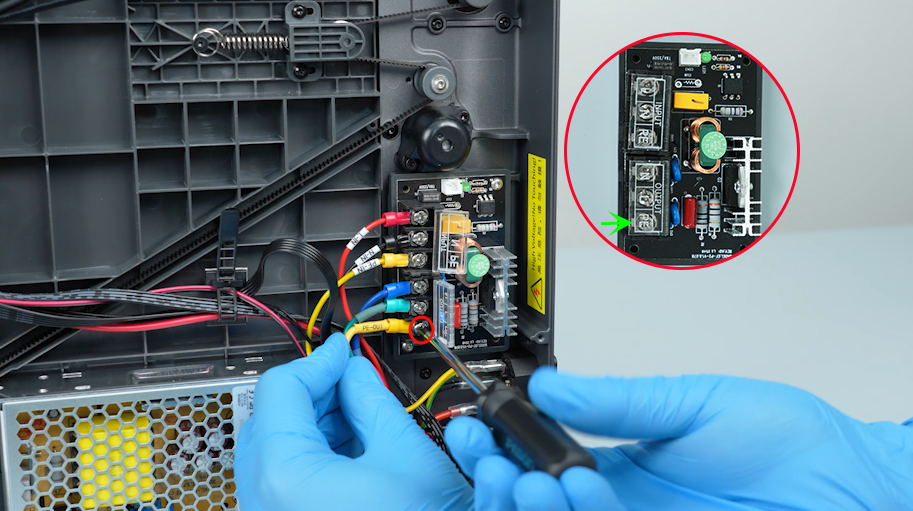
Connect the PE-OUT yellow wire to the OUTPUT-PE port. Secure the securing screw with the Phillips screwdriver.
-
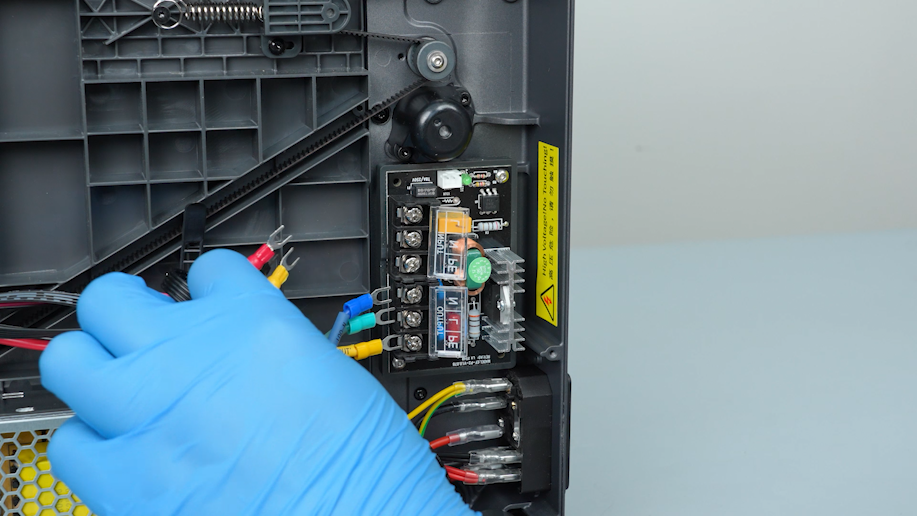
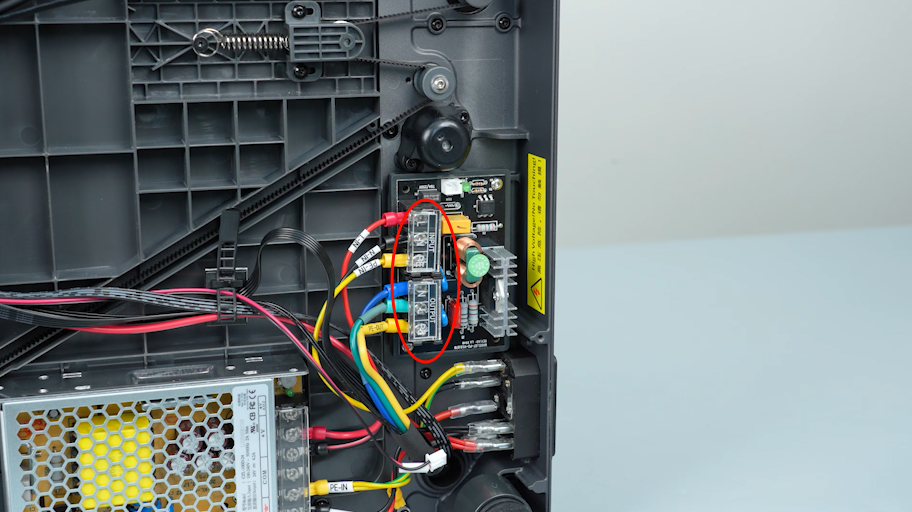
Close the heated bed control board cover.
-
Plug in the signal cable of the heated bed control board.

-
Tighten the ten screws securing the bottom cover with a 2.0 mm Allen key.
¶ Restart the Printer
-
Plug in the power supply cable. Turn the power switch ON (symbol "|") .
-
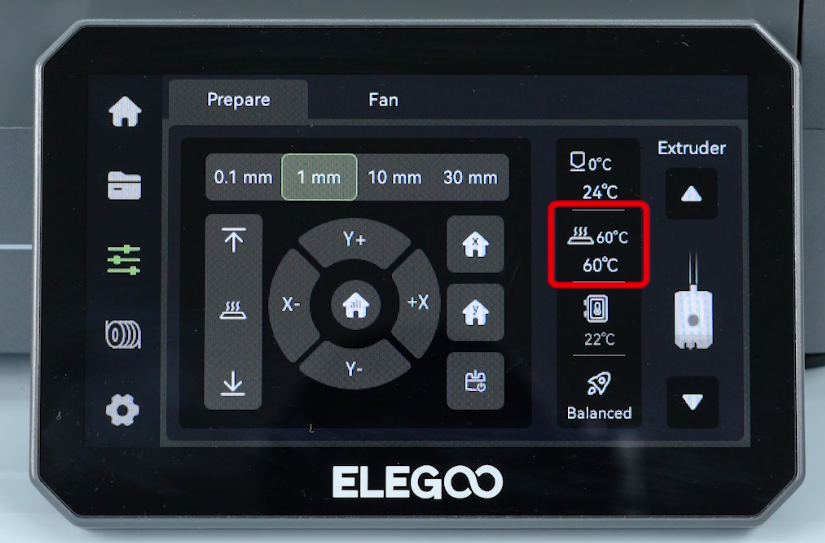
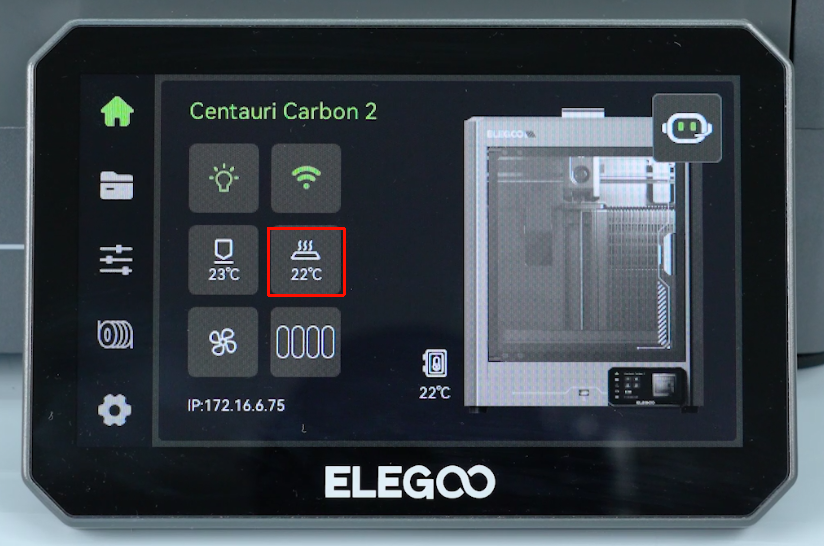
Heat the heated bed up via the touch screen.
-
Confirm that the heated bed can heat up normally and the printer is ready for use.