¶ Possible Causes
- Applying lateral force during disassembly may wear the edges of the screw socket.
- The screwdriver is worn.
- The screw is worn.
¶ Required Tools
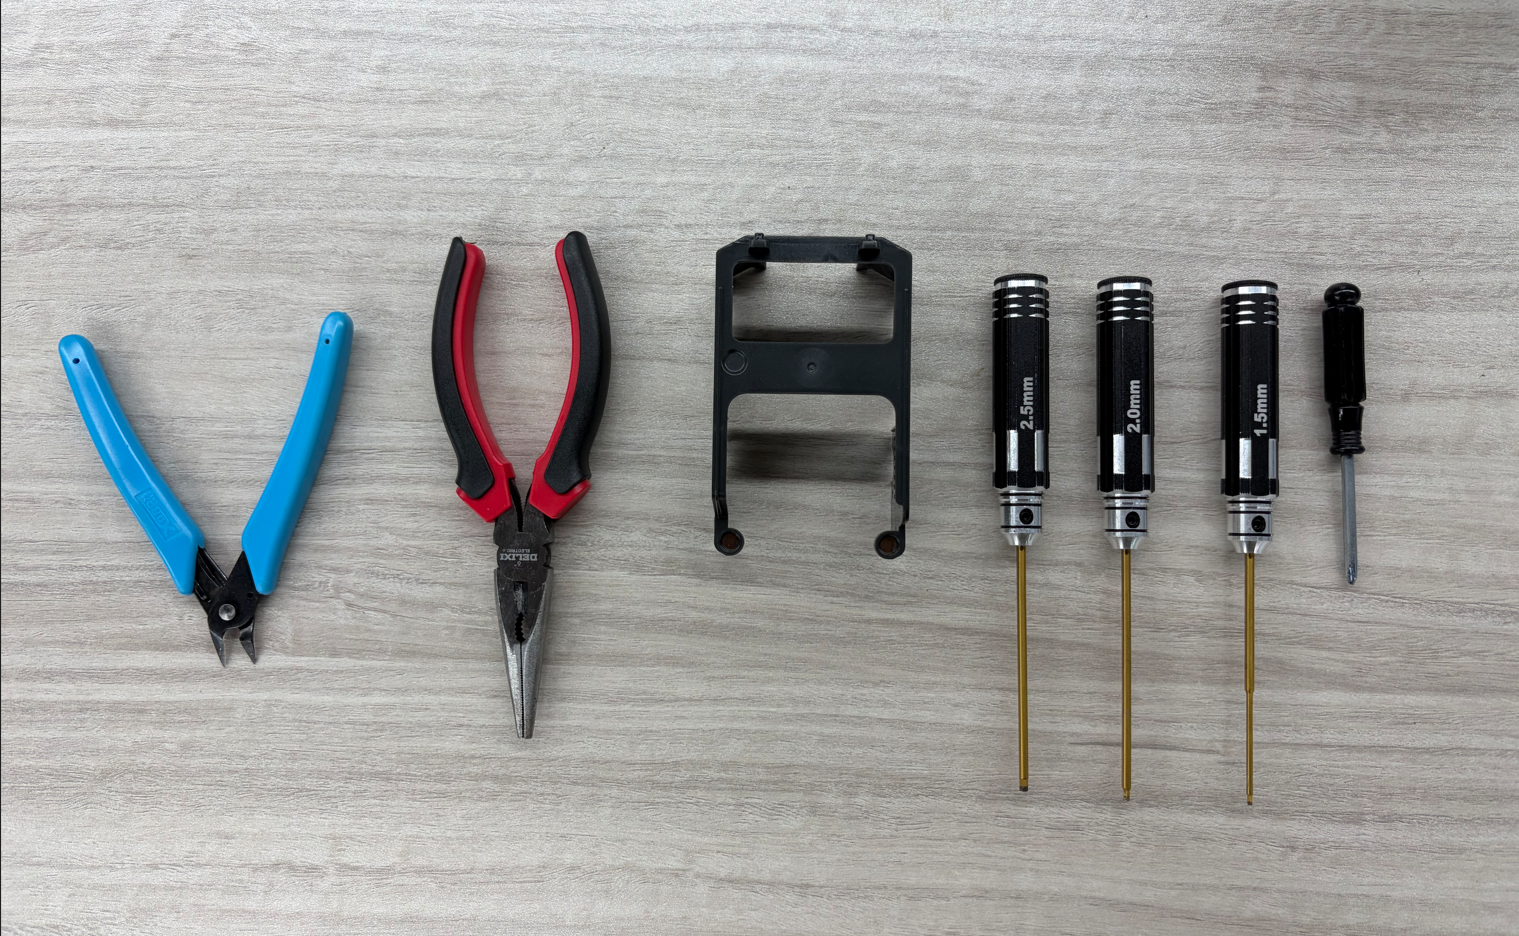
- Diagonal cutters
- Needle-nose pliers
- New extruder housing
- Phillips screwdriver
- 1.5 mm Allen key
- 2.0 mm Allen key
- 2.5 mm Allen key
- Rubber band
¶ Method 1 — Replace the Screwdriver
If the 2.0 mm hex screwdriver is worn, purchase a new one from an online store or hardware store. Search for "2.0 mm precision hex screwdriver".
¶ Method 2 — Use a Rubber Band to Assist Removal
- Place a rubber band over the screw, making sure it is aligned with the hex socket.
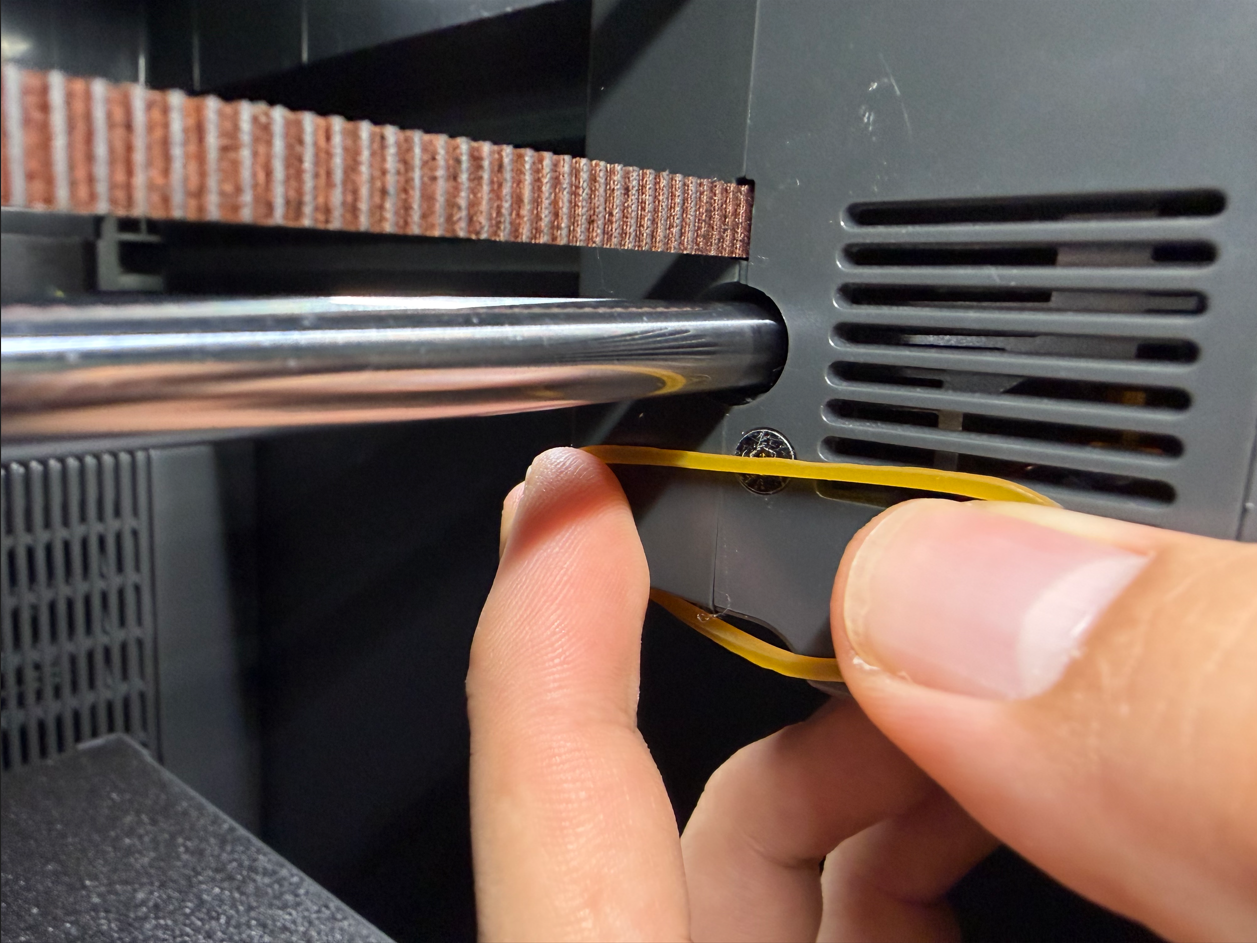
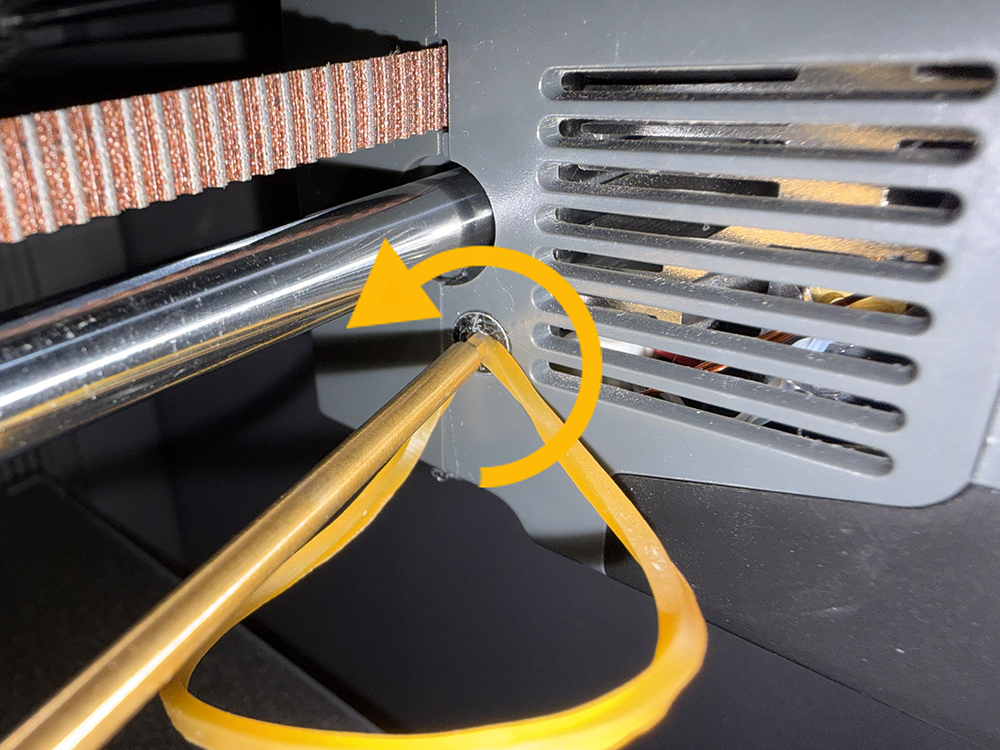
- Press the screwdriver vertically into the hex socket so that the rubber band fills the gaps in the socket. Then, turn the screwdriver counterclockwise to remove the screw.
¶ Method 3 — Cut the Tool Head Housing to Access the Stripped Screw
¶ Disconnect the Tool Head Communication Cable
- Turn off the printer and unplug the power cord.
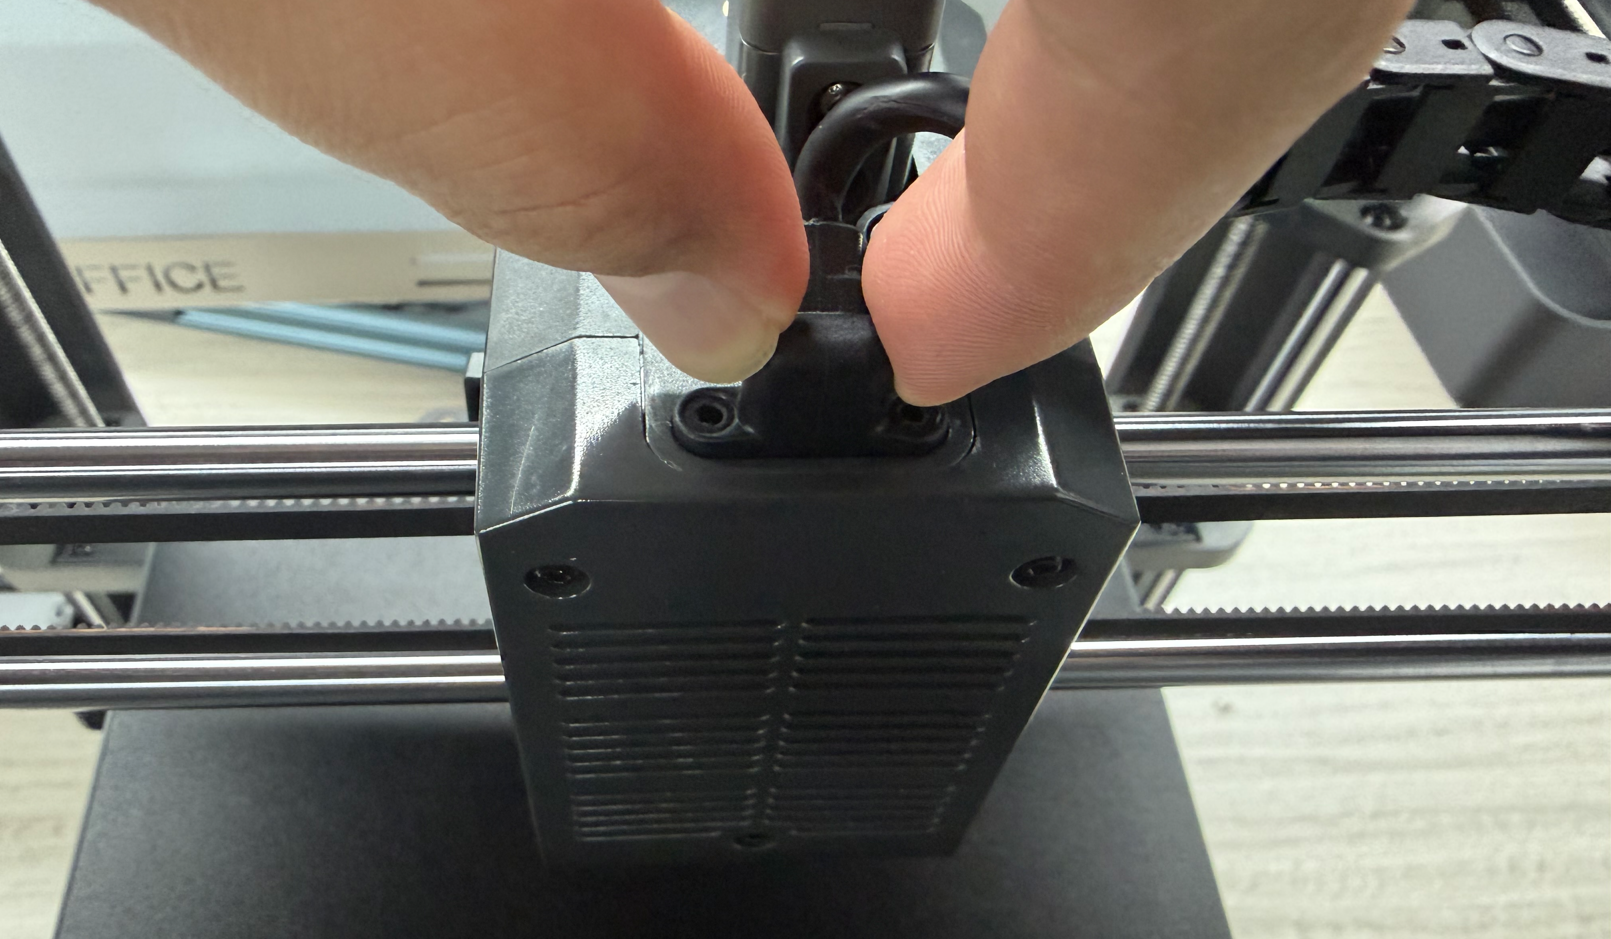
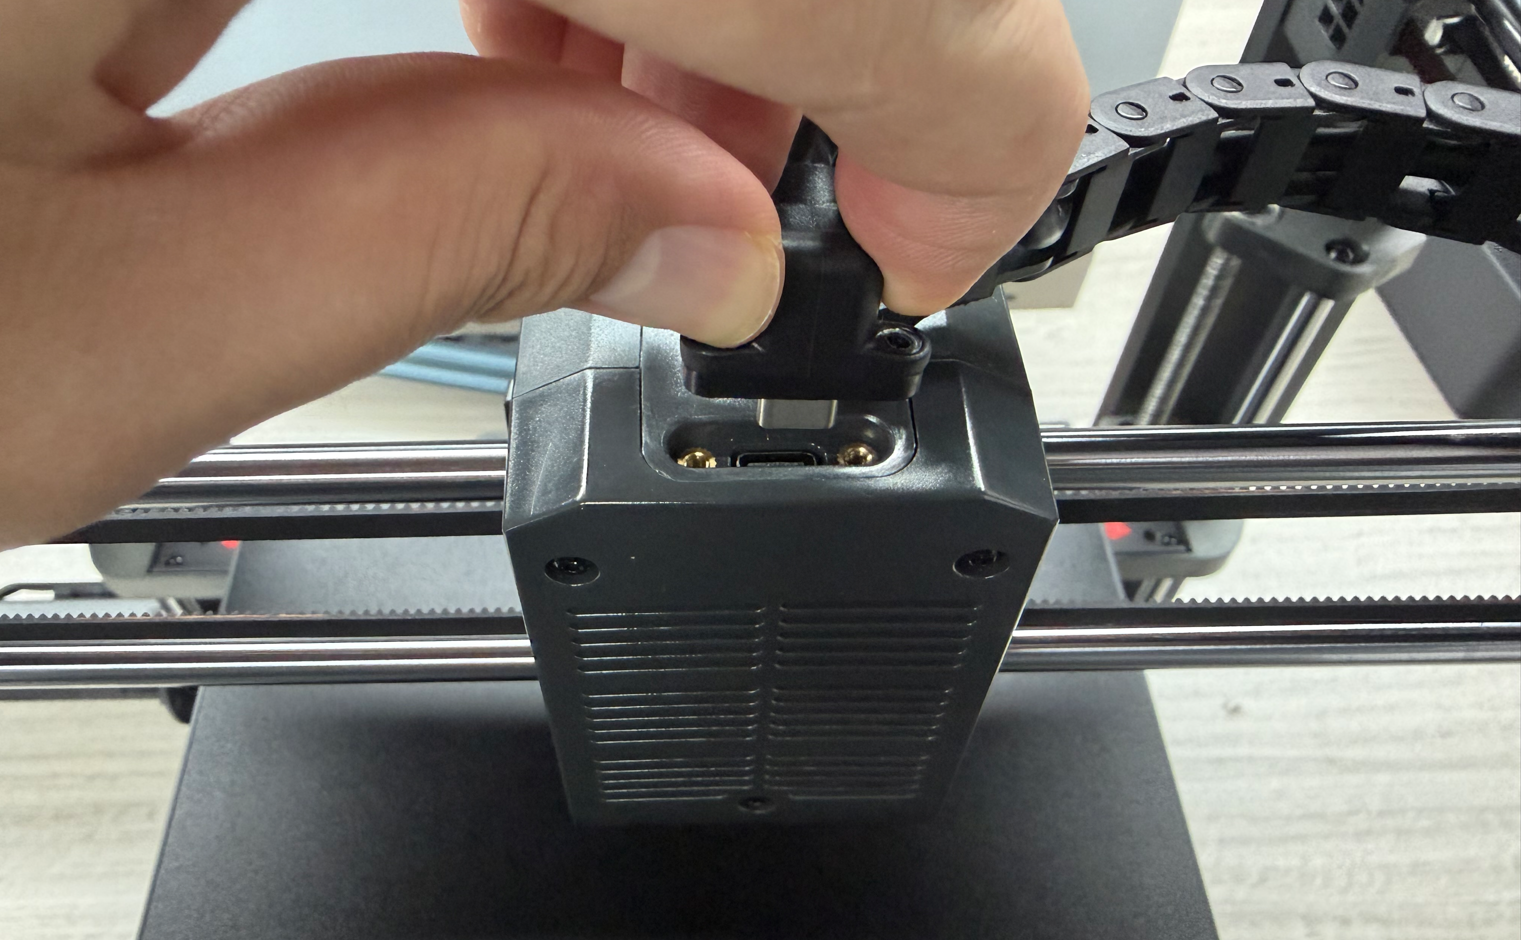
- Use a Phillips screwdriver to remove the two screws securing the tool head communication cable.
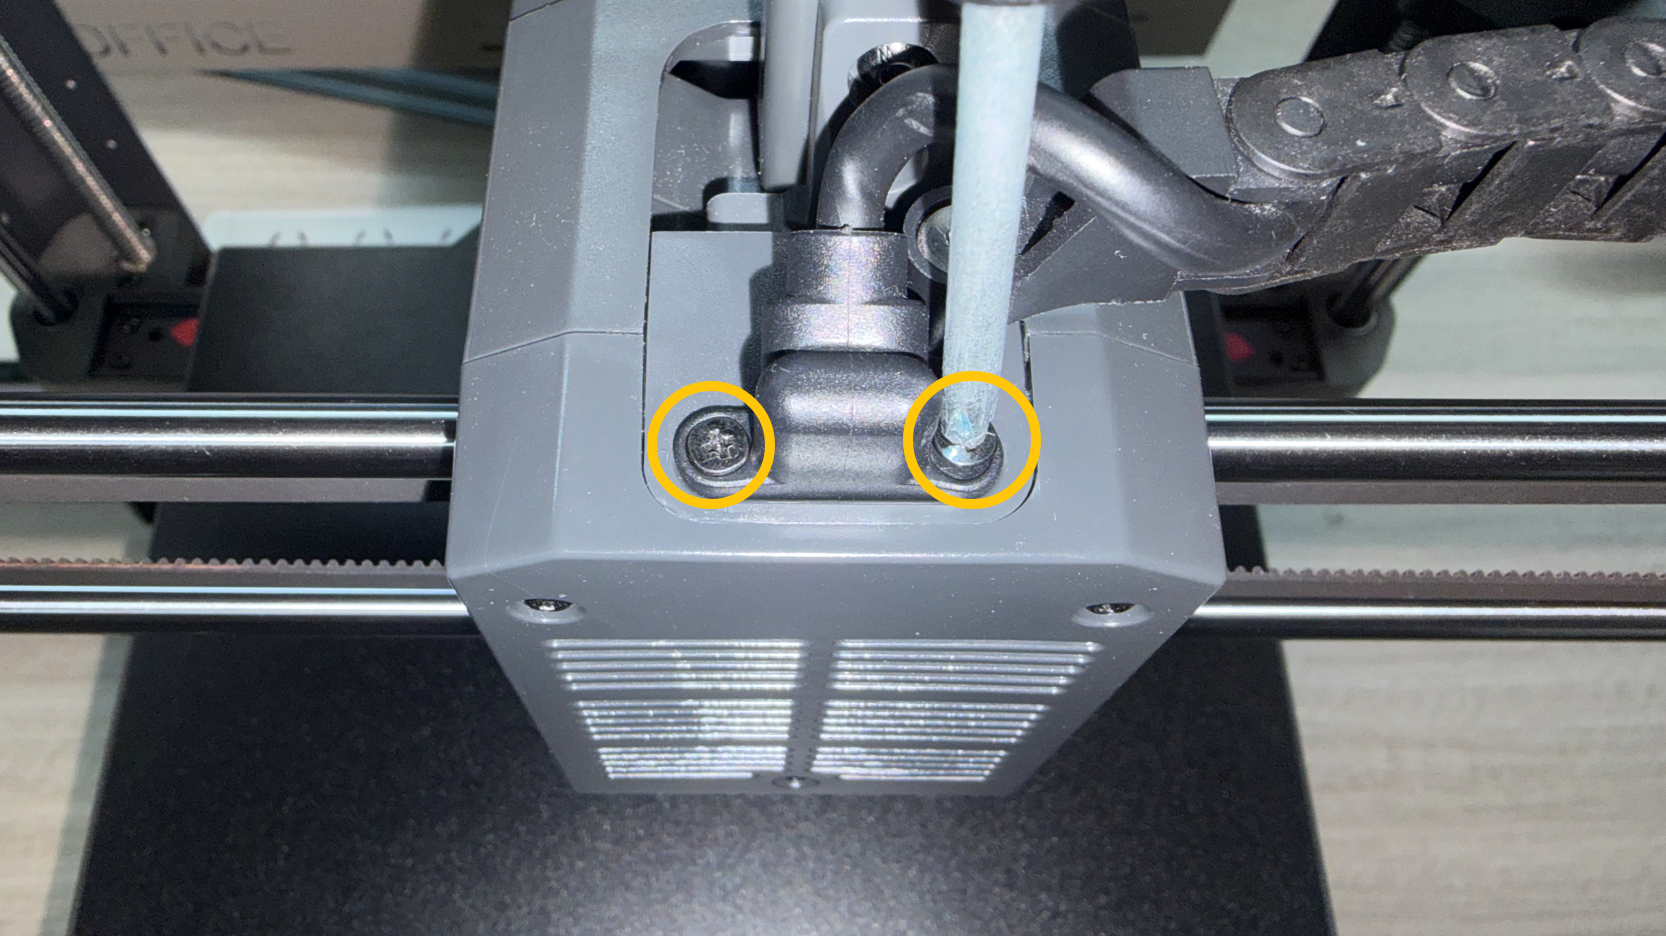
- Disconnect the tool head communication cable connector.
¶ Remove the Tank Chain
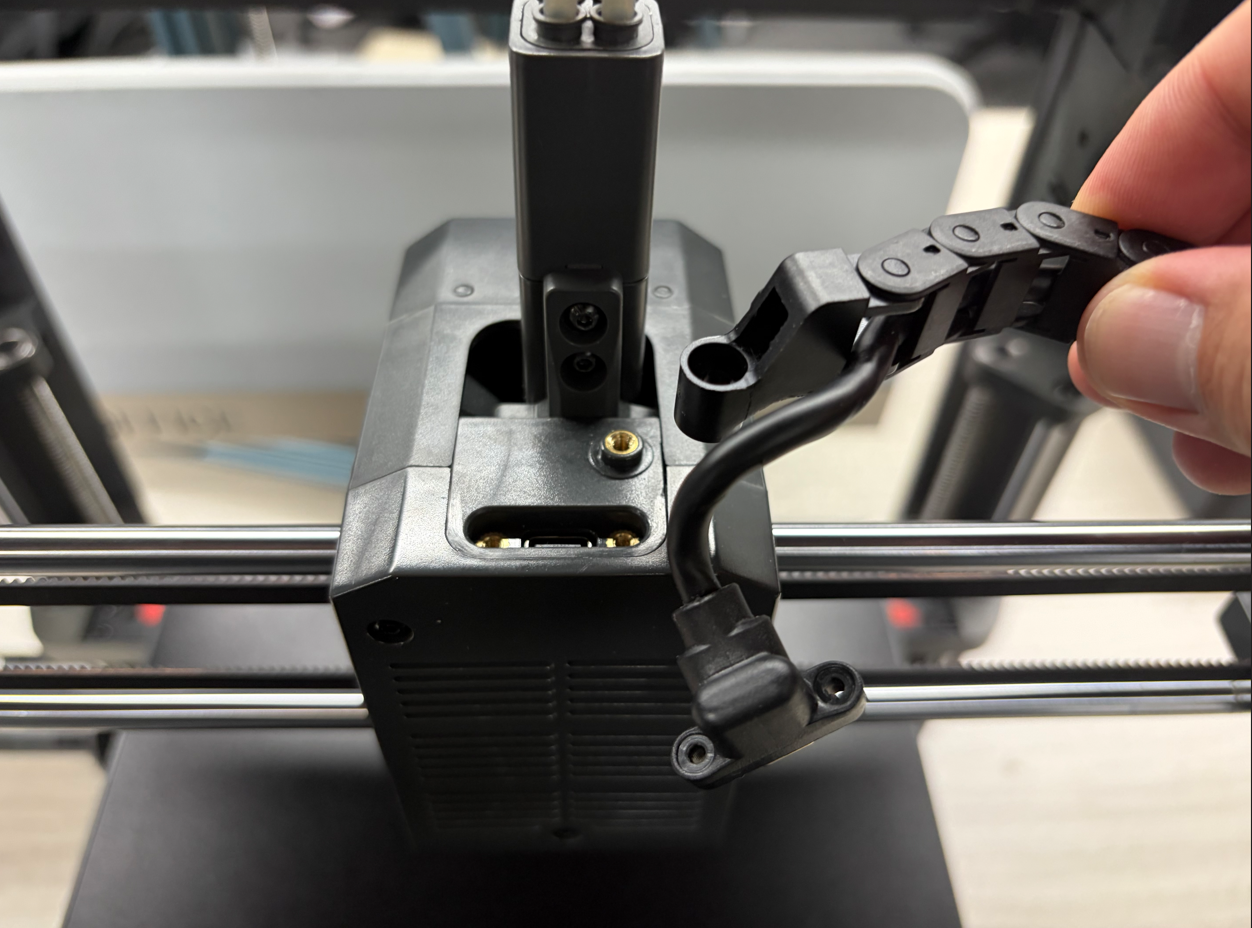
- Use a 2.5 mm Allen key to remove the screw securing the tank chain.
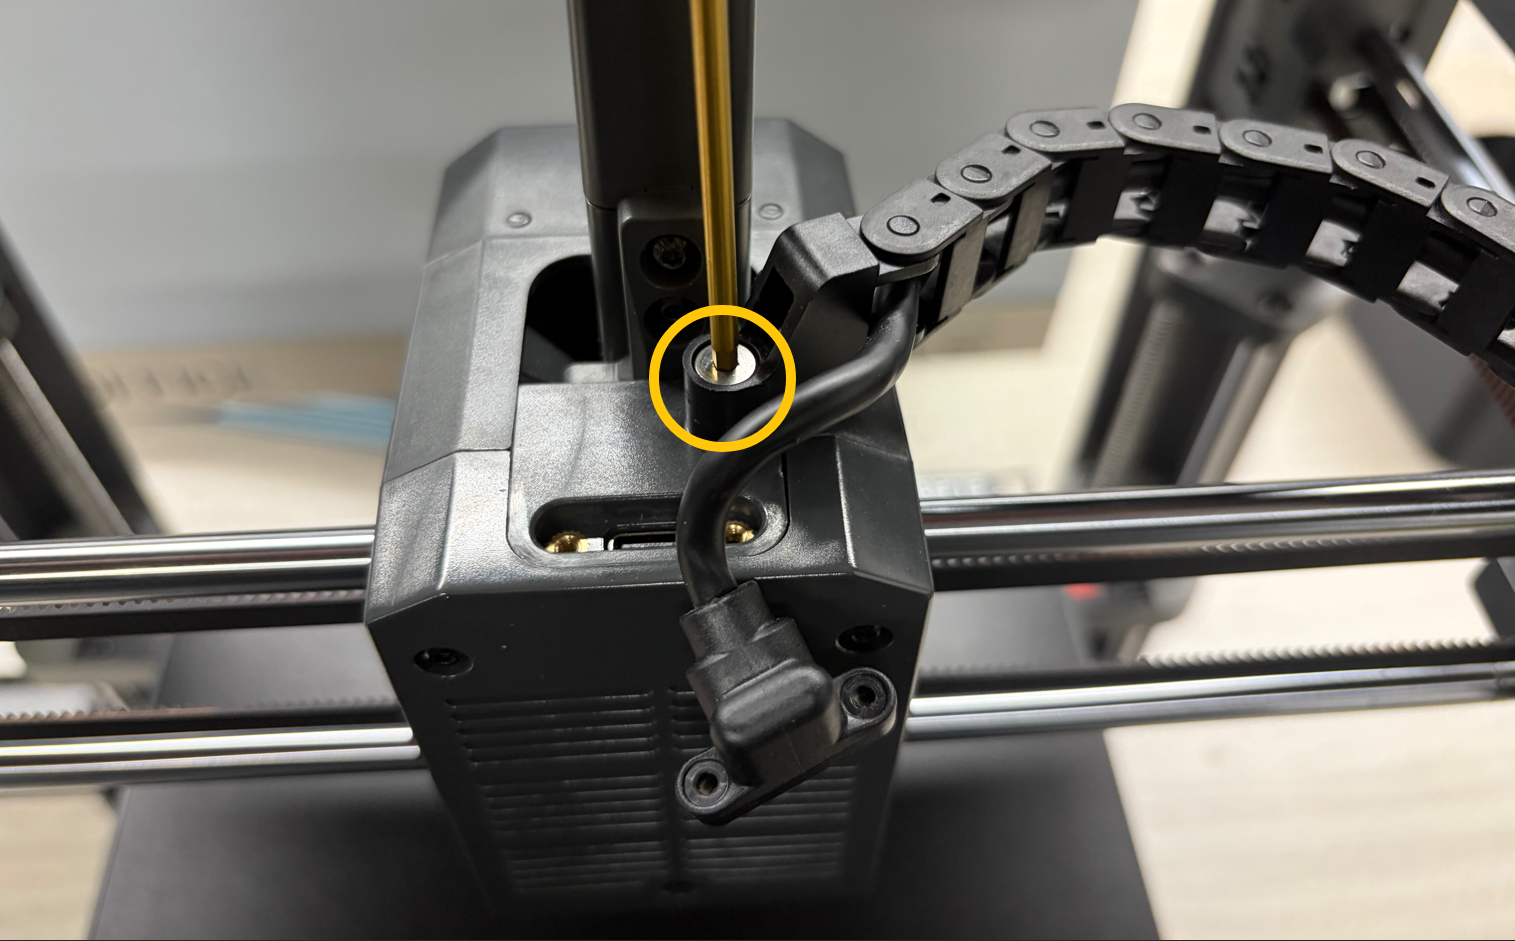
- Remove the tank chain.
¶ Remove the 4-in-1 Hub
- Use a 2.0 mm Allen key to remove the two screws securing the 4-in-1 hub.
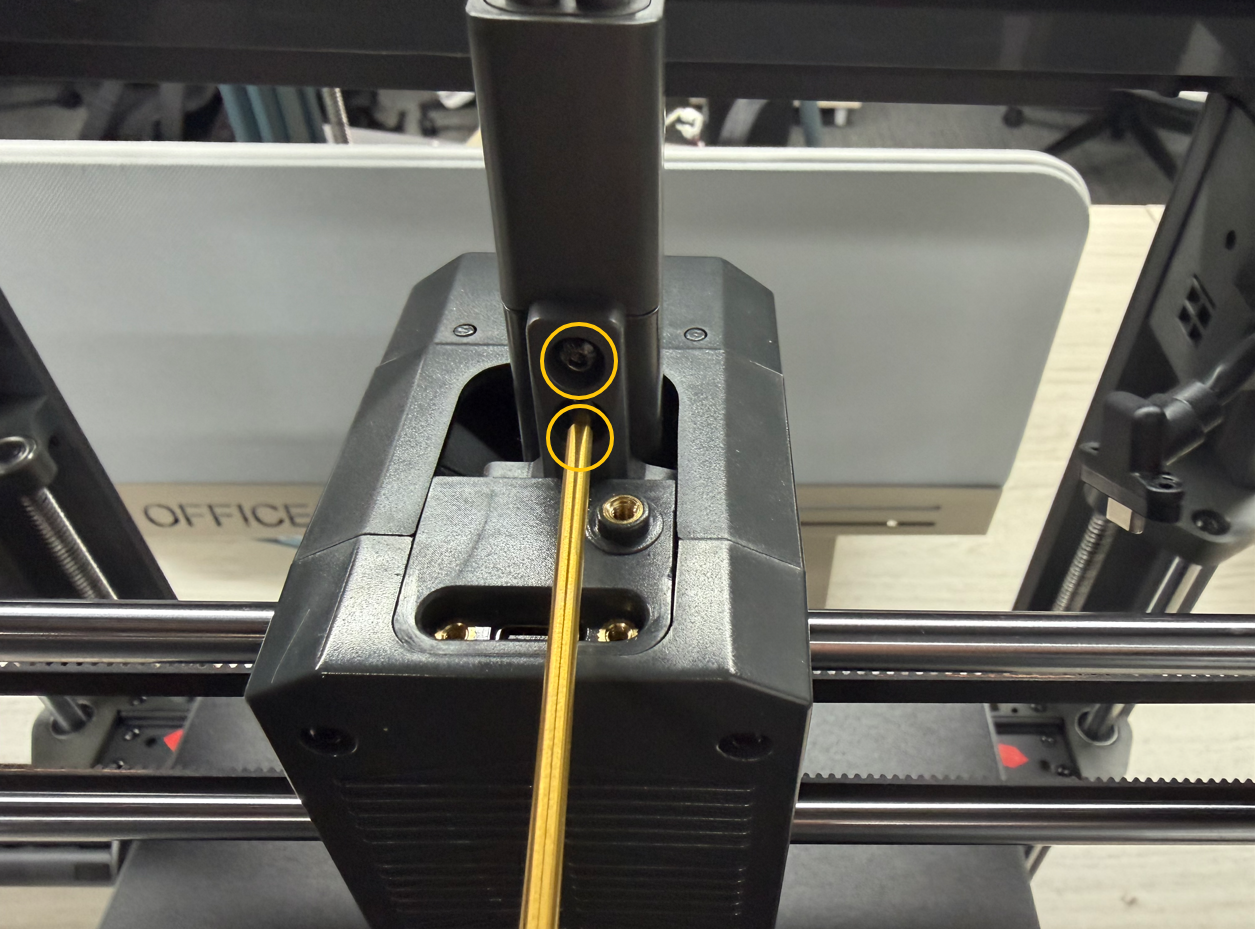
- Remove the 4-in-1 hub.
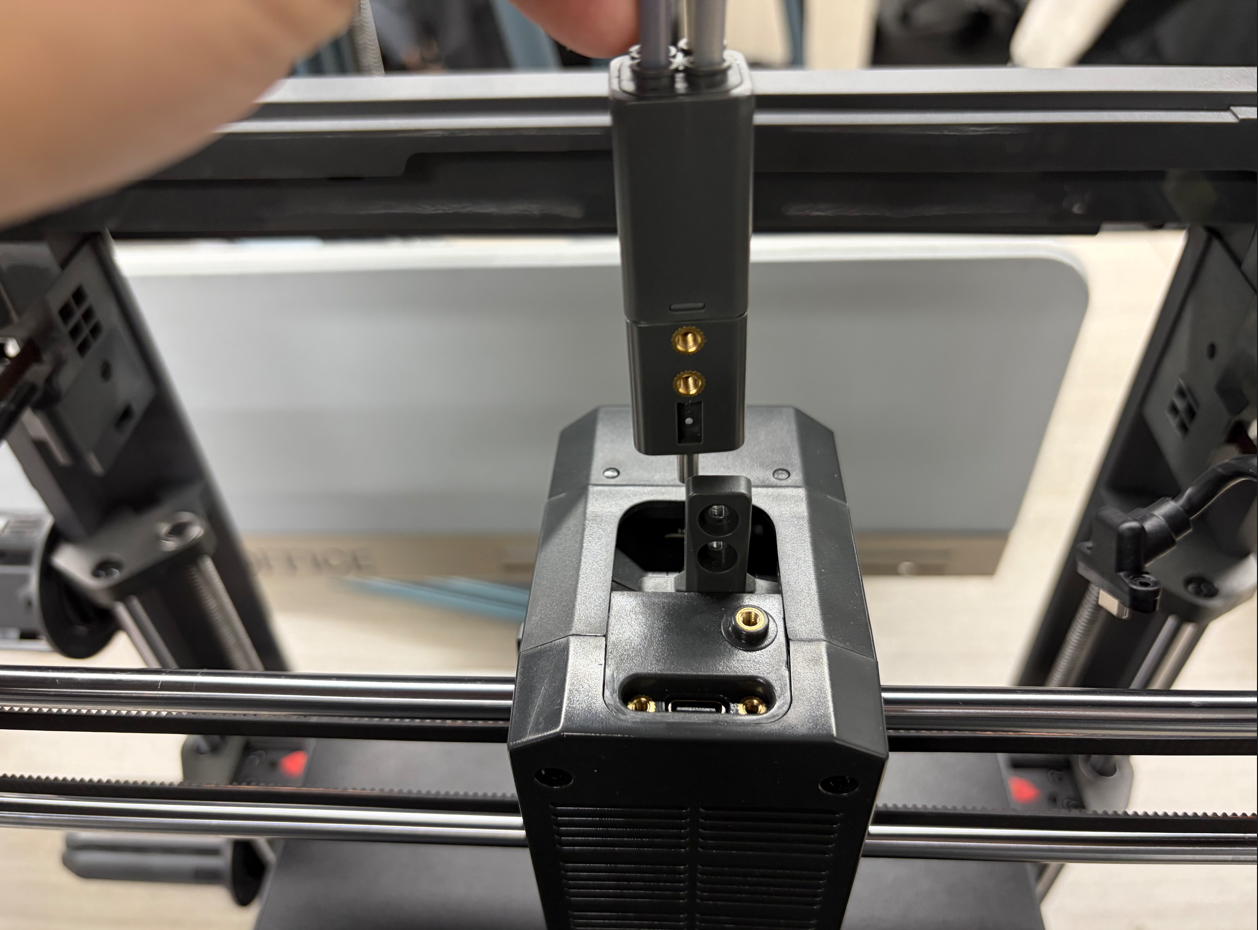
¶ Remove the Tool Head Front Cover
- Open the tool head front cover.
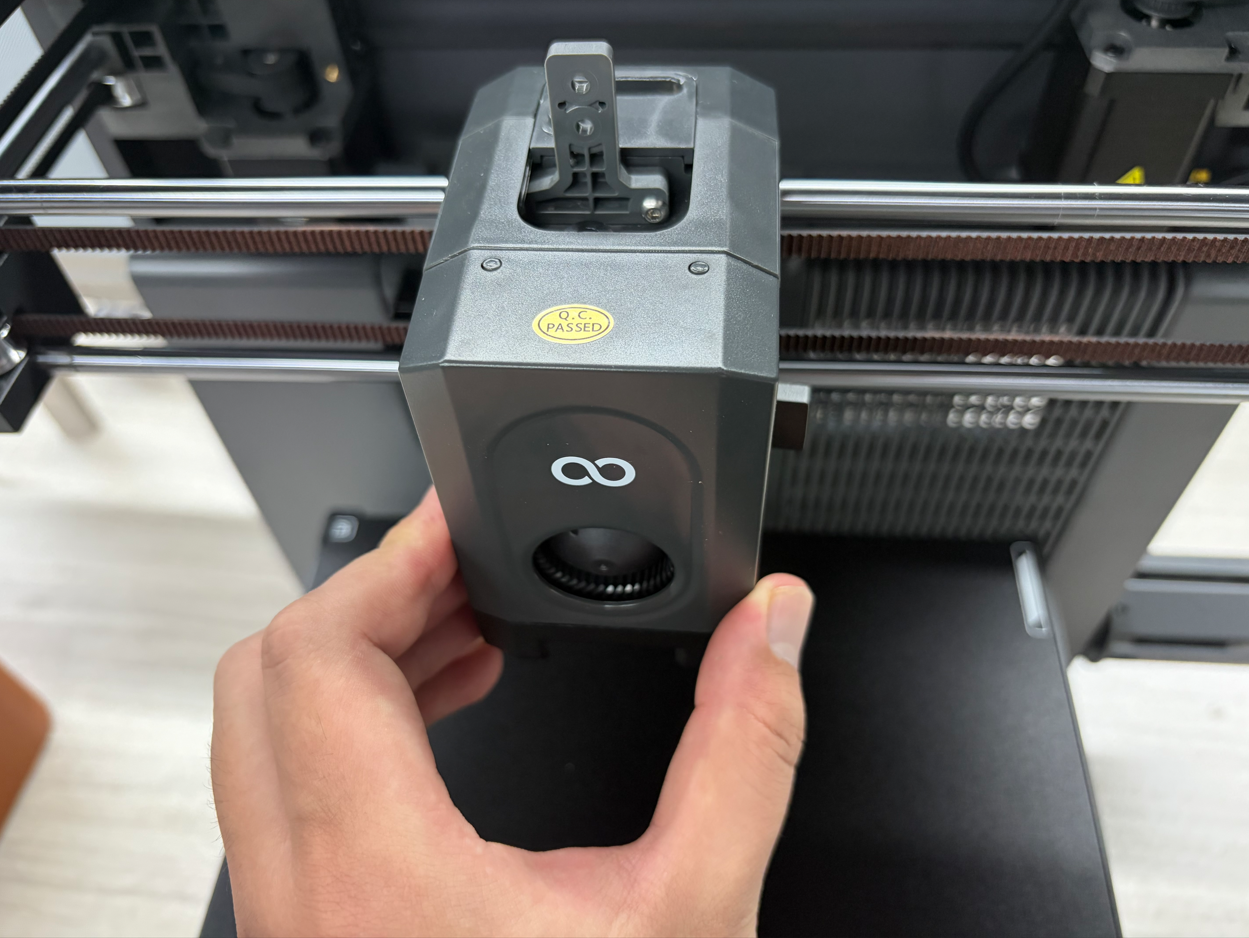
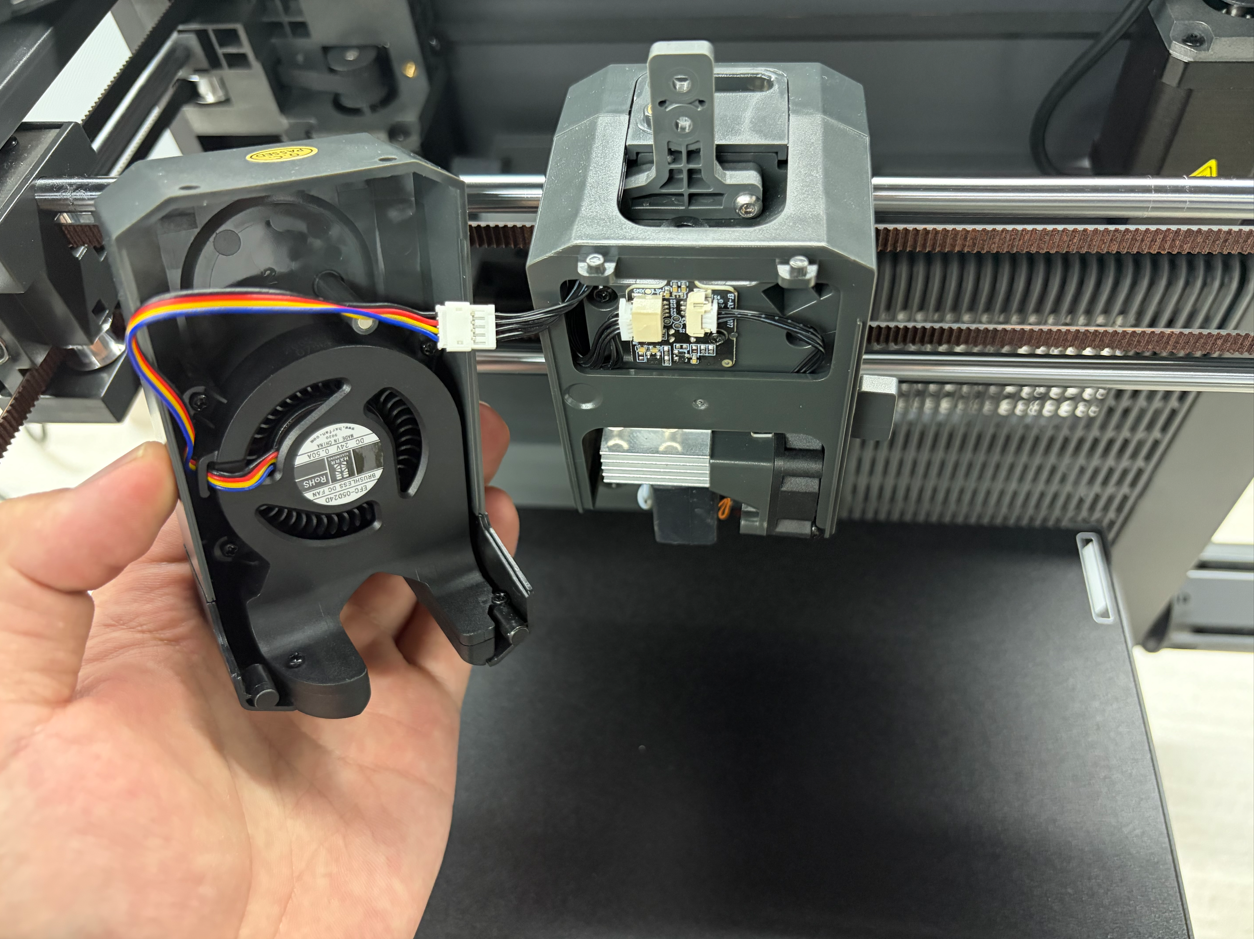
- Disconnect the tool head fan cable and remove the tool head front cover.
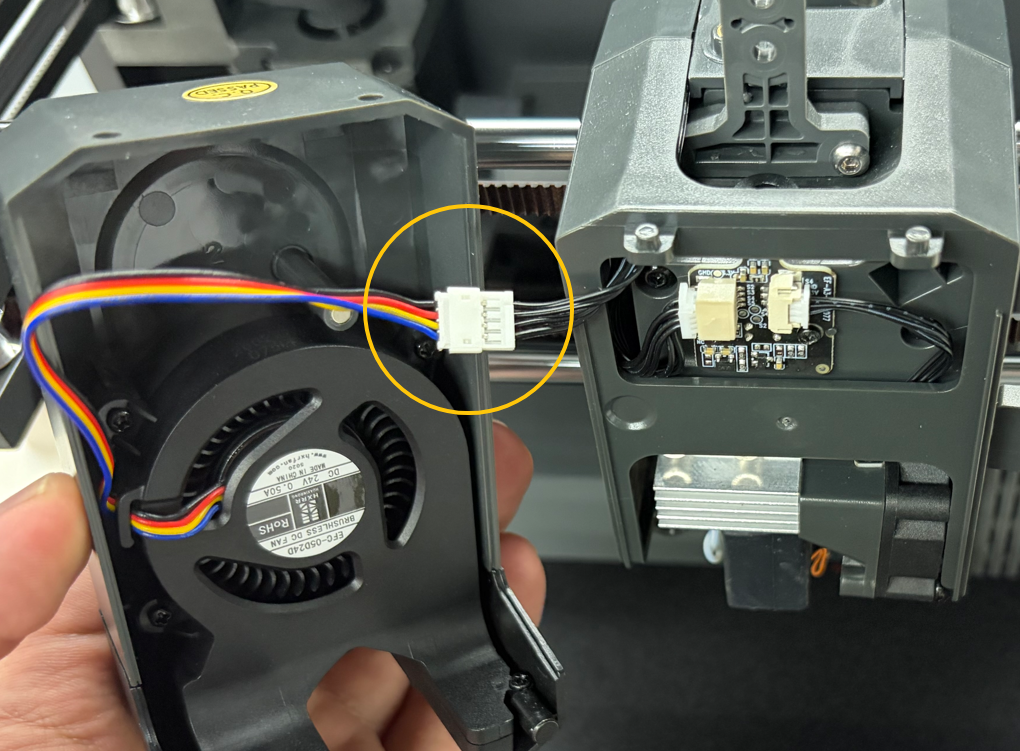
¶ Remove the Remaining Screws
Use a 2.0 mm Allen key to remove the screws on the side of the tool head housing that are not stripped.
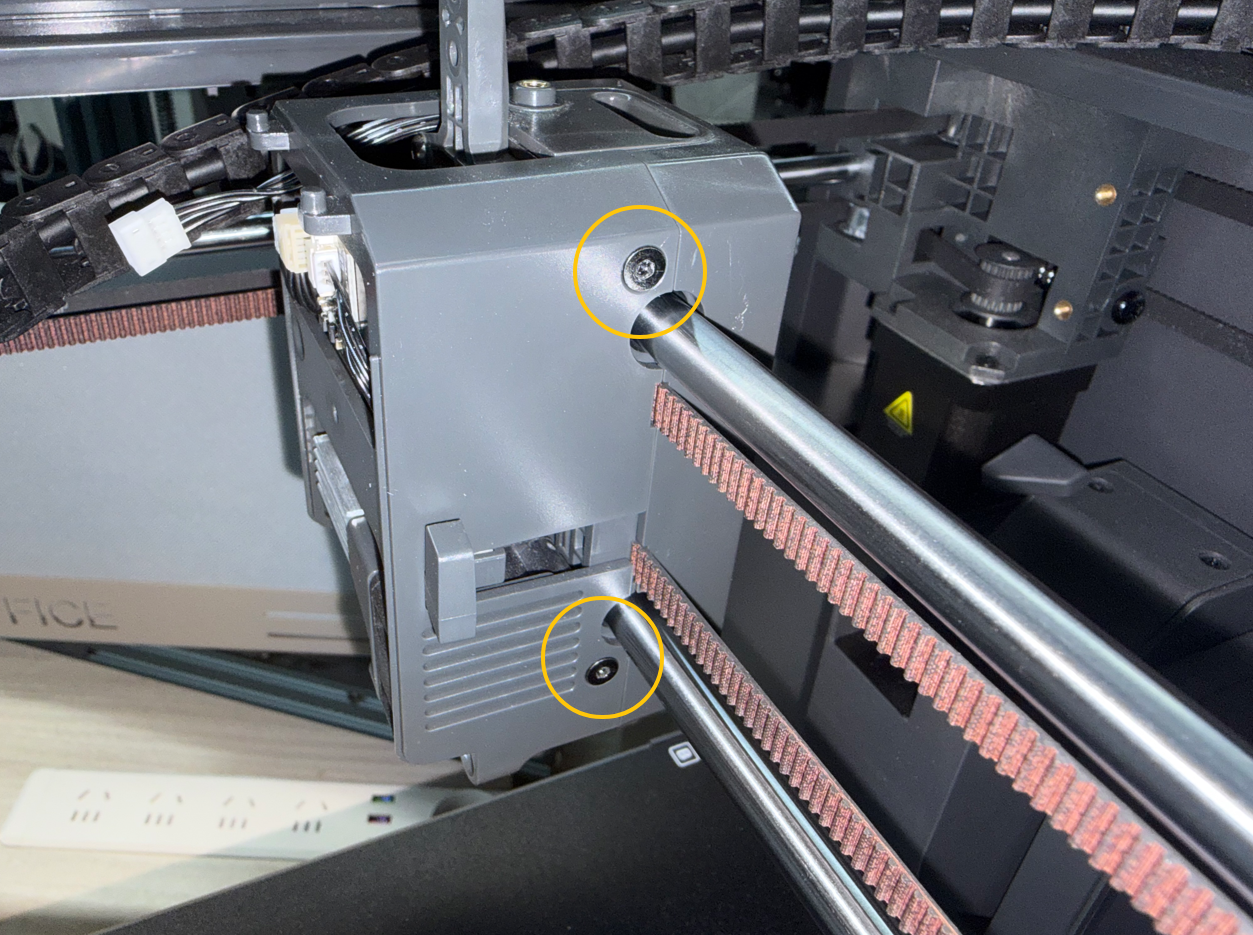
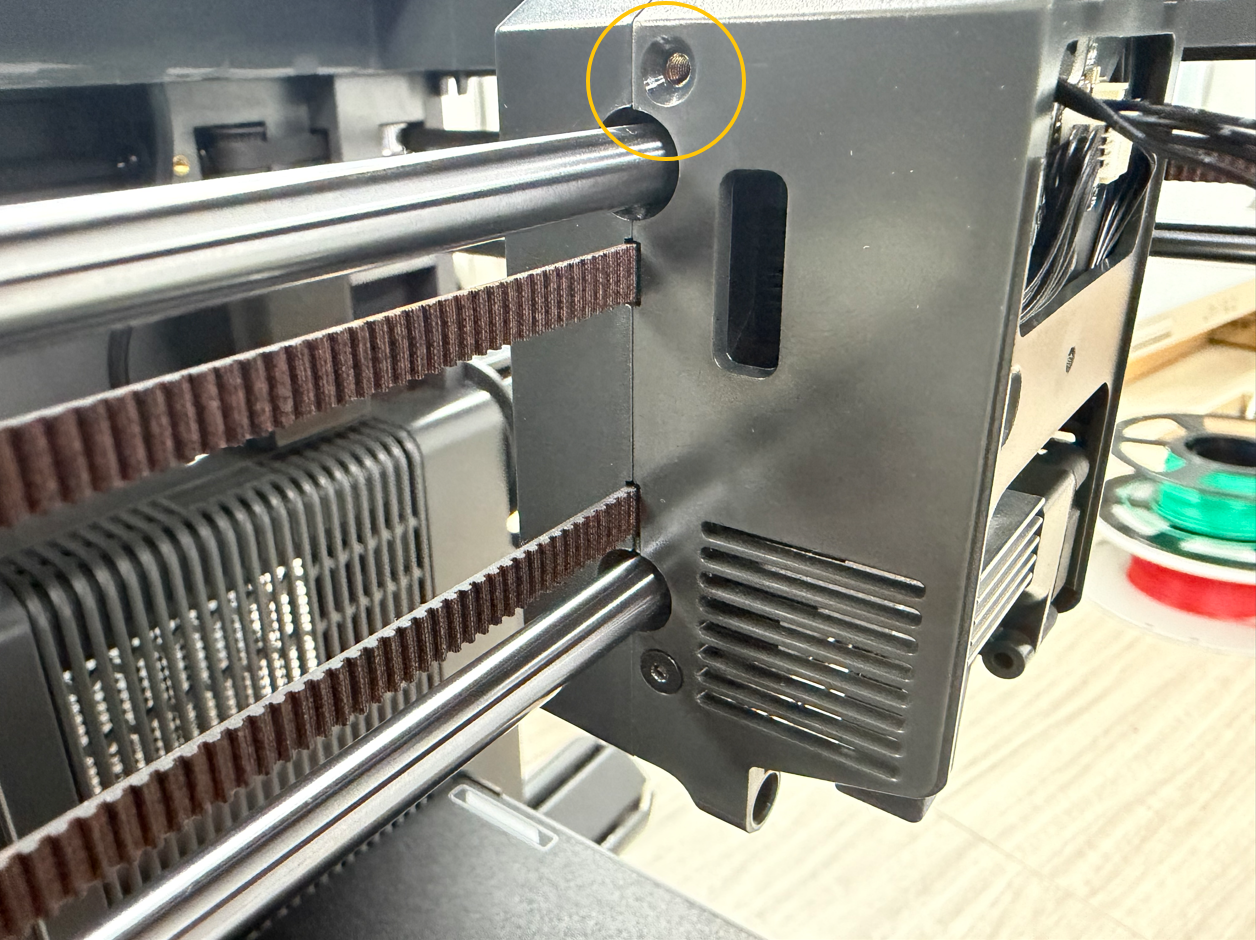
¶ Cut Tool Head Housing
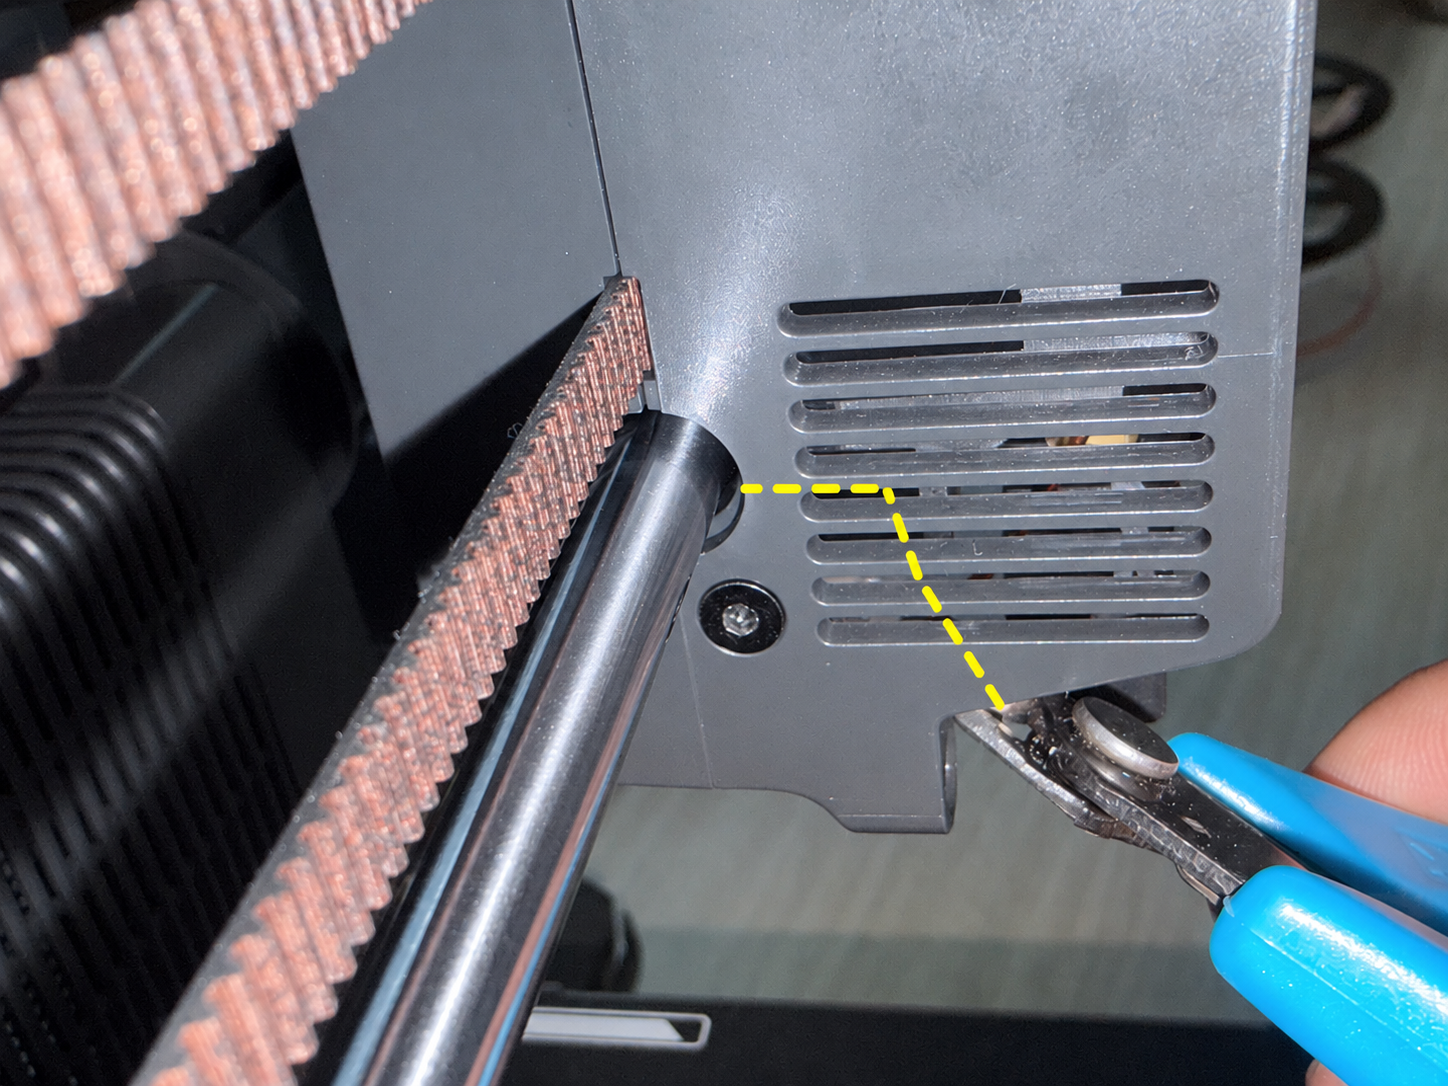
- Cut the tool head housing along the marked direction.
Note: Before cutting the housing, check the position of the surrounding wires. Do not cut too deeply to avoid damaging the internal wires.
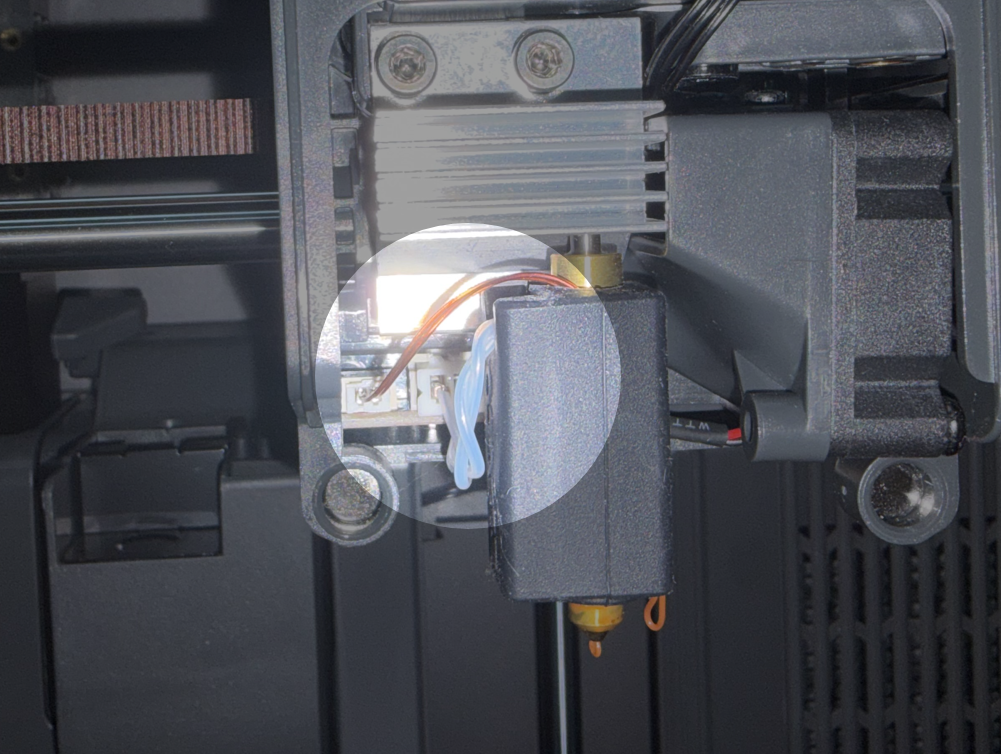
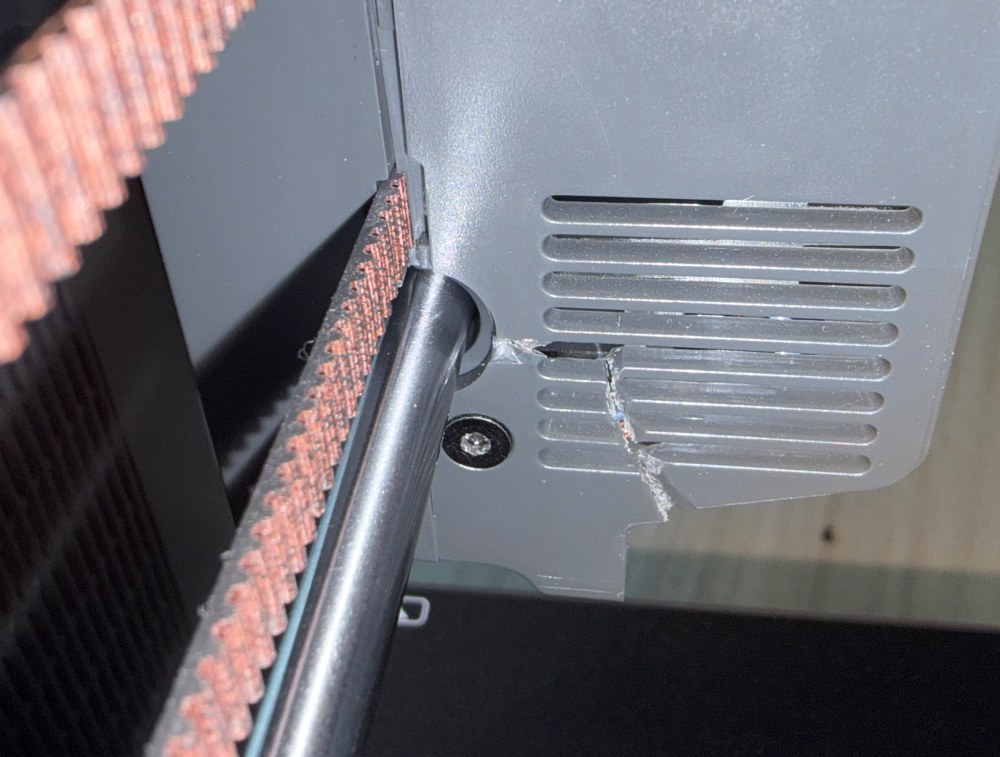
- Remove the tool head housing.
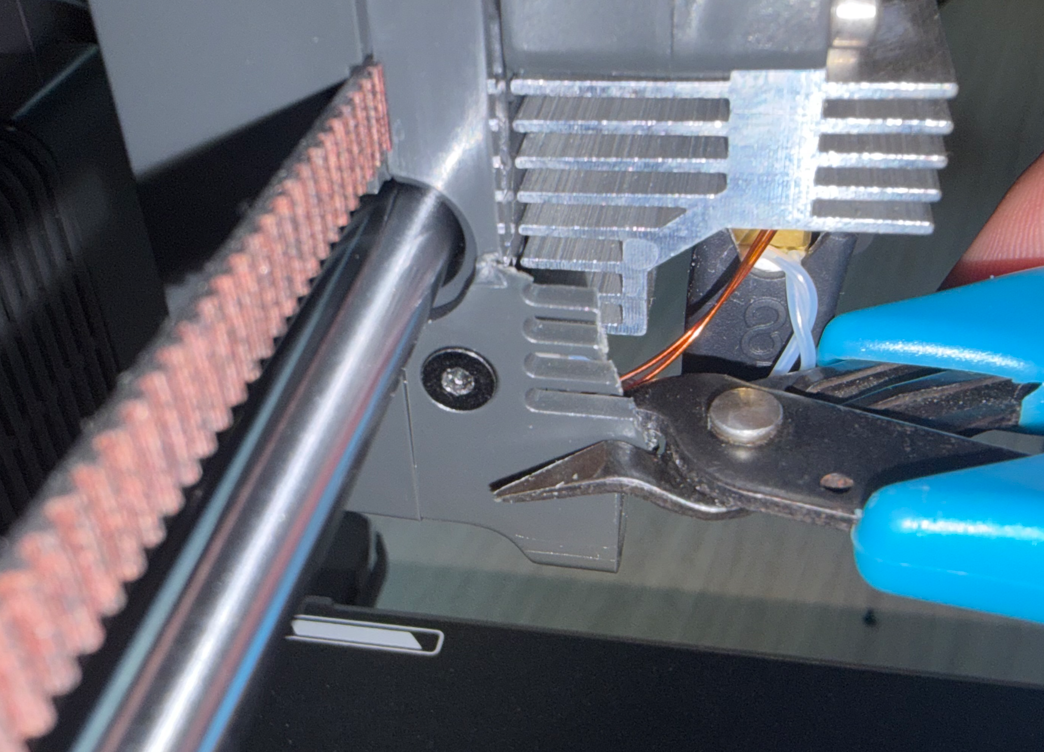
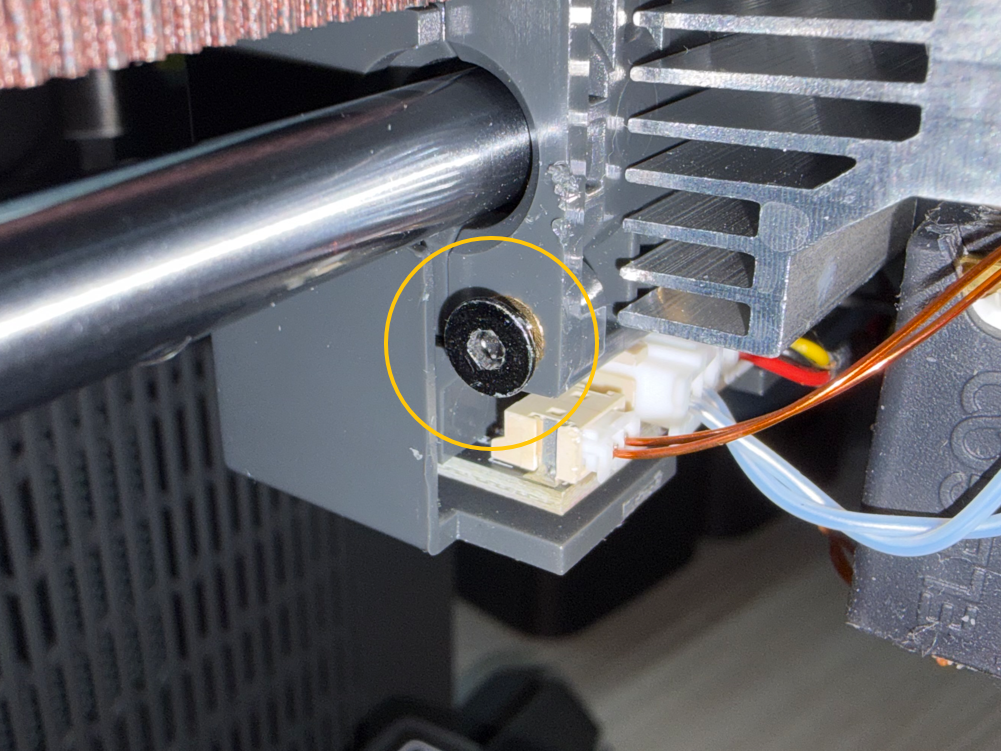
- Further trim away the remaining housing material until only the stripped screw remains.
¶ Remove the Stripped Screw
- Use needle-nose pliers to firmly grip the stripped screw and turn it counterclockwise until it becomes loose.
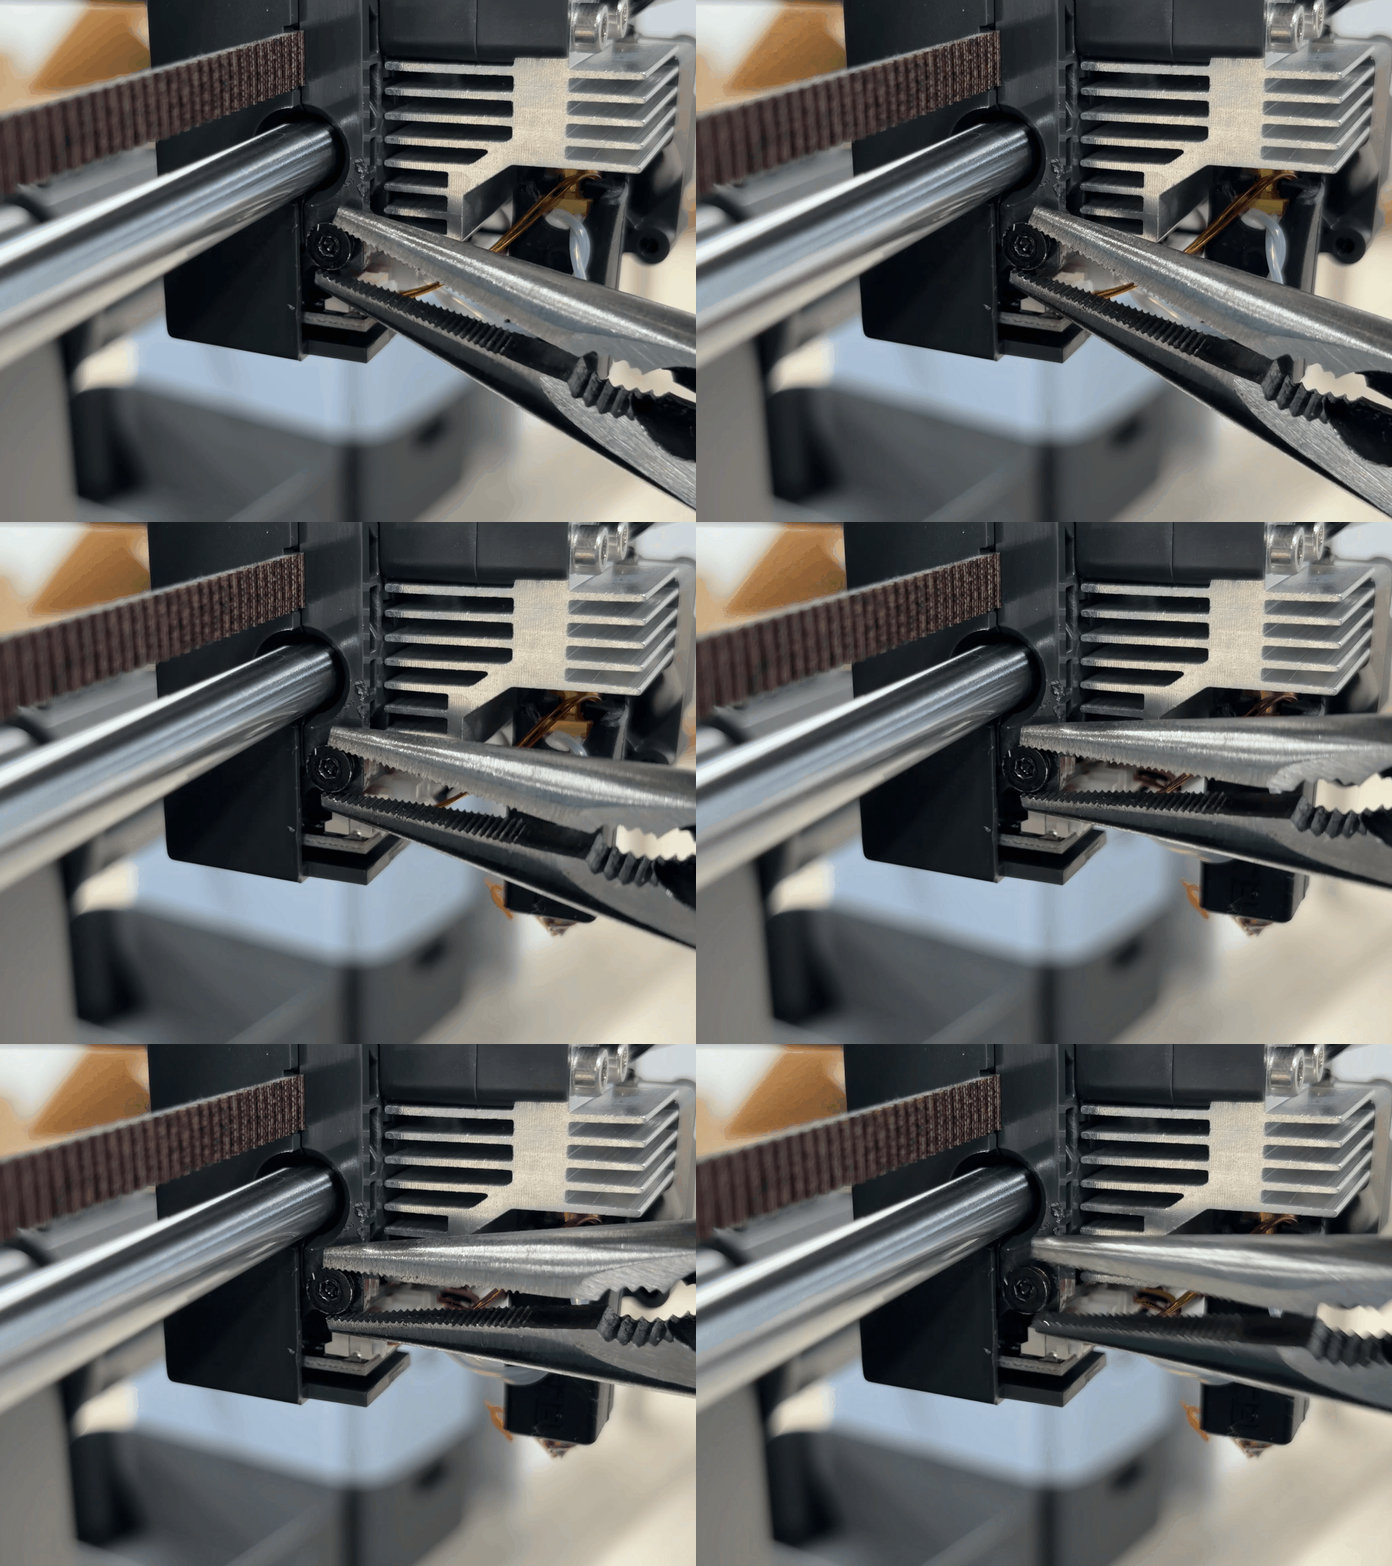
- Remove the stripped screw by hand.

Note: Do not reuse a stripped screw. Purchase a new screw from a hardware store or online store. The screw specification is M3 × 6 mm countersunk socket head screw.
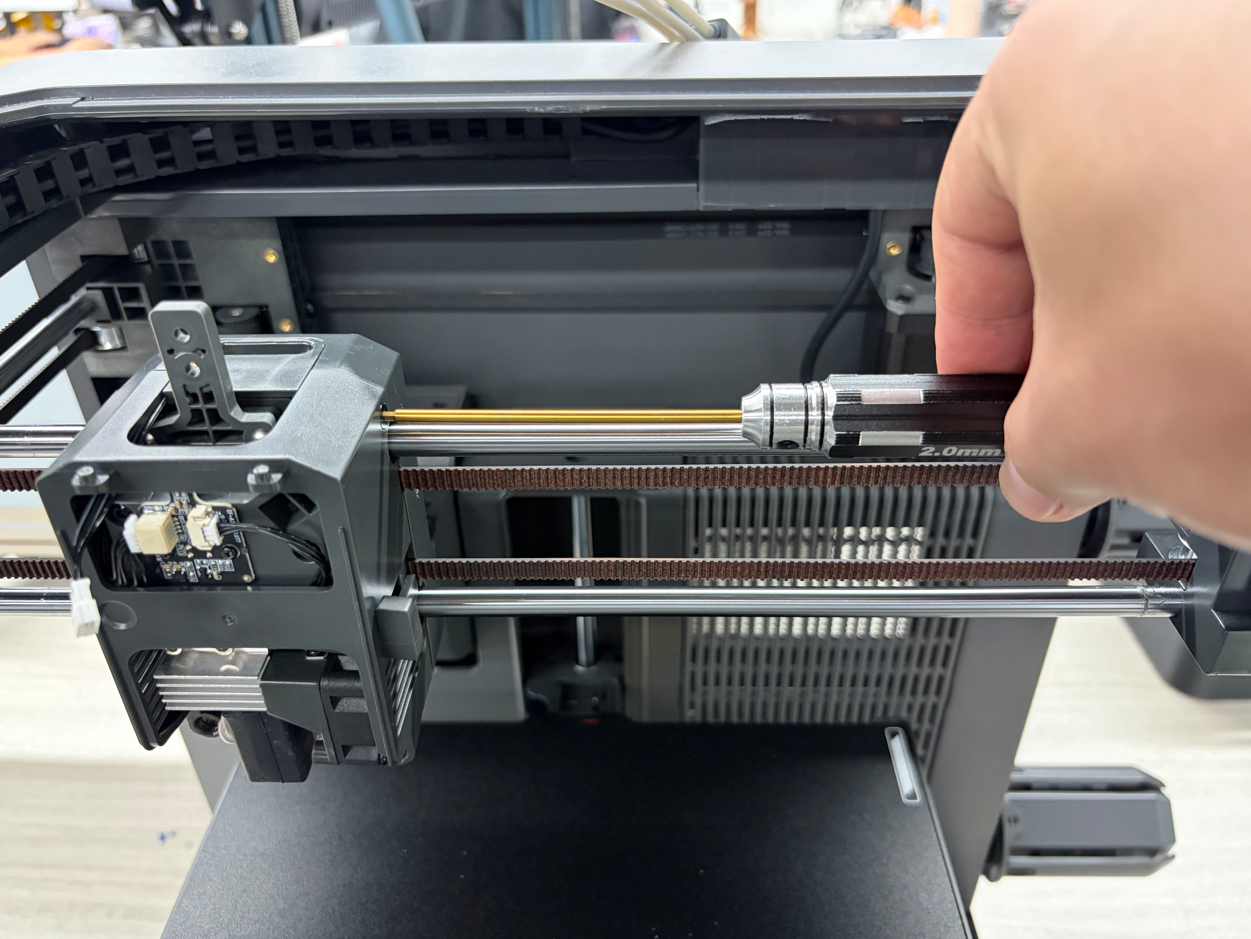
Note: To prevent this issue from occurring again, make sure the screwdriver is properly aligned with the screw when removing it. The screwdriver must remain perpendicular to the screw axis and must not be tilted.
¶ Verification
- Install the new extruder housing.
- Reconnect the tool head fan cable.
- Install the 4-in-1 hub and tank chain.
- Power on the printer and perform the following tests:
- Verify that tool head communication is normal.
- Verify that the fan operates normally.
- Verify that the heating and extrusion functions operate normally.
¶ Contact Technical Support
If you have completed Steps 1–3 but still cannot remove the stripped screw, contact Technical Support via email at 3dp@elegoo.com and provide the following information:
- Provide a clear, high-resolution photo of the stripped screw.
- Provide the printer's order number. If the printer was purchased from an ELEGOO distributor, provide the invoice instead of the order number.
- Provide the printer's SN. The SN is printed on the white label near the power button and is typically in the format C2.XXXXX.XXXX.
¶ Help Us Improve
If you have any ideas or suggestions for improving the wiki pages, please let us know through the ELEGOO official feedback channel.