¶ Operation Steps for Each Model
The steps below are based on Centauri Carbon 2 Combo. For other models, skip the steps related to parts that are not installed.
| Model | Action | Steps to Skip |
|---|---|---|
| Centauri Carbon 2 Combo | Follow all steps | None |
| Centauri Carbon 2 | Skip enclosure-related steps |
|
| Centauri 2 Combo | Skip enclosure-related steps |
|
| Centauri 2 | Skip enclosure-related steps |
|
If your printer has optional accessories installed, such as CANVAS or an enclosure, follow the steps related to those parts.
¶ Tools and Materials
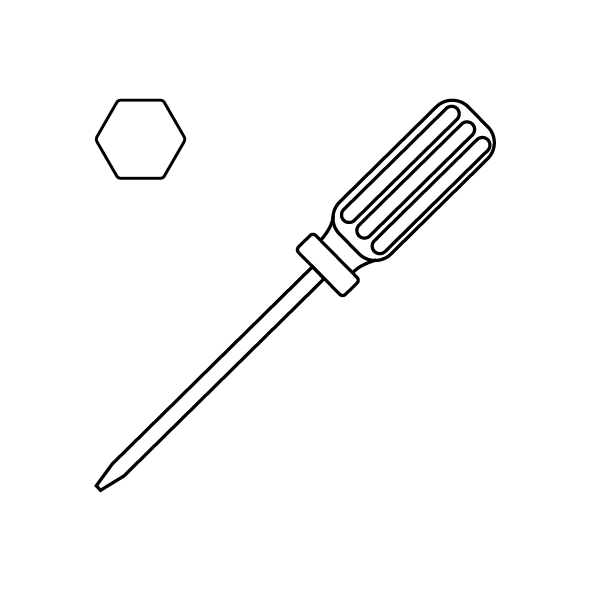
- 2.0 mm Allen key
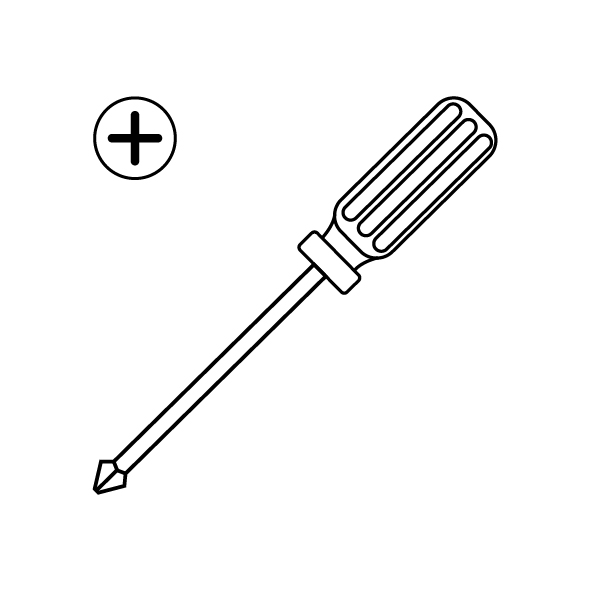
- A Phillips screwdriver
- A new heated bed control board
¶ Tutorial Video
¶ Instructions
¶ Preparation
Turn the power switch OFF (symbol "〇") and unplug the power supply cable.
¶ Remove the Bottom Cover and Disconnect the Heated Bed Control Board
-
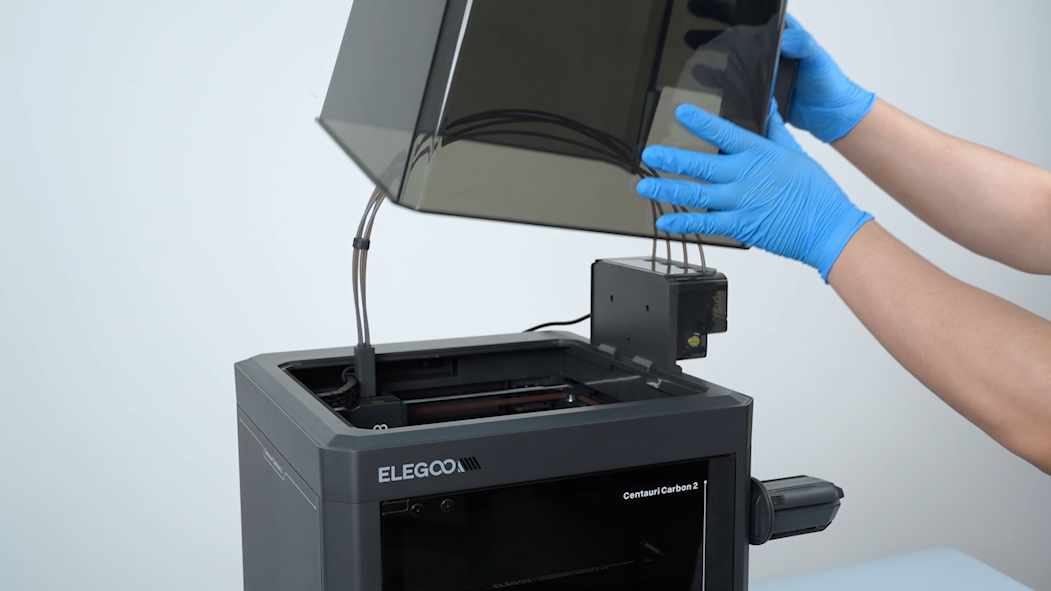
Remove the lid.
-
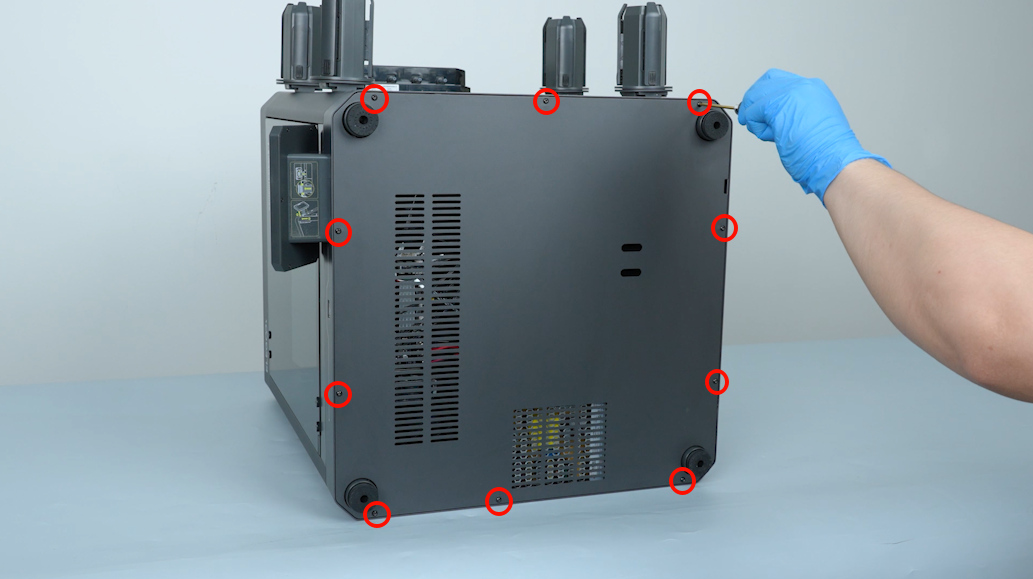
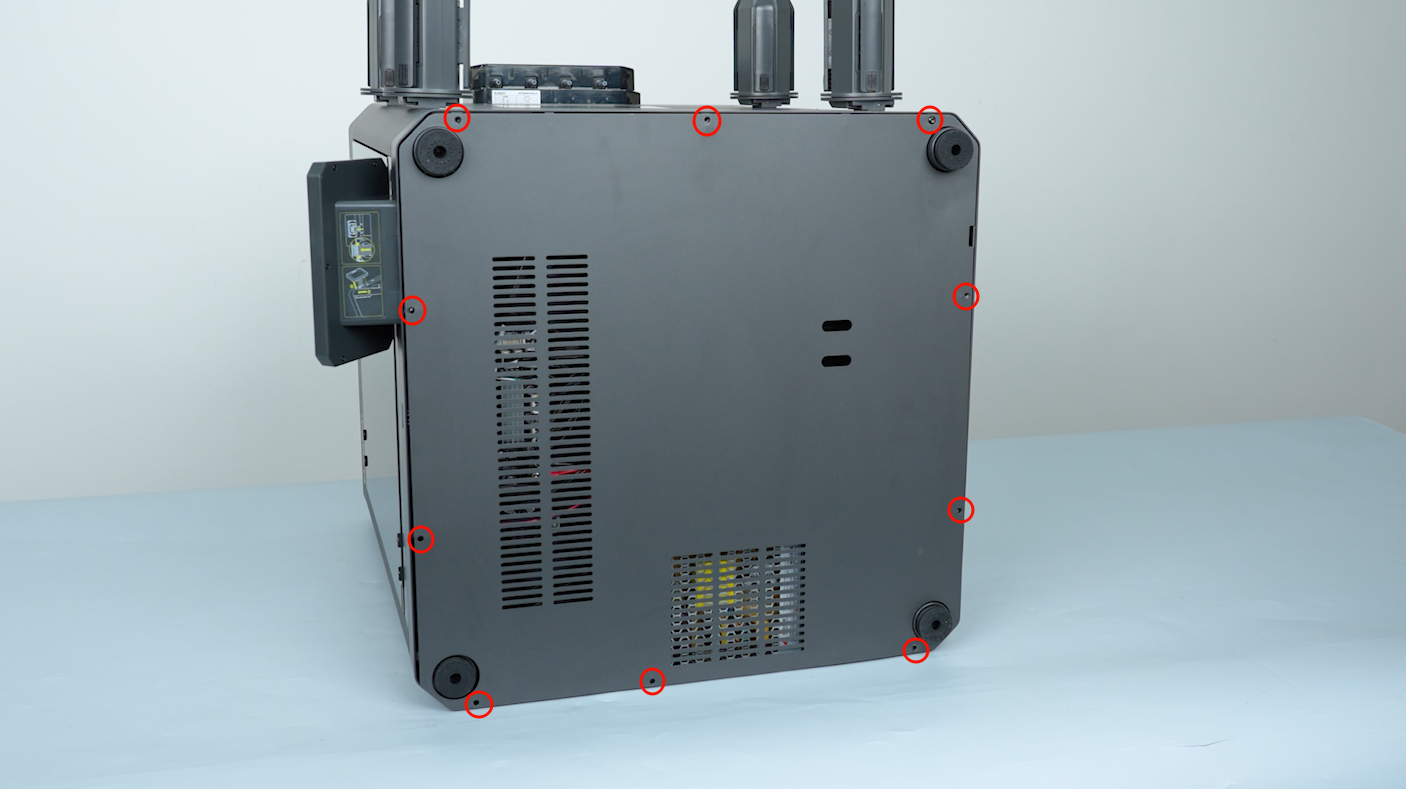
Release and remove the ten screws securing the bottom cover with a 2.0 mm Allen key.
-
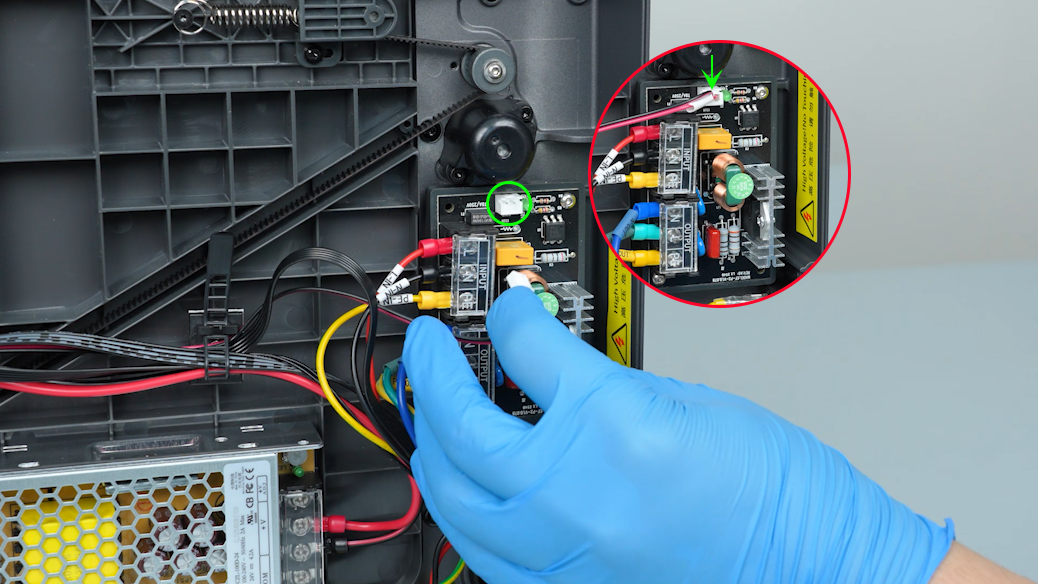
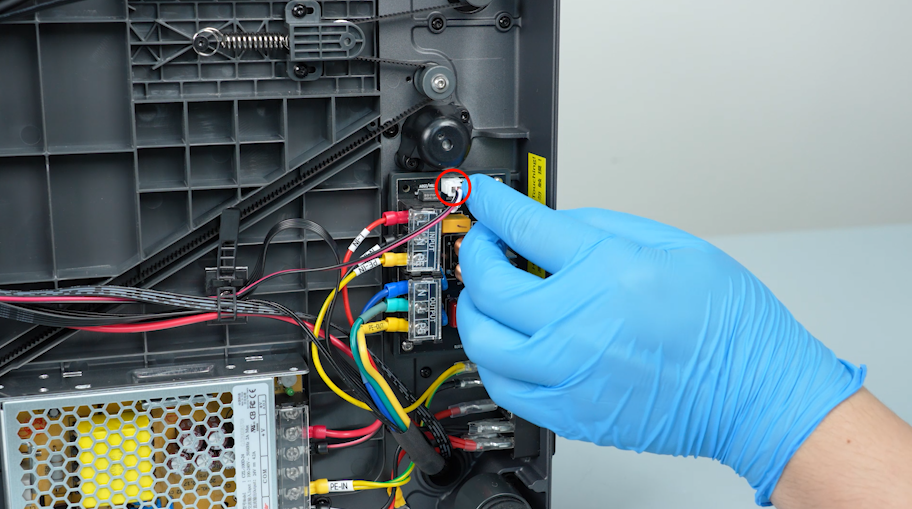
Unplug the signal cable of the heated bed control board.
-
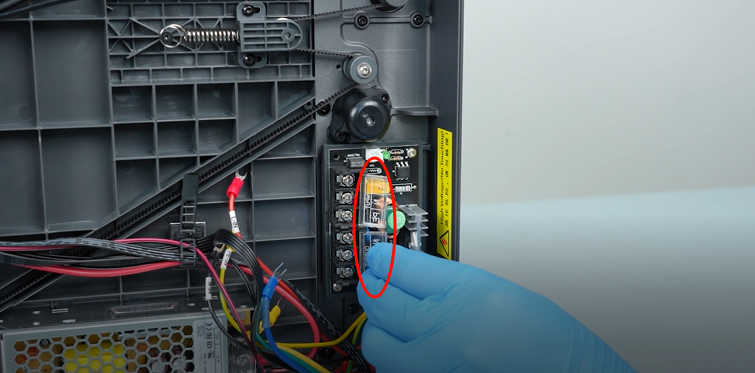
Open the cover.
-
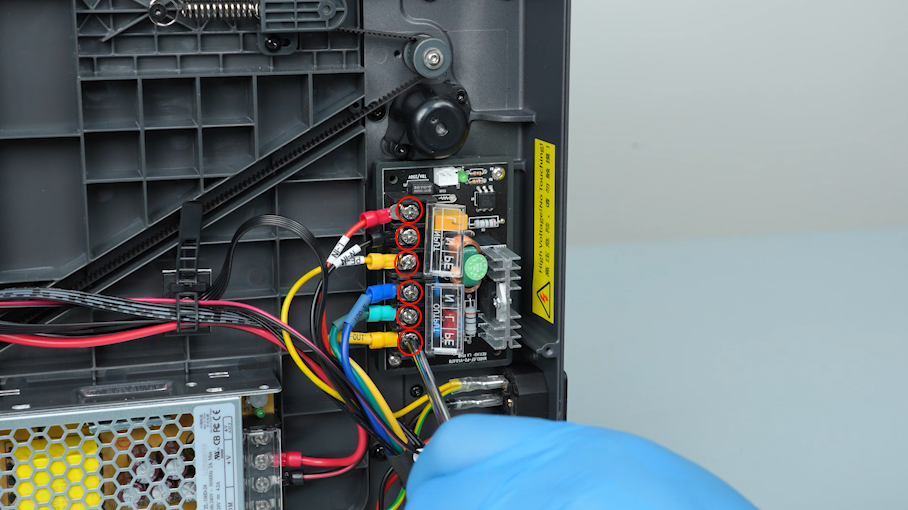
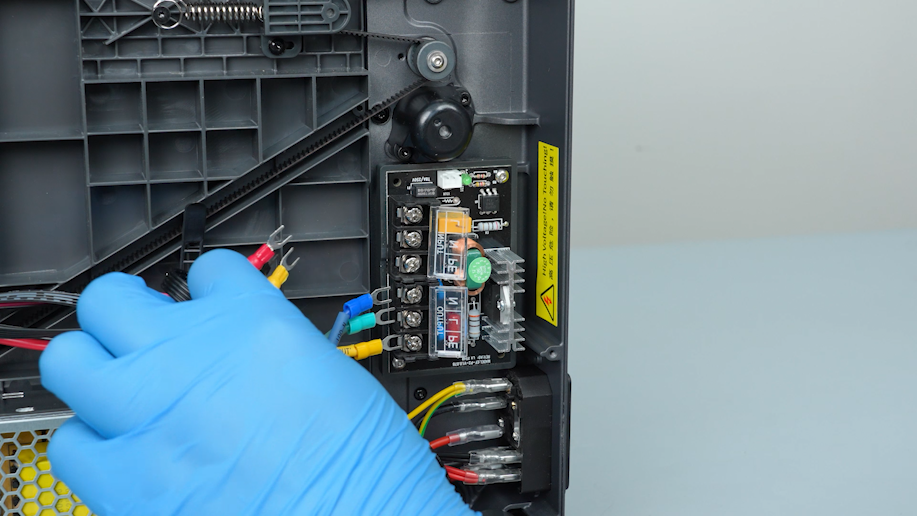
Loosen the screw with a Phillips screwdriver and unplug the input wires and the output wires of the heated bed control board.
¶ Remove the Old Heated Bed Control Board
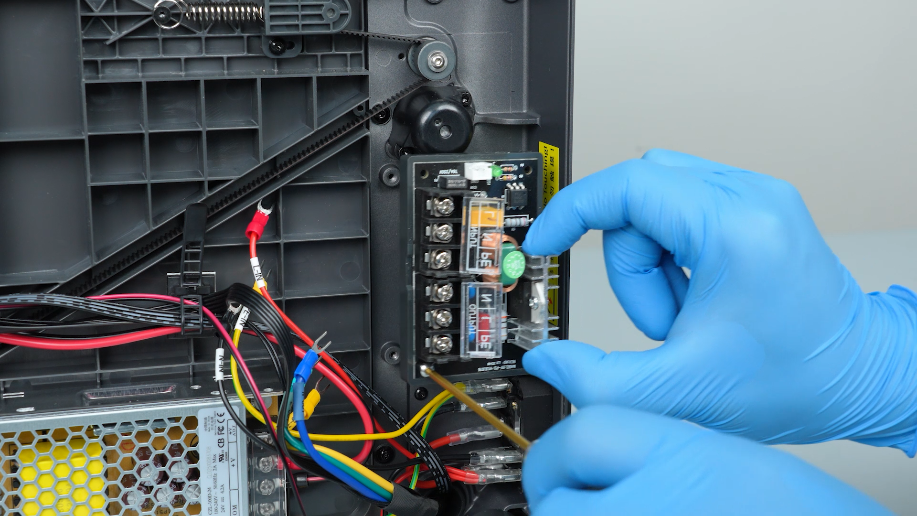
- Release and remove the two screws securing the heated bed control board with a 2.0 mm Allen key. Remove the old heated bed control board.

¶ Install the New Heated Bed Control Board
-
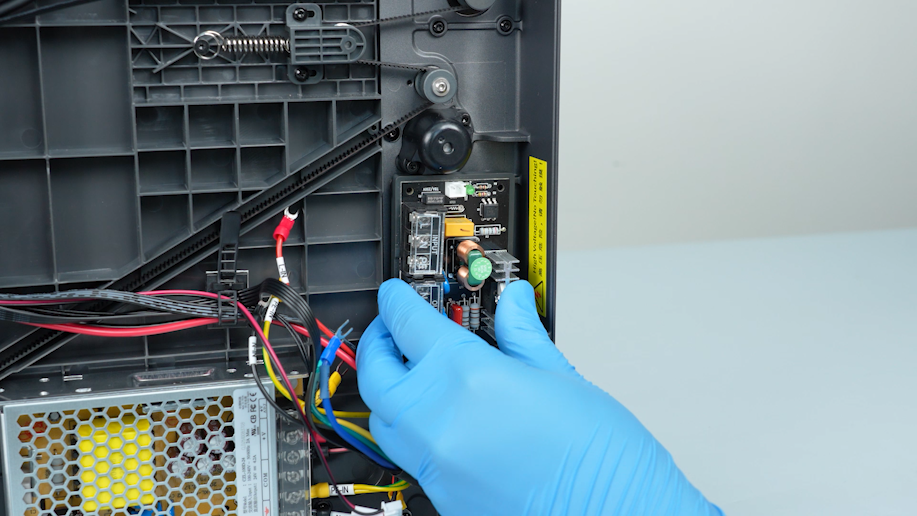
Put the heated bed control board in the installation position.
-
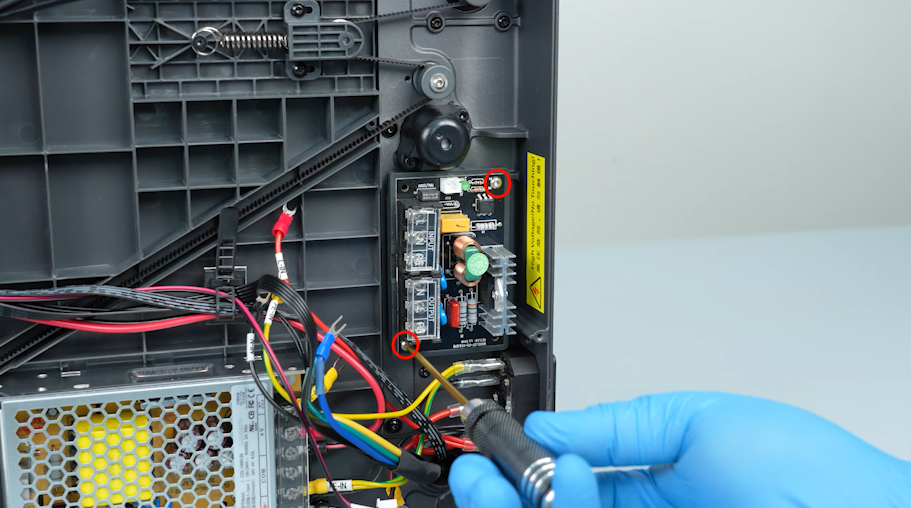
Tighten the two screws securing the heated bed control board with a 2.0 mm Allen key.
¶ Connect the Power Input Wires of the Heated Bed Control Board
-
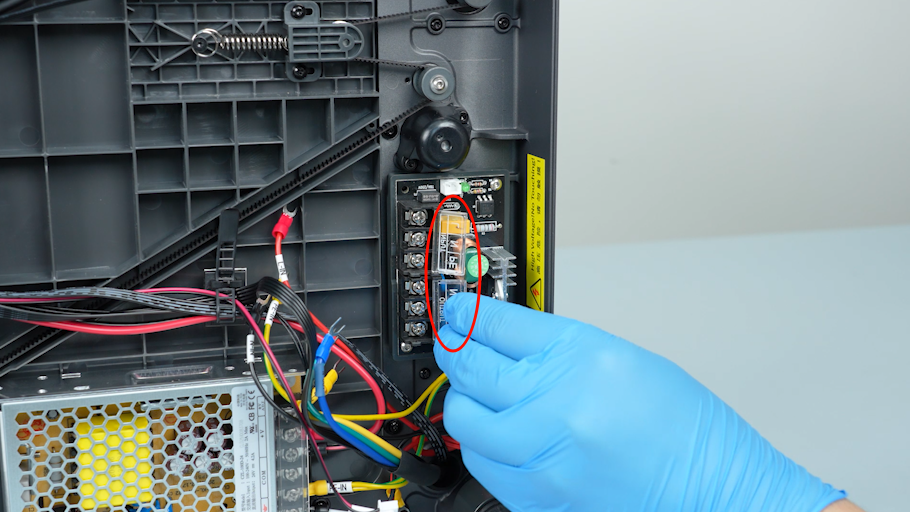
Open the heated bed control board cover.
-
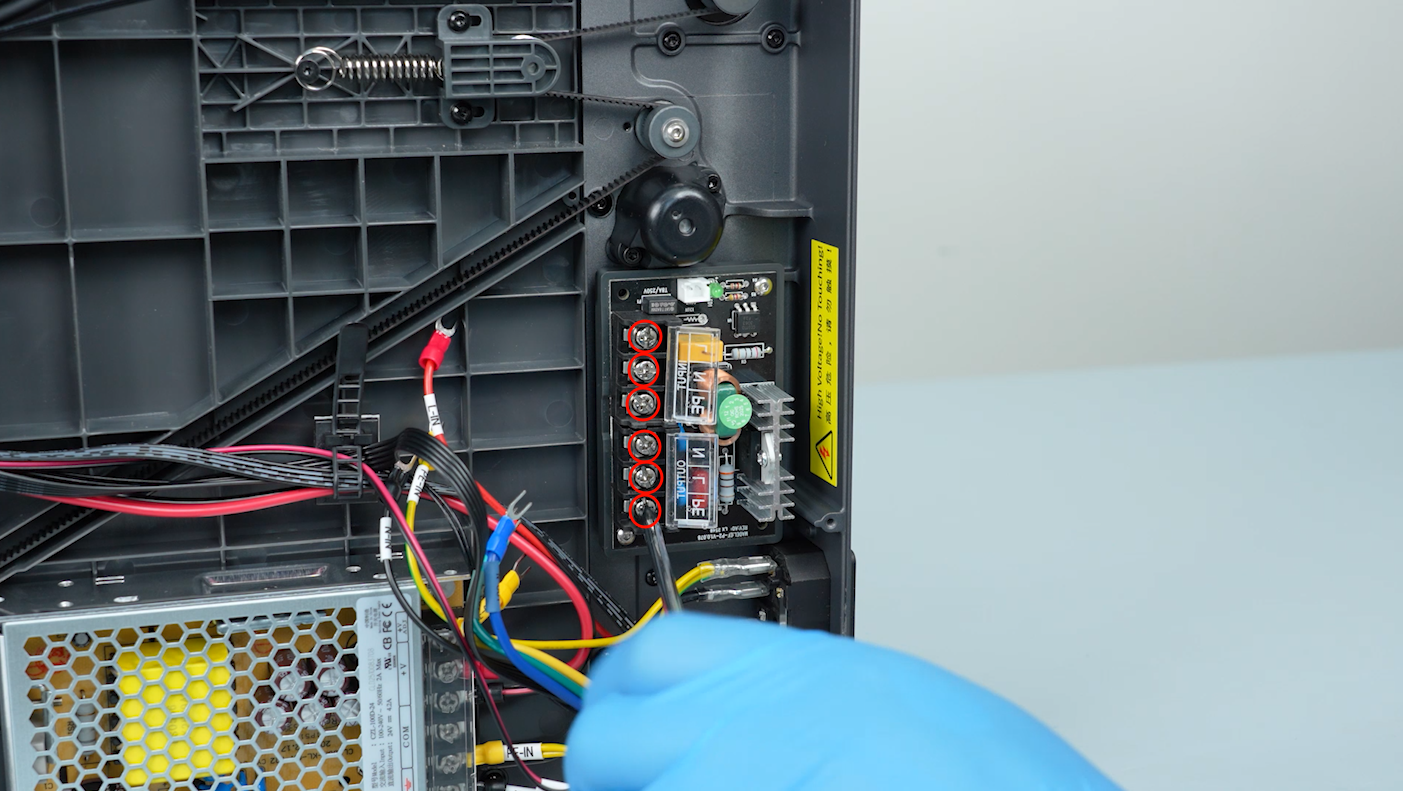
Loosen the screw securing the heated bed control board ports with a Phillips screwdriver.
-
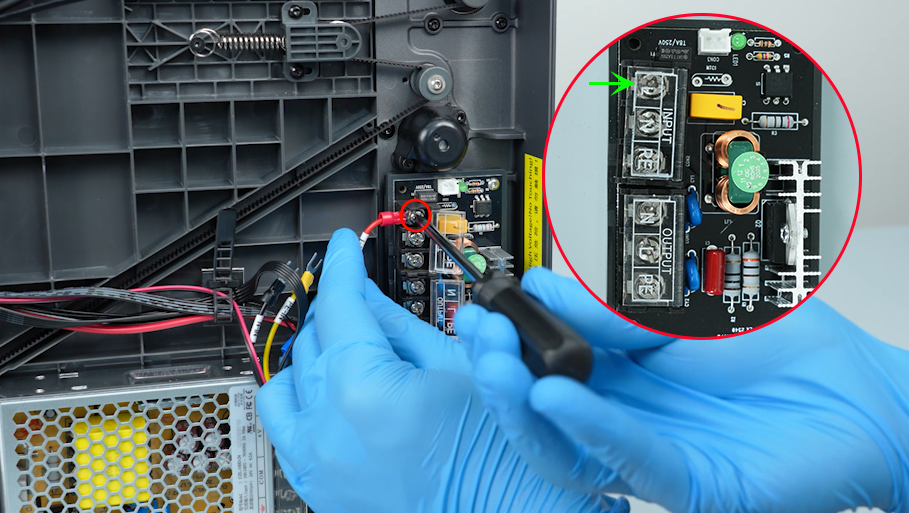
Connect the L-IN red wire to the INPUT-L port. Secure the screw with the Phillips screwdriver.
-
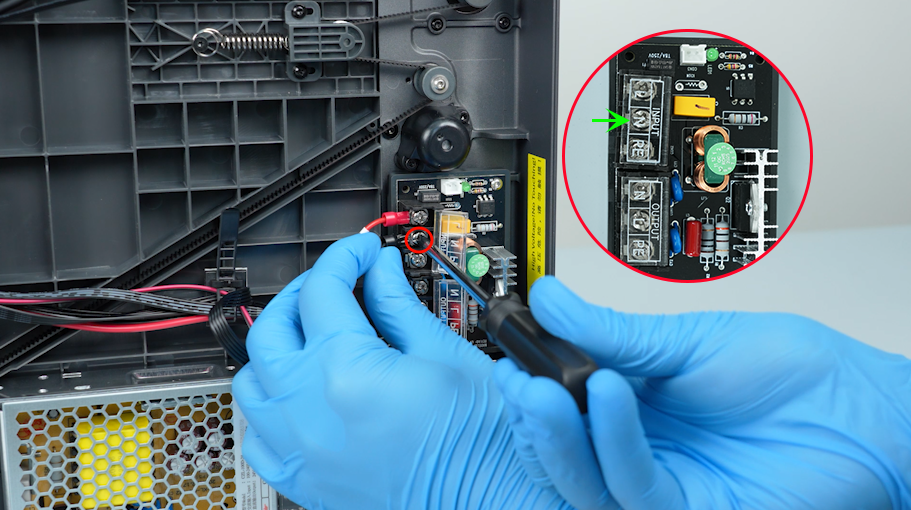
Connect the N-IN black wire to the INPUT-N port. Secure the screw with the Phillips screwdriver.
-
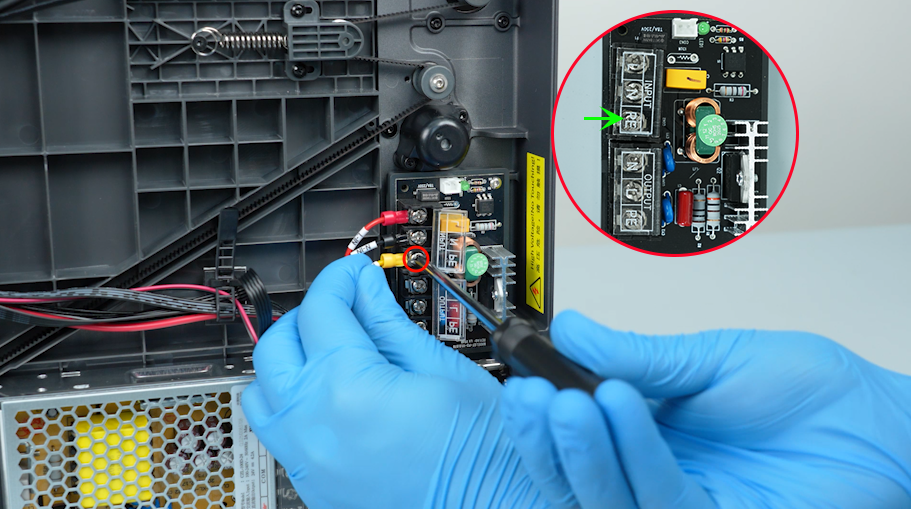
Connect the PE-IN yellow wire to the INPUT-PE port. Secure the screw with the Phillips screwdriver.
¶ Connect the Heated Bed Output Wires and Complete Installation
-
Connect the N-OUT blue wire to the OUTPUT-N port. Secure the screw with the Phillips screwdriver.
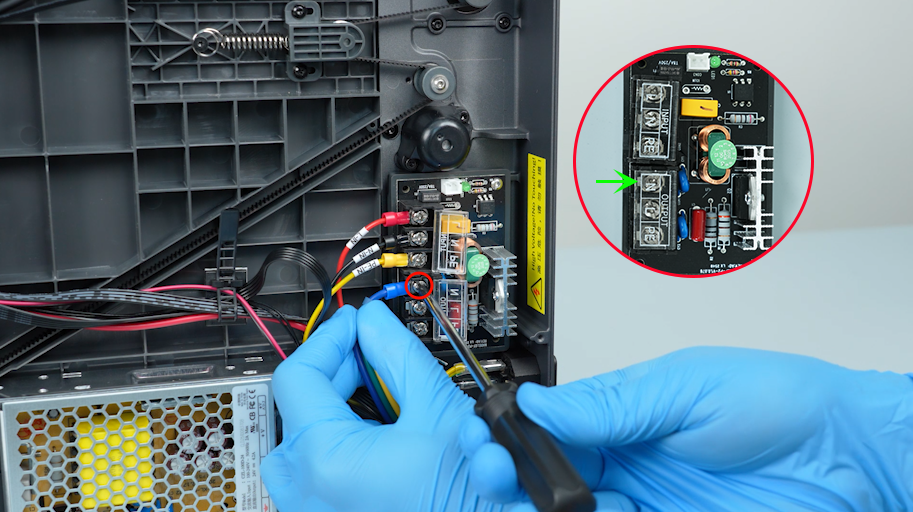
-
Connect the L-OUT green wire to the OUTPUT-L port. Secure the screw with the Phillips screwdriver.
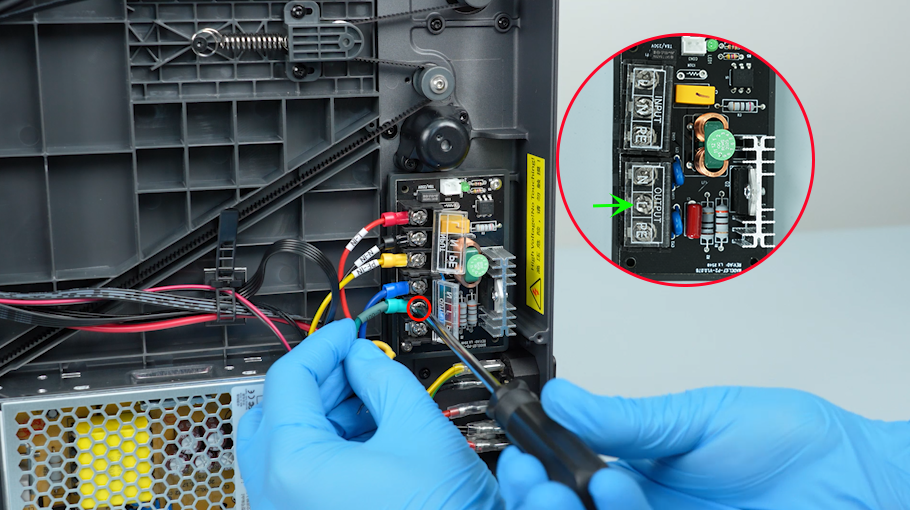
-
Connect the PE-OUT yellow wire to the OUTPUT-PE port. Secure the screw with the Phillips screwdriver.
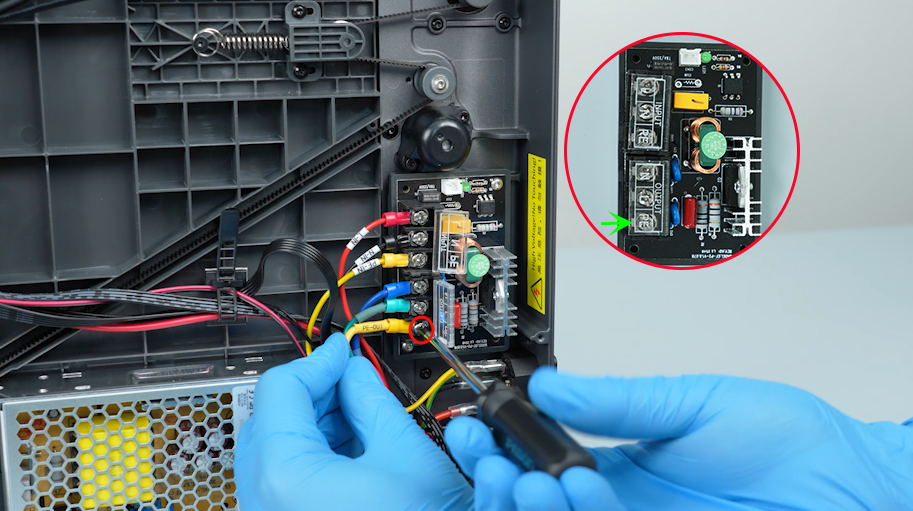
-
Close the heated bed control board cover.
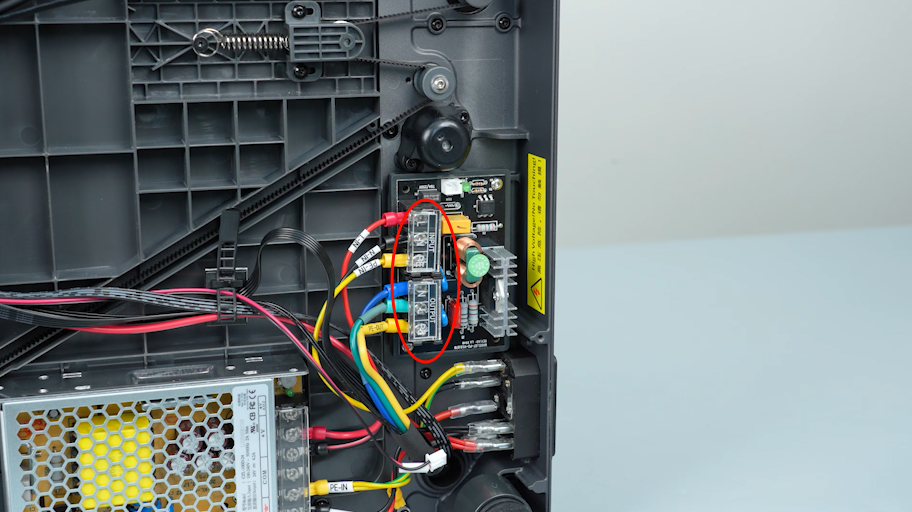
-
Plug in the signal cable of the heated bed control board.
-
Tighten the ten screws securing the bottom cover with a 2.0 mm Allen key.
¶ Verify the Heated Bed Control Board Replacement
-
Plug in the power supply cable. Turn the power switch ON (symbol "|").
-
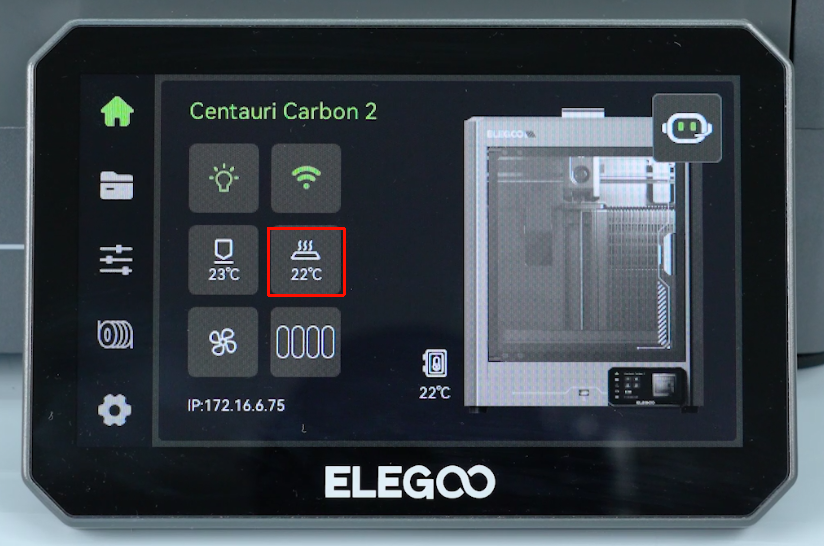
Heat the heated bed up via the touch screen.
-
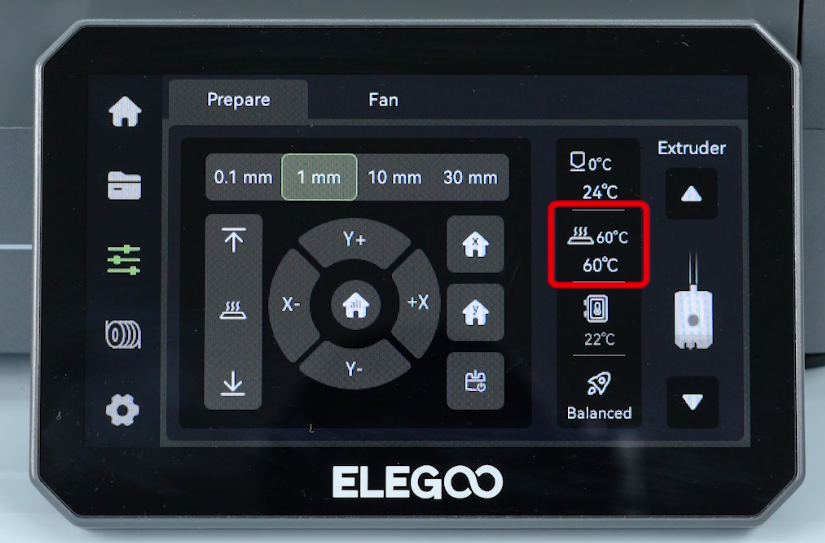
Confirm that the heated bed can heat up normally and the printer is ready for use.
¶ Help us improve
If you have any ideas about the wiki pages, please let us know via ELEGOO official feedback channel