¶ Operation Steps for Each Model
The steps below are based on Centauri Carbon 2 Combo. For other models, skip the steps related to parts that are not installed.
| Model | Action | Steps to Skip |
|---|---|---|
| Centauri Carbon 2 Combo | Follow all steps | None |
| Centauri Carbon 2 | Skip enclosure-related steps |
|
| Centauri 2 Combo | Skip enclosure-related steps |
|
| Centauri 2 | Skip enclosure-related steps if enclosure is not installed |
|
If your printer has optional accessories installed, such as CANVAS or an enclosure, follow the steps related to those parts.
¶ Tools and Materials
-
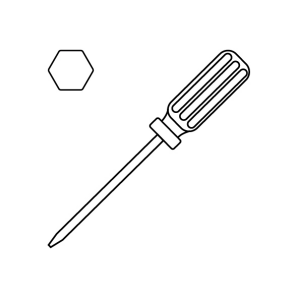
A 2.0 mm Allen key
-
A 1.5 mm Allen key
-
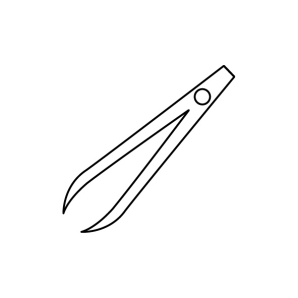
A pair of tweezers
-
A new extruder communication board
¶ Tutorial Video
https://www.youtube.com/watch?v=pACuX6vFSJ8&feature=youtu.be
¶ Instruction
¶ Preparation Before Replacement
Turn the power switch OFF (symbol "〇") and unplug the power supply cable.
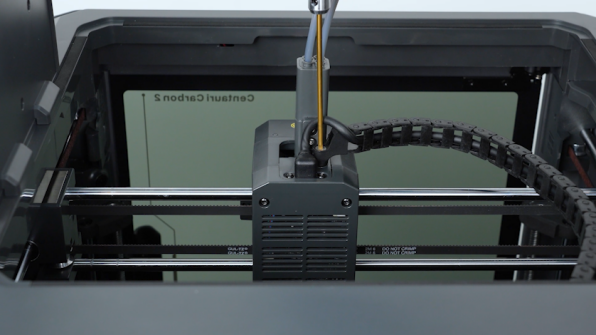
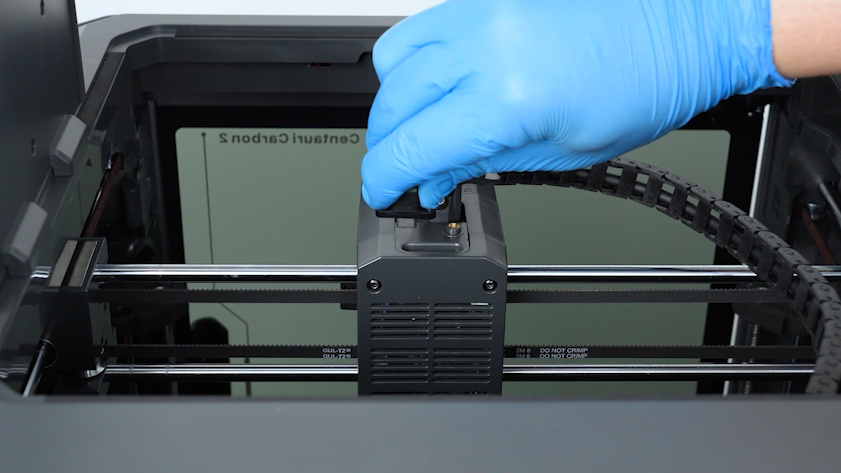
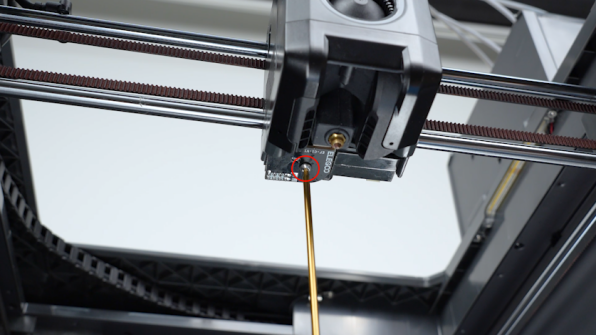
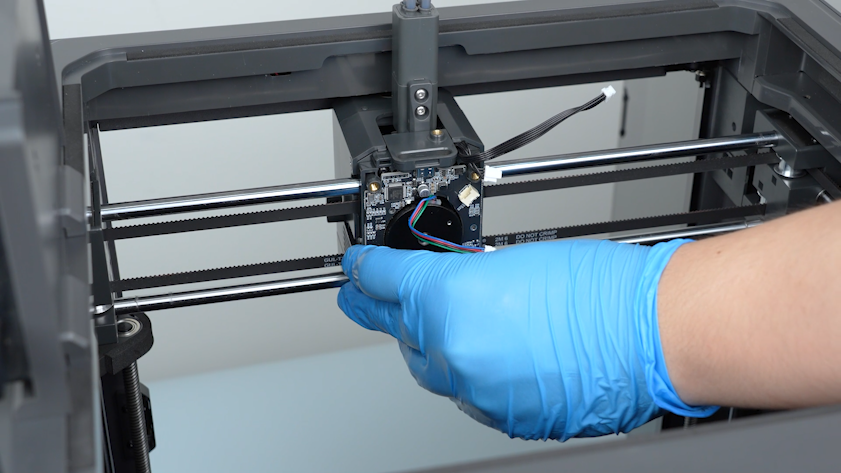
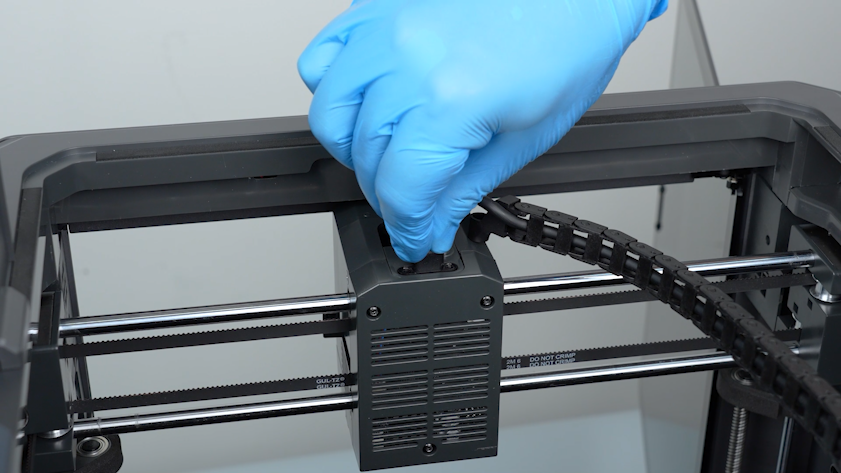
¶ Remove the Extruder Cover and Disconnect External Connections
- Remove the lid.
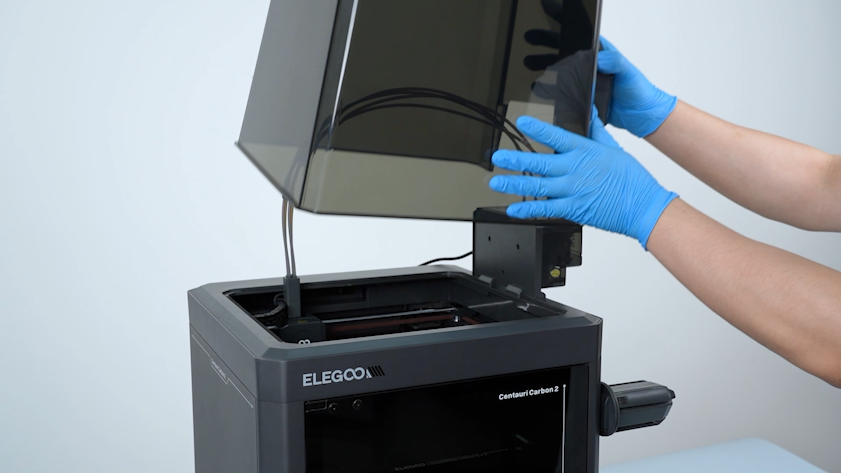
- Loosen the screw securing the tank chain with a 2.5 mm Allen key. Remove the screw with a pair of tweezers.
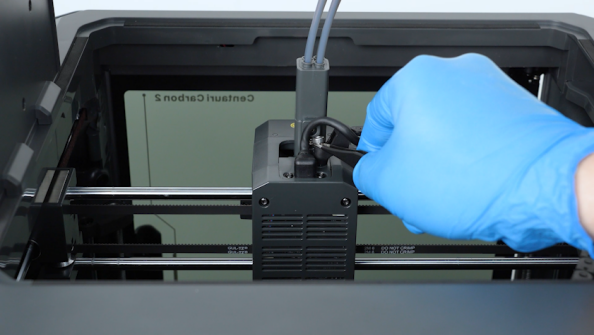
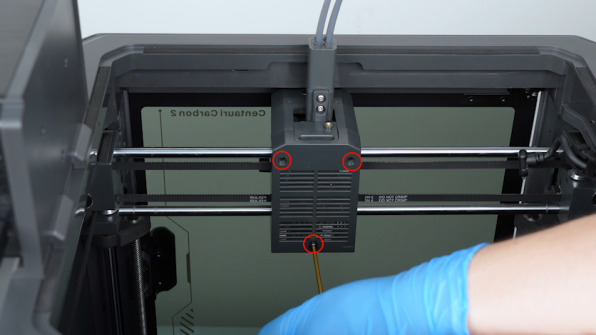
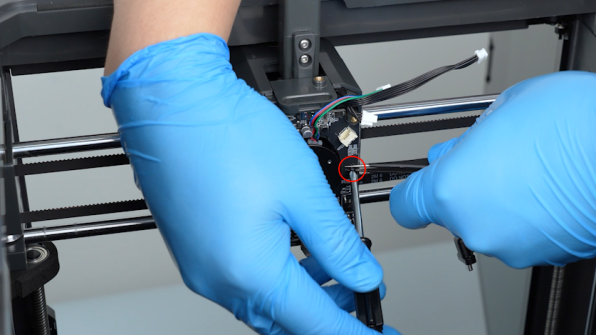
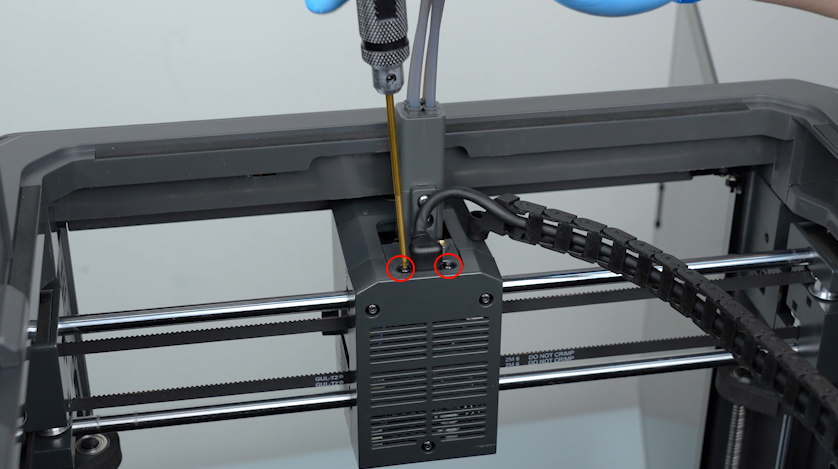
¶ Disconnect the Extruder Communication Cable
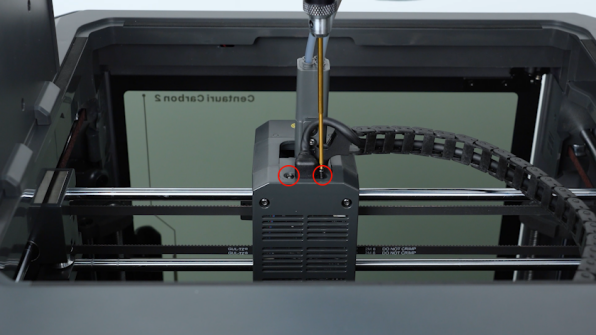
- Loosen the two screws securing the extruder communication cable with a 1.5 mm Allen key. Remove the screws with a pair of tweezers.
- Unplug the extruder communication cable.
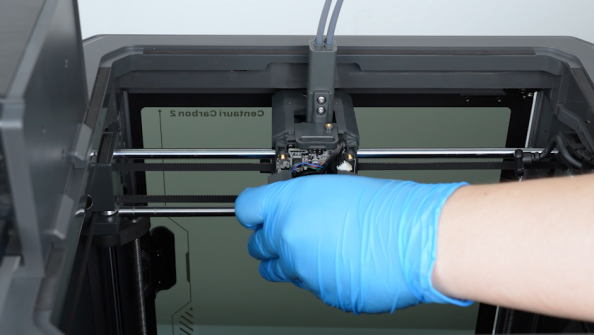
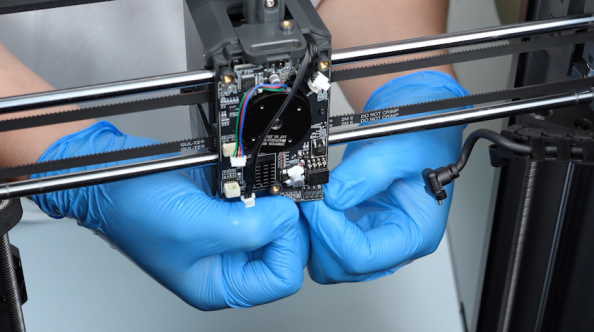
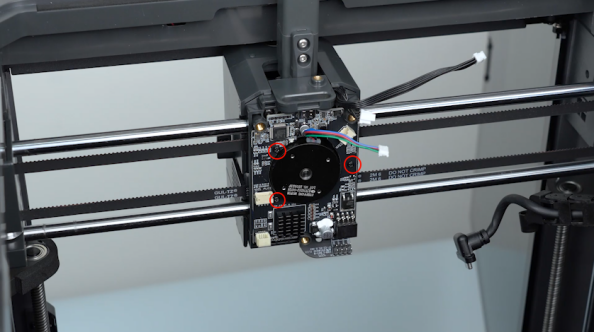
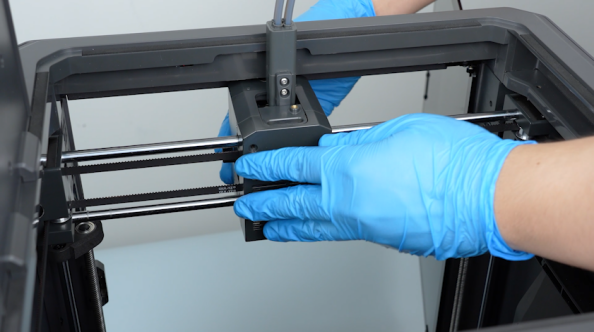
¶ Remove the Extruder Back Cover
- Release and remove the three screws securing the back cover of the extruder with a 2.0 mm Allen key. Remove the back cover.
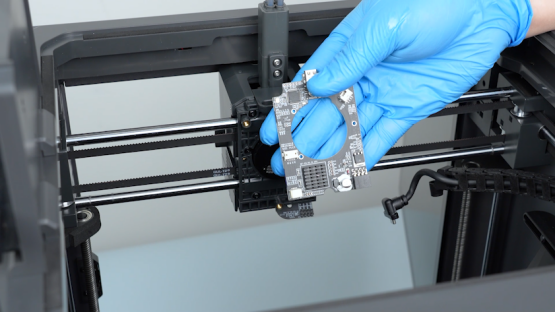
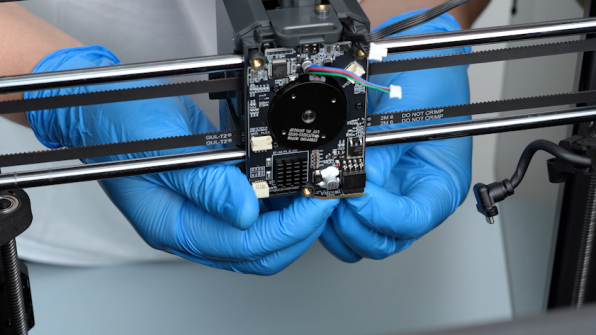
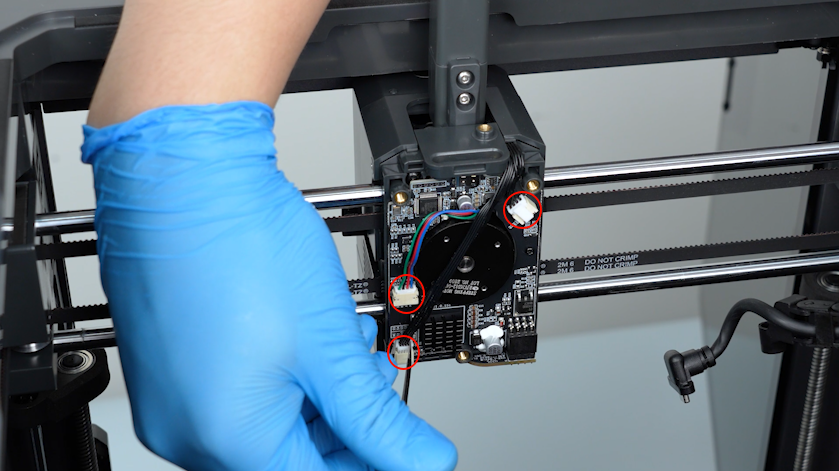
¶ Remove the Nozzle Interface Board and Extruder Communication Board
- Remove the plugs of the extruder communication board with a pair of tweezers.
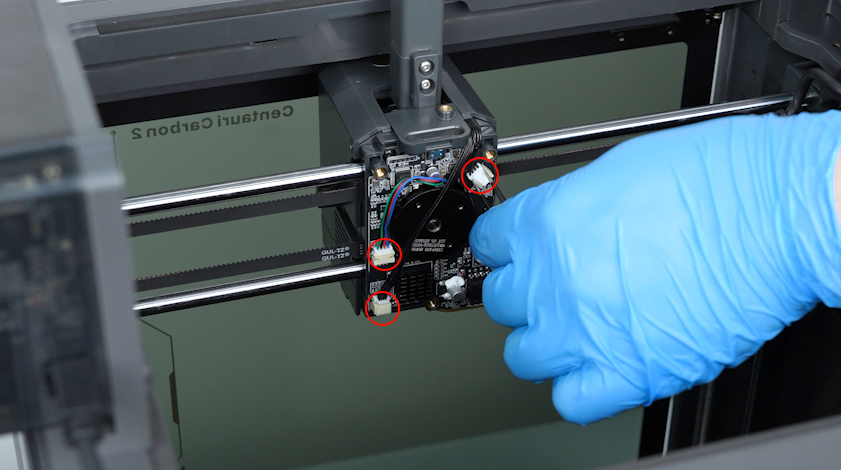
- Release and remove the screw securing the nozzle interface board with a 2.0 mm Allen key. Remove the nozzle interface board.
- Release and remove the three screws securing the extruder communication board with a Phillips screwdriver.
Note: Hold the screws to prevent them from falling off with a pair of tweezers.
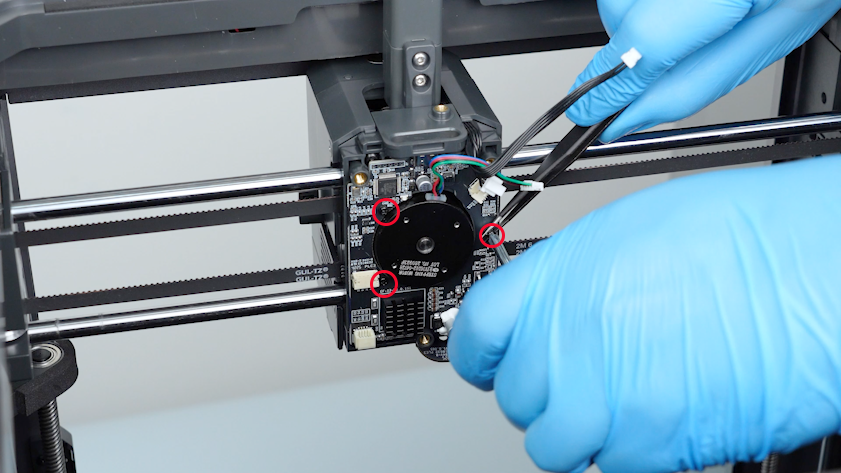
- Organize the cables and remove the old extruder communication board.
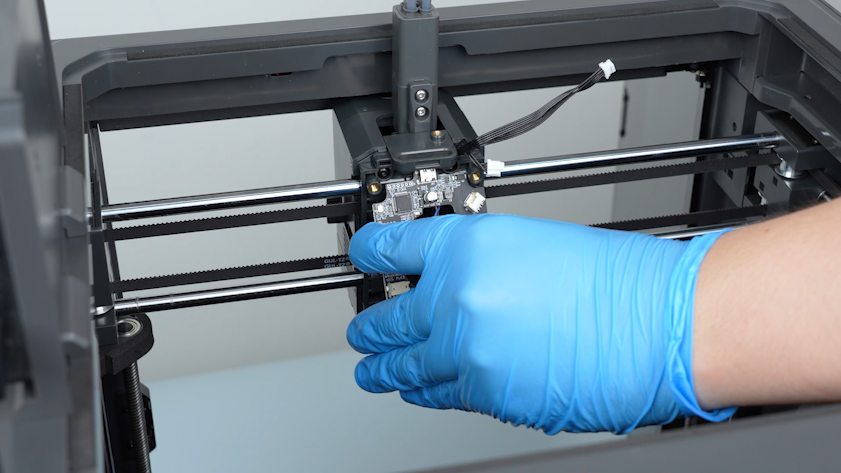
¶ Install the Replacement Extruder Communication Board
- Get the new extruder communication board and put it in the installation position.
- Tighten the three screws securing the extruder communication board with a Phillips screwdriver.
Note: Hold the screws to prevent them from falling off with a pair of tweezers.
¶ Install the Nozzle Interface Board and Reconnect the Cables
- Put the nozzle interface board in the installation position and tighten the screw securing the nozzle interface board.
- Insert the plugs on the extruder communication board with a pair of tweezers.
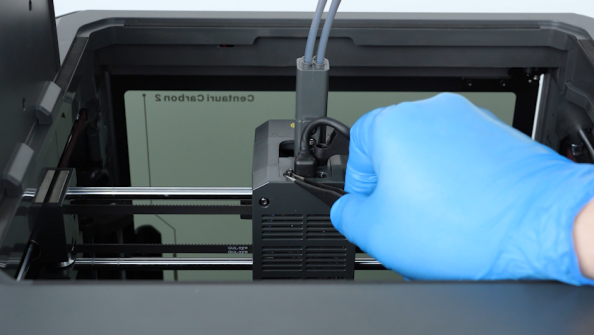
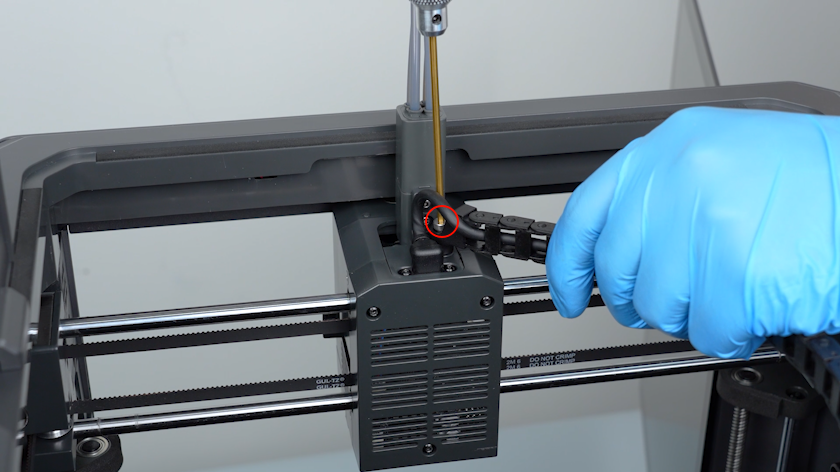
¶ Reinstall the Extruder Back Cover and Tank Chain
- Put the back cover in the installation position and tighten the three screws securing the back cover of the extruder.
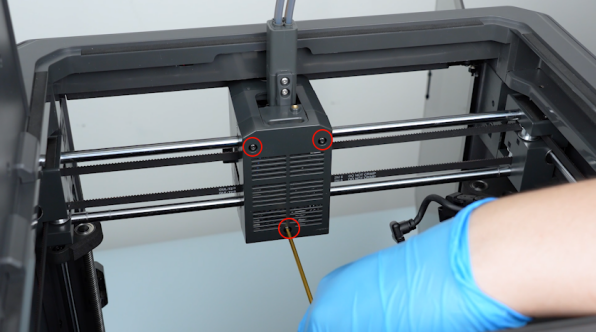
- Plug in the extruder communication cable.
- Tighten the two screws securing the extruder communication cable.
- Put the tank chain in the installation position and tighten the screws securing the tank chain.
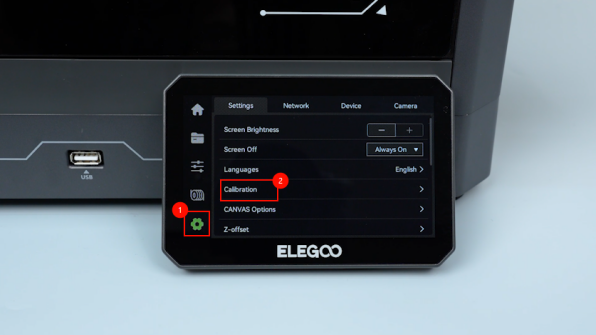
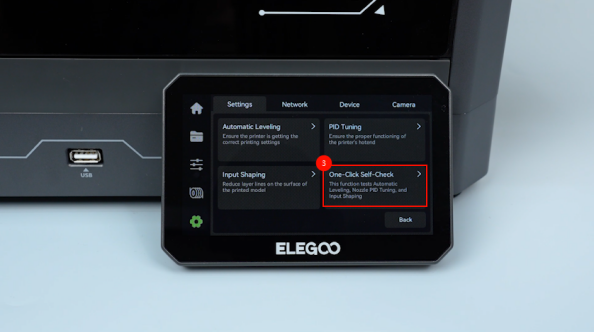
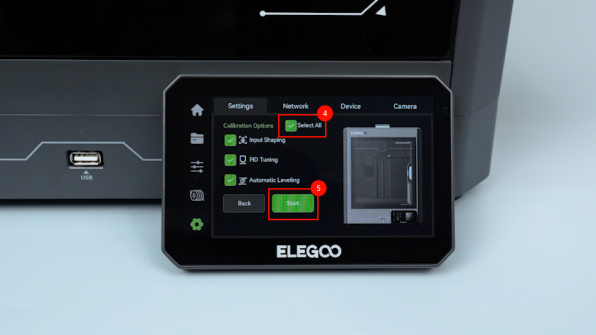
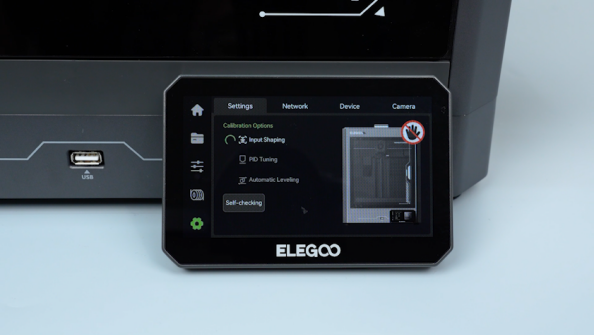
¶ Perform a Self-Check After Replacement
-
Turn the power switch ON (symbol "|").
-
On the touch screen, select Settings - Calibration - One-Click self-check - All - Start. The printer is ready for use after the self-check.
¶ Help us improve
If you have any ideas about the wiki pages, please let us know via ELEGOO official feedback channel