¶ Fault Description
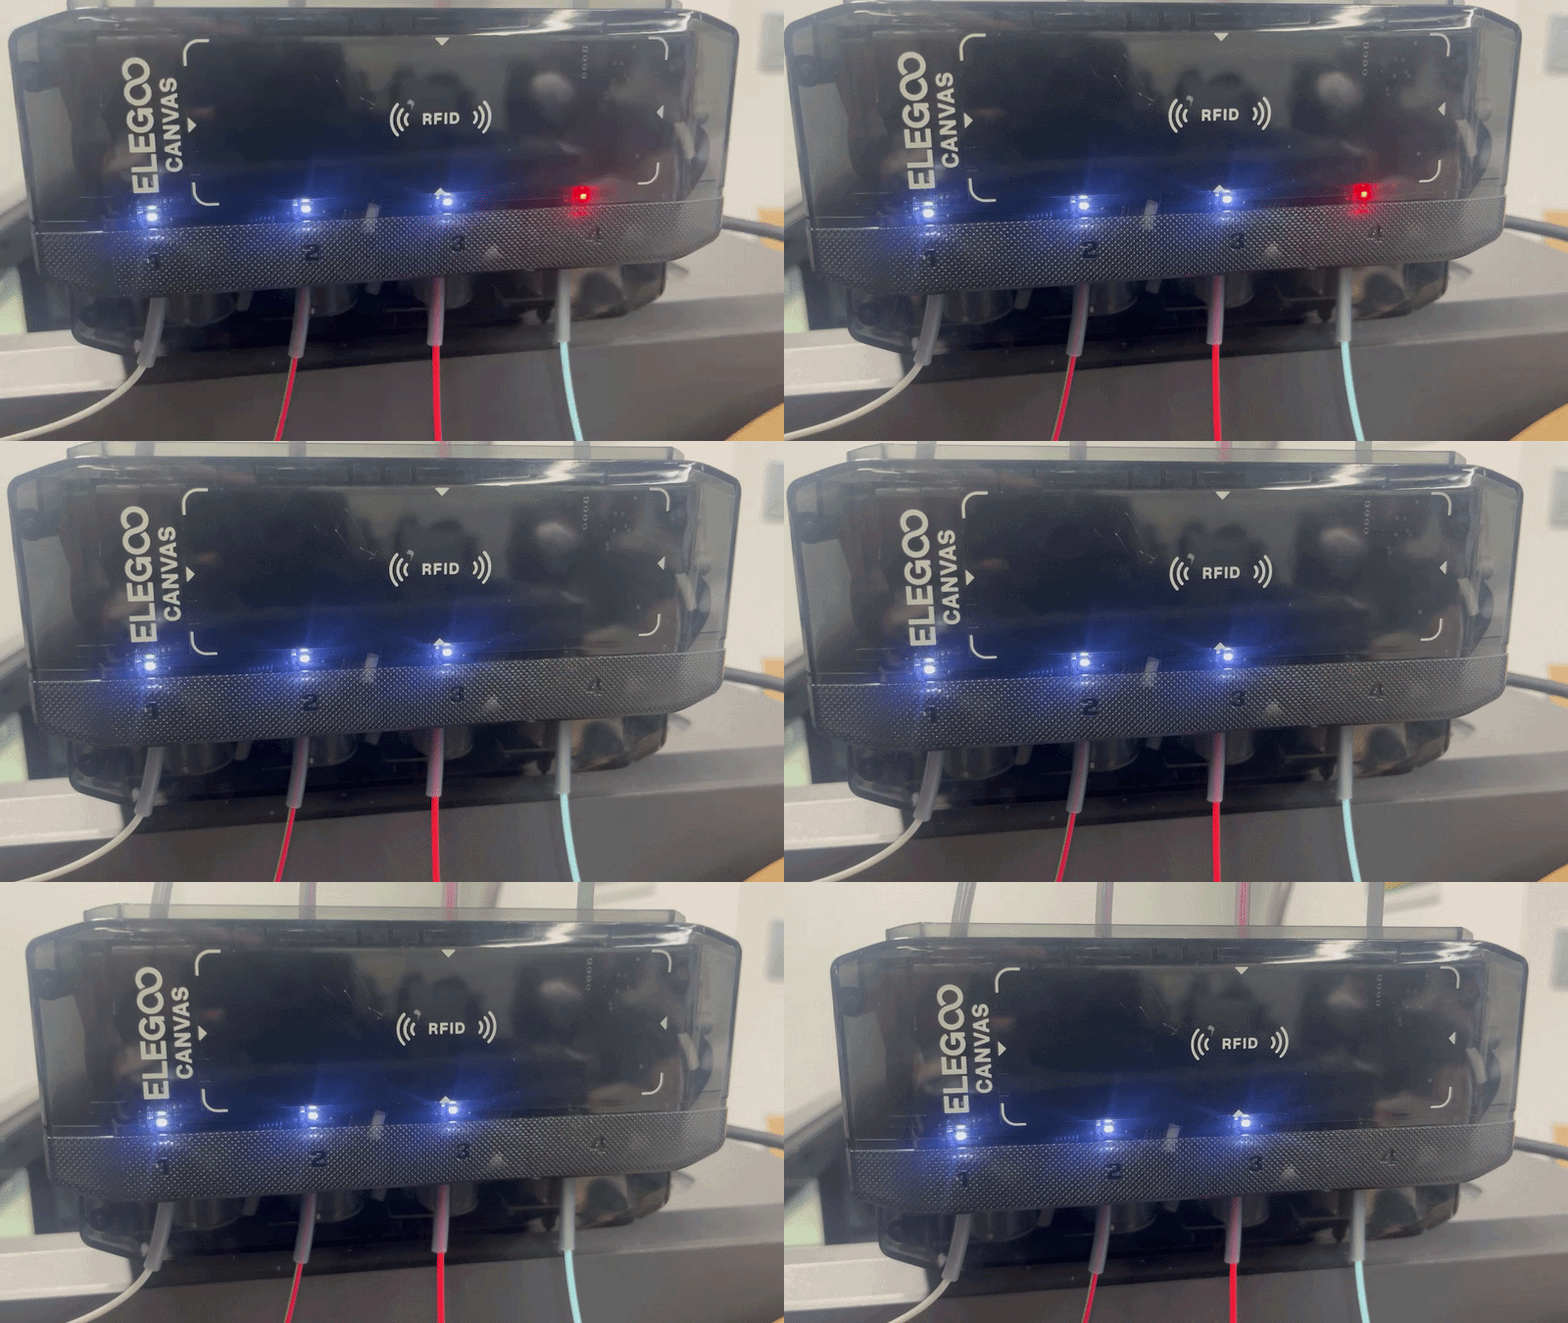
When CANVAS fails to feed filament to the tool head, an error message appears or printing is paused. The corresponding port indicator flashes red during filament loading.
¶ Possible Causes
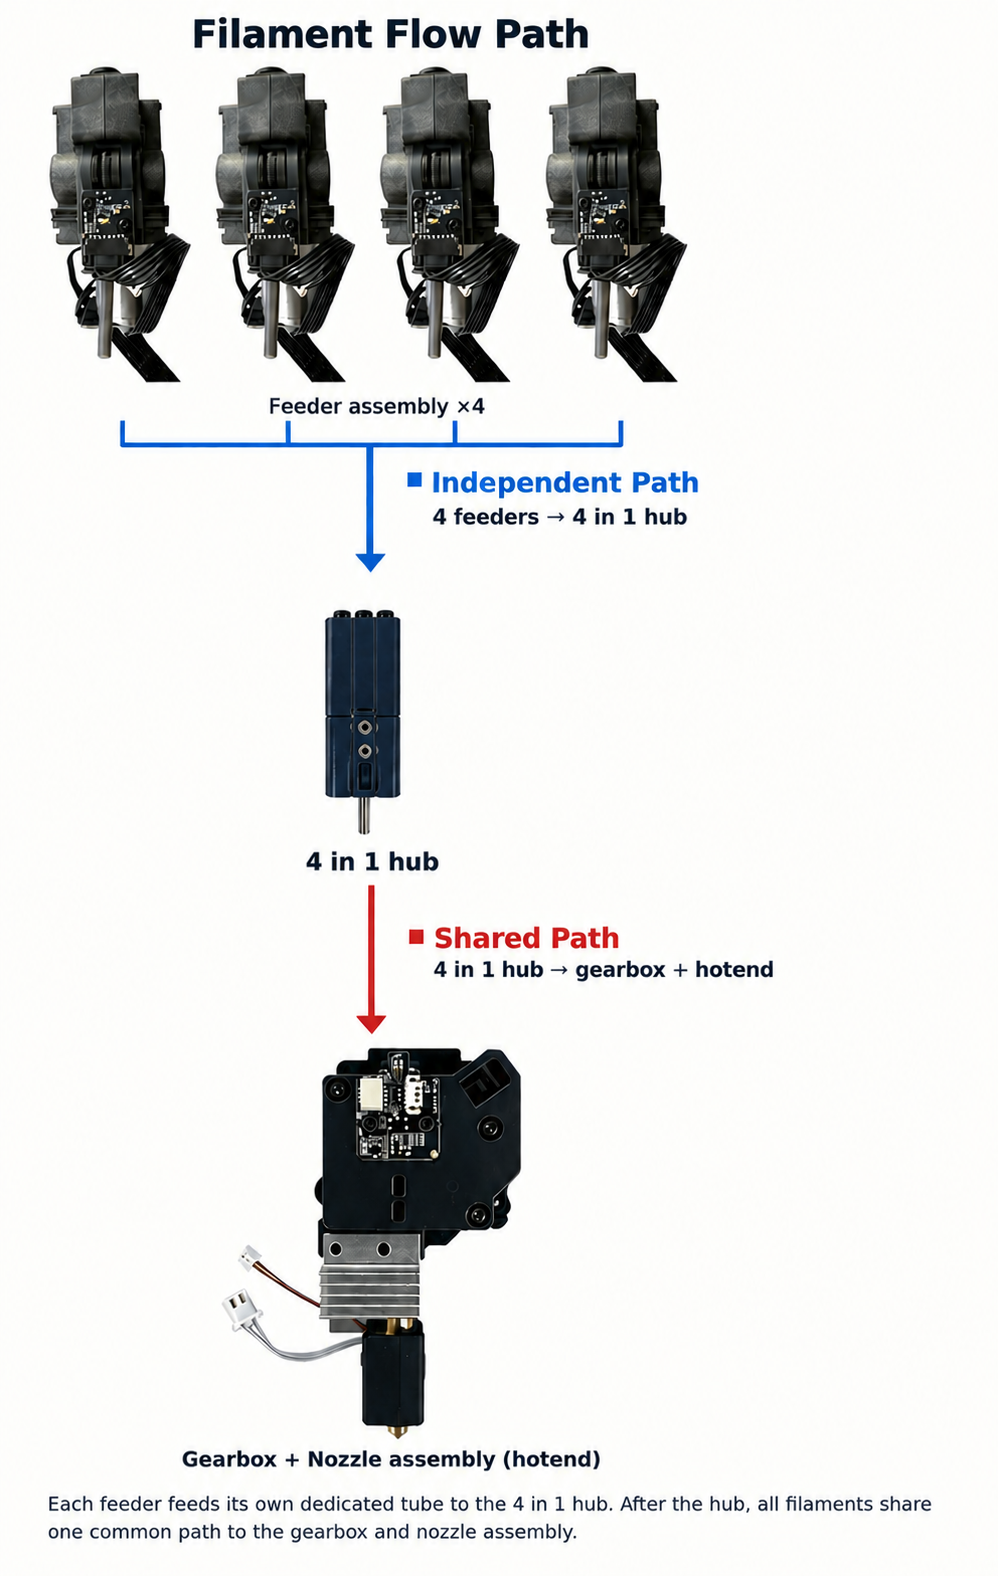
- Independent path issue: A specific CANVAS filament channel has a problem, such as:
- Feeder motor failure.
- Filament path blockage.
- Filament-related issues (tangled, knotted, or blocked filament).
- Common path issue: The common filament path after CANVAS has a problem, such as:
- 4-in-1 hub blockage caused by leftover filament.
- Tool head issue (gear box cannot detect filament, filament cannot be extruded, or nozzle assembly is clogged).
¶ Required Tools
- 1.5 mm Allen key
- 2.0 mm Allen key
- 2.5 mm Allen key
- One roll of filament
- Side cutters
¶ Troubleshooting Steps
Note: When CANVAS encounters a filament loading or unloading failure, first determine whether the issue occurs on only one filament port or all ports. This helps identify whether the problem is caused by an individual filament channel or the common filament path after the 4-in-1 hub.
¶ 1. Check Other CANVAS Ports for Testing
Use filament from another CANVAS port and perform a printing test.
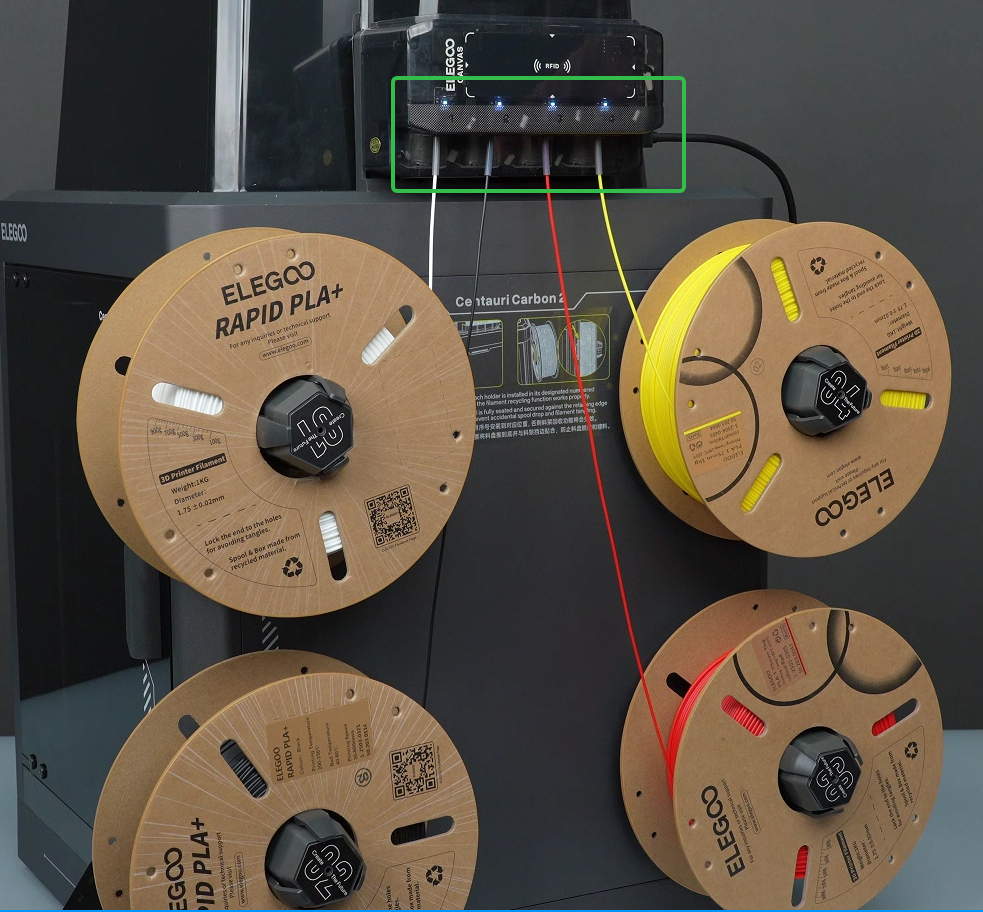
- If the error disappears when using the other three ports, continue with Step 2.
- If the other three ports still show the same error, continue with Step 3.
¶ 2. Check a Single CANVAS Channel Issue
¶ 1. Check the Filament
Check whether the filament loaded through this port is tangled, knotted, or blocked.
If the filament is tangled, untangle it or replace it with a new spool of the same filament type for testing. If printing returns to normal, the issue is caused by the filament.
Note: When inserting filament into the CANVAS channel, always hold the filament end to prevent it from becoming tangled.
If the filament is not tangled, remove the filament and check whether the filament tip has become enlarged.
If the filament tip is enlarged, use side cutters to trim the enlarged section before reinserting the filament.

¶ 2. Check the CANVAS Channel
- Open the CANVAS cover and reinstall the feeder motor according to the reference video:
https://www.youtube.com/watch?v=OLclADMW7Tc
- Make sure the grooves on the upper side of the feeder motor are aligned correctly, and the feeder motor cable is properly installed inside the cable clip as shown below.
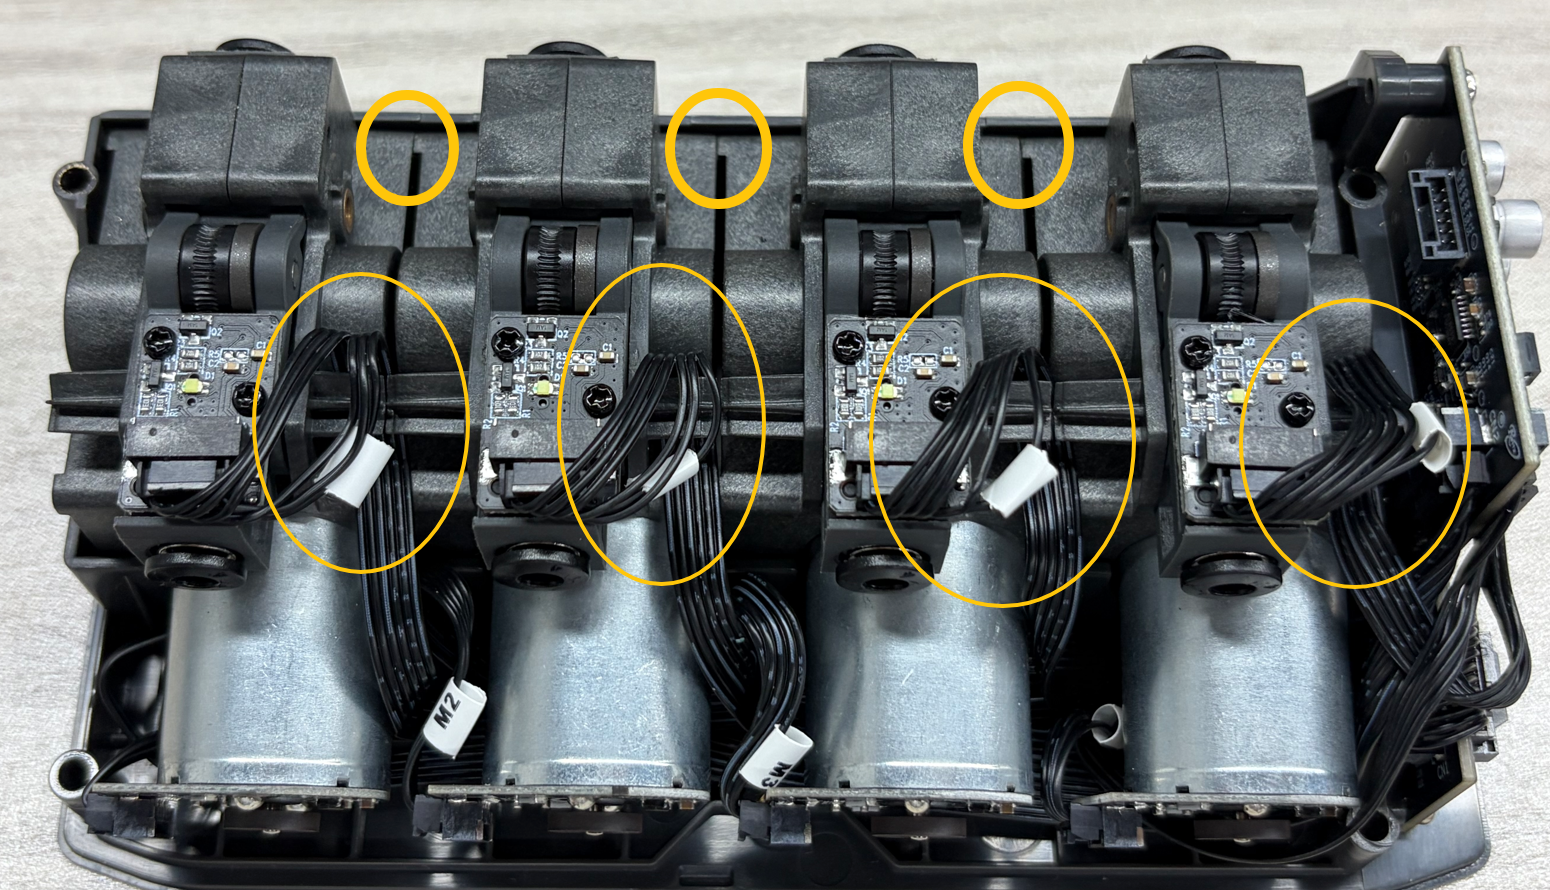
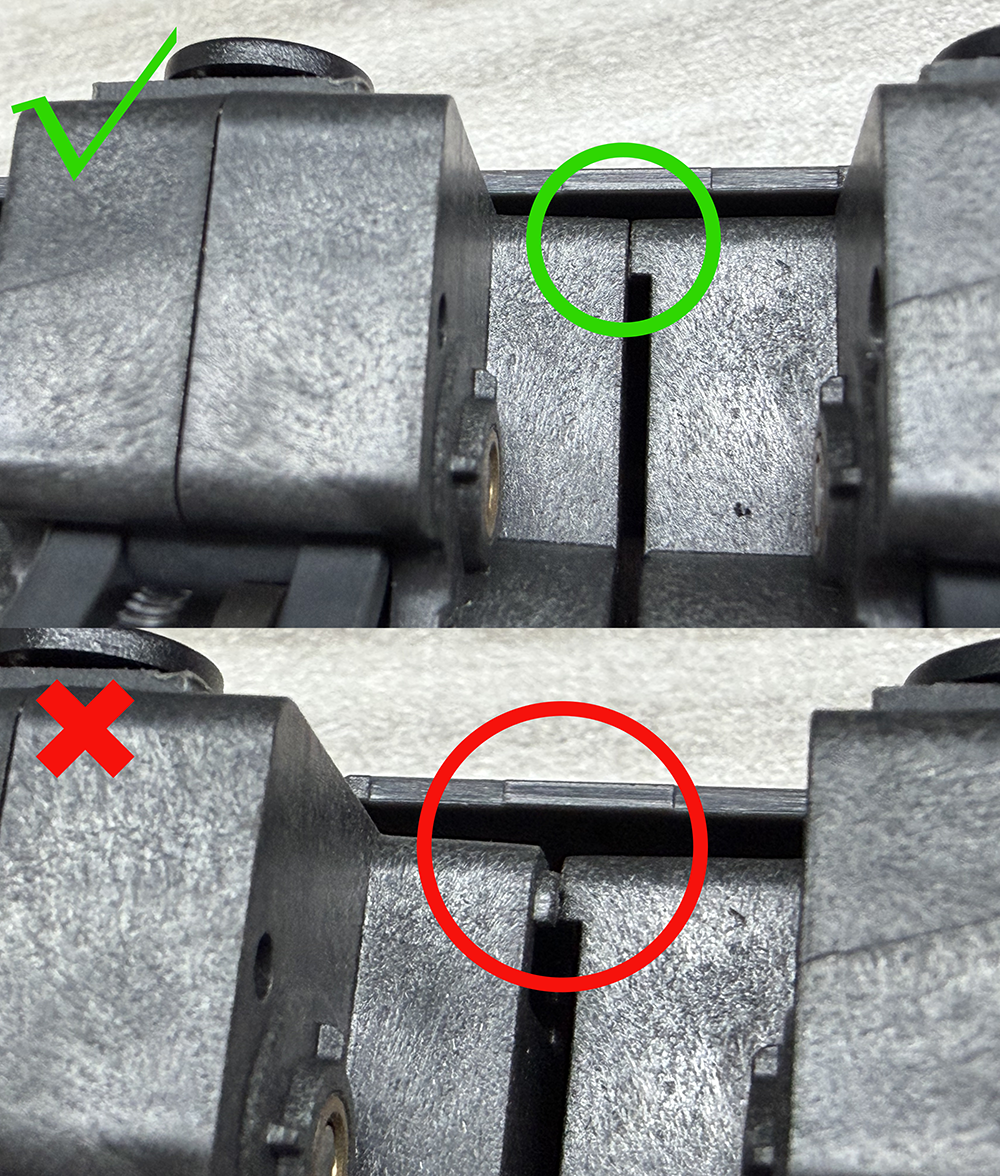
- Disconnect and reconnect the connectors on both ends of the feeder motor to ensure the connectors are properly connected and there is no loose connection or poor contact.
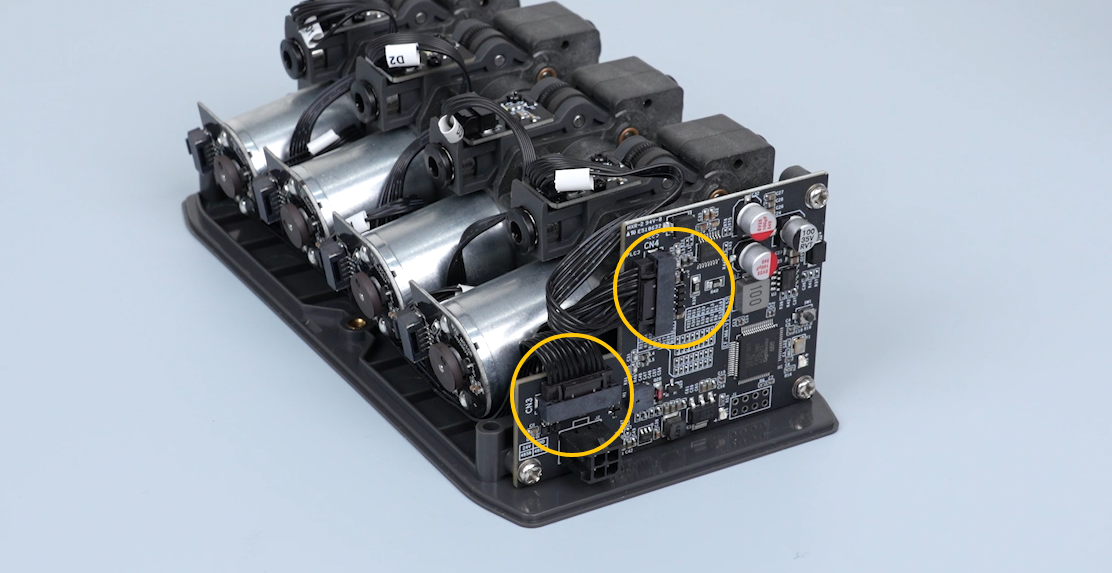
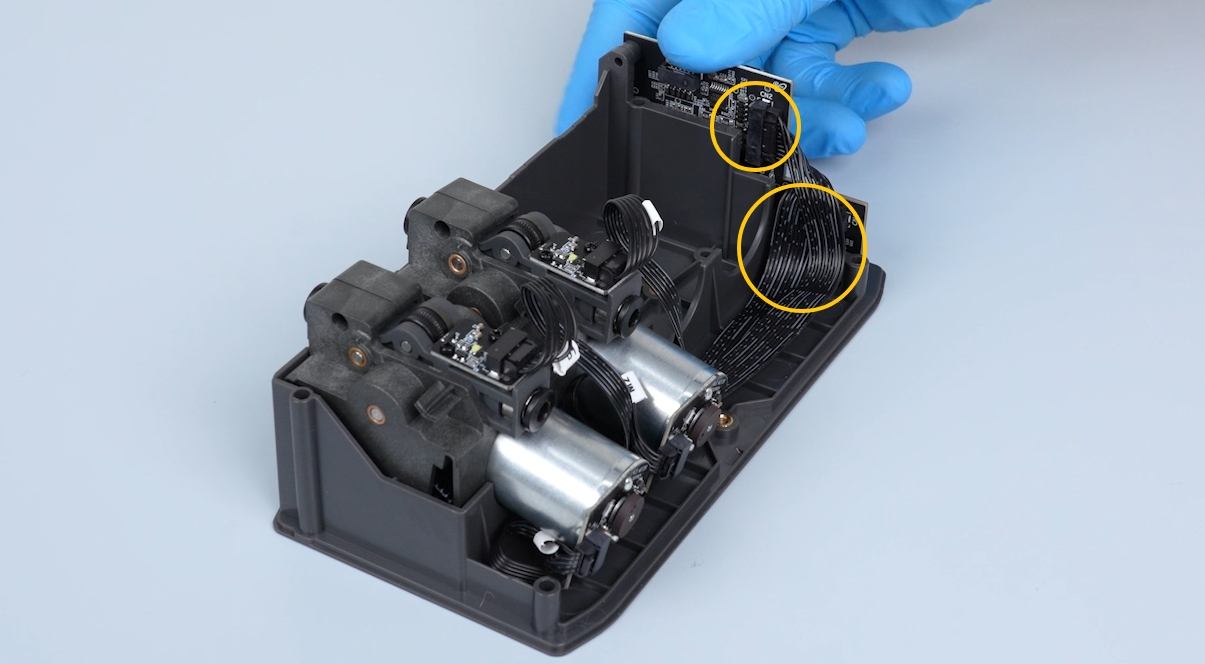
¶ 3. Check Issues with All Four CANVAS Channels
¶ 1. Check the 4-in-1 Hub
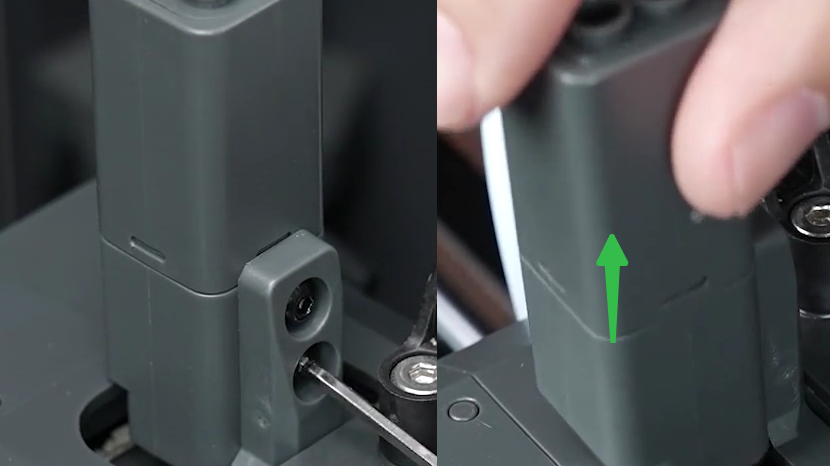
- Use a 2.0 mm Allen key to loosen the two screws on the back of the 4-in-1 hub, then pull the hub upward to remove it.
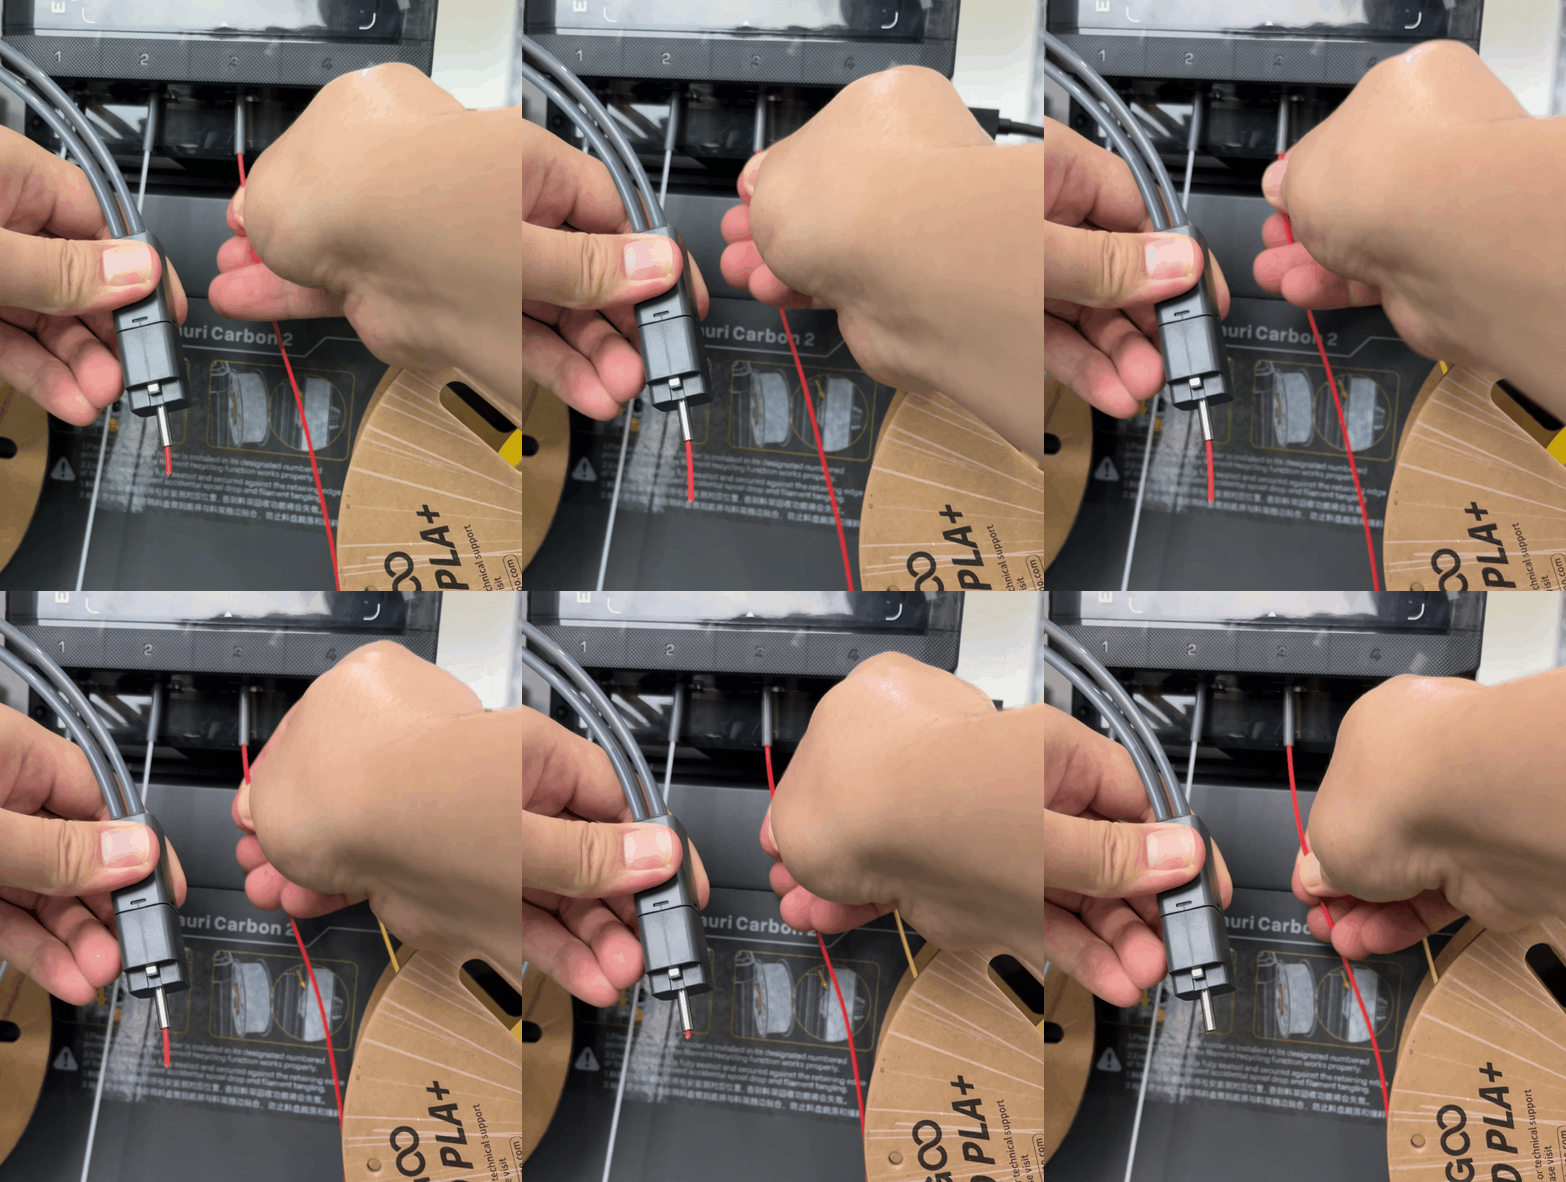
- Manually push filament through the channel and check whether there is any leftover filament inside the 4-in-1 hub and whether the filament can pass through smoothly.
- If the filament is stuck inside the 4-in-1 hub and cannot be pushed out, replace the 4-in-1 hub.
- If the filament can pass through normally, proceed to the next step.
¶ 2. Check the Tool Head
-
Connect the power cord and turn on the printer.
-
Insert a piece of filament into the top filament inlet of the tool head.
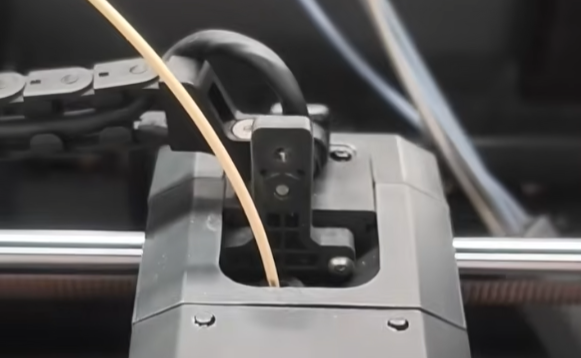
If no broken filament is found in the Tool head or PTFE tube, proceed to steps 3 and 4 for further troubleshooting.
¶ 3. Check the Filament Detection Board
- Unplug any PTFE tube from the upper side of the CANVAS.
- Manually feed filament into the PTFE tube and continue pushing until it cannot advance any further.
- Access the control menu on the Tool head and check whether the Tool head icon lights up green. (Under normal conditions, the green light stays on continuously.)
.gif)
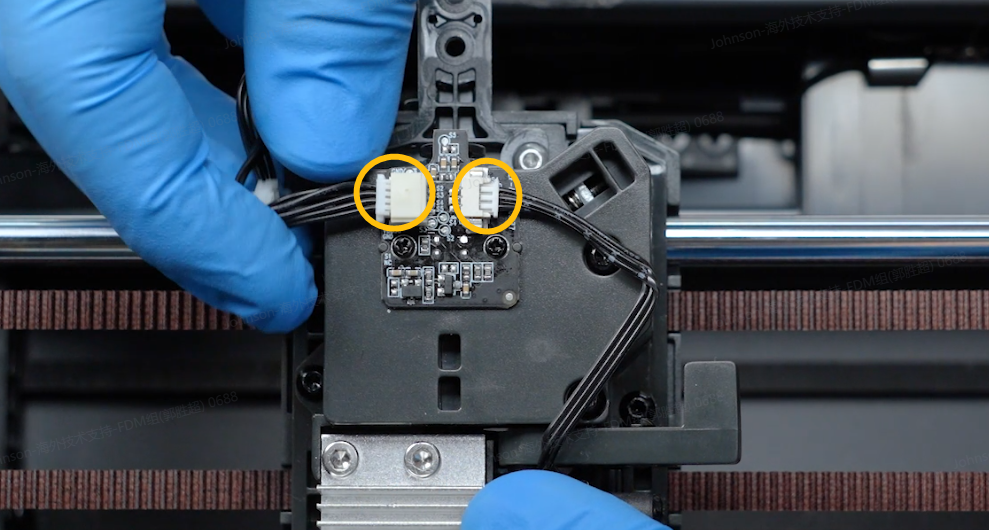
- If the icon does not light up green, the Filament detection board may have an assembly issue. Refer to the guide below to reinstall the Filament detection board:
Filament Detection Board Replacement - If the Tool head icon still does not light up green after reinstalling the Filament detection board, replace the Filament detection board with a new one.
- If the icon does light up green, set the nozzle temperature to 200°C on the touch screen, then enter the control menu and press the ▼ button to extrude filament.
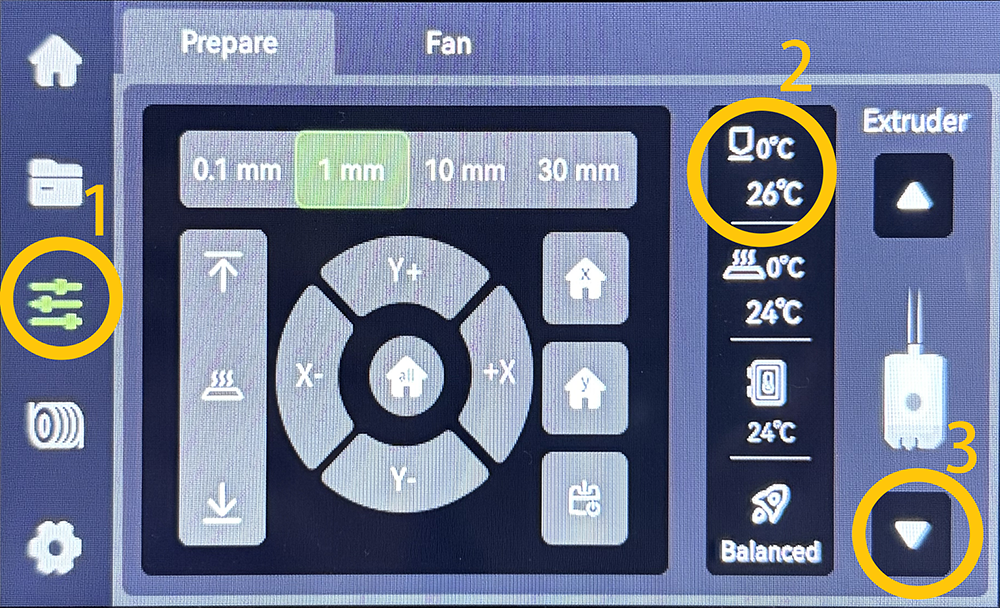
- Check whether filament can be extruded from the nozzle normally.
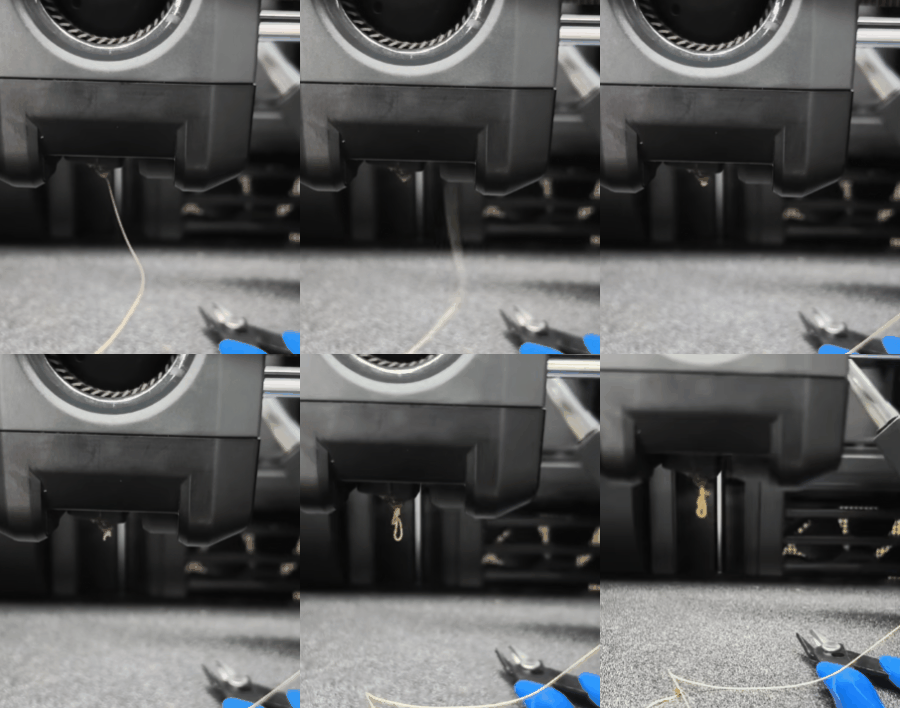
- If filament cannot be extruded, proceed to the next step.
¶ 4. Check the Gear Box
Disassemble the gear box and check whether there is any filament debris inside. Tighten the gear. Refer to the following video for gear box disassembly:
https://www.youtube.com/watch?v=0XCBpwRAjXE
Rotate the screw at the bottom counterclockwise to tighten the gear.
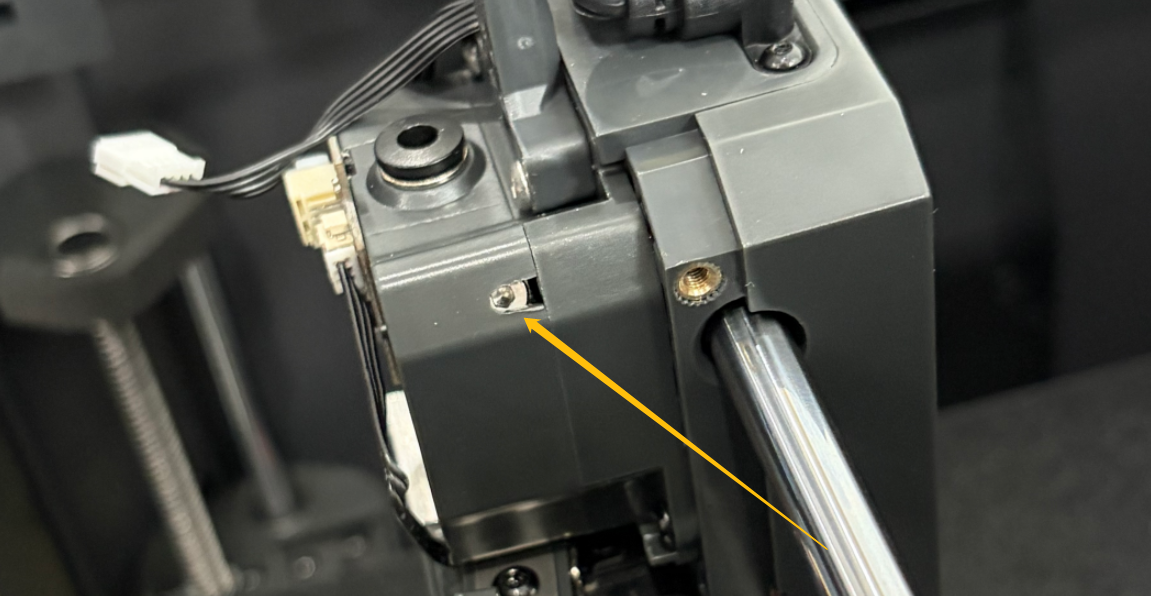
Manually rotate the gear to confirm that the gear box can properly load filament.
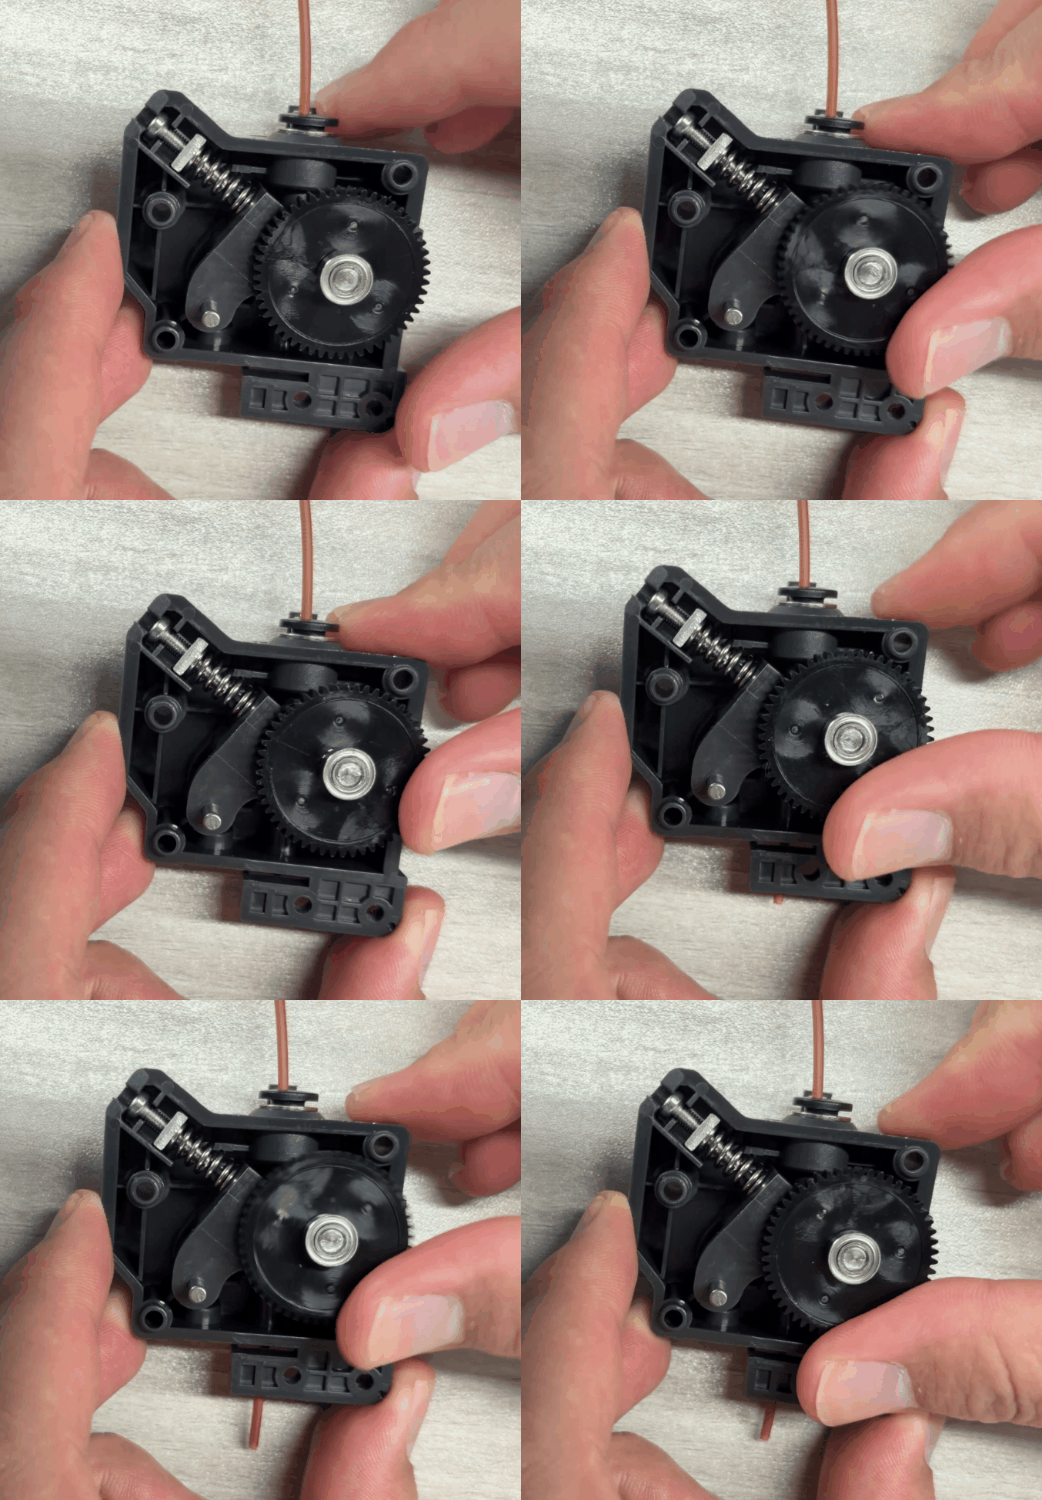
- If filament cannot be extruded normally but can be pushed out by manually rotating the gear, the nozzle is clogged. Please provide screenshots or videos showing the relevant issue and send them to our technical support team for further analysis.
¶ Still Not Resolved
If the issue still exists after completing all troubleshooting steps, please provide the following information and contact technical support.
Technical Support Email: 3dp@elegoo.com
Please provide:
- Confirm whether the filament loading/unloading failure occurs only on a single port or all ports.
- Provide a short video showing the complete filament loading process and the location where the filament stops moving.
- If the issue occurs on the Centauri 2 series and there is a specific filament loading error message, provide a photo of the error message.
¶ Help Us Improve
If you have any ideas about the wiki pages, please let us know via ELEGOO official feedback channel.