¶ Issue Description
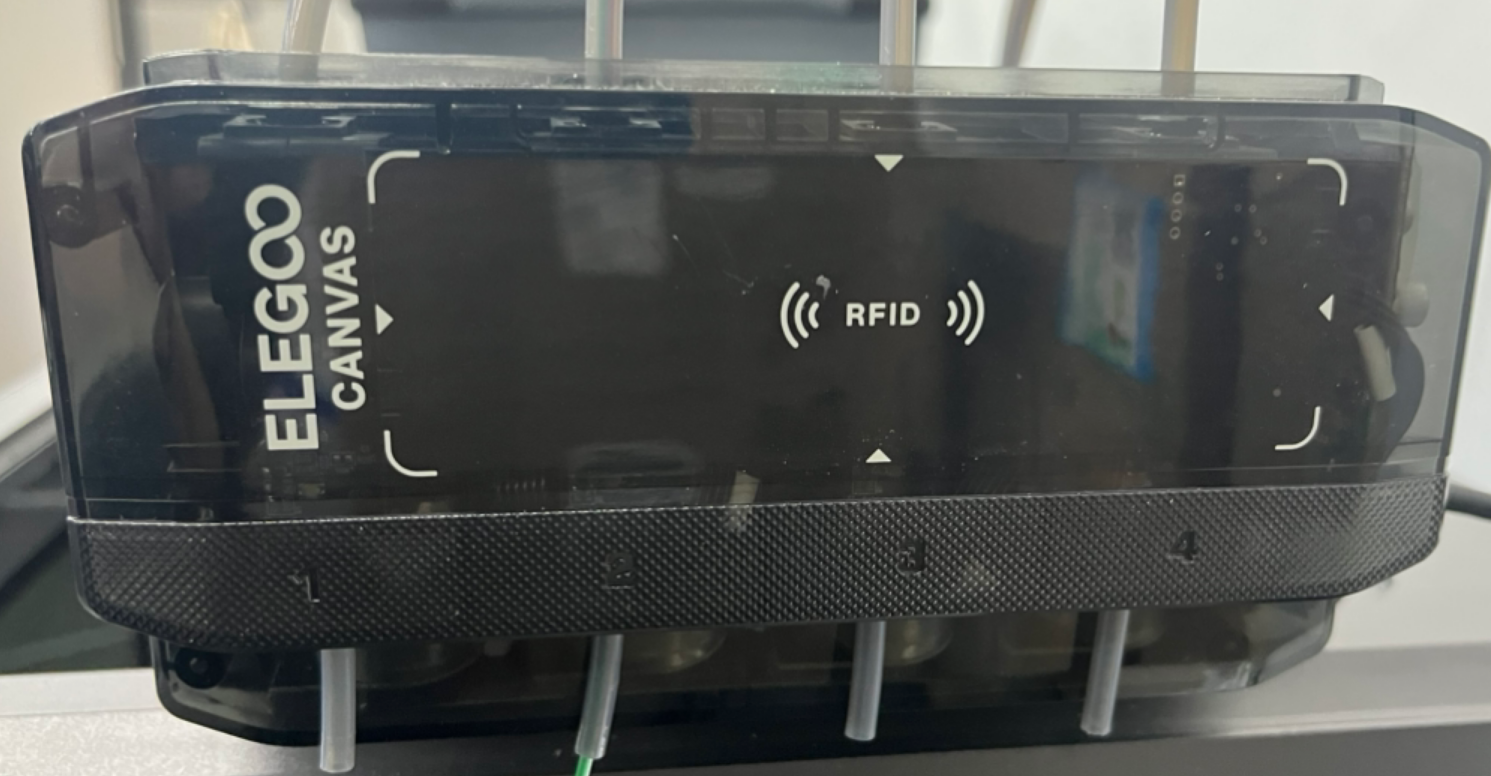
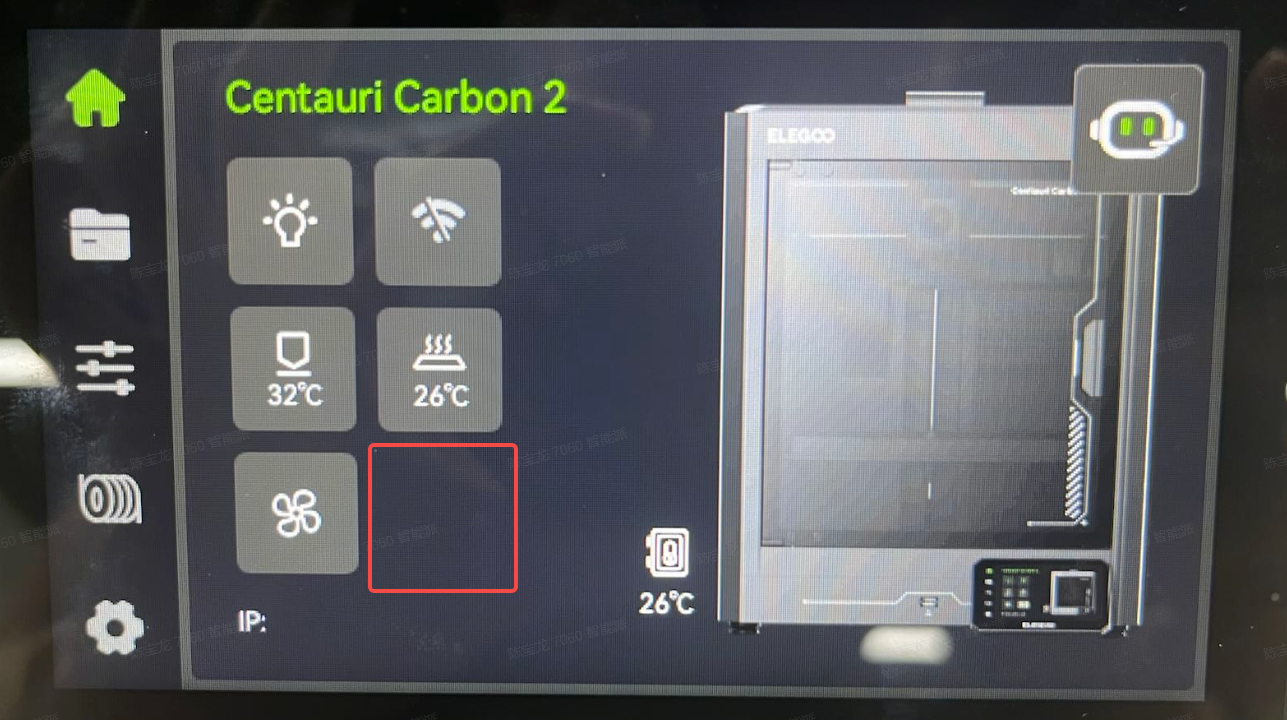
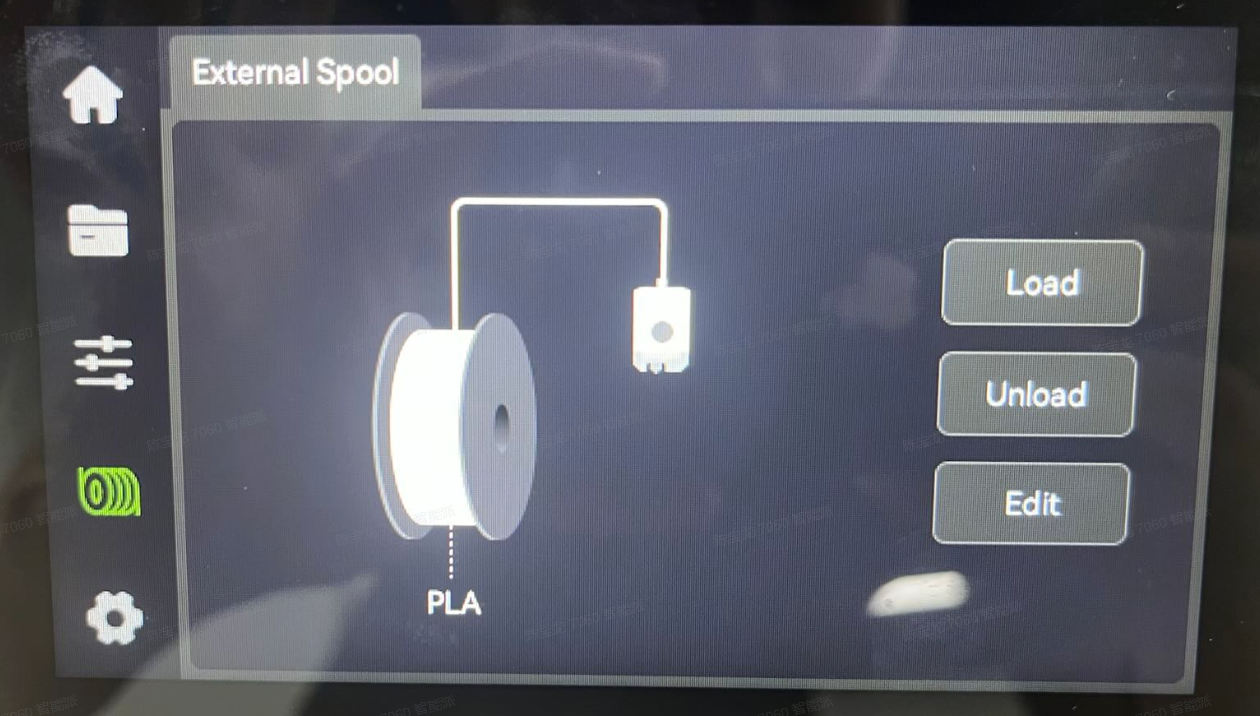
After installing CANVAS, the printer cannot properly recognize the CANVAS module, and the UI still displays the single-color printing interface.
¶ Possible Causes
- The firmware version does not support CANVAS, or the firmware has not been loaded correctly.
- The hardware connection or wiring status is abnormal.
¶ Required Tools
- 1.5 mm Allen key
- 2.0 mm Allen key
- Tweezers
¶ Troubleshooting Steps
¶ 1. Firmware Check
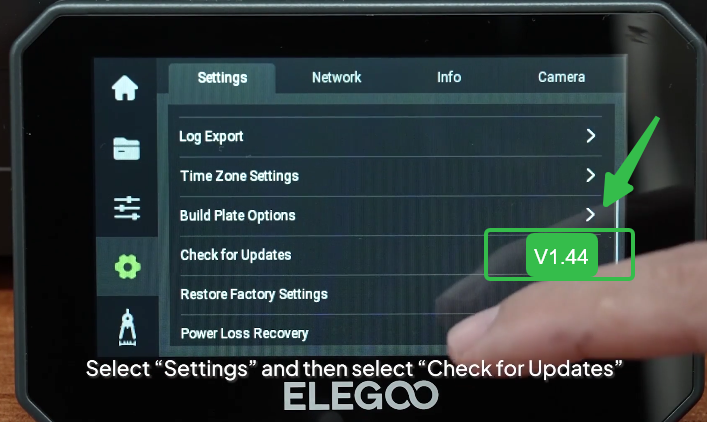
- After installing CANVAS, the Centauri Carbon requires the corresponding firmware update. Firmware version 1.44 or above is required to support CANVAS multi-color printing.
On the printer touch screen, tap Settings → Check for Updates to complete the OTA firmware update.
¶ 2. Reseat the CANVAS Communication Cable Connector
- Turn off the printer power switch and unplug the power cord.
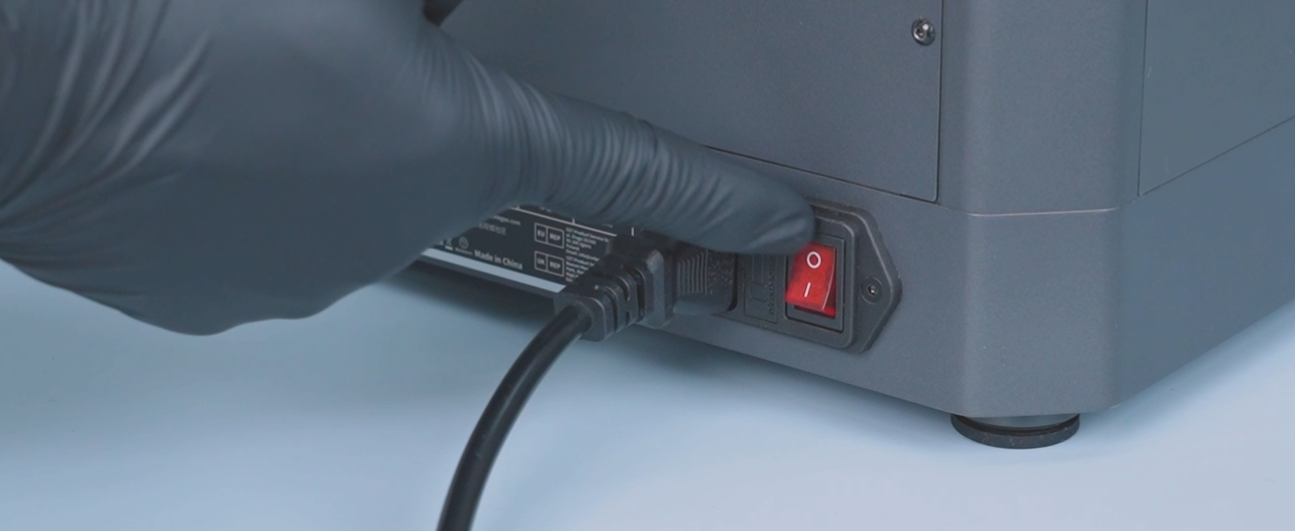
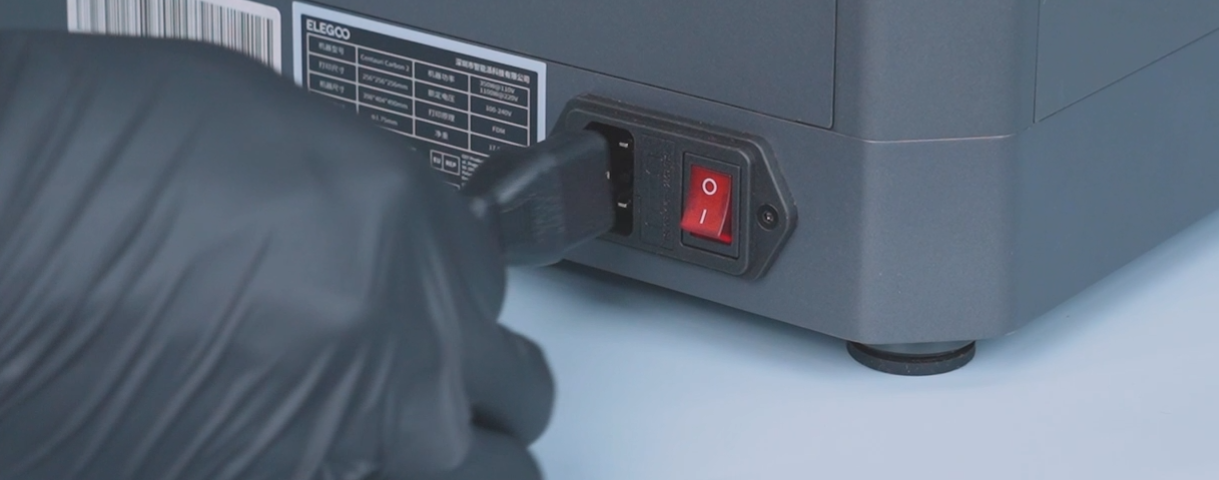
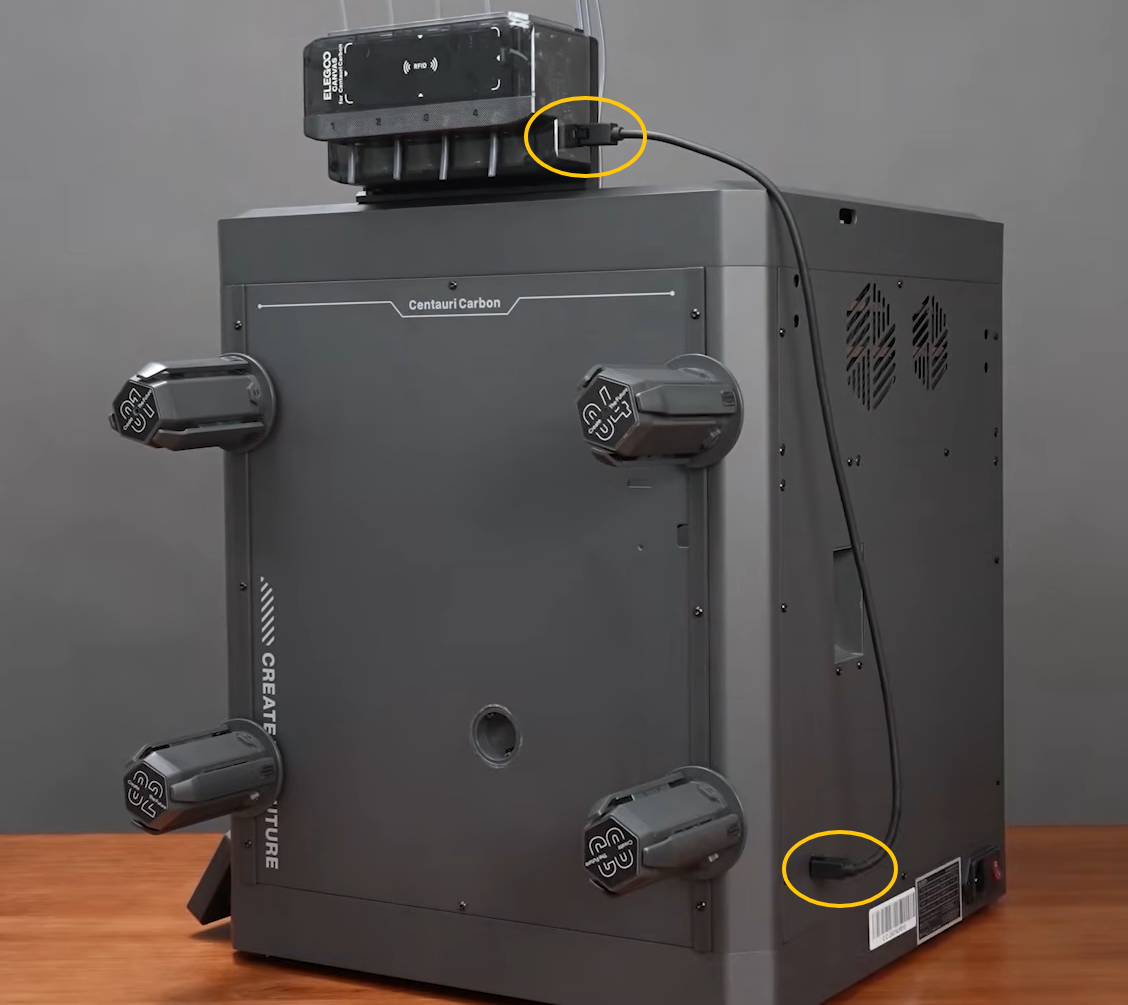
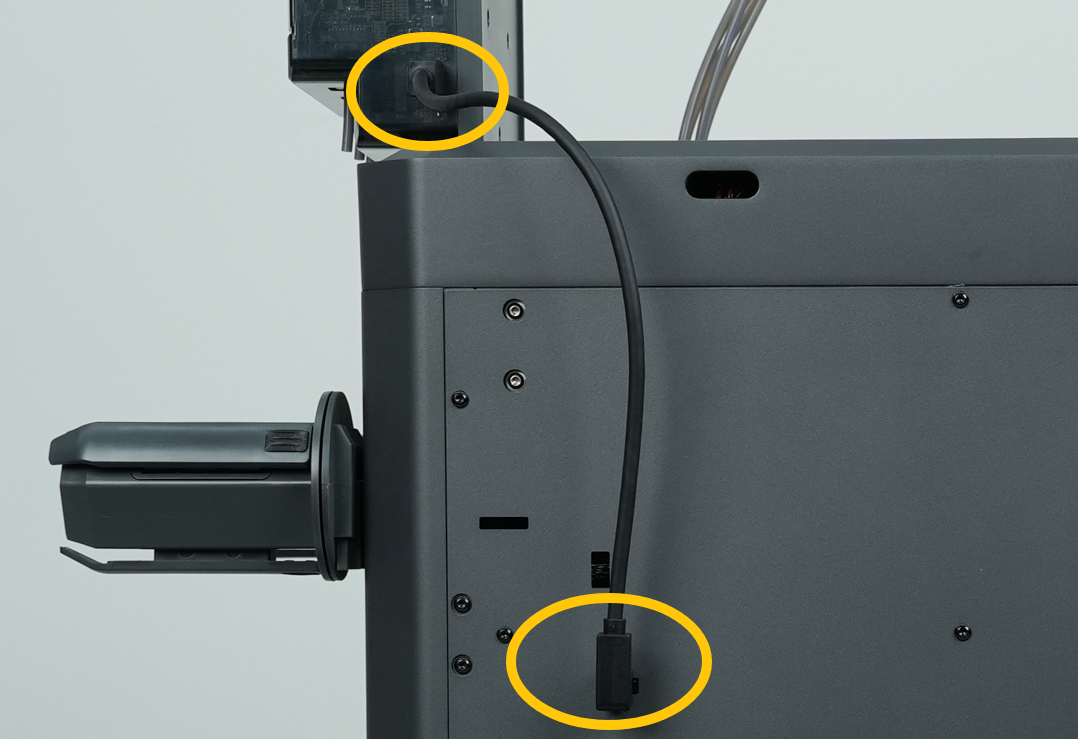
- Reconnect the CANVAS communication cable.
Note: For Centauri Carbon, the connector is located on the lower-left side.
Note: For the Centauri 2 series, the connector is located on the upper-left side.
¶ 3. Reseat the CANVAS Extension Cable / Multi-color Extension Adapter Cable
-
Turn off the printer and unplug the power cord.
-
Use a 2.0 mm Allen key to loosen the 10 screws securing the bottom cover, then remove the bottom cover.
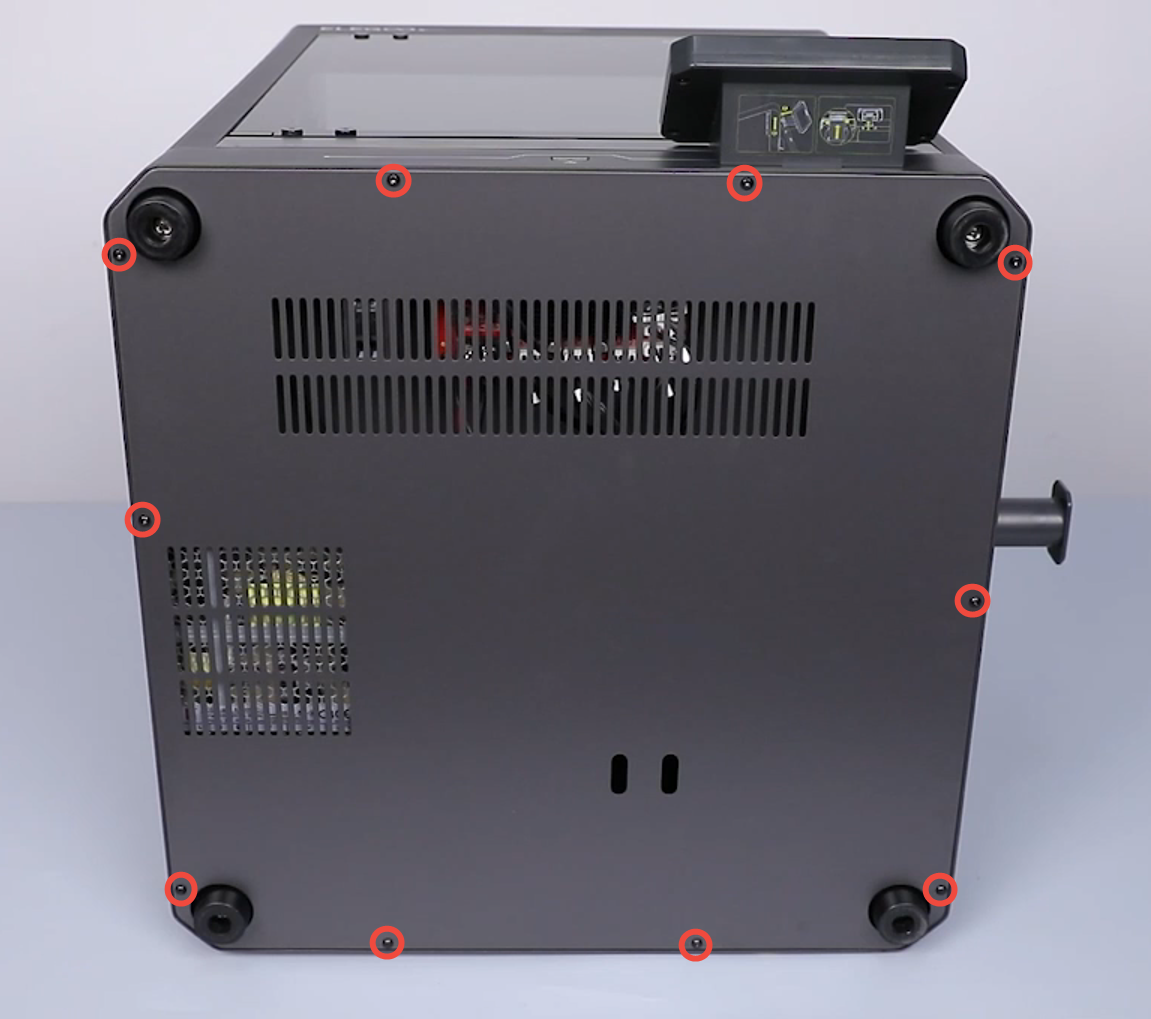
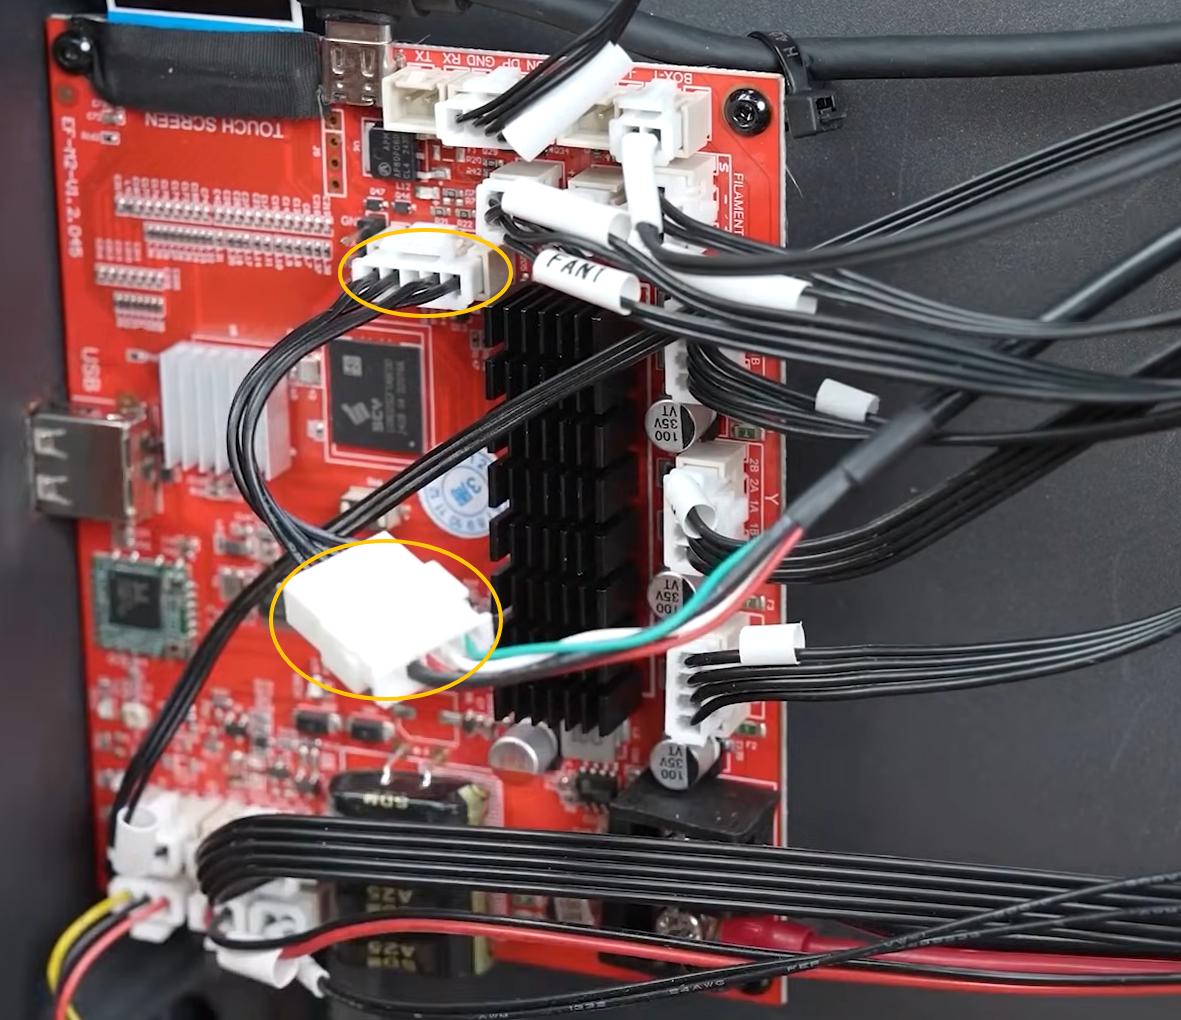
- For the Centauri Carbon 1, reconnect the CANVAS extension cable and CANVAS extension adapter cable on the mainboard side.
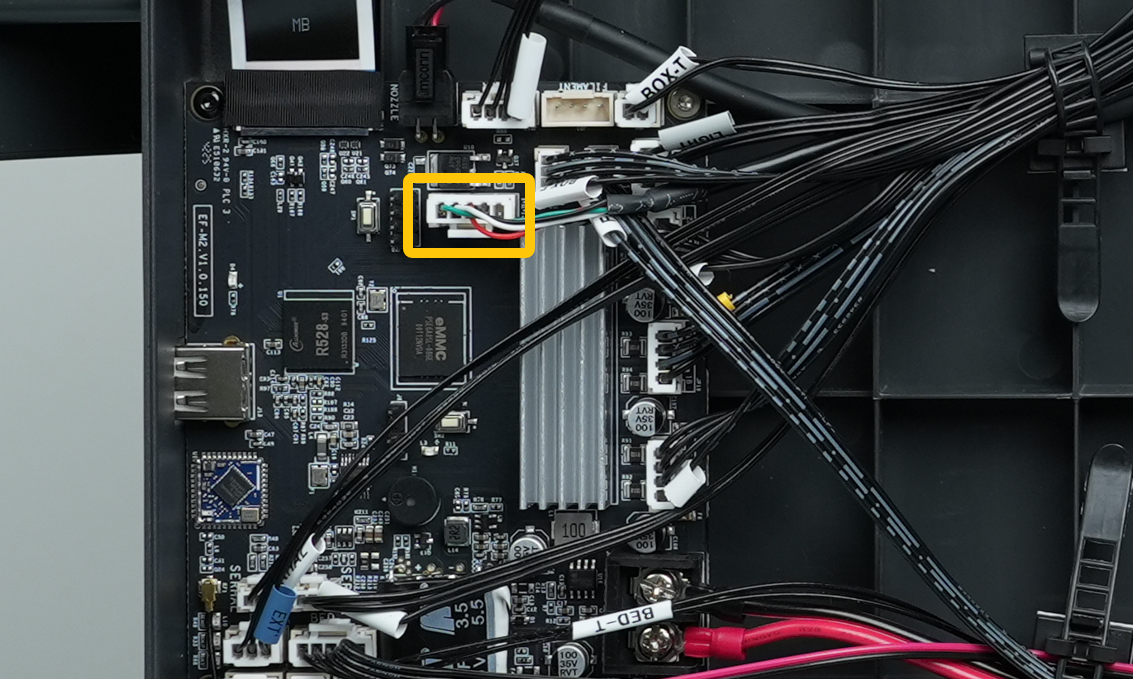
- For the Centauri 2 series, there is no CANVAS extension adapter cable. Directly reconnect the CANVAS extension cable on the mainboard side.
¶ 4. Reseat the CANVAS Mainboard Connector
-
Turn off the power switch and unplug the power cord.
-
Disconnect the CANVAS communication cable.
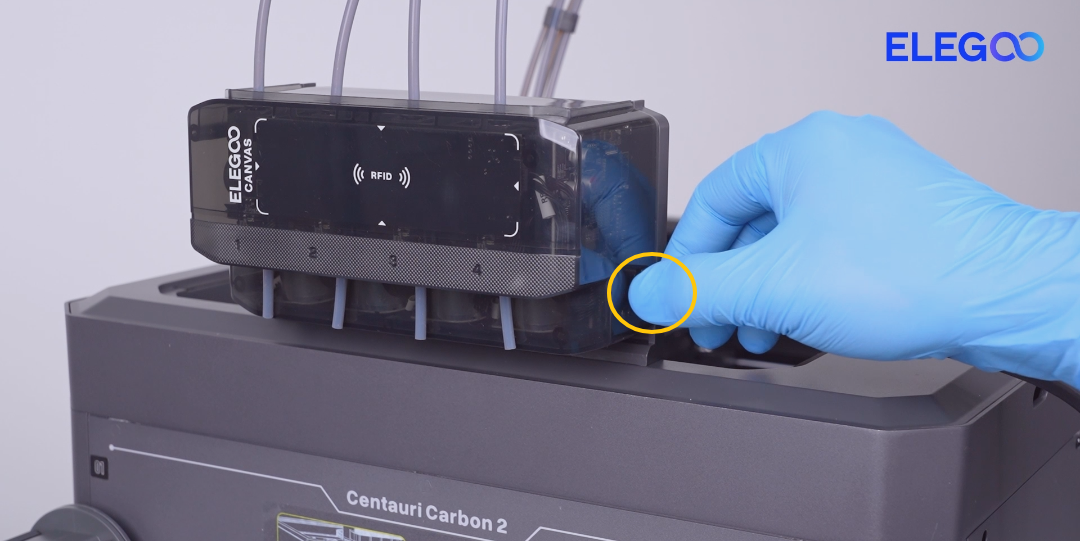
- Disconnect the PTFE tubes on both sides of CANVAS.
Gently press the PTFE tube connector with tweezers to release the tube, then remove the PTFE tube.
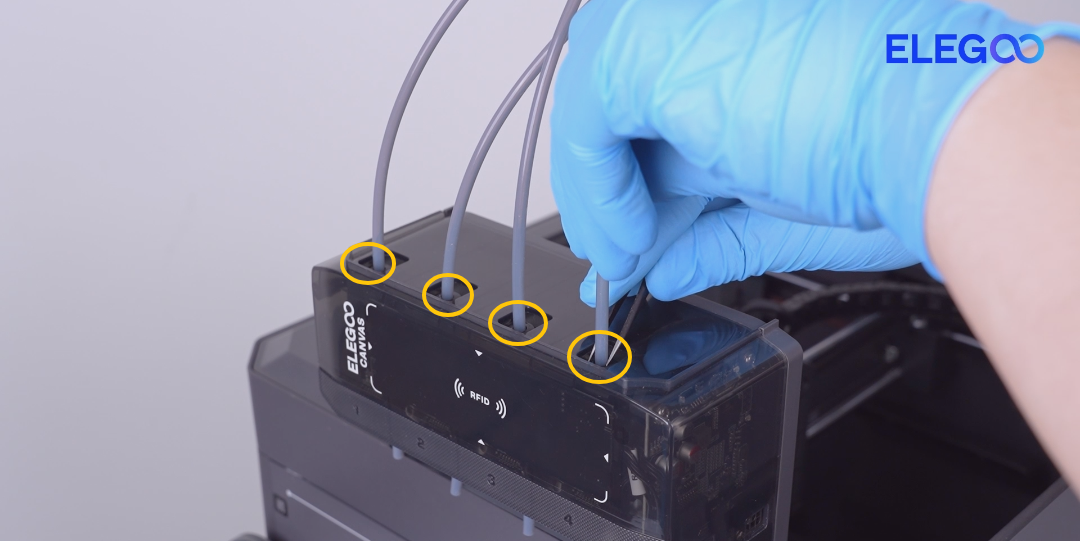
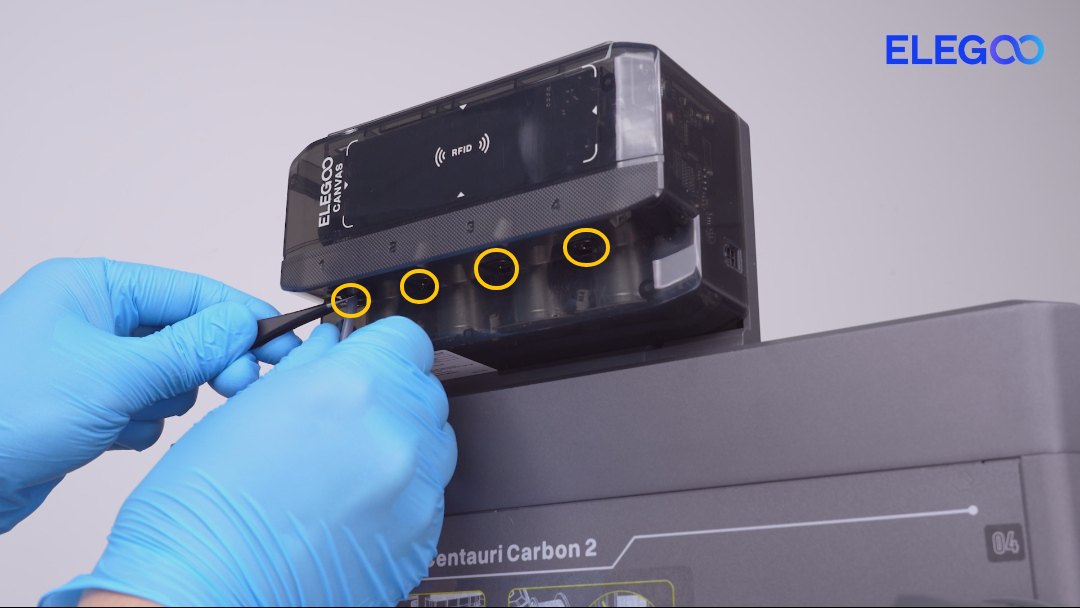
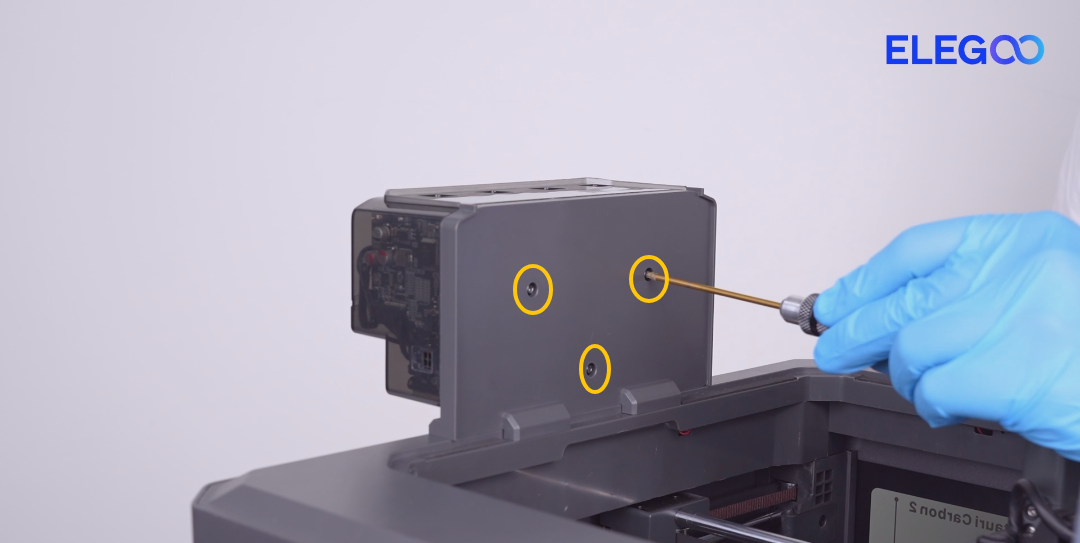
- Remove the three screws securing the CANVAS mounting bracket.
When removing the last screw, hold the CANVAS assembly with your hand to prevent it from falling. Then remove the CANVAS assembly.
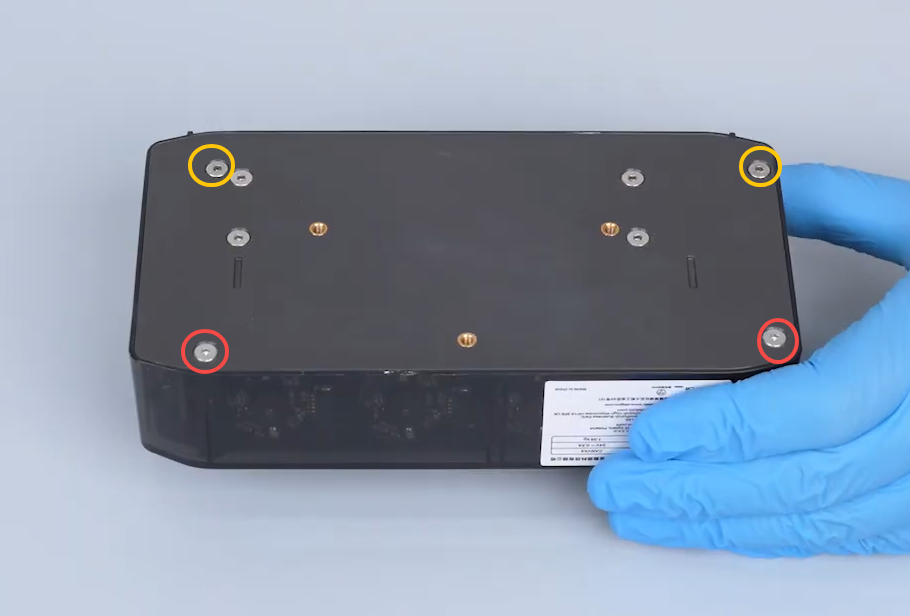
- Remove the four screws securing the CANVAS housing.
Screw Specifications:
Yellow marking: M3×45
Red marking: M3×18
Note: Some CANVAS versions require a 1.5 mm Allen key for disassembly.
- Open the CANVAS housing and locate the CANVAS mainboard.
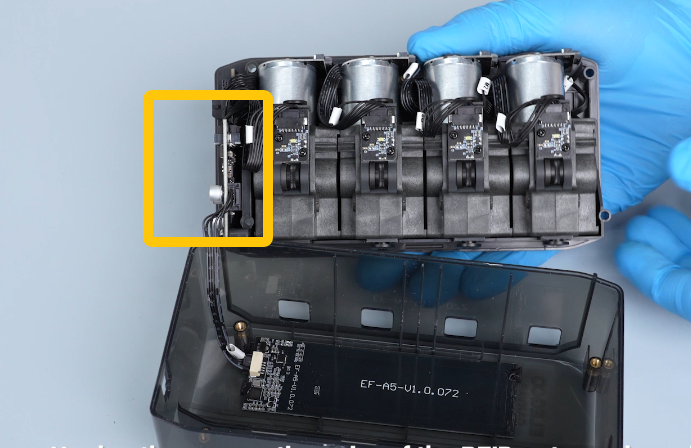
- Reconnect the two connectors on the CANVAS mainboard.
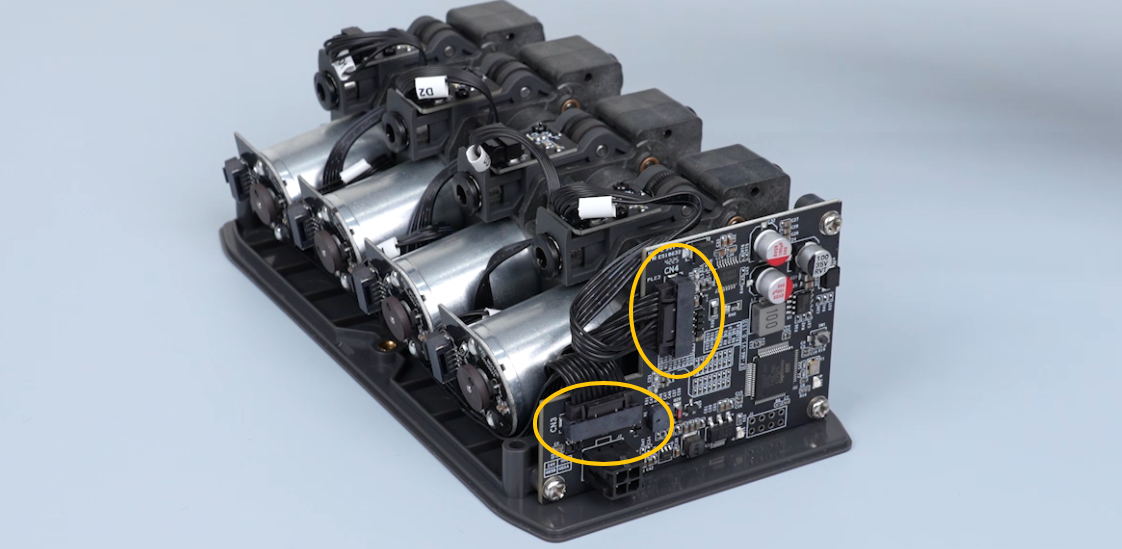
- After completing the above steps, reassemble the CANVAS unit and restore all components.
¶ Still Not Resolved
If the issue persists after completing all troubleshooting steps, please provide the following information and contact technical support.
Technical Support Email: 3dp@elegoo.com
- Picture of the printer UI interface.
- Picture showing the CANVAS device status.
- Picture showing the CANVAS communication cable connection status and whether the cable harness is damaged.
¶ Help Us Improve
If you have any suggestions or feedback regarding the wiki pages, please let us know through the ELEGOO official feedback channel.