¶ User_Manual
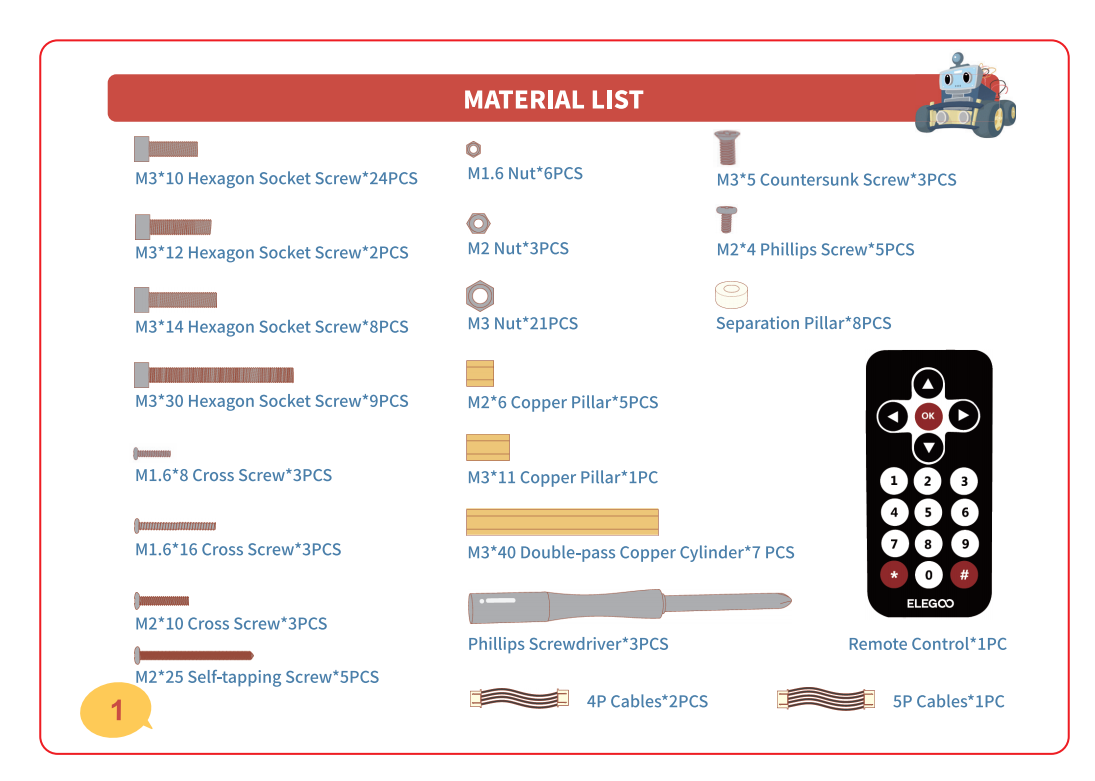
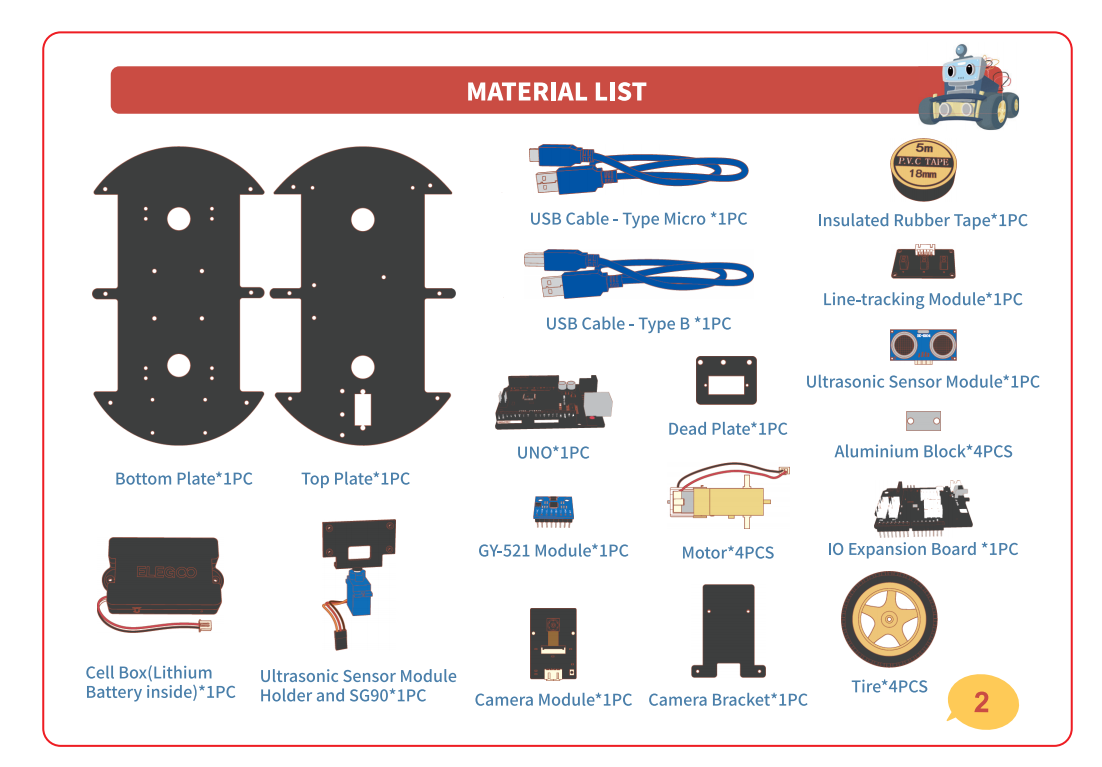
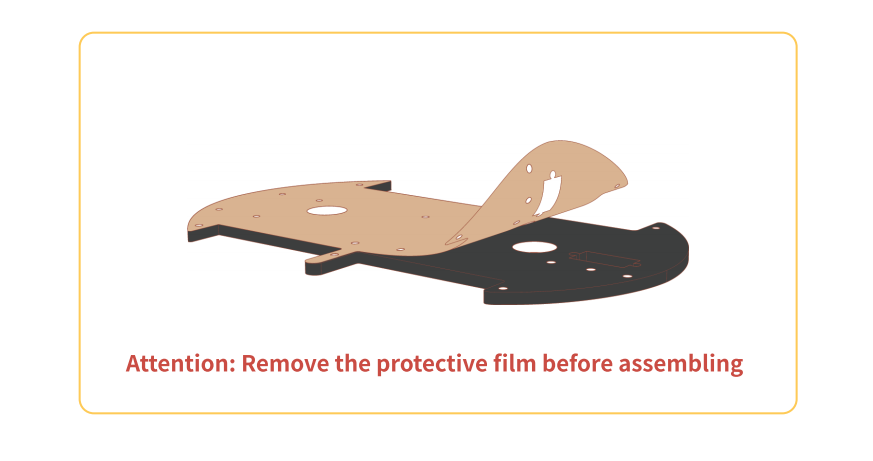
If you find the illustrated assembly instructions difficult to follow, you may download the ELEGOOkit APP. After launching the app, tap the Build button to view the step-by-step animated assembly guide.
The ELEGOOKit App is available for direct download via the Google Play Store. You can simply search for it and install it.
¶ ASSEMBLE THE MOTOR
Take ①②③ out from the bag marked“FOR MOTOR”
①: M3 Nut*2PCS
②: 330 Hexagon Socket Screw2PCs
③: Aluminium Block*1PC
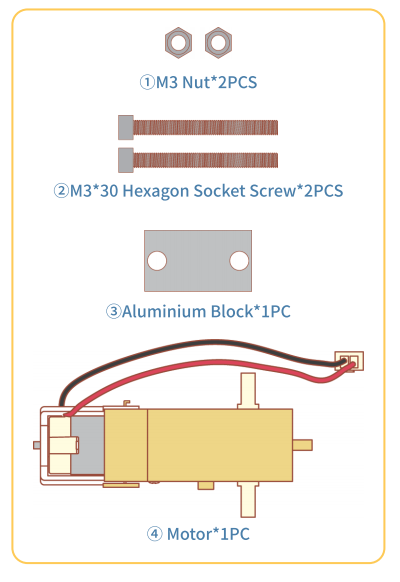
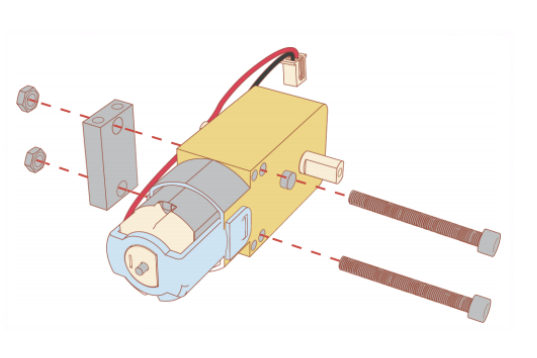
Take ①out from the bag marked "FOR MOTOR"
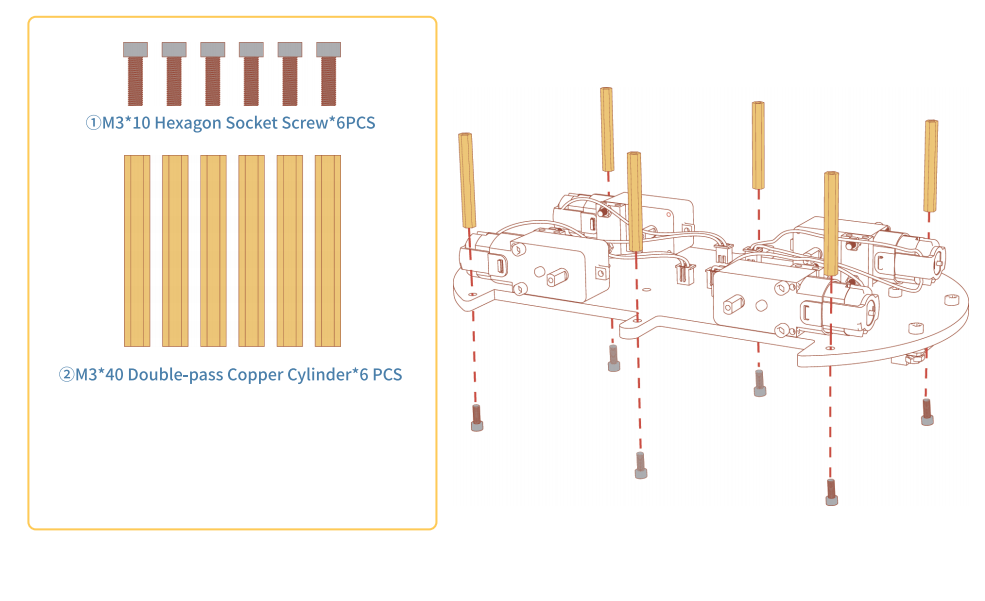
Please pay attention to the direction of each motor to ensure that the motor direction is correct.
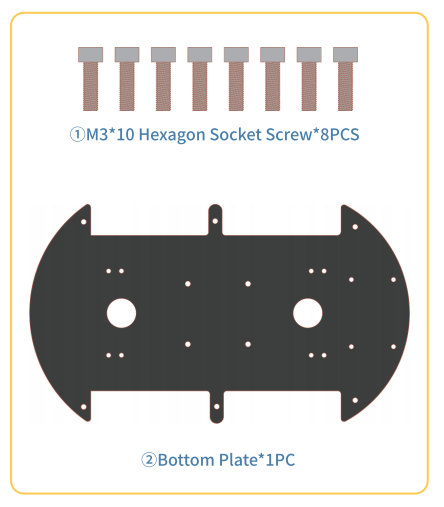
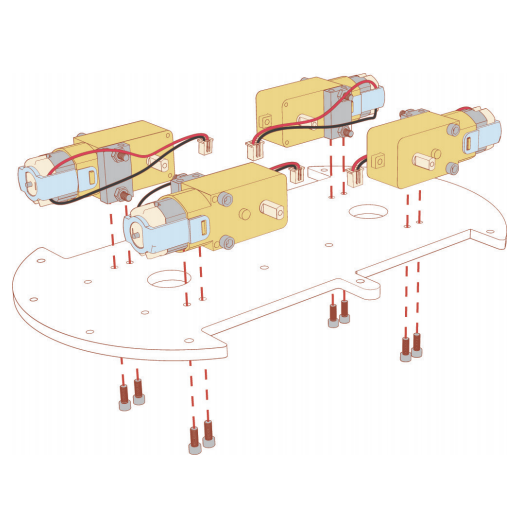
Please note the orientation of the metal adapter plate — do not install it backwards. Ensure the nuts are fully tightened, as loose fasteners may come off during operation.
When performing this installation step, make sure all the wired sides face inward. If any motor cannot be installed flush or properly seated inward, please check if it was installed backwards in the previous step.
Use the green hex screwdriver for fastening.
¶ ASSEMBLE THE LINE-TRACKING MODULE
Take ①②③ out from the bag marked “FOR UNO, LINE TRACKING”
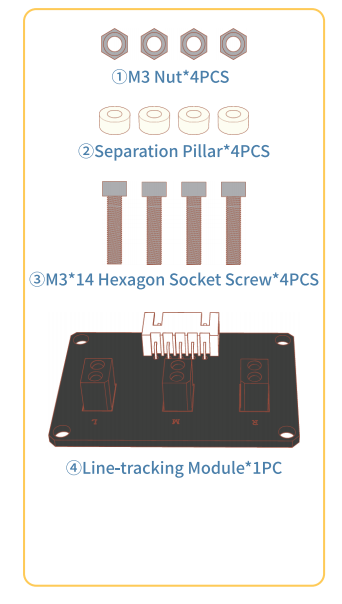
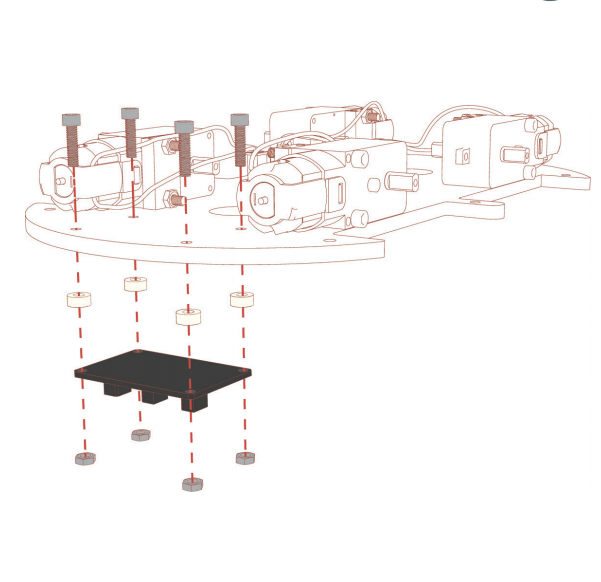
During this step, you may hold the car upright. Insert the screws and washers into their corresponding holes, then place the line-tracking sensor into position by aligning it with the matching holes. Screw in the four screws partially to prevent them from falling out, then use a screwdriver to fully tighten them. Note that the probes of the line-tracking sensor must face forward.
¶ ASSEMBLE THE EXPANSION BOARD AND UNO
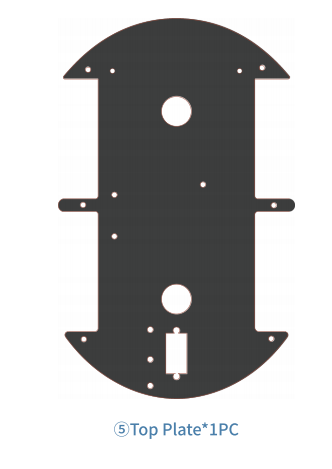
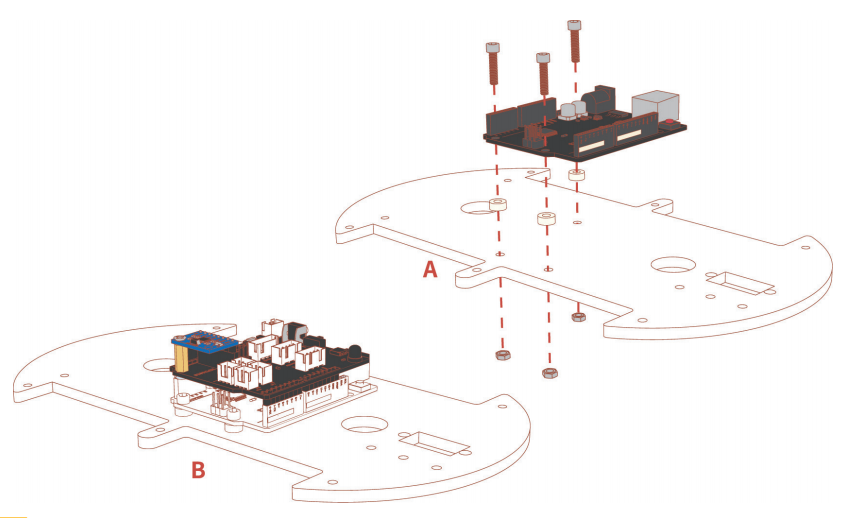
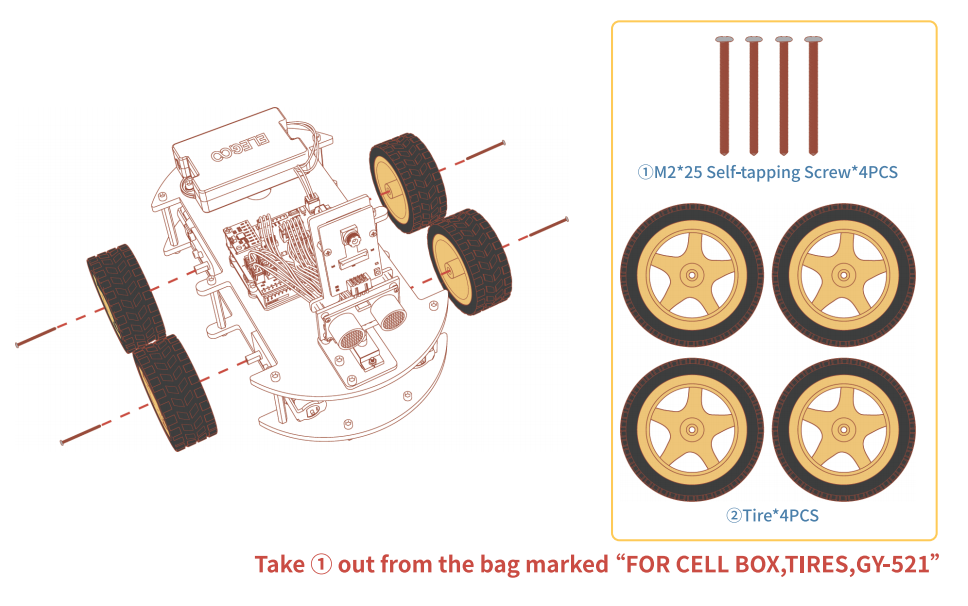
Take ①② out from the bag marked "FOR CELL BOX, TIRES, GY-521"
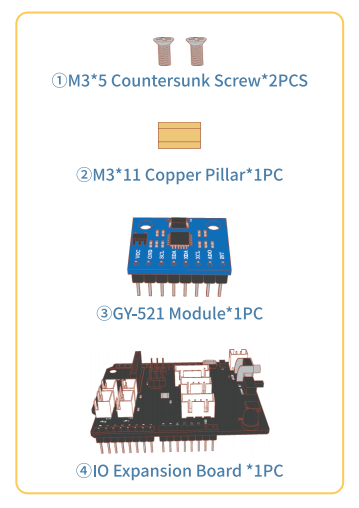
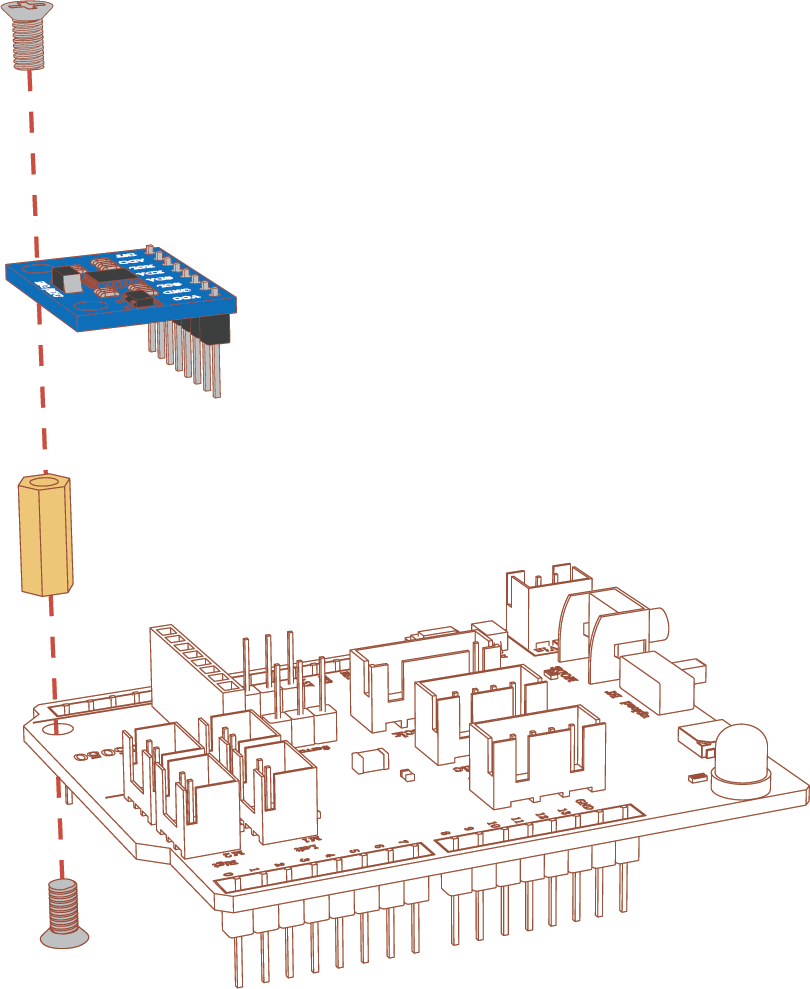
Take ①②③ out from the bag marked "FOR UNO, LINE TRACKING"
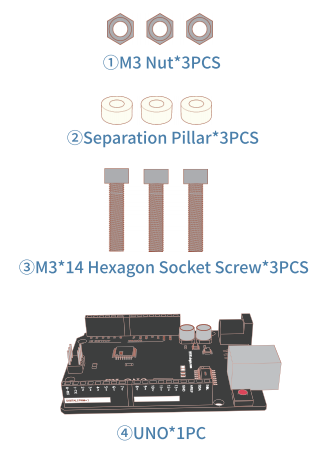
¶ ASSEMBLE THE BATTERY BOX
Take ①② out from the bag marked "FOR CELL BOX, TIRES"
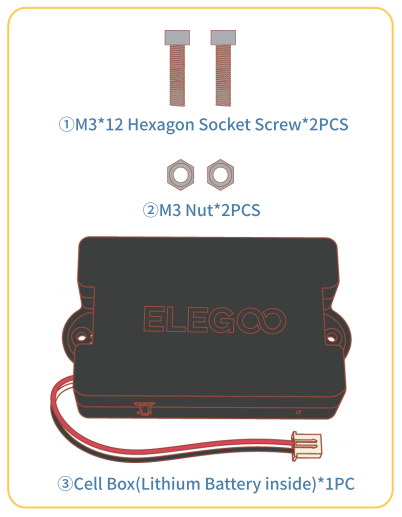
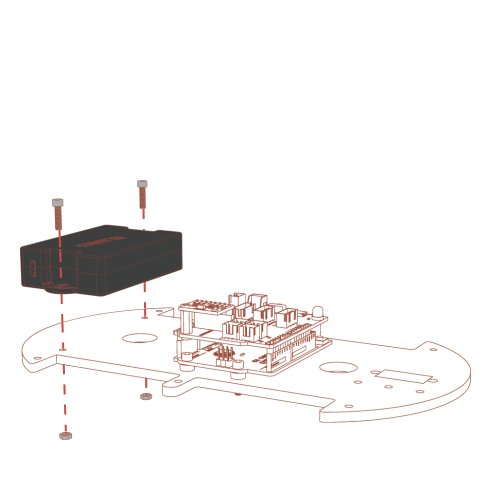
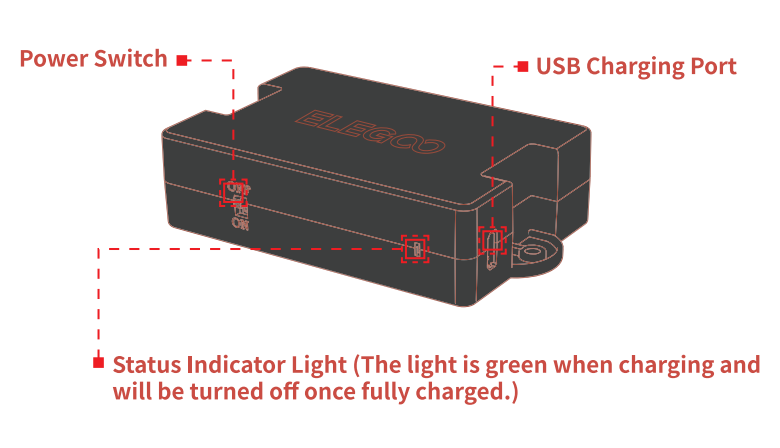
Please fully charge the battery before using it.
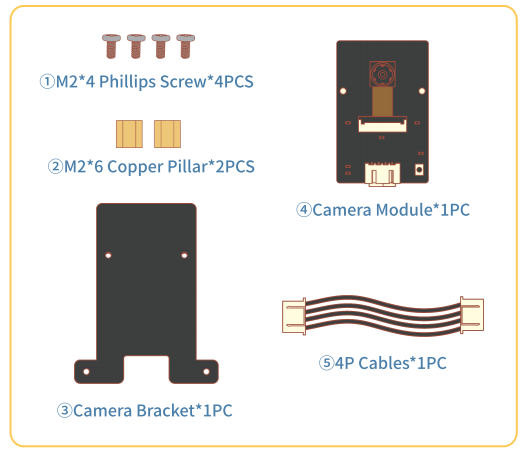
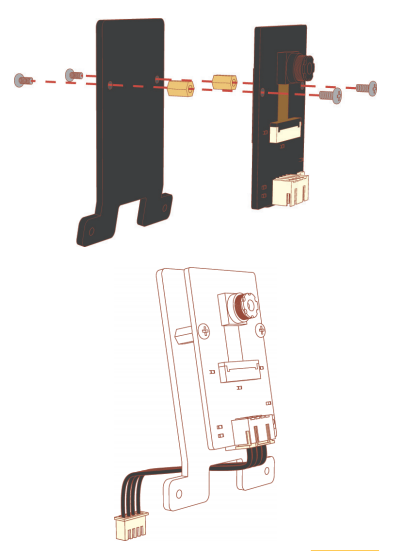
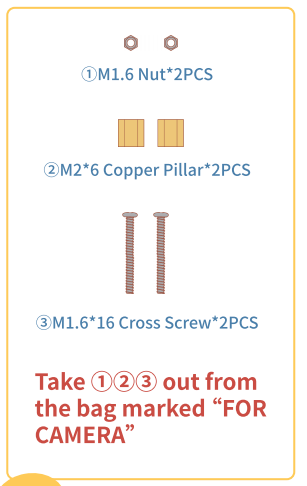
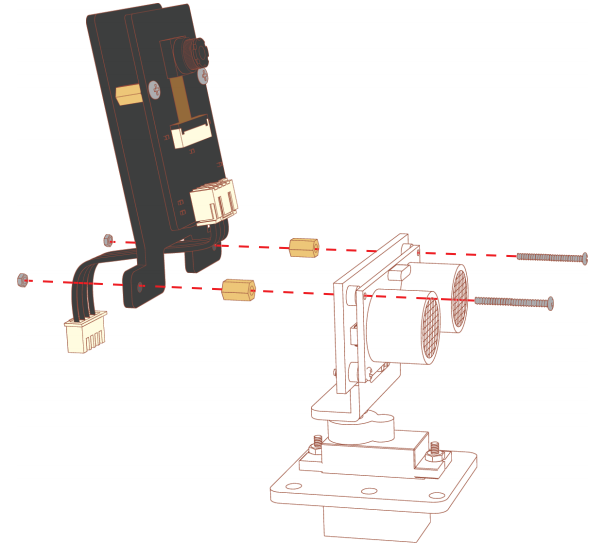
¶ ASSEMBLE THE CAMERA MODULE
Take ①② out from the bag marked "FOR CAMERA"
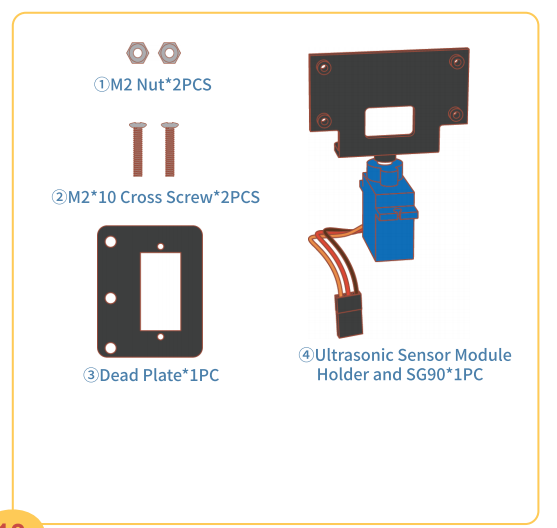
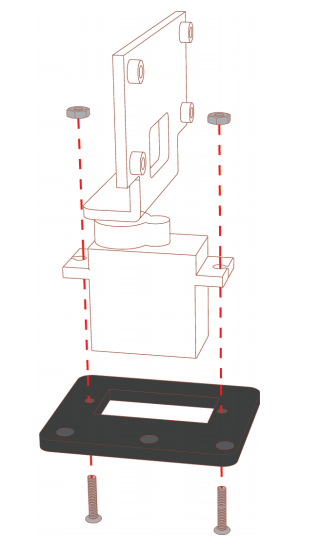
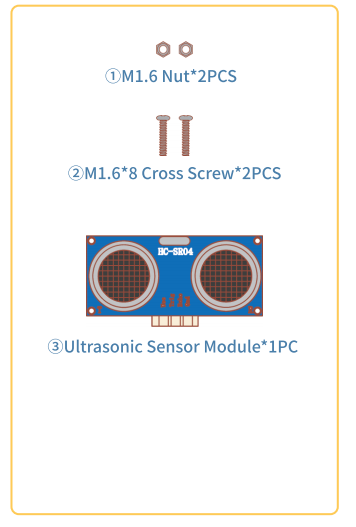
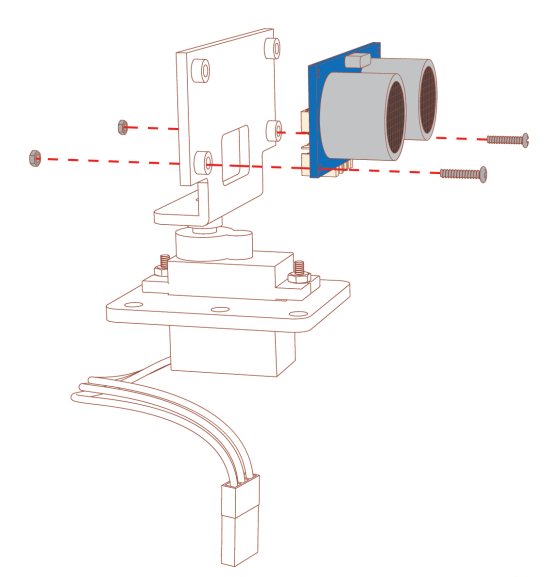
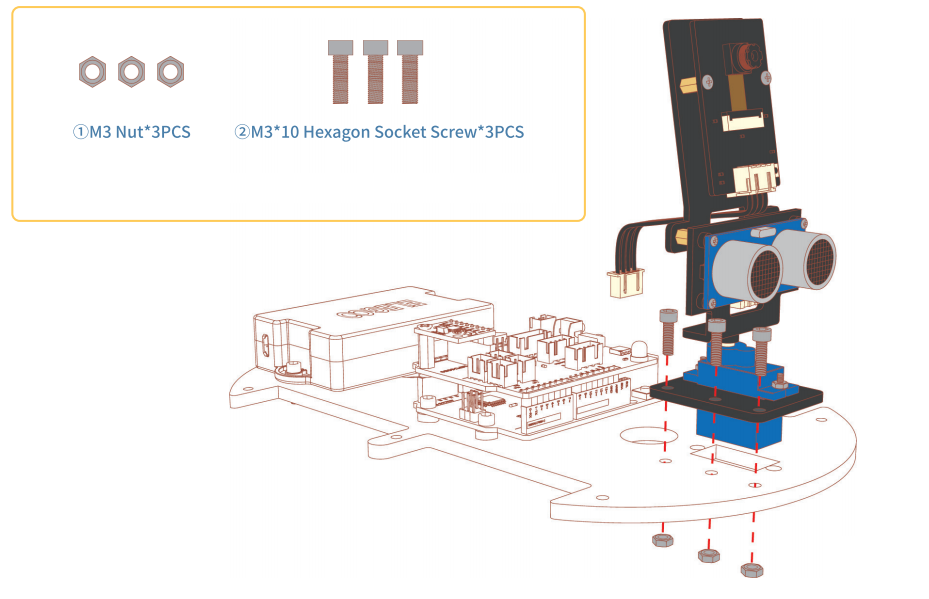
¶ ASSEMBLE THE ULTRASONIC SENSOR MODULE
Take ①② out from the bag marked "FOR ULTRASONIC"
¶ WIRING DIAGRAM
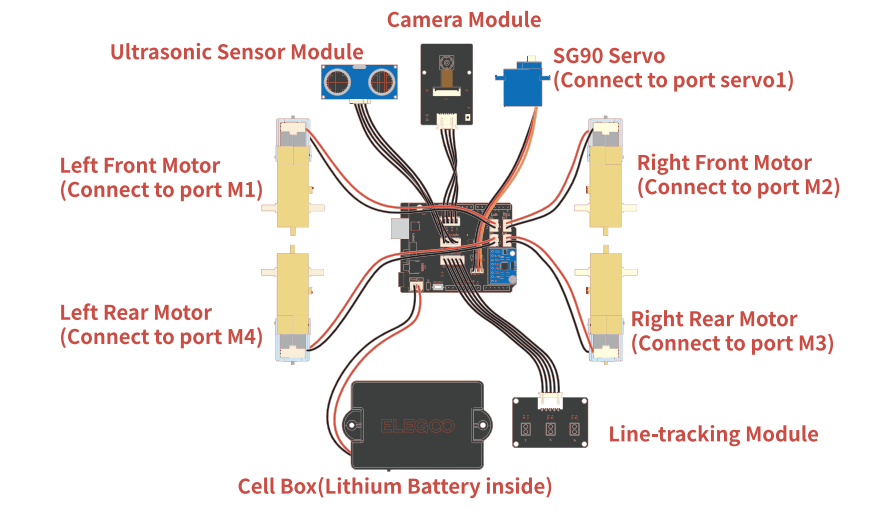
This illustration is to give you an idea of the parts corresponding to each port on the controlboard for later installation. You are not required to plug all the parts to the corresponding port as shown in the picture at present.
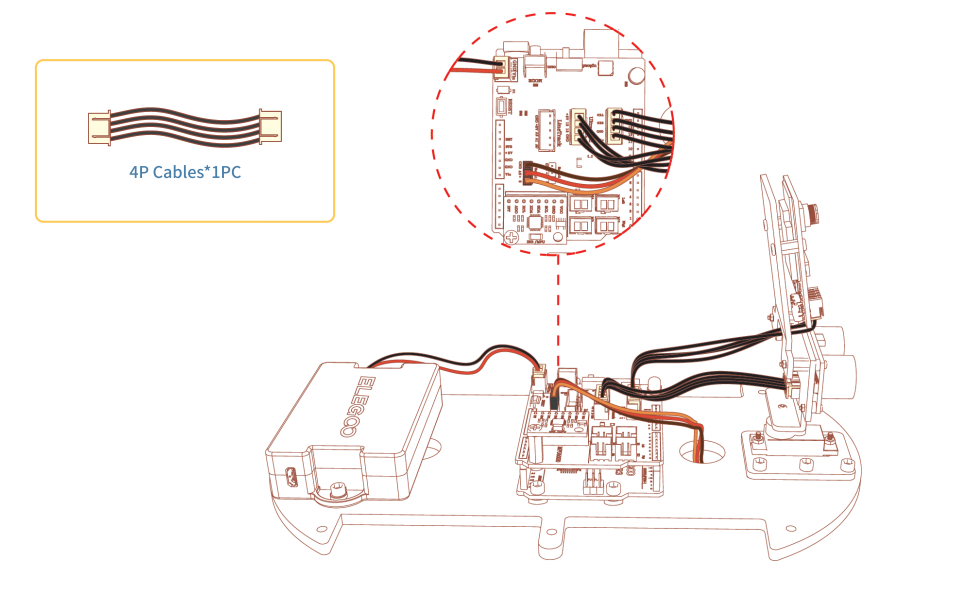
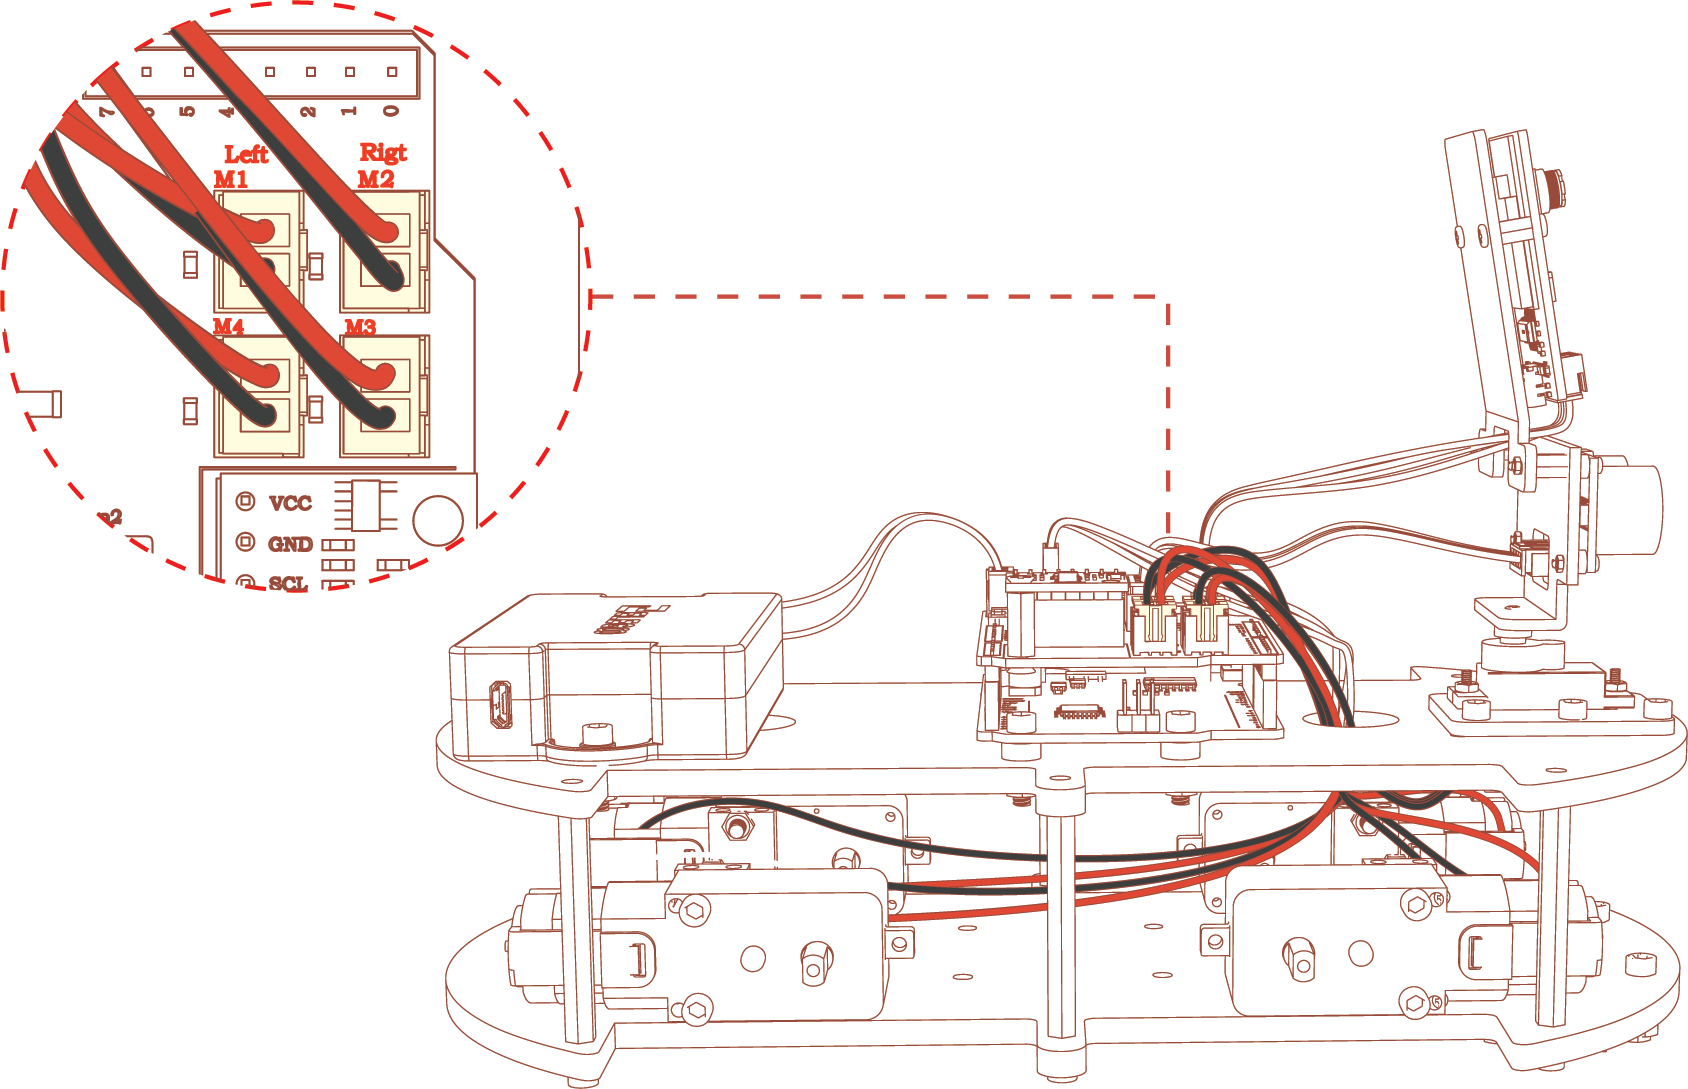
Please pay attention to the corresponding wiring ports of each of the four motors and do not plug in the wrong one.
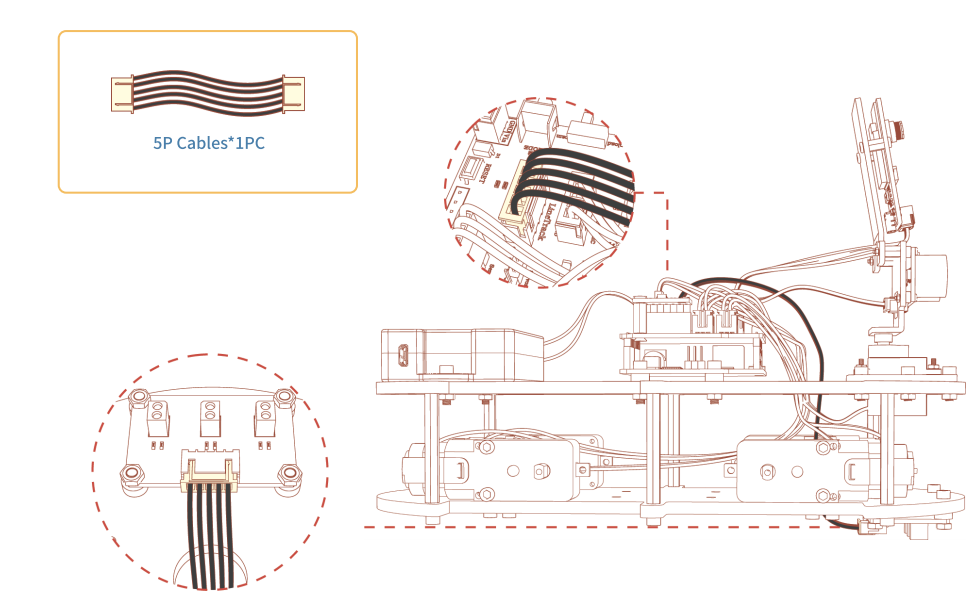
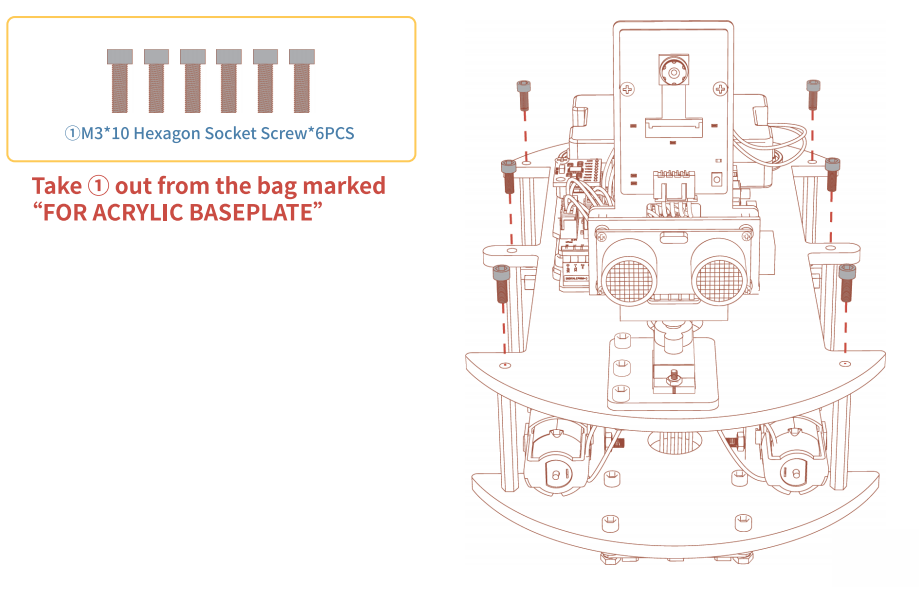
Confirm all wiring is connected to the correct ports before tightening the top screws.
For best results, only tighten the two diagonally opposite screws just enough to hold the part in place. After the final test confirms everything works correctly, fully tighten the remaining screws.
Similarly, since this step does not affect the overall subsequent testing, you may tighten the screws only after testing is complete and you have confirmed everything works properly.
¶ DEFINITION OF BUTTON
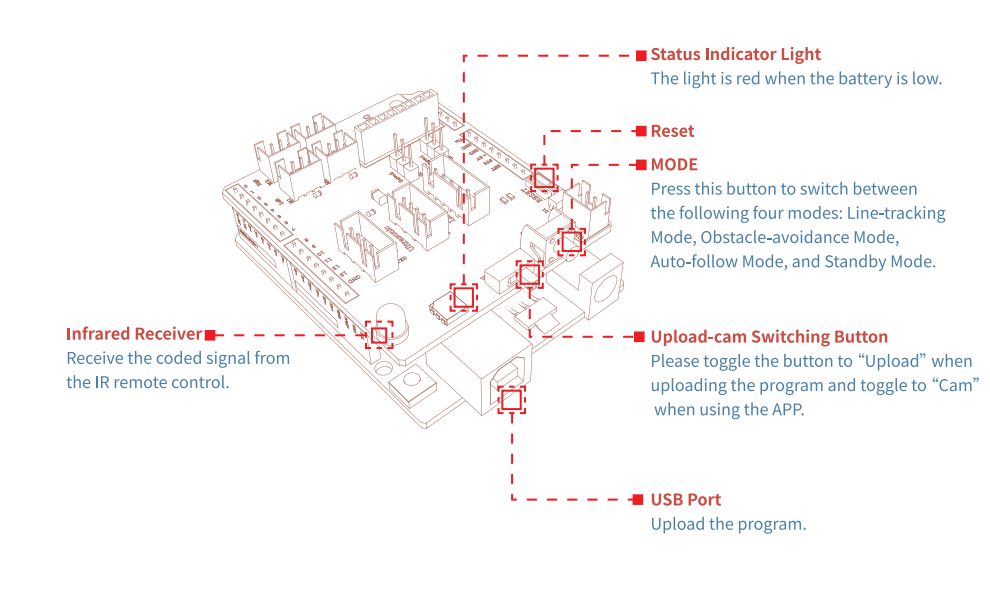
Status indicator Light:the light is red when battery is low.
Infrared Receiver:Receive the coded signal from the IR remote control.
MODE:press this button to switch between the following four modes: Line-tracking Mode,obstacle-avoidance,Auto-follow Mode,and standby mode.
Upload -cam Switching Button:please toggle the button to Uplaod when uploading the program and toggle to cam when using the app
USB port:upload the program
¶ CONTROL THE SMART ROBOT CAR USING THE IR REMOTE CONTROL
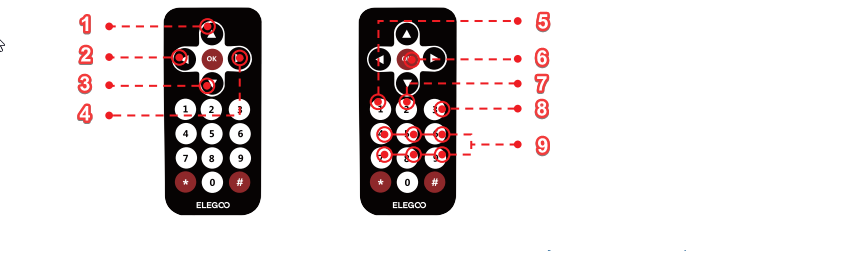
| Remote Control Key | Function Description |
|---|---|
| 1 | Forward |
| 2 | Turn Left |
| 3 | Backward |
| 4 | Turn right (4) |
| 5 | line-tracking mode |
| 6 | stop |
| 7 | obstacle-avoidance mode |
| 8 | auto-follow mode |
| Remote Control Key | Function Description |
|---|---|
| Key4 | increase the threshold value |
| Key5 | restore the initial default value |
| Key6 | reduce the threshold value |
| Key7 | increase the speed |
| Key8 | restore the initial default speed |
| Key9 | reduce the speed |
Please remove transparent plastic insulation from the rear of the remote control before using it.
Since the sensors on the line-tracking module are greatly affected by the environment, if the car does not work well under the line-tracking module, you can use the IR remote control to adjust the sensor thresholds so that it can enable the car to operate at its optimum level.
Line-tracking Mode:
Affix the tape on the ground to make a line track and then put the car on the track. When pressing key 1 of the remote control, the car will enter the line-tracking mode and the status indicator light will always on green. The car will move along the runway under this mode.
Obstacle-avoidance Mode :
The car will enter the obstacle-avoidance mode and the status indicator light is always on yellow when pressing key 2 of the remote control. The car will move forward automatically until encountering obstacles. And it will automatically turn to the direction without obstacles to continue moving forwards.
Auto-follow Mode
The car will enter the auto-follow mode and the status indicator is always on blue when pressing key 3 of the remote control. If there are obstacles in the 20 CM ahead of the Ultrasonic Sensor Module, the car will automatically move following the obstacle.
¶ CONTROL THE CAR WITH APP
STEP1:
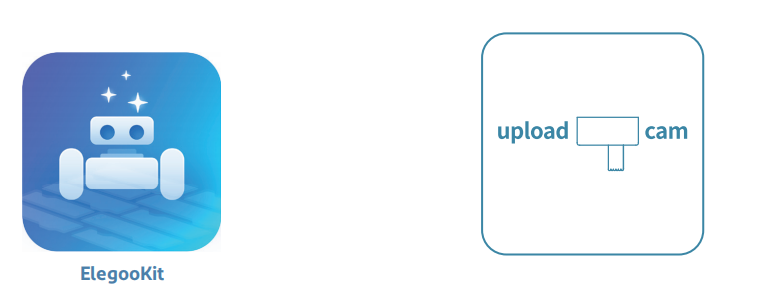
- Application InstallationYou can download the latest version of the "ElegooKit" app on App Store and Google Play.
STEP2:
- Application SettingsFirstly, please toggle the upload-cam switching button of the IO Expansion Board to "cam".
Turn on the WIFI in the phone settings and connect to “ELEGOO-123”. (The number "123" is the physical address of the camera module, and the physical address of each camera module is different.)
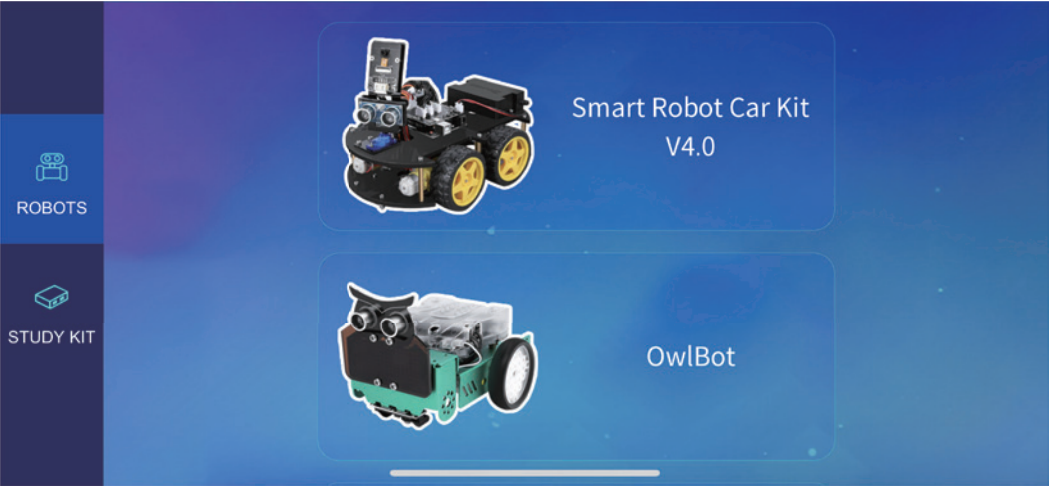
After the WIFI connection is successful, open the "ElegooKit" APP and click device “Smart Robot Car Kit V4.0”.
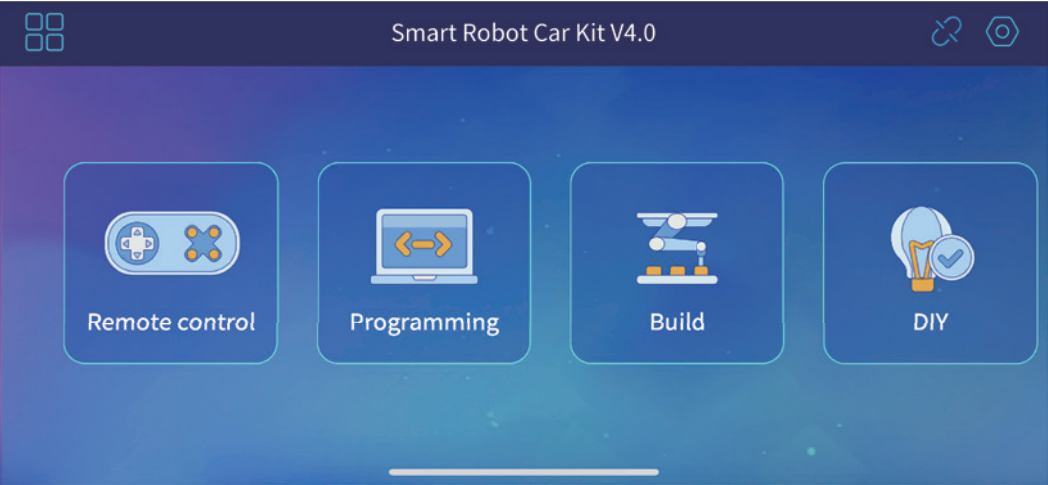
Go to the project selection page and click on the WIFI disconnected icon “🔗” on the top right corner, and it will display “Device connected successfully!”.
Choose the language by clicking the setting icon “⚙️” on the top right corner.
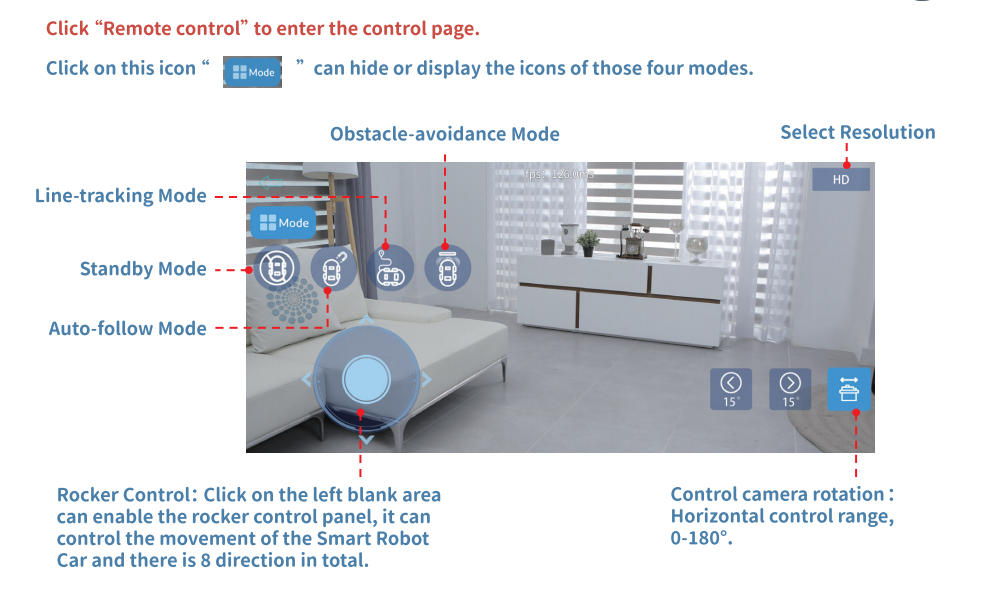
When the toggle switch is set to the "cam" position, enable Wi-Fi on your phone and check for a corresponding network name, usually in the format ELEGOO-XXXX. This is a Wi-Fi hotspot created by the car itself for control purposes only and does not provide internet access. Therefore, do not worry if the connection shows "No internet access."
Before using the app, please ensure you are connected to the corresponding Wi-Fi. If connected, open the app to view the live video feed. If the feed does not appear, reconnect the Wi-Fi.
If you see the video feed but cannot control the car:
- First, confirm the toggle switch is set to the "cam" position.
- Turn off the power, then reconnect. This usually restores control.
If control is still unavailable, you may need to reinstall the app to grant the required permissions.
If the issue persists after all these steps, the product may be damaged. Please contact customer support for troubleshooting or replacement.
Programming
- The entry of the program, only the program module that is connected to this graphics module will be executed after the play button is clicked.
- The current project name
- Click to save the project you edited.
- List Button, click to show all saved items.
- Play Button, click to start executing the program.
- Pause Button, click to pause the program.
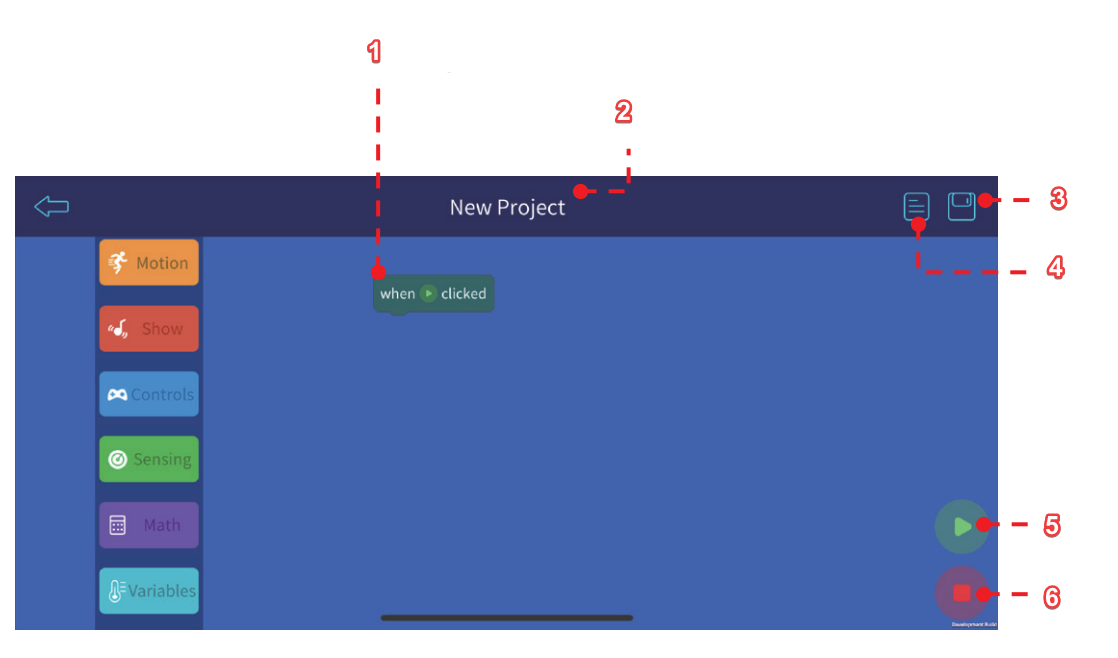
- Motion: Graphic modules for controlling the movement of the car.
- Show :Graphic modules for controlling the sound and light.
- Controls: Graphic modules for controlling program flow.
- Sensing: Graphic modules for sensor type electronic components.
- Math: Graphic modules for mathematical operations.
- Variables :Graphic modules for variable operation.
If you are an advanced DIY user who can write custom programs or modify the provided code, you can use the DIY function for debugging. This feature includes a debug communicator to help you easily obtain key information about issues in your program.
Please note: This function is not intended for self-developed standalone features!
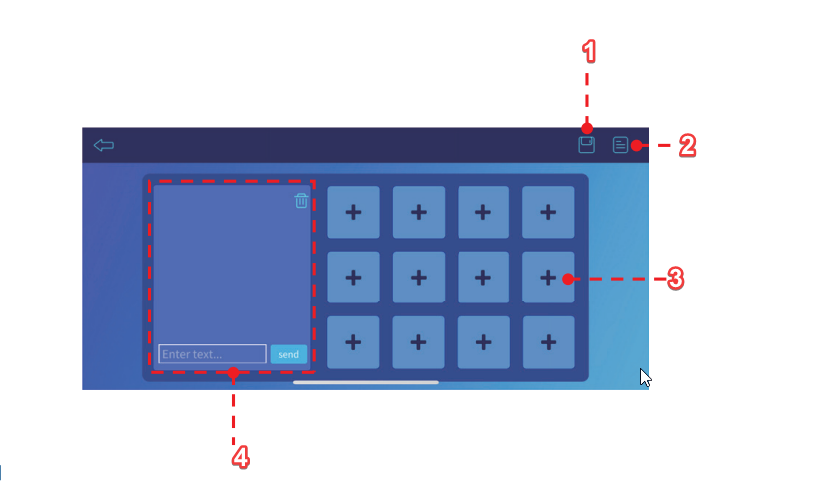
- Click to save the project you edited.
- List Button, click to show all saved items.
- Custom button: Long press this button will pop up the button editor, you can fill in the button name and message you want to send.
- Command debugging window: Display the sent commands and received commands, the input field can freely input commands and send tests.
¶ Other project selections
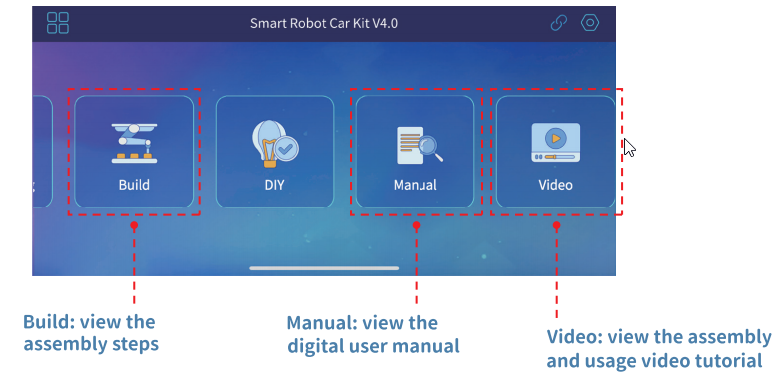
Build:View the assembly steps:
you can view the complete dynamic assembly process of the project and follow the animated demonstration to complete the assembly step by step.
Note: After completing all tests using the remote control and the App, install and fully tighten any remaining loose screws. Double-check all fasteners; if any are found loose, retighten them with a screwdriver. This step ensures no screws come loose during the car’s subsequent operation.
¶ Troubleshooting
-
If the car moves or turns in the wrong direction when using the remote control, please recheck the wiring of the four motor connectors. First, confirm the forward direction of the car (defined as the direction of the line-tracking sensor), then connect the left and right motors in sequence.
-
If the car drifts off course and fails to travel in a straight line, check whether the gyroscope is installed correctly. Gently shake the gyroscope to verify there is no poor connection.
-
If the remote control does not respond when pressed, please check whether the plastic insulating sheet of the remote control has been removed, and confirm that the car power is turned on normally. Press the MODE button on the UNO board to check if the car works properly. If the car runs normally but the remote control still has no response, gently tap the remote control. If the problem remains after all the above operations, please contact customer service for troubleshooting or replace the remote control.
-
When using the app, first connect to the Wi-Fi network starting with "ELEGOO-". After confirming the Wi-Fi connection, open the app and check if the live video feed is displayed. Follow the pop-up prompts to connect to the device. If you fail to connect to the device, please turn off mobile data and try again. If the issue persists, contact customer support for troubleshooting and driver updates.
-
If the video feed lags after connecting, please power off the car and reconnect to the Wi-Fi. If the issue persists, please access http://192.168.4.1/channel to adjust the corresponding channel settings.