¶ Tutorial Video
Wait for upload.
¶ Instruction
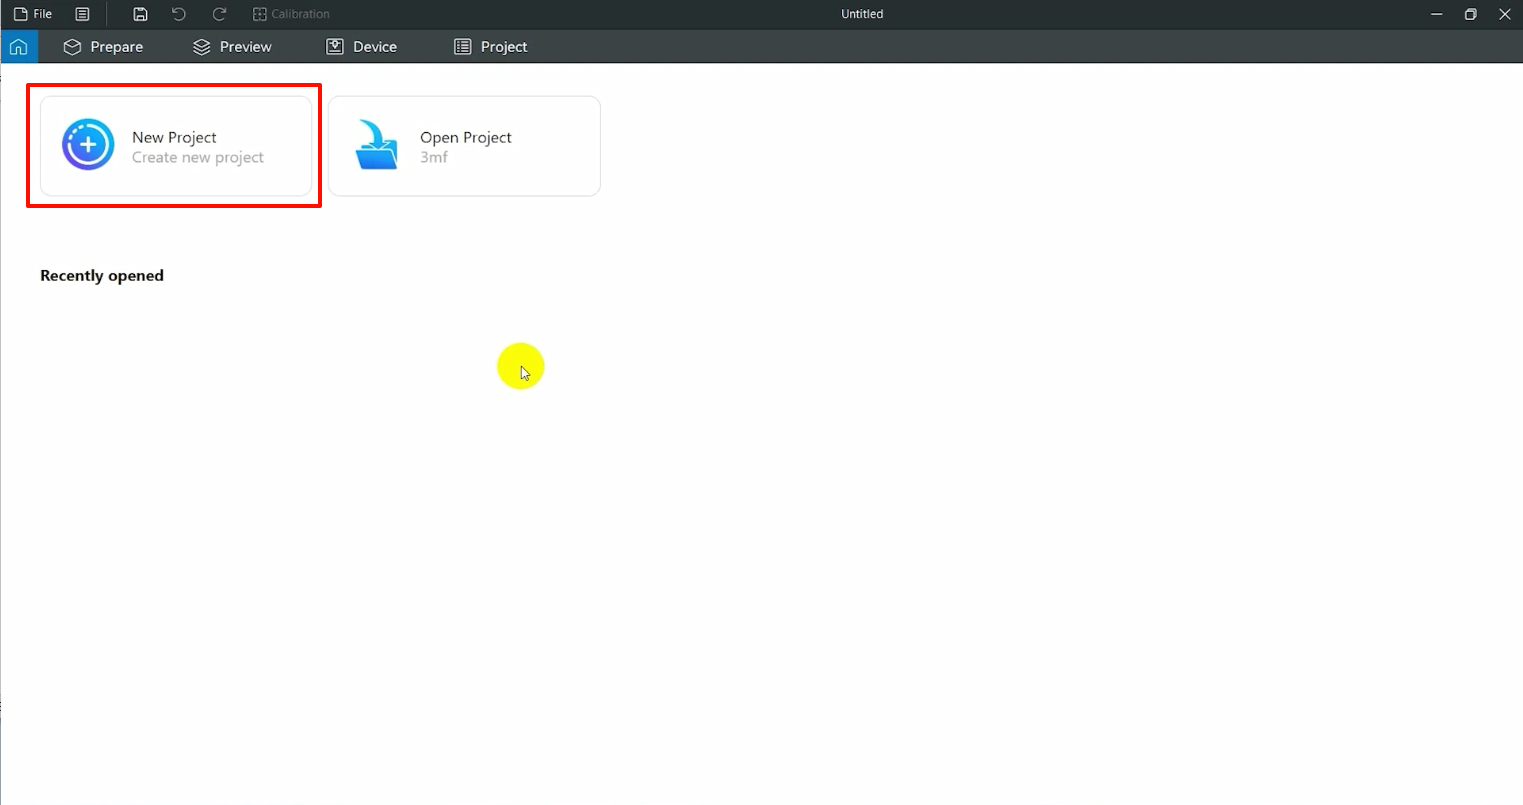
- Open the slicing software and click "New Project".
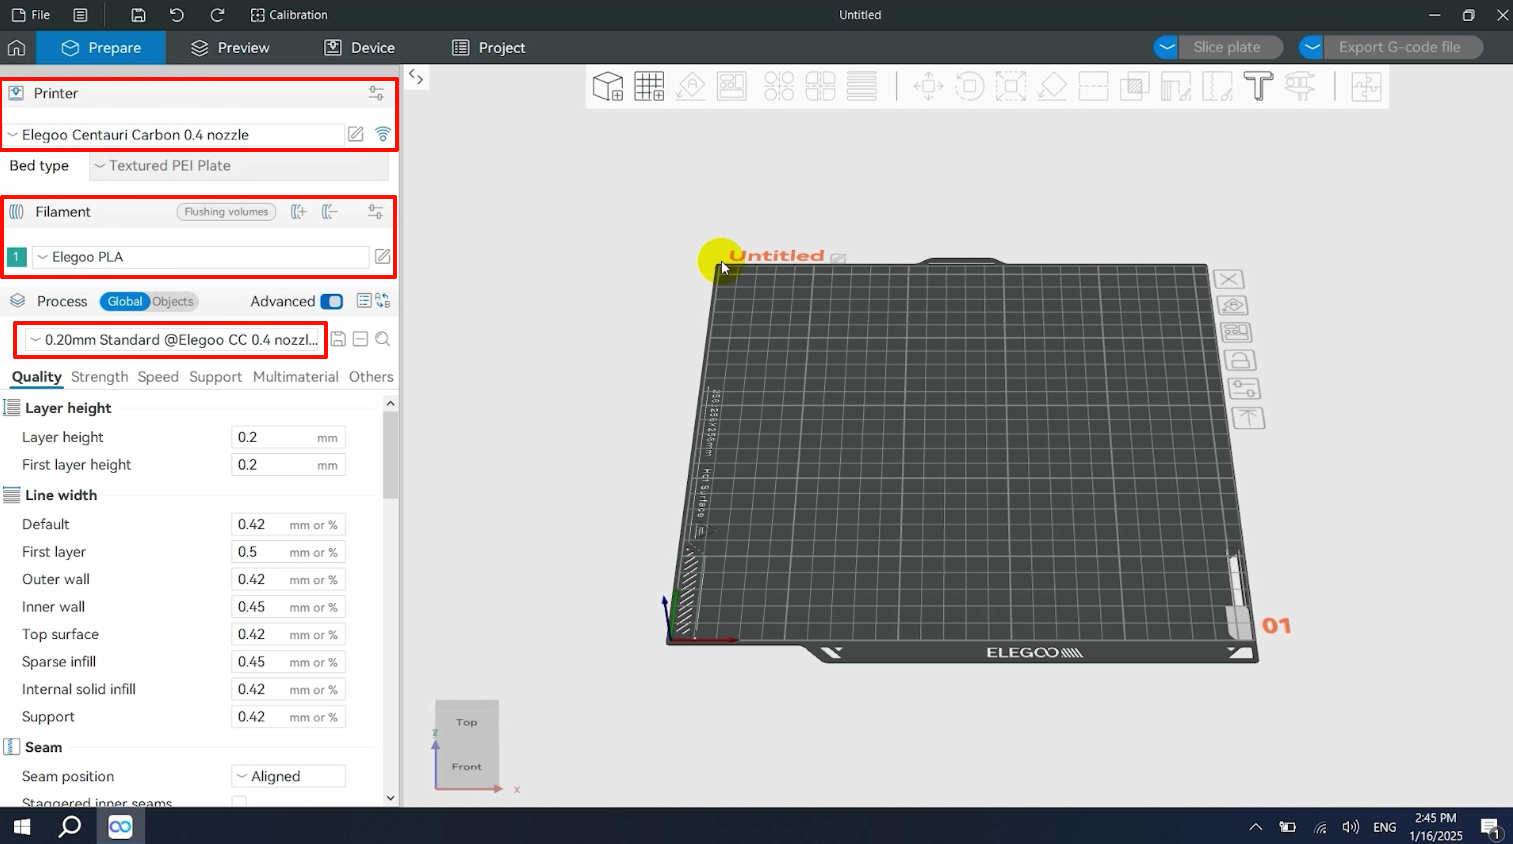
- Set the printer type, filament and the parameters.
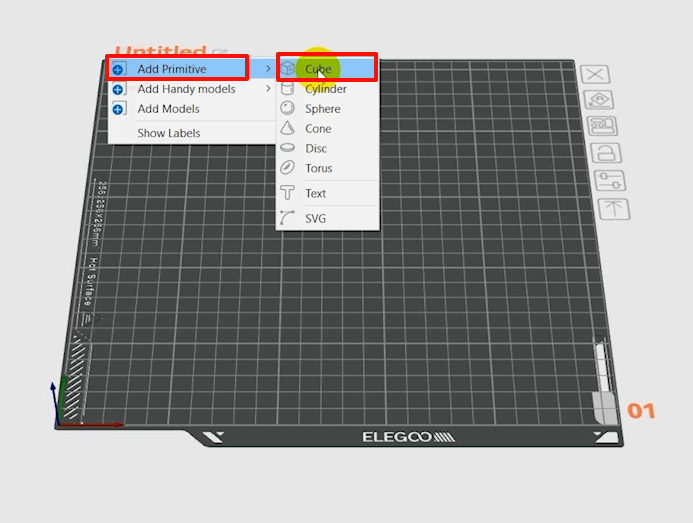
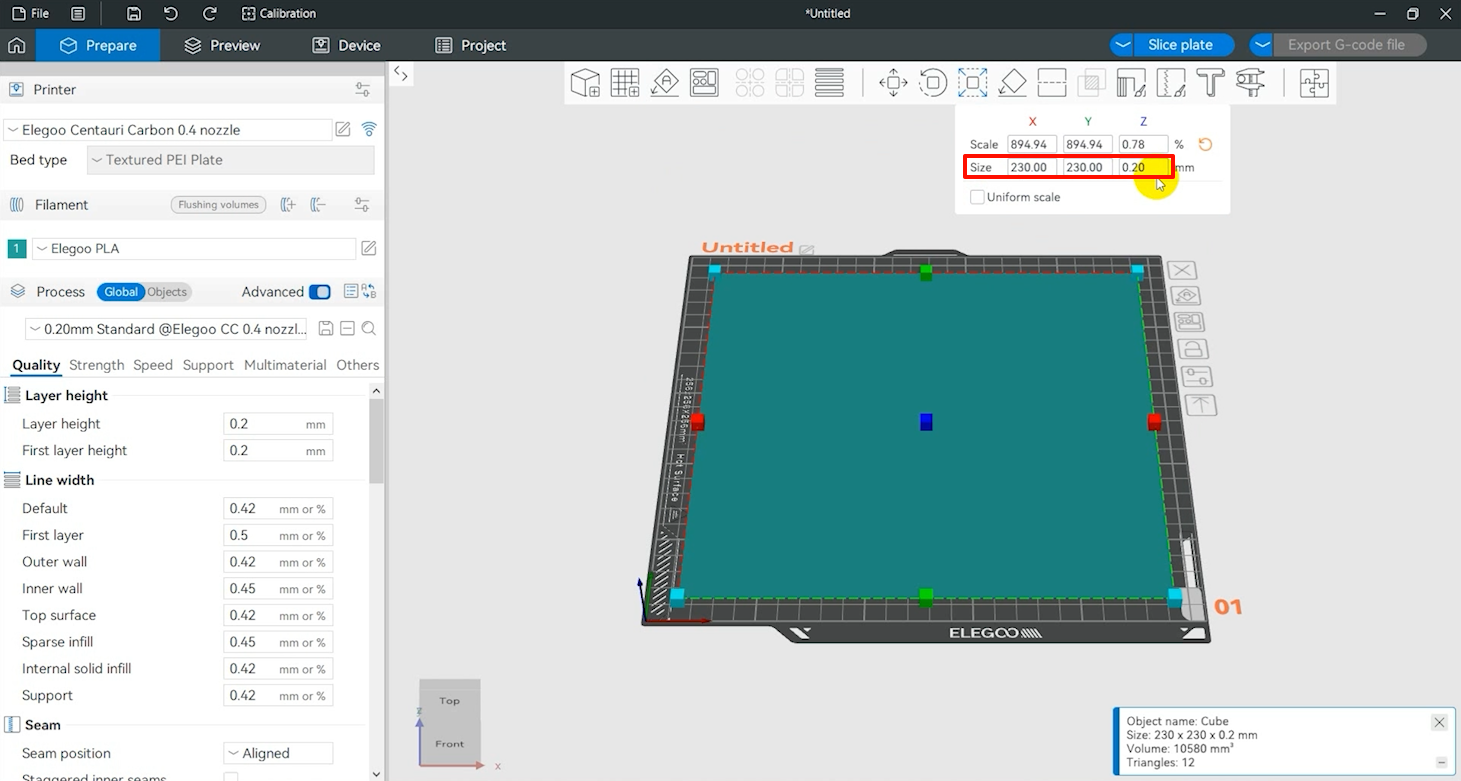
- Right-click the blank area, then click "Add Primitive - Cube".
- Click "Scale" to set the model volume to 230×230×0.2 mm.
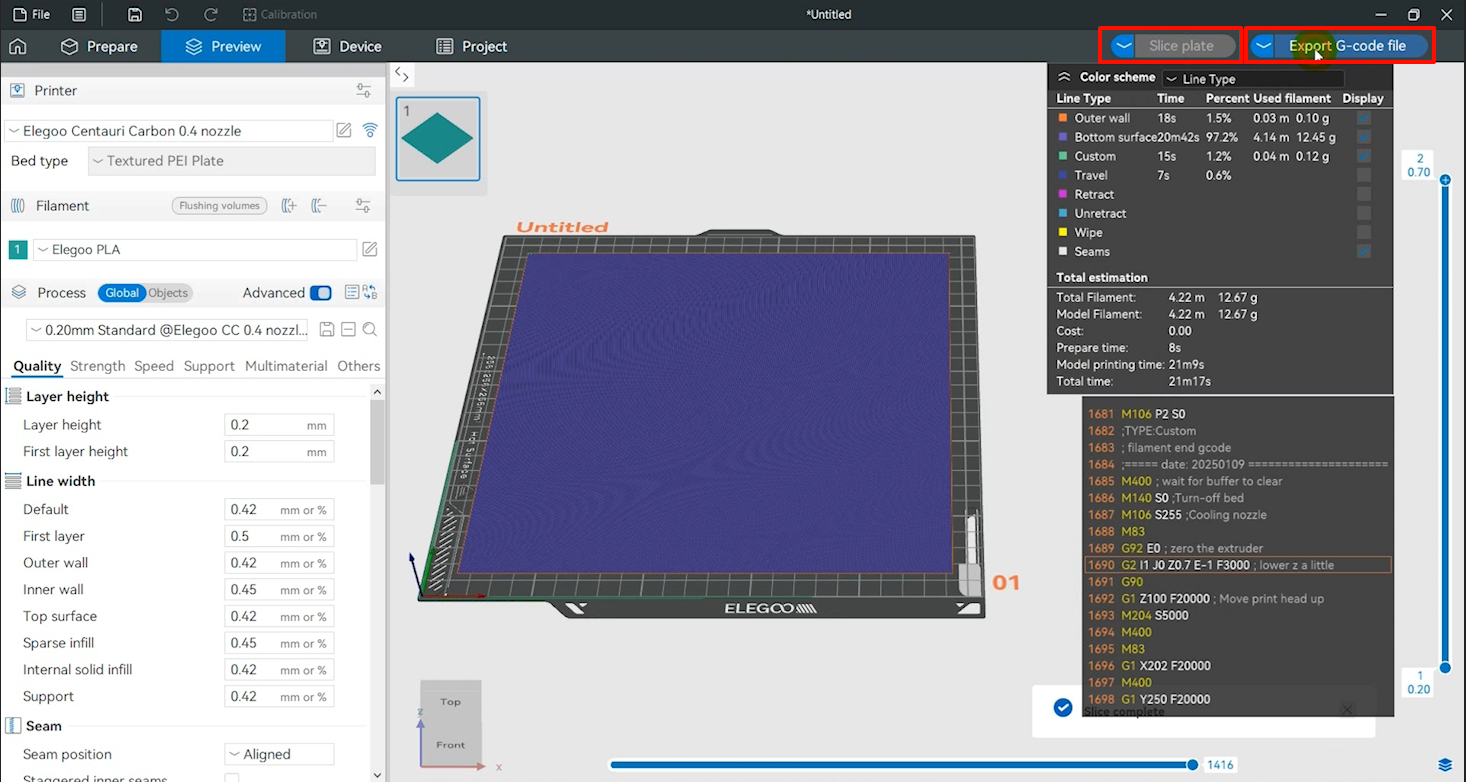
- Click "Slice plate - Export G-Code file" to save the sliced model.
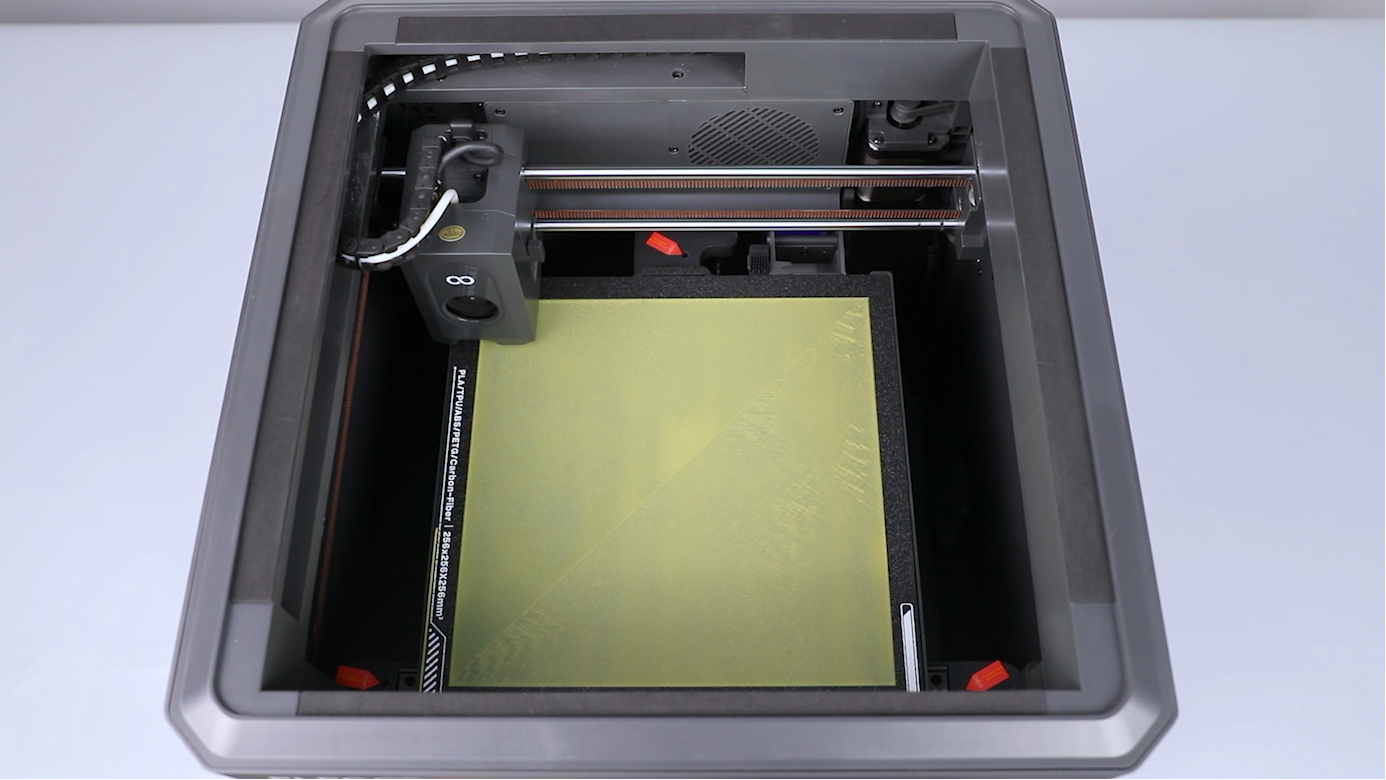
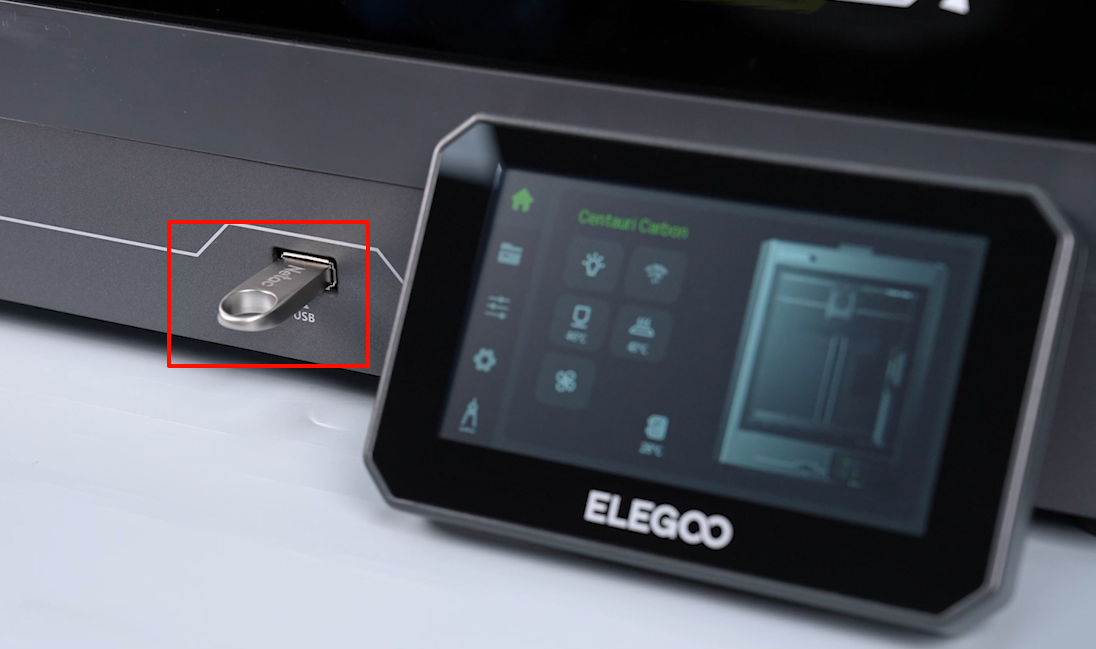
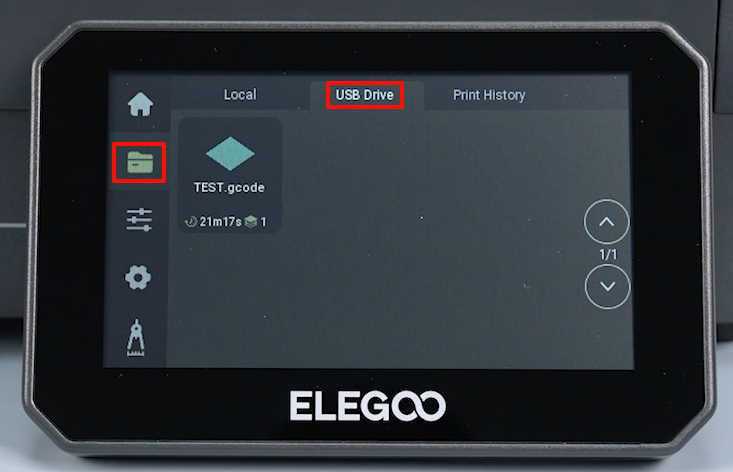
- Power on the printer. Insert the U disk.
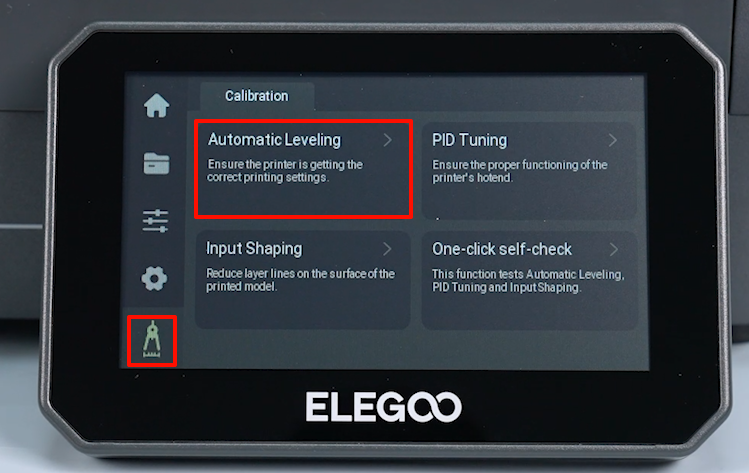
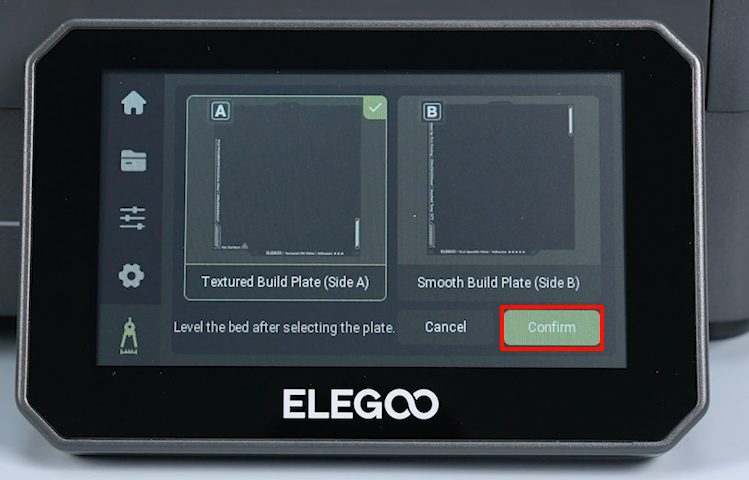
- Tap "Calibrate - Automatic leveling" on the touchscreen.
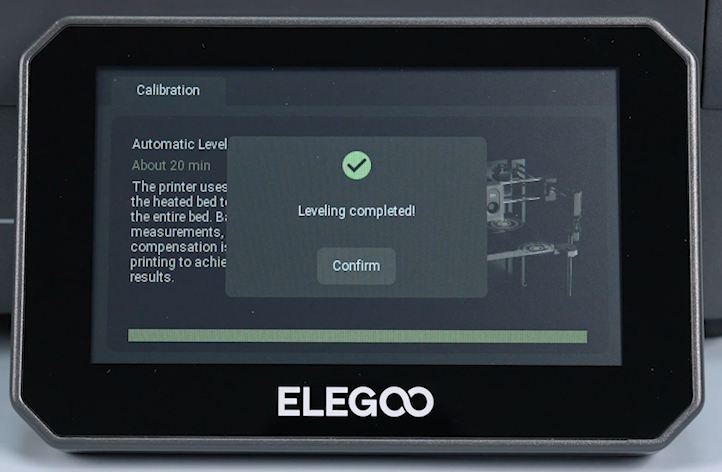
- Select the printing plate type, then click "Confirm". The printer starts to level automatically.

- After the leveling, click "Confirm - Files - U disk" to select the model to be printed.
After the model is printed, subsequent adjustments are made according to the printing effect.
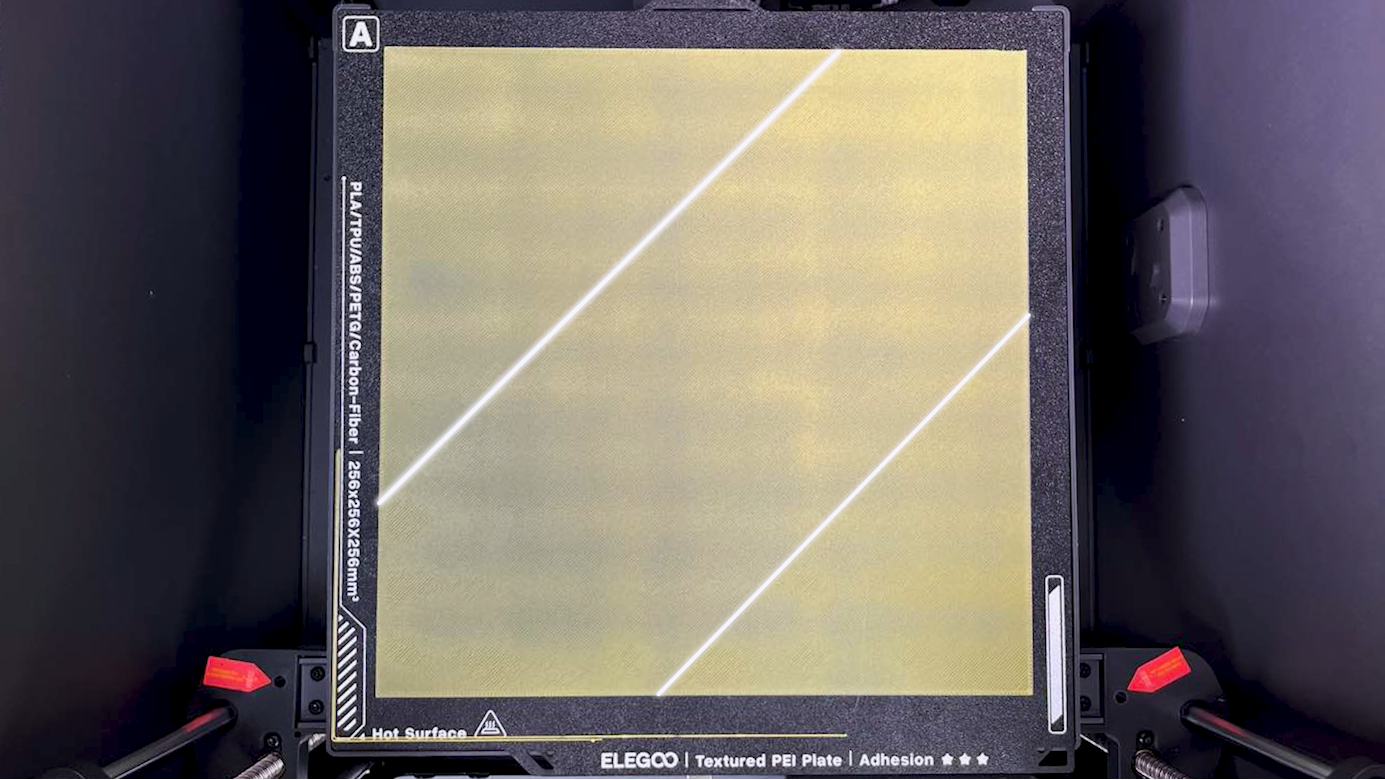
¶ The first phenomenon: The extruded filament is uniform in thickness and accuracy, requiring no additional adjustments for proper model printing.
No additional adjustments are required.
¶ The second phenomenon: The build plate is far away from the nozzle.
Observe the printing process. If the build plate is far away from the nozzle, the extruded filament fails to adhere firmly to the build plate, conduct the procedures as following.
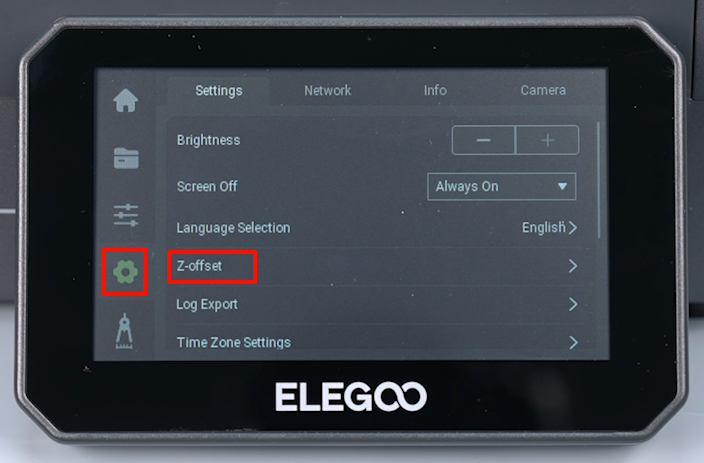
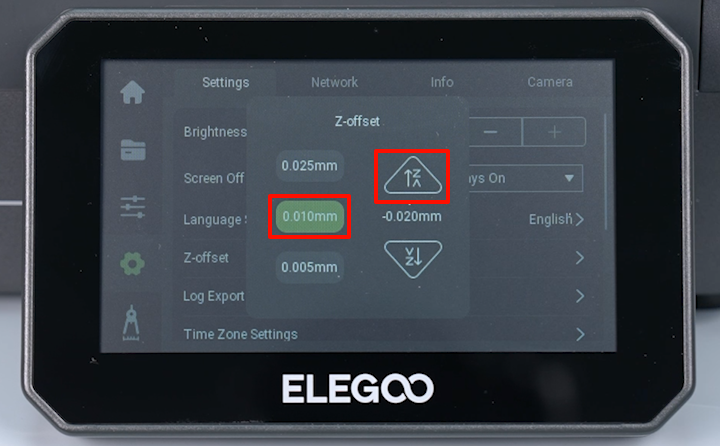
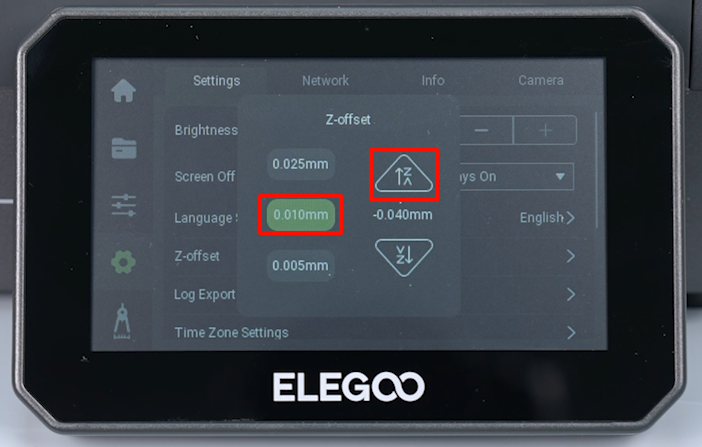
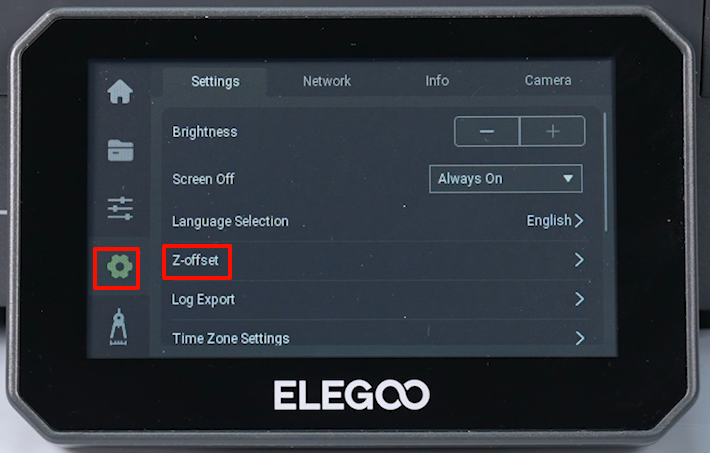
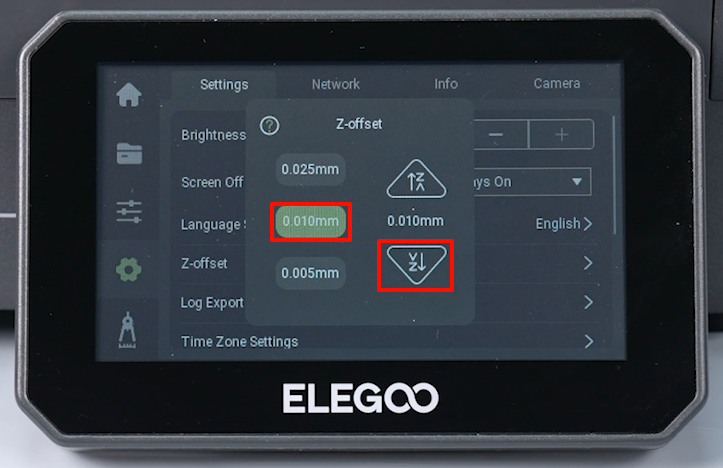
- Click "Setting - Z-axis Deviation - 0.1 mm - Lower the build plate" on the touchscreen.
- Observe the printing process after adjustment. If the printing continues to be abnormal, try to adjust more times. The printer is ready for use after the bottom is printed completely without any abnormalities.

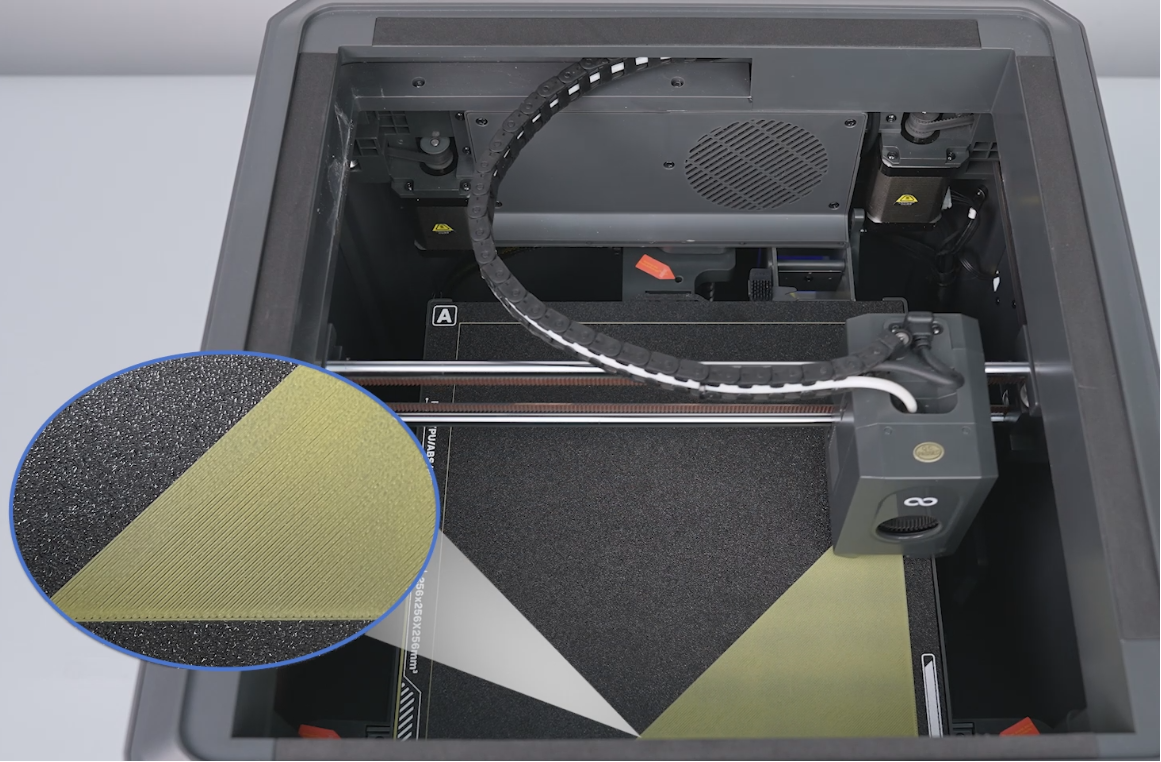
¶ The third phenomenon: The build plate is too close to the nozzle.
Observe the printing process. If the build plate is too close to the nozzle, the extruded filament is too thin, causing overflow or the nozzle to rub against the build plate. Conduct the procedures as following.
- Click "Setting - Z-axis Deviation - 0.1 mm - Lower the build plate" on the touchscreen.
- Observe the printing process after adjustment. If the printing continues to be abnormal, try to adjust more times. The printer is ready for use after the bottom is printed completely without any abnormalities.