¶ Tools and Materials
- A 1.5 mm Allen wrench
- A 2.0 mm Allen wrench
- A Phillips screwdriver
- A new print head PCB and a new adapter board
¶ Tutorial Video
¶ Instruction
¶ Remove the Old PCB of the Print Head
- Power off the printer and unplug the power cord.
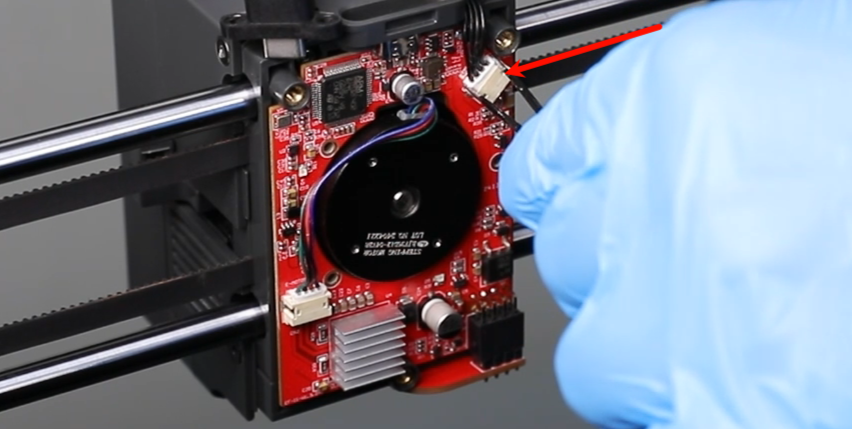
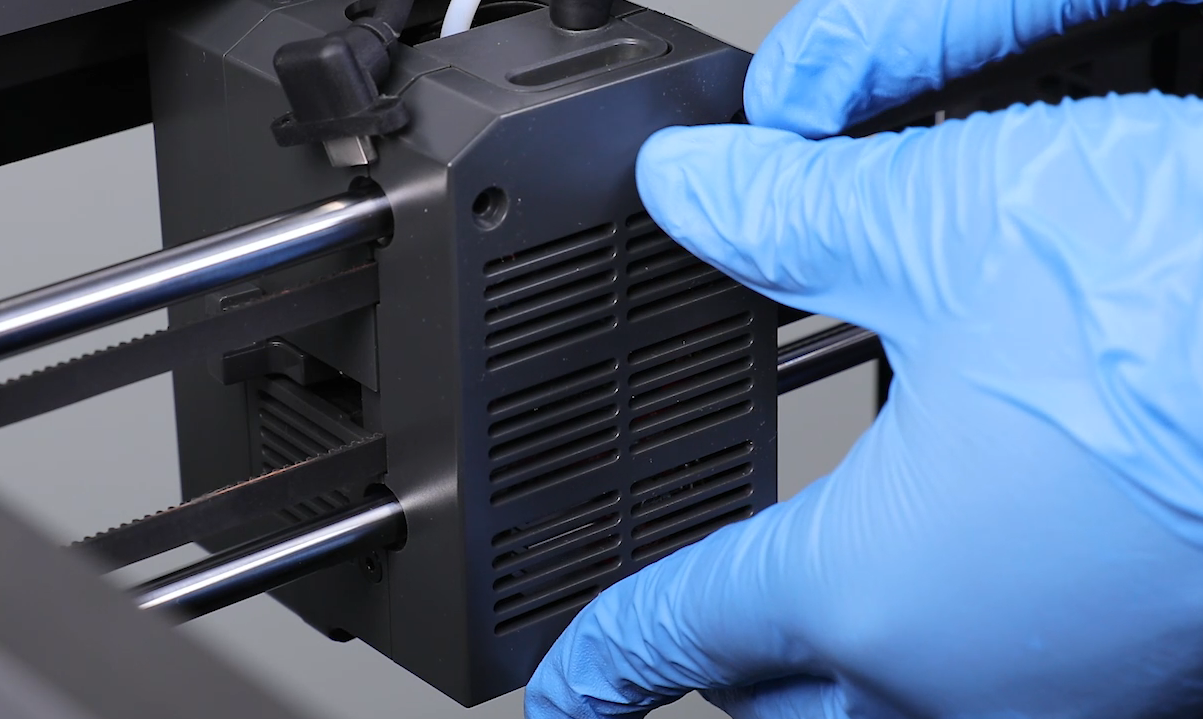
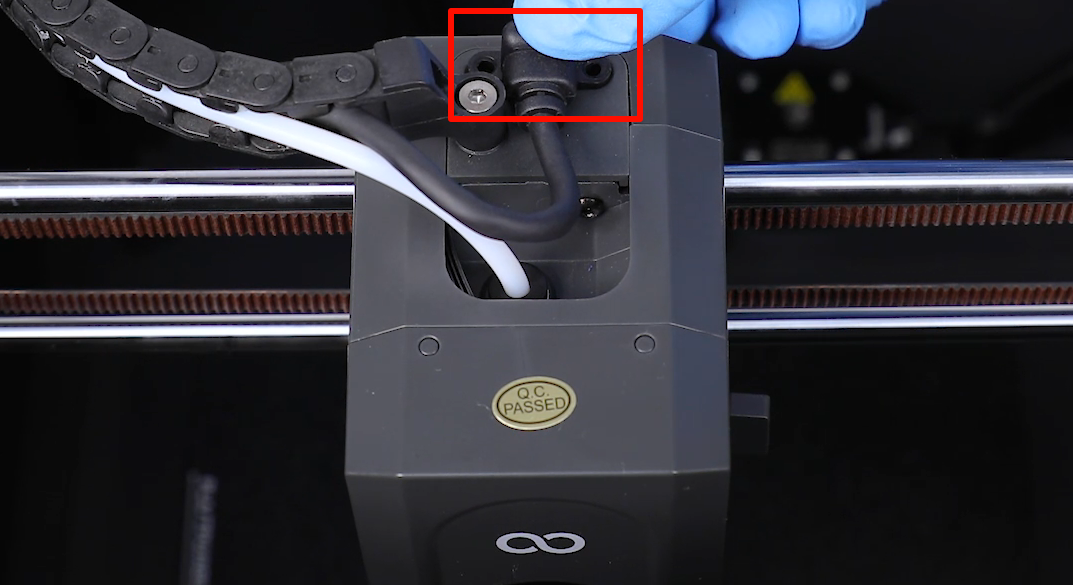
- Use a 1.5 mm Allen wrench to loosen the 2 screws securing the cable port of the print head, then unplug the cable.


- Use a 2.0 mm Allen wrench to loosen the 3 screws securing the back cover of the printer, then remove the back cover.

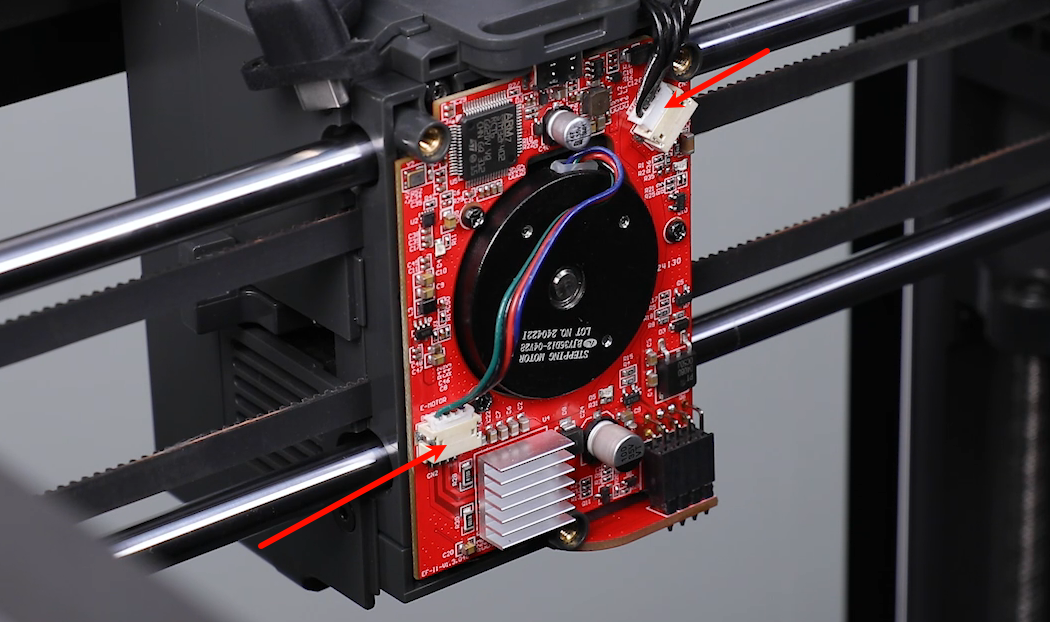
- Unplug the ribbon cables for the model cooling fan and extruder motor from the print head PCB.

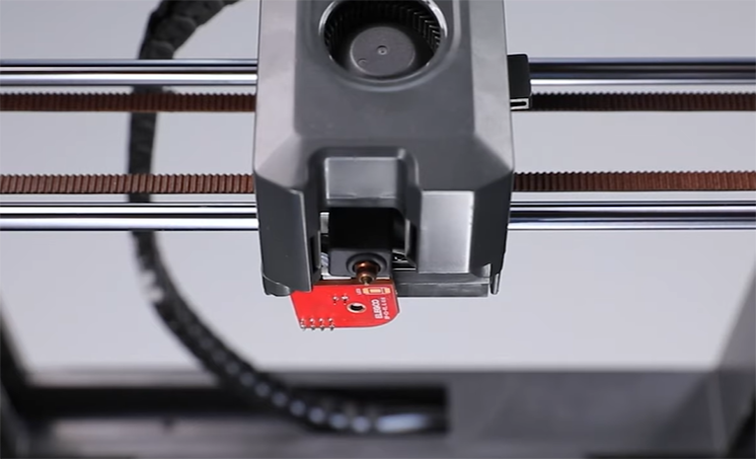
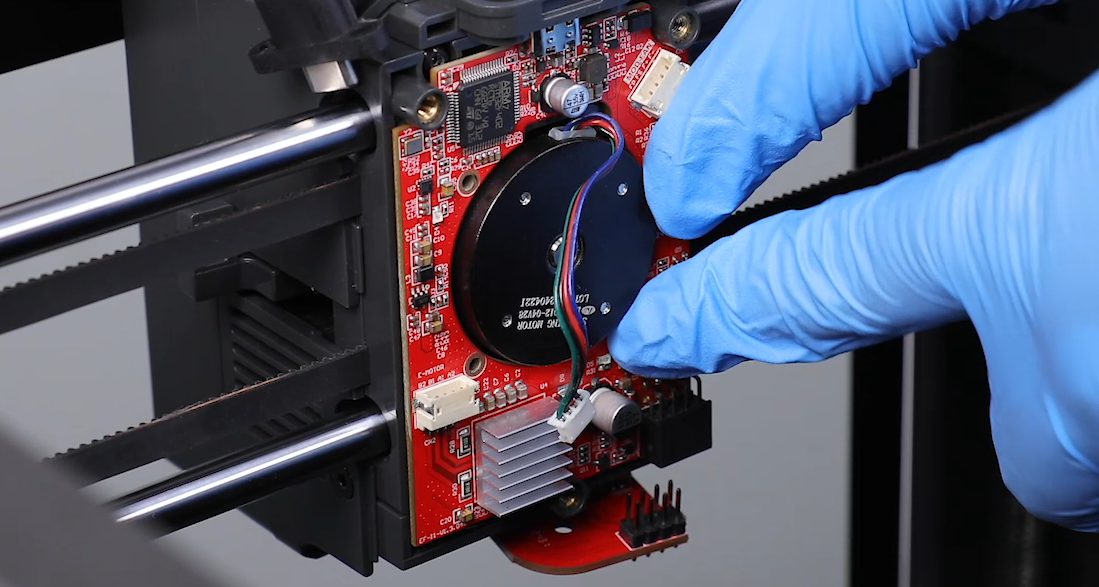
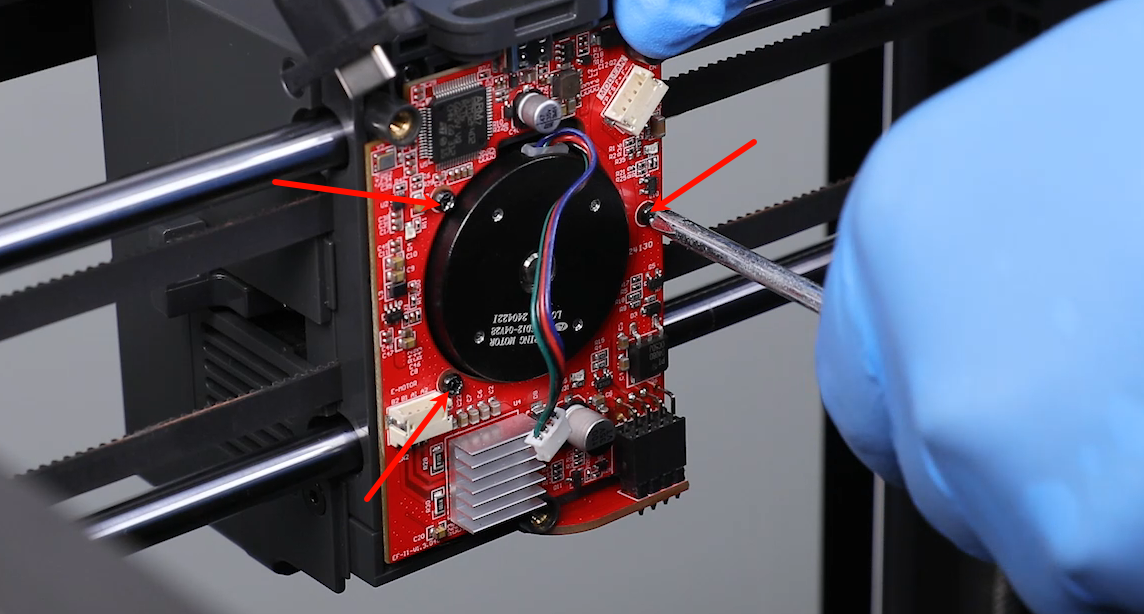
- Use a Phillips screwdriver to loosen the 3 screws securing the print head PCB.

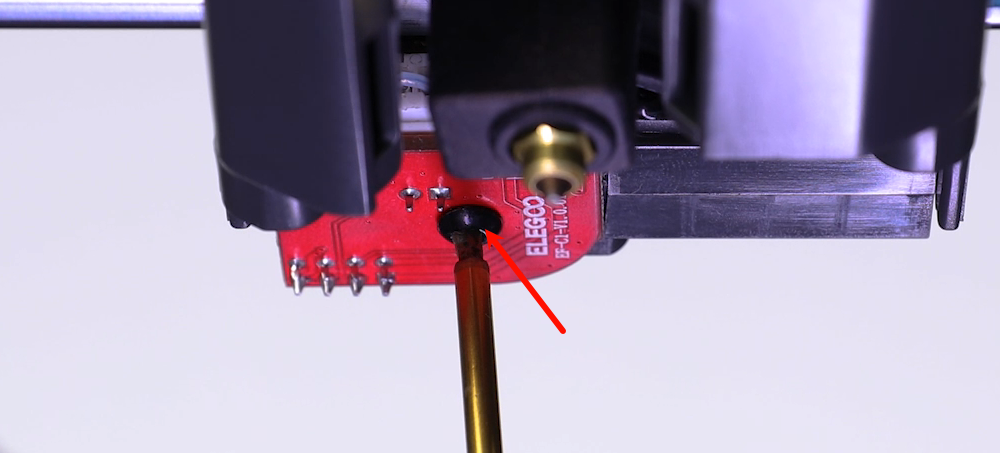
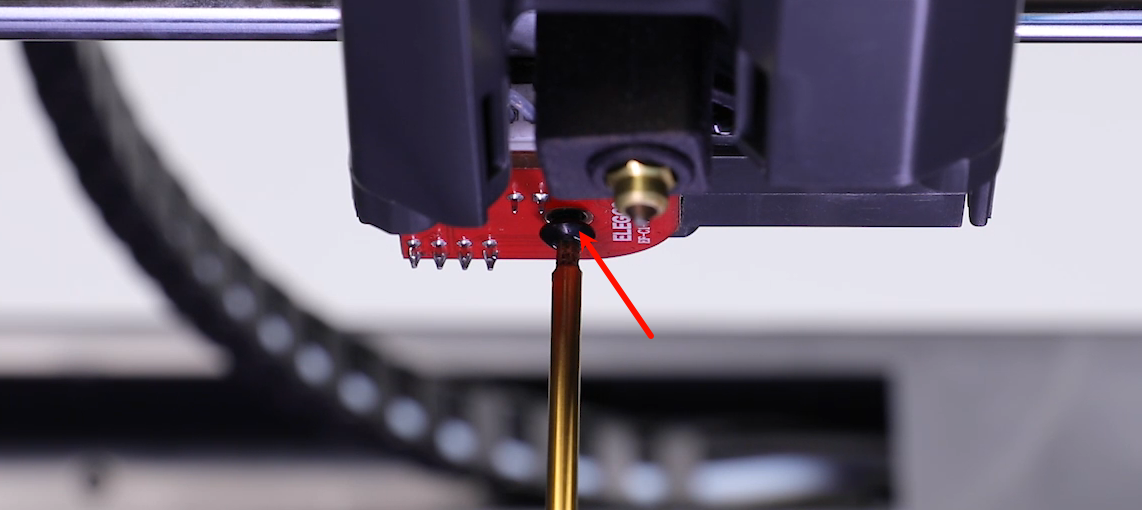
- Use a 2.0 mm Allen wrench to loosen the screw below the adapter board.
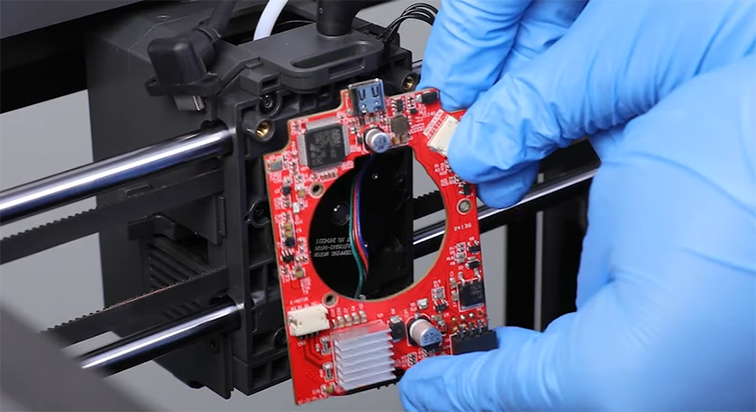
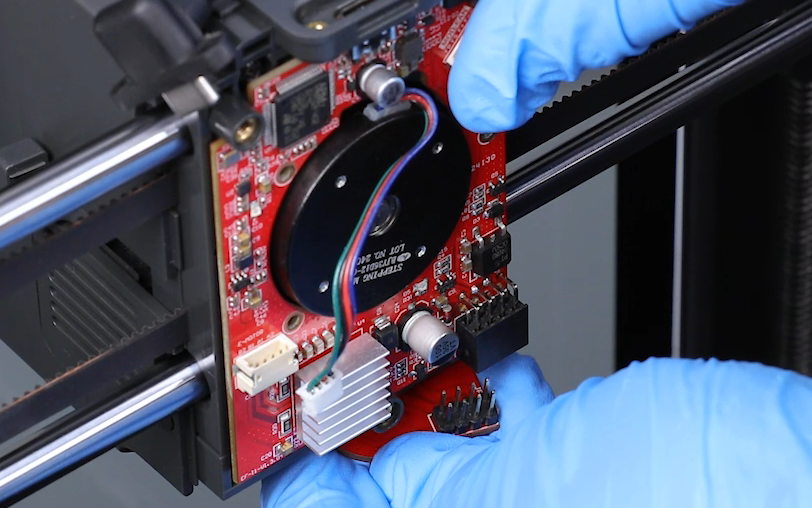
- Gently press down to release and remove the adapter board, then take out the old print head PCB.

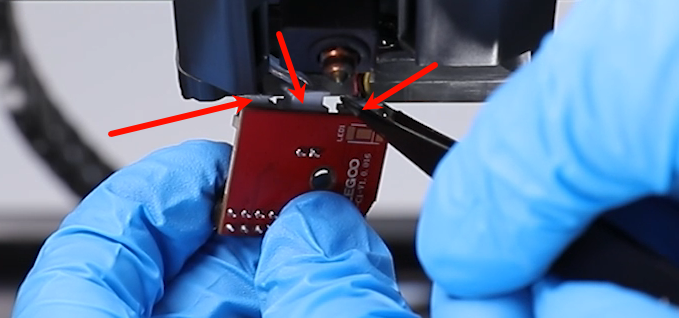
- Unplug the ribbon cables from the adapter board and remove the old one.
Note: If the adapter board is damaged, then replace it.
¶ Install the New Print Head PCB
- Take the new adapter board and connect the ribbon cables to the appropriate ports based on their size.

- Align the new print head PCB with the screw holes and place it into position.(Remember to organize the ribbon cables.)
- Insert the adapter board into the print head PCB by aligning the connectors.

- Use a Phillips screwdriver to tighten the 3 screws securing the PCB of the print head.
- Use a 2.0 mm Allen wrench to tighten the screw securing the adpater board.
- Plug the ribbon cables of the model cooling fan and the extruder motor into the corresponding ports on the print head PCB.
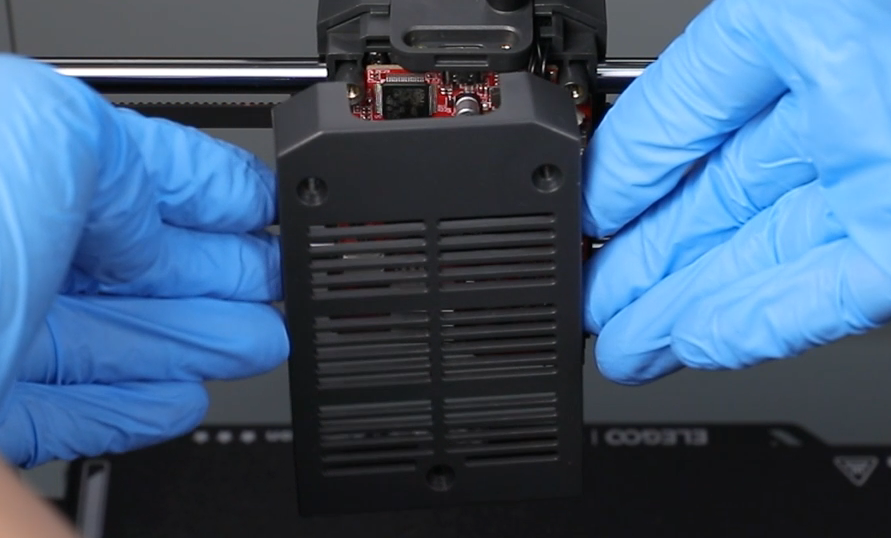
- Reattach the back cover of the print head by aligning it with the screw holes.
- Use a 2.0 mm Allen wrench to tighten the 3 screws securing the back cover of the print head.

- Insert the cables of the print head.
- Use a 1.5 mm Allen wrench to tighten the 2 screws securing the cable port of the print head.

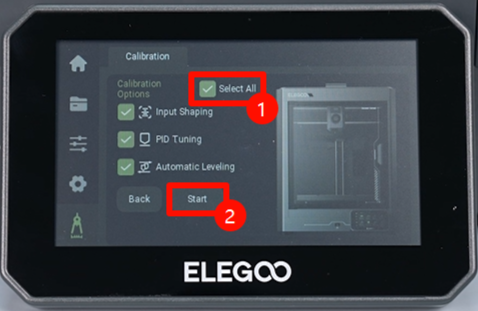
- Plug in the power cord and power on the printer. Tap "Calibration - Self-Check - Select All - Start" on the touchscreen. The printer is ready for use after the self check.