¶ Tools and Materials
- A 2.0 mm Allen key
- Cable tie x 2
- New multi-color connector and its ribbon cable
¶ Tutorial Video
Coming soon.
¶ Instruction
¶ Remove the old multi-color connector and its ribbon cable
- Power off the printer and unplug the power cord.
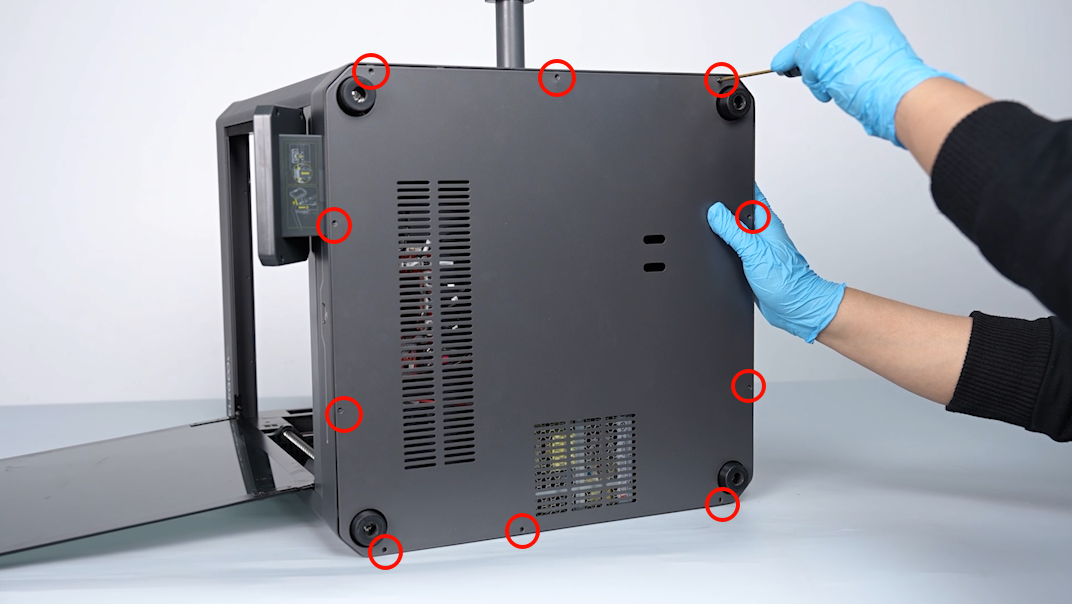
- Put the printer on its side. Use a 2.0 mm Allen wrench to loosen the 10 screws securing the bottom cover of the printer.
Note: Keep the glass door closed to prevent it from falling during the process.
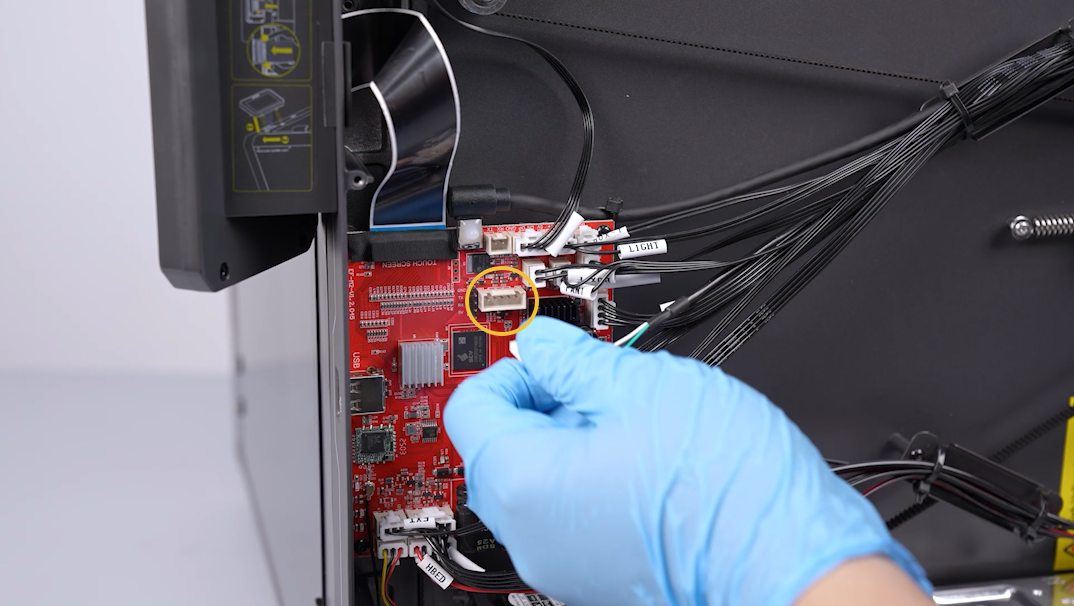
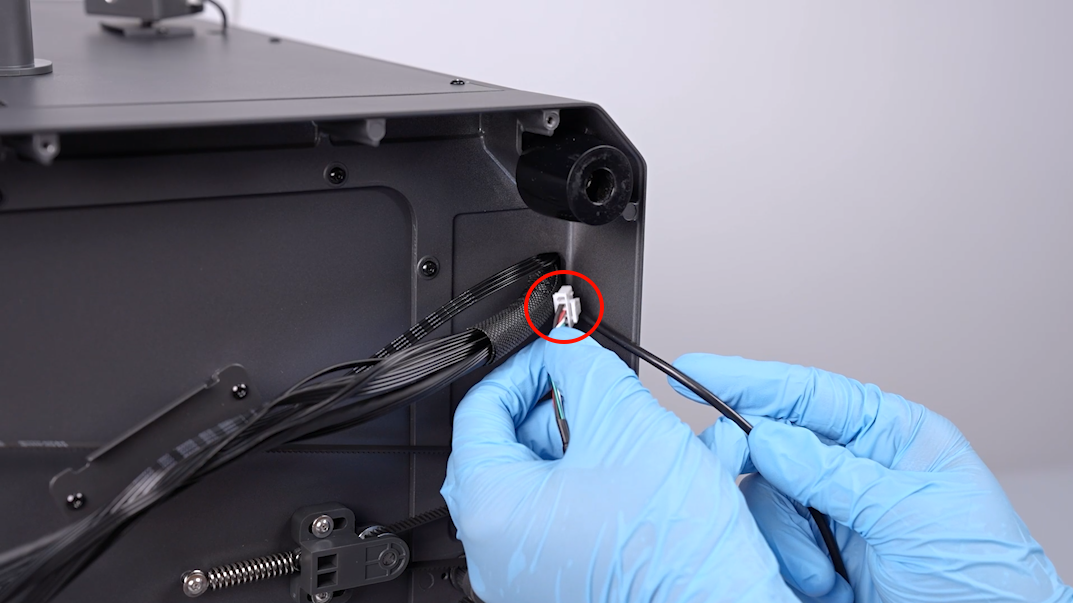
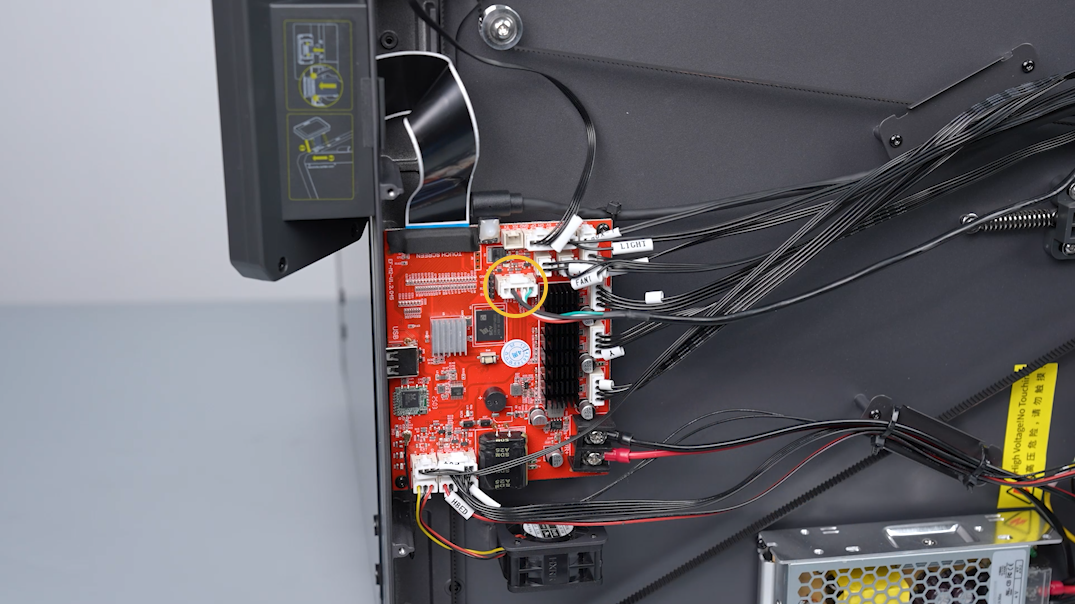
- Remove the bottom cover of the printer. Disconnect the ribbon cable of the multi-color connector on the motherboard.
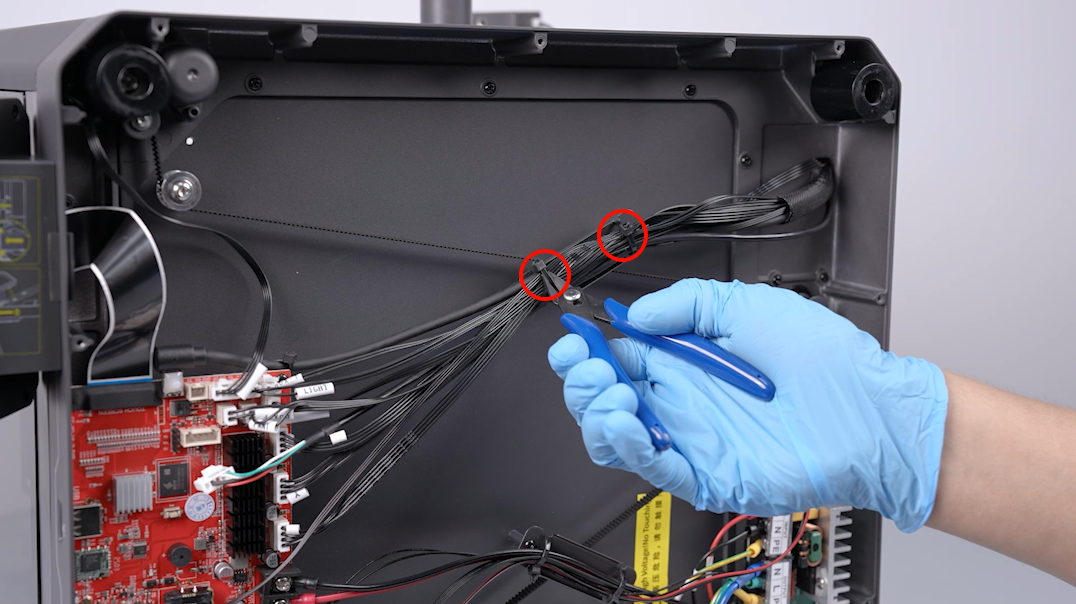
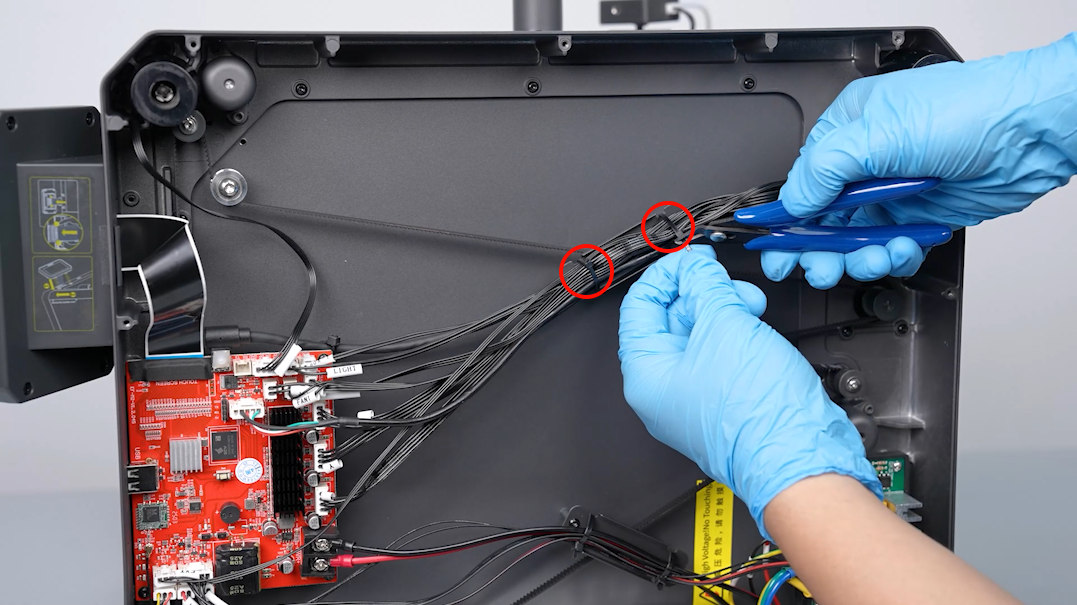
- Cut off the two pieces of cable tie securing ribbon cables on the cable holder using a pair of diagonal pliers.
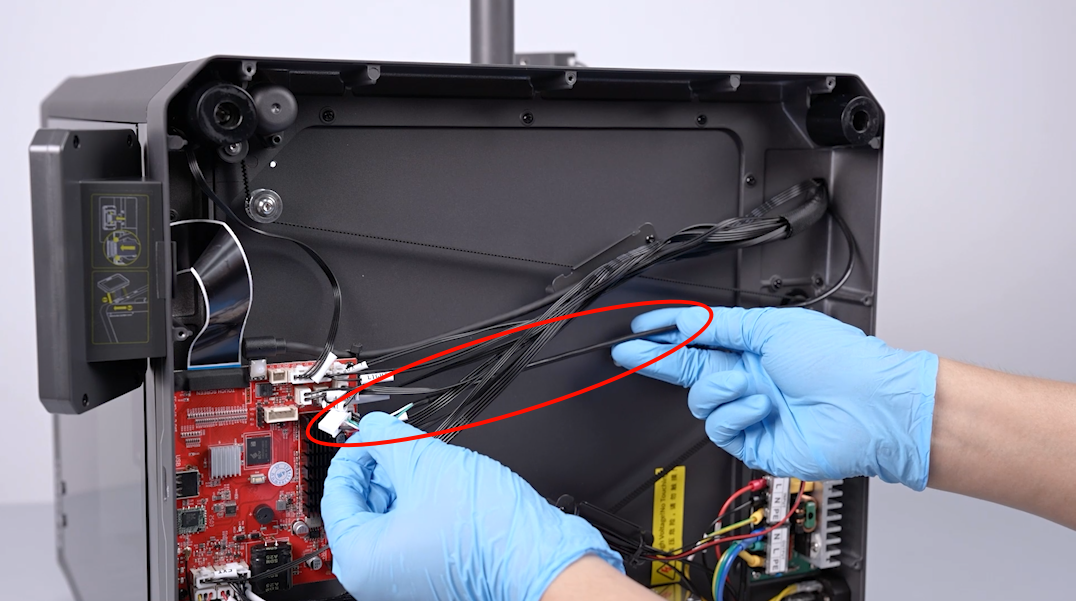
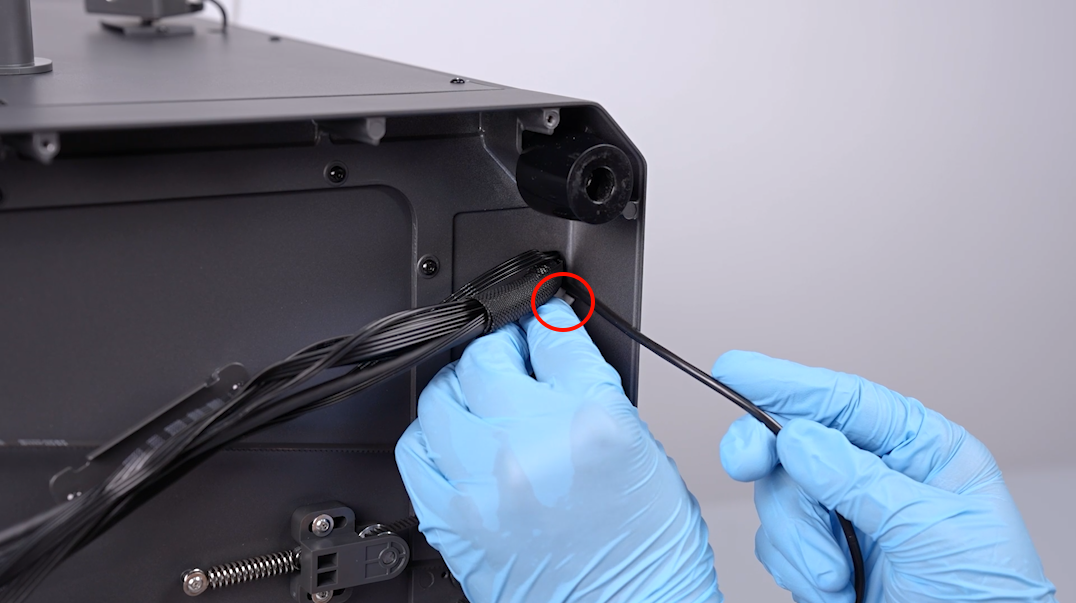
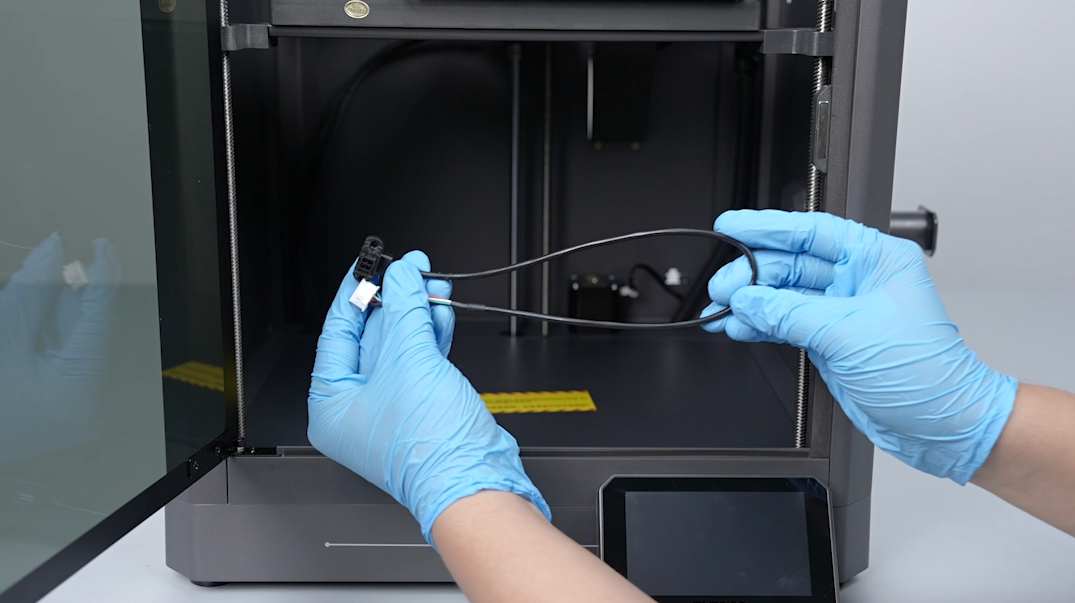
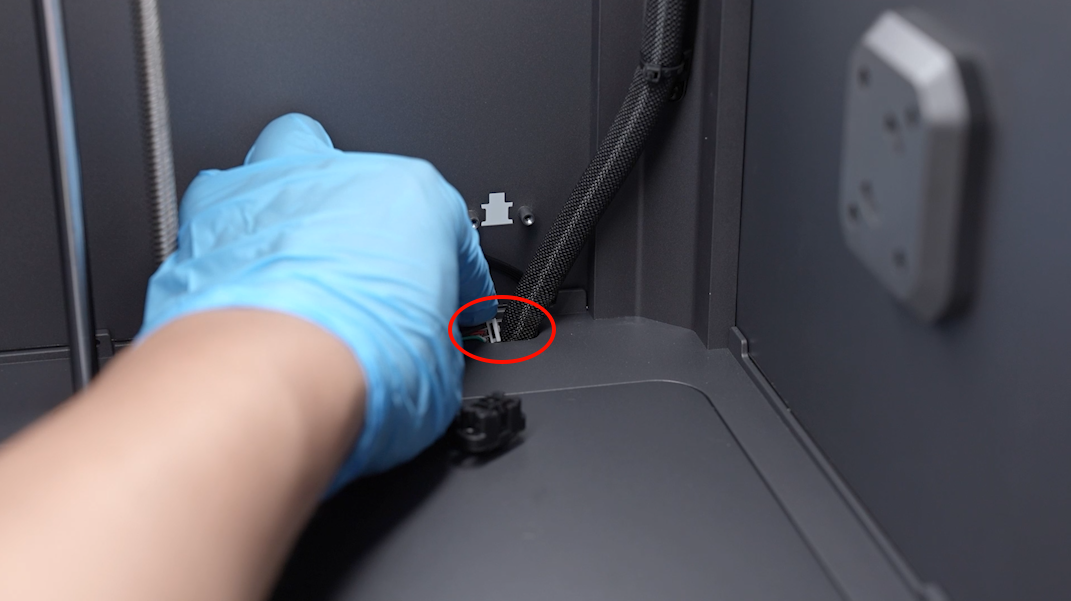
- Oragnize the ribbon cable and remove it. Pass the ribbon cable through the reserved hole into the interior of the printer.
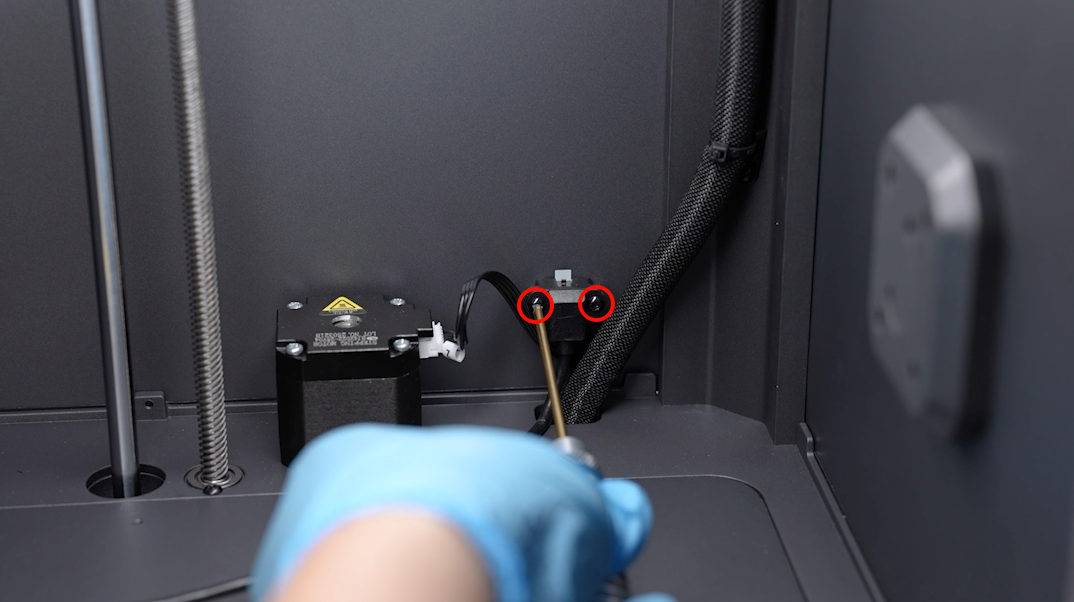
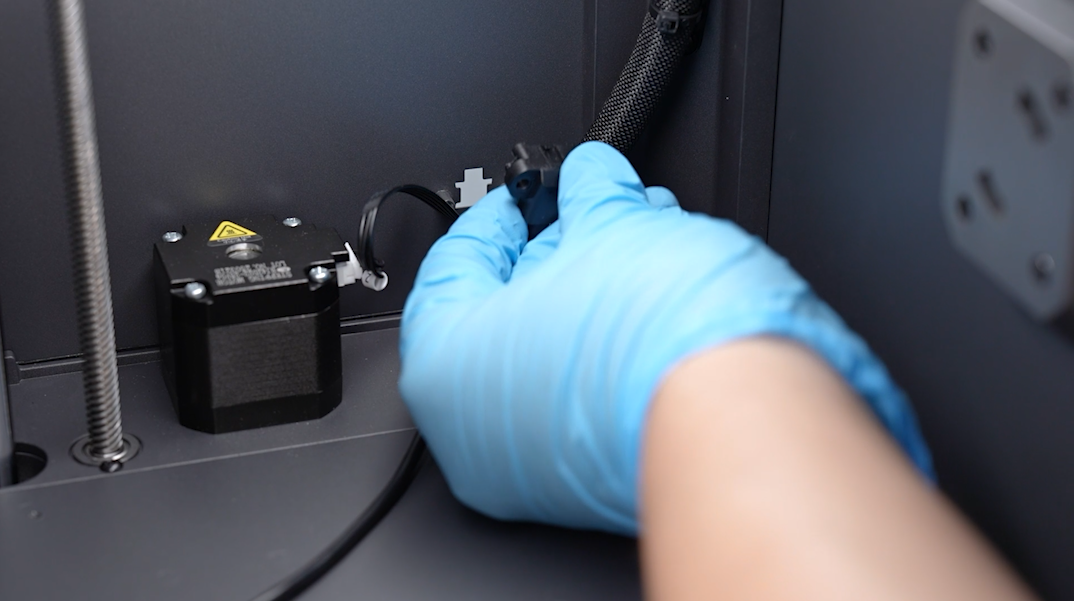
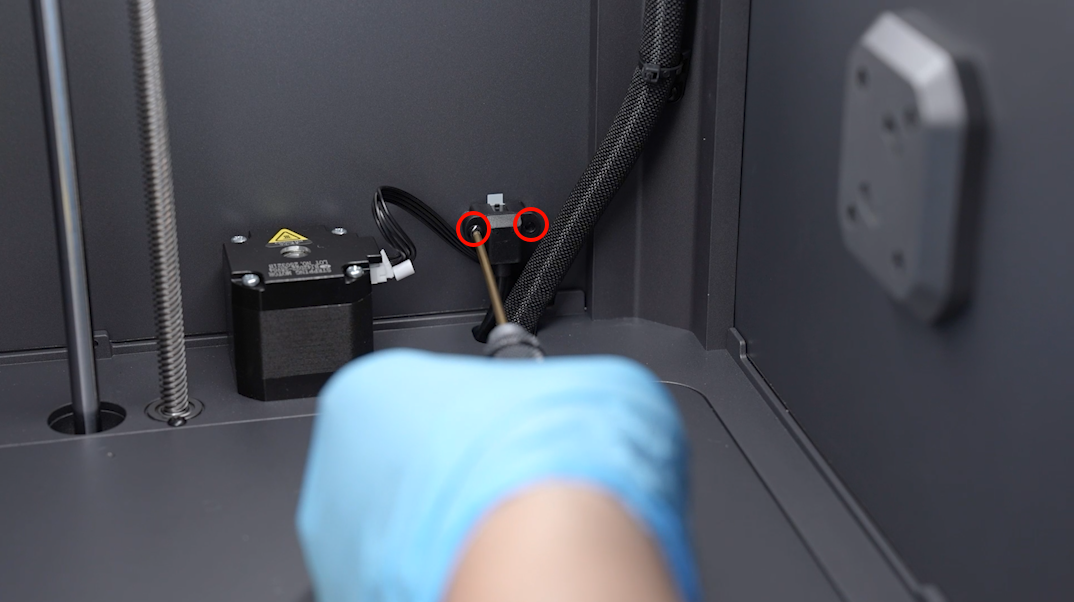
- Loosen the 2 screws securing the multi-color connector using a 2.0 mm Allen key, then remove connector.
¶ Install the new multi-color connector and its ribbon cable
- Prepare the new multi-color connector and its ribbon cable.
- Pass the end of the ribbon cable connecting to the motherboard through the reserved hole to the printer's bottom. Align the multi-color connector with the screw holes and put it in the installation position.
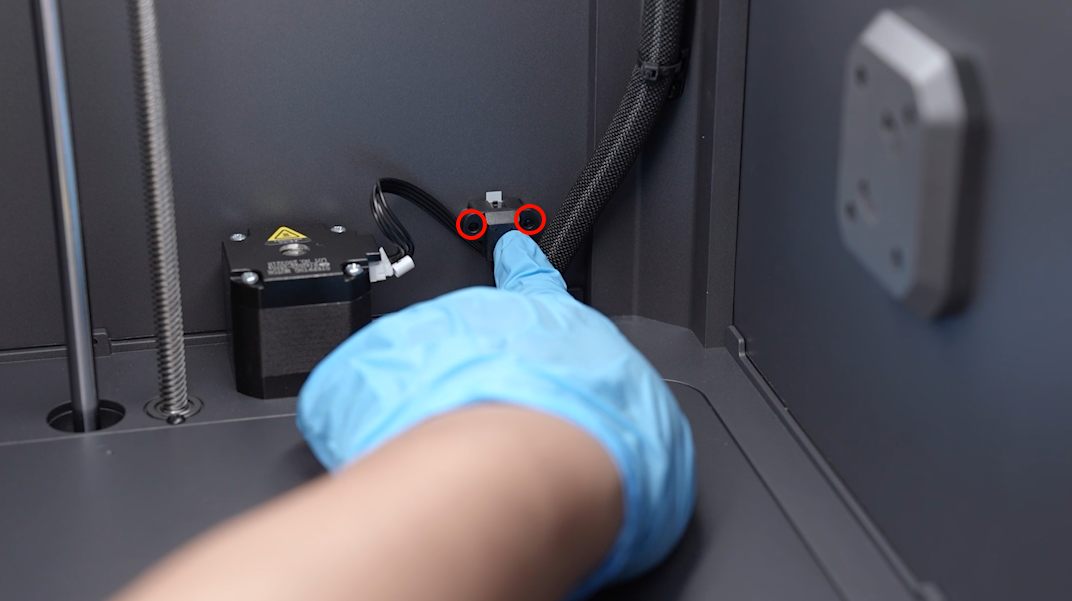
- Tighten the two screws securing the multi-color connector using a 2.0 mm Allen key.
- Insert the ribbon cable of the multi-color connector into the port on the motherboard.
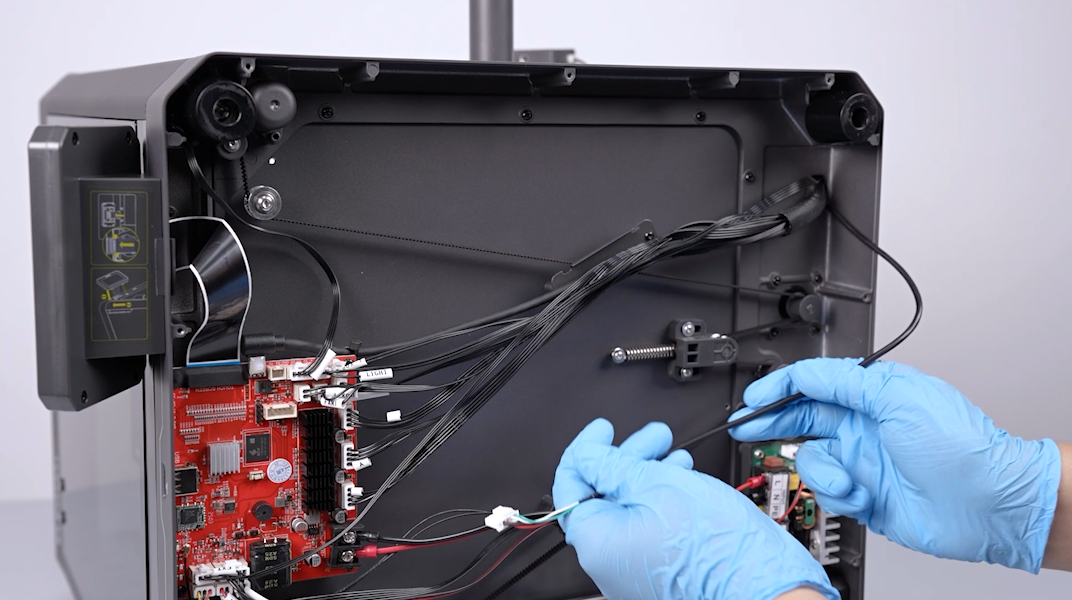
- Organize the ribbon cables and use 2 pieces of cable ties to secure the ribbon cables on the holder.
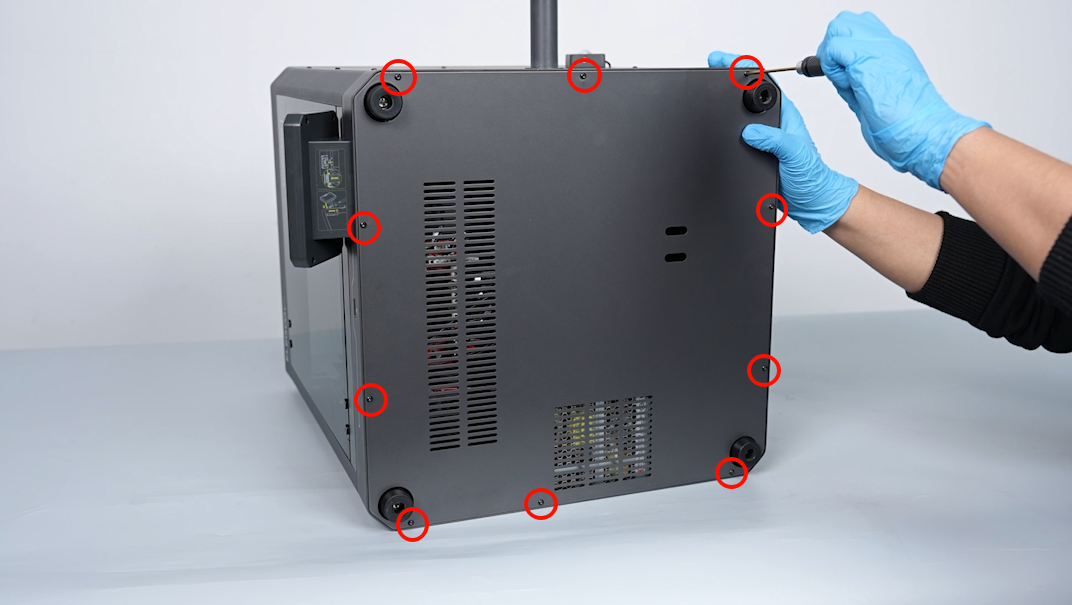
- Put the bottom cover of the printer in the installation position by aligning it with the foot pad holes and screw holes. Use a 2.0 mm Allen key to loosen the 10 screws securing the bottom cover.