¶ Tools and Materials
- A 2.0 mm Allen wrench
- A pair of tweezers
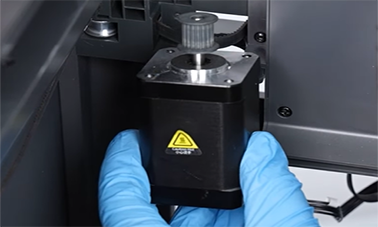
- A new motor of the print head


¶ Tutorial Video
¶ Instruction
¶ Remove the back cover of the printer and the multi-color connector
- Power off the printer and unplug the power cord. Loosen the two screws securing the multi-color connector using a 2.0 mm Allen key, then remove connector.


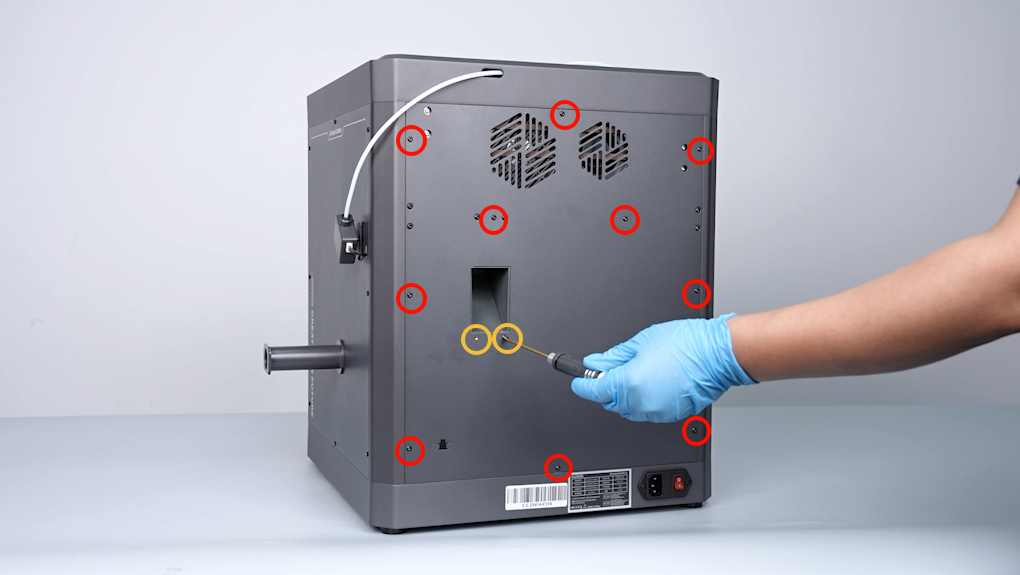
- Loosen the 12 screws securing the back cover of the printer using a 2.0 mm Allen key, then remove the back cover.
Note: Screw holes labeled by the red circle are M3*4, while screw holes labeled by the yellow circle are M3*8.

¶ Replace the Right-Side Motor
¶ Remove the old motor
- Unplug the ribbon cables of the right-side motor.

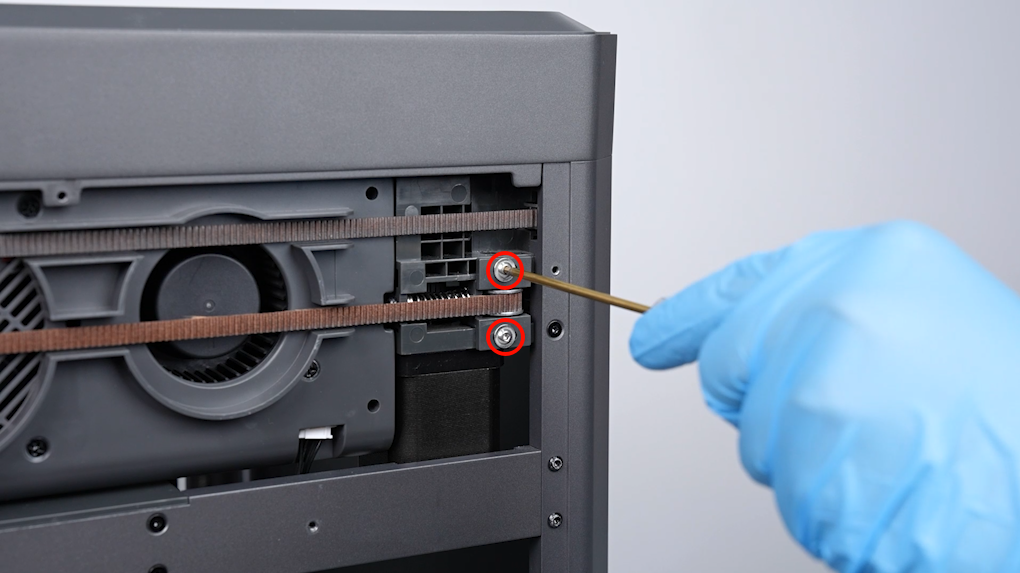
- Loosen the 2 screws securing the belt tensioner using a 2.0 mm Allen key, then remove the belt tensioner and the spring.


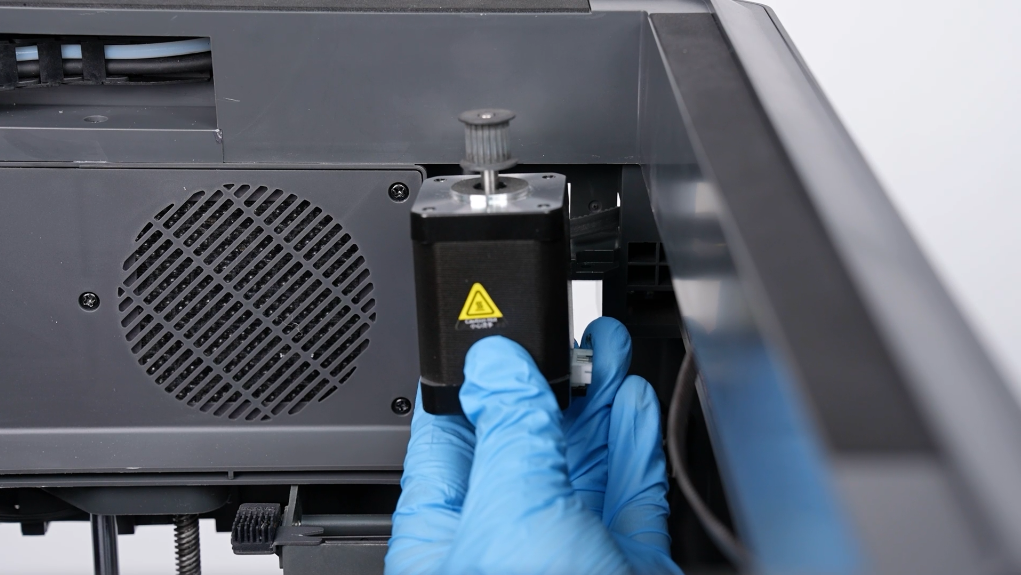
- Loosen the 3 screws securing the right-side motor using a 2.0 mm Allen key, then remove the old motor.


¶ Install a new motor
- Prepare the new right-side motor. Put it in the installation position by aligning it with the screw holes. Tighten the 3 screws securing the right-side motor using a 2.0 mm Allen key.
Note: Install the timing belt on the timing pulley of the motor.


- Prepare the belt tensioner, then hook the spring to the belt tensioner coupler. Put the spring in the installation position by aligning it with the screw. Compress the spring to install the timing belt on the idler pulley of the belt tensioner.


- Press the belt tensioner, then put it in the installation position by aligning it with the screw holes. Tighten the 2 screws securing the belt tensioner using a 2.0 mm Allen key.


- Insert the ribbon cables of the right-side motor.

¶ Replace the Left-Side Motor
¶ Remove the old motor
Remove the left-side motor in the same way as removing the right-side motor.
- Unplug the ribbon cables of the motor. Loosen the 2 screws securing the belt tensioner using a 2.0 mm Allen key, then remove the belt tensioner and the spring.


- Loosen the 3 screws securing the right-side motor using a 2.0 mm Allen key, then remove the old motor.


¶ Install a new motor
Install the left-side motor in the same way as installing the right-side motor.
- Tighten the 3 screws securing the left-side motor using a 2.0 mm Allen key.
Note: Install the timing belt on the timing pulley of the motor.


- Install the spring on the fixing column of the belt tensioner, then install the timing belt on the idler pulley of the belt tensioner. Compress the spring to install the timing belt on the idler pulley of the belt tensioner.


- Press the belt tensioner, then put it in the installation position by aligning it with the screw holes. Tighten the 2 screws securing the belt tensioner using a 2.0 mm Allen key.

- Insert the ribbon cables of the left-side motor.

¶ Install the back cover of the printer and the multi-color connector
- Put the back cover of the printer in the installation position by aligning it with the screw holes. Use a 2.0 mm Allen wrench to tighten the 12 screws securing the back cover of the printer.
Note: Screw holes labeled by the red circle are M3*4, while screw holes labeled by the yellow circle are M3*8.
- Put the multi-color connector in the installation position by aligning it with the screw holes. Tighten the 2 screws securing the multi-color connector using a 2.0 mm Allen key.


- Plug in the power cord and power on the printer. Navigate to "Calibration - Self check - All - Start" on the touchscreen.


- The printer is ready for use after self inspection.
