¶ Tools and Materials
- A 2.0 mm Allen wrench
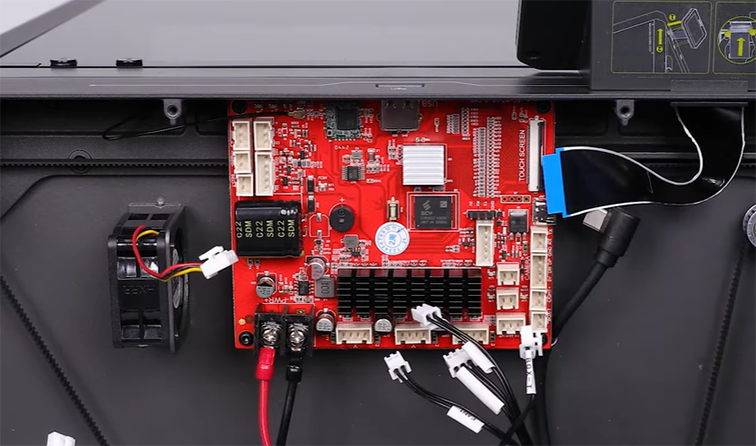
- A new motherboard
¶ Tutorial Video
¶ Instruction
- Power off the printer and unplug the power cord.
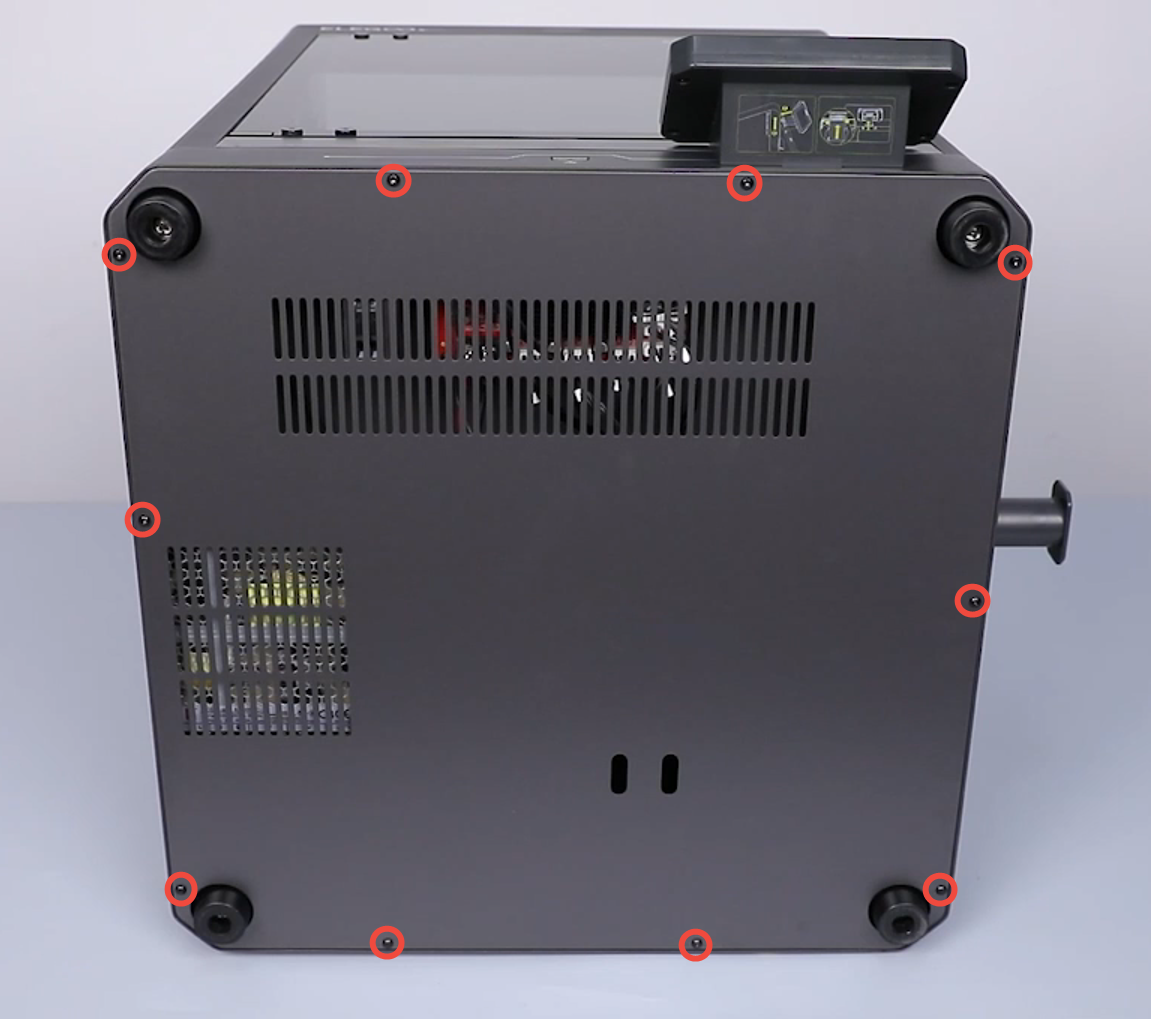
- Use a 2.0 mm Allen wrench to loosen the 10 screws securing the bottom cover of the printer, then remove the bottom cover.
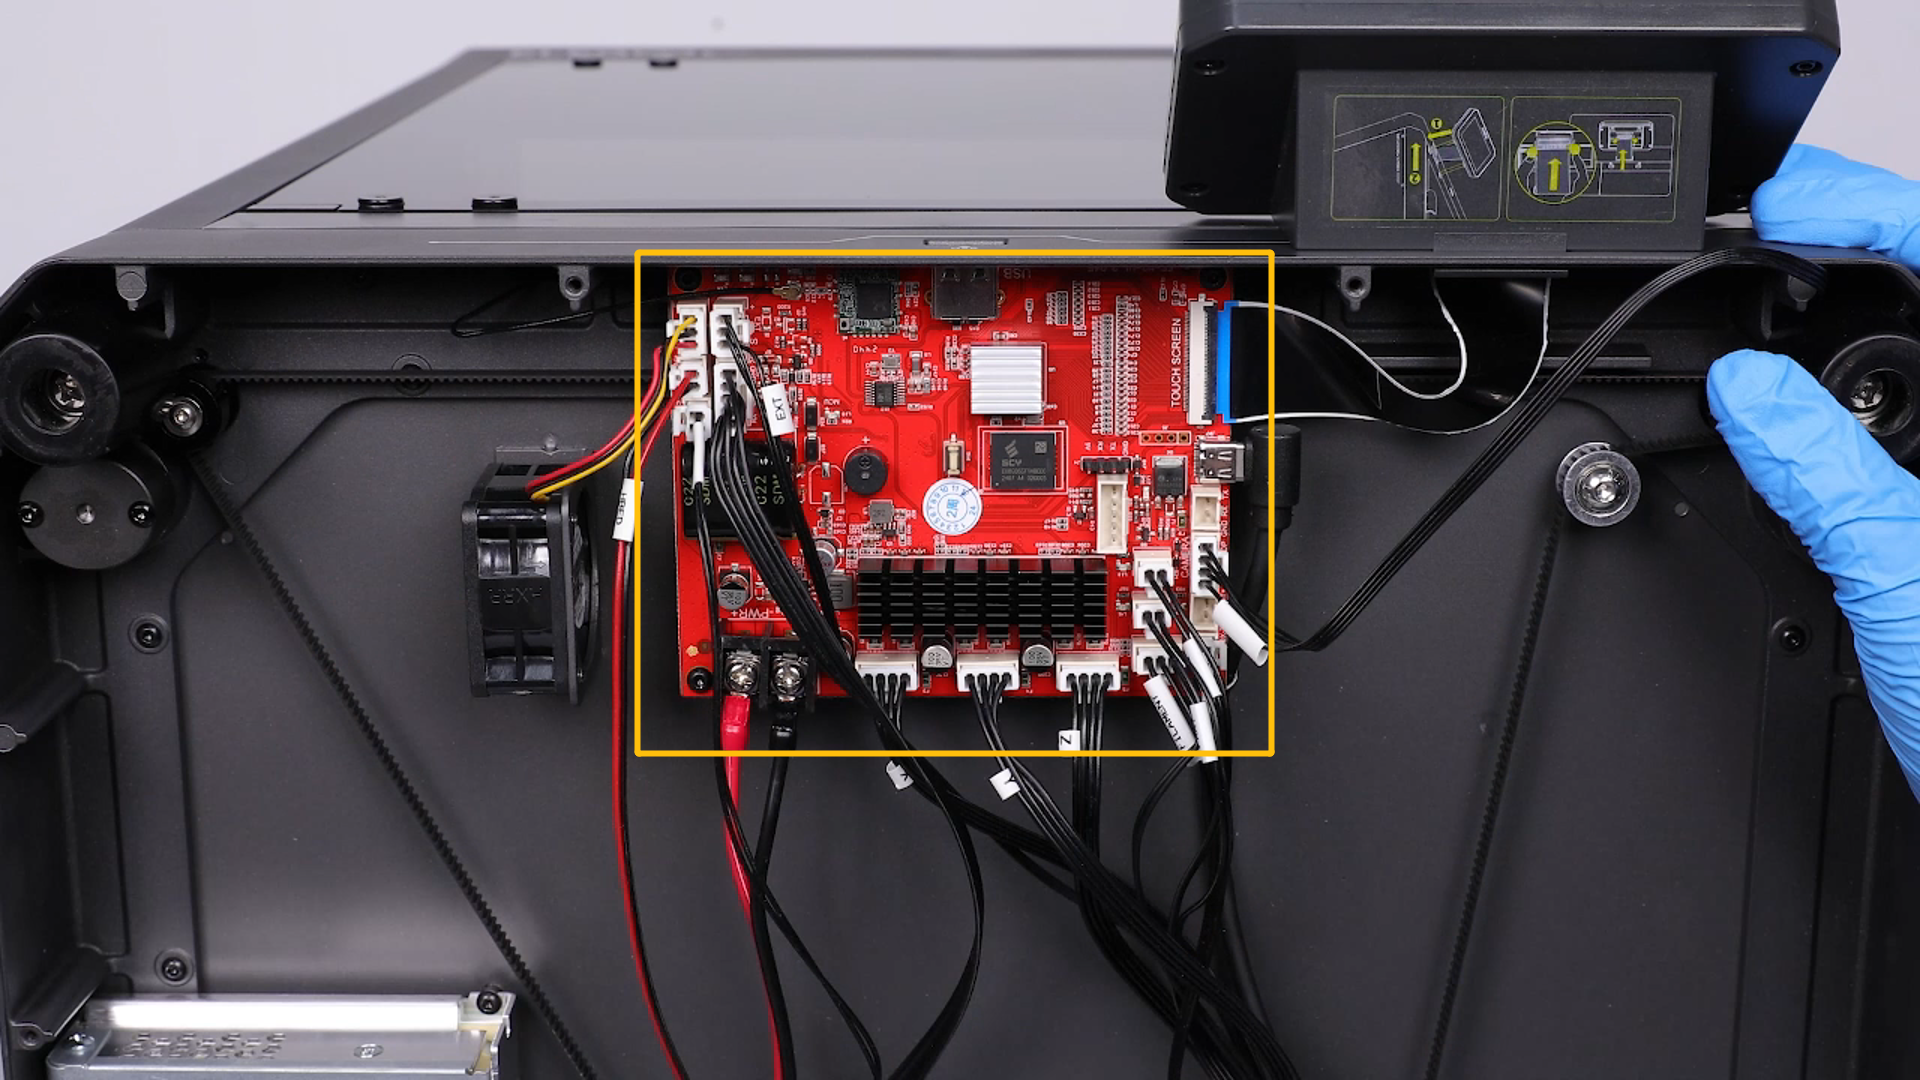
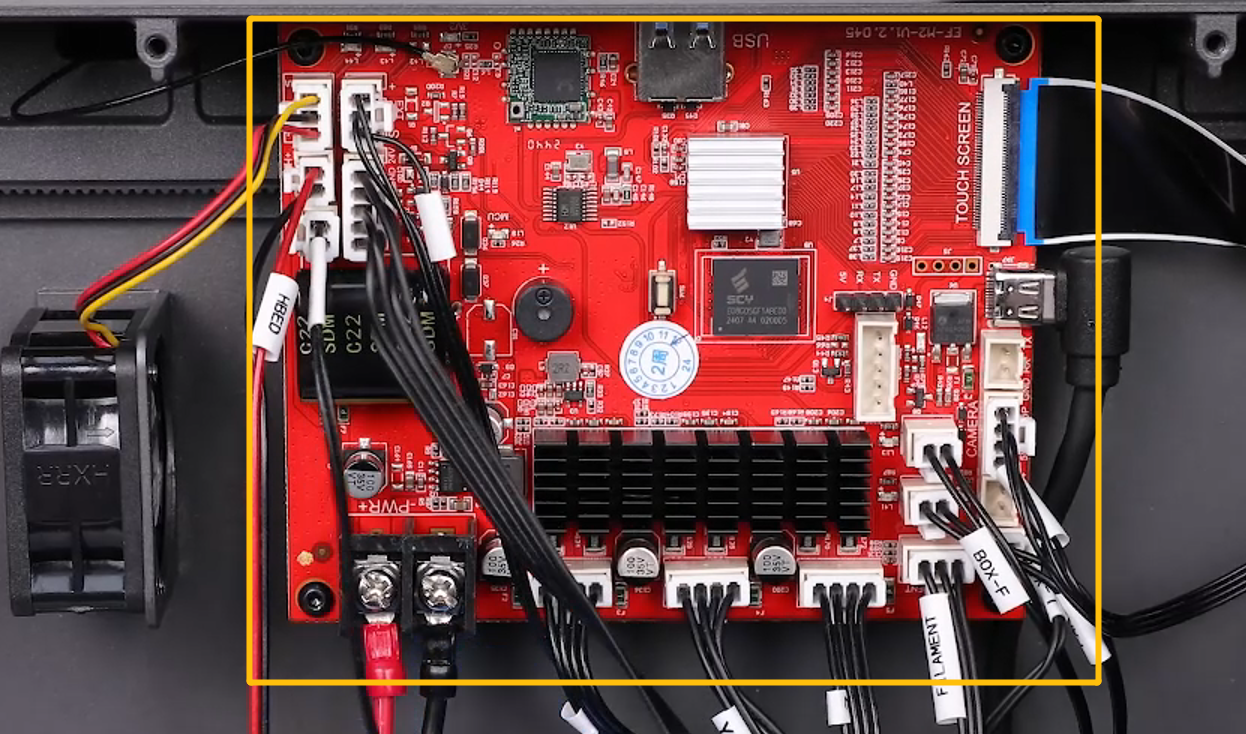
- Unplug the ribbon cables from all the ports on the motherboard.
Note: Check whether each cable port has its label before unplugging the ribbon cables so as to plug the cables back subsequently.
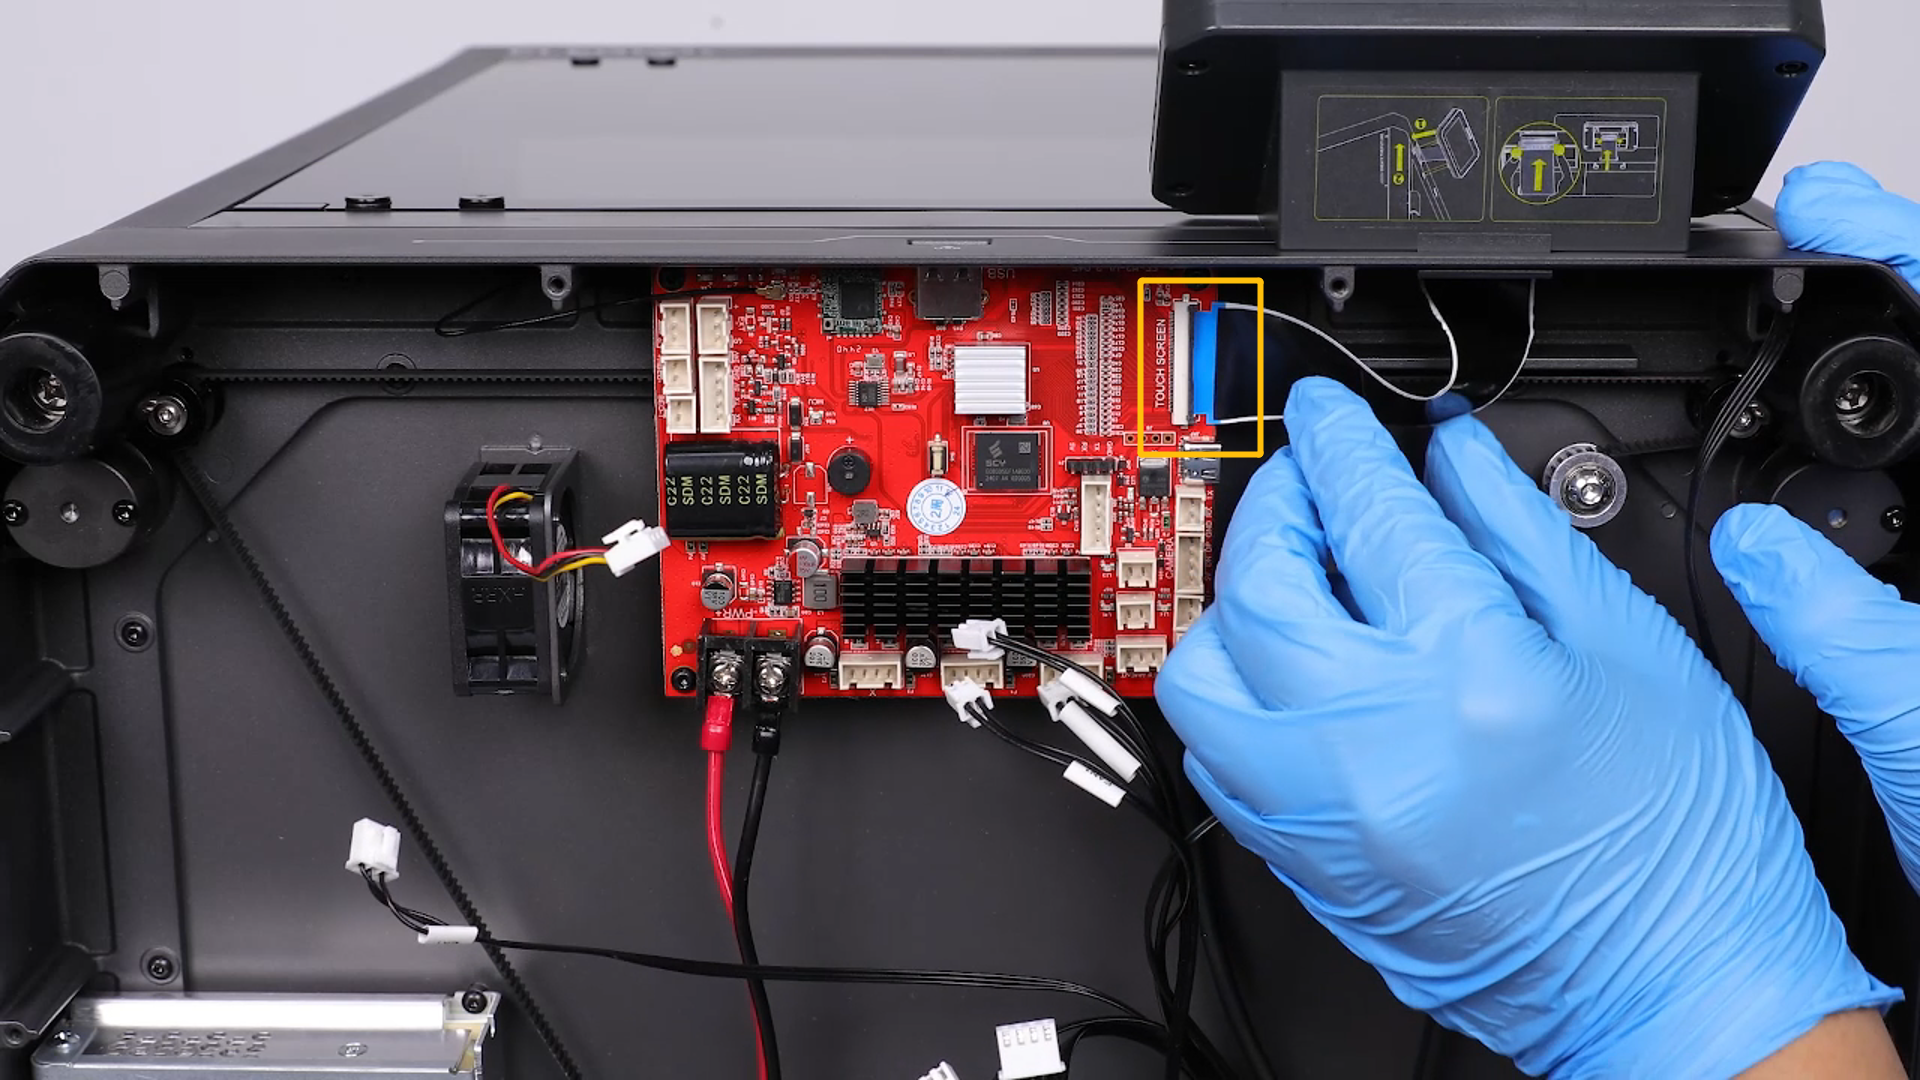
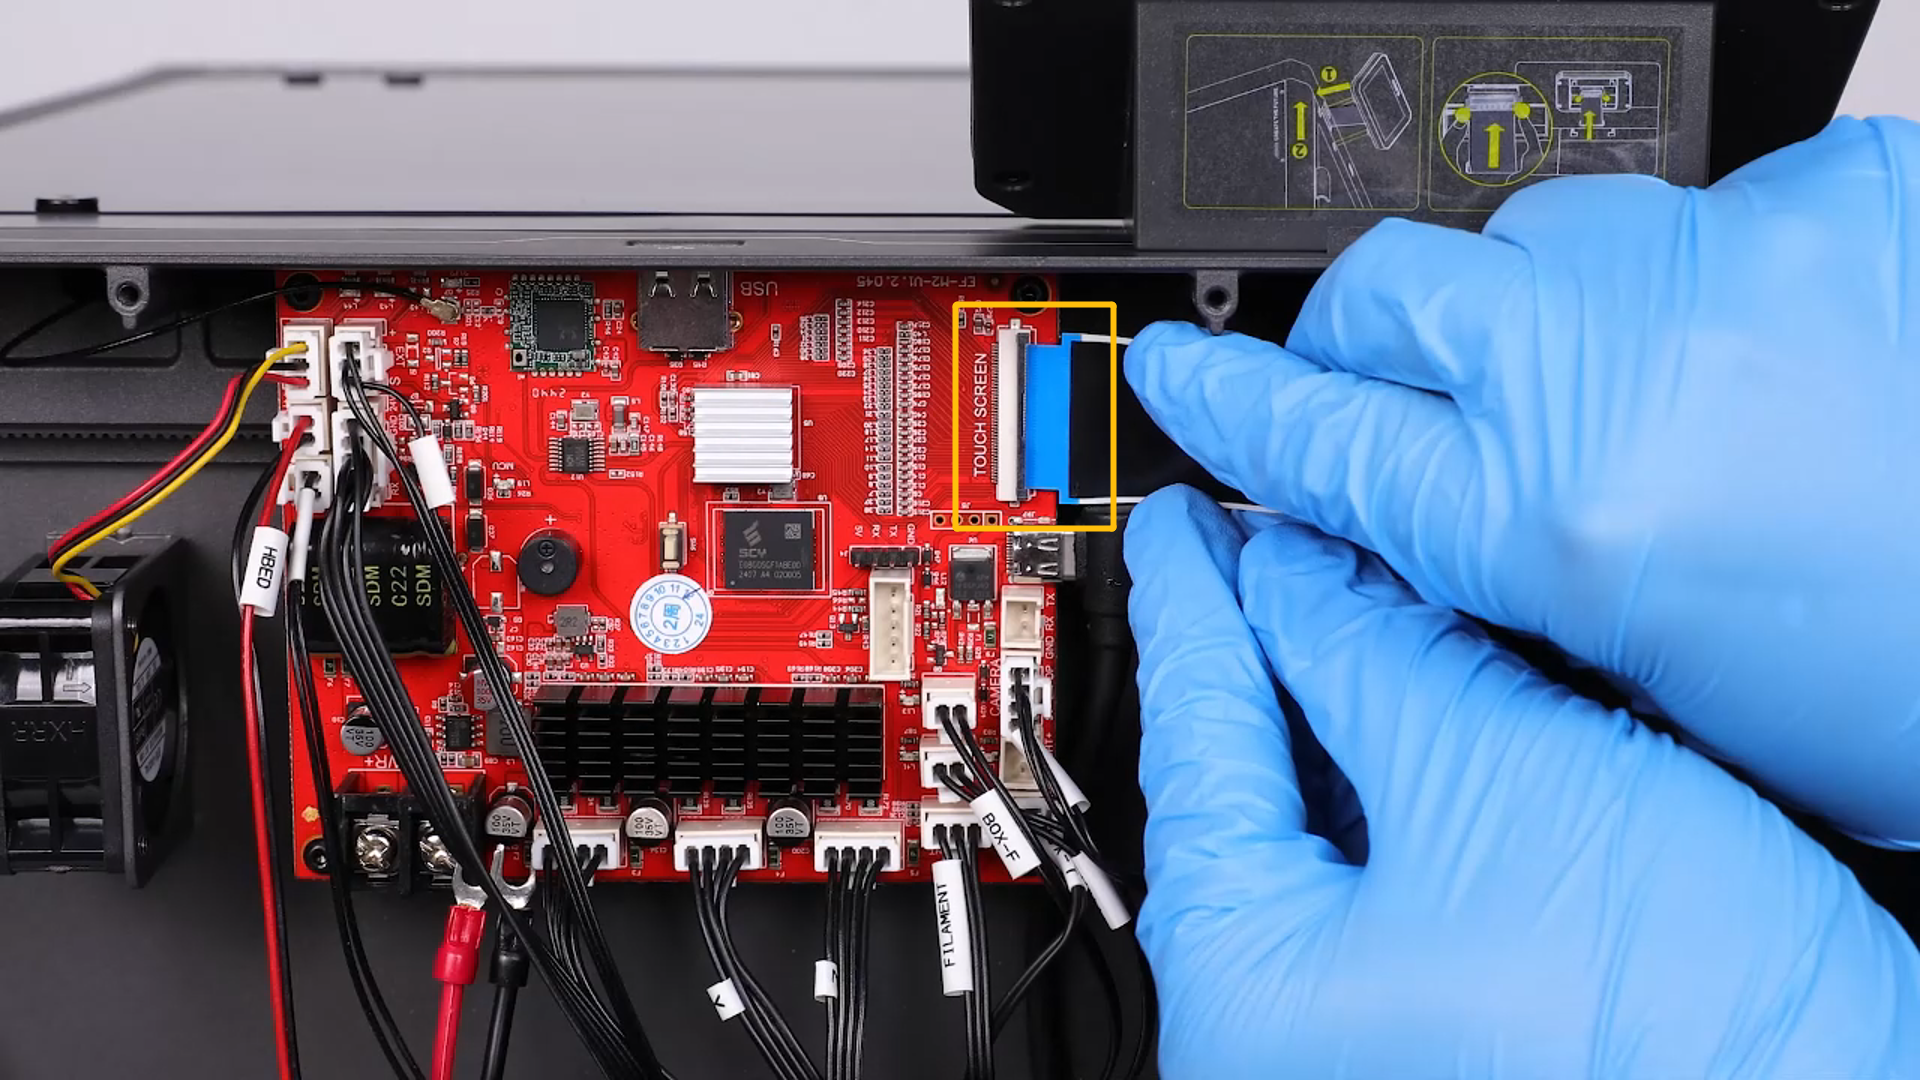
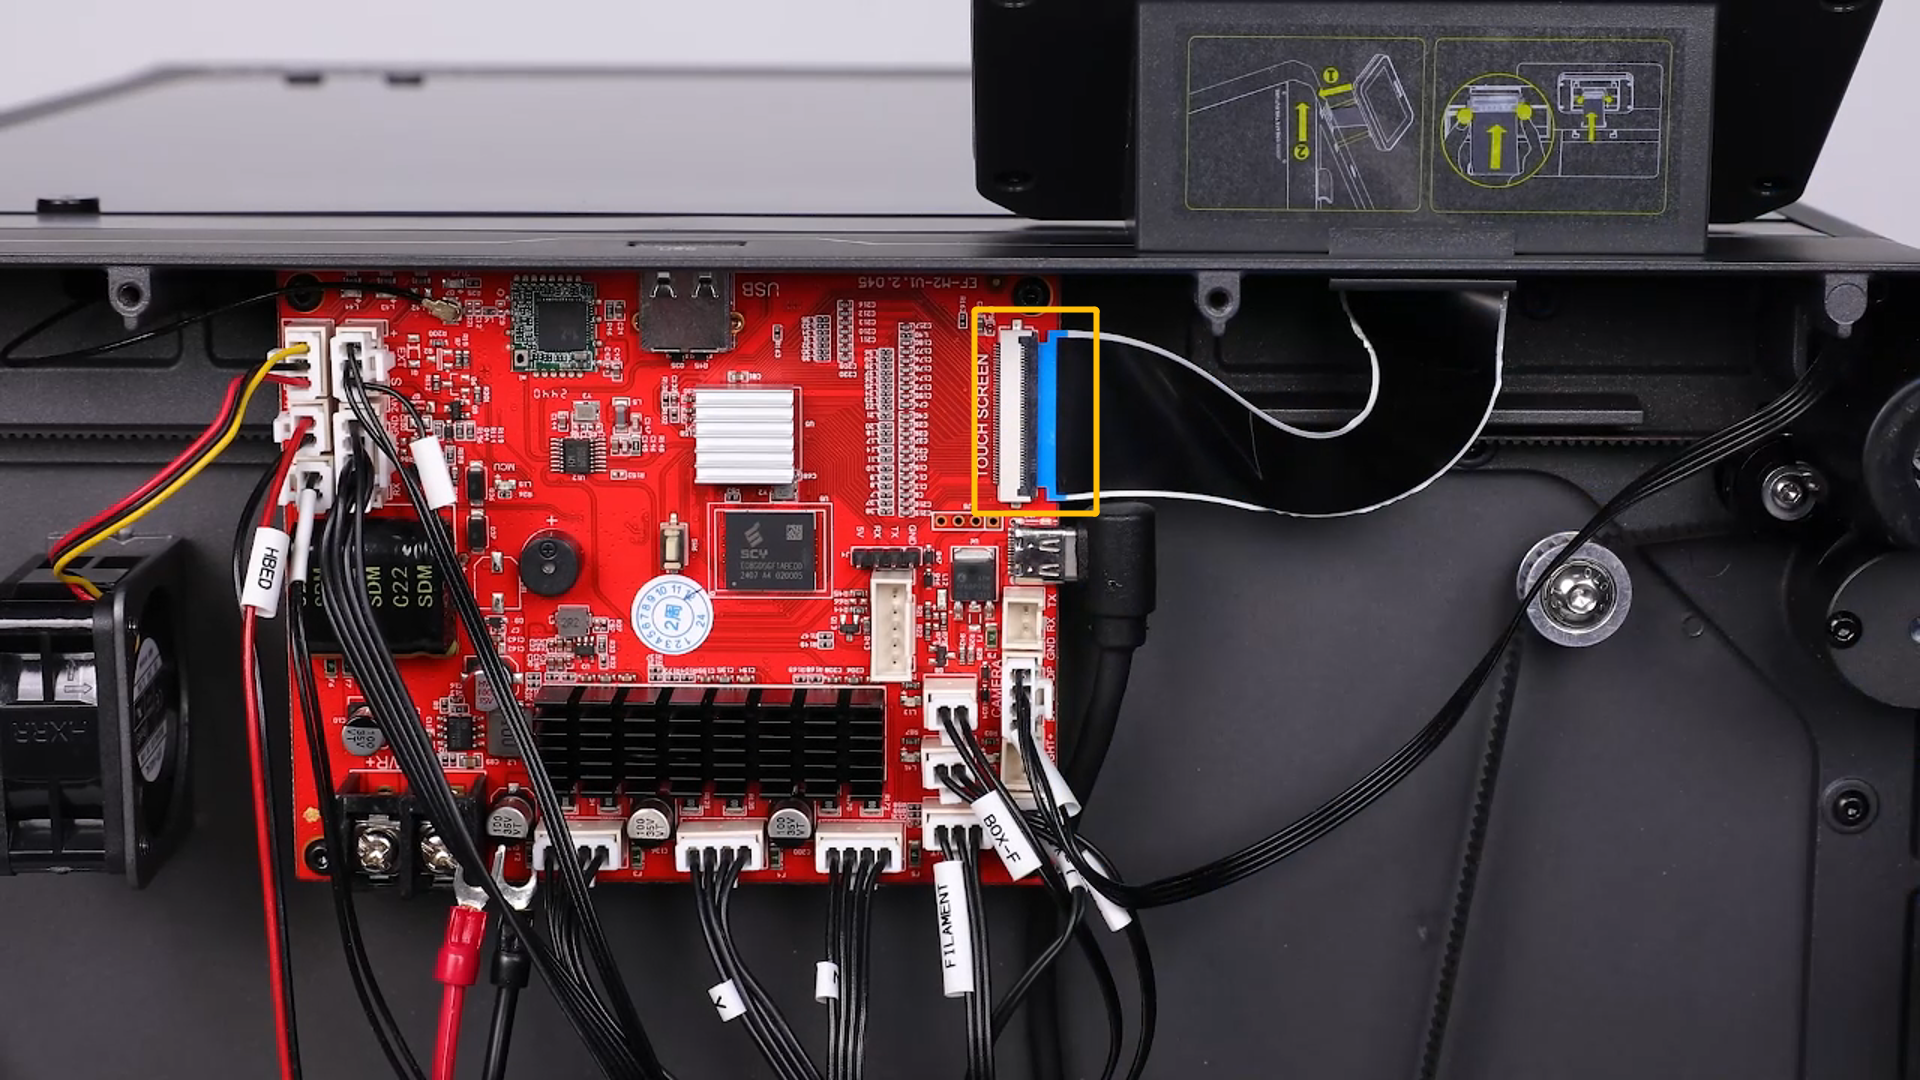
- Lift the buckle to 90°, then remove the touchscreen cable.
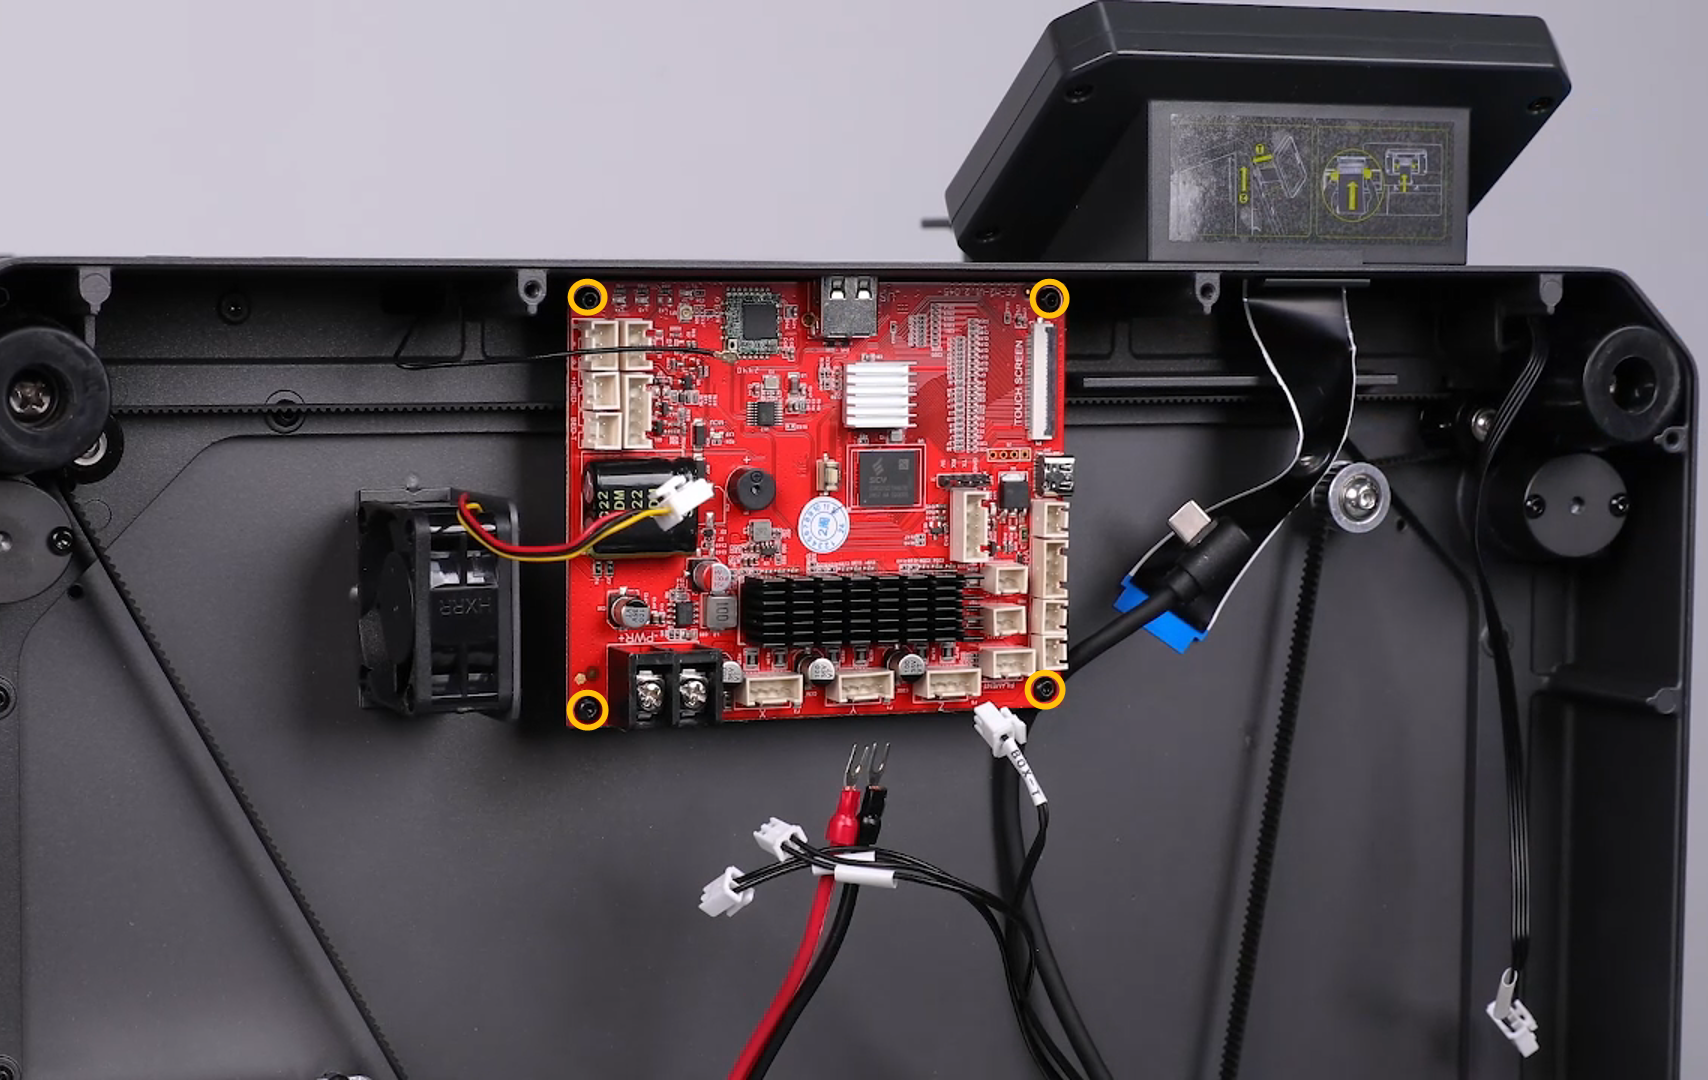
- Use a 2.0 mm Allen wrench to loosen the 4 screws securing the motherboard, then remove the old motherboard.
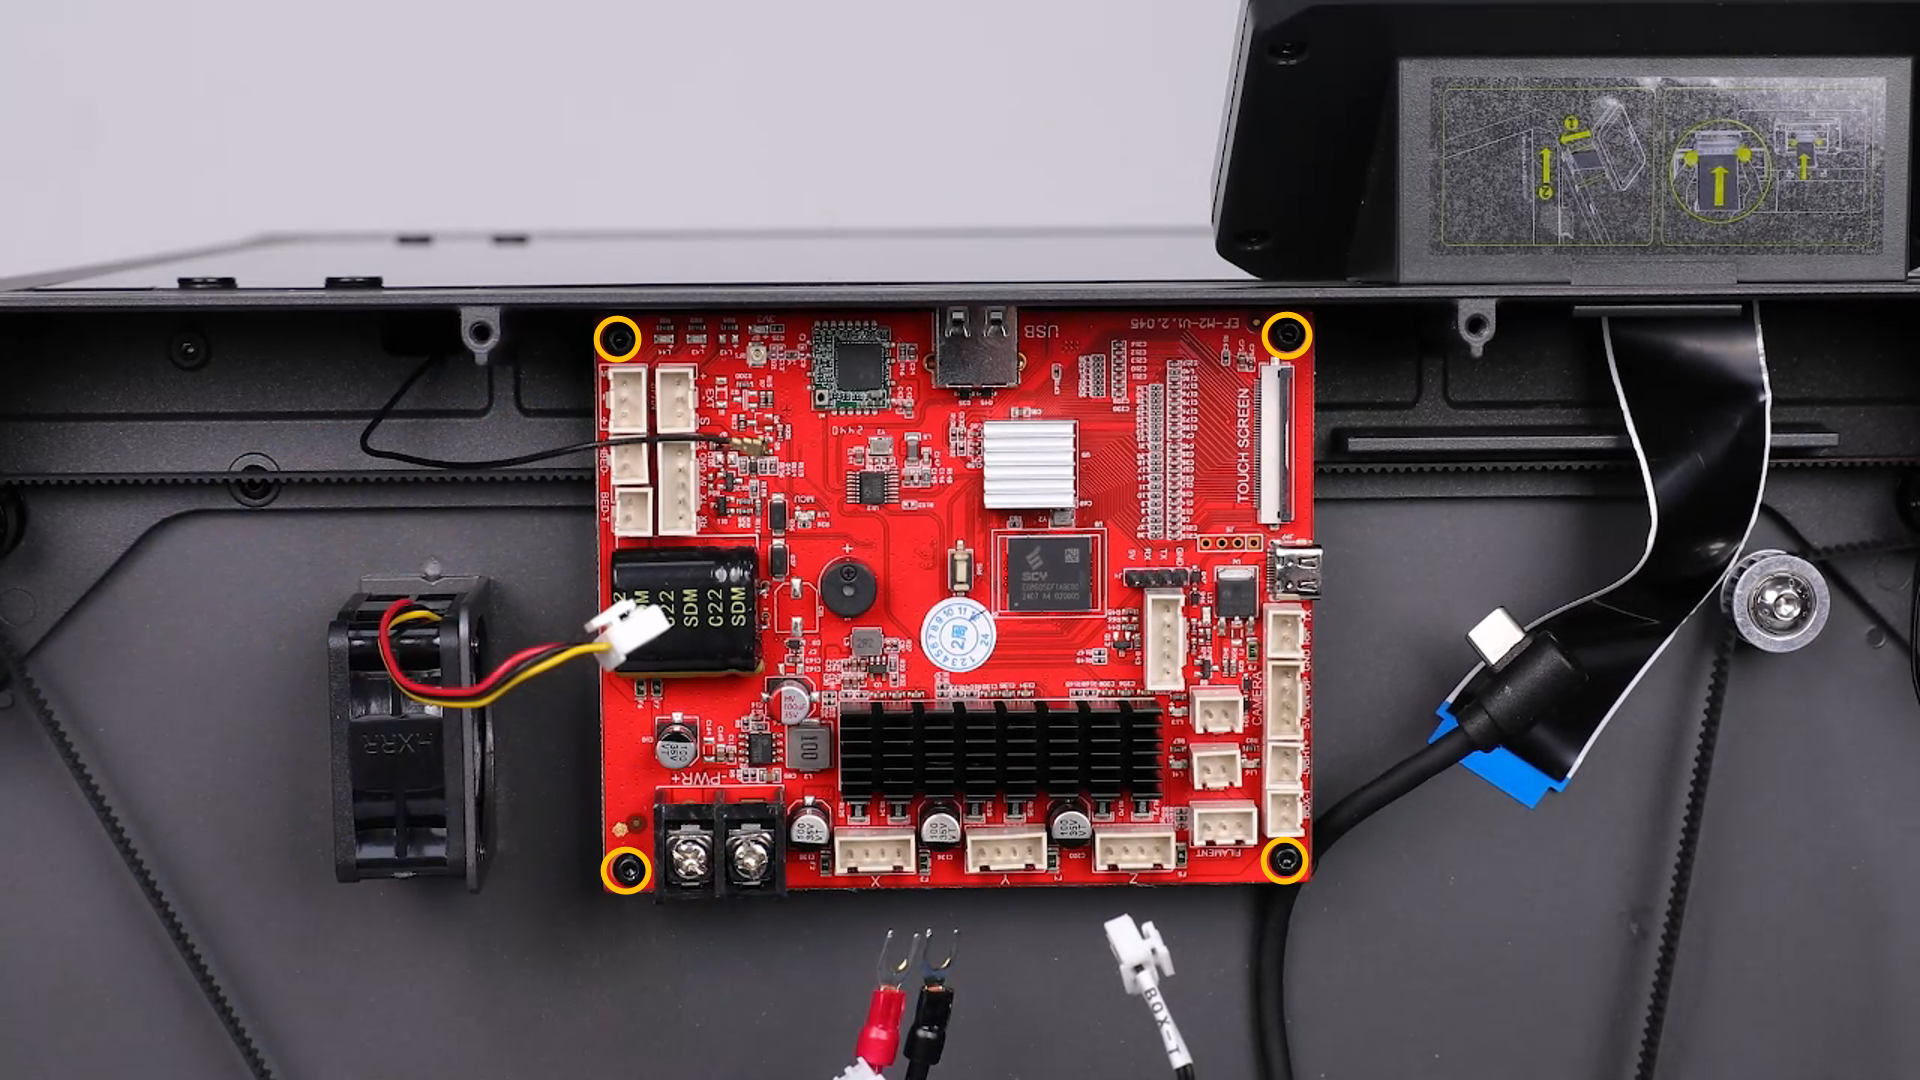
- Prepare the new motherboard by placing it in the installation position. Tighten the 4 screws that secure the motherboard using a 2.0 mm Allen wrench.
- Insert the ribbon cables into the ports on the motherboard according to the label information.
- Insert the touchscreen cable, then close the buckle to secure the cable.
Note: The touchscreen cables has a fixed installation position.
- Put the bottom cover in the installation position by aligning it with the screw holes. Use a 2.0 mm Allen wrench to tighten the 10 screws securing the bottom cover.

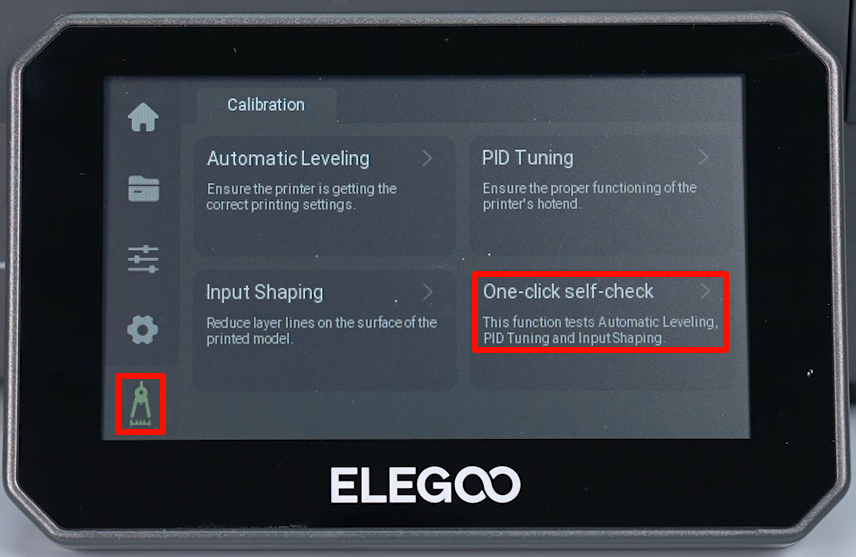
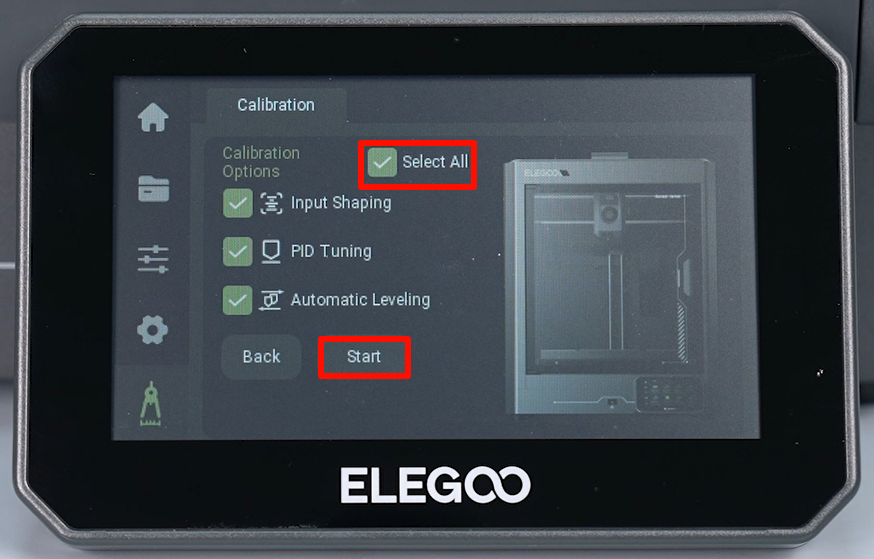
- Power on the printer. Power on the printer. Tap "Function - Self check - All - Start" on the touchscreen. The printer is ready for use after the self check.