¶ Tools and Materials
- A 1.5 mm Allen wrench
- A 2.0 mm Allen wrench
- A pair of diagonal pliers
- Cable ties
- A new connection cable
¶ Tutorial Video
¶ Instruction
¶ Remove the old connection cable
- Power off the printer and unplug the power cord.
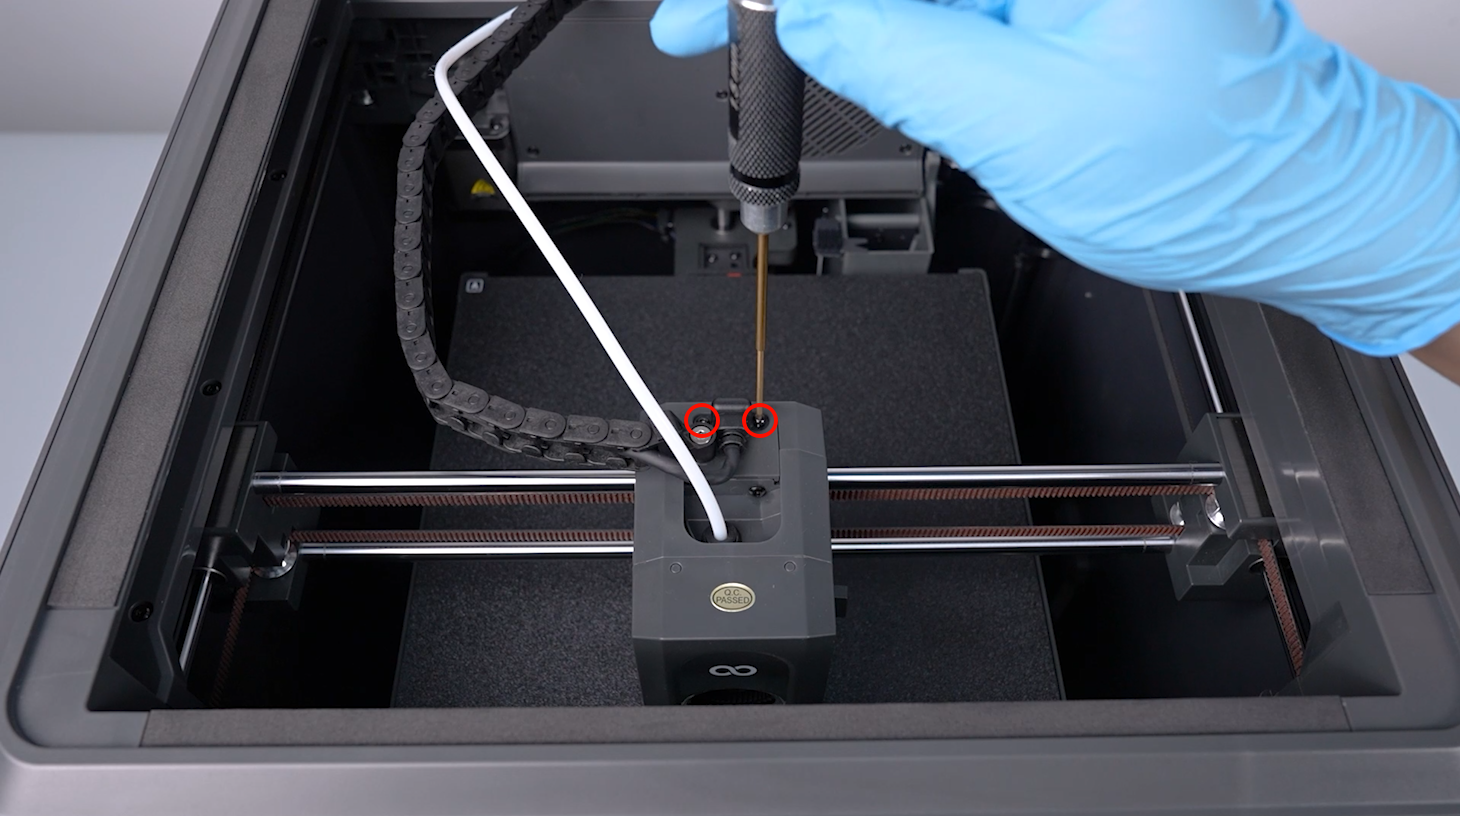
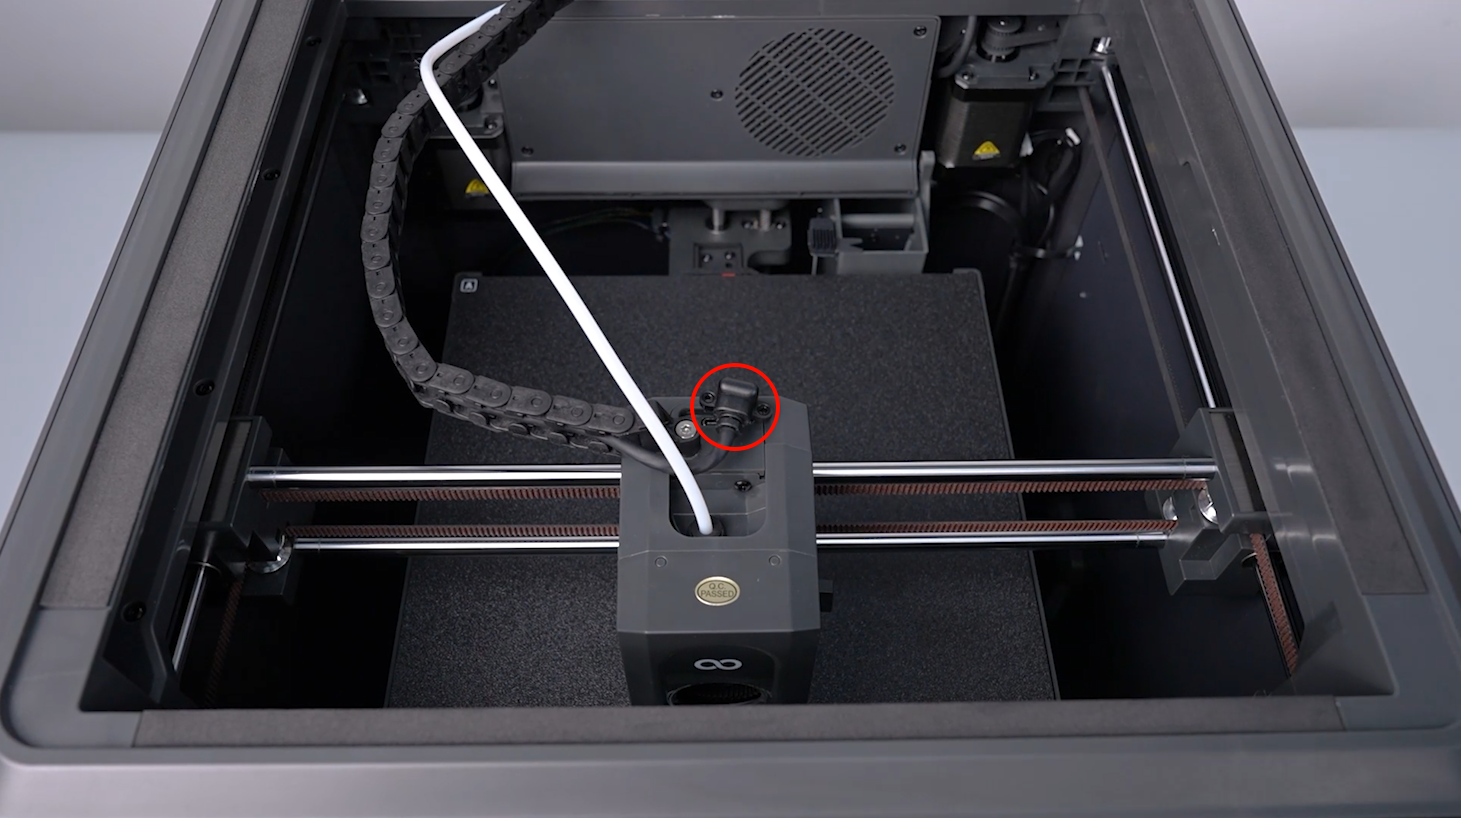
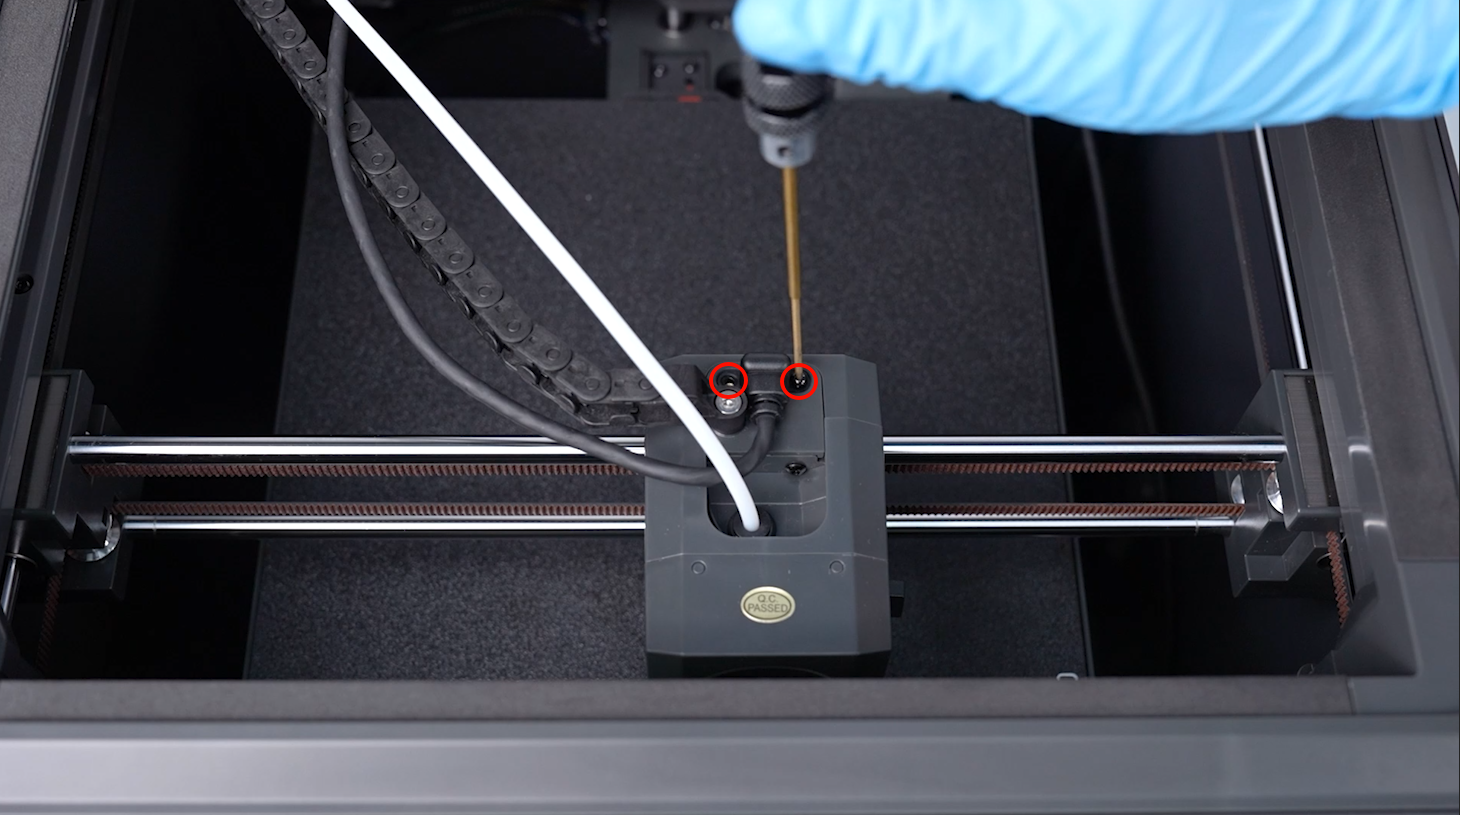
- Use a 1.5 mm Allen wrench to loosen the 2 screws securing the connection cable port of the print head.
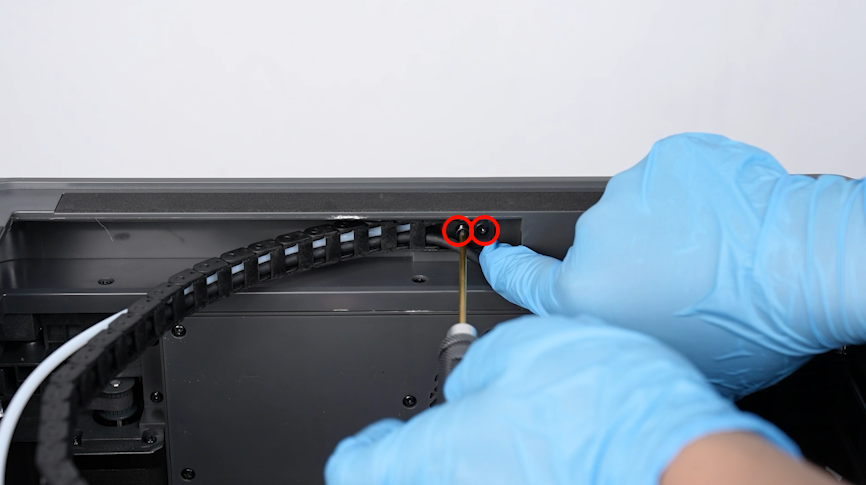
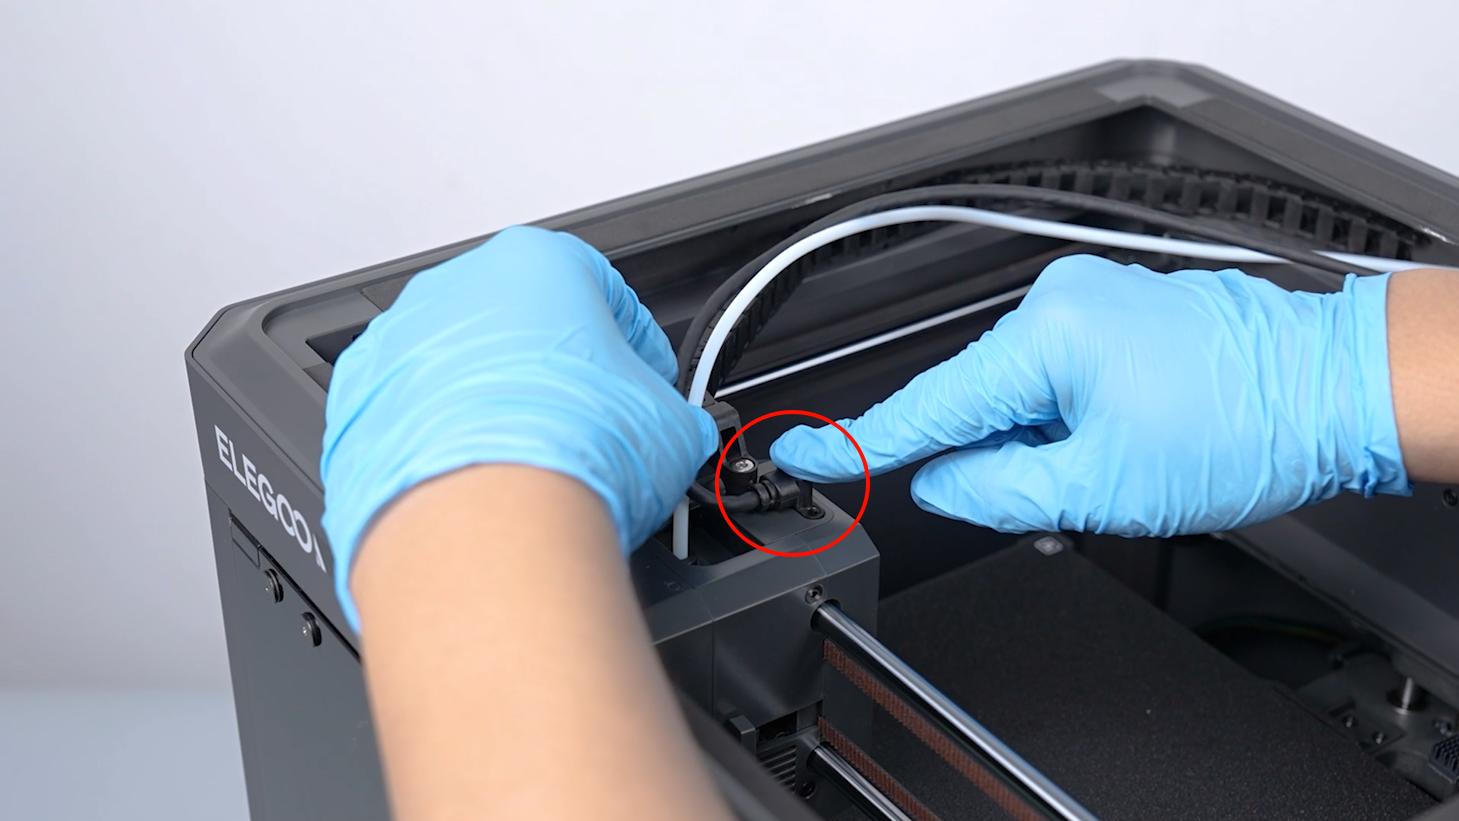
- Use a 2.0 mm Allen wrench to loosen the 2 screws securing the cable chain terminal, and pull out the cable from the cable chain.
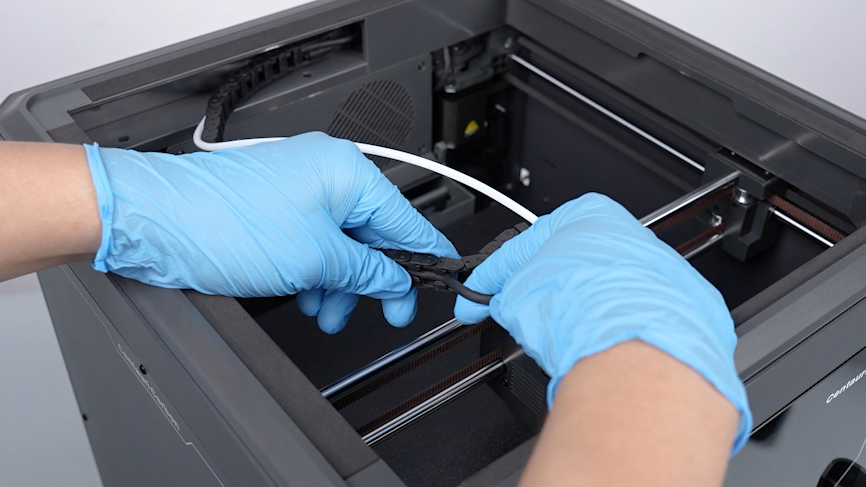
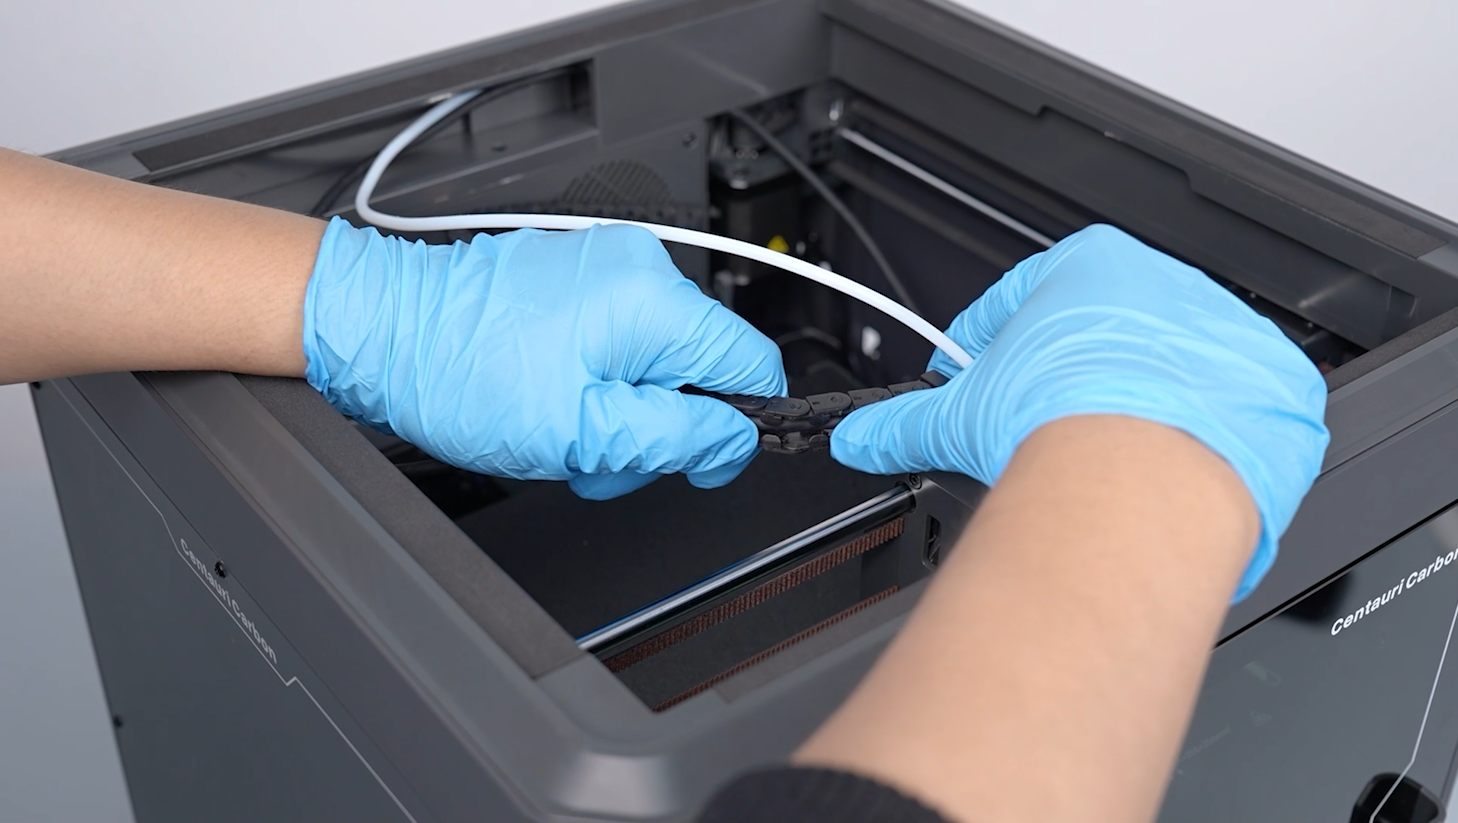
- Remove the last link at the end of the cable chain to take out the print head connection cable completely.
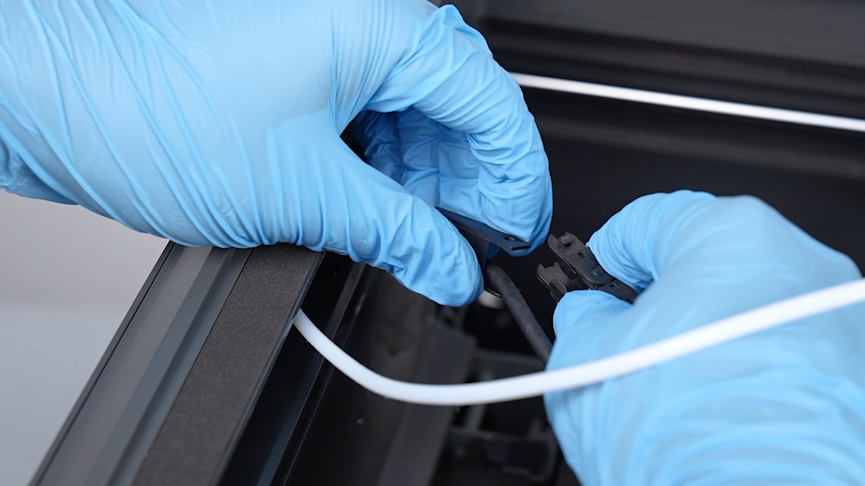

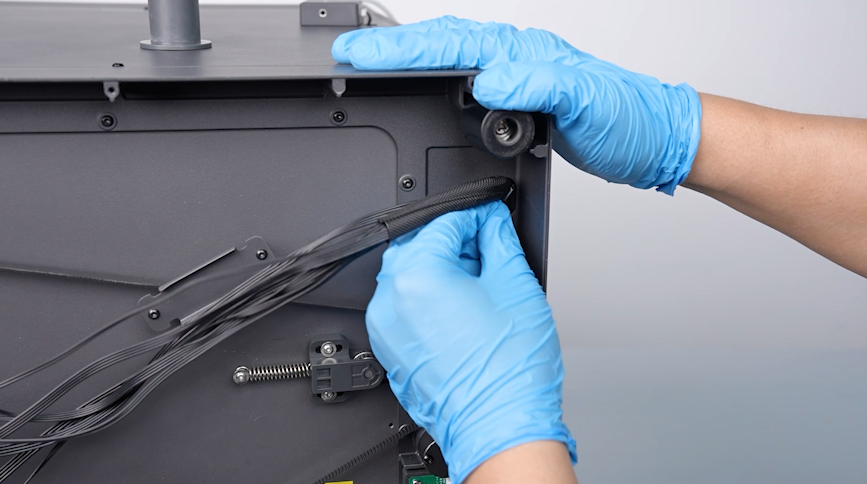
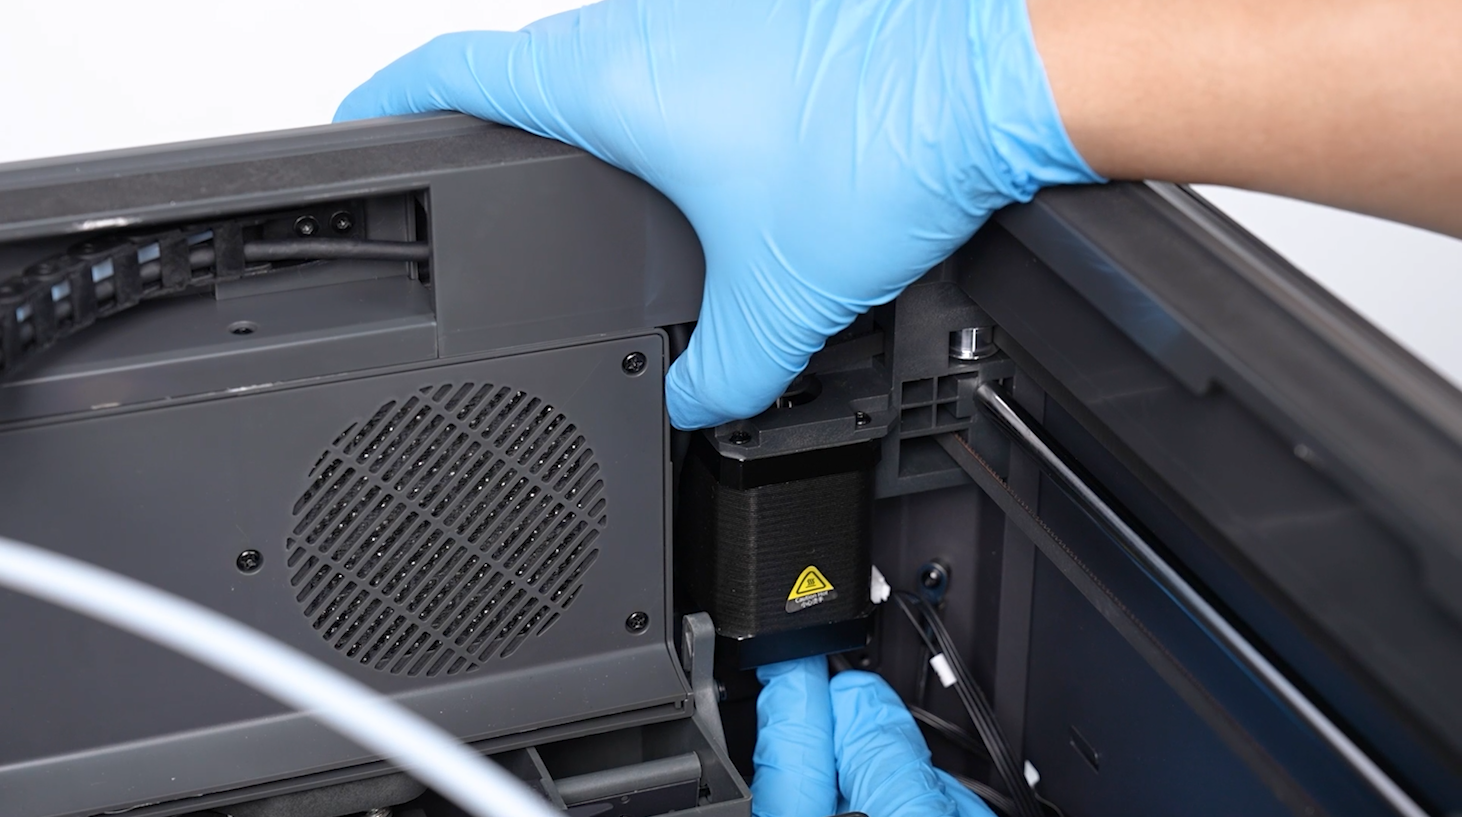
- Remove the connection cable of the print head from the back side of the print head's motion motor.
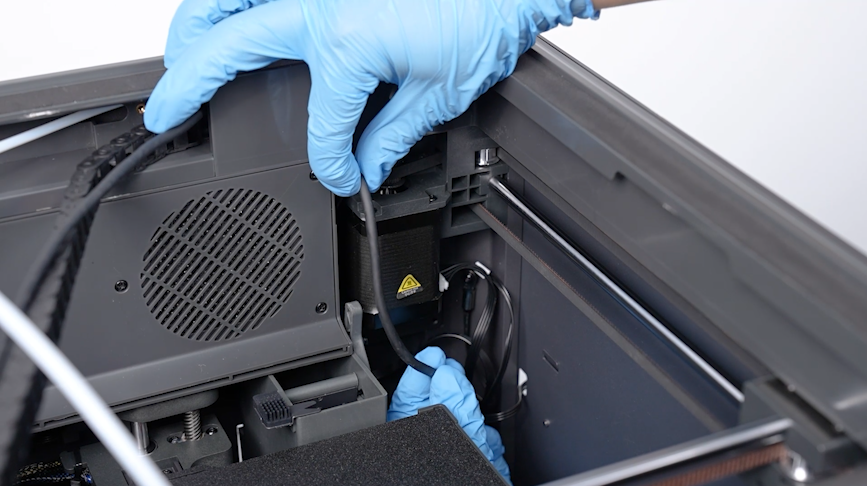
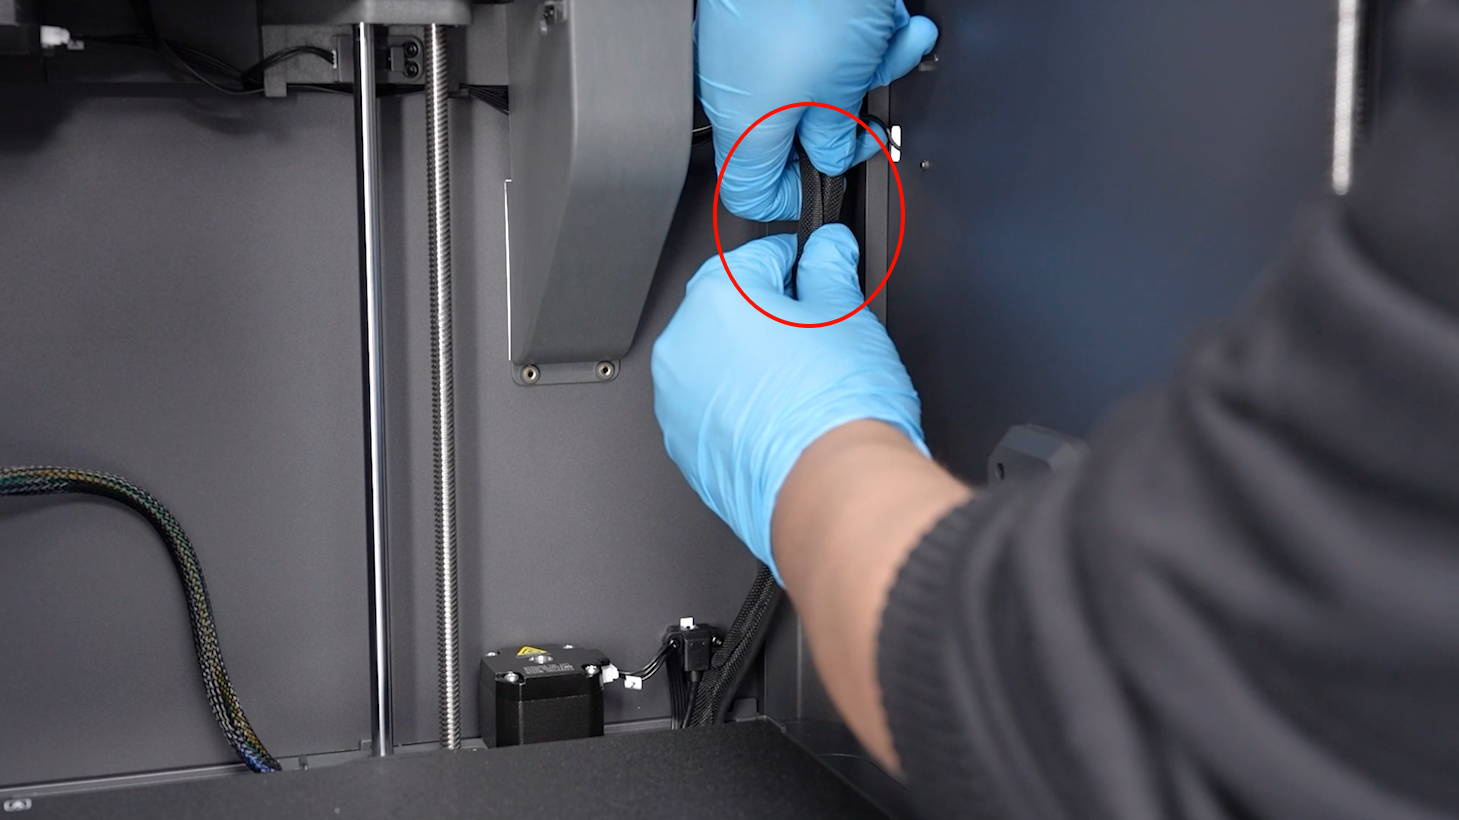
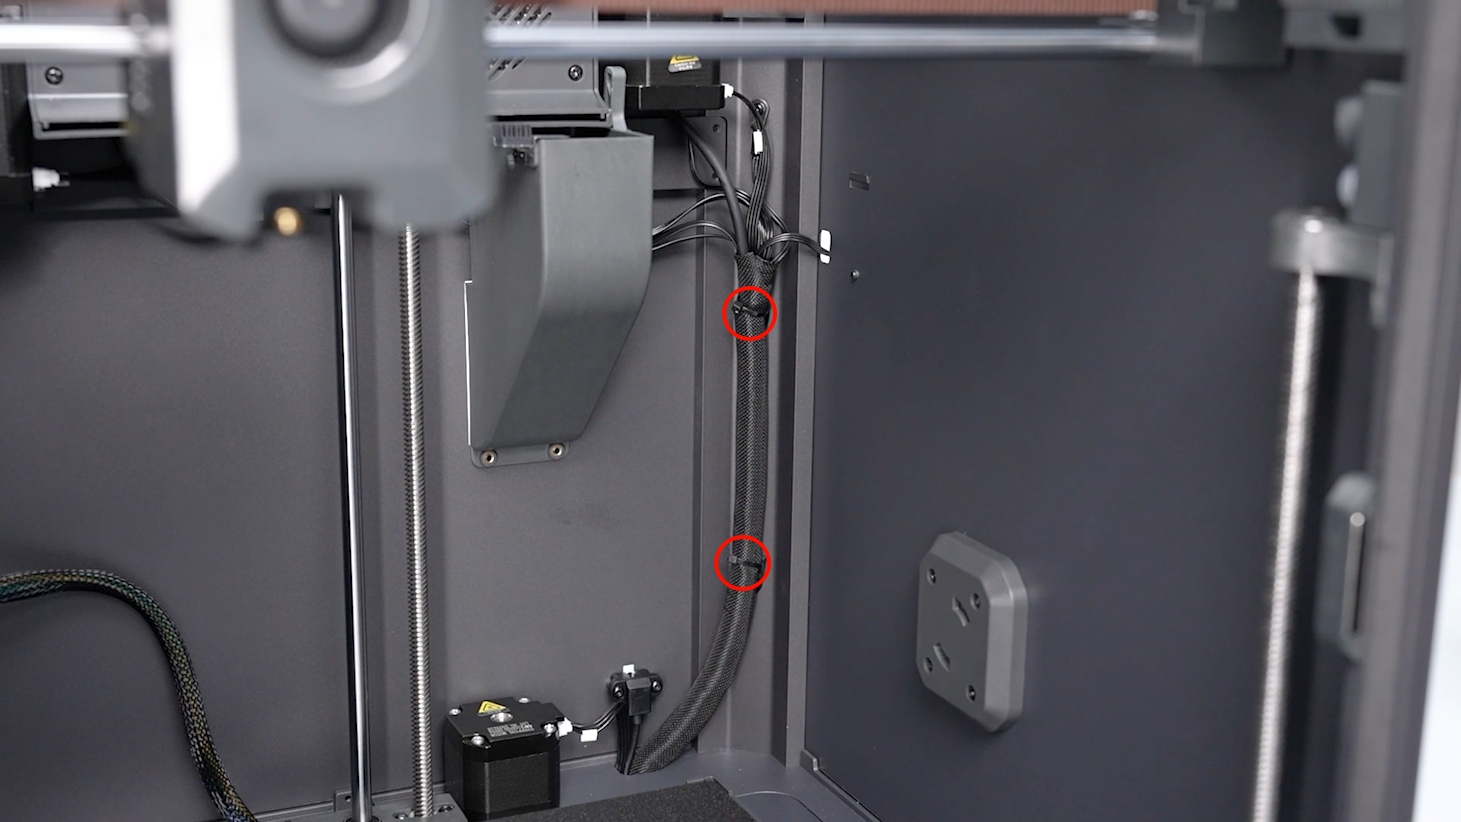
- Cut off the 2 pieces of cable tie securing the braided cable sleeve using a pair of diagonal pliers.
- Pull out the connection cable of the print head from the braided cable sleeve.
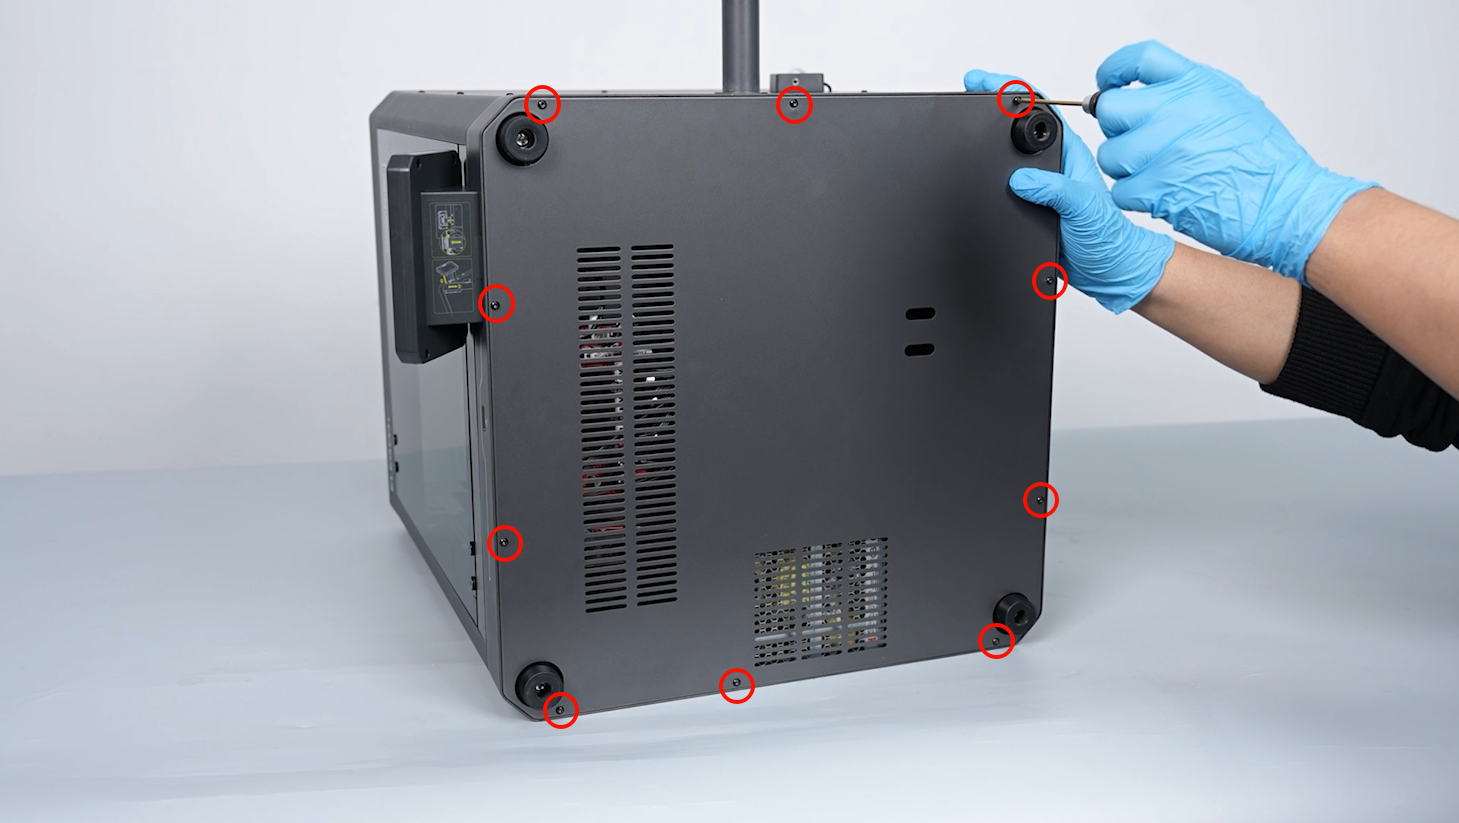
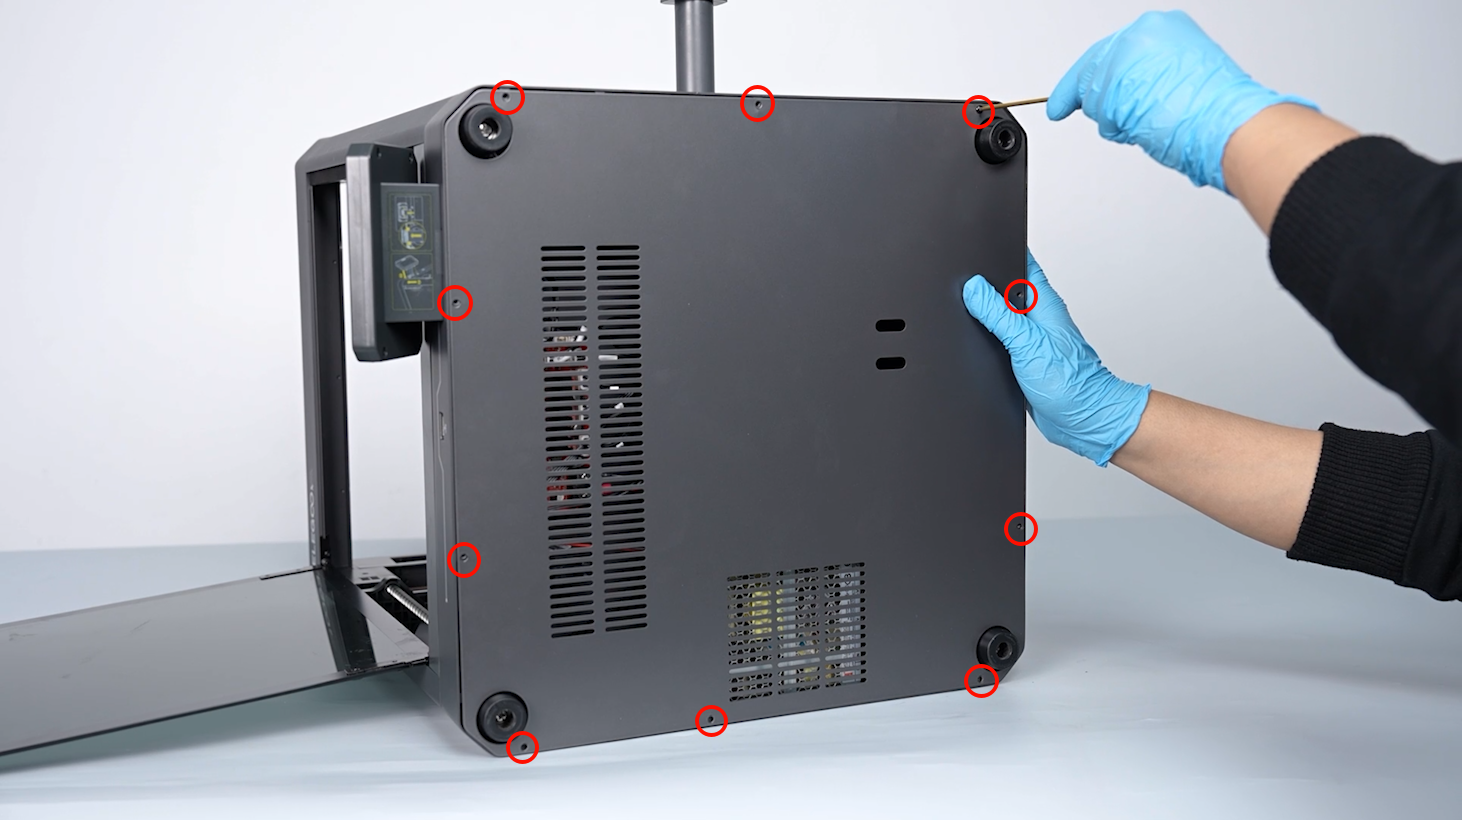
- Put the printer on its side. Use a 2.0 mm Allen wrench to loosen the 10 screws securing the bottom cover of the printer, then remove the printer.
Note: Keep the glass door closed to prevent it from falling during the process.
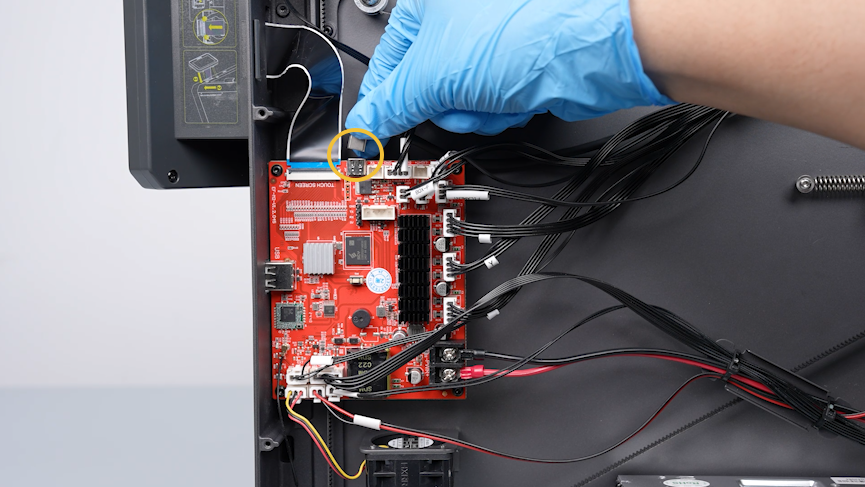
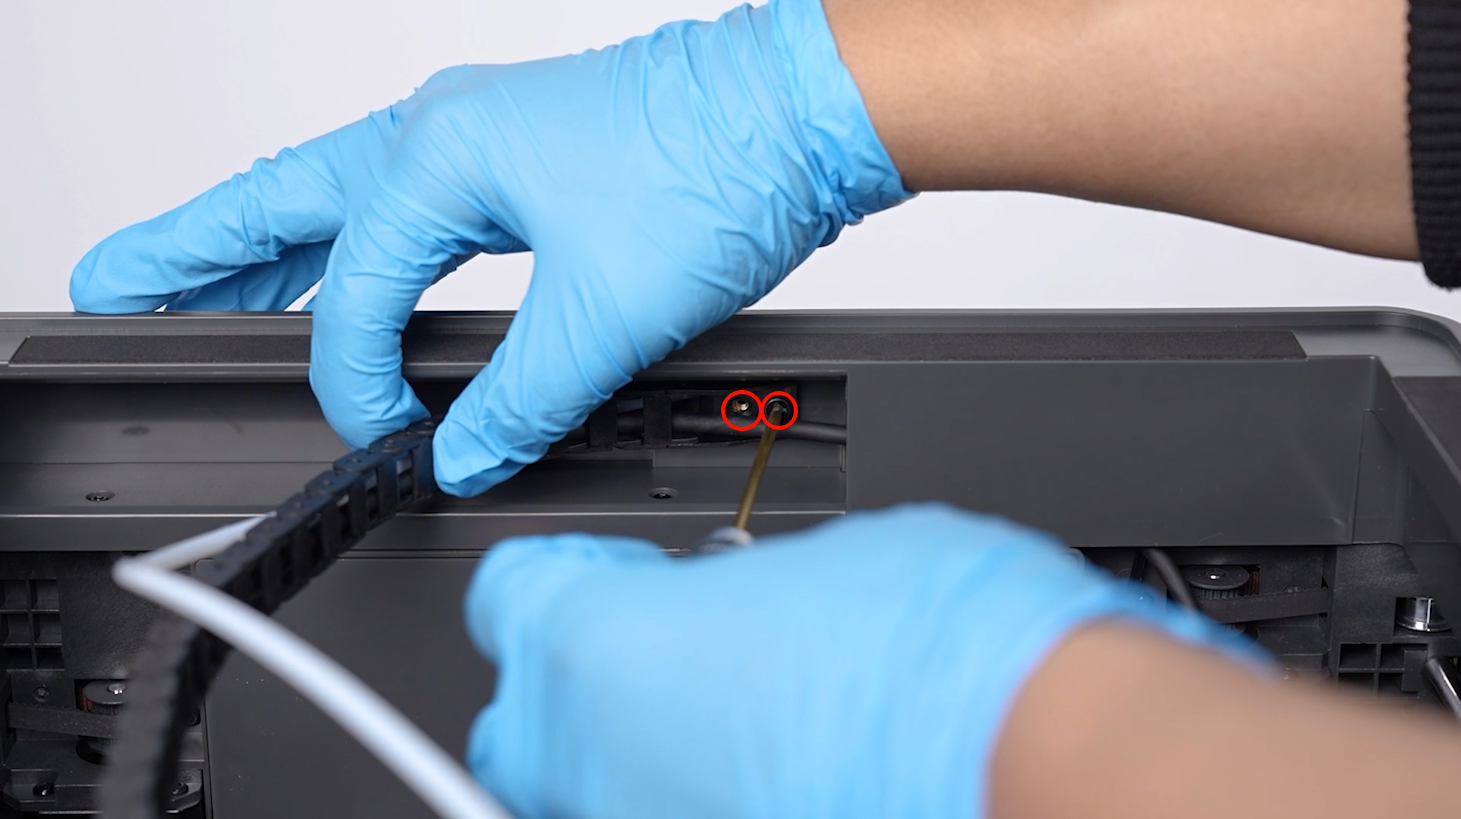
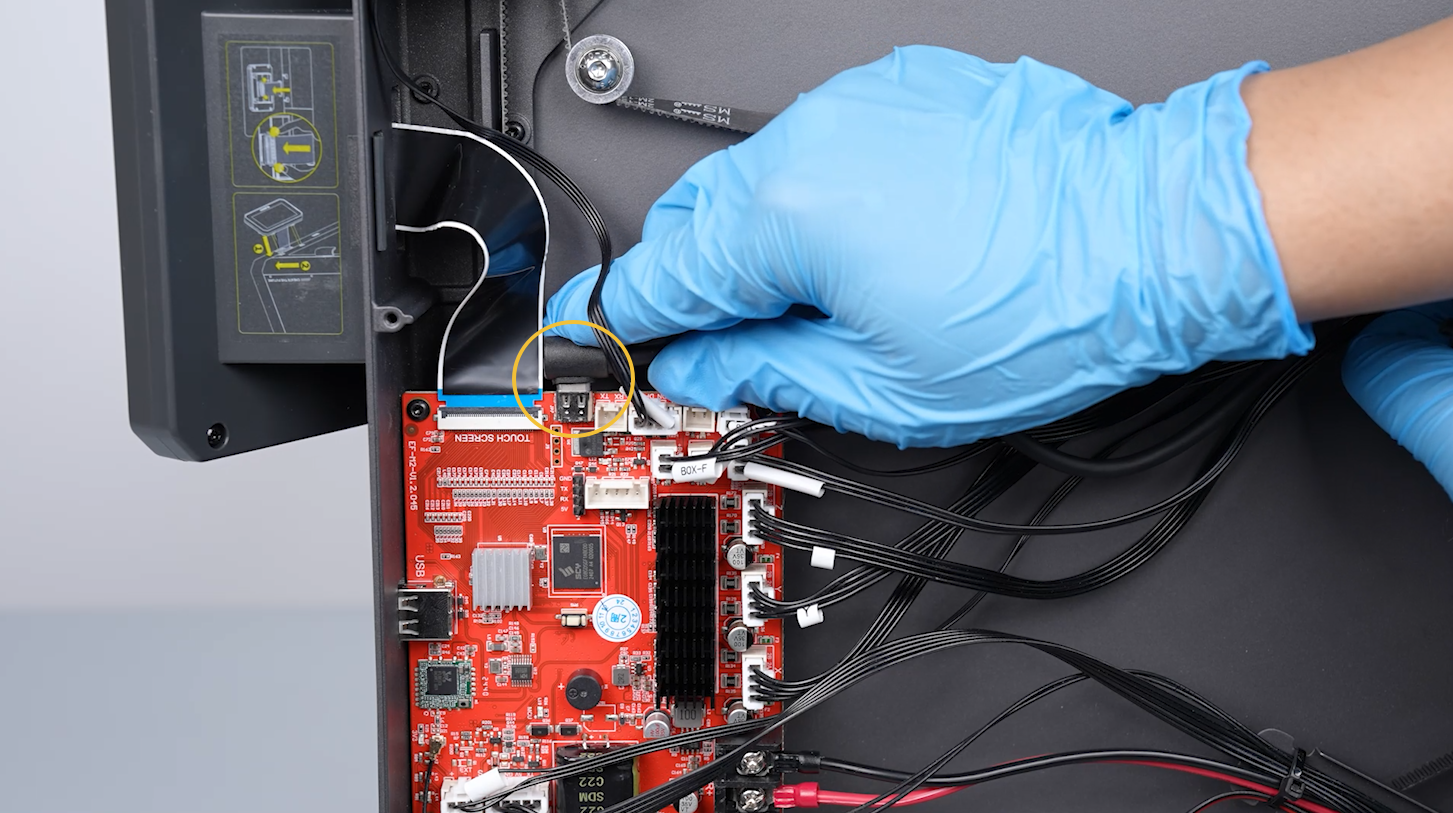
- Remove the connection cable port of the print head on the motherboard.
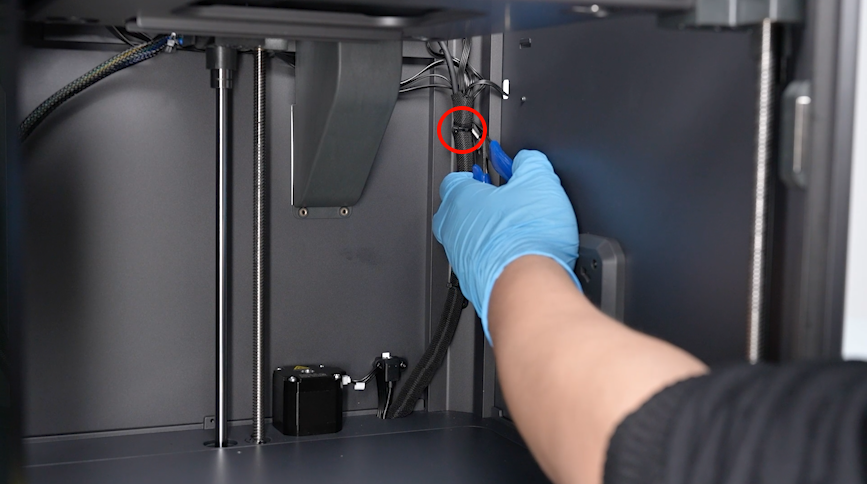
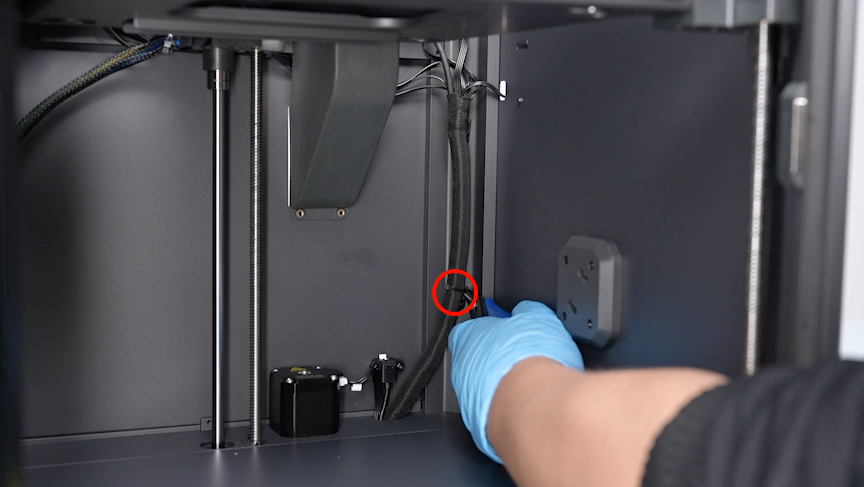
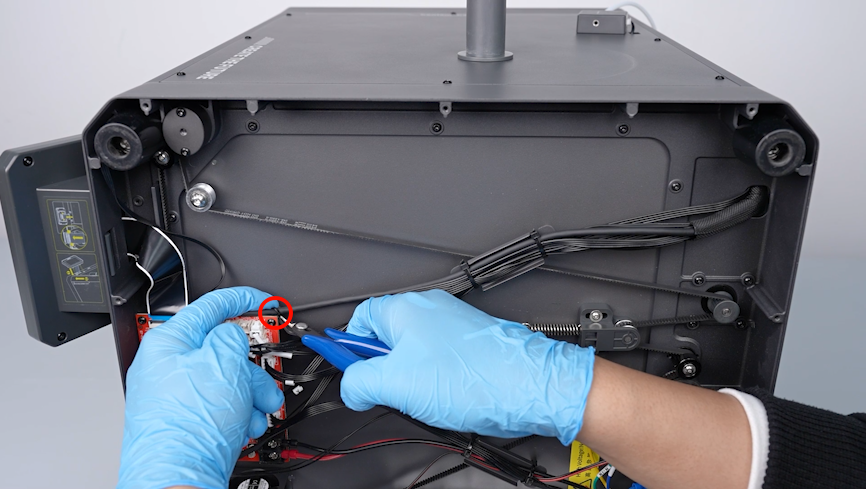
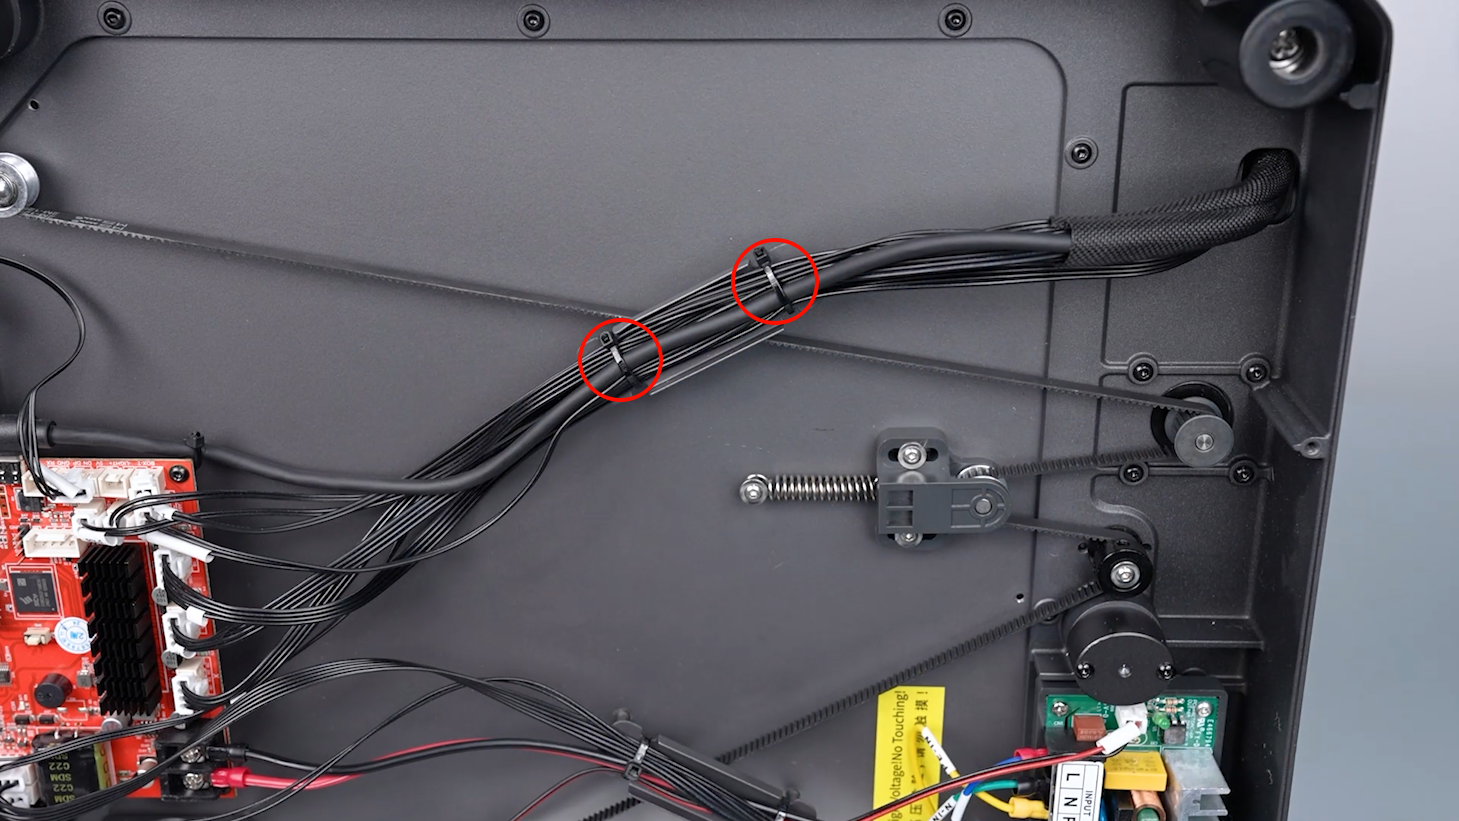
- Use a pair of diagonal pliers to cut off the cable tie securing the connection cable. Cut off the 2 pieces of cable tie securing the ribbon cable holder.

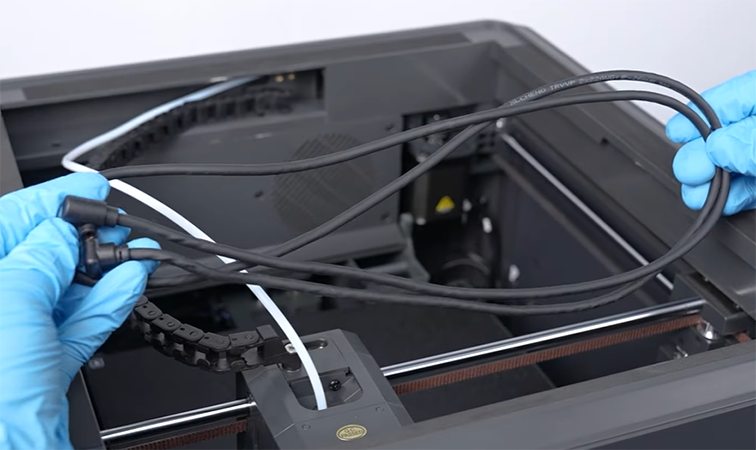
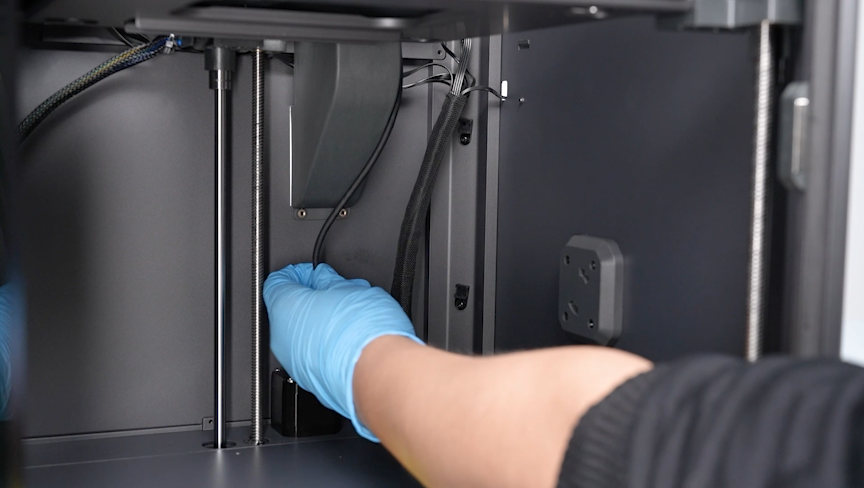
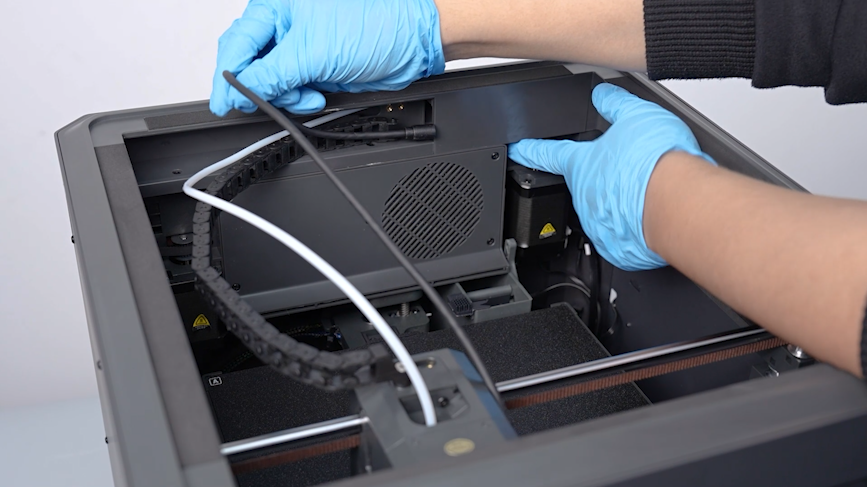
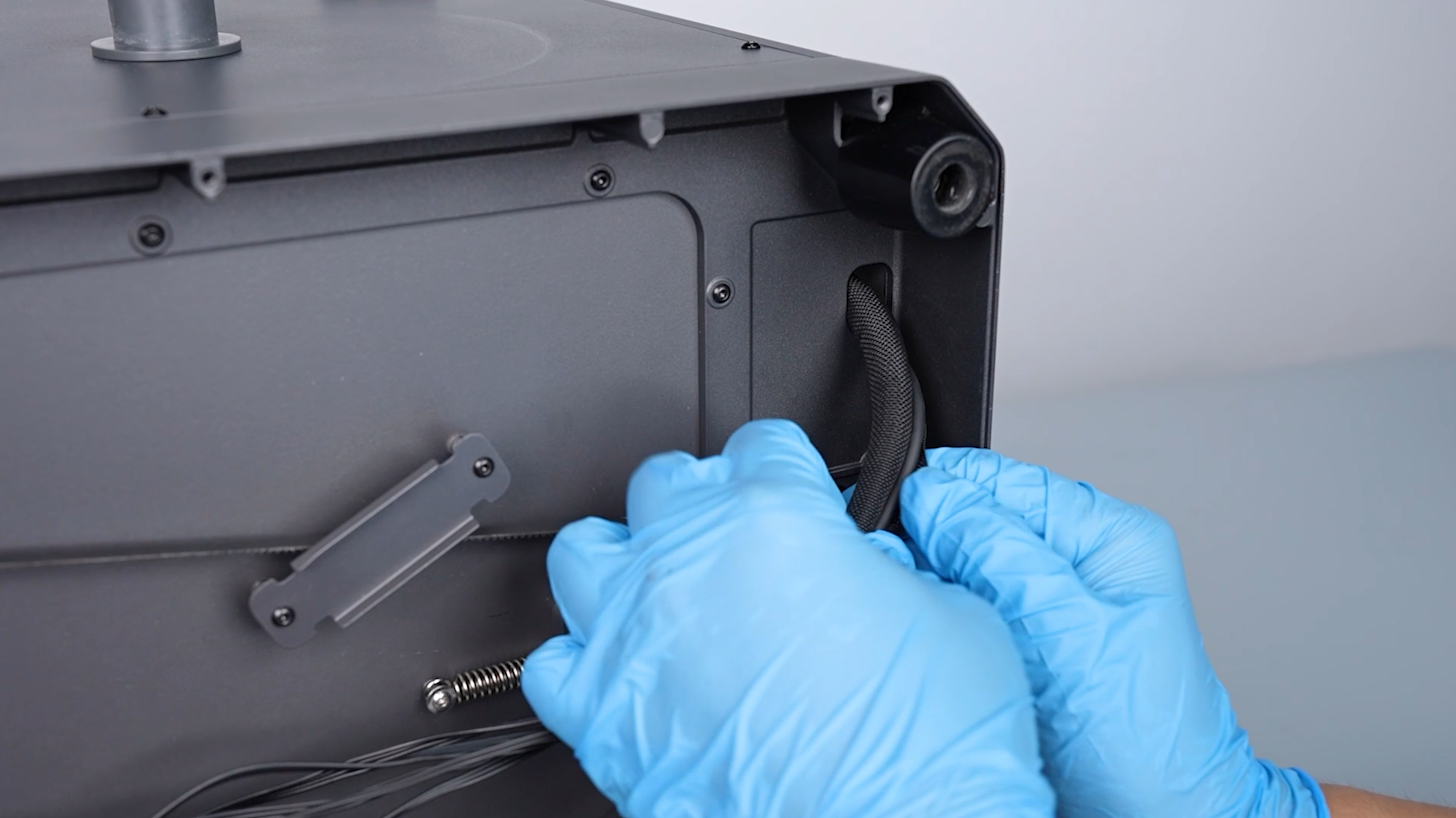
- Organize the connection cable of the print head. Pull out the connection cable of the print head from the braided cable sleeve at the bottom of the printer.
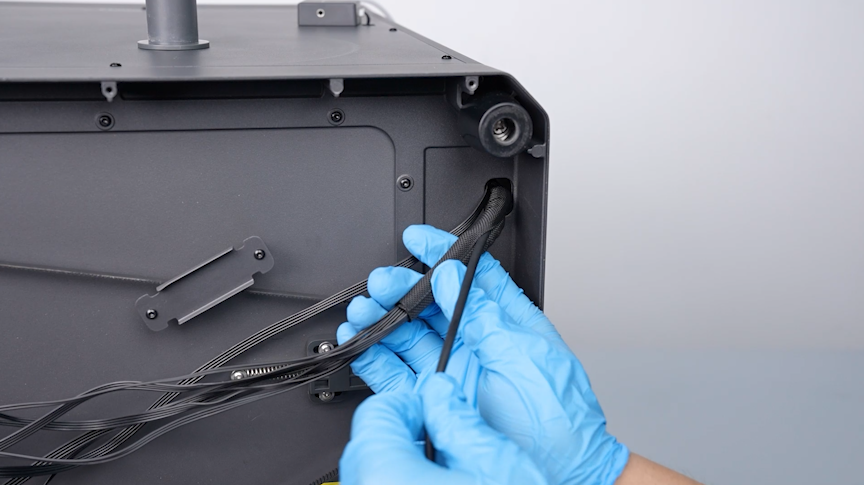
- Pass the print head's connection cable at the bottom through the reserved hole into the interior of the printer. Pull out the old print head connection cable from the top of the printer.
Note: Organize the front connector of the print head's connection cable. Do not pull out the cable forcefully.
¶ Install the new connection cable
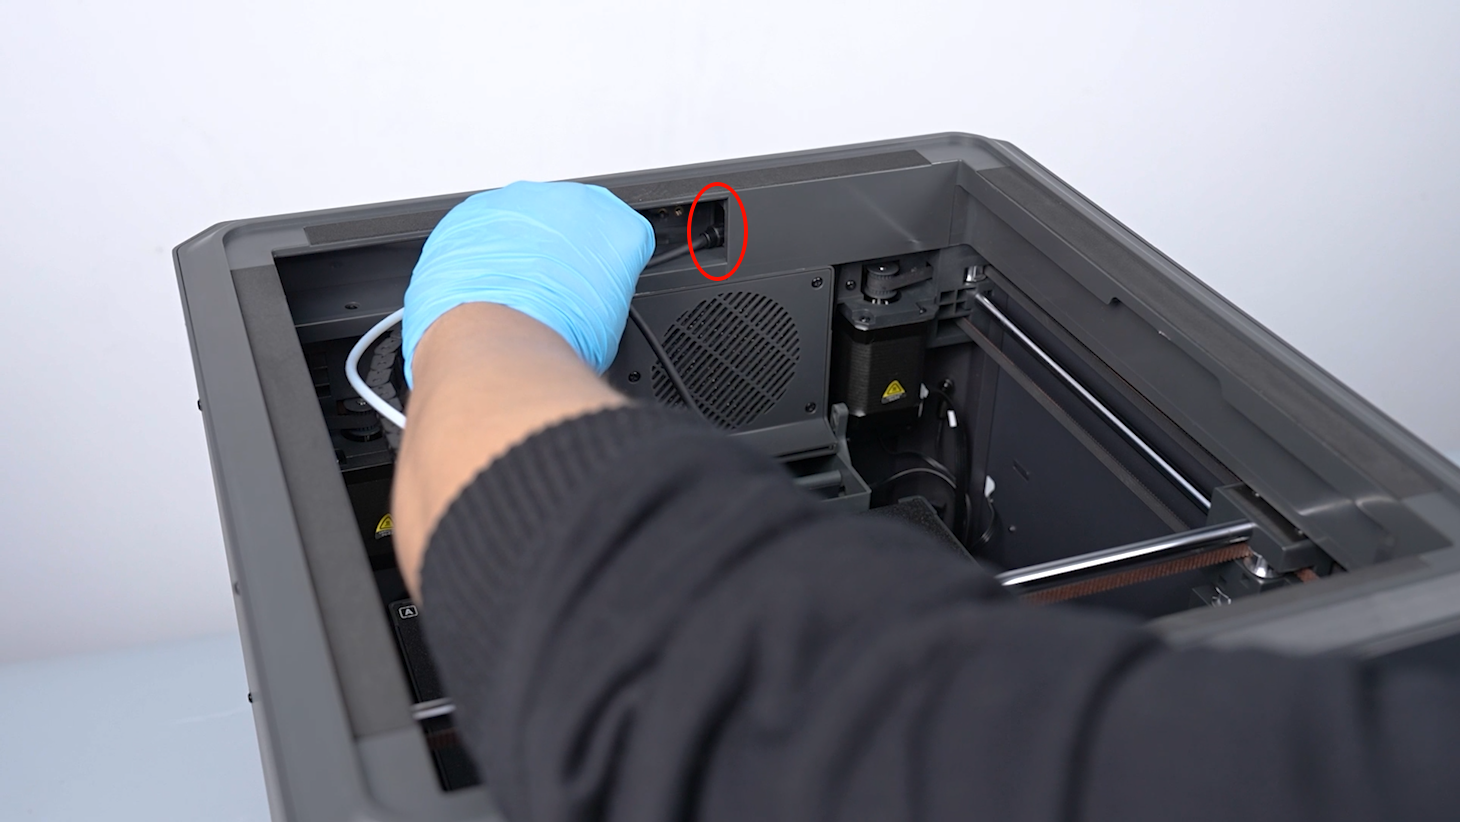
- Prepare the new connection cable. Pass the connector of the motherboard through the reserved hole at the top of the printer. Reserve the length to connect the print head adapter board port.
- Insert the print head's connection cable into the adapter board port.
- Use a 1.5 mm Allen wrench to tighten the 2 screws securing the connection cable port of the print head.
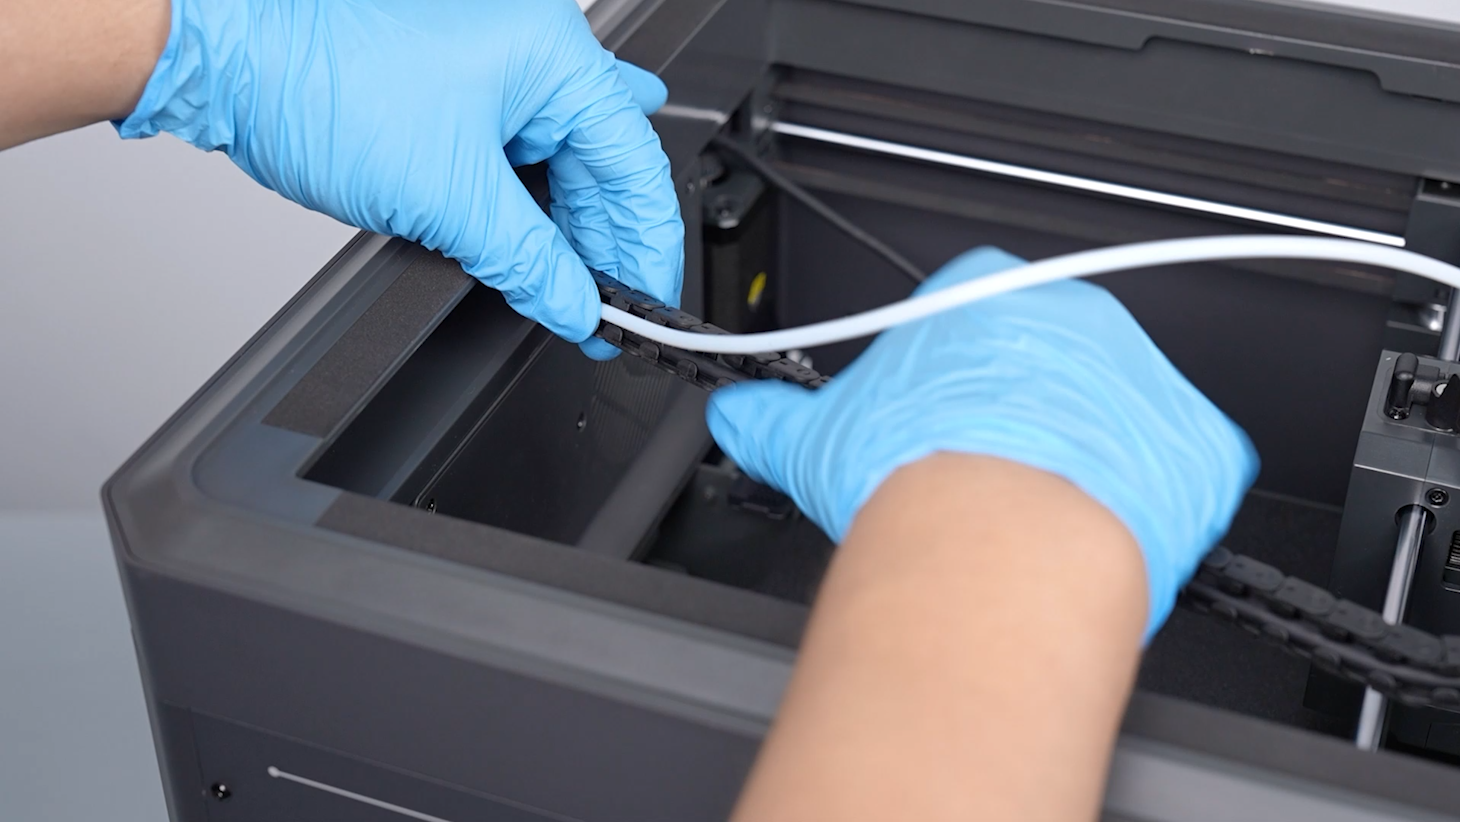
- Press the connection cable into the cable chain. Install the last link of the cable chain in its original place by aligning it with the clip holes.

- Press the PTFE tube into the cable chain from the terminal of the chain. Install the PTEE pipe to the one-third from the end of the cable chain.
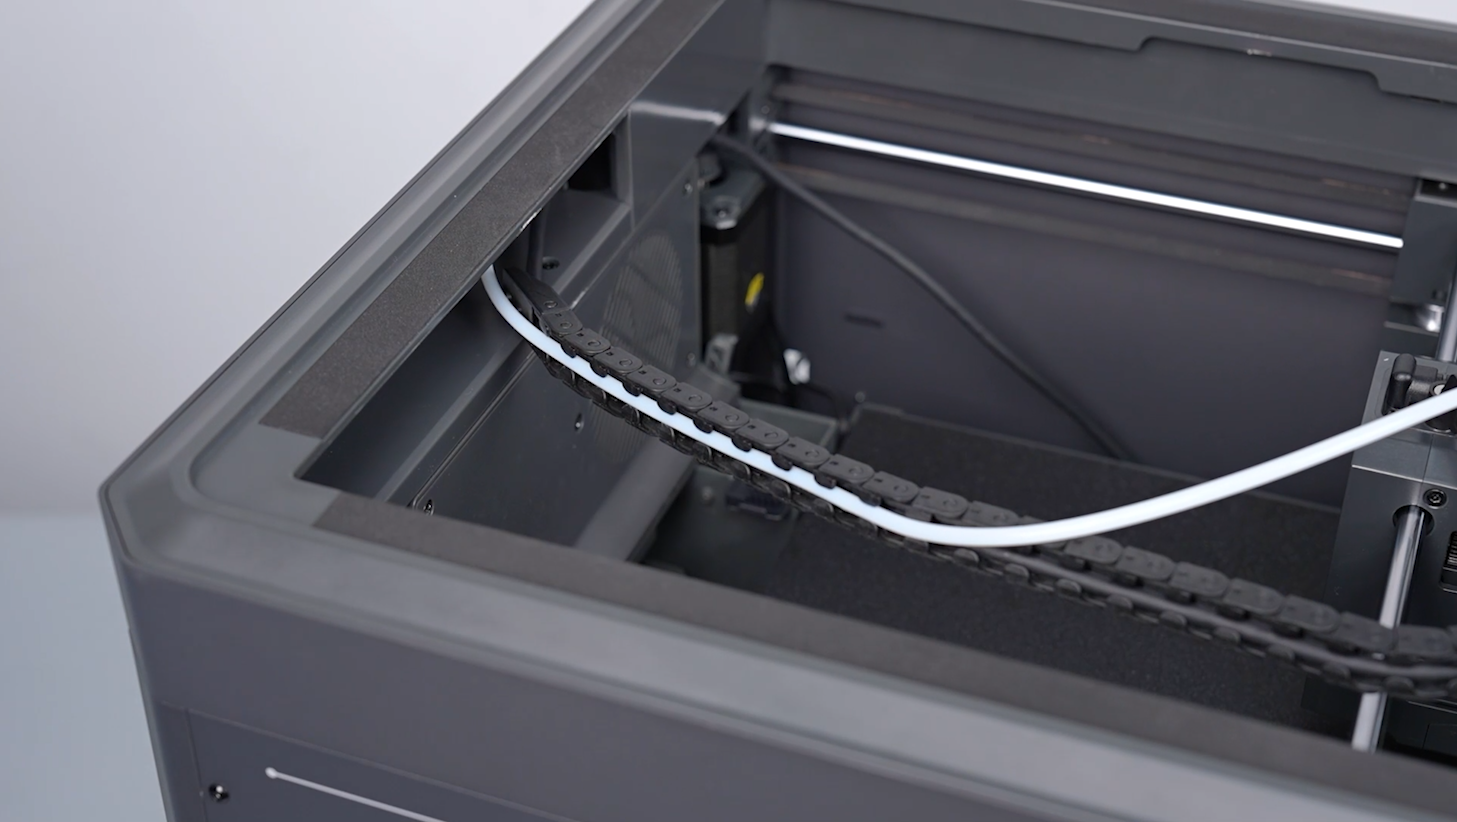
- Tighten the 2 screws securing the cable chain terminal using a 2.0 mm Allen wrench.
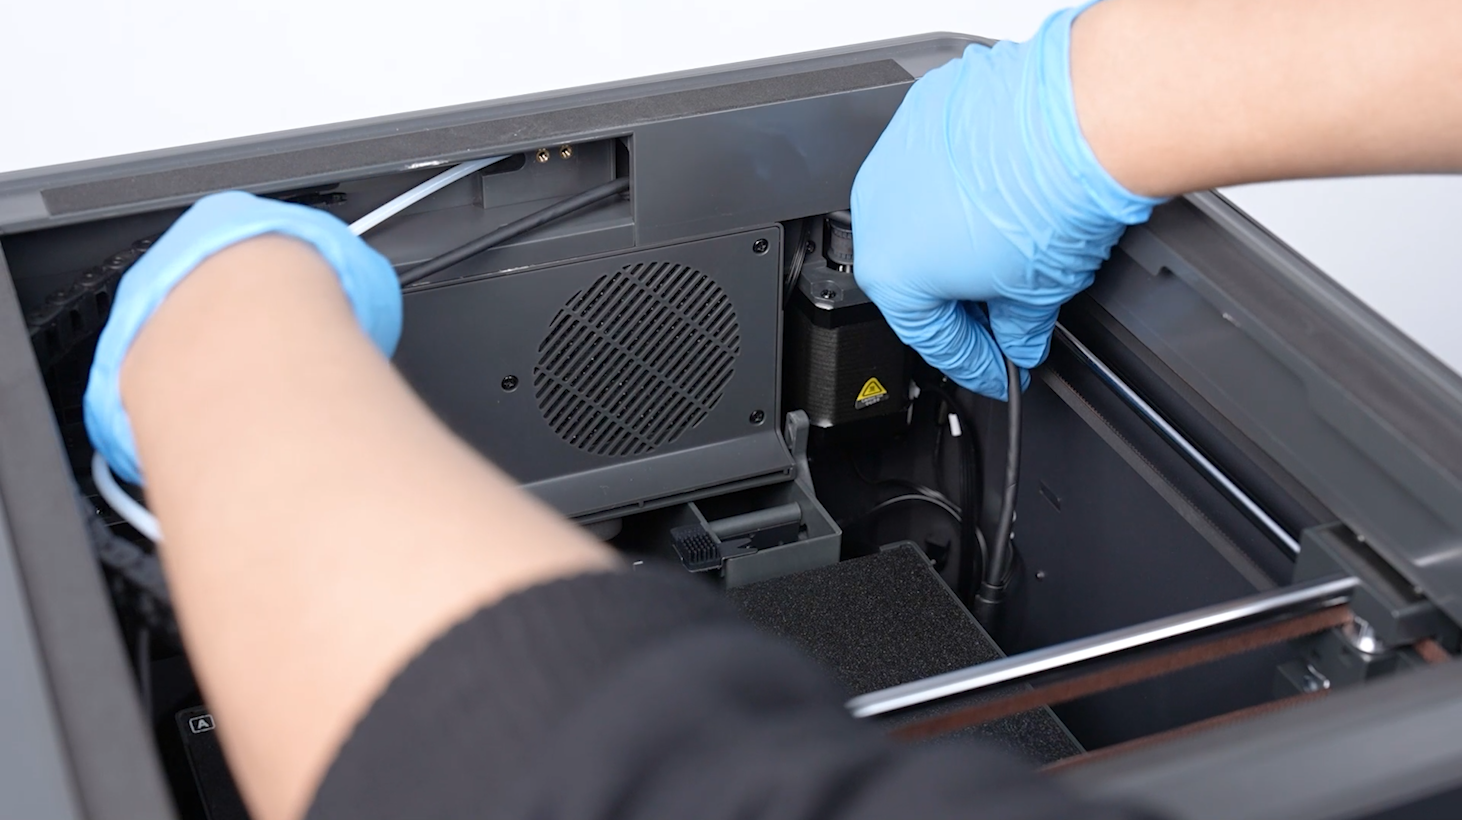
- Organize the connection cable of the print head and put it at the back side of the motion motor.
- Pass the print head's connection cable through the reserved hole in the bottom of the printer to the bottom. Organize the connection cable inside the printer to put them into the braid sleeving.
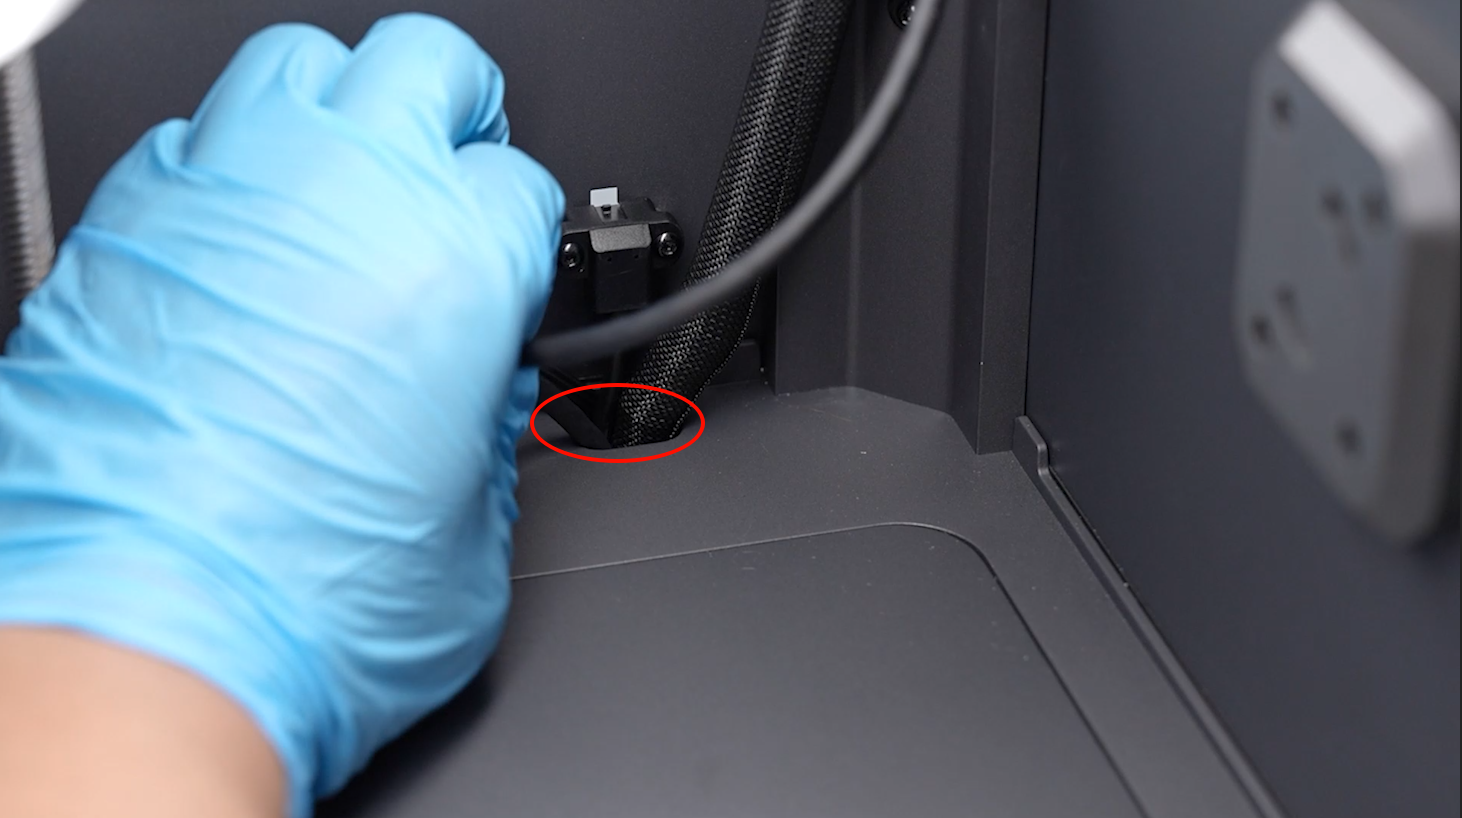
- Encase the connection cable of the print head in the braided cable sleeve at the bottom of the printer.
- Insert the connection cable into the port on the motherboard.
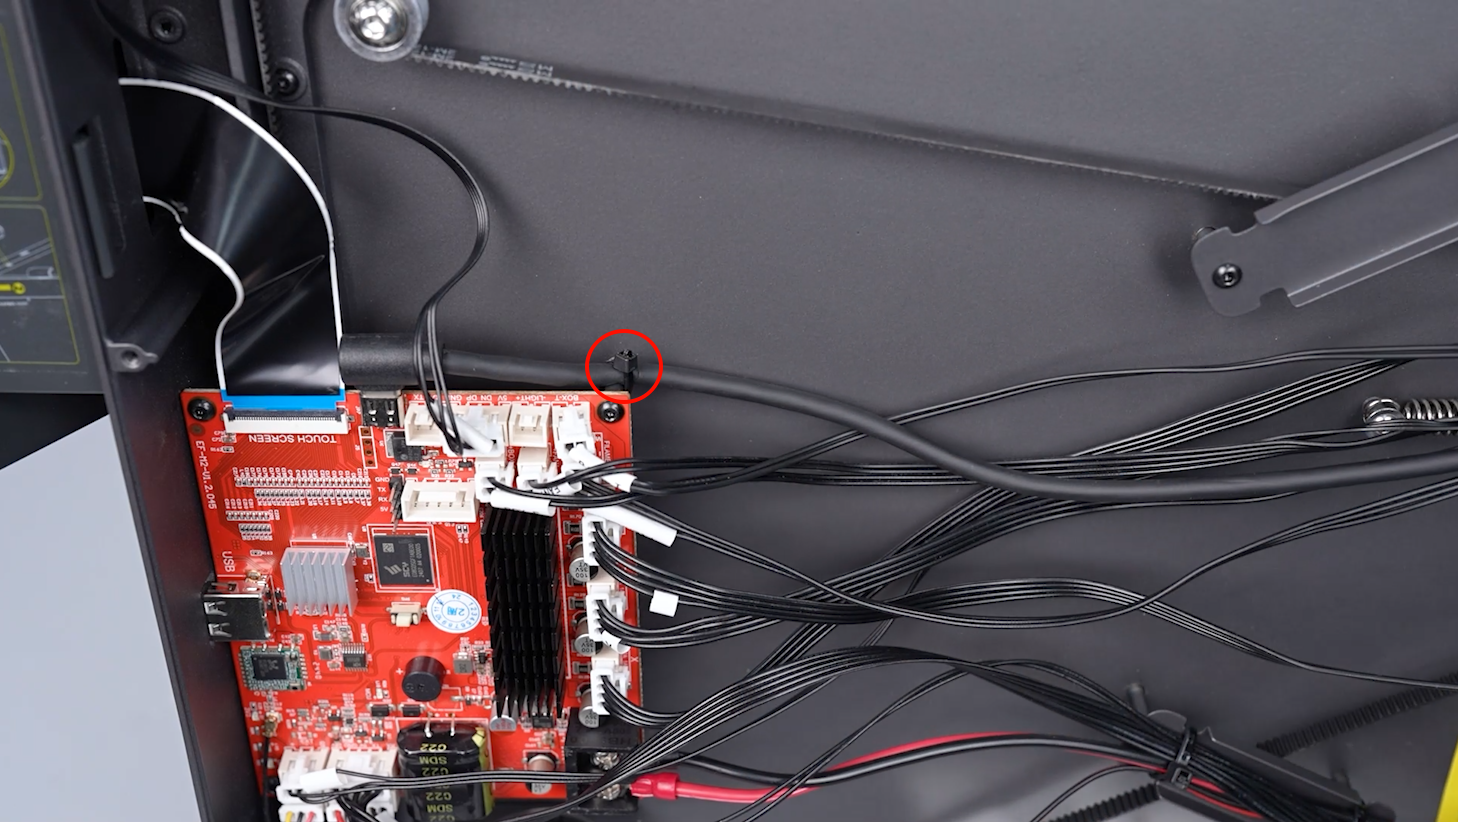
- Use a piece of cable tie to secure the connection cable to the stud of the motherboard.
- Organize the ribbon cables and use 2 pieces of cable ties to secure the ribbon cables on the holder.
- Put the bottom cover of the printer in the installation position by aligning it with the foot pad holes and screw holes. Use a 2.0 mm Allen key to loosen the 10 screws securing the bottom cover.
- Use 2 pieces of cable tie to secure the braided cable sleeve.
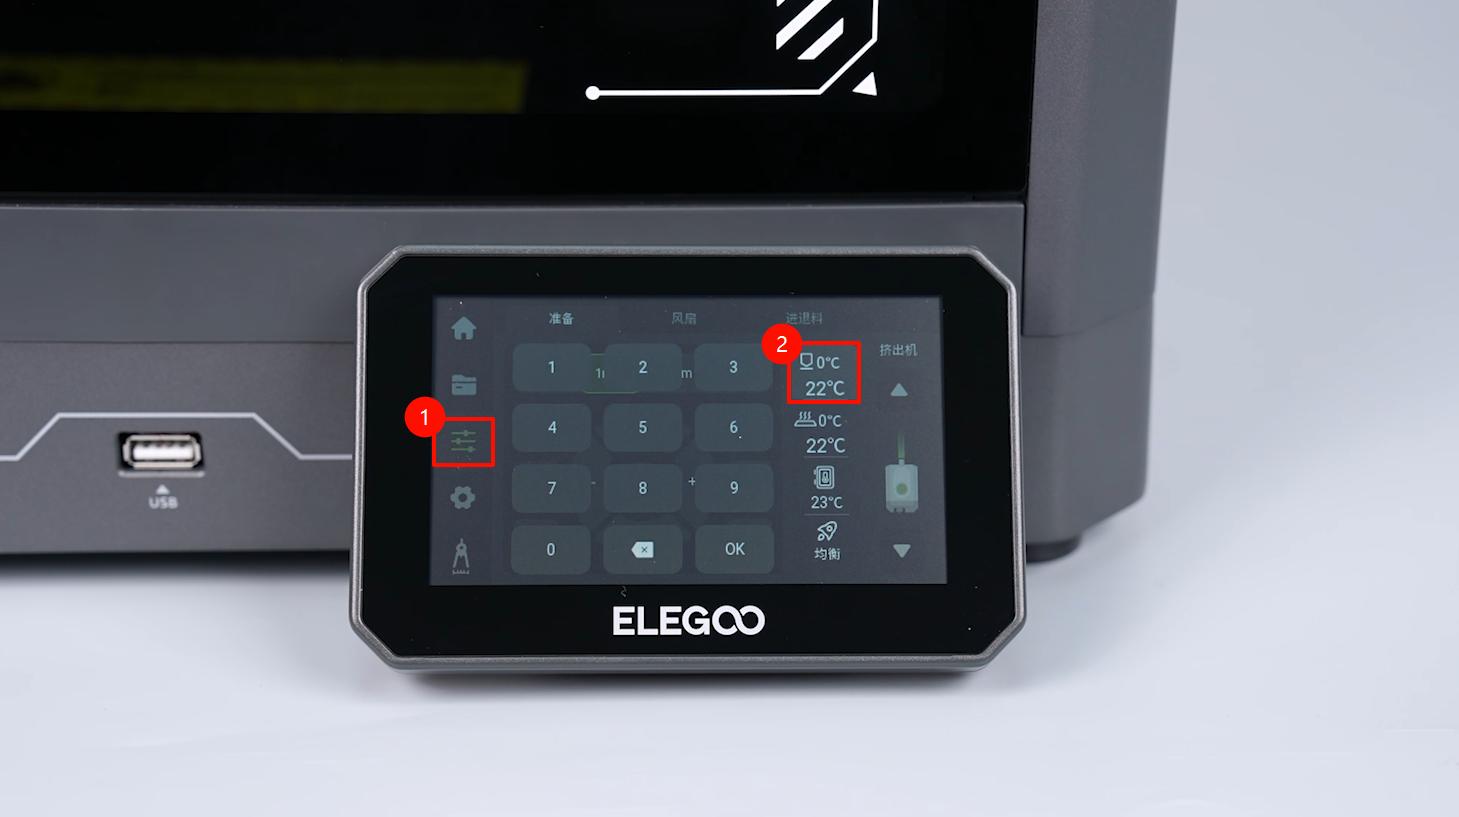
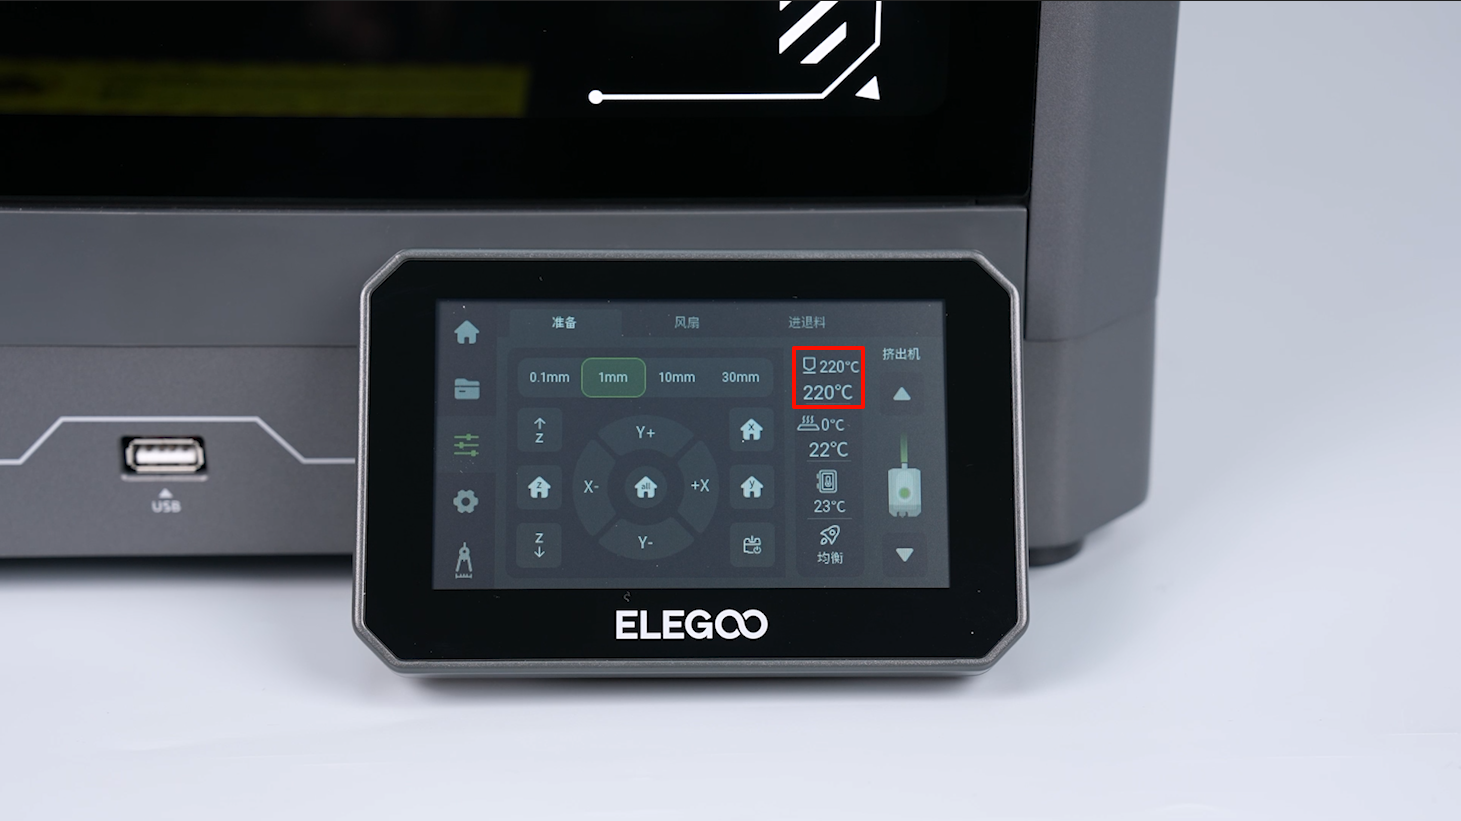
- Power on the printer. Navigate to "Function" on the touchscreen to enter the Prepare interface. Set the temperature of the nozzle to 220 ℃. The printer is ready for use after the hotbed heats up normally.