¶ 1. Introduction
- This guide applies to Centauri Carbon (CC1).
- It explains how to manually add and connect the printer using ELEGOO Slicer.
- It also explains how to connect to and control the printer via the Web Interface.
¶ 2. Tutorial Video
https://www.youtube.com/watch?v=-_OS3eUePAY
¶ 3. Connecting to ELEGOO Slicer
¶ 1. Printer-Side Operations
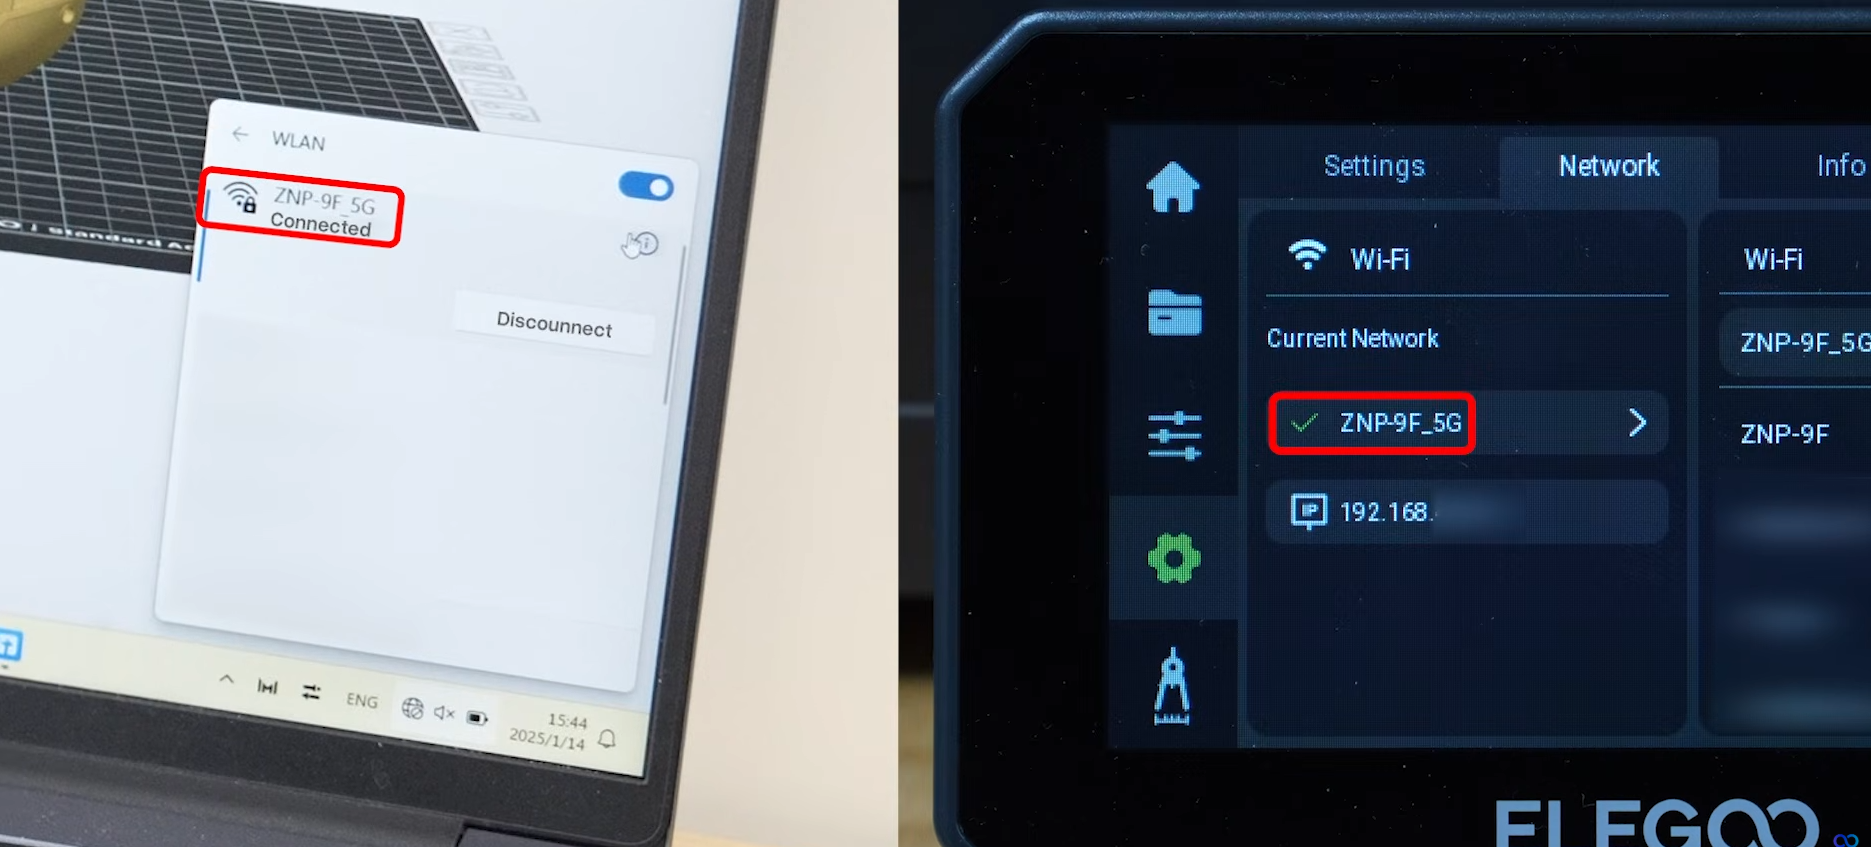
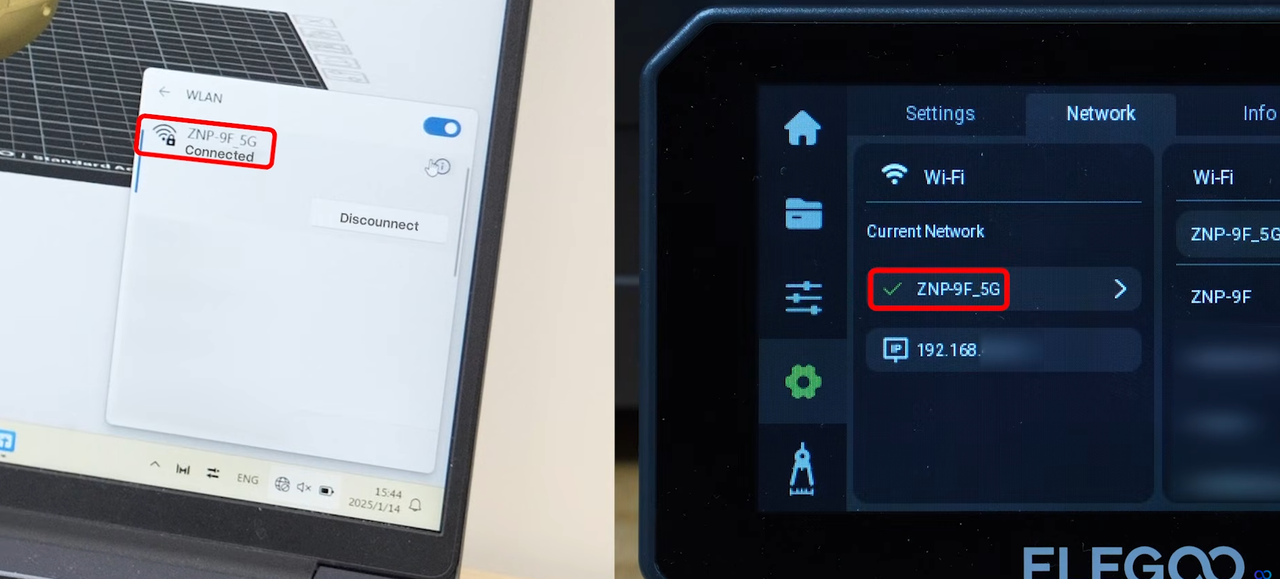
- Tap Settings > Network.
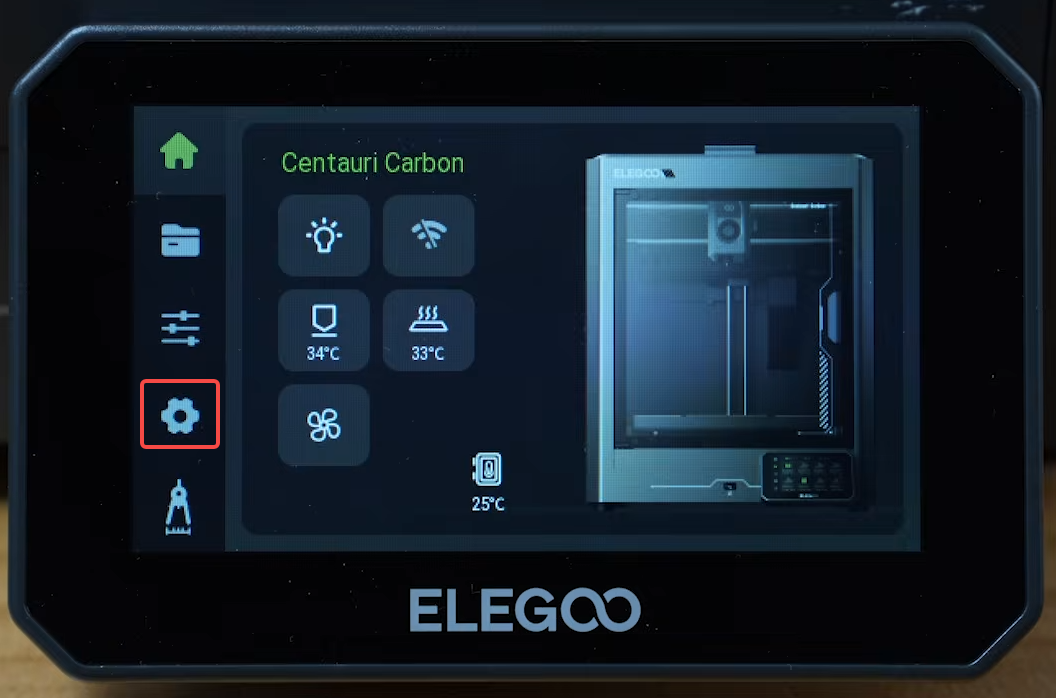
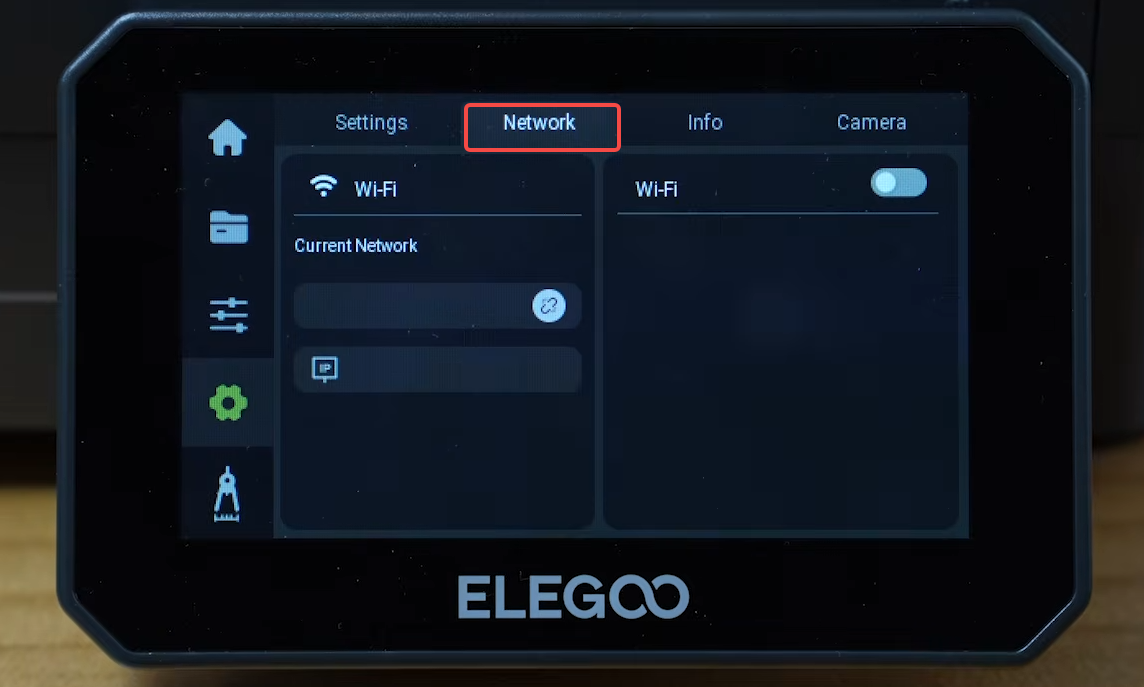
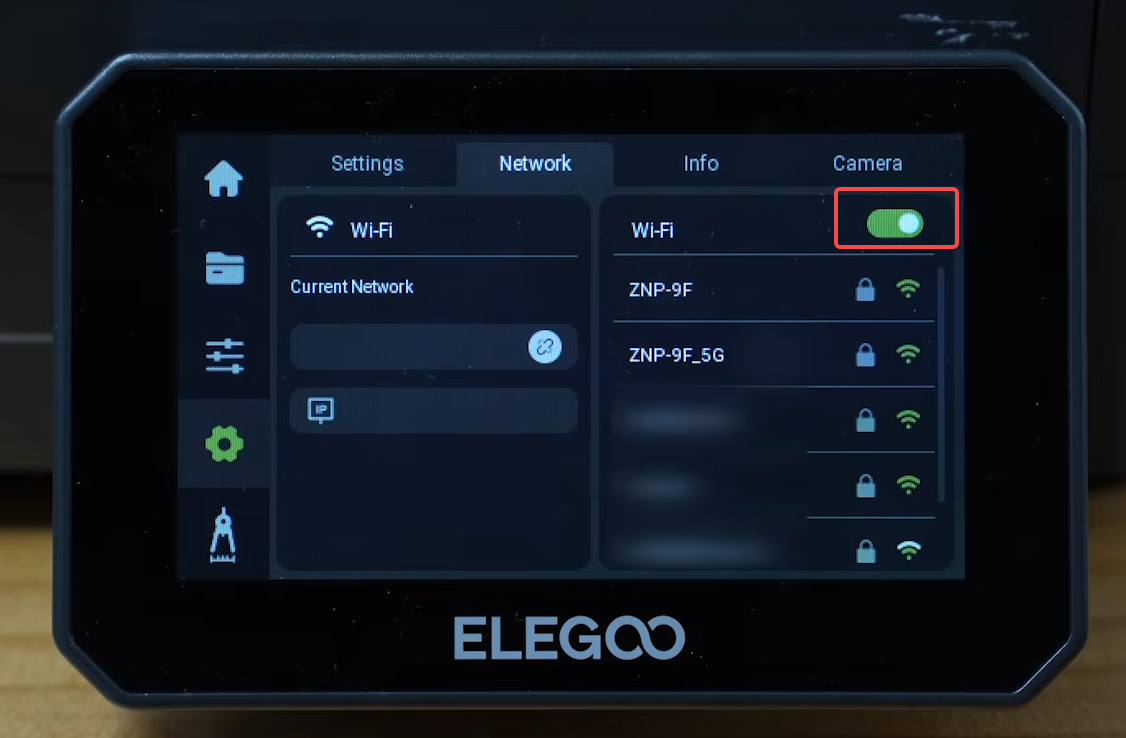
- Enable Wi-Fi, select an available Wi-Fi network, and enter the password to connect.
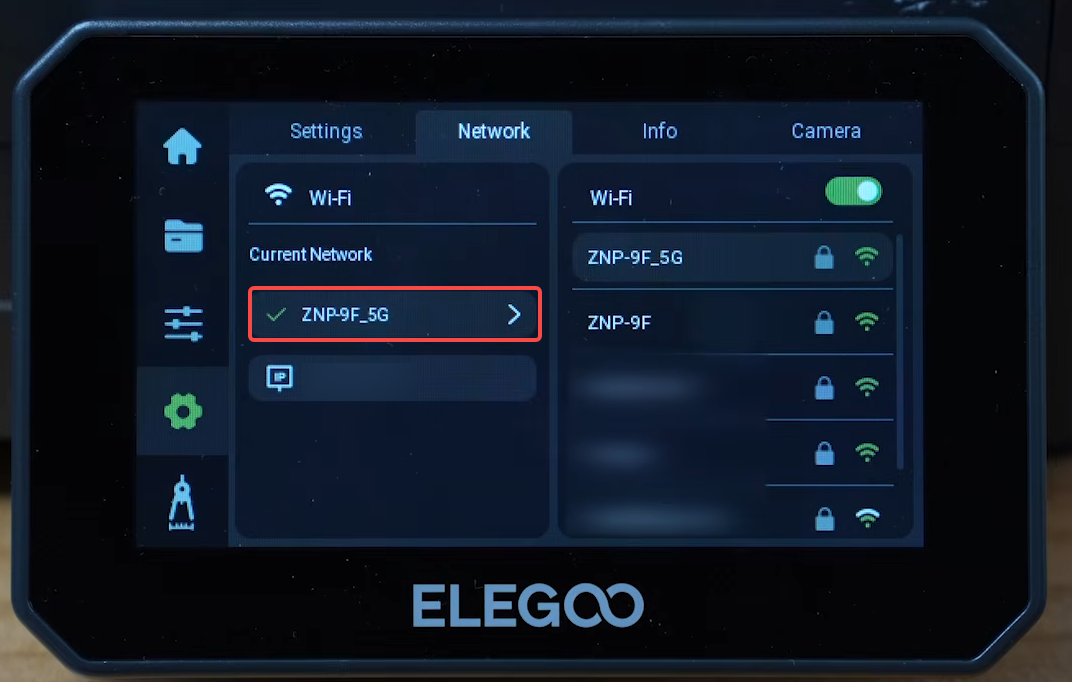
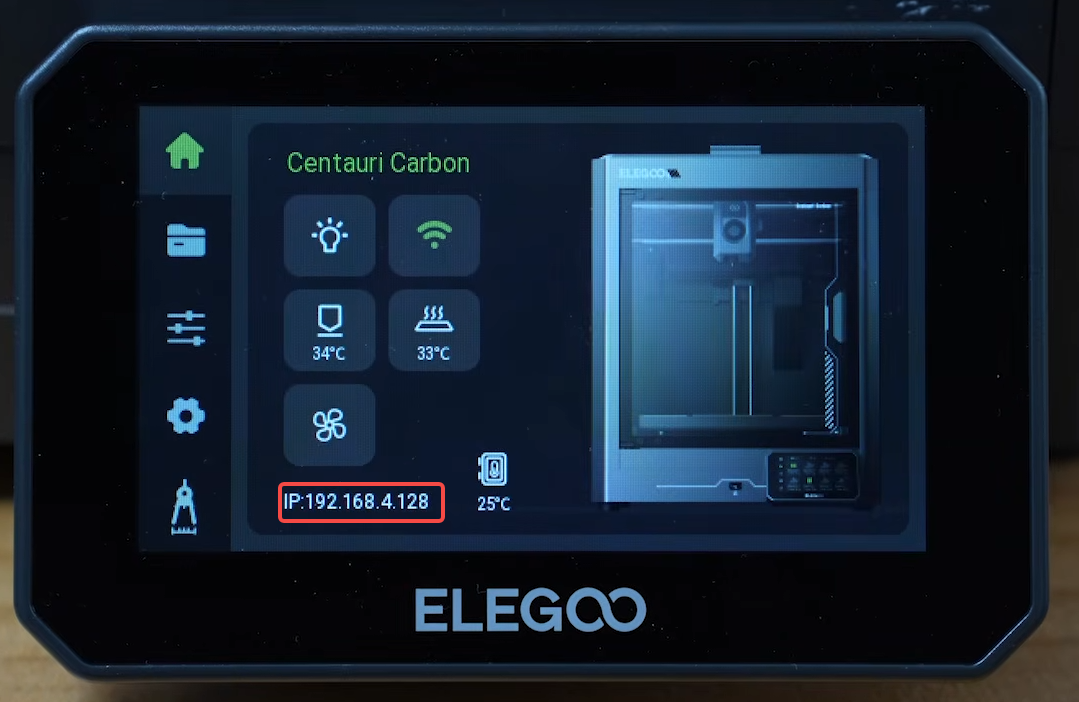
- Return to the home screen and locate and note the printer's IP address.
¶ 2. Computer-Side Operations
- Make sure the printer and computer are connected to the same local network.
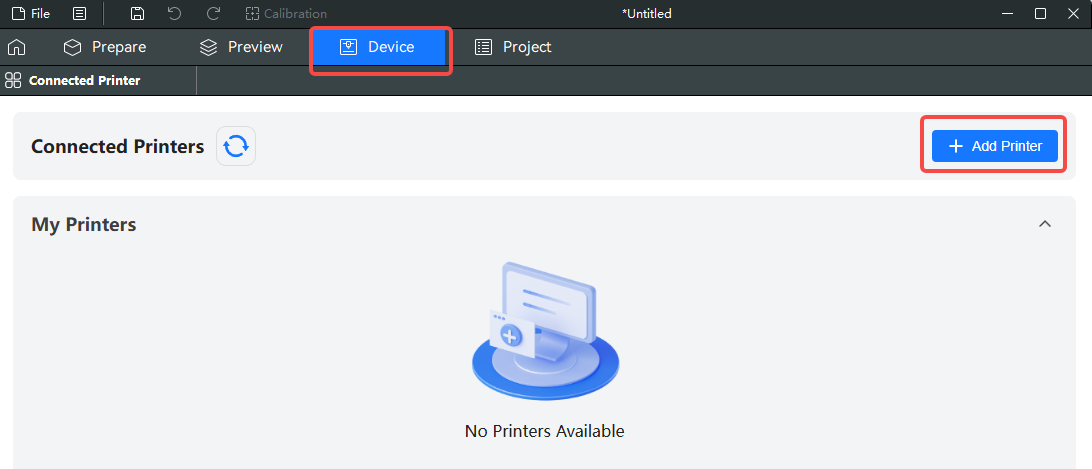
- Open ELEGOO Slicer and click Device > Add Printer.
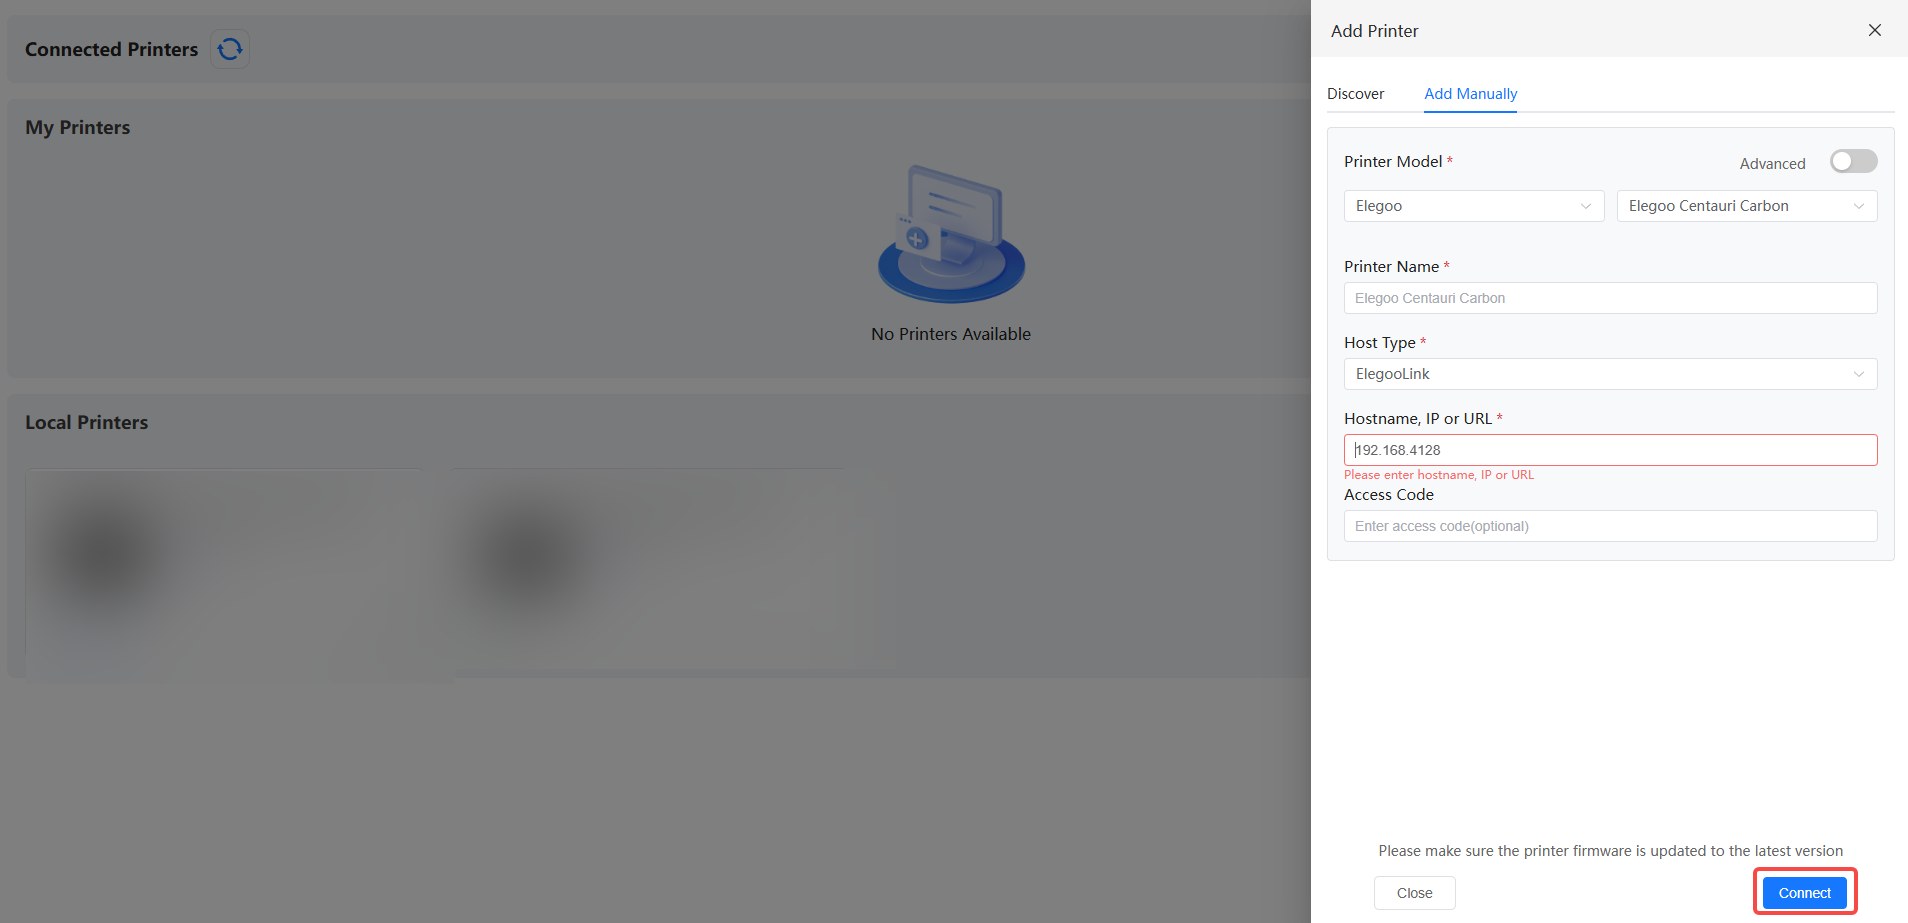
- Click Add Manually, enter the printer's IP address, and then click Connect.
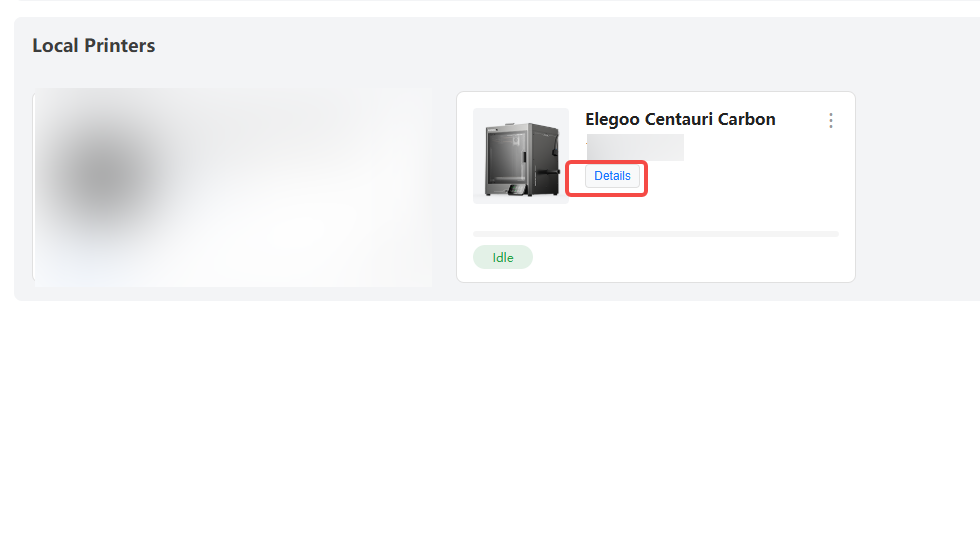
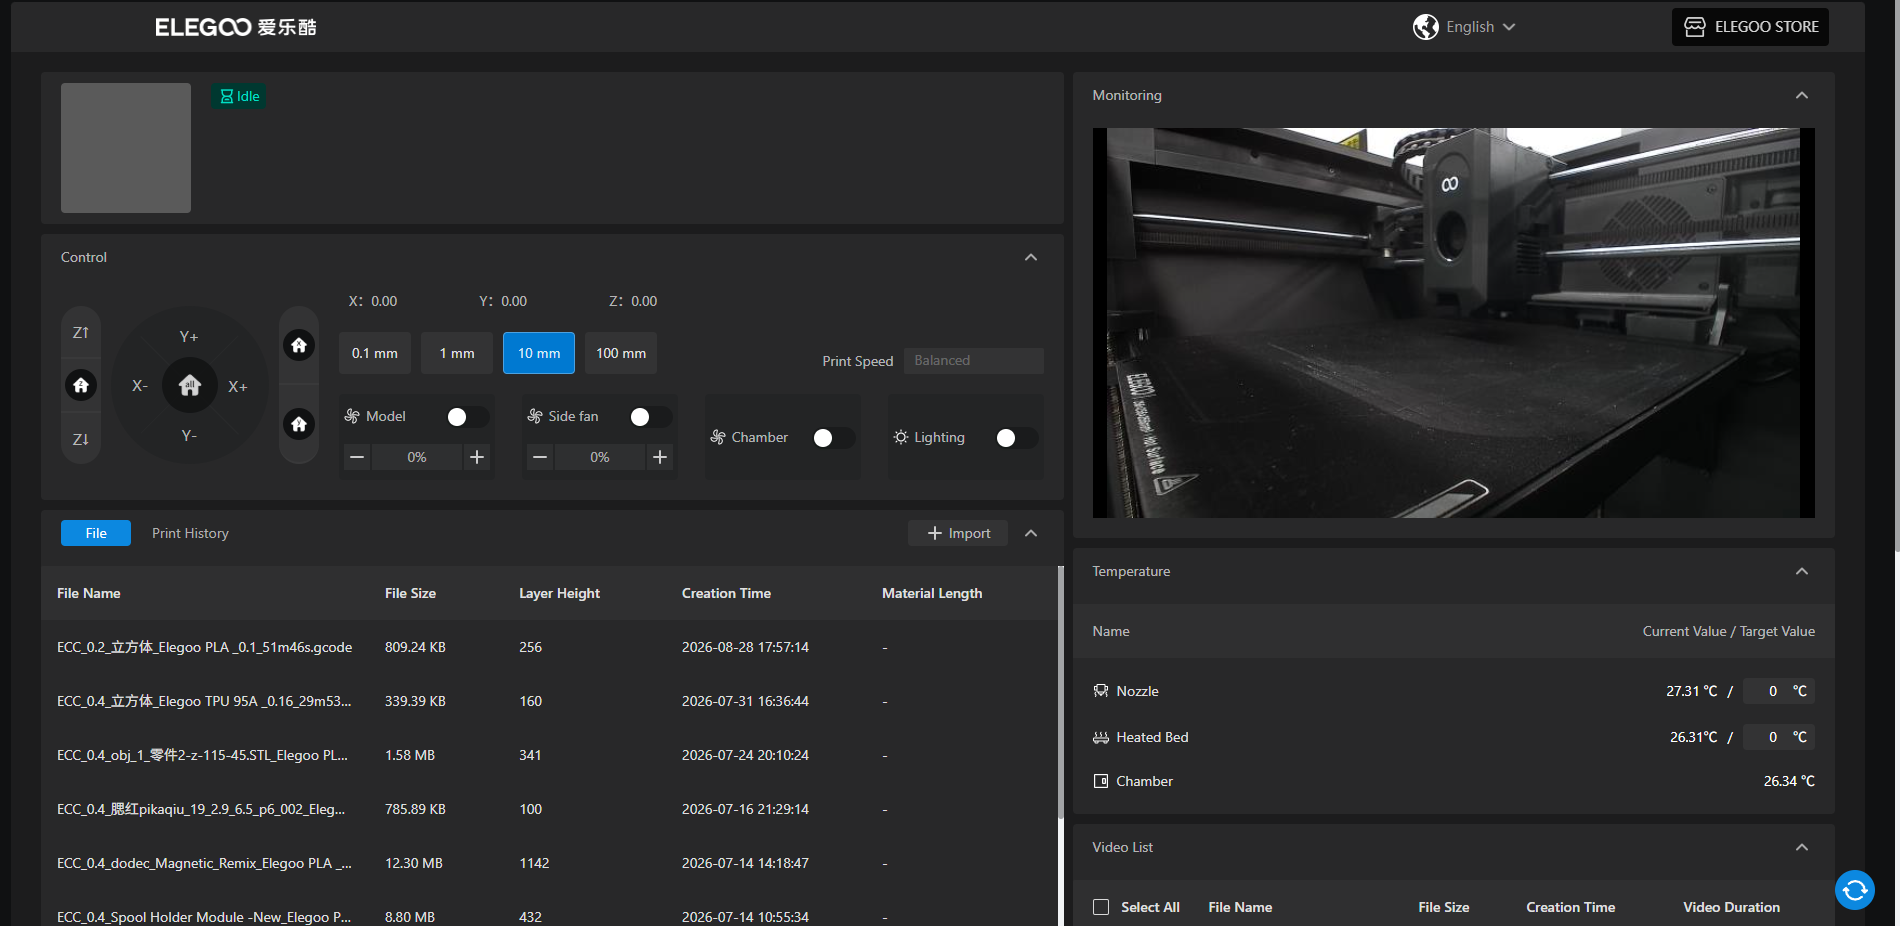
- Once the connection is established, the printer will appear in the Local Printers list. Click Details to open the printer control interface.
¶ 4. Connecting to and Controlling the Printer via the Web Interface
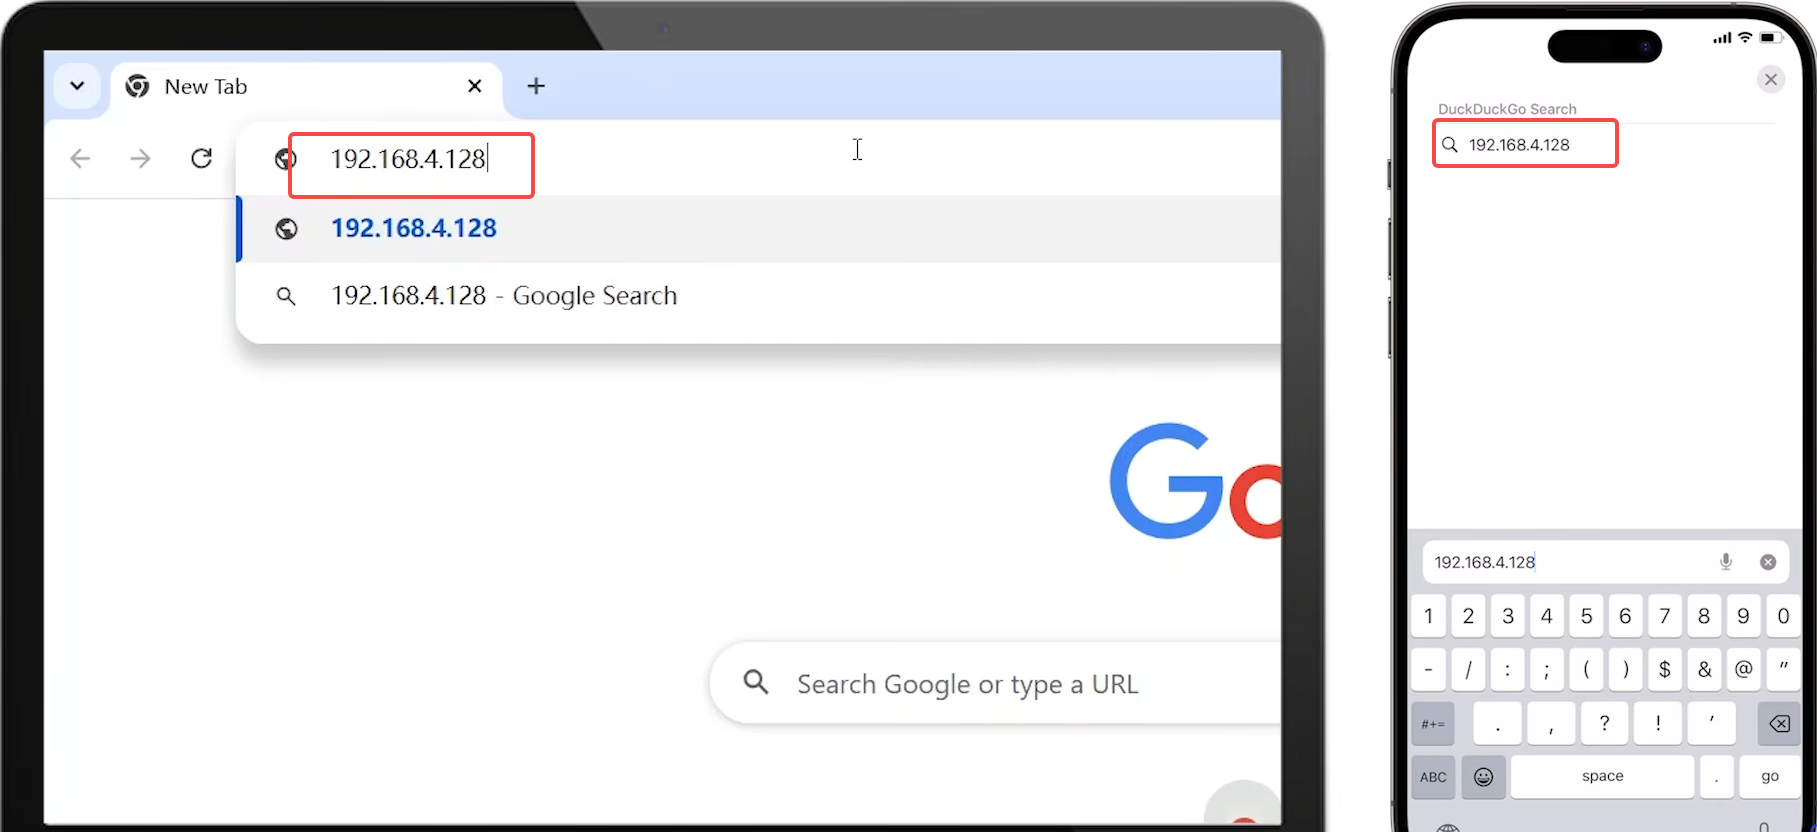
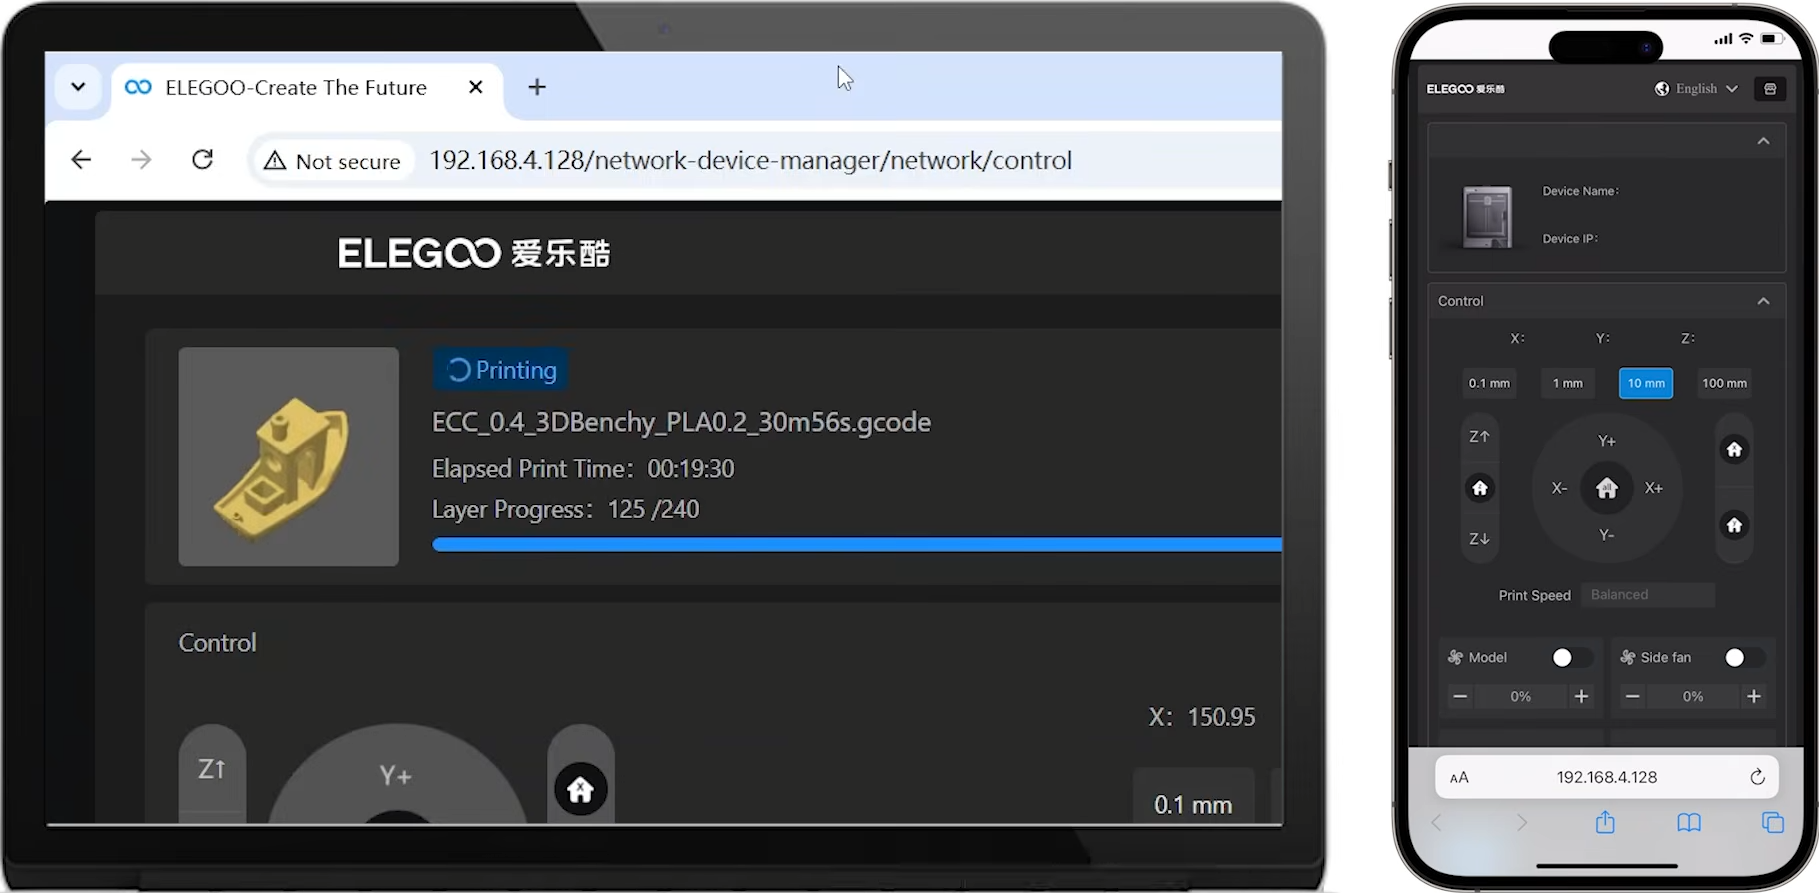
- Make sure your computer or mobile device and the printer are connected to the same local network. Open a web browser on your computer or mobile device and enter the printer's IP address in the address bar.
- Once the Web Interface opens, you can access the printer control panel.
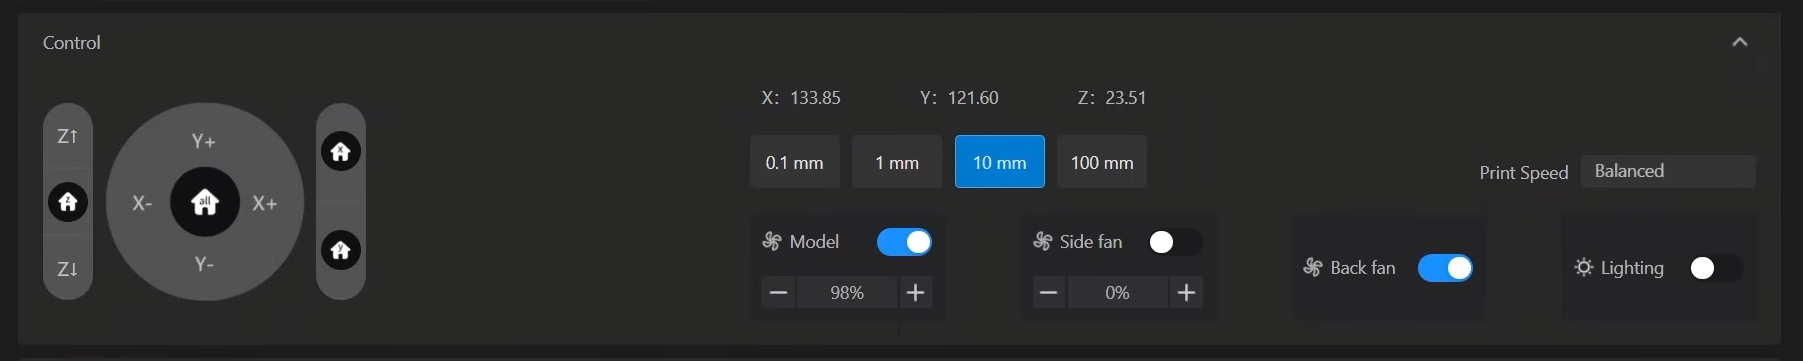
- Use the control panel to control the movement of the printer's components.
- In the file list, you can select previously printed files from the file list.

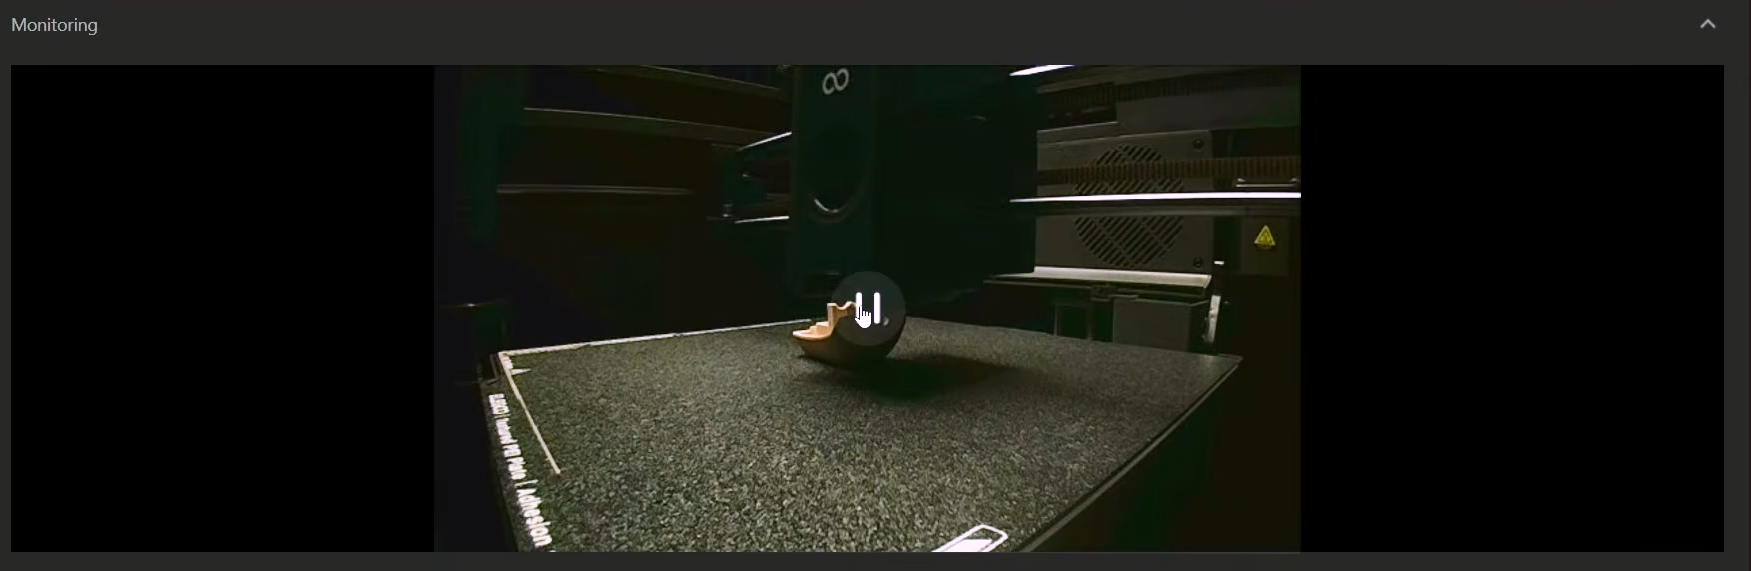
- Use the chamber camera to remotely monitor the printing progress.
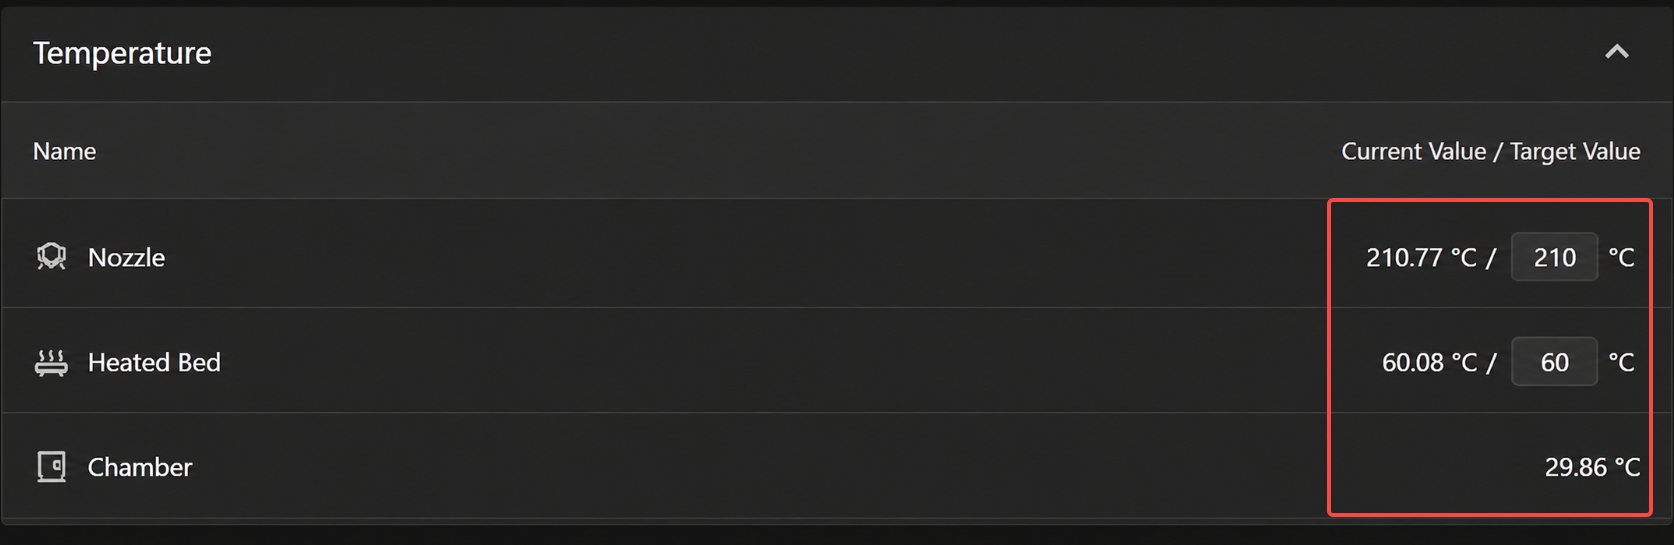
- In the temperature section, you can view the temperatures of the heated bed, hotend, and printer chamber.
¶ Help Us Improve
If you have any suggestions for improving our Wiki pages, please share them through the ELEGOO Official Feedback Channel.