This article introduces the left-side tool bar and the top toolbar.
¶ Left-Side Toolbar
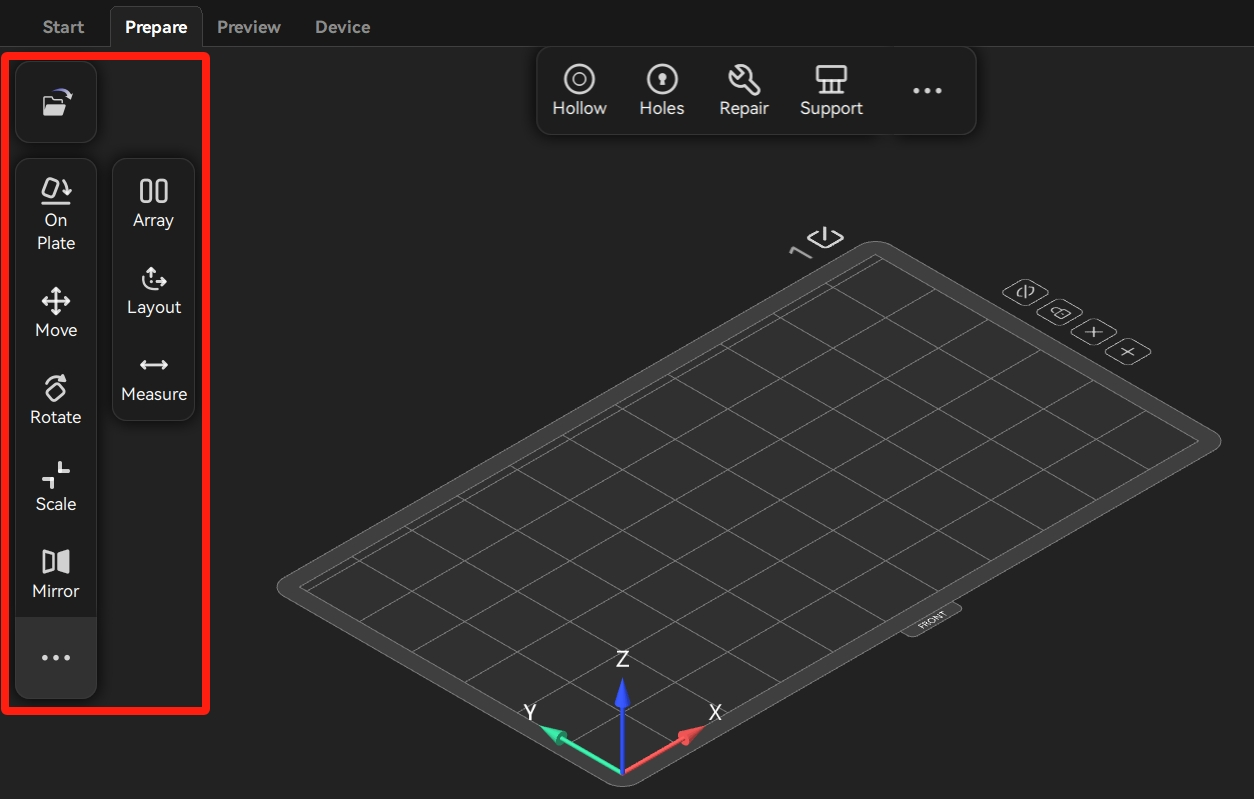
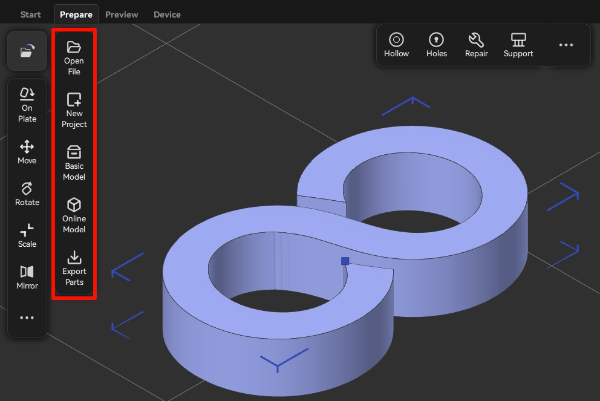
¶ Importing a Model
Click the file icon to import the model as required. After the import is successful, the model appears on the build plate.
¶ On Plate (Shift+B)
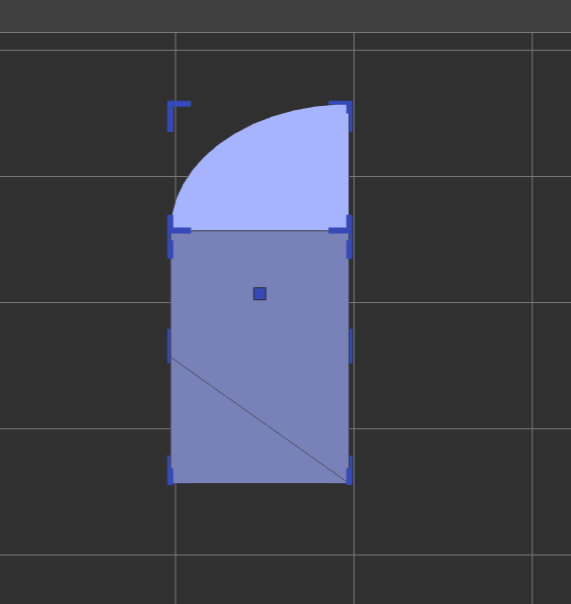
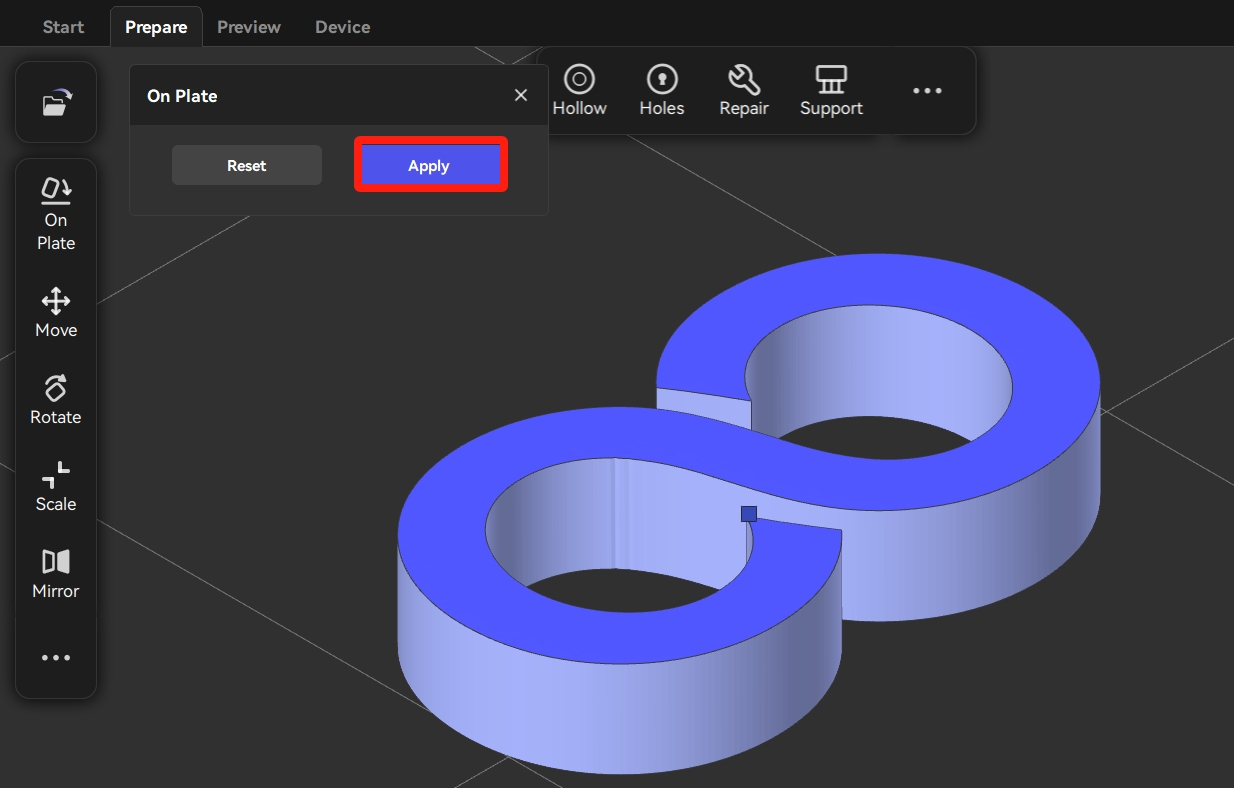
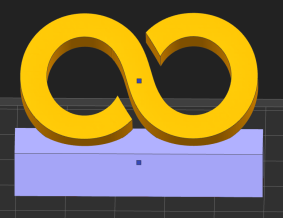
Users can select the surface to designate it as the bottom surface by clicking On Plate button.
Click On Plate, and then click the selected surface. Click Apply to confirm.
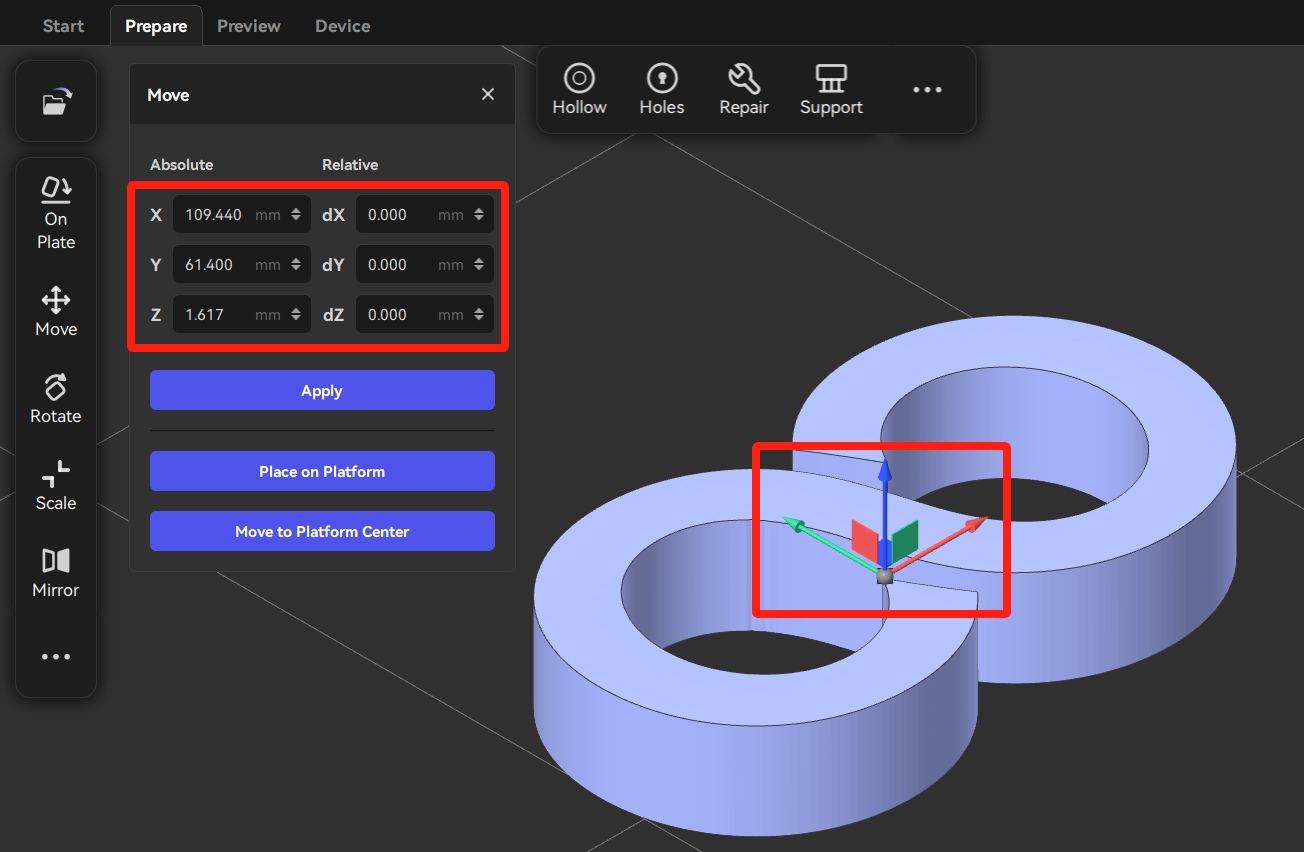
¶ Move (M)
Users can move the model to the specified position by clicking Move.
There are two methods to move the model:
- Drag the model to move.
- Modify the coordinate values and then click "Apply" to move the model.
¶ Rotate (R)
Users can rotate the model by clicking Rotate.
There are two methods to move the model:
- Select the axes on the model, and then rotate the model to the appropriate angle.
- Adjust the rotation angle or click the "45°" angle to rotate the model.

¶ Scale (S)
Users can scale up/down the model by clicking "Scale".
There are two methods to scale up/down the model:
- Modify the value of "Percentage" or the value of "Size" and then click "Apply" to scale up/down the model.
- Scale up/down the model by dragging the axes on the model.

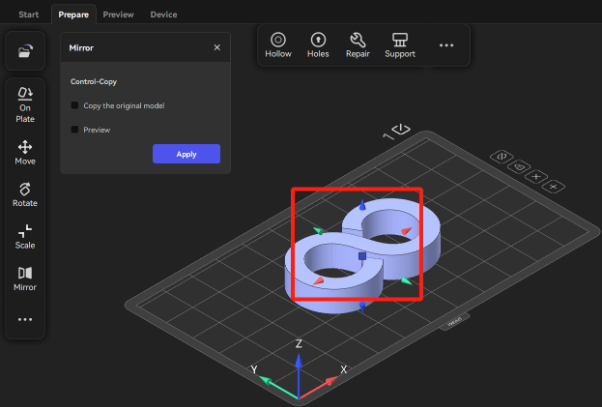
¶ Mirror (Ctrl+M)
Users can mirror the model by clicking Mirror.
Click Mirror and then click the arrow in the direction as needed to mirror the model.
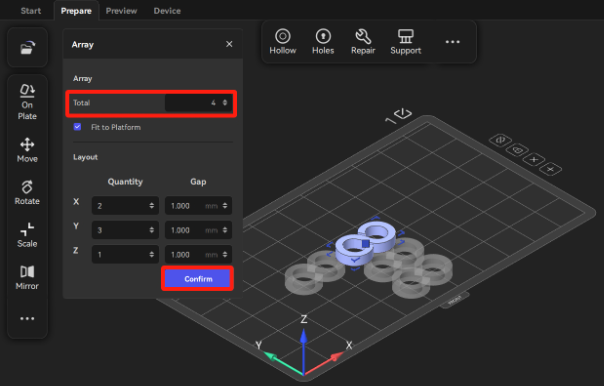
¶ Array (Ctrl+D)
Users can duplicate and array models by clicking Array.
- Click "Array" and then modify the value of "Total".
- Click "Confirm" to duplicate and array the models.
(After modifying the Total, users can uncheck Fit to platform. Then, the number of models distributed along each axis can be adjusted based on users' demands.)
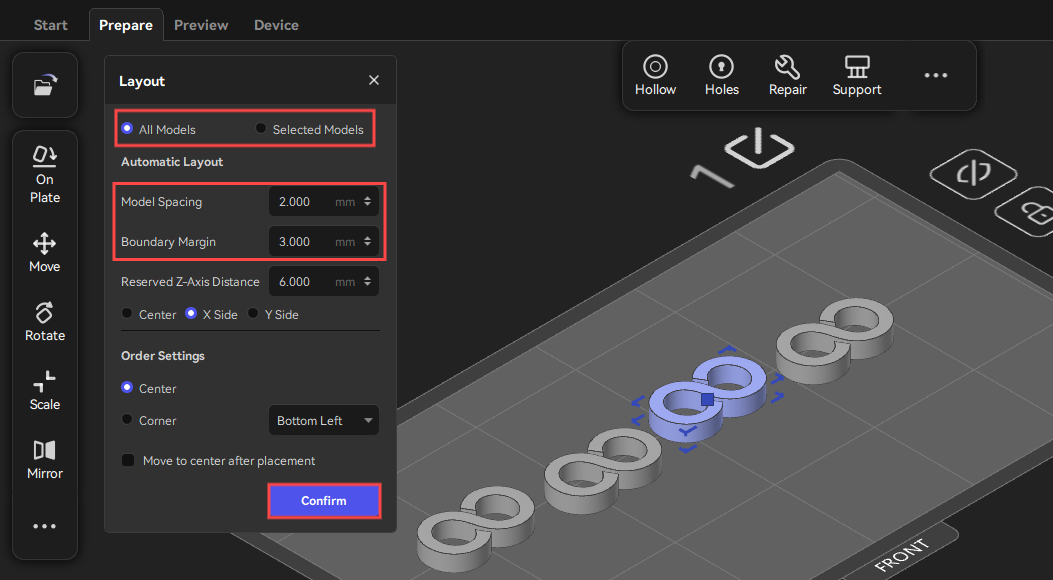
¶ Layout (Shfit+A)
Users can rearrange the models by clicking Layout.
- Click Layout, and then users can choose either All Parts or Selected Parts to rearrange the models.
- According to the printing requirements, users can adjust the model spacing and boundary margin.
- Click Confirm to finalize the new positions of the models.
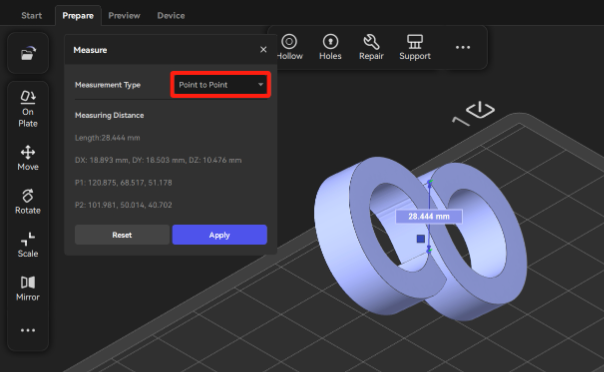
¶ Measure (Shift+M)
Users can measure the distance between either two points or a point and the platform.
- Choose Point to Point measurement type.
- Select the two points on the model that need to be measured, and then the distance value will be displayed.
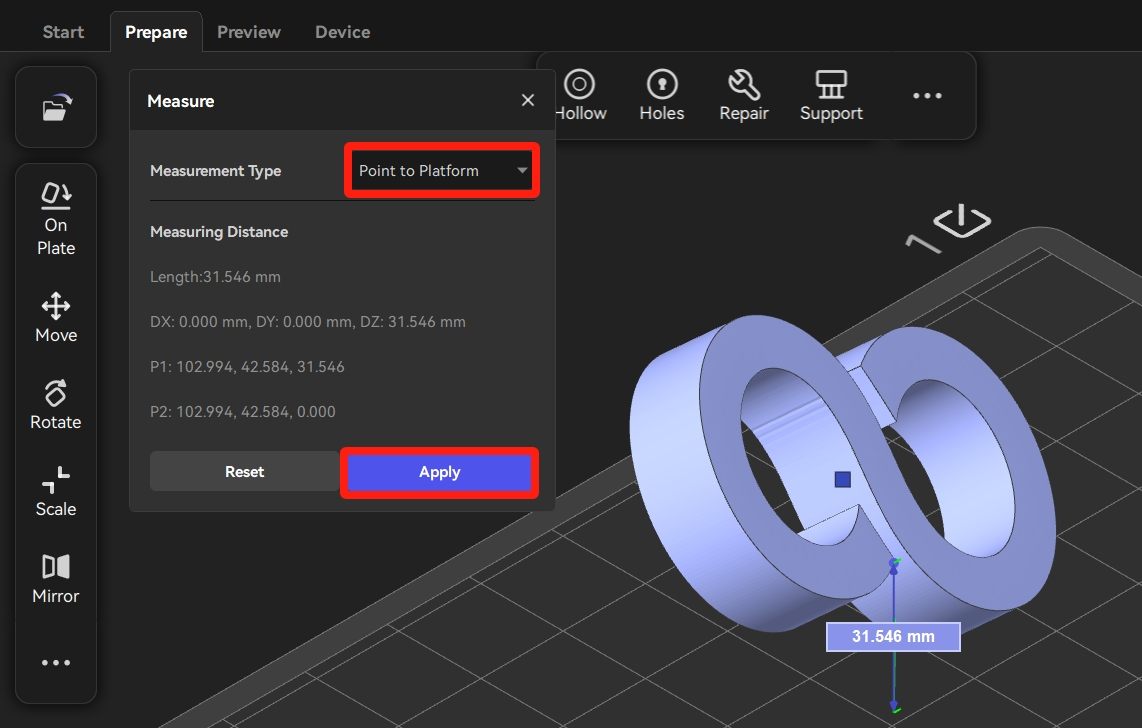
3. Choose Point to Platform measurement type.
4. Select a point on the model to be measured and then the distance value appears.
5. Click Apply, and then the values remain.
¶ Top Toolbar

¶ Hollow (Alt+H)
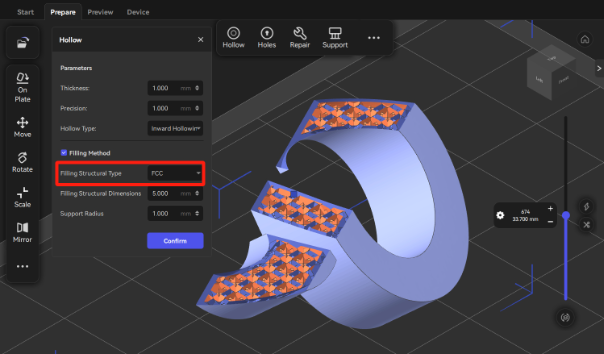
Users can hollow out the model by clicking Hollow to reduce the quantity of resin to be used.
After clicking Hollow, users can set the parameters in the Hollow pop-up windows. Then, click Confirm to hollow out the model.

Thicknes: The thickness of the shell. It influences the strength of the model.
Filling Method: There are two different types of filling structure to choose.
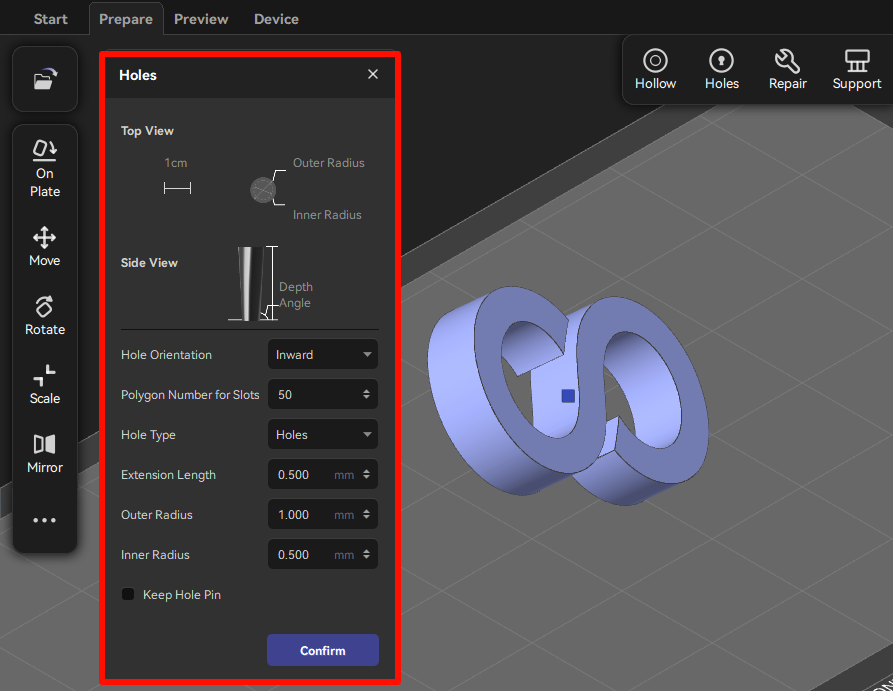
¶ Holes (Shift+P)
It is necessary to add holes to the hollowed models.
Note: To prevent the vacuum zone in the center of the model and to facilitate the cleaning of resin, it is necessary to add at least TWO holes to hollowed models, with one at the bottom and the other at the top.
- Click Holes and then users can set the Extension Length, Outer Radius and Inner Radius in the Holes pop-up windows.
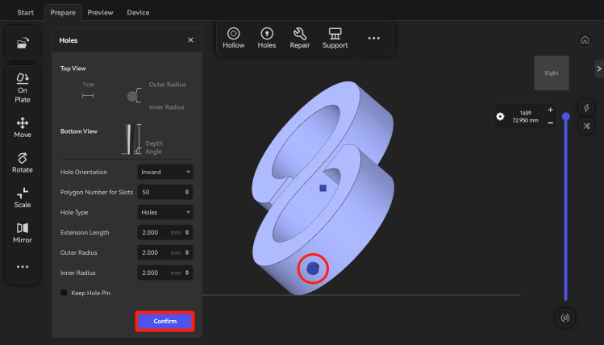
- Click the surface of the model to locate the positions of holes. Then, click Confirm.
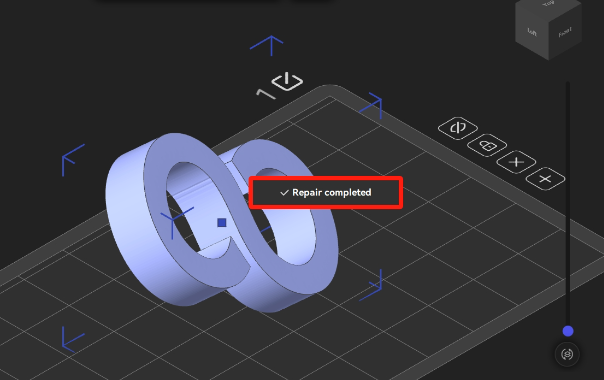
¶ Repair (Ctrl+Alt+R)
Users can click Repair and then the software will automatically fix any abnormalities of the model.
There will be a pop-up notification when a model with any abnormalities is imported.
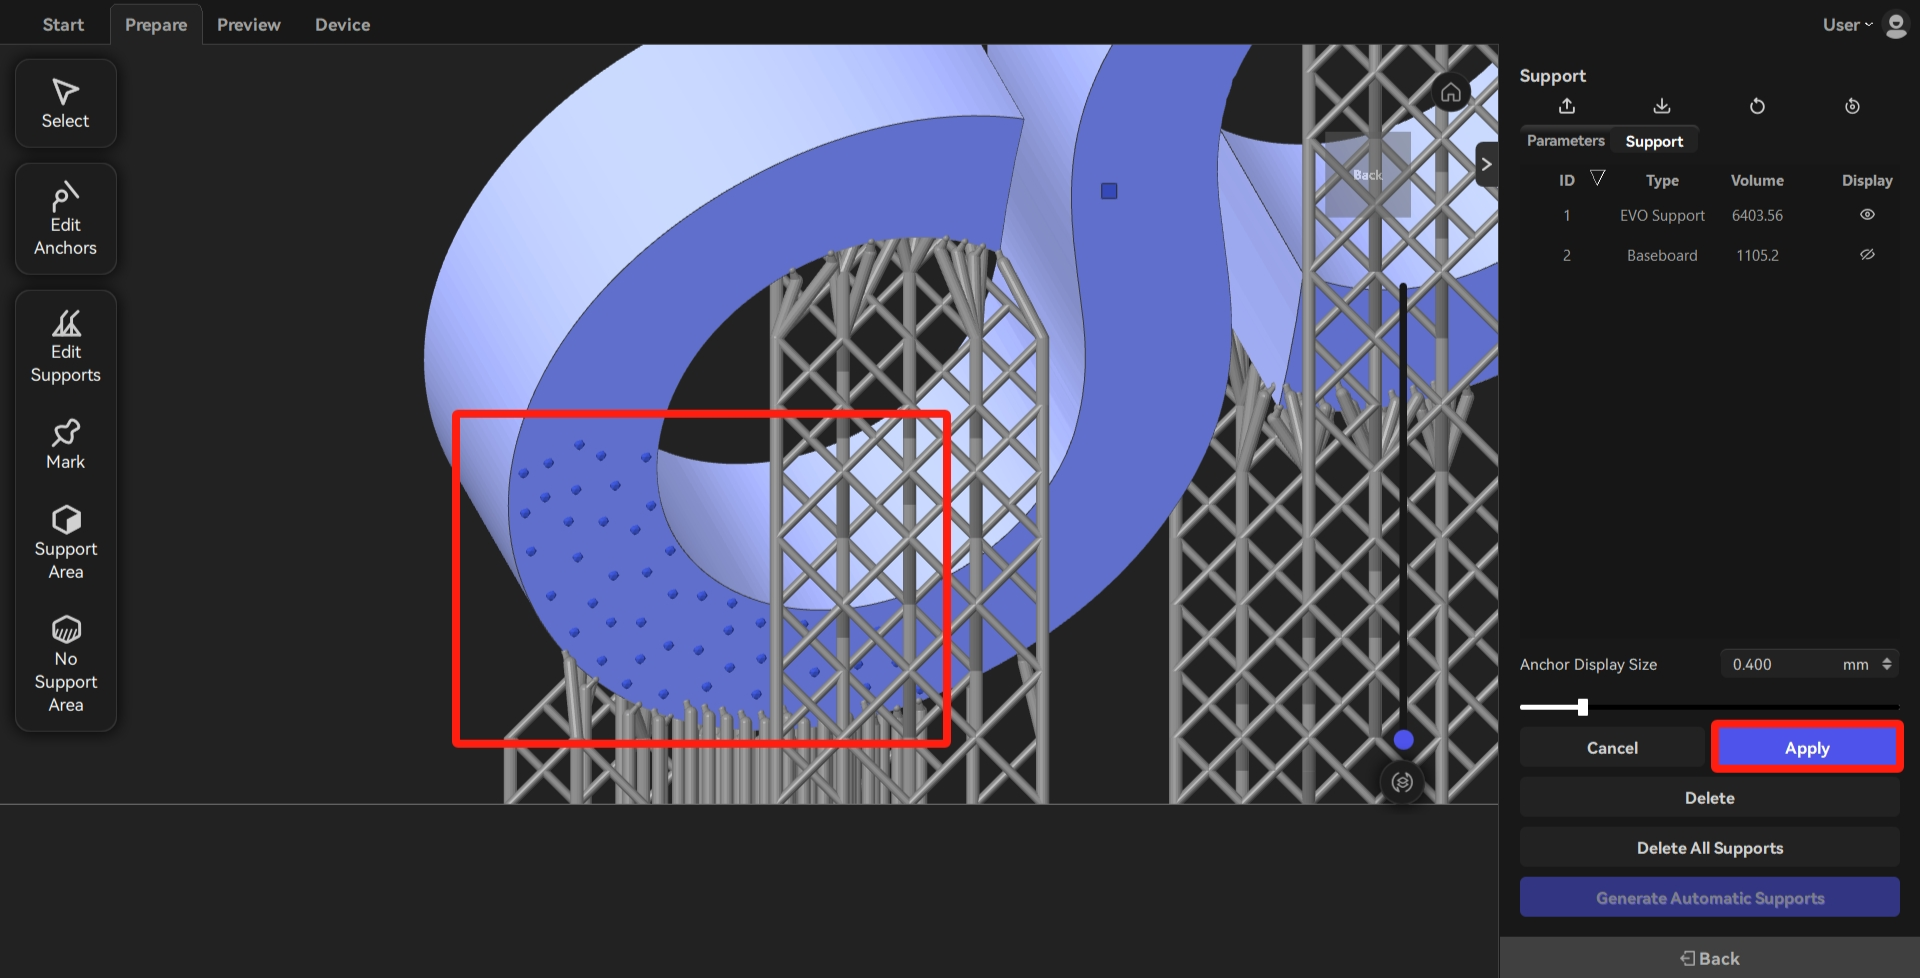
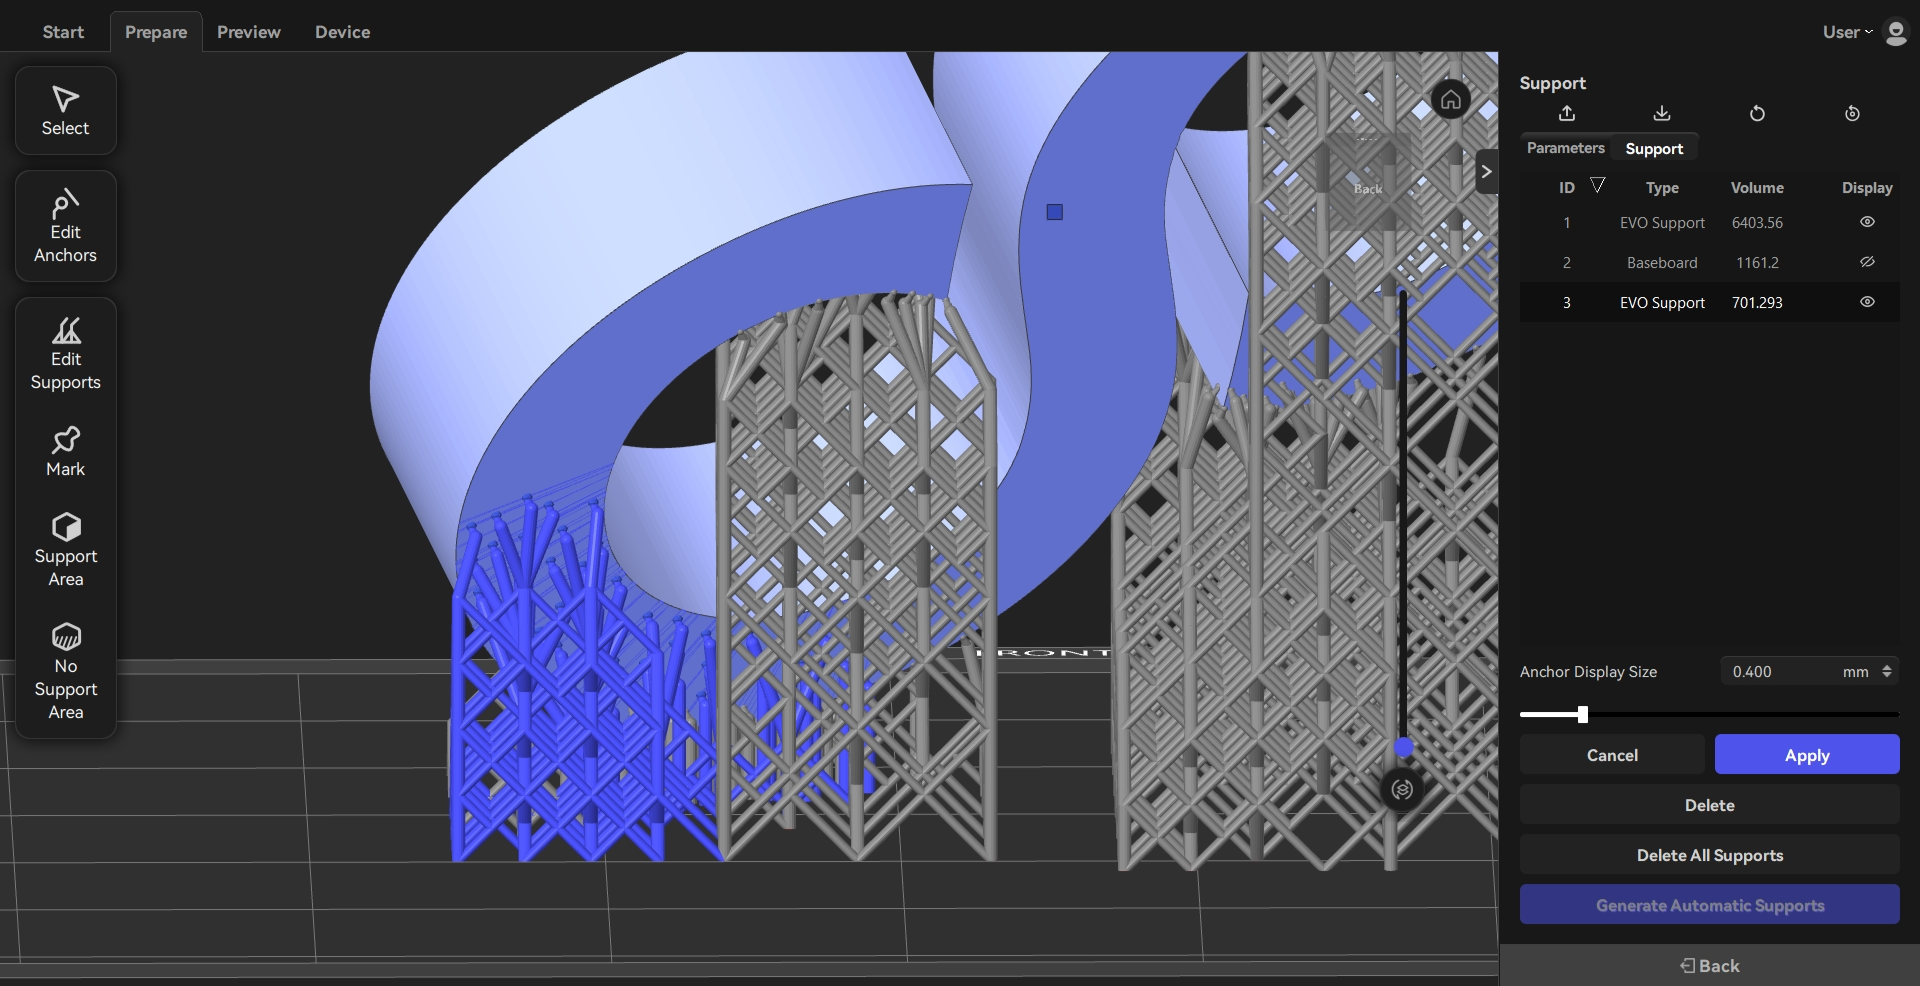
¶ Support(Shift+I)
Users can follow the steps below to add supports to a model.
- Click Support to enter the support-adding interface. Then, the software can automatically identify the model's height and select the appropriate type of support.
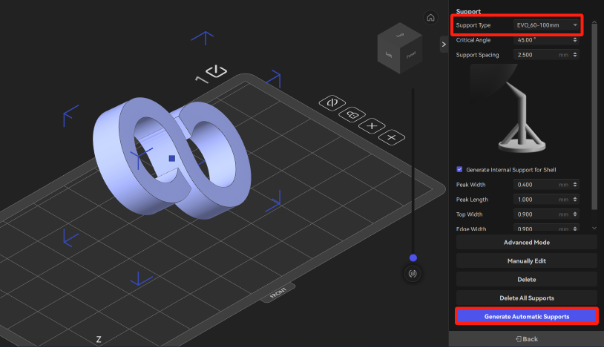
2. Click Generate Automatic Supports, and the supports for the overhanging parts of the model can be generated automatically.
3. Rotate the model to observe the model and click Manually Edit to add supports manually to the positions where supports are not enough.
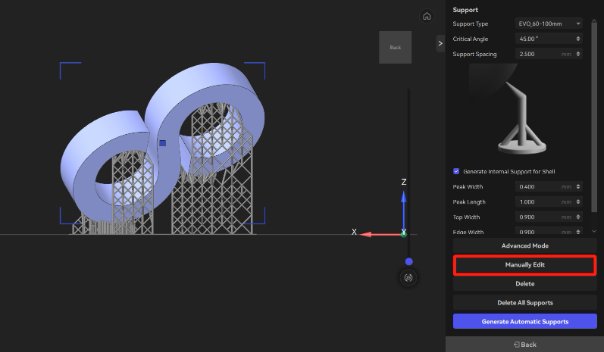
4. Click the surface of the model and then click Apply to add the supports.
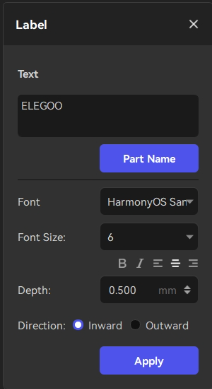
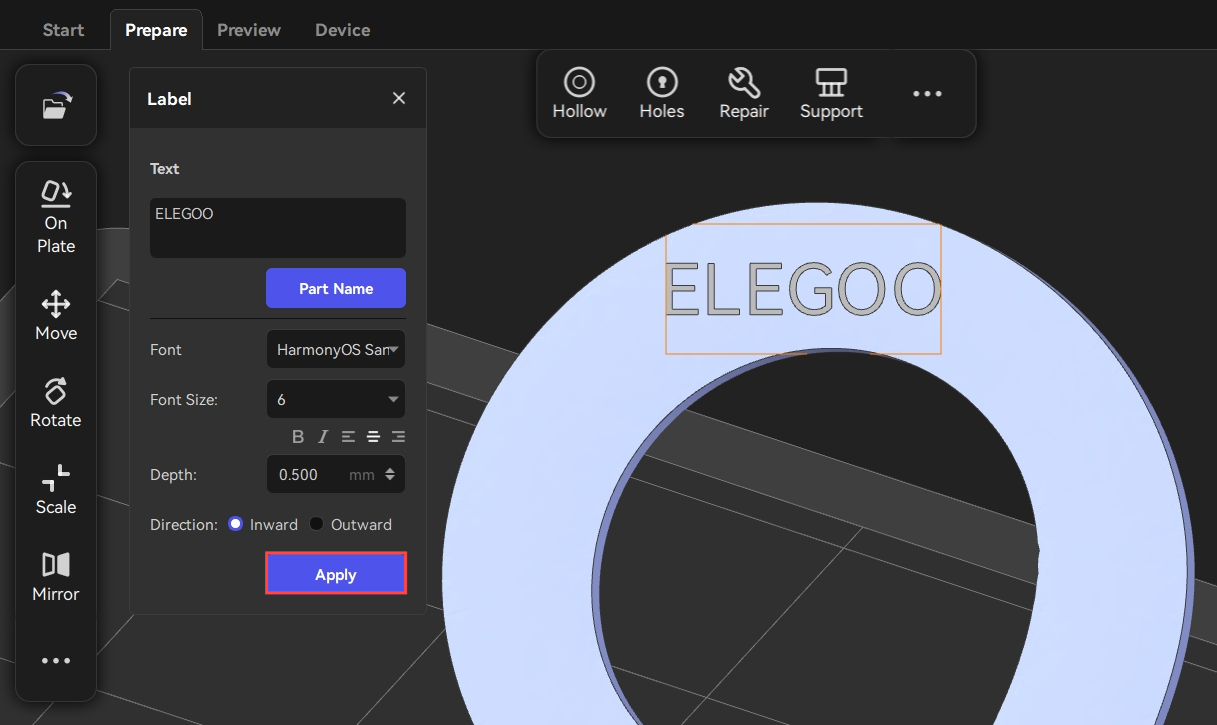
¶ Label (Shift+L)
Users can add characters on the surface of a model by clicking "Label".
- Click "Label" and then type the text. Users can can modify the "Font", "Font Size", "Depth" and "Direction" as needed.
Inward: The label text is indented.
Outward: The label text is embossed.
2. Locate a region of the label on the surface to preview the text.
3. After checking that the text is normal, users can click "Apply" to set the position of the label.
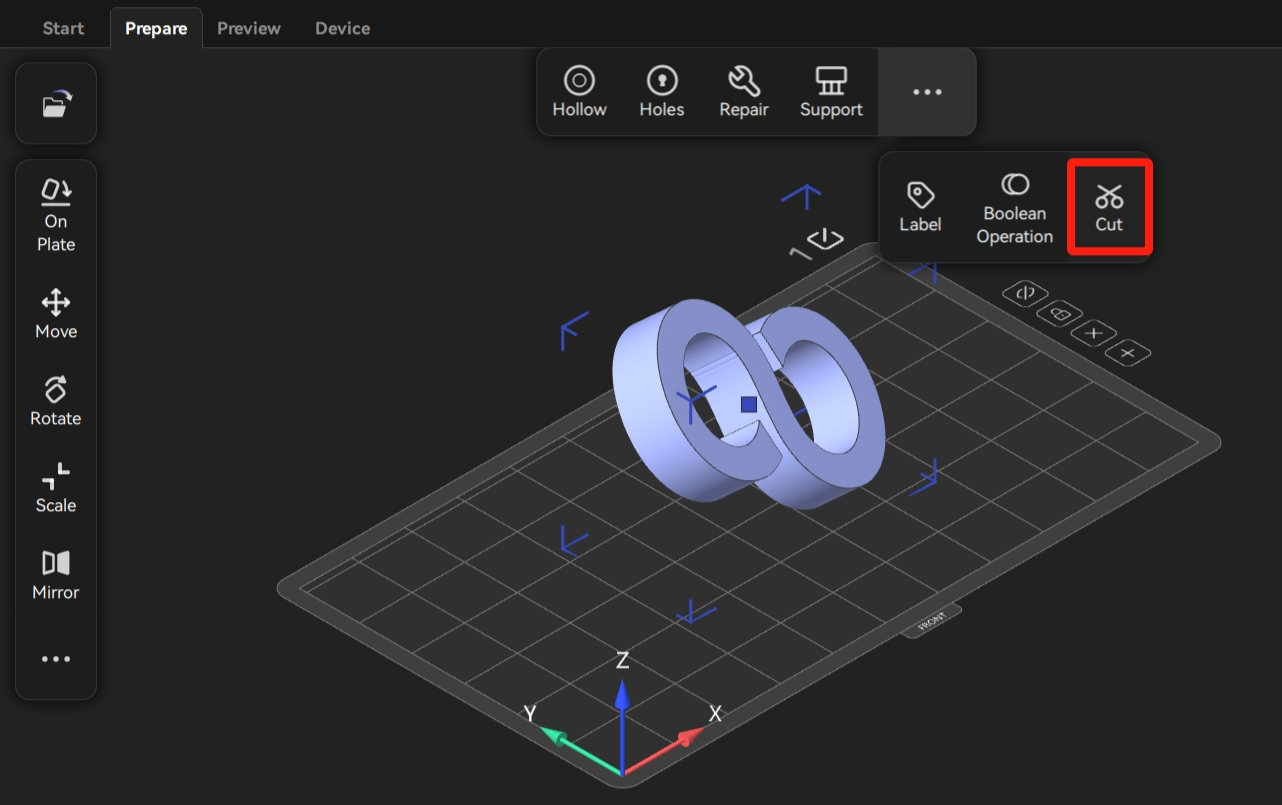
¶ Cut (Alt+C)
Users can divide a model into different parts by clicking Cut.
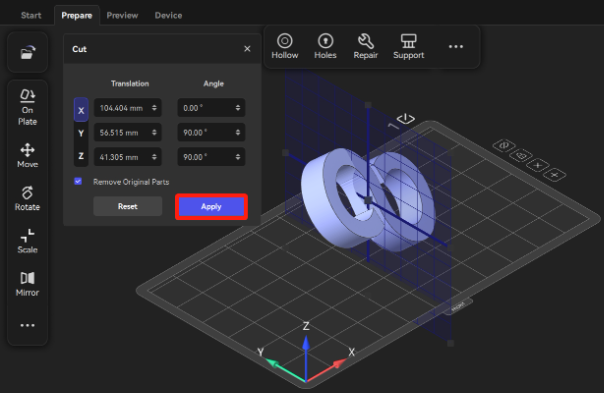
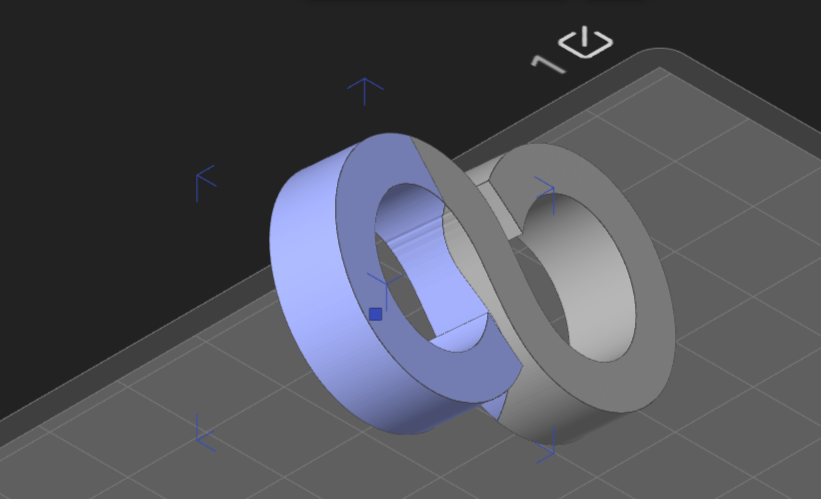
- Click Cut and then click the position to cut on the surface of the model.
- Users can adjust the coordinates and modify the angle to optimize the cutting surface. Then, click Apply to confirm the modification of the model.

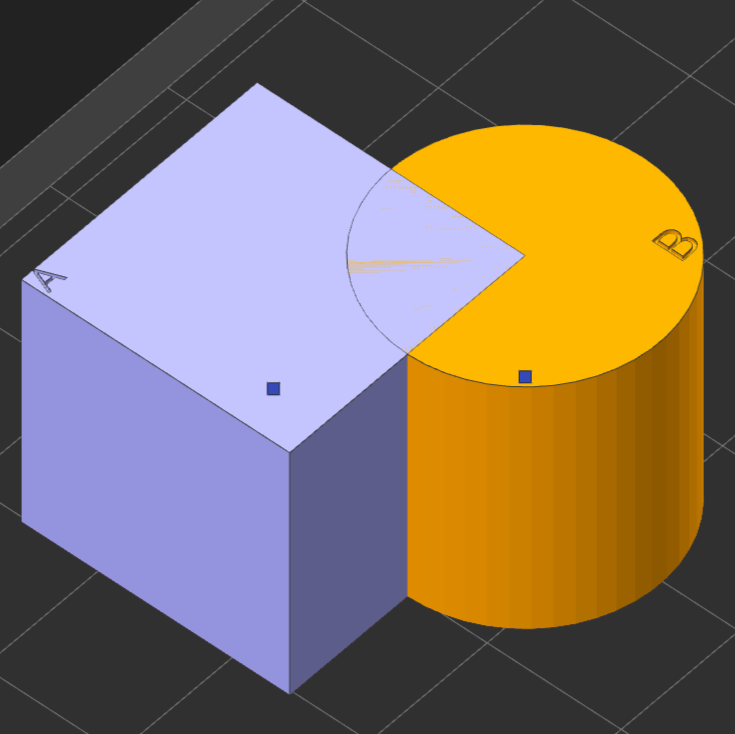
¶ Boolean Operation (Ctrl+B)
Users can add, remove, and intersect two or more models to create a new model by clicking "Boolean Operation".
- Move models to appropriate positions.
- Select two or more models simultaneously and click "Boolean Operation" to select a type of operation.

3. A new model is created sccessfully.
Boolean operation has four types of operation: Merge, A minus B, B minus A, and Intersect.
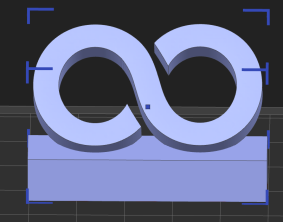
¶ Merge:It means to combine two or more models to form a single one.
Before merging:
After merging:
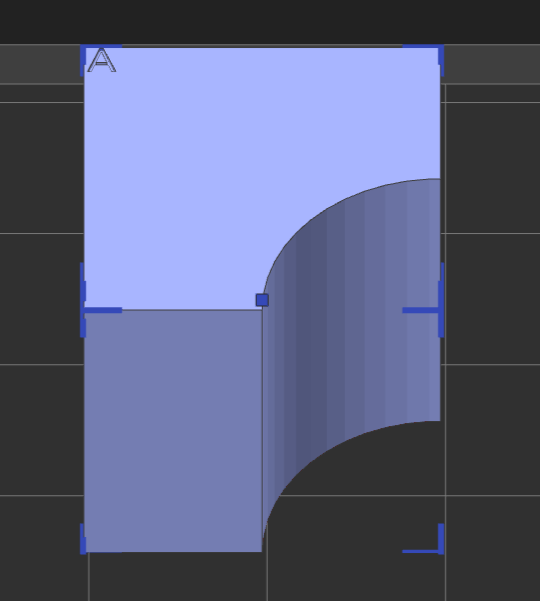
¶ A minus B:It means to subtract Model B contained in the Model A.
Before A minus B:
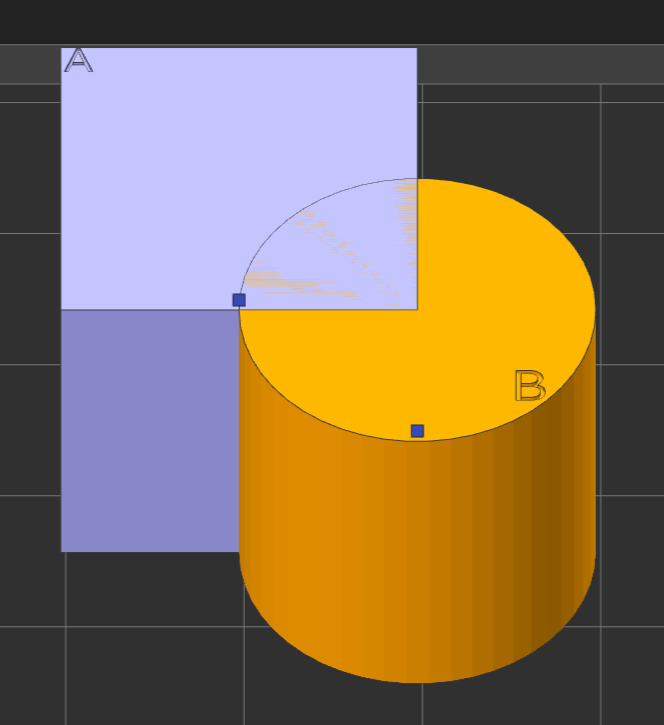
After A minus B:
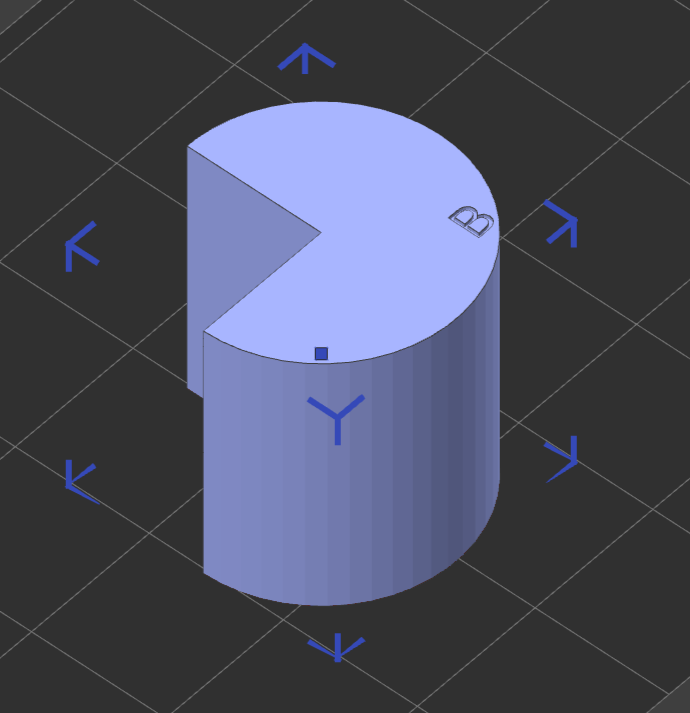
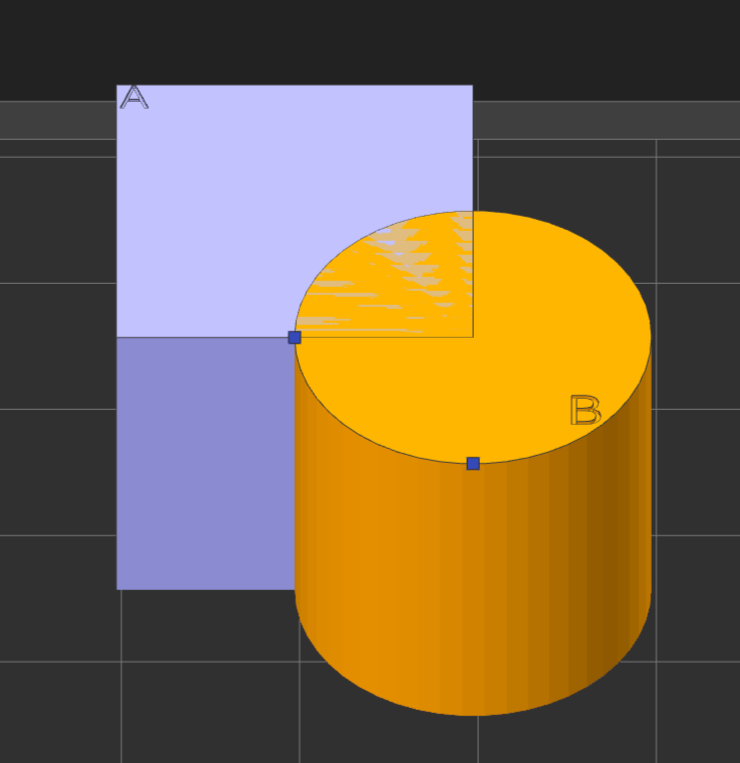
¶ B minus A:It means to subtract Model A contained in the Model B.
Before B minus A:
After B minus A:
¶ Intersect: It means to reserve the common part shared by Model A and B.
Before intersection:
After intersection: